
 100% Security Verified | No Subscription Required | No Malware


 ChatGPT
 Perplexity
 Gemini
 Claude
 Grok
Grok
Imagine you are trying to create a highlight reel for your recent travel vlog before a social media deadline. However, combining and merging multiple clips is new to you because you mostly post single videos on your social account.
Thankfully, there are many tools available online and offline that let you splice videos efficiently. In this article, we will discuss the most reliable splice online resources that you can use to create beautiful video montages.

In this article
Part 1. What is Meant By Video Splicing?
The process is referred to as the cutting and joining of multiple clips to create a single video in a sequence. It is one of the fundamental techniques of video editing that allows users to remove unwanted scenes from their videos and rearrange them according to their preferences. Besides basic trimming and merging, splicing can include adding different transitions between the clips to give the final product a more enhanced look.
Part 2. Top 5 Splice Video Online Options To Try
If you are looking for tools to splice film online but do not know which one to choose, consider the section below. Provided next are a few of the top online video editior that allow you to trim and join multiple clips:
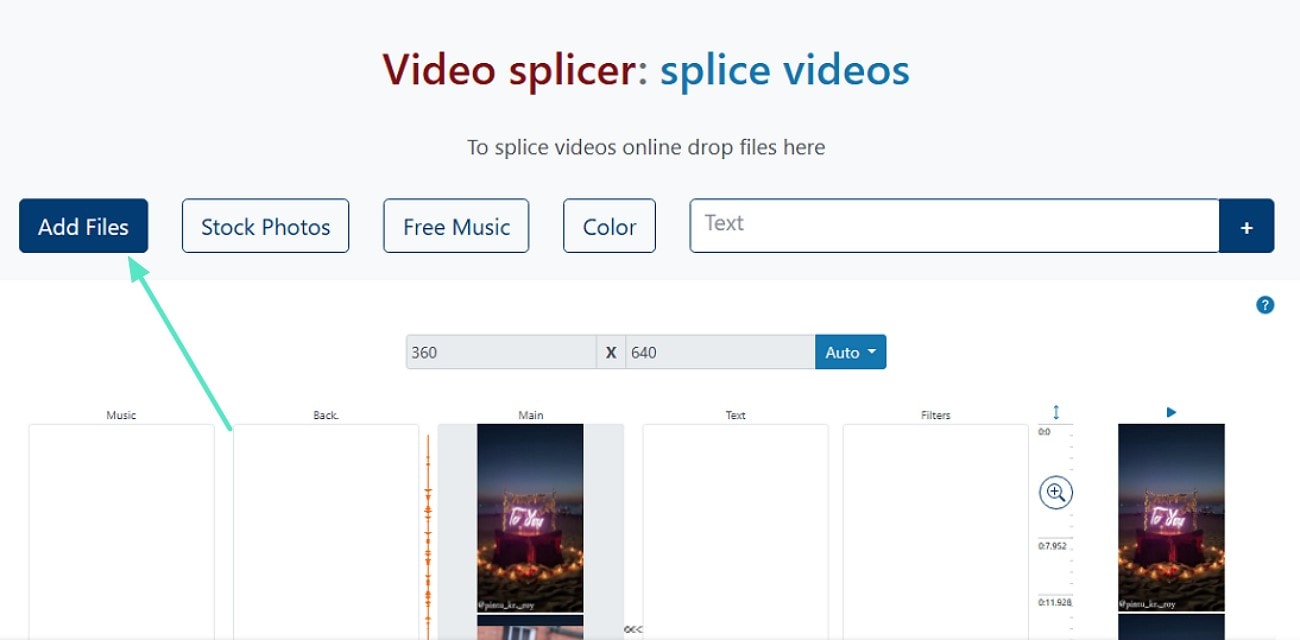
1. Movie Maker Online
One of the online tools that enables users to video splice at once is Movie Maker Online. This online tool lets you add text to the video and apply various filters while joining the clips together. Moreover, you can select multiple aspect ratios according to your preferences and the platform you want to share on.
Steps for Splicing Clips With Movie Maker Online
Step 1. Start by accessing the tool on your browser and pressing the “Add Files” button to add the clips of your choice.
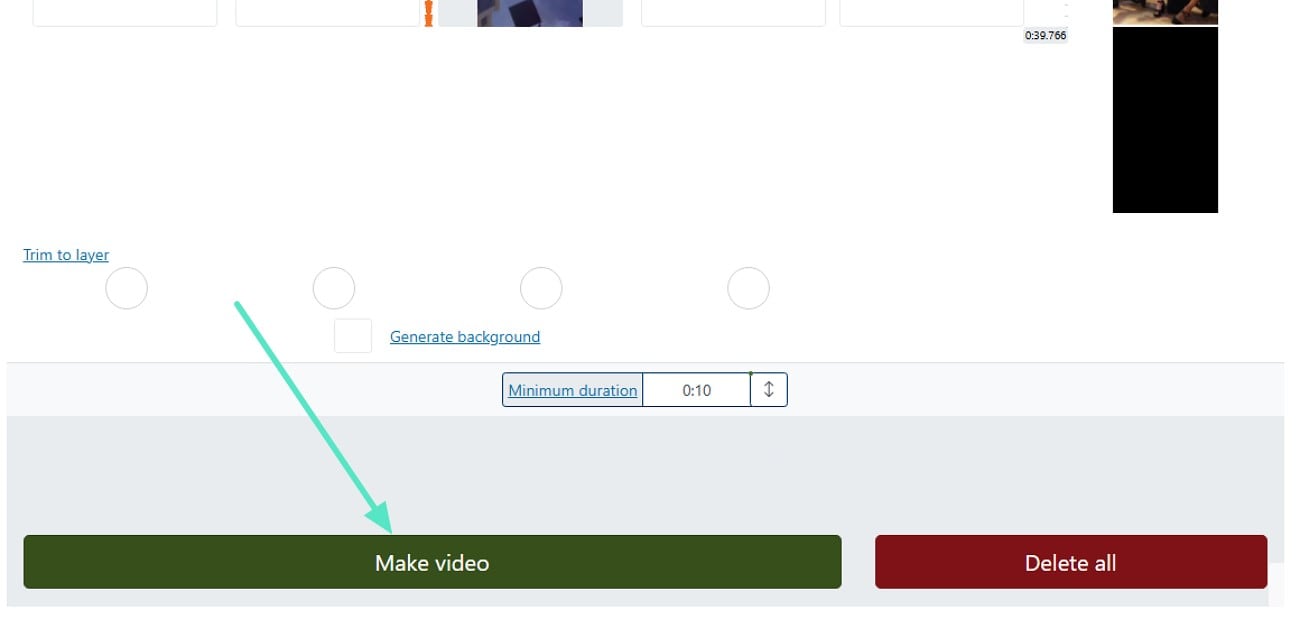
Step 2. Once the clips are uploaded, scroll down a bit and specify the duration for each clip for trimming off other segments. Press the “Make Video” button to let the tool combine your visual clips.
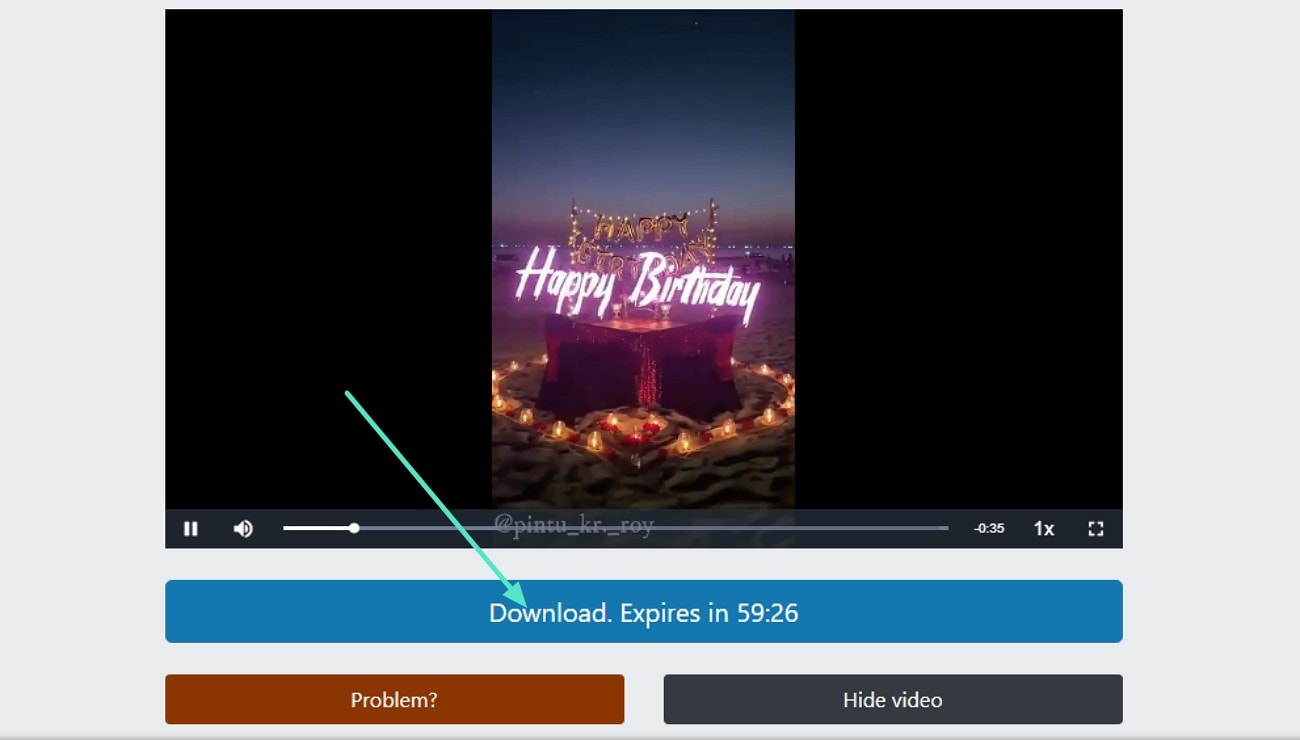
Step 3. Locate and click the “Download” button in the following interface to save the video to your device once it is generated.
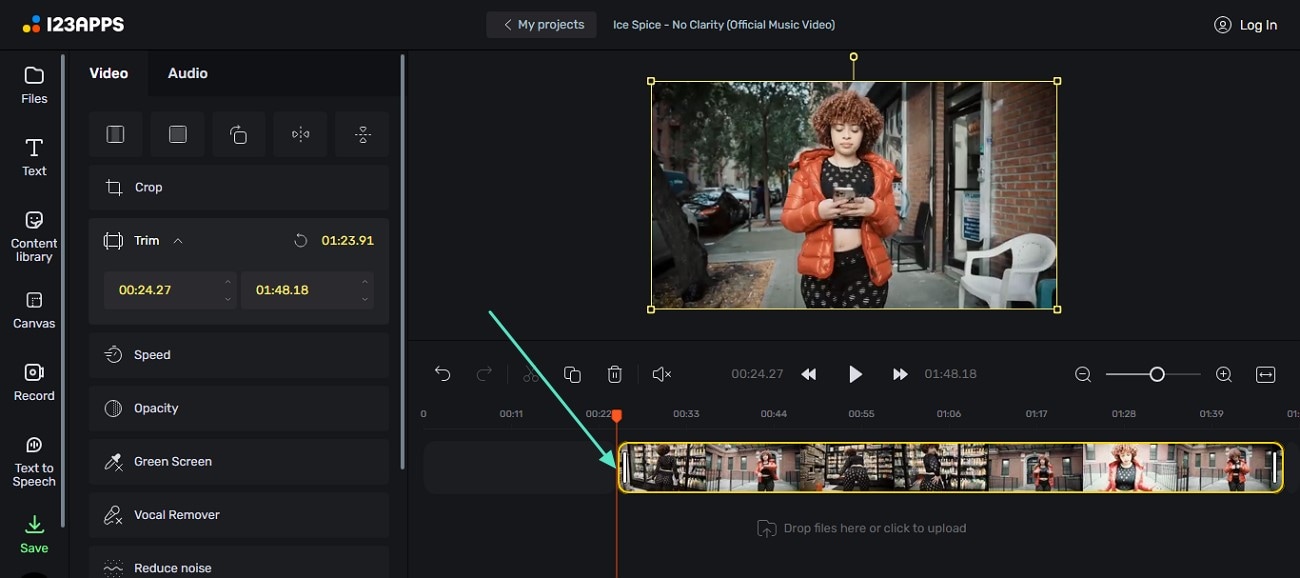
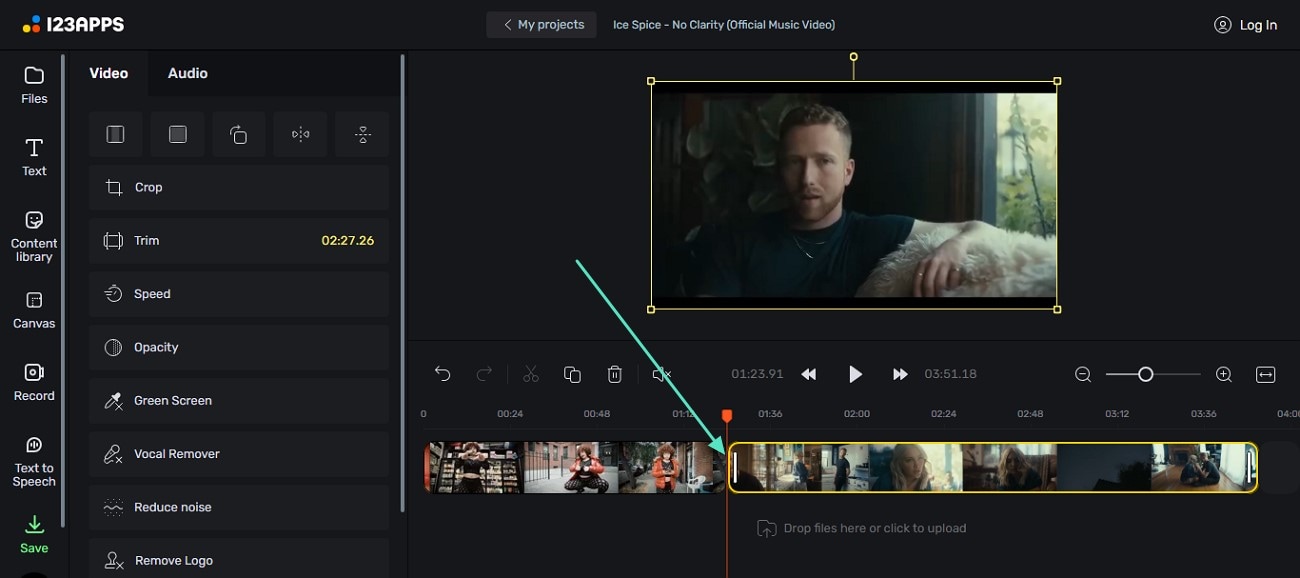
2. Online Video Cutter
With various video editing functionalities, this efficient splice film online tool allows users to splice and enhance their videos. The editing timeline and preview window allow users to precisely remove the unwanted sections from their clips. Moreover, you get the ability to adjust the speed of each clip according to your preferences.
Steps for Splicing Videos with Online Video Cutter
Step 1. Start by importing the video into the tool’s interface and drag the corner of the video track to trim the video according to your preferences.
Step 2. Now add another video to trim it accordingly and join both videos by adjusting them on the timeline. Save the video once you are done with the splicing.
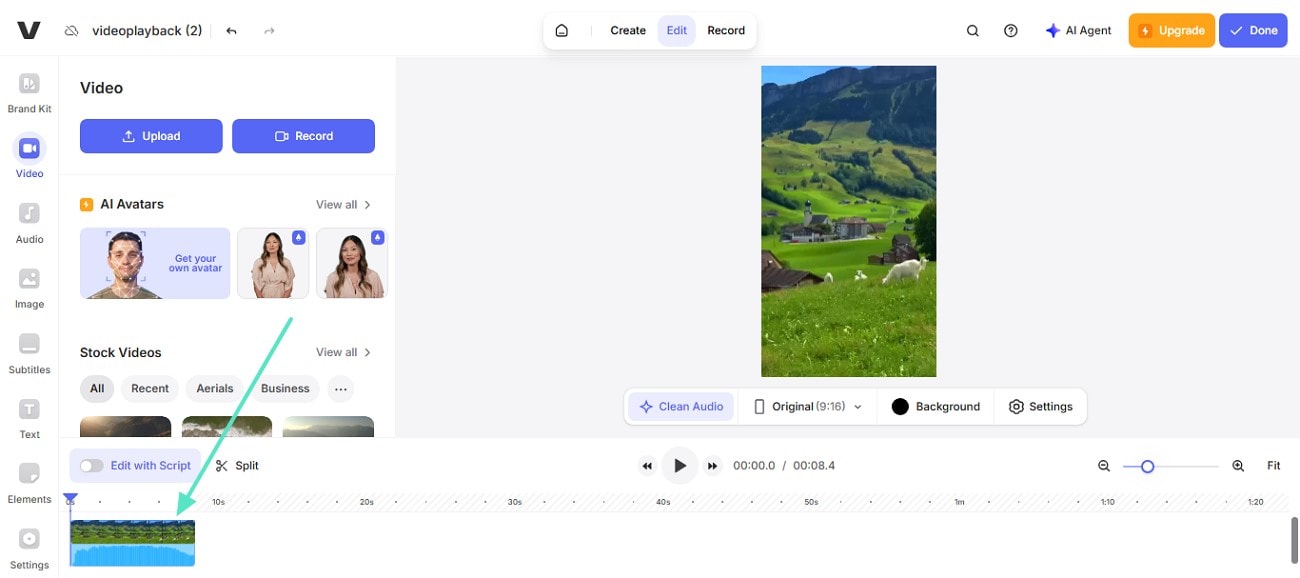
3. VEED.io
Another online tool that provides a splice online free utility is VEED.io. This is an online video editor that allows you to upload multiple videos and join them seamlessly. The timeline-based editing enables users to remove and trim the video sections without any complicated process. Moreover, you can apply other video editing features to enhance the overall visuals of your video.
Complete Steps to Splice Videos With VEED.io
Step 1. Once you have imported the first clip to the online tool’s interface, place the arrowhead on the timeline and press “Split” to isolate the unwanted part. Now delete it using the delete key on your keyboard.
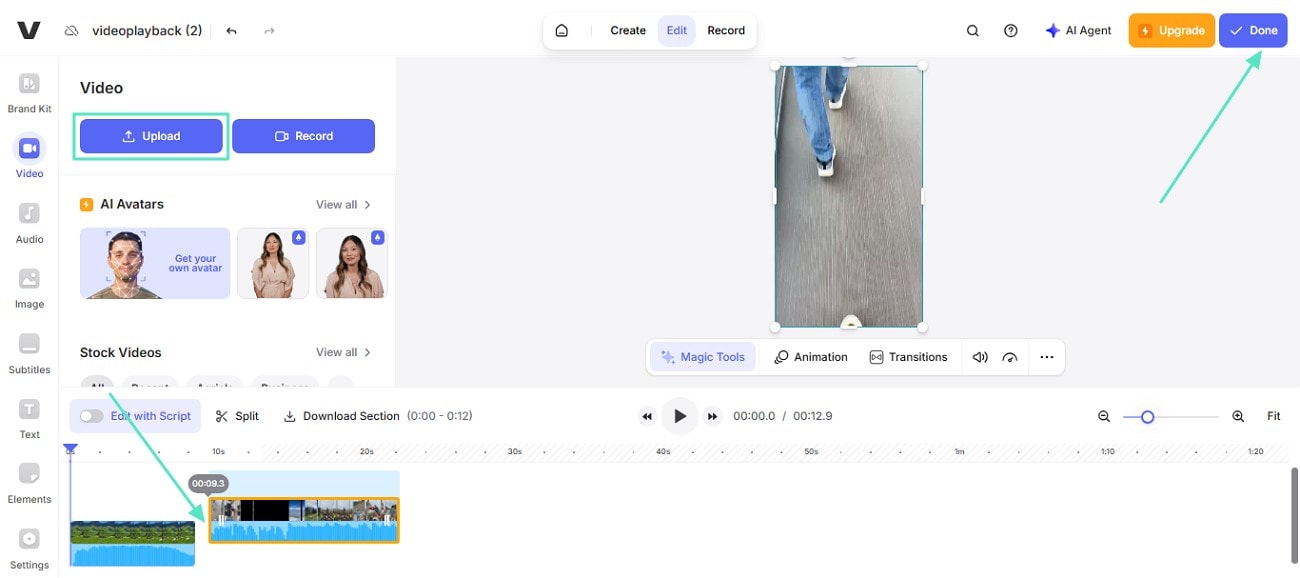
Step 2. Locate the “Upload” button and click on it to add another clip and adjust it on the timeline to join it with the previous clip. Once you have completed the task, head to the top-right corner of the interface and press the “Done” button.
4. Flixier
Flixier is an online video merger that provides the utility of uploading multiple videos at once and then trimming and joining them effortlessly. The intuitive interface allows users to add the video by simply dragging and dropping the media into the interface for splicing. Additionally, you get the ability to change the orientation of the videos as per your needs.
How to Splice Video With Flixier
Step 1. After you have imported all the videos to the tool by accessing it from your browser, drag the videos in a sequence on the edit timeline for a smooth flow.
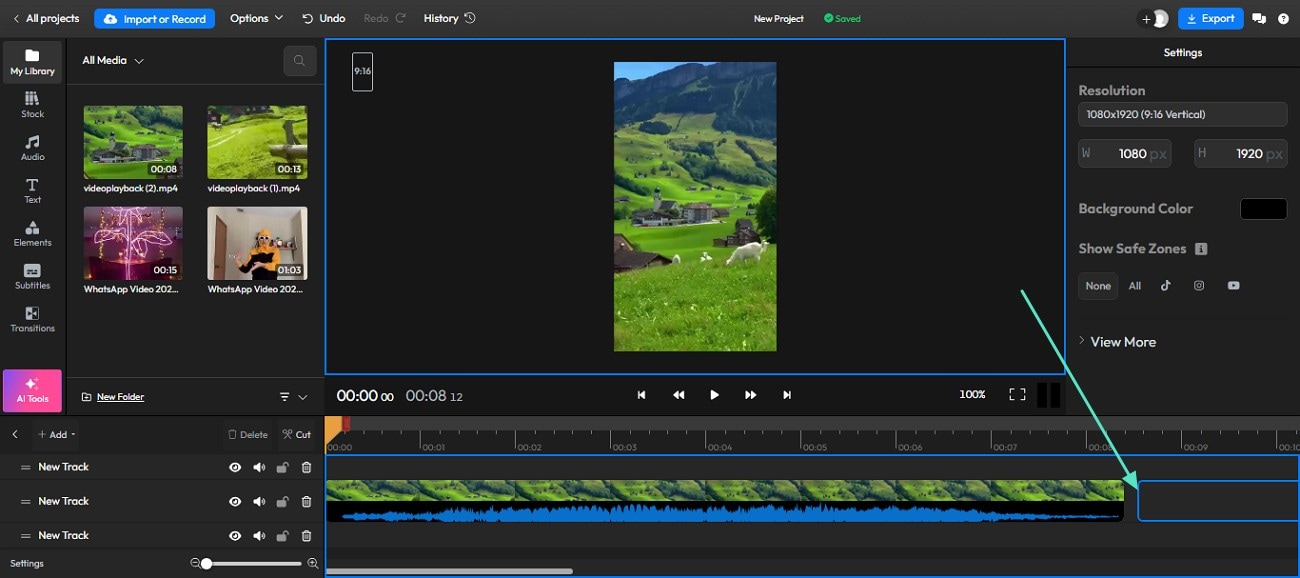
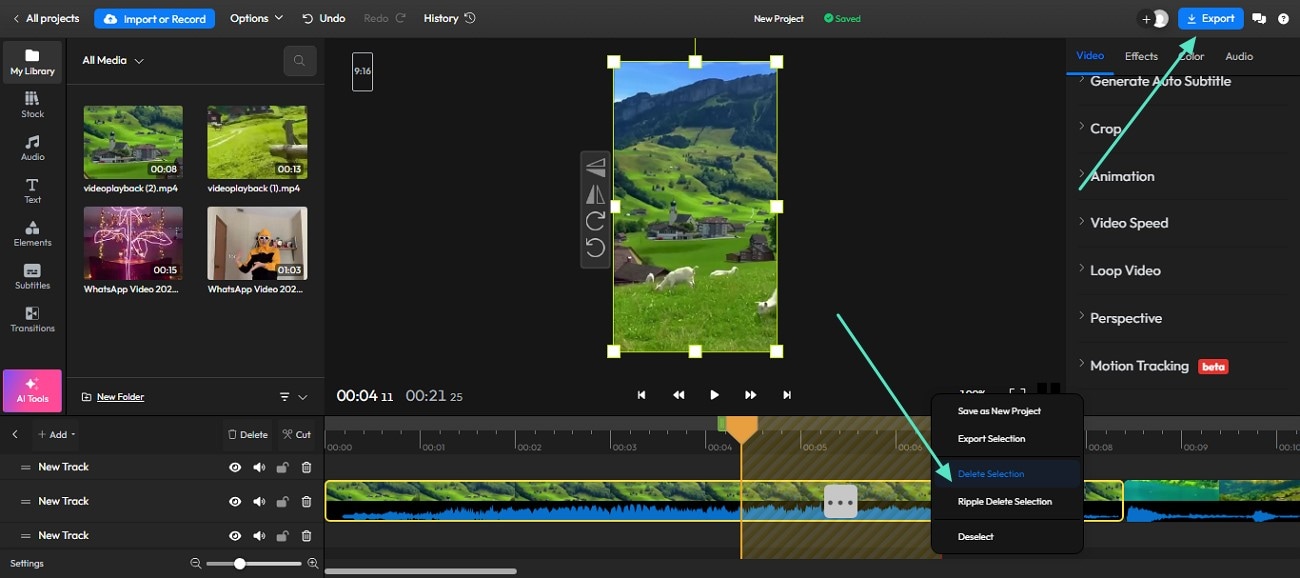
Step 2. Drag the right side of the play head and right-click on the selected area. Select the “Delete Selection” option to eradicate the unwanted part from the remaining video. Once you get the desired results, click the “Export” button to download the spliced video to your device.
5. FlexClip
This online tool is specially used to create videos by choosing the presets without any effort, as it offers a vast library of templates for its users. Besides templates, you can create videos from scratch by uploading videos or recording them through its interface. Moreover, this splice video online tool allows you to split the clip into multiple sections with a single click.
Steps for Splicing Clips with FlexClip
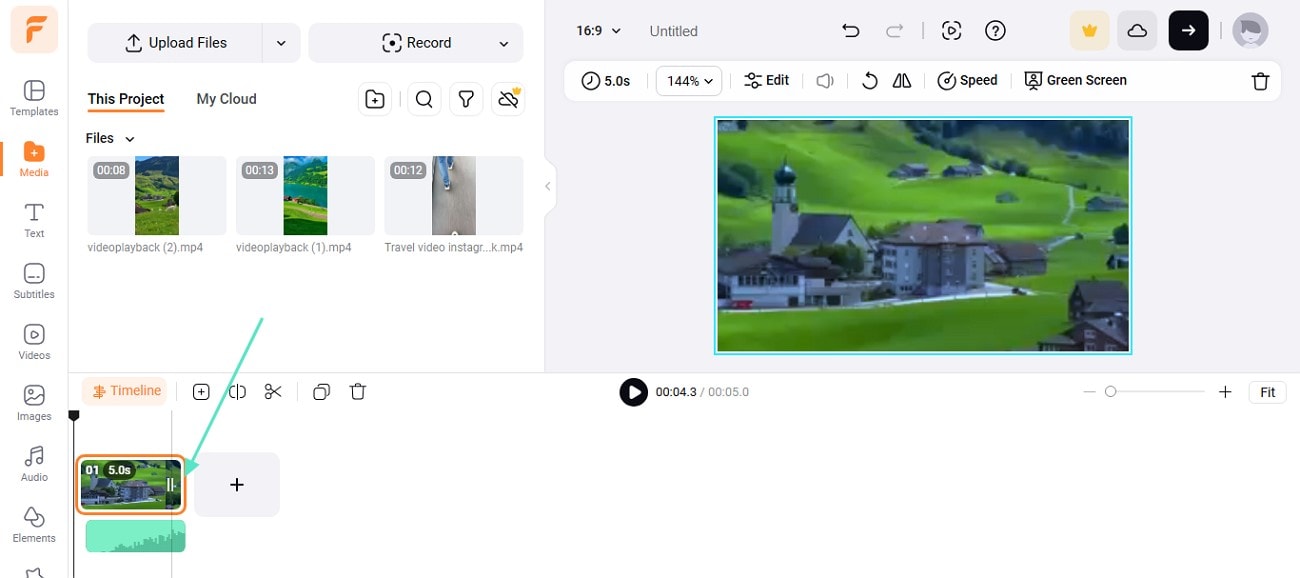
Step 1. When you have accessed the tool on your browser and uploaded the clips to its interface, drag them to the editing timeline to perform editing. Drag the corner of the video track to trim the unwanted part of the clip.
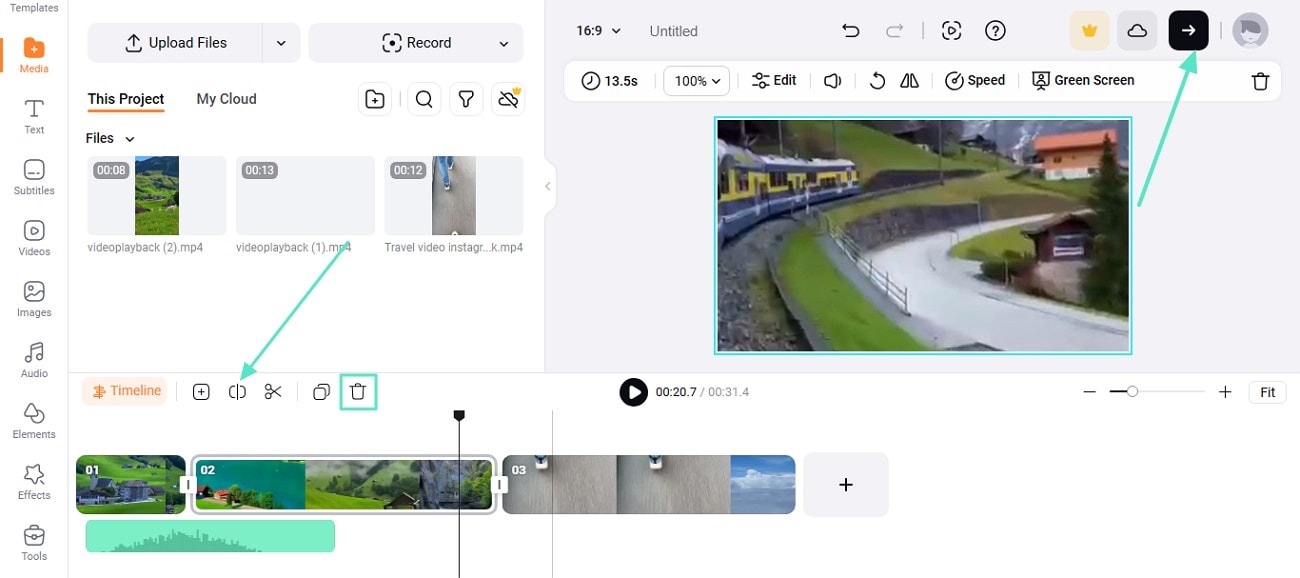
Step 2. You can conversely remove the unwanted section by placing the play head over the area and pressing the “Split” icon. Hit the “Delete” button to remove the unwanted part. Once you are done with the editing with this splice online tool, head to the top right corner and download the video to your PC.
Part 3. Best Offline Video Splicing Option: Wondershare Filmora
Although these online tools handle splicing effectively, limitations like a lack of AI-powered features and dependence on a stable internet connection can make them less practical for many users. For this, offline tools like Wondershare Filmora come in handy as they provide efficient video editing along with AI enhancement to create stunning highlight videos and other montages. The tool allows users to precisely remove the unwanted segments from the clips.
Moreover, you get the ability to add multiple transitions between each clip while merging them to give a seamless effect. With Filmora, you can process and edit each clip separately and add enhancements like effects, filters, and background music. Additionally, the functionalities of this platform can also be used from your smartphones as it offers a mobile application for both operating systems.
 secure download

Comprehensive Steps for Splicing Videos With Filmora Desktop
With Filmora, you can perform precise trimming and merging of clips and adjust other elements efficiently. To learn how to video splice with Filmora, read the steps mentioned below:
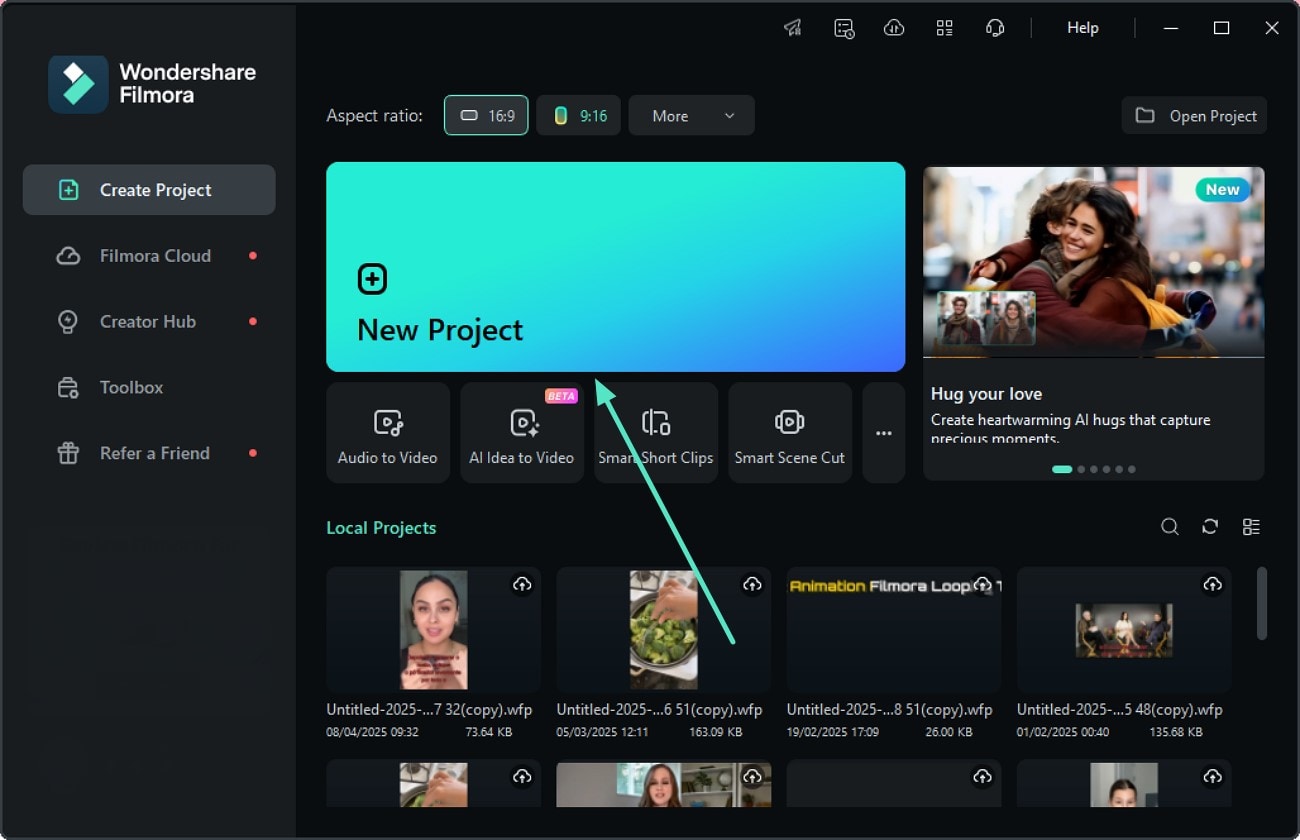
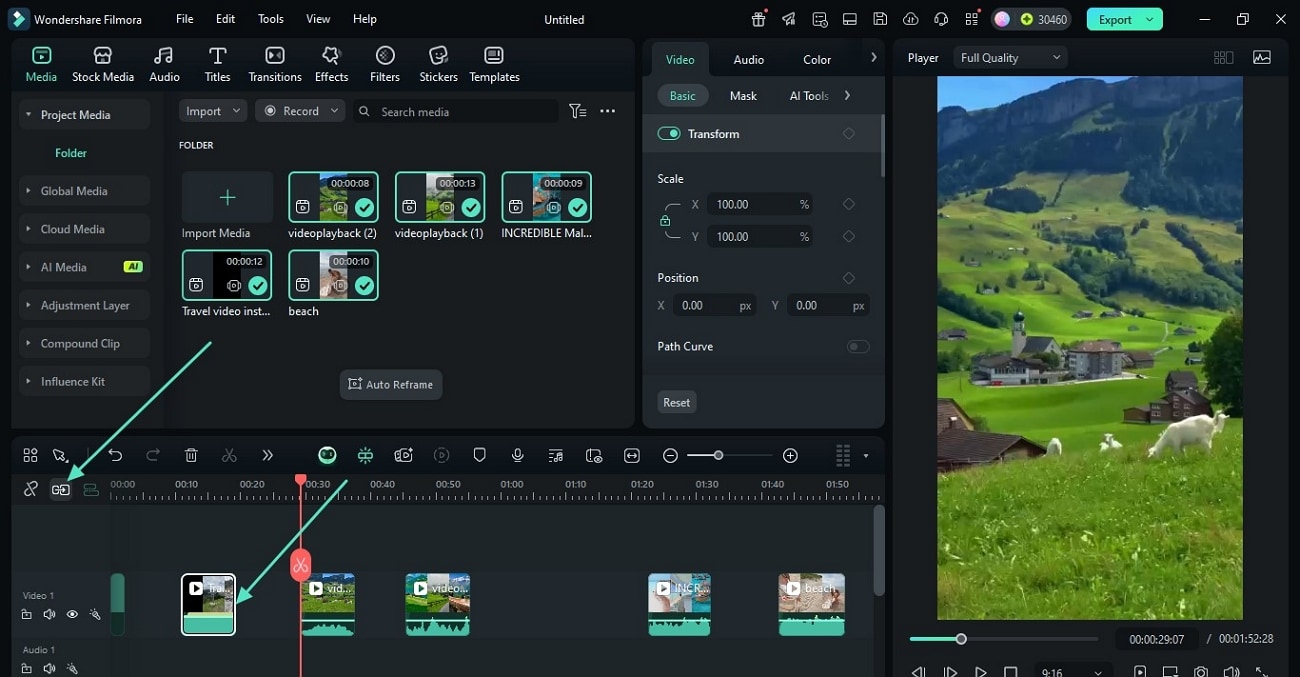
Step 1. Create a New Project on Filmora. To begin the process, create a project by launching Filmora on your desktop and clicking on the “New Project” option located on the homepage. Import the videos that you want to merge and splice to the tool’s interface. Select all the clips that you want to merge from your device and import them into the tool’s interface and drag them to the editing timeline.
Step 2. Cut the Unwanted Sections. Once the clips are imported, remove the unwanted parts of the clips by placing the arrowhead on the selection. Click on the “Scissor” icon to detach it from the remaining clip. Locate the “Bin” icon and click on it to remove the detached part from the clips. Repeat the process for removing all the unwanted sections.

Step 3. Trim the Length of Clips and Combine. To shorten your video length, grab and hold the head of the video track and drag it to the area you want to skip. Click on the “Enable Magnetic Timeline” icon on the left side to automatically join all the clips seamlessly when all the clips are combined.
Step 4. Add Transitions Between the Clips. When the clips are joined together, add smooth transitions between them by accessing the “Transitions” option from the toolbar. Next, choose the transition of your choice from the library and apply it between the clips by dragging it on the timeline. Set up the attributes of the transitions by accessing the panel in the middle of this splice video maker.

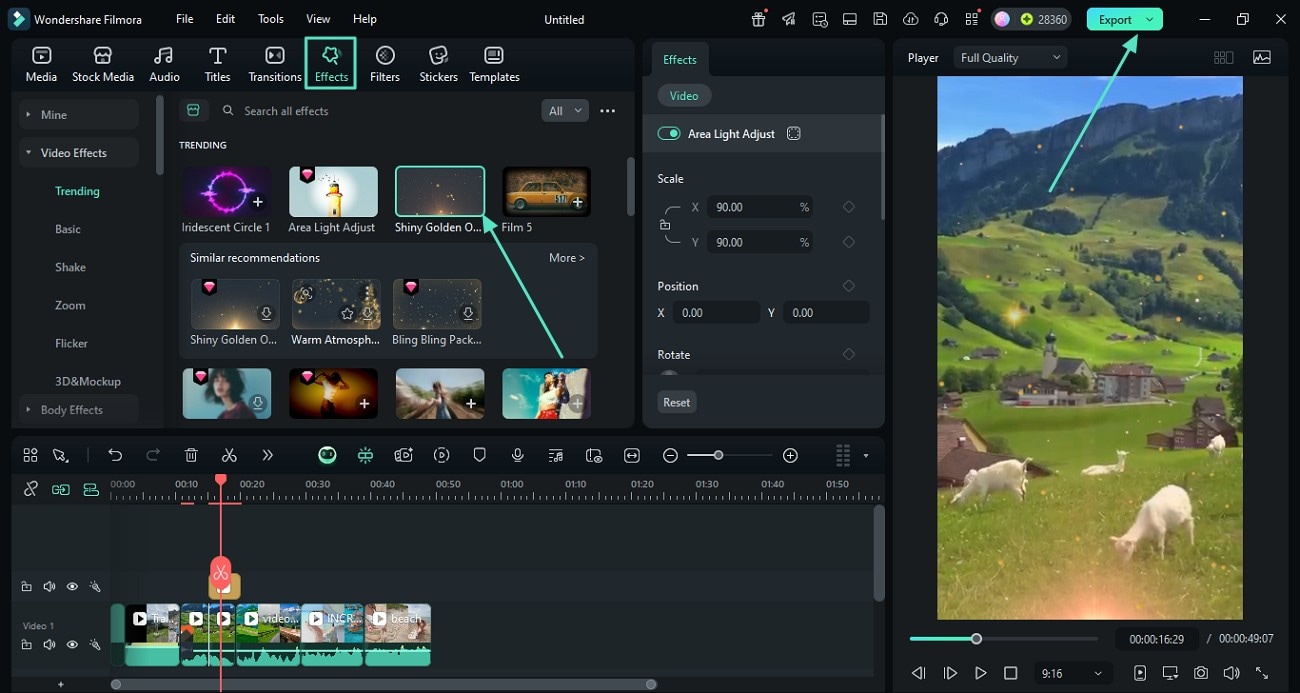
Step 5. Insert Effects & Filters and Export. Moving forward, access the toolbar again and enable the “Effects” section. Apply the effect of your choice by clicking on the “+” icon located on its thumbnail. Similarly, apply filters by acquiring the “Filters” section from the toolbar. Once you are satisfied with the results, head to the top right corner of Filmora’s interface and press “Export” to save the created video montage to your computer.
Comprehensive Guide to Splicing Video With Filmora App
The Filmora App also provides the ability to splice video by offering an easy-to-use interface. Provided next is a step-by-step guide on how to splice video using this efficient application:
Filmora for Mobile Filmora for Mobile Filmora for Mobile Filmora for Mobile Filmora for Mobile
Edit Videos on Your Mobile Phone with 1-Click!
- • Powerful Brand New AI Features.
- • User-friendly video editing for beginners.
- • Full-featured video editing for professional.


Step 1. Create Project and Trim Clips. Start by launching the application on your smartphone and pressing the “New Project” button from the homepage. Next, import all the clips from your phone that you want to merge into the app’s interface. Hold and drag the clip on the timeline till the part you want to trim and repeat this for each clip and remove the unwanted part.
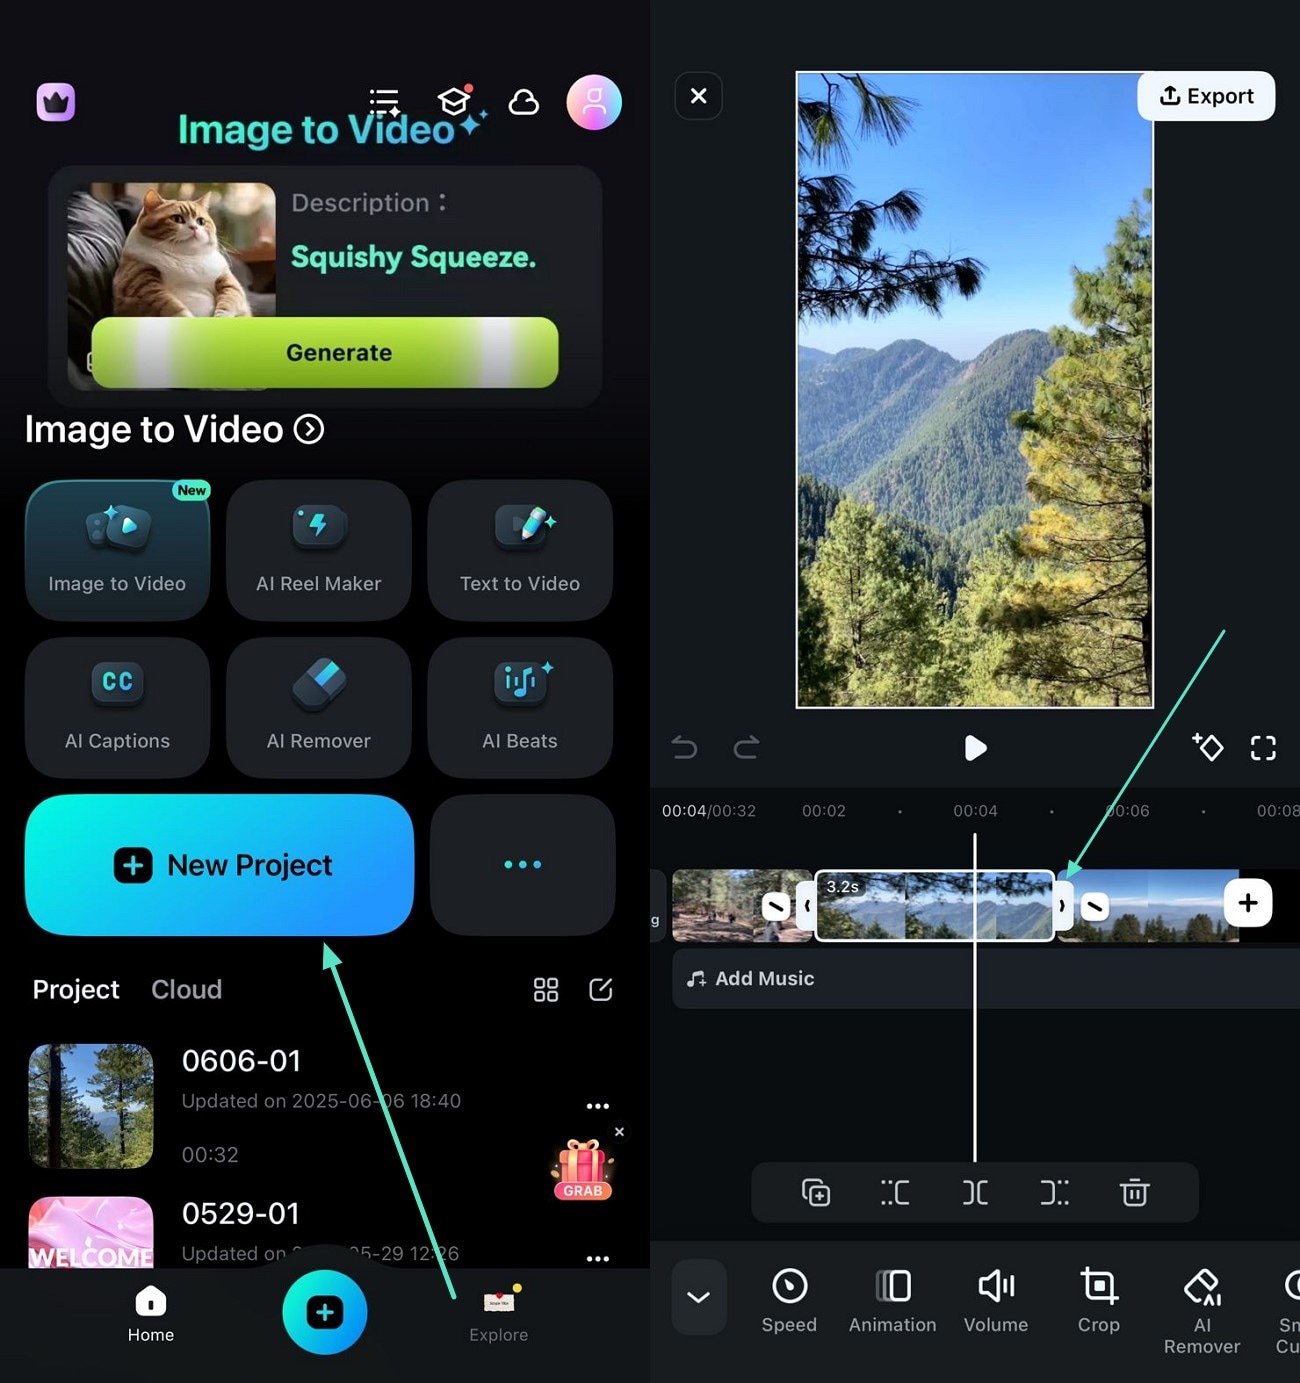
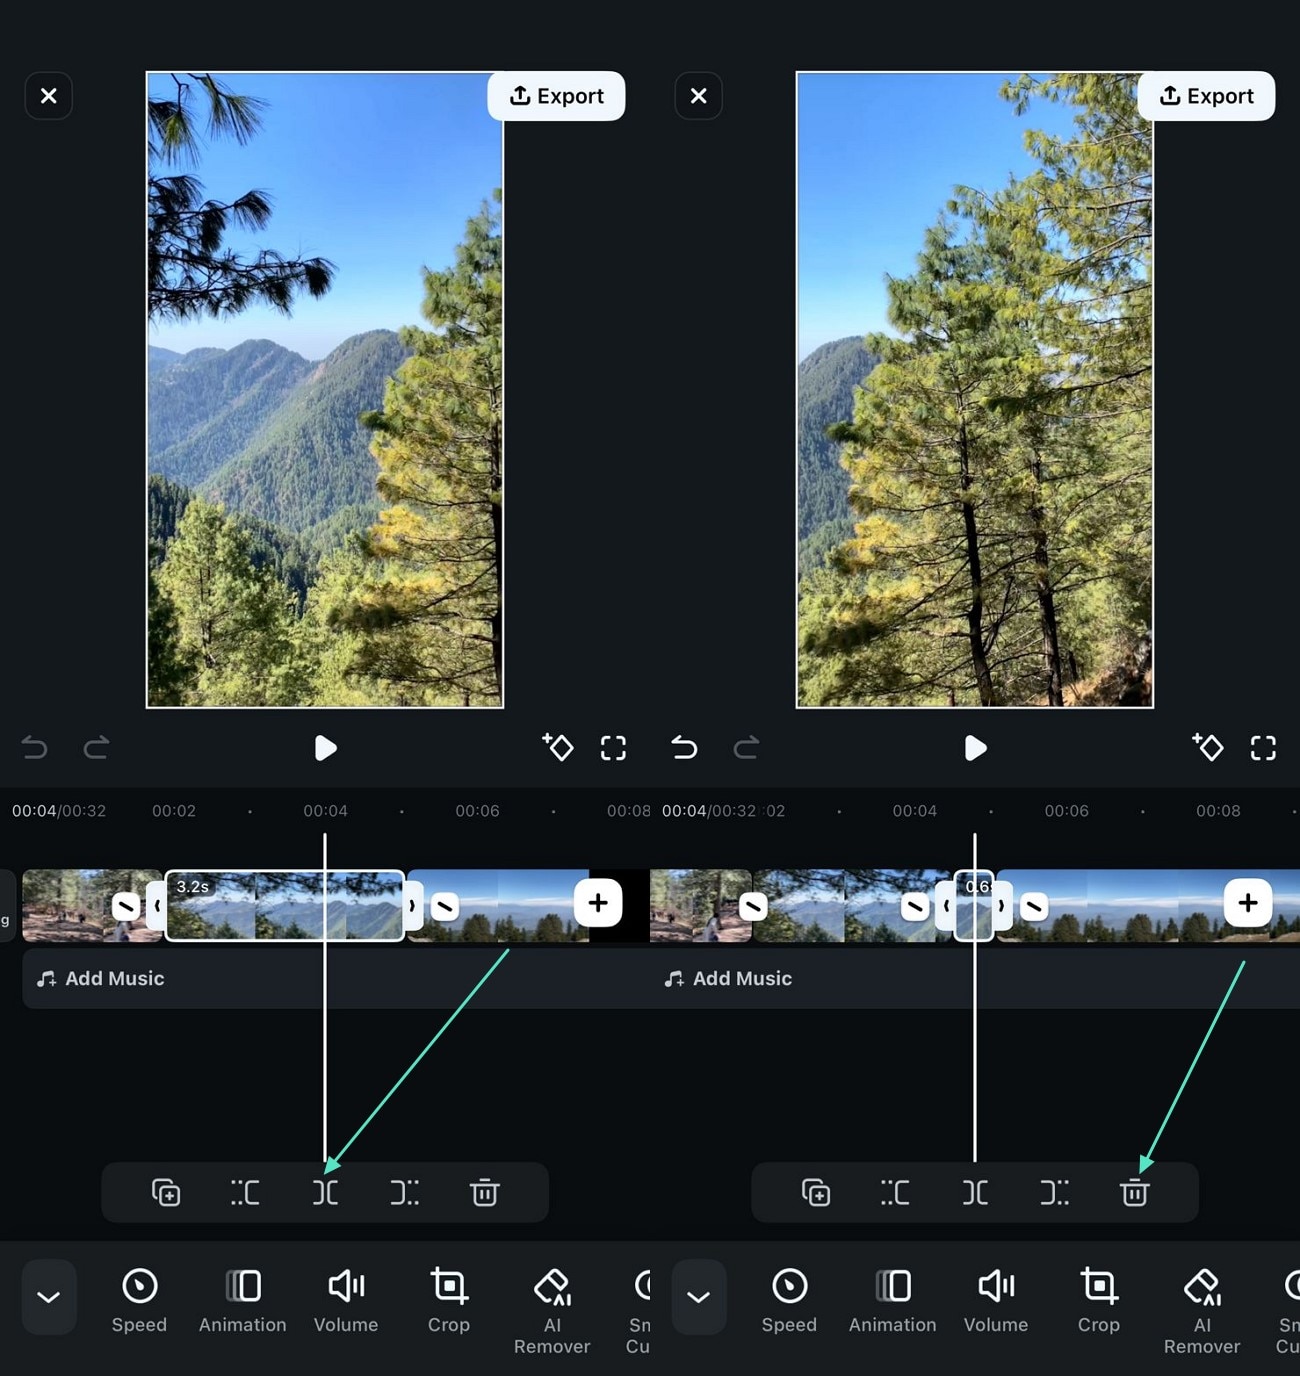
Step 2. Cut Unwanted Section. Tap on the “Split” icon located below the timeline to remove an unwanted chunk from your clips, and place the arrowhead on the part. Now, press the “Bin” icon to remove the unwanted section conveniently.
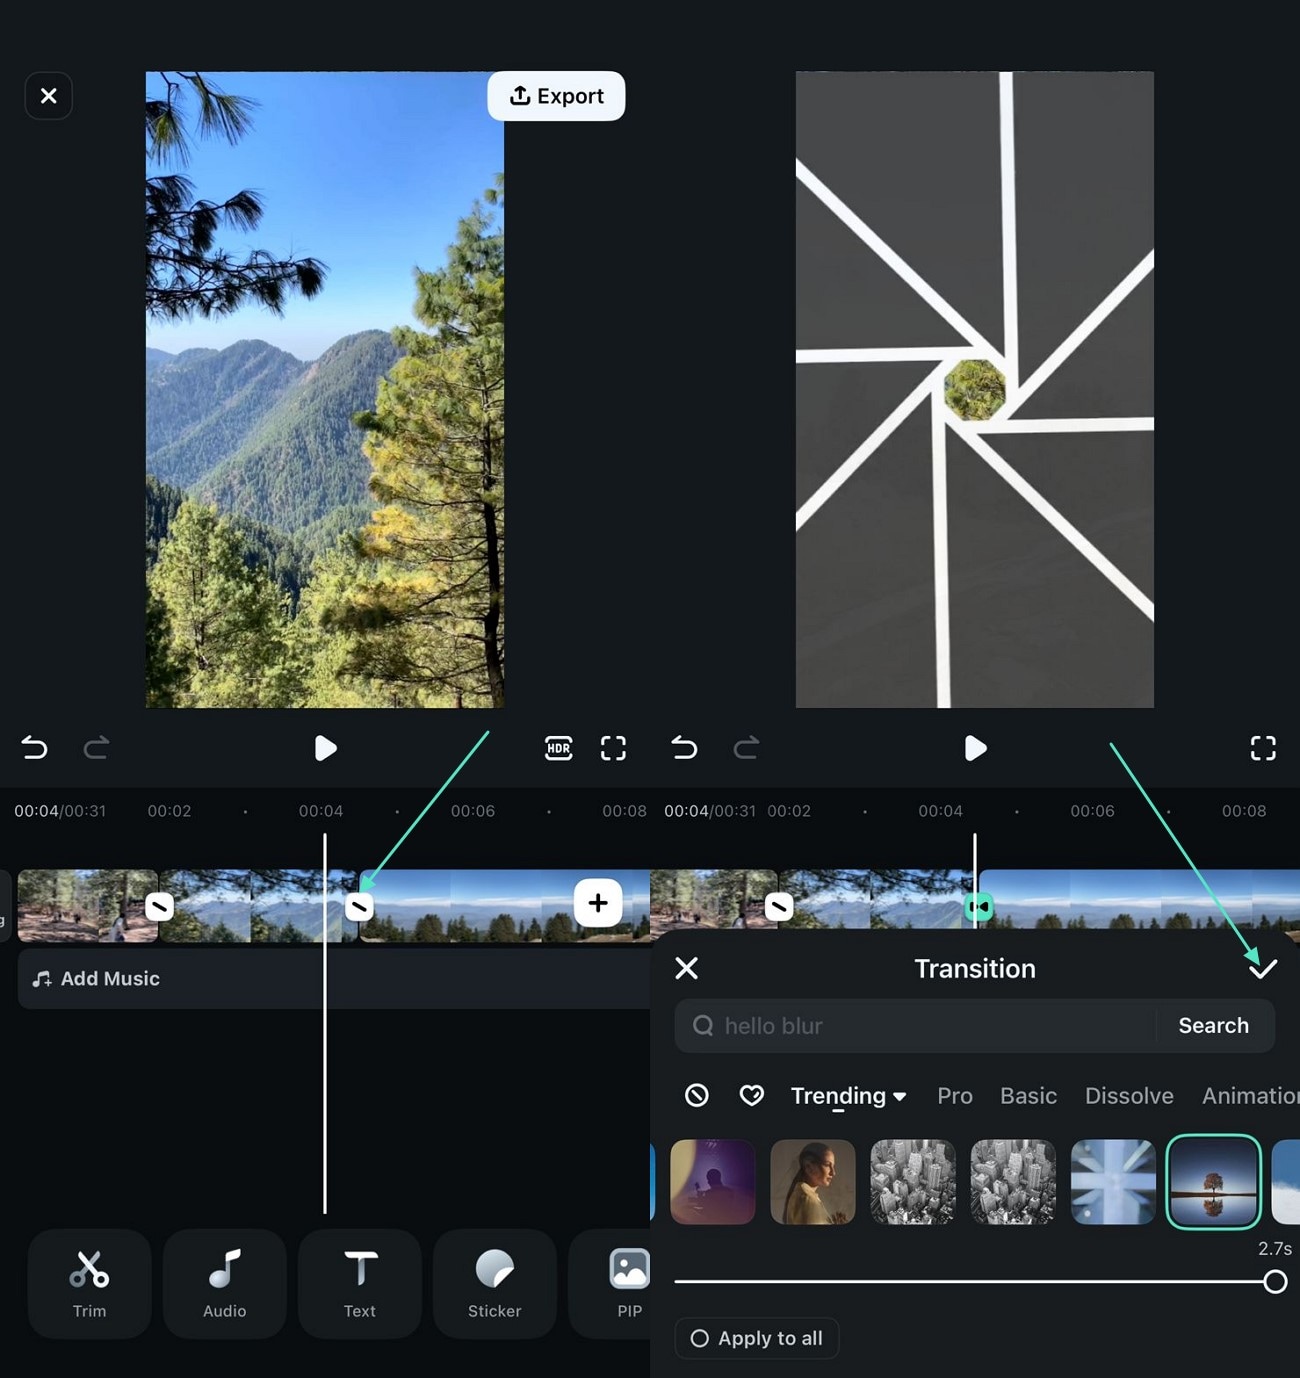
Step 3. Apply Transitions Between the Clips. Once the clips are trimmed and automatically merged, tap on the “Transitions” icon between two clips to enable the “Transition” library. Apply your favorite transition by selecting it and pressing the small “Tick” icon on the right.
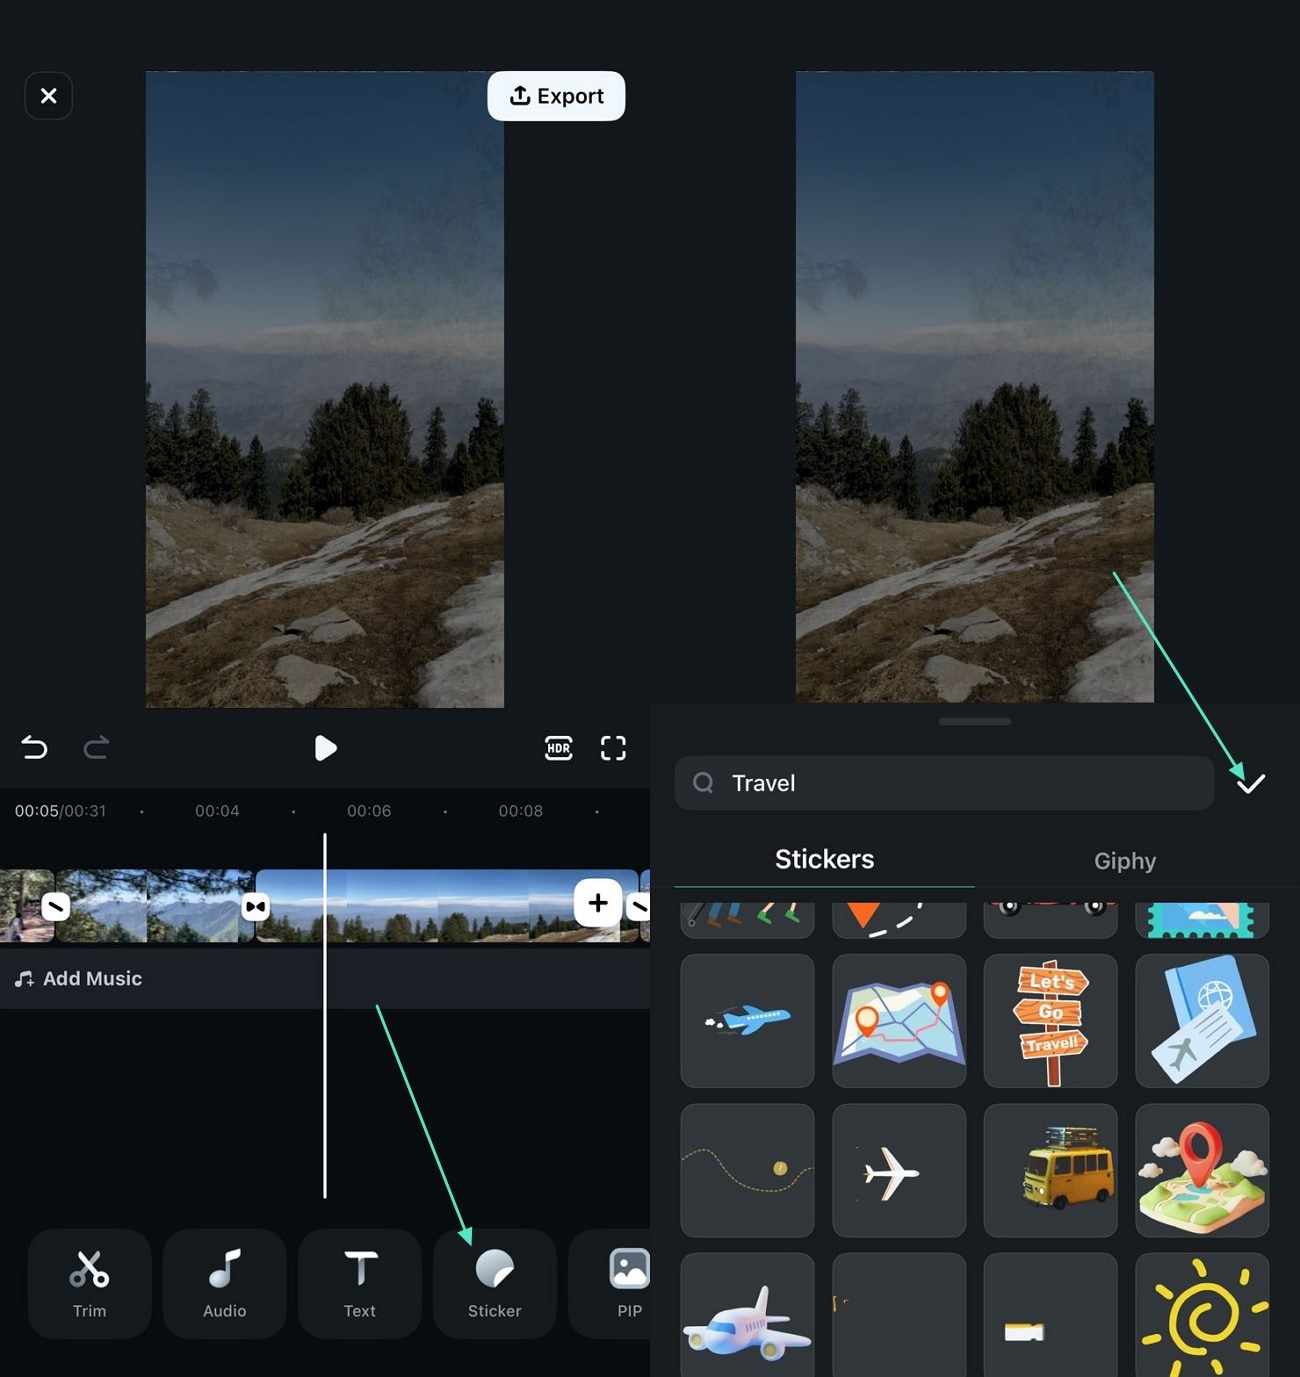
Step 4. Add Sticker to the Video. To enhance and modify the visuals, access the “Stickers” section from the toolbar located at the bottom, select the relevant sticker from the library. Use the “Tick‘ icon from the right to apply the selected sticker to the video.
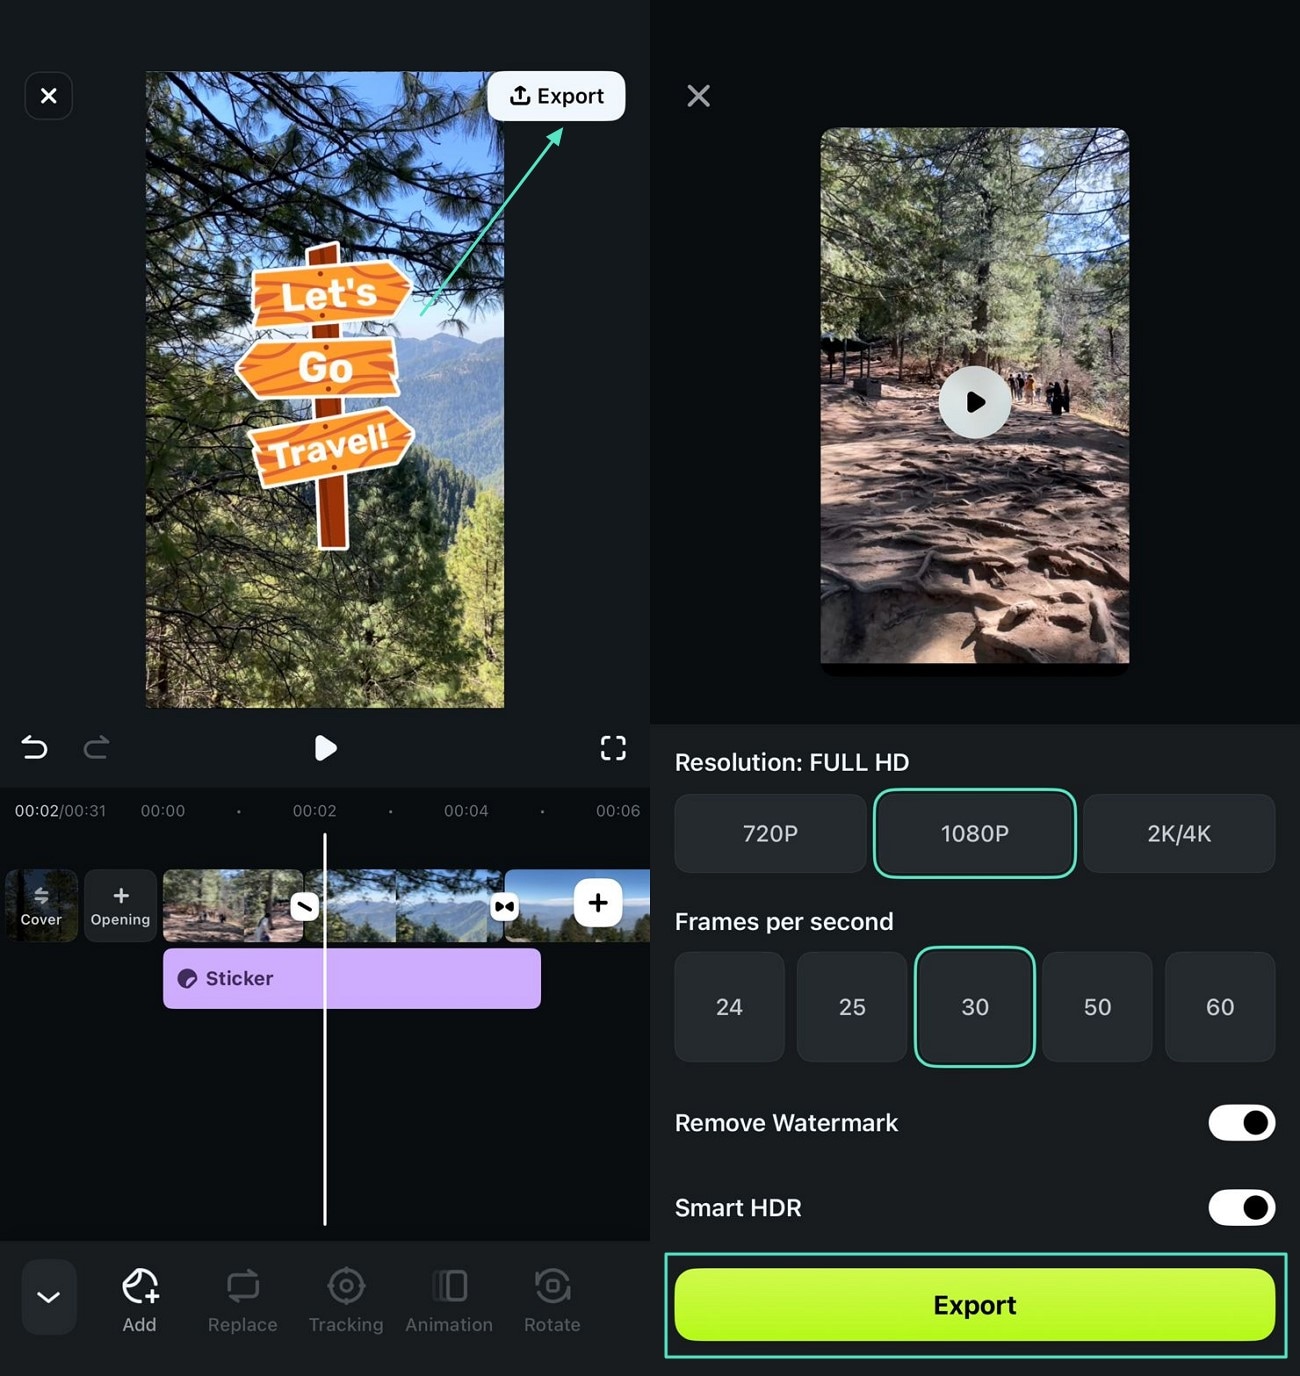
Step 5. Export Your Spliced Video. Head to the top-right corner of the app’s interface and press the “Export” button after the splicing and enhancement are completed. In the following interface, select output settings and tap on the “Export” button to finally save your video to your smartphone.
Conclusion
To summarize, this article discussed various splice online video editors that let you trim and merge multiple videos. However, these resources have limited functionalities, which makes you go for offline options. Wondershare Filmora is one of the most reliable solutions that offer extensive functions to efficiently splice videos from your desktop as well as your smartphone.
