It’s an indisputable fact that editing is an essential aspect of video creation, and it’s what brings your initial idea to life. However, it can be very daunting and time-consuming, especially when working on a video project containing lots of footage.
In this post, we will walk you through the five best tips that can come in handy to operate fast and smoothly while editing videos of any size. All you just need is the Filmora video editor. You don’t even require technical knowledge.
In this article
1. Organize your Media
Since a video project usually has various elements, keeping track of them can take a lot of work. So, the first editing step should be to organize the files so that it is easy to follow them. To do that, you need to do the following;
Create a Folder for Each Media File in your Project
Creating folders involves sorting your video files into various categories, thus making it easy for you to look into specific files and find the missing ones quickly when you need them. For example, you can create a folder for A roll, B roll, Photos, Audio, Sound FX, Music, and Drone Footage. Follow the steps below to see how you can use Filmora to create a folder for each file in your video project;
Step1 Launch Filmora and click Create Project.
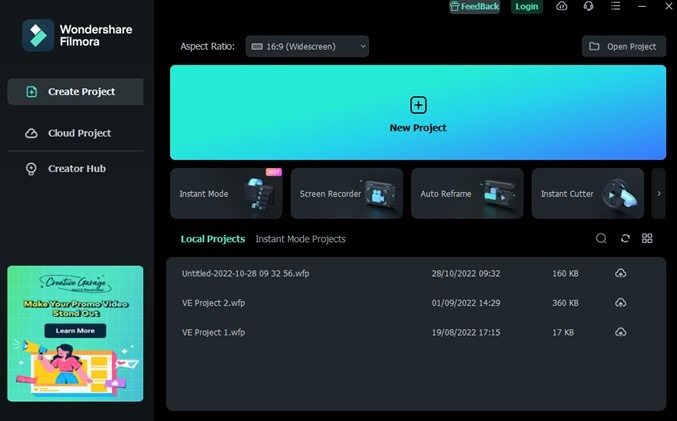
Step2 Navigate to the bottom left corner before the Timeline > click the Folder icon from there, as shown in the image below;
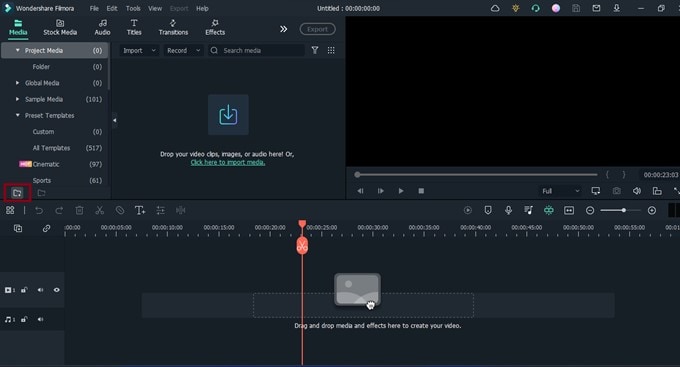
Step3 Click on the folder icon until you reach the total number of folders you need to categorize your video files.
Right-click on each folder and name it accordingly.

After you name each folder, use the Import button to upload each video files you need to edit your video.
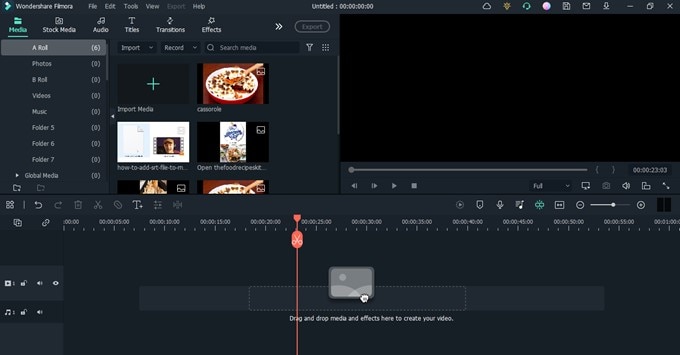
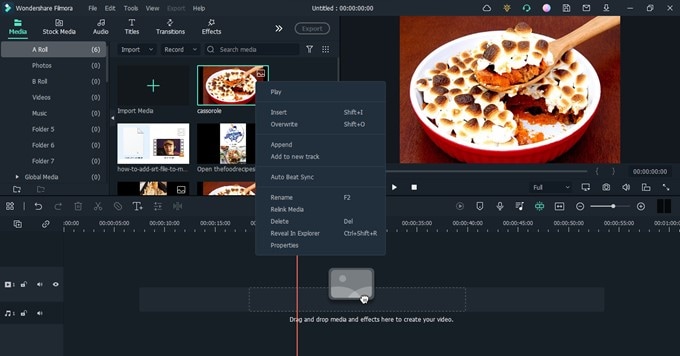
Step4 Rename all imported files. To rename your imported files, right-click on them to add a preferred name. Then, click Rename from the pop-up list to name the files.
2. The Use of Proxies
Another tip that enhances a quick editing process is the use of proxies. Proxies can be described as low-resolution versions of your video files. So, if you’re working on video files that drag back playback speed, like 4K footage, you can create a proxy to enable your PC to handle the file seamlessly.
A tool like Filmora editor can help create proxies of your video file flawlessly. You just have to follow the steps below;
Step1 Locate the large video file you imported to Filmora and right-click it. Then, select Create Proxy File.
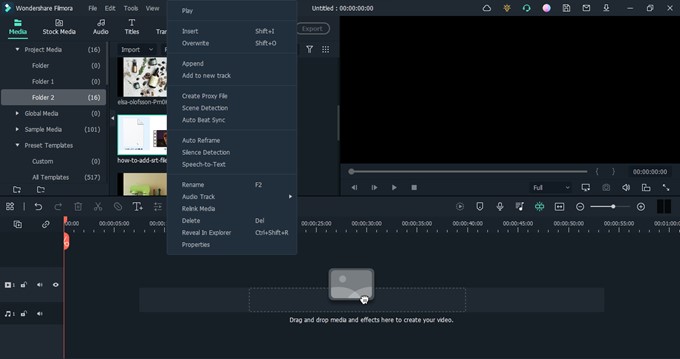
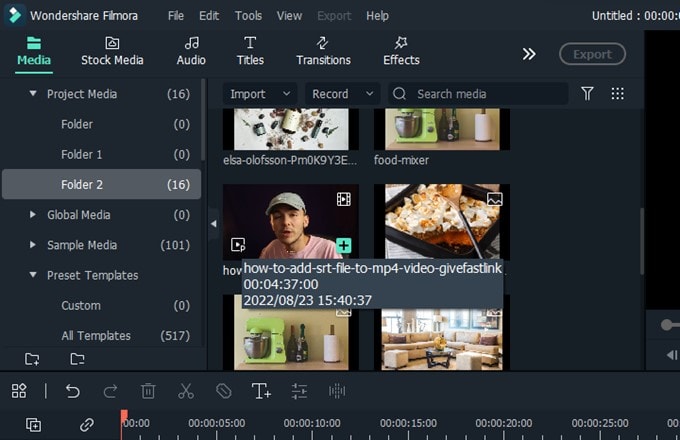
Step2 You should see the proxy icon at the bottom right corner of your video once it completes. This takes only a few minutes.
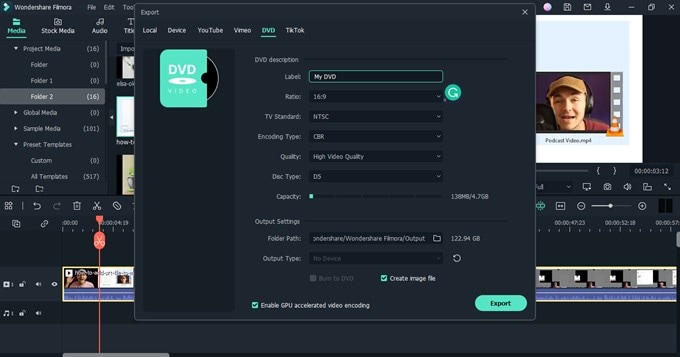
Step3 Drag-n-drop the video to the timeline and perform the necessary editing. Afterward, use the Export button to save the file to your PC.
3. Keep Your Videos and Audio Tracks Organized
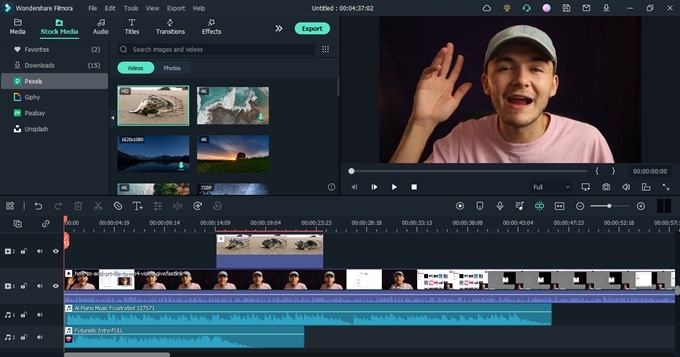
This is similar to our first tip, and fortunately, the Filmora video editor facilitates this kind of operation quickly and easily. It involves organizing video and audio clips in the timeline while editing. For instance, use video track #1 for graphics or text, #2 for your B roll, and #1 for the main footage taken.
You will also do the same for Audio, for instance, Audio track #1 for music, Audio track #2 for dialogues, and many more. This will allow you to edit various clips simultaneously, making the editing process faster and easier. Here are the steps to use this tip;
Step1 Click on the Add icon at the left side of the Timeline and select Add Video Track or Add Audio Track to add more timelines for your clips.
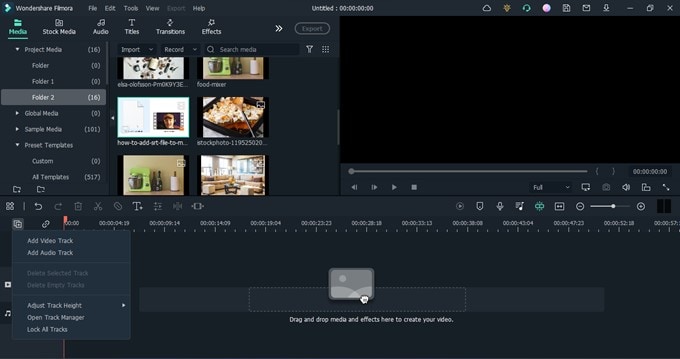
Step2 Drag-n-drop the video clips and audio clips to the relevant timeline.
4. Keyboard Shortcuts
These are commands on the keyboard of your pc that will enable you to edit your projects easily and quickly. Various options can be available by keying in specific orders rather than going through a long process using the mouse. This knowledge can be a real time-saver when handling projects. To get more enlightened on the setup in Filmora, follow the steps outlined below;
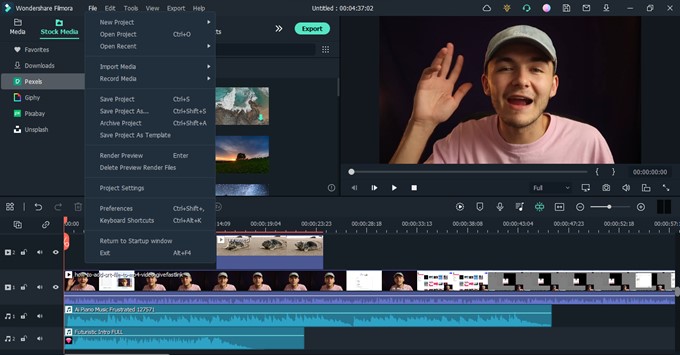
Step1 Open Filmora and click File from the top side.
Step2 Select Keyboard Shortcuts from the drop-down list.
Step3 The new pop-up window on your PC screen will display all shortcuts you can employ while using Filmora, and the interesting part is that you can customize the shortcut keys to your preference. Moreover, you can freely switch keyboard shortcuts between Filmora, Adobe Premiere Pro, and Final Cut Pro.
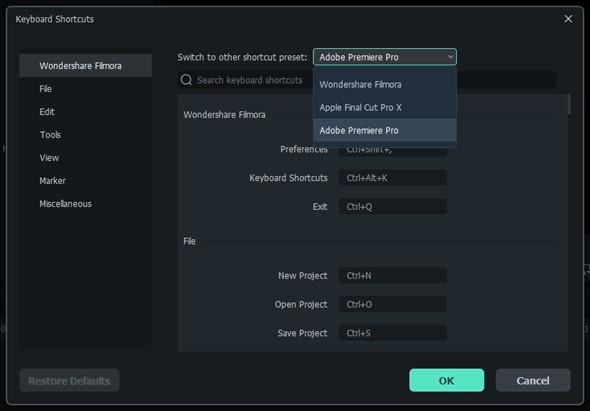
Step4 For clicking CTRL+ALT+N will allow you to create a new folder for your file.
5. Edit in Stages
Our final tip is to edit in stages. Yes, it is necessary to edit in stages when dealing with editing work. This helps to limit the time you spend on a project. In the beginning, you should do a rough cut. You can begin by editing the A roll at first and then move on to edit the B roll, moving on to the Sound FX, Music, Graphics, and Color Correction, and then reviewing the entire project before exporting it.
In case while editing the A roll, you find something that requires a quick fix in its audio, focus on it and, if possible, use a marker icon to describe it. This will help you not get confused once you get to the Audio stage. See the steps to use Filmora to do this below;
Step1 Firstly, focus on your video footage. Move them to the required timeline.
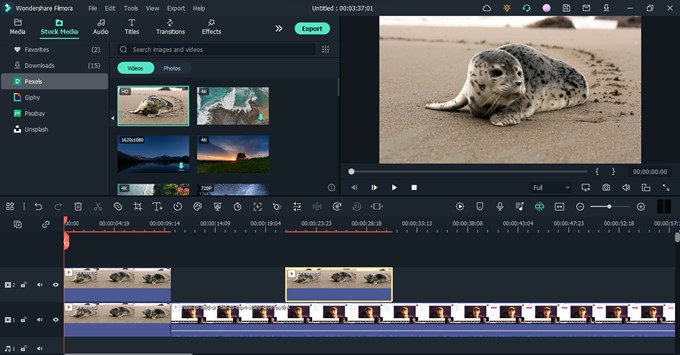
Step2 Next, move your B-roll to the relevant timeline. Then, apply the required editing.
Step3 Afterward, move drag-n-drop the audio clips to the timeline and apply the needed edits.
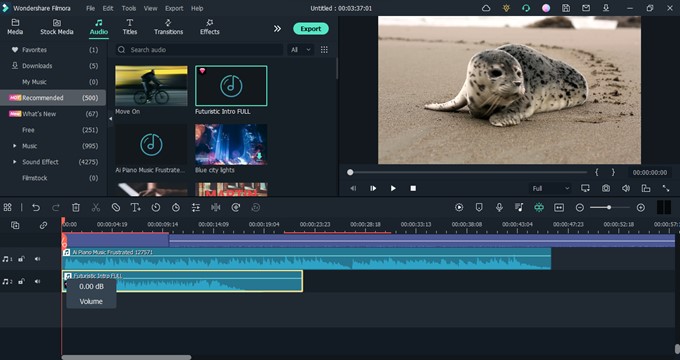
Repeat the process for different operations in stages until you finish.
Conclusion
The editing process is about having a free mind where creativity is the primary focus. When you can do that, you will be able to complete your projects in a short time and work on various tasks simultaneously. The tips discussed in this article will go a long way in helping you handle your projects using Filmora.
You can use Filmora to edit videos and other media files downloaded from YouTube, Vimeo, and many more video-sharing sites. Follow these tips and make editing your video projects quite easy and fast.


 100% Security Verified | No Subscription Required | No Malware

