Are you considering getting your video editing skills to a new high level? Are you worried about spicing your videos with stylish shots and bringing attention to particular aspects of your video?
Freeze frame sequence is one the most stunning effects that can help you greatly. The freeze frame sequence has been used in many classic and present-day movies. And it will never go out of fashion.
Here, we will guide you on creating freeze frame sequences in your videos using Filmora. It is critical here to know what exactly the freeze frame sequence is. So let's jump right into it!
In this article
Part 1. What Is A Freeze Frame?
A freeze frame is a specific single frame of the video clip shown repeatedly in the video. It gives the illusion of a static picture. It is used to draw the viewers' attention to the minute details of a specific moment, to set up a powerful narrative, or to introduce your main characters.
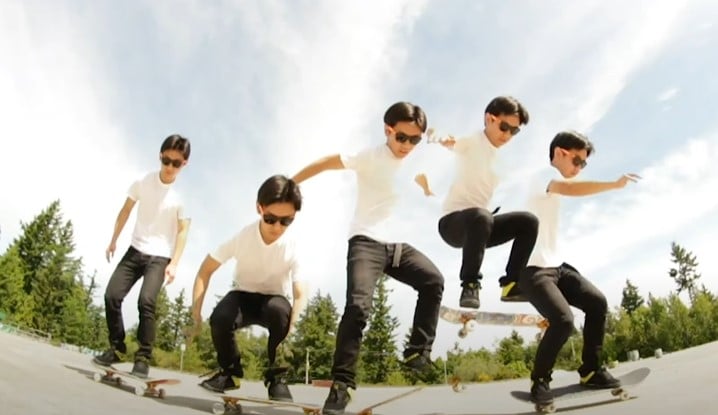
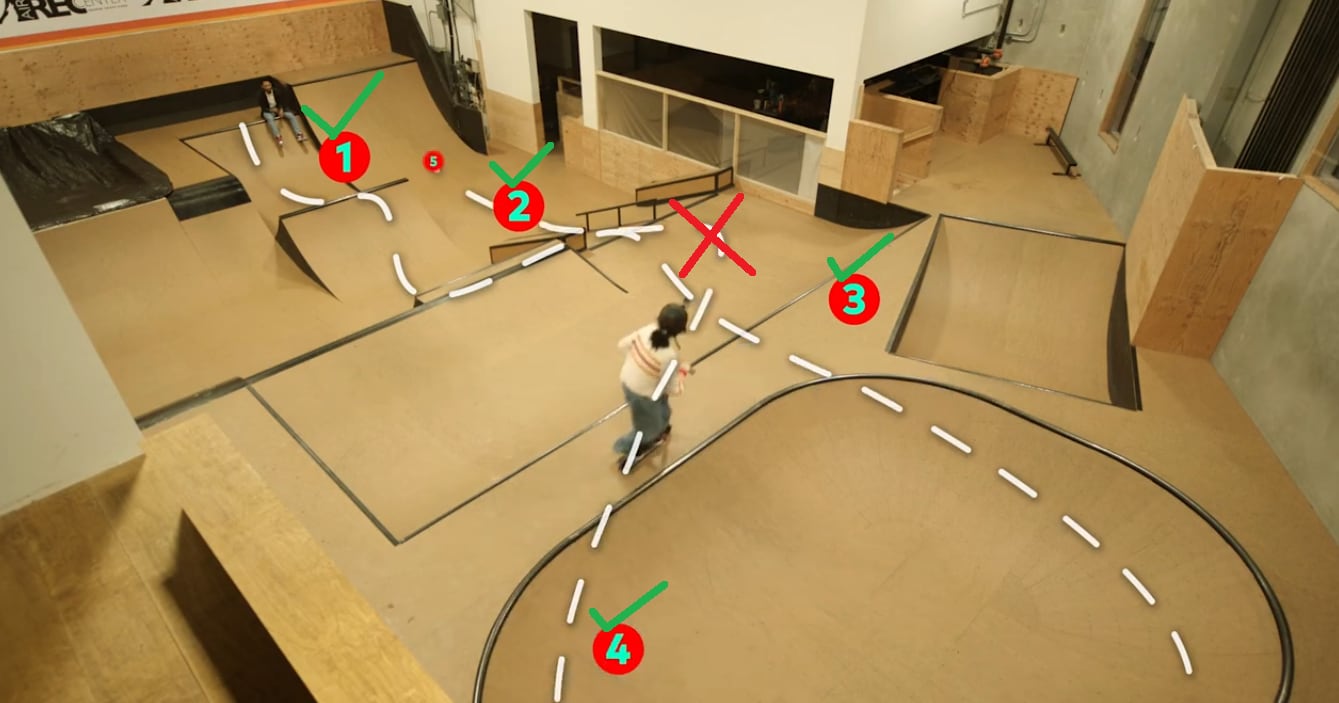
Content creators can also use the freeze-frame effect on fast-moving objects to draw the viewers' attention. Have a few examples of the most popular freeze frames used in the movies.
Examples of freeze frames in popular movies
Alfred Hitchcock used the first-ever freeze-frame in his film Champagne (1928). There is a long list of many famous tv shows and movies in which the freeze frame effect has been used since then. But to count a few, three examples are given here.
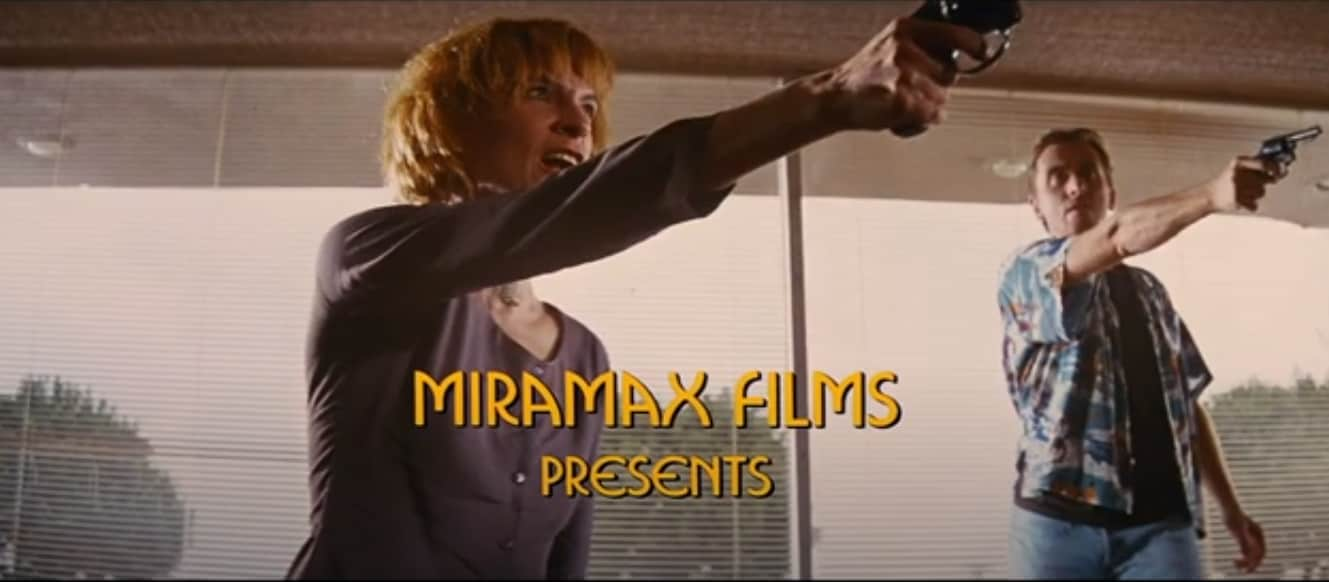
1. Pulp Fiction (1994)
In the beginning scene of Pulp Fiction, where robbery is about to occur, a freeze-frame effect is used to engage the audience. Later in the movie, it was relieved what would happen next. It was a dramatic pause to draw attention. It is a strong example of the freeze-frame effect.
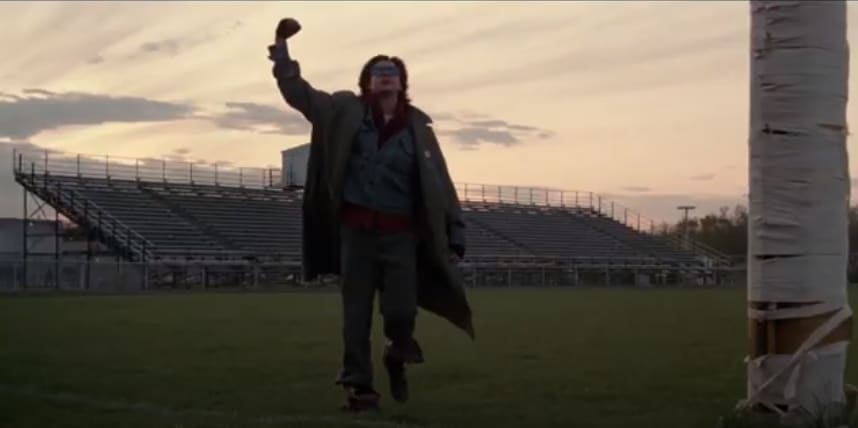
2. The Breakfast Club (1985)
The ending of Breakfast Club is an iconic example of the freeze-frame effect. With a powerful narration, the freeze frame conveys the movie's central idea to the audience.
3. Suicide Squad (2016)
In the trailer of Suicide Squad, freeze frames were used by the director to introduce the characters. This trailer used stylish animations to give relevant information about the film's main characters.

Having discussed the famous examples, let's learn about the power of freeze frames.
The power of freeze frame
The old freeze frames give a retro vibe. However, with the advancement in editing technology, this special effect has proved that there is no end. Furthermore, it has shown that you can do many things with pauses.
Especially when you are a content creator, this effect empowers you by advertising your skills impressively. It also conveys your message convincingly.
Being a content creator, you always want to reach the maximum audience. This special effect will serve this too. It will ultimately get you more viewership, more likes, and more subscriptions. But how to create a freeze frame?
Part 2. How To Create Freeze Frame Sequence? [Step-Wise Guide]
Let's see how to add a freeze frame sequence in your video step-wise and get started.
Step1 Download Wondershare Filmora
Wondershare Filmora is an all-in-one video editing platform. It is enhanced with multiple practical media resources. You can head to Wondershare Filmora official site to download or upgrade your Filmora.
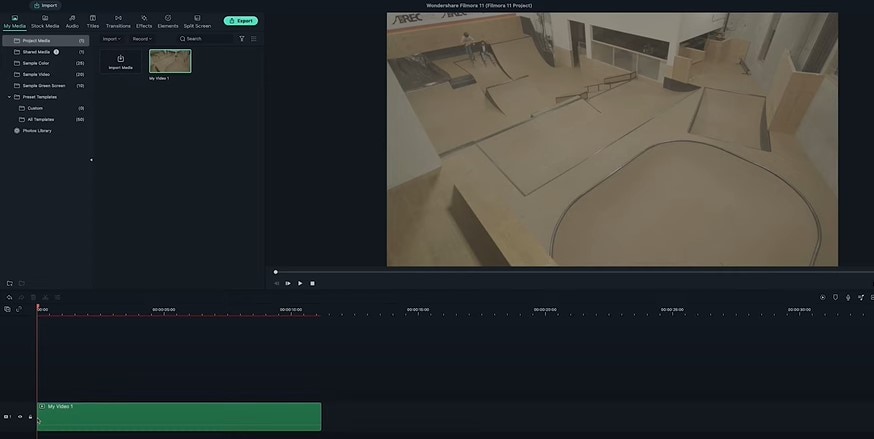
Step2 Import your clips and add them to the timeline
Open Filmora and create a new project. Import your clip into the media library. Add your clips to the first video layer on the timeline.
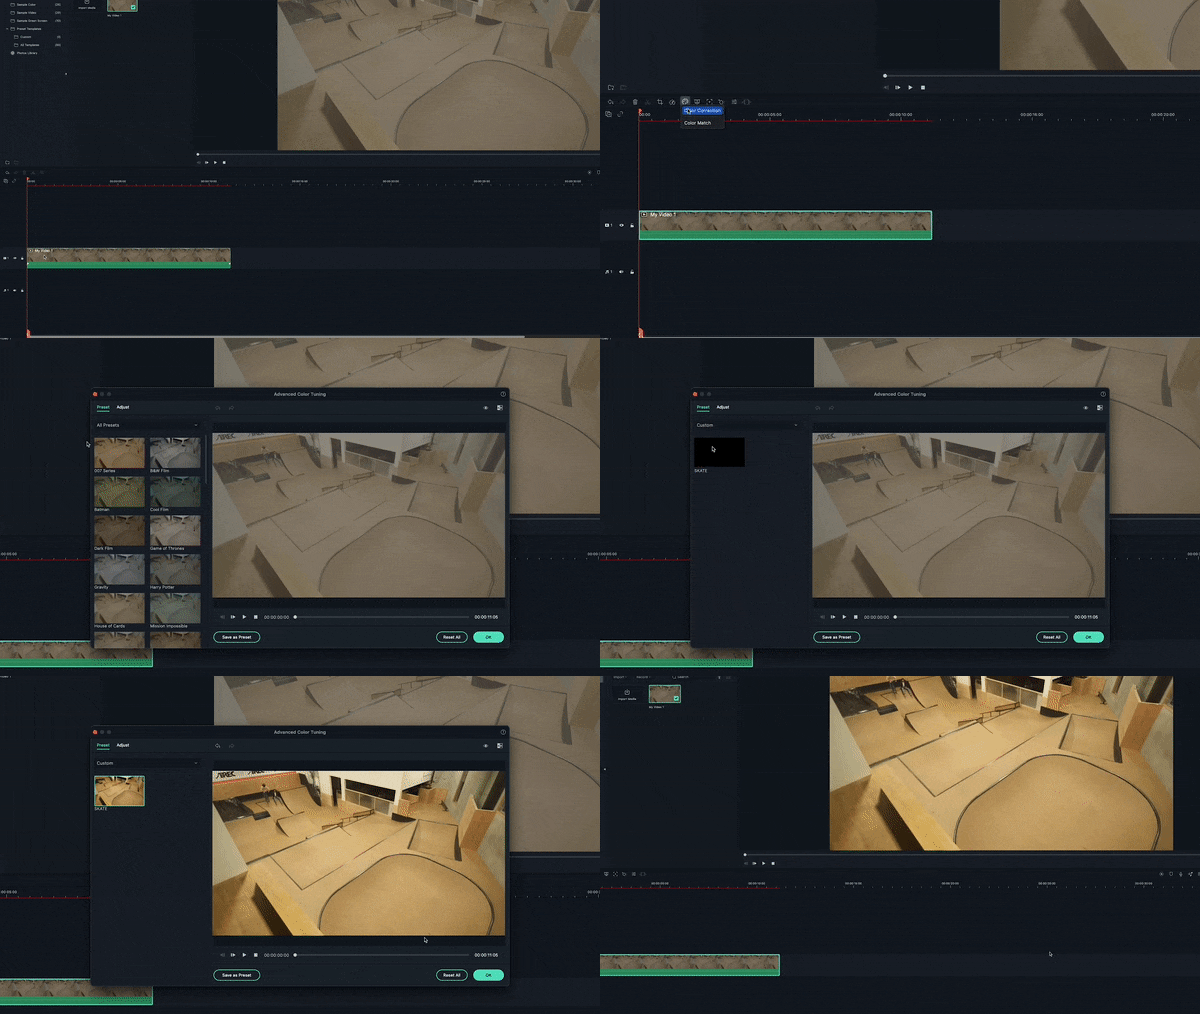
Step3 Apply color correction to the footage
Before we start our edit, let's color correct our footage, so the corrected color is already applied when we take the screenshots.
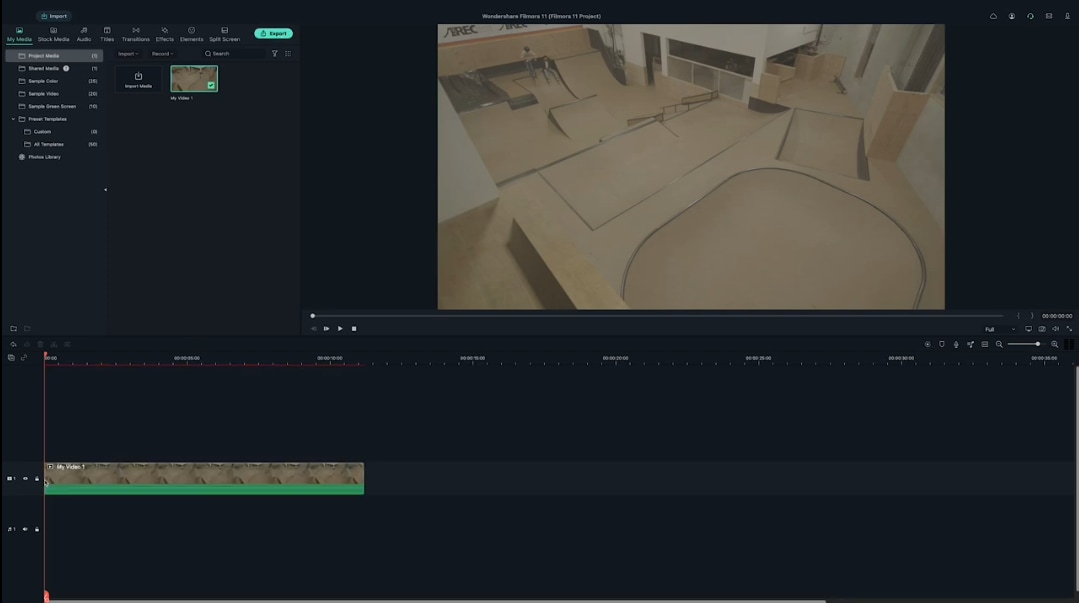
Step4 Find your first action frame
Next, scrub through the clip to find your first action frame. For example, in this video, this is our first action frame.
Step5 Take a screenshot of the action frame
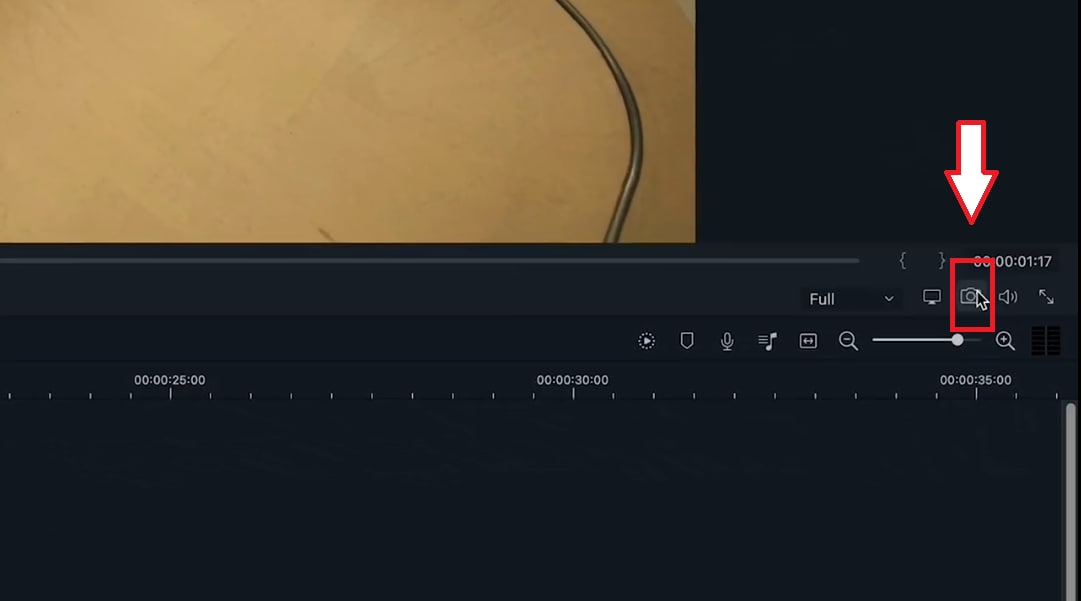
Let's head to the camera icon under the preview screen and click the icon. It will take a screenshot of the current frame that the playhead is on the timeline.
Make sure to keep the playhead the same after you've taken the snapshot. You can find your screenshot in the media tab.
Step6 Add the screenshot to timeline
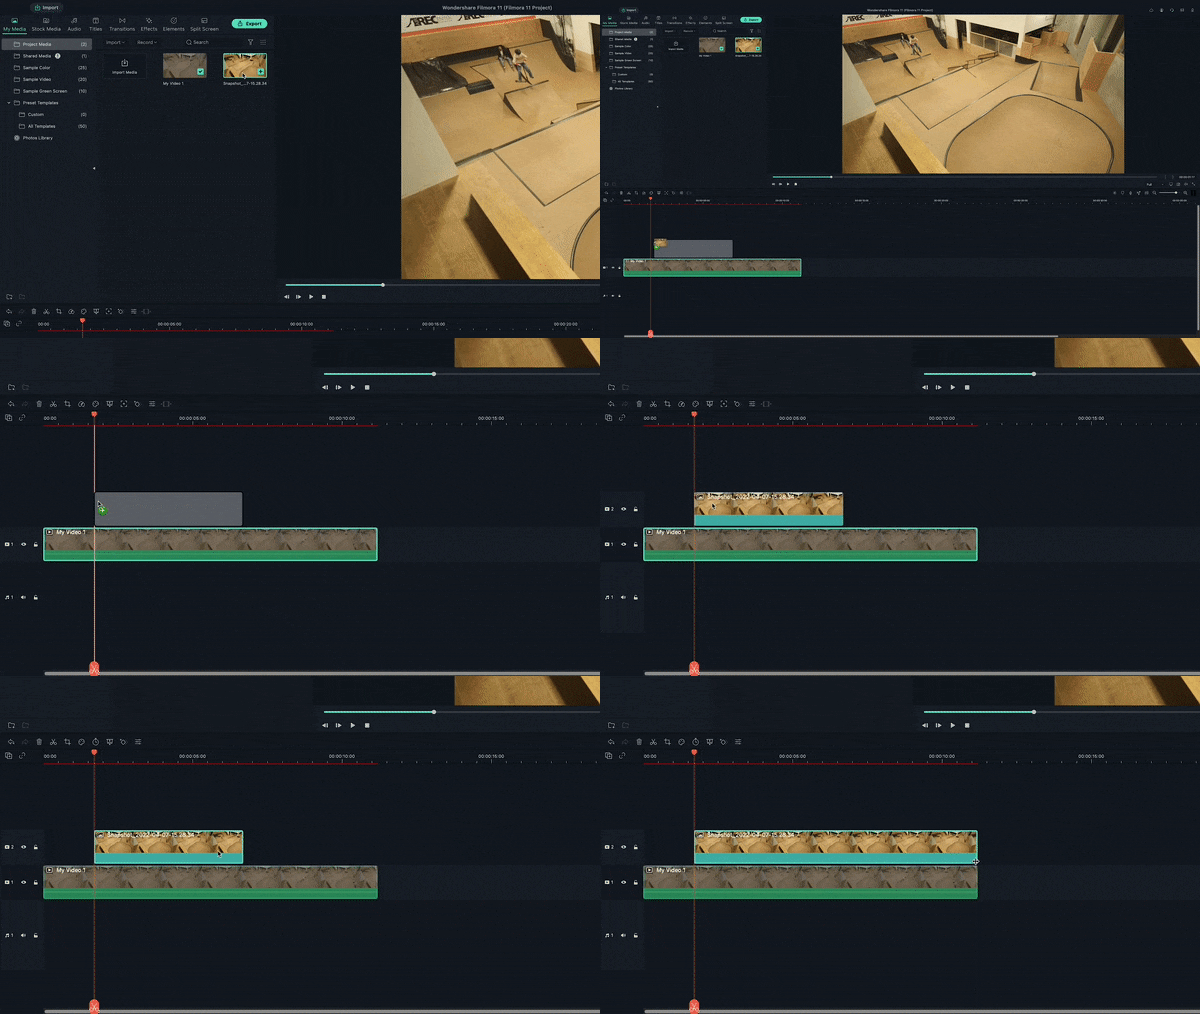
Let's drag your screenshot onto video layer 2 and align it on the right side of the playhead. Then extend the screenshot so it lasts as long as your central clip.

Step7 Apply masks to the screenshot
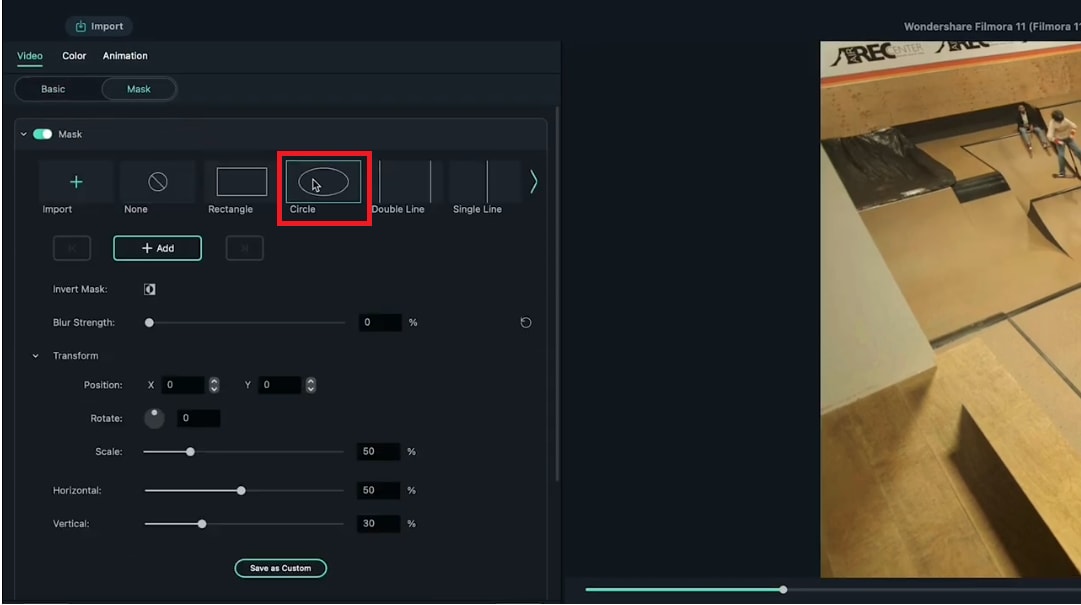
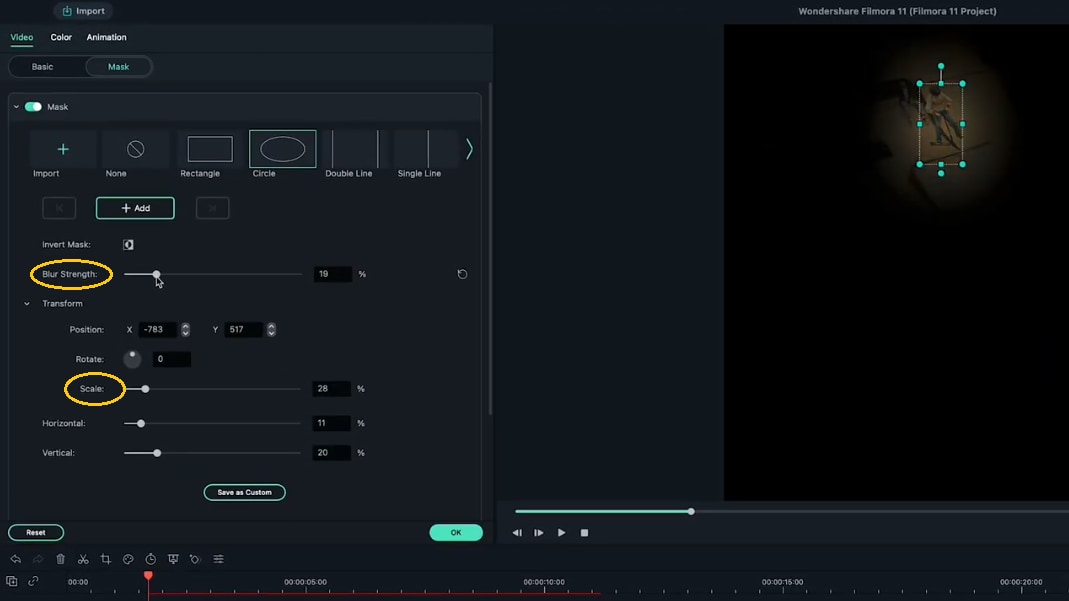
Now, double-click on the screenshot. It will open the "Video" menu, then go into the "Mask" menu. Choose a mask shape and edit it so that it only covers where your subject is in the screenshot. For example, we choose the "Circle" mask shape in this video.
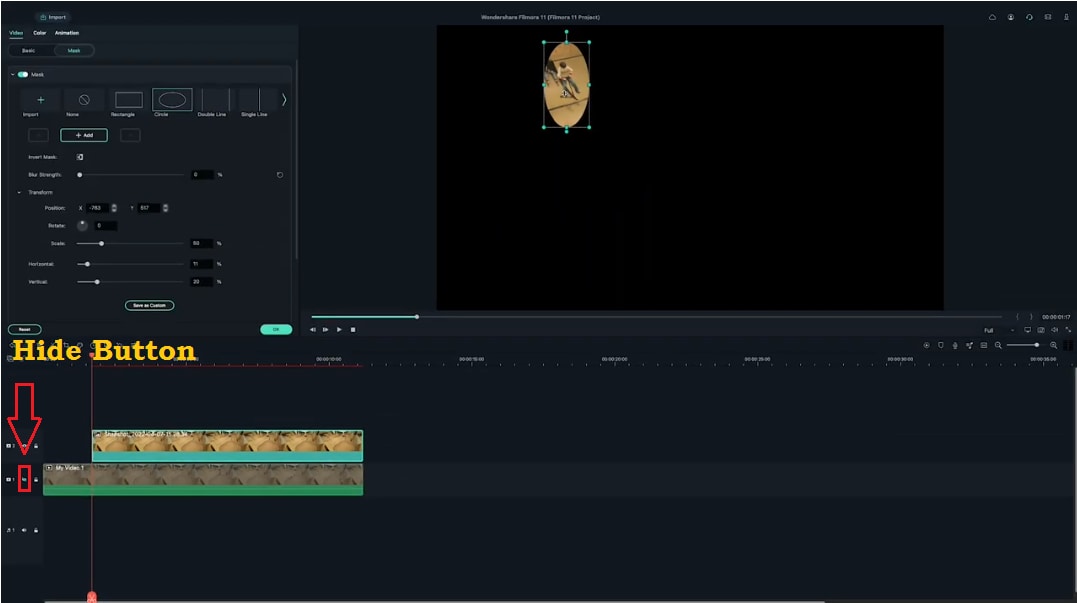
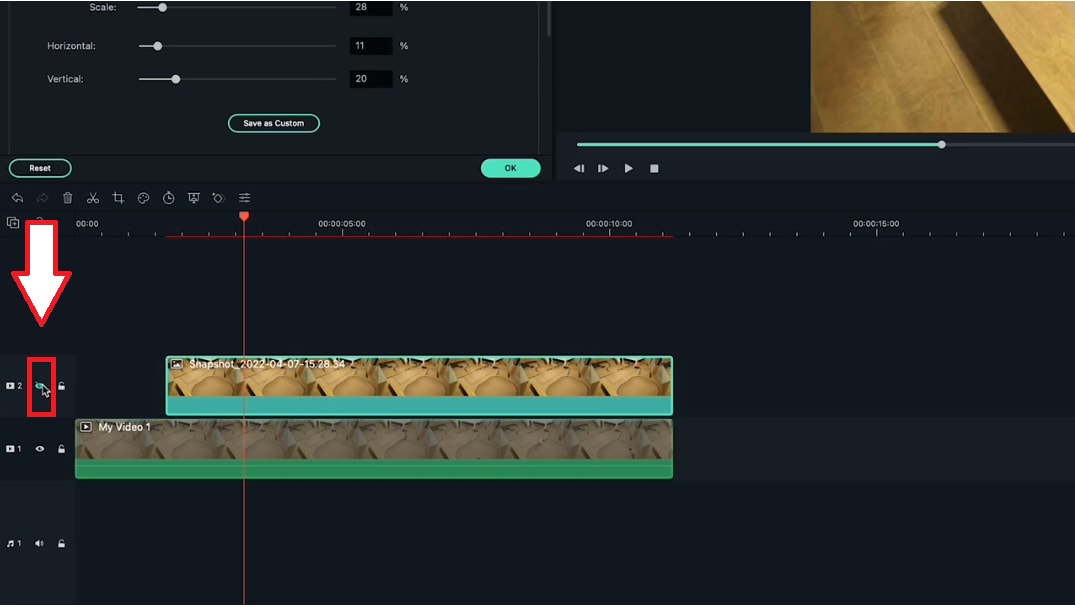
If you need help seeing what you're masking, hide the main video layer and edit your mask like this.
Move the playhead forward and clean up your "mask." Next, Increase the blur to soften the edges. But not too much because it may become visible on your subject.
Step8 Hide the first screenshot
Let's layer a couple more action frames! First, hide the first screenshot so it doesn't appear in your new screenshot.
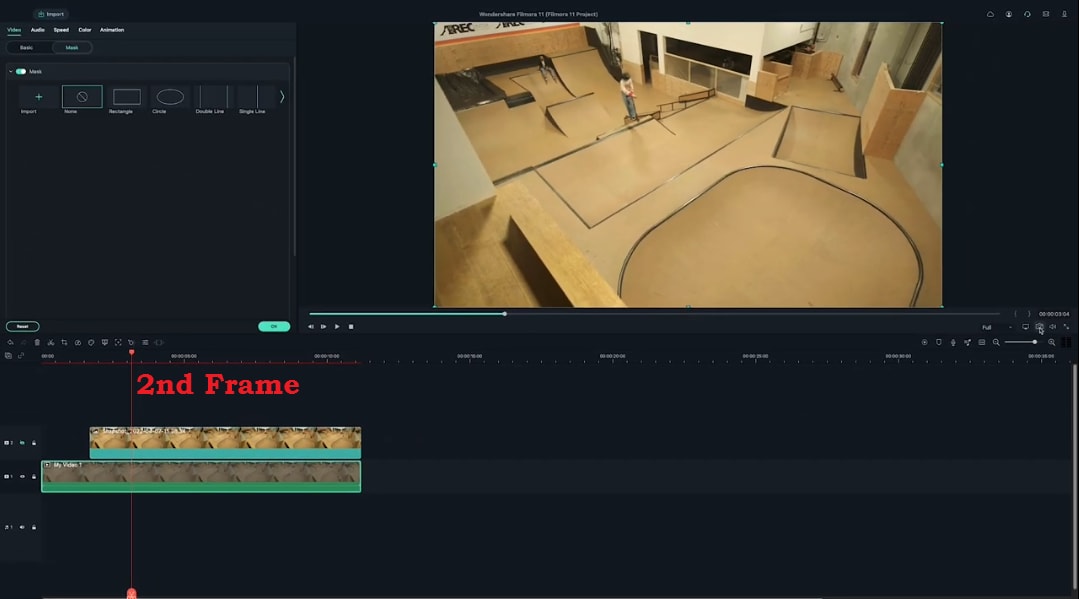
Step9 Select your second action frame
Then, pick a new frame.
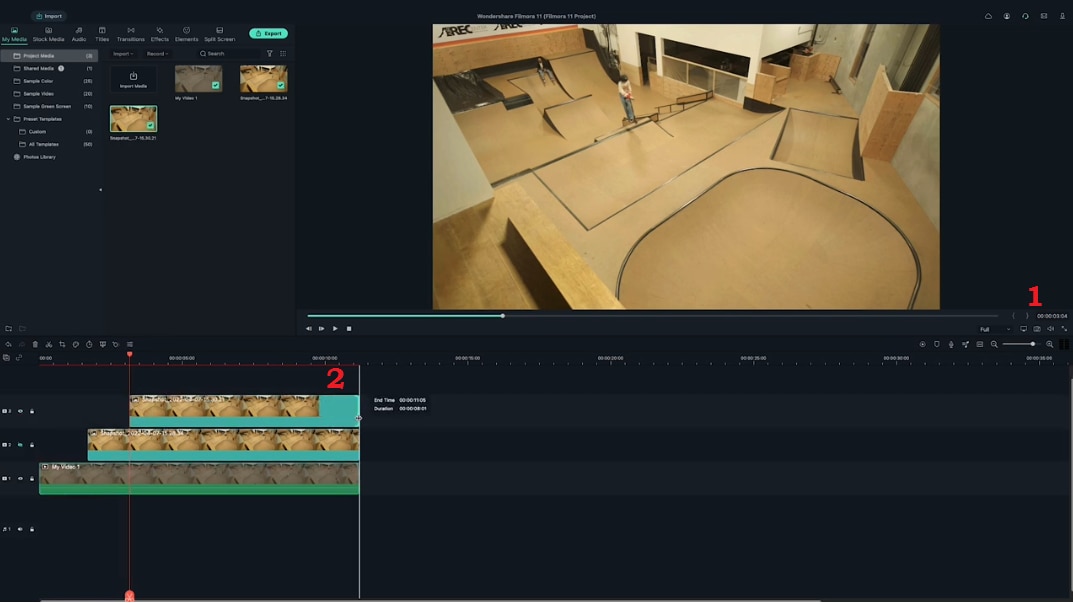
- Click the camera icon.
- Drag the screenshot at the new playhead spot.
- Extend the clip.
- Double-click to mask this frame.
- And play it back to make sure it looks good.
- It would help if you did this a couple more times until you have several frames.
Please have a look at the final product and how it looks!
And that's how you create a freeze-frame video effect in Filmora.
Part 3. Tips To Use Freeze Frame Sequence
You've known how to make the freeze frame sequence. However, don't miss essential tips to improve your video at the next stage.
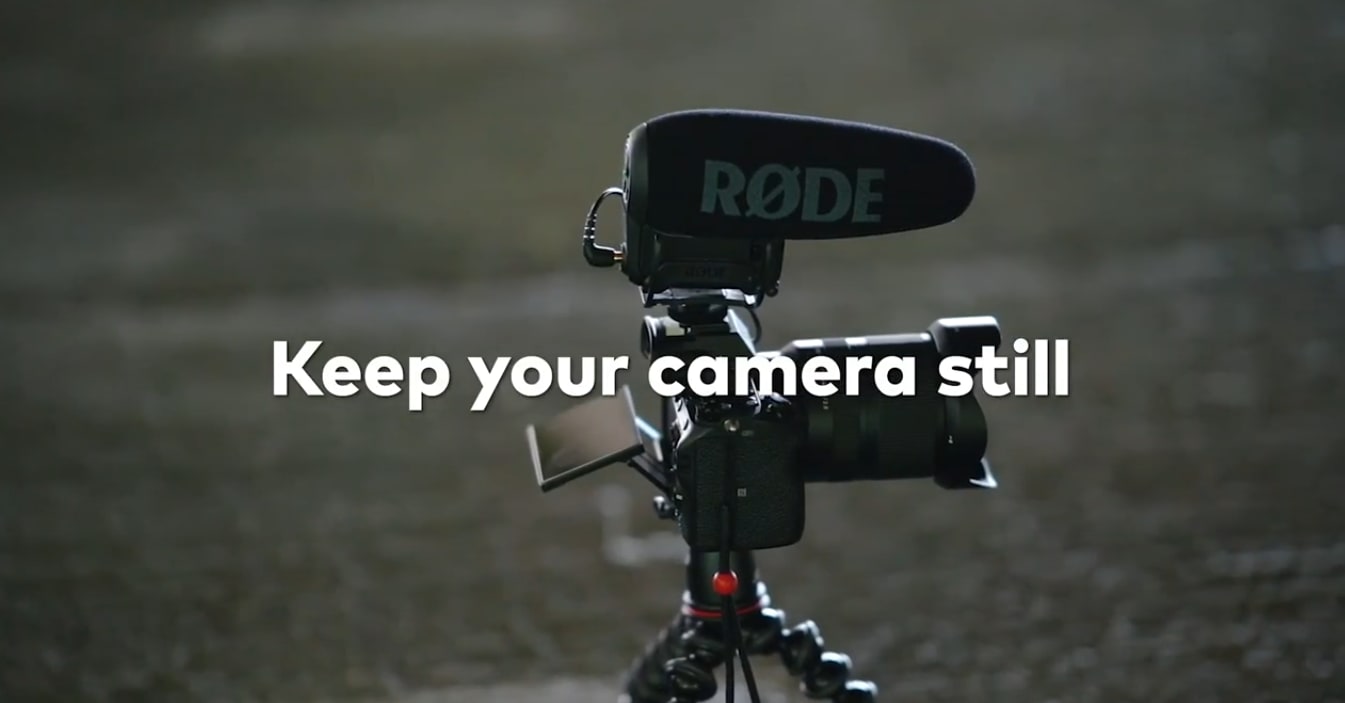
Tip 1: Making a steady shot is important
First, ensure a steady shot with no camera shake while filming. You can use a tripod or a stable surface to keep your camera still.
Why is it necessary to make a steady shot?
- It helps you to make smooth, fluid shots.
- It is much more professional.
- It will take your editing skills to a new level.
- It grabs the attention of the viewers.
- It makes your editing easier.
Tip 2: No crossing over
Make sure your subject only crosses the same spot once. Otherwise, you would need help editing the video.
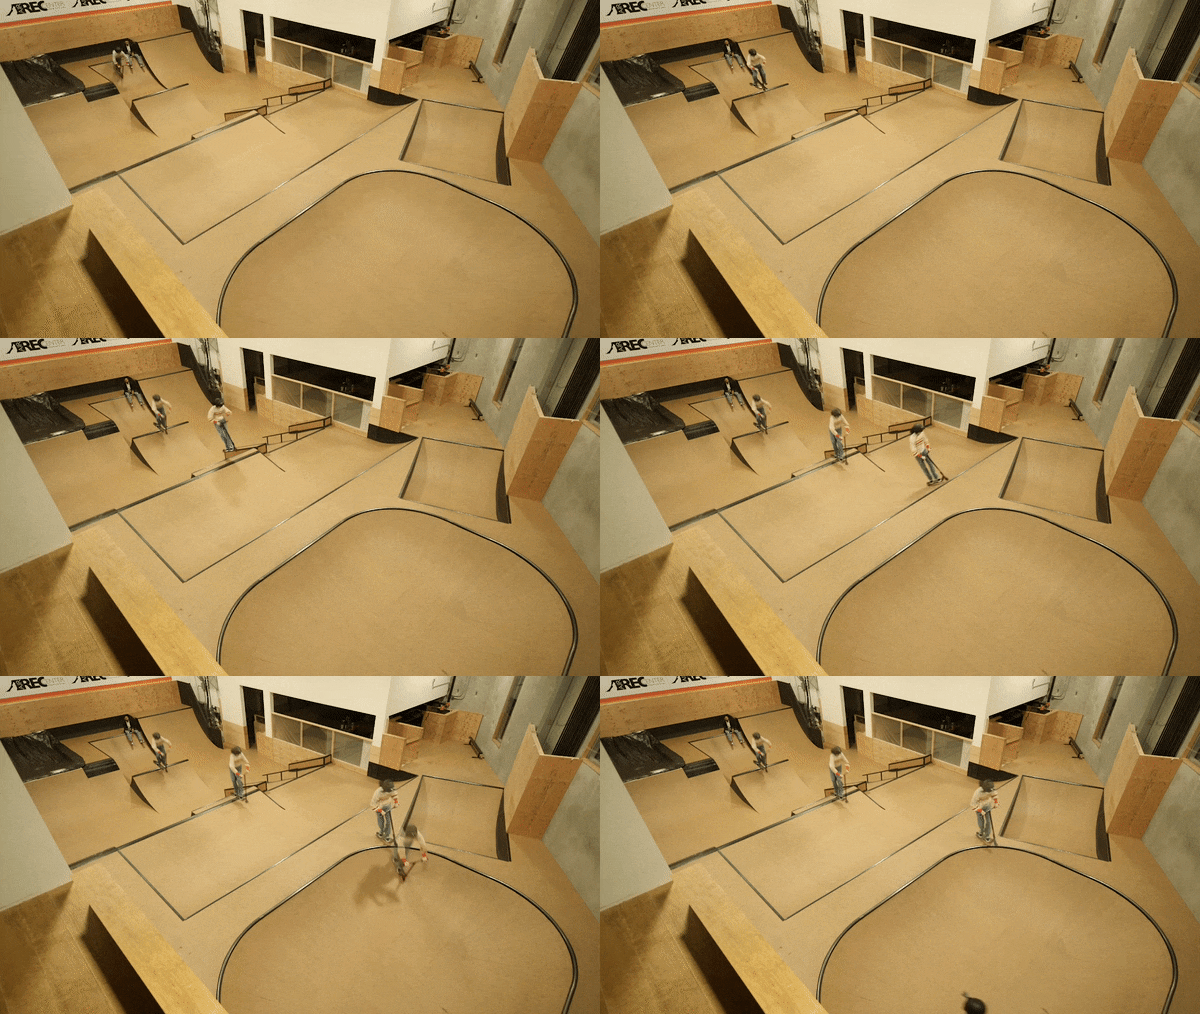
Why is it necessary to avoid crossing the same spot?
- It prevents misalignment of the shots, and your print won't get damaged, primarily when you use pieces of the same image.
- It helps to create an illusion of holding specific moments.
Final Words
The Freeze Frame Sequence looks professional but much more manageable. The creator's confidence gets to the next level when they learn how to create it. This step-wise guide using Wondershare Filmora is all for your ease.


 100% Security Verified | No Subscription Required | No Malware

