100% Security Verified | No Subscription Required | No Malware

In this article
Flame video editing is one of those techniques that instantly makes a video look cooler, but getting it right isn't always easy. Beginners often run into problems like fake-looking flames or not knowing which tools to use.
The truth is, you don't need expensive gear or a full studio setup to make it work. With the right editor, you can easily master the fire effect for video editing with no real struggles. So, scroll down as we'll walk you through everything step-by-step so your next fire edit looks heat for real.
Part 1. Get Ready Before You Hit Record
Before you even start editing, it's all about how you set things up. Remember, good prep makes everything easier later, especially when you're planning a fire edit. After all, the best flame video editing projects always come from clean, well-shot footage.
So, take a minute to get things ready before you hit the record. Here are a few simple tips to make sure your clips are solid from the start.
1. Set The Scene Right
Go for a dim or neutral setup before you start filming. Fire edit stands out best when the background isn't stealing the spotlight, and it instantly gives your video a more dramatic feel.
2. Pick The Right Outfit

Avoid wearing shiny or reflective clothes that might catch the fire light in weird ways. Stick with simple textures so the flames stay the center of attention.
3. Plan Your Angles
Think ahead about how you want the fire to move in your shot. Try filming from angles that make the flames look natural, like they're part of the environment instead of pasted on later.
4. Keep Your Footage Steady
Shaky clips can ruin a good fire edit. Use a tripod or prop your camera on something solid so your fire effect stays smooth and easy to match in post.
5. Capture Extra B-Roll

Record a few extra seconds before and after each take. These clips help when editing transitions or layering the fire effect for video editing later without feeling rushed.
Part 2. How to Add Fire Effect to Your Video
Once you've got your footage ready, it's time to make it look alive. This is the fun part where all your preparation pays off and the flames start to take shape. Now, here's the thing, you can easily add fire effects to video online using editors like Kapwing, FlexClip, or VEED.io if you just want something quick and simple.
However, these online platforms often come with limitations like watermarks, file size limits, or fewer customization options. So, if you're after more control and want the flames to blend naturally with your scene, using Wondershare Filmora is the way to go. It gives you everything you need to turn a basic clip into a clean, cinematic fire edit without the usual struggle.
 secure download

Why Filmora is the Better Choice for Fire Editing:
- Ready-To-Use Fire Effects: Filmora already includes built-in fire effects and overlays, so you don't have to waste time hunting for assets online. Everything you need for a solid fire edit is right inside the editor.
- Creative Body Effects: You can add fiery touches that move with your subject using Filmora's body effects. It's perfect for action scenes or dramatic moments that need a little spark.
- Realistic Sound Add-Ons: Filmora makes it easy to drop in fire crackles or burning sounds that match your visuals. A bit of audio polish always helps your fire effect for video editing feel alive.
- Easy Layering For Complex Shots: Stack multiple fire overlays or mix them with smoke and glow effects to build realistic depth. The layering system makes complex fire scenes look natural and well-balanced.
- Full Creative Control: Every detail of your flame video editing can be adjusted, from the color and size to the intensity and opacity of the flames. You decide how bold or subtle you want your fire to look.
secure download All these features make Filmora an easy choice for creating clean, realistic fire edits. Not to mention, it's simple enough for beginners but still powerful for anyone who's been editing for a while.
You don't need to spend hours figuring things out, everything just makes sense once you start using it. Now, let's jump into the simple steps to begin your flame video editing journey.
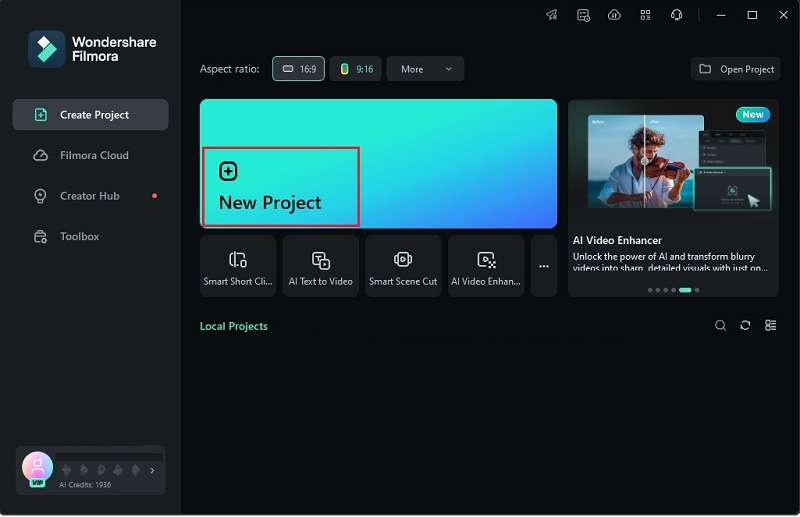
Step 1. Launch Filmora and start a new project
First, make sure you've got the latest version of Filmora installed on your device. When it's ready to go, launch the app and click on “New Project” to begin working with a fresh timeline.
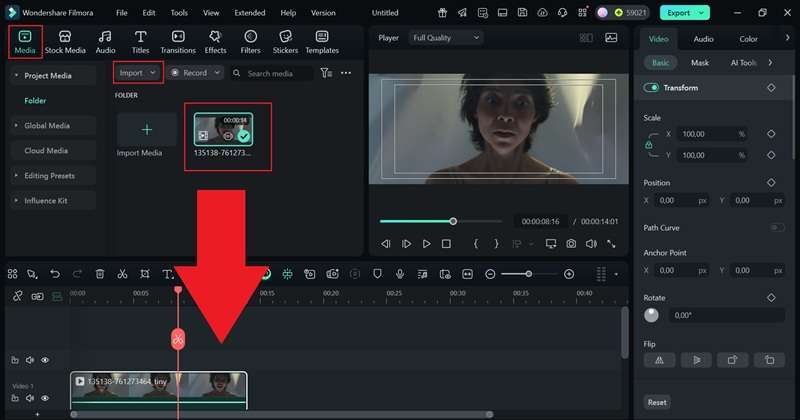
Step 2. Import your footage
Inside the main workspace, go to the “Media” tab and click “Import” to add your video clips. When they appear in your library, drag them straight onto the timeline to get started with your edit.
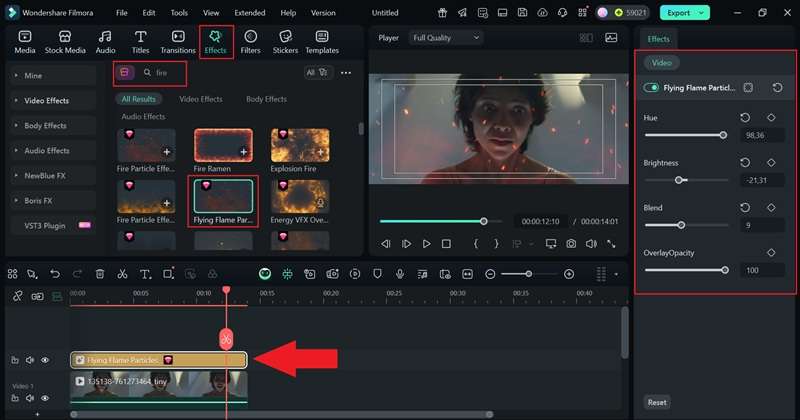
Step 3. Insert the fire effect
Next, head over to the “Effects” tab and type “Fire” into the search bar to find the available options. Choose the one that best fits your scene. For instance, in a horror shot where the character spots a faint “ghost fire” beneath her, a softer flame feels more believable than an intense blaze.
After picking your effect, drag it onto the timeline and fine-tune its strength using the controls on the right side of the screen.
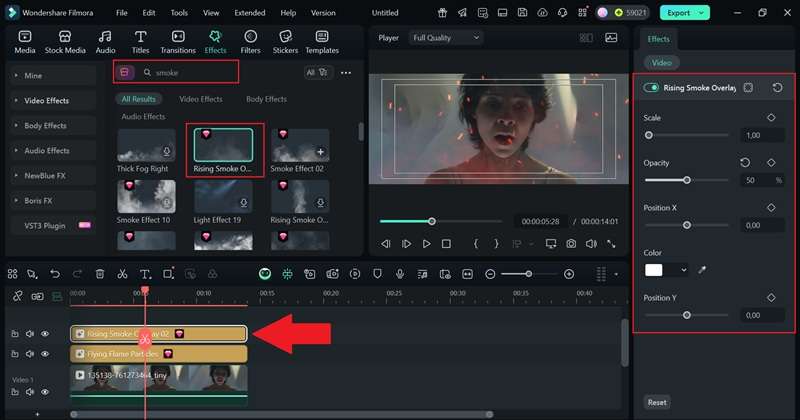
Step 4. Add a smoke effect to make it more believable
Fire always looks more real when there's a hint of smoke around it. So, go back to the “Effects” tab, search for “Smoke”, and drag the one you like onto the timeline. Keep it subtle so it enhances the fire instead of stealing the spotlight.
Step 5. Add fire sound effects
To make your scene feel more alive, layer in a realistic flame sound. Open the “Audio” tab, choose “Sound Effect”, and look under the “Fire” section for the right match. Once you find one that fits your scene, drag it to the timeline and adjust the volume from the property panel so it blends naturally with your footage.

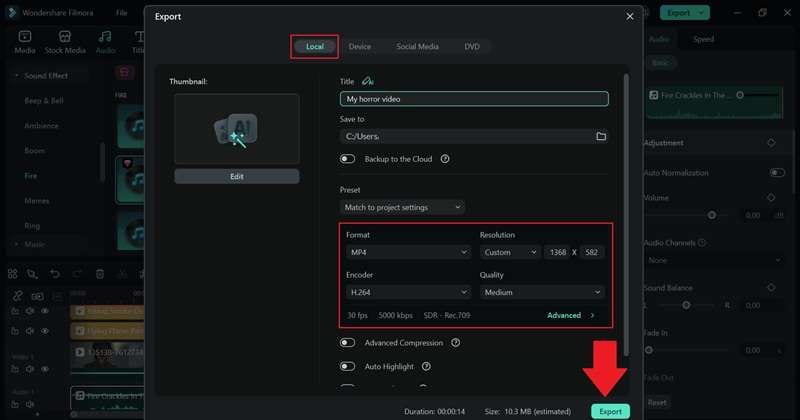
Step 6. Export and save your video
When your edit looks just the way you want, click “Export.” Select “Local” to download it to your device or choose “Social Media” to upload it straight from Filmora. Give your video a title, pick the format and resolution you prefer, set the destination folder, and press “Export” once more to wrap it up.
And that's it, you've nailed it. The fire effect is now part of your video, adding extra depth and energy to the scene. Take a moment to enjoy your finished work and see how it all comes together.
Part 3. Creative Edits: How to Shoot Fire using Filmora
As you can see, Filmora makes the whole process of flame video editing so smooth and effective, and honestly, kind of fun. And the best part about Filmora is, that's just the beginning. This editor goes way beyond simple overlays and helps you pull off effects that feel straight out of a movie, like a superhero blasting fire from their hands.
Or, you can push it further with power-up moments where a character bursts into flames. That's right, you can learn how to shoot fire in video editing and create that same energy using Filmora with just a few creative tricks. Here's how you can bring those fiery transformations to life step-by-step.
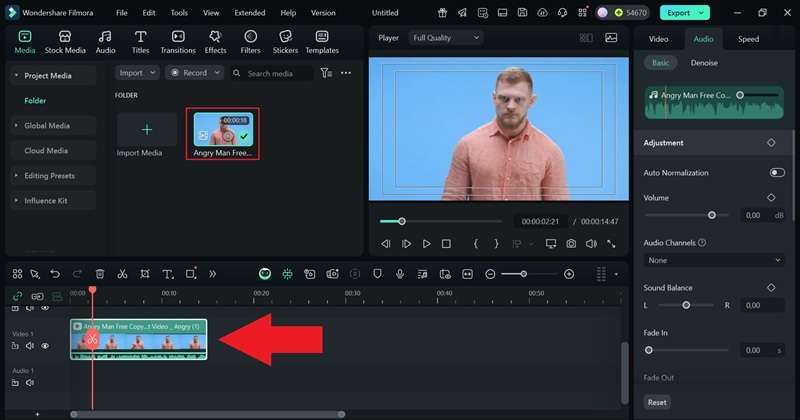
secure download Step 1. Drag your clip to the timeline
Upload the video you want to work on and bring it into Filmora's workspace. Once it's in your media library, drag the clip down to the timeline so you can start editing right away.
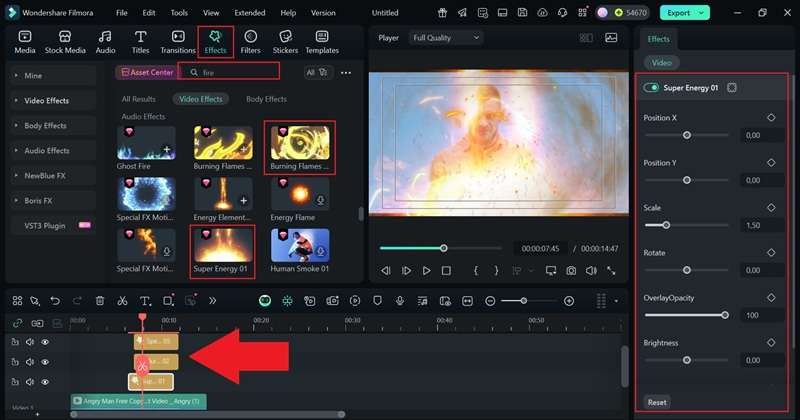
Step 2. Combine various fire effects
Head to the “Effects” tab and type “Fire” in the search bar to find what you need faster. For a powerful transformation scene, try layering a few different effects to make the moment feel real and dynamic. You can explore any options you like, but some great choices are “Super Energy 01”, “Burning Flames 02”, and “Special FX Motion Overlay 05.” Stack them on the timeline and adjust their timing so the fire builds up naturally with your scene.
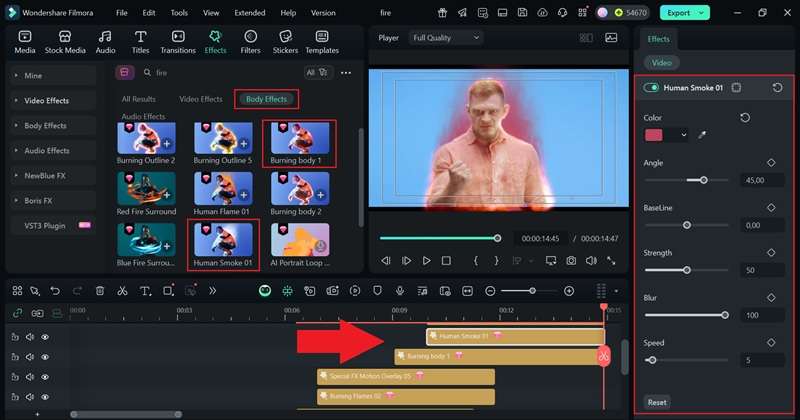
Step 3. Add body effects
To make the transformation feel intense and lasting, head over to the “Body Effects” section. Here, you'll find fire effects that stay attached to your character even as they move. Pick the ones that match your scene and drag them onto the timeline. For a fiery transformation, try combining “Burning Body 01” with “Smoke Effects” and place them at the right moment to keep the energy flowing through the shot.
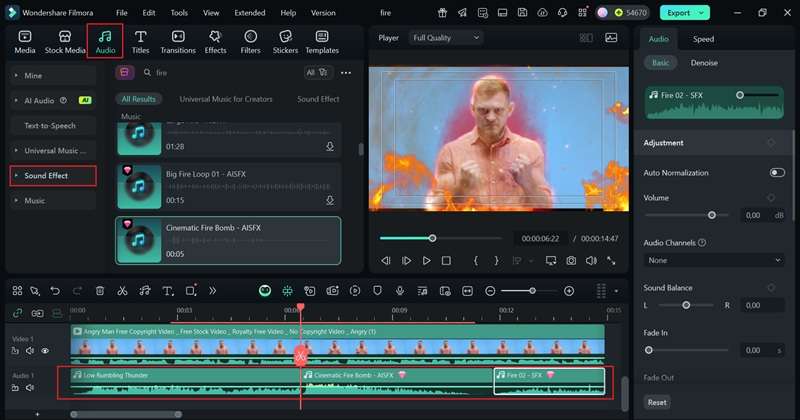
Step 4. Add sound effects
You can't wrap up a good transformation scene without powerful sound. Go to the “Audio” tab, choose “Sound Effects,” and browse through the options that fit your vibe. For this kind of scene, mix in rumbling sounds, thunder, or even a fire explosion for extra impact. Once everything feels synced and balanced, drop the sounds onto the timeline and export your project when it's ready.
And that's about it! You've just added another awesome flame video editing trick to your list, and this one stands out from the rest. Take a look at the video you just created below and see how your fiery transformation scene came to life.
Part 4. Best Spots to Grab Fire Effects Online
Filmora already gives you plenty of fire effects to play with, covering everything from soft glows to full-on flames. Still, sometimes you might want a little more variety to match a specific vibe or scene. The good news is, there are tons of great places online where you can find extra flame overlays to level up your fire edits.
Here are some of the best spots to grab high-quality fire effects for your next project.
1. Filmstock
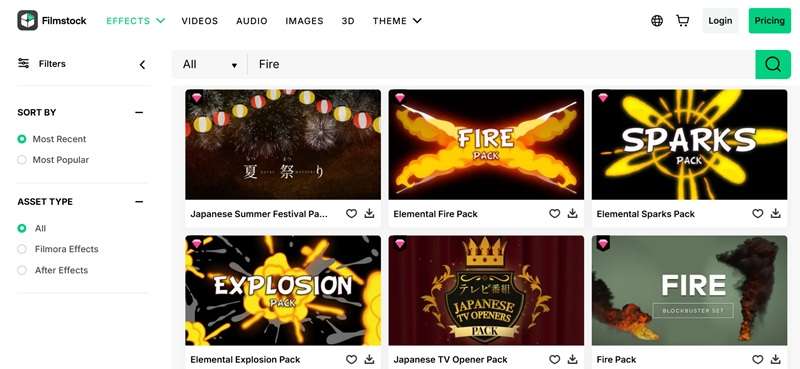
Filmstock is a free website where creators can download free videos, audio, images, and after-effects. The effects are available in multiple categories like Elements, Festival, Autumn, Fall, Titles, etc. Just choose a video effect and download it to access it on your Filmora X account.


2. Pexels
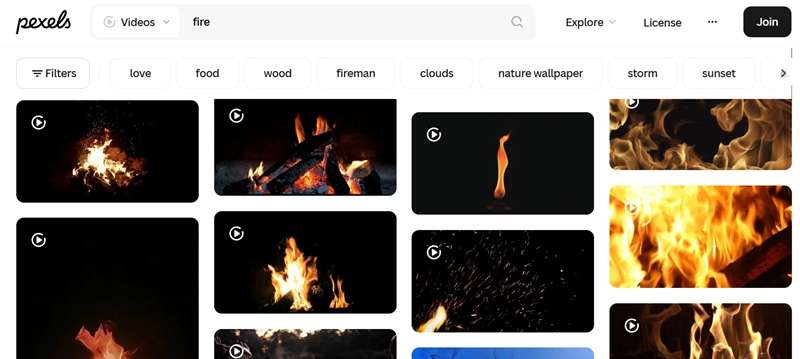
Pexels is one of the most popular photo and video hosting websites. On this website, you can discover and download royalty-free videos without paying a dime. Also, Pixels contains millions of free stock photos to use on your websites or social media handles. What's more, you can upload local media content and share it with the Pixels community.
3. Pixabay
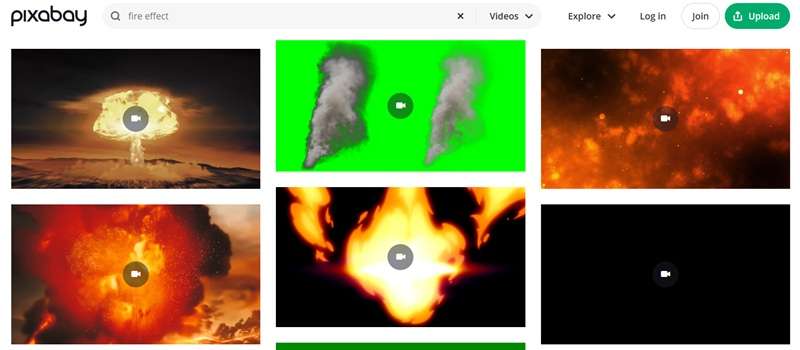
Pixabay is another photo-sharing website that also doubles up as an excellent video-hosting site. Here, you can search videos by multiple categories before downloading in 4K, UHD, or HD resolutions. And like Filmstock and Pixels, Pixabay users can download high-quality music and sound effects as well.
4. EnvatoElements
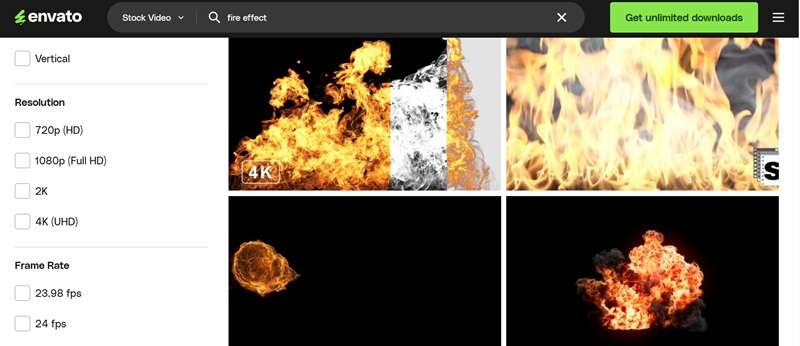
EnvatoElements is a free website that hosts more than 50 million photos and thousands of royalty-free videos. Just create an account and download stock videos, video templates, sound effects, presentation templates, fonts, and so on. There are also hundreds of courses and tutorials to help you create those incredible videos.
5. Videvo (Freepik)
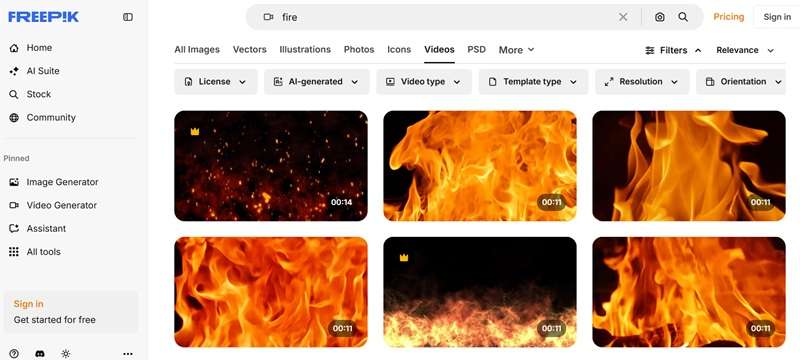
Videvo, which is now integrated with Freepik, offers free stock images and videos supplied by its generous community. Its vast library features a handful of 4K fire effect clips and thousands of HD videos. Interestingly, some videos are delivered in QuickTime MOV, whereas others come in MP4. And yes, you can upload and share videos.
Conclusion
Mastering fire edits adds a powerful edge to your video editing skills, especially when you can easily add fire effects to video online. But if you're ready to create something more polished and detailed, you'll want a reliable editor that keeps up with your ideas.
Wondershare Filmora is built for that; it gives you a full range of creative fire effects for any kind of scene, from glowing embers to roaring flames. With it, you can experiment with fun ideas like learning how to shoot fire from your hands or crafting intense transformation sequences. Filmora also comes loaded with sound effects, filters, and color tools that make every fire edit feel alive.
Frequently Asked Questions
-
Can I add fire effects on mobile instead of desktop?
Yes, you can. Filmora has a mobile version that lets you make fire edits straight from your phone. It's perfect for quick edits, and you still get plenty of control over how the flames look and move.Yes, you can. Filmora has a mobile version that lets you make fire edits straight from your phone. It's perfect for quick edits, and you still get plenty of control over how the flames look and move.What's the safest way to shoot real fire?What's the safest way to shoot real fire? -
What's the safest way to shoot real fire?
If you're working with real flames, safety should always come first. Keep a bucket of water or a fire extinguisher close, avoid crowded spaces, and record from a safe distance. You can always enhance or extend the flames later using flame video editing instead of pushing it in real life.If you're working with real flames, safety should always come first. Keep a bucket of water or a fire extinguisher close, avoid crowded spaces, and record from a safe distance. You can always enhance or extend the flames later using flame video editing instead of pushing it in real life.How do I make fake fire look more realistic?How do I make fake fire look more realistic? -
How do I make fake fire look more realistic?
The trick is to blend your fire effect naturally with your scene. Match the lighting, add soft glows, and throw in a little smoke so it feels like the fire is really there. A touch of crackling sound also helps sell the moment.The trick is to blend your fire effect naturally with your scene. Match the lighting, add soft glows, and throw in a little smoke so it feels like the fire is really there. A touch of crackling sound also helps sell the moment.Do I need green screen footage to add flames?Do I need green screen footage to add flames? -
Do I need green screen footage to add flames?
Not really. You can add flames directly to your video using overlays or effects from editors like Filmora. Green screen clips can help with complex shots, but most simple fire edits don't need them at all.Not really. You can add flames directly to your video using overlays or effects from editors like Filmora. Green screen clips can help with complex shots, but most simple fire edits don't need them at all.Grammarly