In this article
How To Add Lightning Effects to Videos Easily: An Ultimate Guide
Great cameras can capture detail, but even the sharpest footage can look flat without lighting. It's not just talking about everyday lighting. This guide focuses on the lightning effect. It's a creative visual trick that mimics flashes of light or electric energy to add drama, thrill, or atmosphere to your video.
Unlike traditional lighting setups, lightning effects are purely digital and easy to add during editing. They can simulate a thunderstorm, power surge, or fantasy magic with just a few taps. Ready to electrify your edits? This article will go through the different ways to add thunder effects to videos.
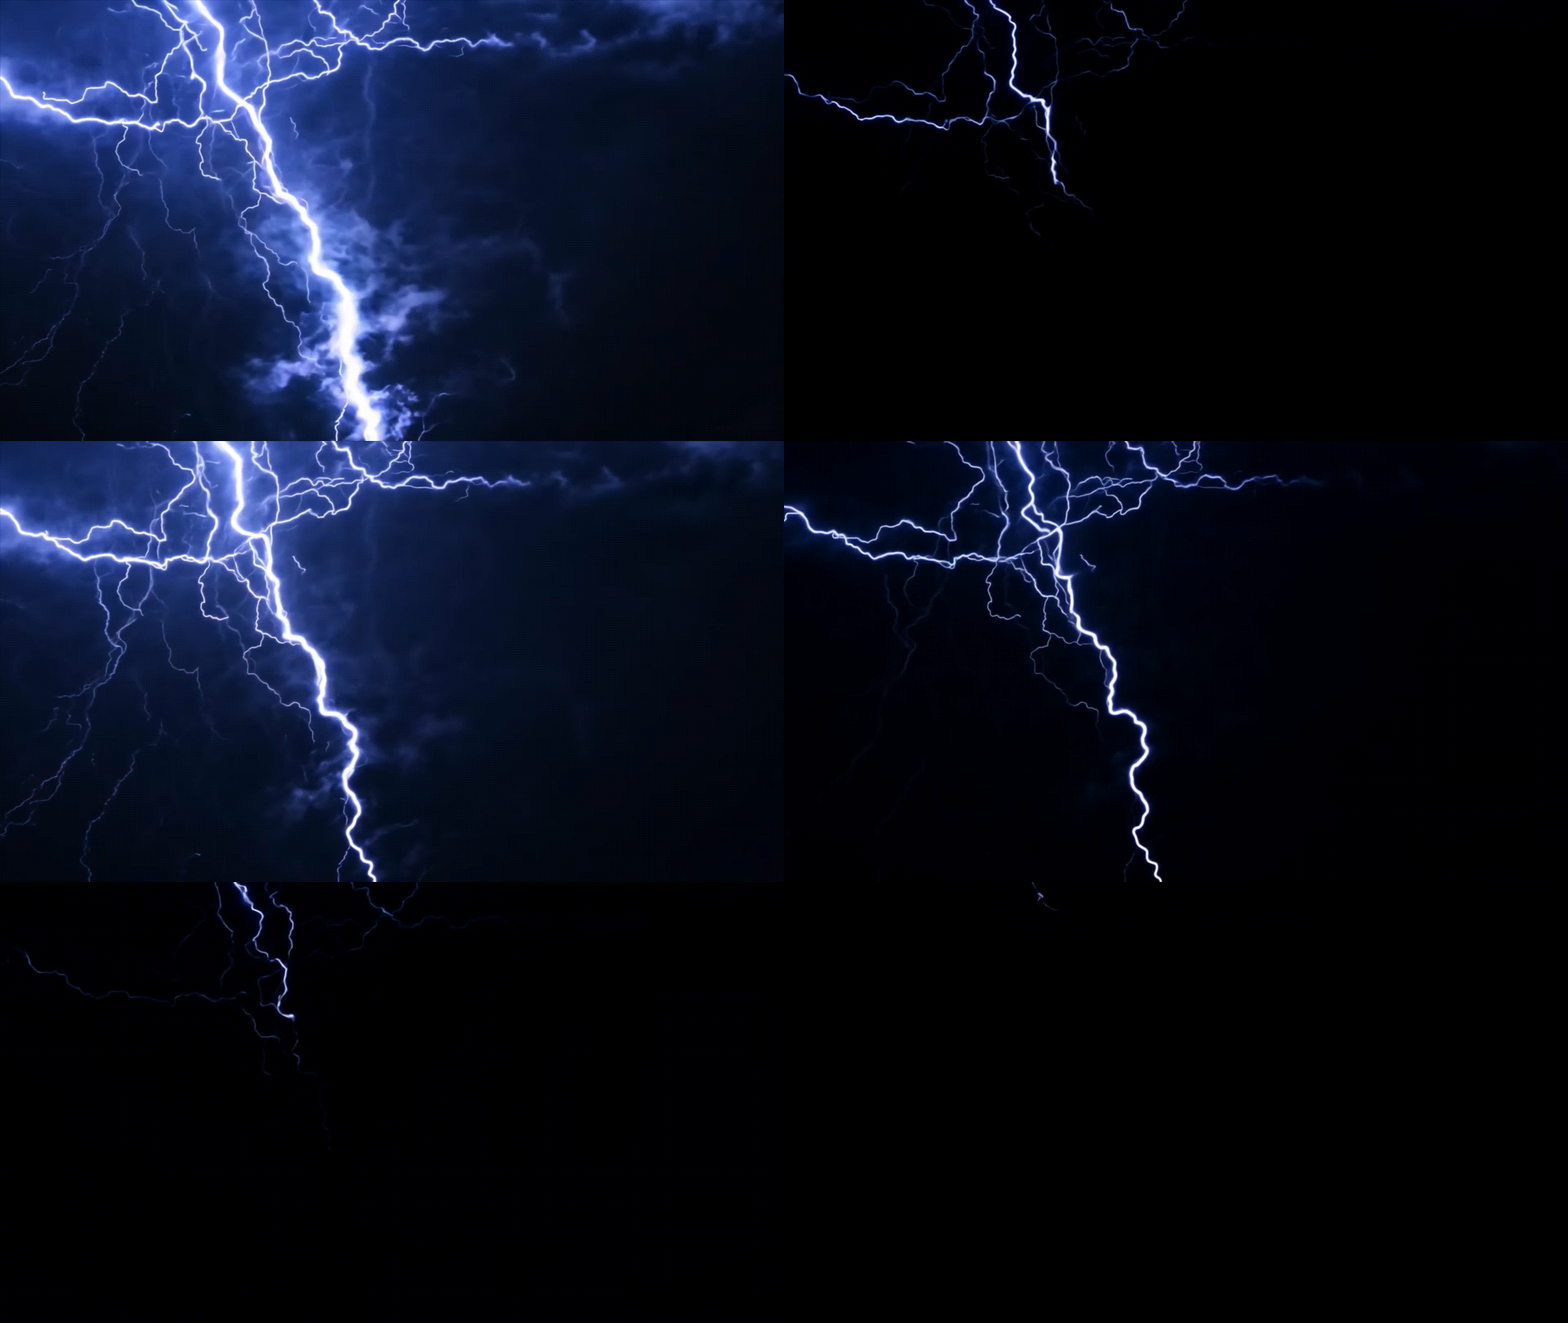
When To Use Lightning Effects
Lightning is a sudden flash of light caused by an electrical discharge between clouds or from the cloud to the ground. It's incredibly intense. A single lightning bolt can heat the surrounding air to temperatures five times hotter than the sun's surface. This extreme heat expands the air rapidly, producing the thunder people often hear right after a strike.
So, you get the idea. In films, they can be used for various purposes:
- To improve the mood. In video editing, lightning effects are used to simulate these powerful natural flashes. But more than just realism, lightning can add visual impact, mood, and direction to a scene.
- To guide the audience. One great way to use lightning effects is to highlight key people or objects. When timed well, these flashes naturally draw the viewer's attention to the right spot, helping you guide their focus without saying a word.
- To improve the intensity of a scene. Lightning effects can also bring color, contrast, and energy to scenes that feel plain or lifeless. With the right transparency or glow, they can dramatically change how a person or object is perceived. A character lit by sudden lightning might seem intense, mysterious, or even magical, depending on the mood you're creating.
There are several types of lightning effects you can mimic in a video:
- Cloud-to-ground lightning. Ideal for dramatic or horror scenes.
- Cloud-to-cloud or intra-cloud lightning. Great for fantasy or sci-fi shots with glowing skies.
- Heat lightning. Visible flashes without thunder, perfect for faraway storms or dreamy night scenes.
- Dry lightning. Often used in forest scenes or intense drama, as it suggests danger or fire.
- Magical lightning. You can also make use of lightning effects to create magical effects, such as when the character is a magician.
No matter the type, lightning effects can help set the tone, create tension, and make your video visually stunning.
How To Add Lightning Effects to Videos in the Fastest Way
Video effects, also called visual effects or filters, can create stunning, eye-catching visuals with just a few taps. Whether you want to add realism or a dramatic punch, lightning effects are among the most powerful tools available to video editors. These are commonly used in high-budget Hollywood films to add tension, excitement, or even magic.
But not every editing tool gives you the freedom to do this easily. Many video editors only offer basic features and a limited set of effects. That's where Wondershare Filmora stands out.
This user-friendly editor comes packed with 300+ built-in effects and presets, including lightning effects, overlays, transitions, motion elements, and filters. With Filmora, you don't need to be an expert. Anyone can create amazing and professional-level videos quickly. Aside from its effects, here are some other features you can enjoy, too:
- Drag-and-drop interface for faster editing
- Real-time preview so you can see changes instantly
- Advanced visual controls for adjusting brightness, temperature, and contrast
- Keyframe animation to fine-tune motion effects
Now, here are some of the steps to follow if you want to learn how to add thunder effects to your video:
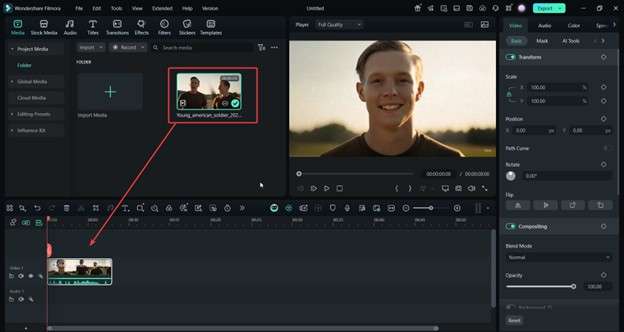
Step 1: Add Media to the Timeline
Once Filmora is open, import your video clips or images by clicking the Media tab. Then, drag and drop the file onto the timeline at the bottom.
Step 2: Apply Video Effects From the Effects Tab
Click the Effects tab at the top of the screen. Use the search bar and type "lightning" or “thunder” to see different lightning video effects you can use.
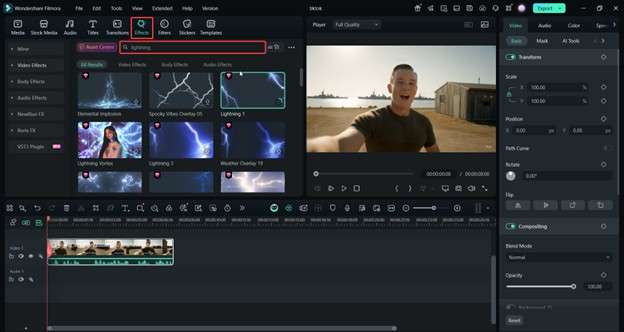
When you find an effect you like, drag and drop it onto the track above your video on the timeline. Adjust the position and duration to match the timing you want.
Step 3: Export the Video
Once you're happy with the lightning effect, click the Export button at the top. Choose your preferred file format (MP4 is recommended for most uses), set the resolution, and select the destination folder. Hit Export again to start rendering. Filmora also has direct uploads to social media platforms like YouTube if you want it straight there.
Here's an example of the Lightning 1 effect applied:

How To Make AI Videos With Lightning Effects
Another quick way to create videos with lightning effects is by using AI tools. These tools generate entire video drafts from just a simple idea or text prompt, and no manual editing is required at the start.
Wondershare Filmora features a built-in AI Idea to Video Generator, which makes this process even faster. It uses your input to create a full video with effects, transitions, music, and more automatically.
Step 1: Access Idea to Video From the Homepage
Open Filmora and click AI Idea to Video on the start screen. This will take you to the AI video workspace.
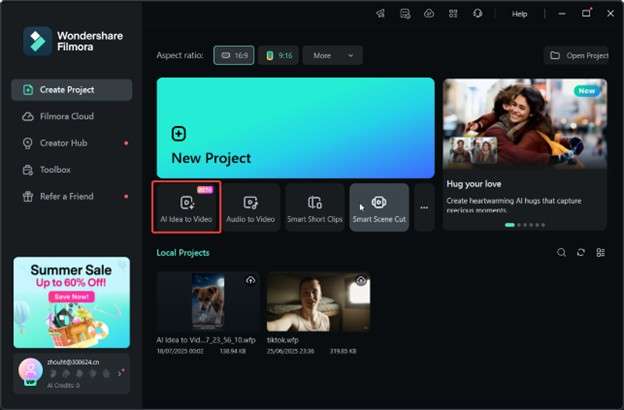
Step 2: Type in Prompt
Type a simple prompt. The AI will generate a video with matching visuals, text, and effects, including lightning where it fits.
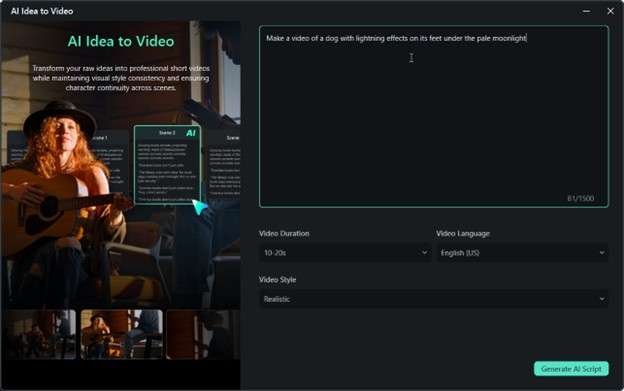
Step 3: Edit and Export
Once the video is generated, you can fine-tune it using Filmora's built-in tools like Effects, Filters, Audio, Text Titles, and Transitions. When you're done, hit Export, and your AI-enhanced video will be ready to share.
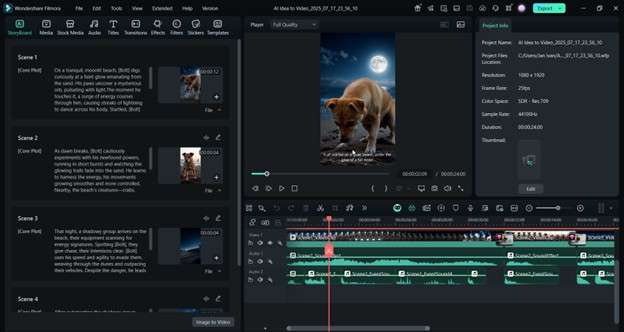
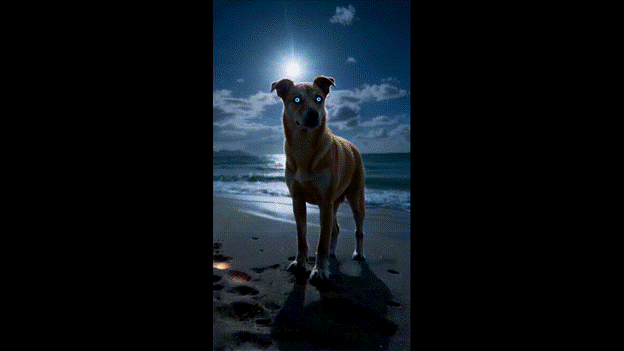
Here's a sample AI video generated with lightning effects on the subject's (dog's) feet. This is a more creative way of adding lightning effects. You shouldn't be limited to literal lightning-from-the-sky effects only. You can explore other ways, like using lightning powers, etc.
How To Add Green Screen Lightning Effects to Videos
Another effective way to add lightning to your videos is by using green screen lightning overlays. These are downloadable video clips with a green background and lightning visuals. With Filmora, you can easily remove the green background using the Chroma Key feature and blend the lightning into your scene.
Step 1: Add Background and Lightning Clips
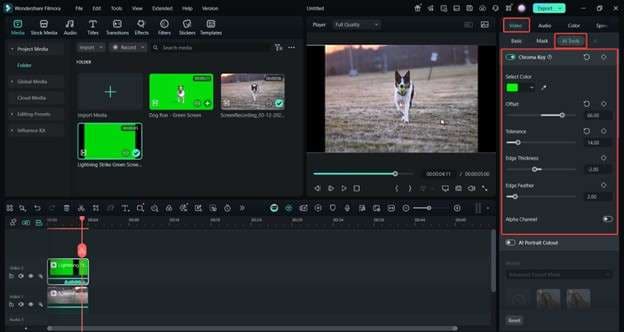
Import both your main video and the green screen lightning overlay into Filmora. Drag your main video to Video 1, and place the green screen lightning clip above it on Video 2.
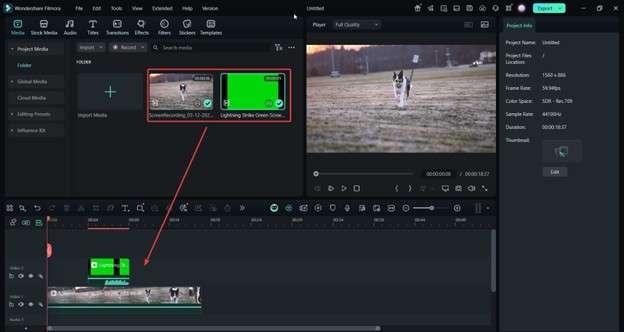
Tip: You can also search for stock lightning media from the Stock Media tab. Just search for “lightning” or “thunder.”
Step 2: Enable Chroma Key (Green Screen)
Click the green screen clip from the timeline. On the right-hand panel, go to Video > AI Tools > Chroma Key. While Filmora will automatically remove the green color background, you still have to fine-tune the Offset and Tolerance settings to make the blending more effective.
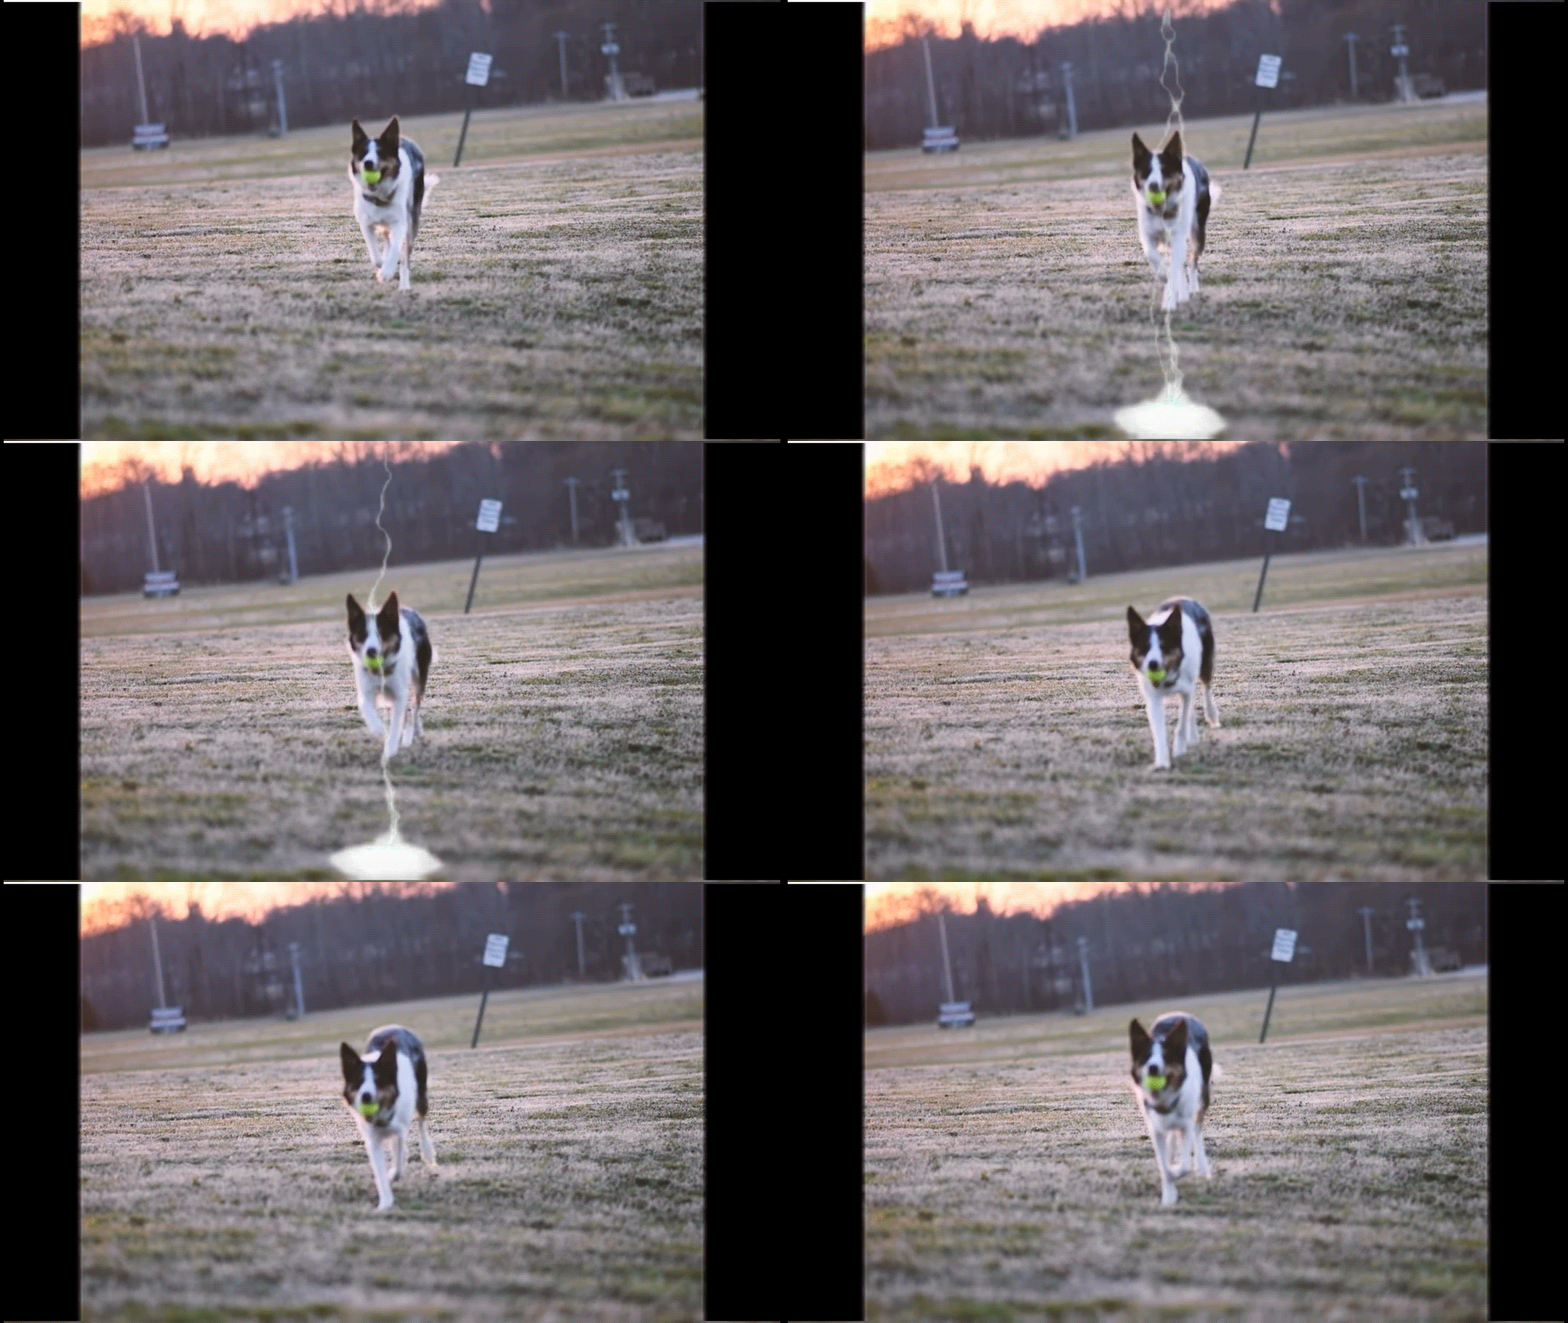
Here's the output from the clip above as edited:
Related Templates For You to Try


Pro Tips for Adding Lightning Effects to Videos
Lastly, here are some quick tips when using lightning effects. After all, knowing how lightning works and applying it to your video makes it feel more natural and effective. Learning how to add lightning effects to video is one thing; knowing when to use them is another.
1. Simulate Lightning Breaking Through the Clouds
Use layered cloud footage and blend modes to create the illusion of lightning flashing from behind the clouds. This adds realism, especially in outdoor or stormy scenes.
2. Add Bursts of Light To Improve the Lightning
Whenever a lightning strike appears, brighten the scene slightly to mimic real-world illumination. Use keyframes to boost exposure or brightness at just the right frame.
3. Use Masking, Opacity, and Feathering for Glow
To enhance the intensity, apply a white or colored mask where the lightning hits. Lower the opacity slightly and feather the edges for a smooth, glowing effect that feels natural and striking.
Conclusion
Adding lightning effects to videos can boost your content's visual appeal. This is especially the case if you want to spice up your videos posted online with some cool effects. The steps provided above are not limited to lightning effects, though. You can apply them by analogy to any effect you want.
And, remember that if you want a beginner-friendly editor packed with powerful features like AI video generation, chroma key, and drag-and-drop effects, Wondershare Filmora is a great choice. Try it out to start creating electrifying videos with ease.


 100% Security Verified | No Subscription Required | No Malware


