
 100% Security Verified | No Subscription Required | No Malware


 ChatGPT
 Perplexity
 Gemini
 Claude
 Grok
Grok
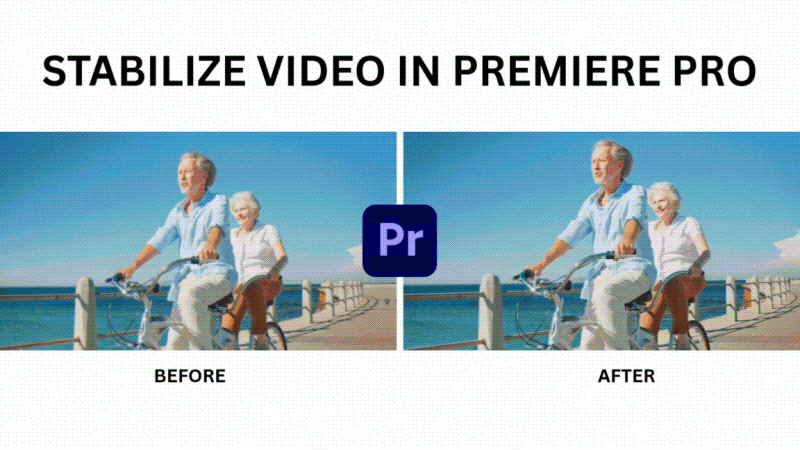
As much as we try to avoid shaky footage, sometimes it's just unavoidable. The cause can be anything, from filming handheld without a tripod since you don't own one, using action cameras that naturally leave more movement, to unintentionally making quick movements while filming.
Adobe Premiere Pro, however, has built-in stabilization tools to quickly fix it. We will show you how to use Premiere Pro to stabilize your video, along with other stabilization tools you can try until your footage looks perfectly smooth and steady.
In this article
Part 1. How to Stabilize Video in Premiere Pro with Warp Stabilizer
The tool you need to stabilize video in Premiere Pro is called Warp Stabilizer. It's a built-in effect that works by tracking various points within each frame and countering unwanted movement by slightly repositioning, rotating, or zooming the footage.
While the effect itself is useful, navigating through Premiere Pro for the first time can feel a bit confusing. Follow our simple steps below, and you'll learn exactly how to apply Warp Stabilizer and make your footage look smooth.
How to Stabilize Video in Premiere Pro
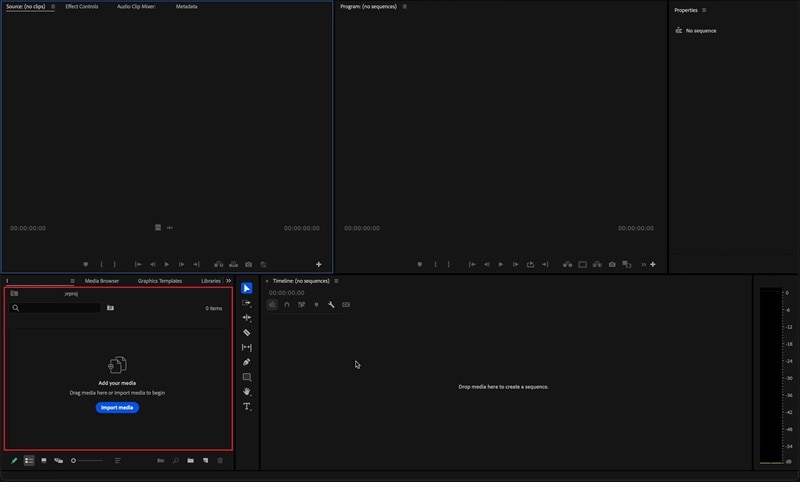
Step 1: Import Your Video Clips
Start by bringing your footage into Premiere Pro. In the Premiere Pro workspace, click Import Media or drag and drop the files from your computer.
Step 2: Trim Down the Shaky Parts First
Since Warp Stabilizer can take up quite a bit of processing power, it's best to apply it only where it's needed. You can do it by isolating the unstable portions of your video through trimming or splitting the clip:
- Move the playhead to the exact point where you want to cut, make sure the video (and audio, if needed) track is selected
- Press Ctrl + K (Windows) or Command + K (Mac). This splits the clip into smaller segments that can be edited or stabilized independently.
Step 3: Apply the Warp Stabilizer Effect
Once your clips are ready, select the shaky one you want to fix. Then, do the following steps:
- Go to the Effects panel.
- Navigate to Distort > Warp Stabilizer.
- Double-click the Warp Stabilizer to apply the effect, or drag it directly onto your clip in the Timeline.

Note: The analysis might take a few minutes depending on your clip length, but you can continue editing other parts of your project while it runs.
Step 4: Fine-Tune the Stabilization Settings
Once the effect finishes processing, preview your clip to see how it looks. If the movement feels too "floaty" or overly smooth, you can adjust the settings to get a more natural result.
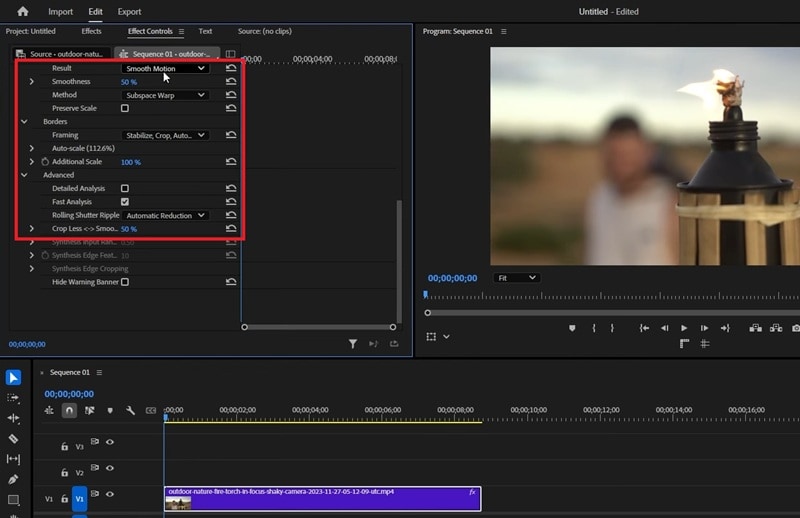
As a stabilizer for Premiere Pro, Warp Stabilizer offers two main styles under the "Result" menu:
- Smooth Motion (default): Keeps the camera's original movement but makes it smoother. You can use the Smoothness slider to control how steady the motion becomes.
- No Motion: Tries to remove all camera movement, creating the look of a locked tripod shot. This setting can sometimes produce odd distortions if your camera was actually moving.
You can also refine how the stabilizer tracks and adjusts your footage through the Method dropdown. Each method applies a different type of motion analysis:
- Position: Uses only position tracking for simple stabilization.
- Position, Scale, Rotation: Adjusts for movement, zoom, and rotation for a more balanced correction.
- Perspective: Treats the entire frame as if it's being corner-pinned to keep it steady.
- Subspace Warp (default): Analyzes and warps different areas of the frame individually for the most advanced and flexible stabilization.
Each time you switch between methods, Premiere Pro recalculates the stabilization, but won't re-analyze the footage.
Advanced Settings:
Under Advanced Settings, you can adjust the Crop Less – Smooth More control to find a balance between frame size and stabilization strength. Setting it closer to 100% increases the smoothness but crops the frame more.
Part 2. Still Not Stable Enough? Try More Stabilization Options
If your clip still feels a bit shaky after using the Premiere Pro stabilization tool, or if Premiere Pro takes too long to process, there's also an easier way to do it, which is using Wondershare Filmora.

Filmora gives you multiple ways to stabilize your footage, whether you want a quick fix or full manual control:
 secure download

- Built-in Stabilization Tool (Fast and Simple): Filmora's built-in Video Stabilization feature automatically analyzes your clip and removes unwanted shake in just a few clicks. Yet, you can still adjust the smoothing level to control how steady the result looks.
- Mocha Filmora (More Precision): If you want more control, you can also stabilize your footage using Mocha Filmora. It offers advanced tracking and stabilization powered by Mocha's professional motion engine, which gives you far more accuracy than standard tools.
- Gyroflow Plugin (For Extreme Shakes): If you're working with action footage, drone shots, or high-motion camera movements, you can use the Gyroflow plugin inside Filmora. It uses gyro data (from GoPros, DJI cameras, and other devices) to calculate real-world motion, then stabilizes the footage based on that information.
Before you start stabilizing your video, make sure you've installed the latest version of Filmora on your computer. After that, open the program, create a new project, then import your clip and drag it onto the timeline.

Once your footage is ready, choose the stabilization method that best fits your needs.
Method 1: How to Stabilize Video Using Filmora's Stabilization
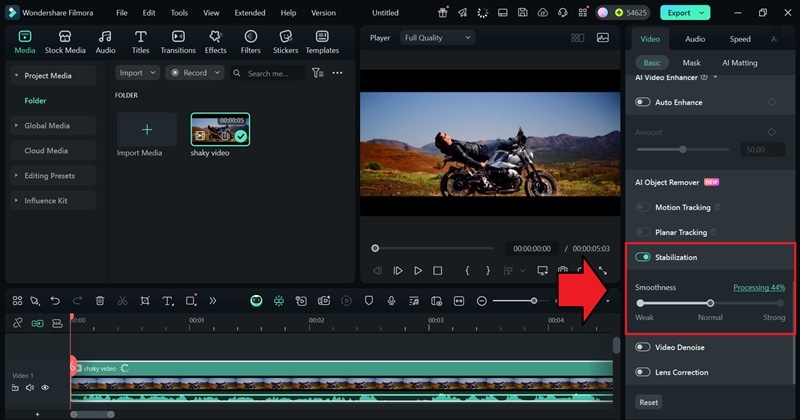
Step 1: Activate the Stabilization Tool
Select the clip and navigate to Video > Basic on the properties panel. Turn on the Stabilization and let Filmora analyze your clip.
 secure download
Step 2: Adjust the Smoothness
Once the analysis is done, use the Smooth Level slider to adjust how steady you want your footage to look. It's the quickest and easiest method to make your video steady like the stabilization tool in Adobe Premiere.
Method 2: How to Stabilize Video Using Mocha Filmora
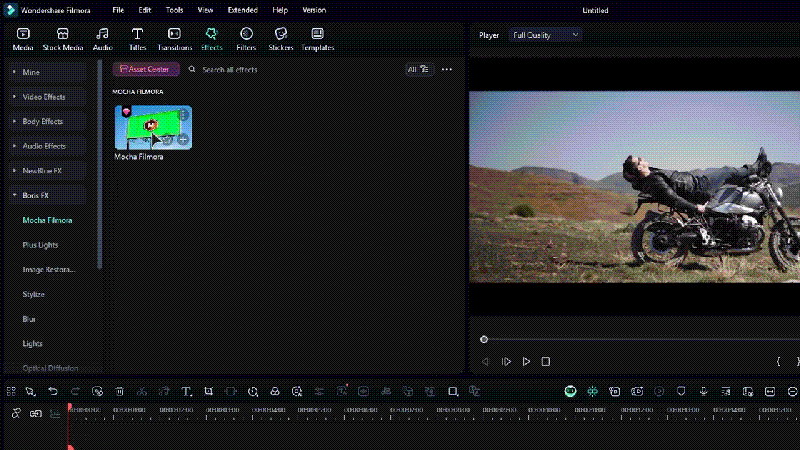
Step 1: Apply Mocha Filmora to the clip
Open the Effects tab, select Boris FX, and search for Mocha Filmora. Drag it onto your clip to apply the effect.
 secure download
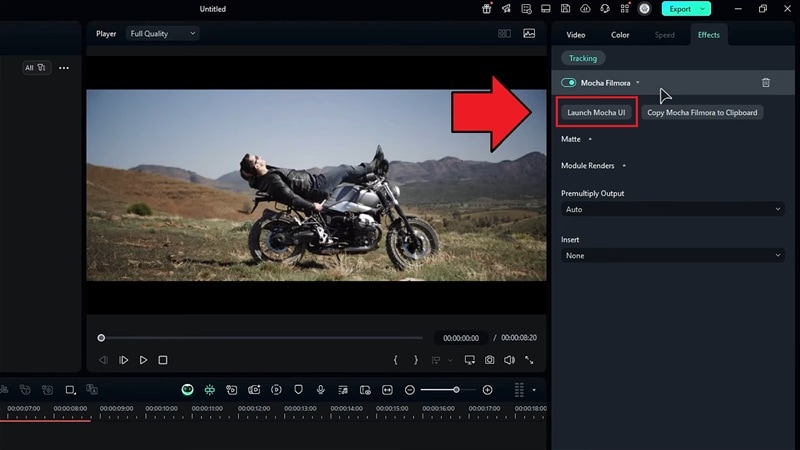
Step 2: Launch Mocha Filmora
Open the Effect settings from the properties panel and click Launch Mocha UI. This will open the Mocha workspace. Once it loads, click Start to begin.
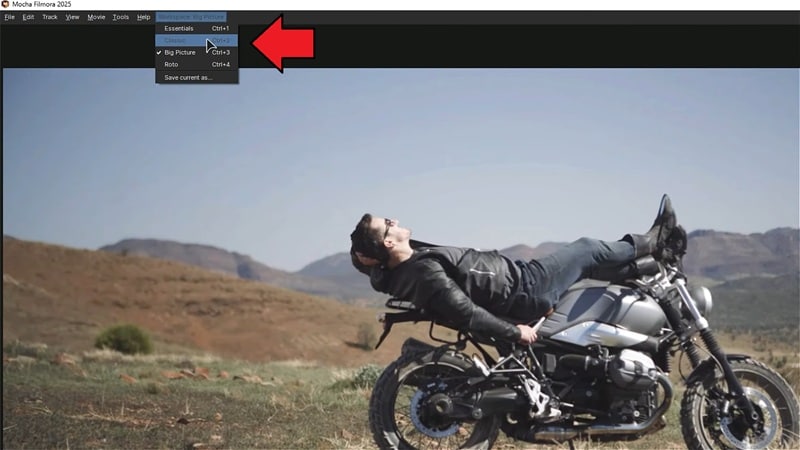
Step 3: Set Up the Workspace and Prepare for Tracking
At the top menu, set your Workspace to Classic so all tools are visible.
Then, make sure the playhead is at the beginning of your video. Choose the Spline Tool (or the Pen or Rectangle Tool, depending on your preference) to draw a selection around the object or area you want to stabilize.
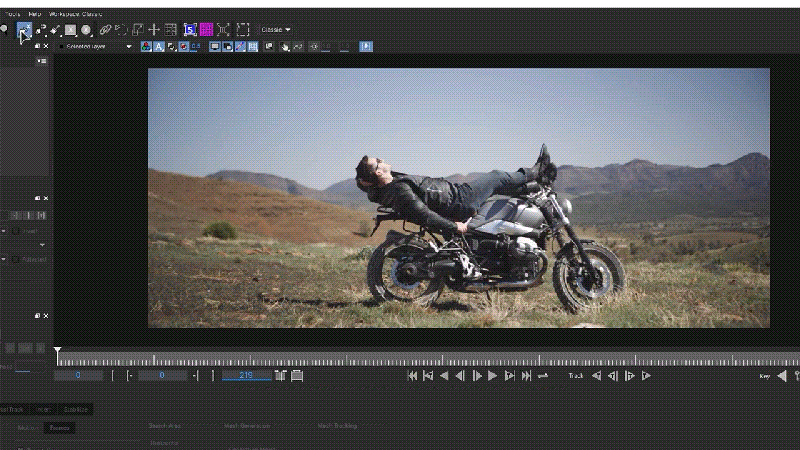
In the Motion settings, uncheck Shear to avoid distortion and enable the Planar Grid to better visualize how your surface moves.
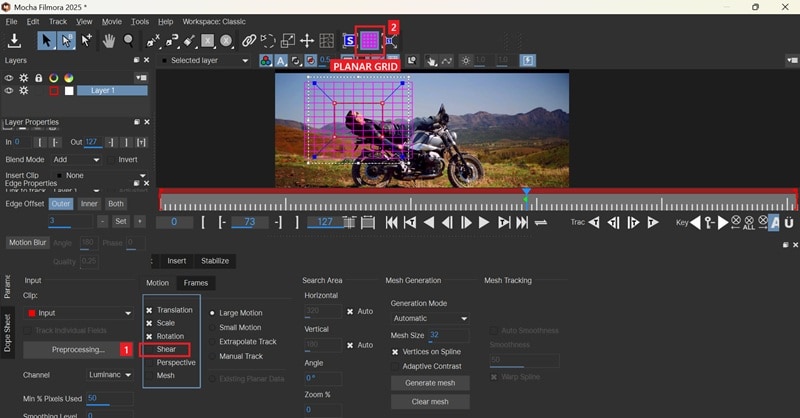
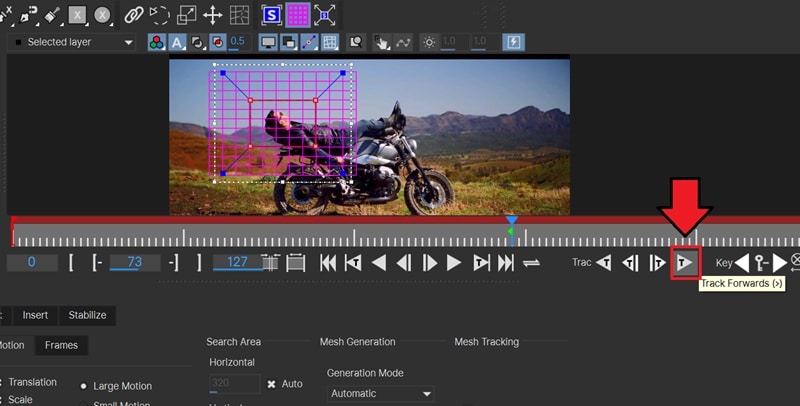
When ready, click Track Forward to let Mocha analyze the motion throughout your clip.
Step 4: Apply Stabilization Settings
After tracking is complete, go to the Parameters section and open the Stabilize tab. You'll notice that your selected object appears more stable.
If you want to make it even smoother, enable Maximum Smoothing to refine the motion and reduce minor jitters.
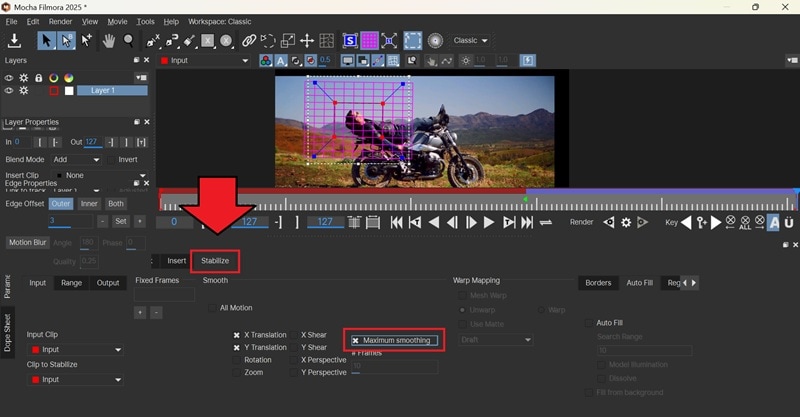
Tip: If your clip includes rotation or zoom, select All Motion in the motion options.
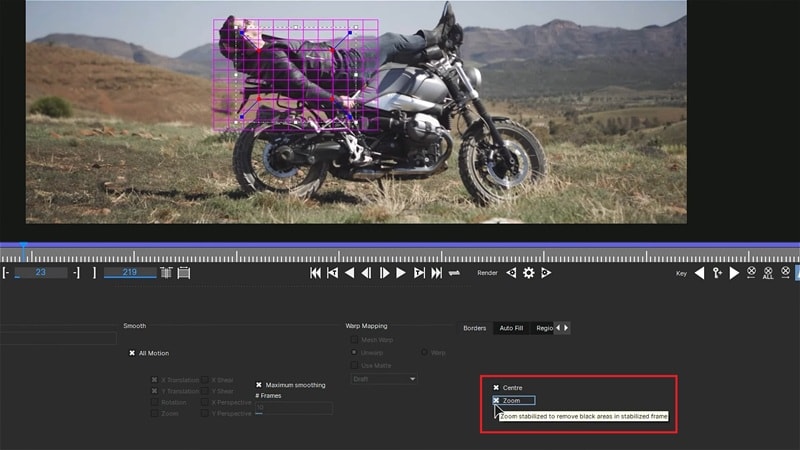
Step 5: Fix the Frame Movement
When the footage stabilizes, you might notice the overall image shifting or moving around the frame. To correct this:
- Go to the Border settings under the Parameters section
- Select Center and Zoom
This recenters your stabilized footage and fills the frame evenly.
Step 6: Save and Return to Filmora
Once satisfied with the result, click Save and close the Mocha interface.
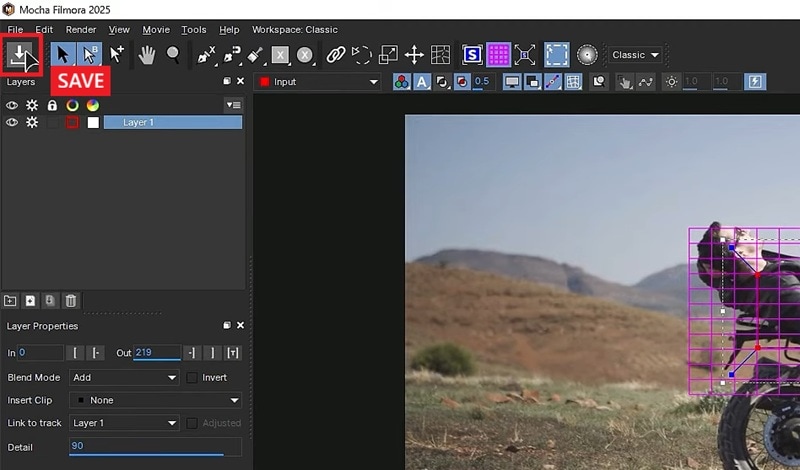
Back in Filmora, open the Module Renders settings and enable Render. From the dropdown list, choose Stabilize to process your final stabilized version.
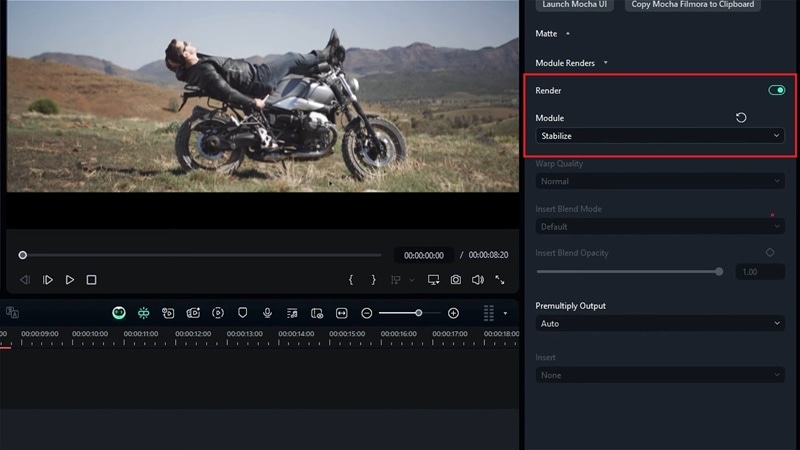
You can now continue editing your clip using Filmora's tools or export the finished video.
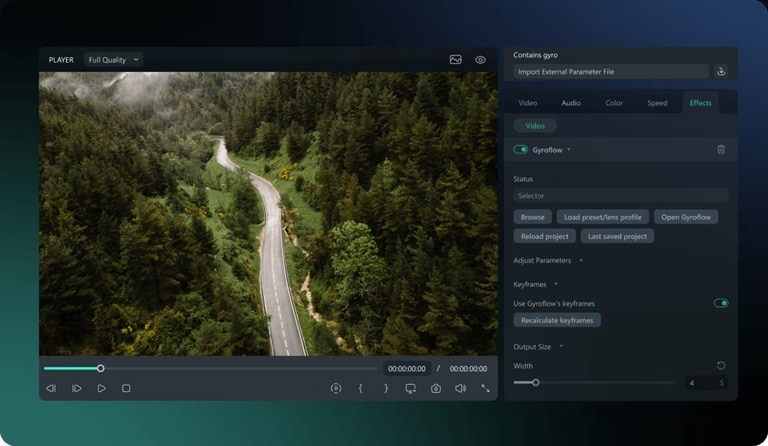
Method 3: How to Stabilize Video Using the Gyroflow Plugin
To use this method, you need to make sure your camera records gyro metadata first. Then, export the gyro data file along with your video. Otherwise, the plugin won't be able to analyze your camera's actual movement and apply accurate stabilization.
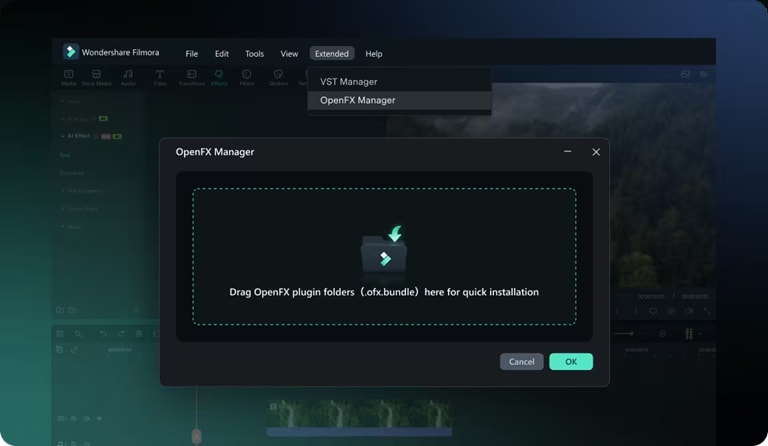
Step 1: Download and Activate the Plugin
Visit the Gyroflow plugin page and download the OpenFX version. After downloading, open Filmora, navigate to Extended > OpenFX Manager, then drag and drop the plugin file to install it.
 secure download
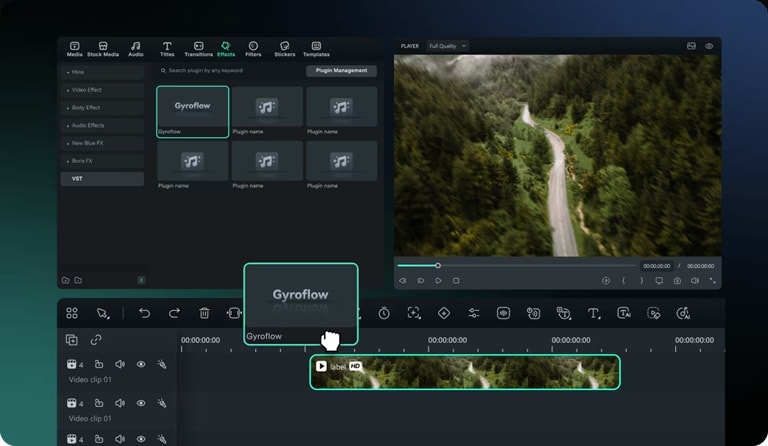
Step 2: Apply the Gyroflow Effect
In Filmora, open the Effects tab and search for Gyroflow (it's usually listed under the OpenFX section). Drag and drop the effect onto your clip in the timeline to apply it.
Step 3: Import Gyro Data and Fine-Tune Stabilization
Load your gyro data into the Gyroflow panel, then adjust the stabilization settings until your footage looks just right. You can preview the results instantly.
Part 3. Best Practices to Avoid Shaky Footage
It's always easier to prevent shaky footage than to fix it later using Adobe Premiere video stabilization or even Filmora. There are a few simple practices you can follow during filming to reduce camera shake in the first place.
1. Use a tripod or gimbal for stable support
If your footage turns out shaky because you're filming handheld, using a tripod or gimbal can help keep your camera steady. Even if you don't have them, you can make use of simple supports around you, like:
- Placing your camera on a flat surface
- Leaning it against a wall, or
- Resting your elbows on a stable object
2. Walk smoothly and bend your knees slightly when moving with the camera
Another way to reduce shaking while filming is to move like you're holding a full cup of water: slow and steady. One common trick used by professionals is to keep your knees slightly bent and take heel-to-toe steps to absorb motion as you walk.
3. Shoot at a higher resolution so you can crop during editing without losing quality

Recording in a higher resolution might mean using more storage space, so many beginners tend to avoid it. However, it actually gives you a big advantage during editing. Let's say you are shooting in 4K. With this extra resolution, you can edit and apply stabilization later without sacrificing image quality, since it has more pixels to work with.
4. Plan your shots instead of making sudden movements or zooms
If your shaky footage often comes from unexpected camera moves, it's likely because you're reacting instead of planning. It's better to take a few seconds to visualize how you want the shot to look and move first. Then, start filming the footage. Avoid sudden pans or quick zooms, unless you want to create a dramatic effect.
Conclusion
Even with the best equipment, shaky footage can happen to anyone. But with the Adobe Premiere Pro stabilize video tutorial above, you don't have to worry about it anymore. You can always smooth your footage out during post-editing and make sure your shot always looks steady and professional.
Even if you think using Premiere Pro doesn't give you the stability you want, you can still try other stabilization options like Filmora. There are multiple ways you can use to stabilize your footage, depending on how much flexibility you need and the kind of project you're working on.
