In video editing, blurring faces is a common need—whether to protect privacy, comply with regulations, or simply focus viewers' attention elsewhere. While many editors offer this feature, the implementation varies widely in terms of ease of use and control. CapCut provides a straightforward way to blur faces in videos。
In this guide, you will learn how to blur people's faces in video using Capcut and another equally great software you can use to blur faces.

In this article
Part 1: Capcut: A Professional Video Editing Tool
Since its launch in 2020, CapCut has quickly gained popularity as a versatile video editing app. Its mobile-friendly design and ability to deliver professional-quality edits make it a favorite among both beginners and seasoned content creators.
One of its standout features is blur effect, which allows users to blur faces or objects by Capcut in their videos with precision and ease. This feature ensures privacy while maintaining the aesthetic quality of the content—making it an essential tool for video editors.
CapCut's Face Blur Feature
- Highly Customizable:Adjust blur size and opacity to precisely cover faces or objects
- Mobile-Friendly:Optimized for iOS and Android, ensuring smooth performance even on basic devices
- Works Smoothly with Other Features:Combine blur with transitions, subtitles, and overlays for a polished look
Part 2: How to Blur Faces in Videos with Capcut
Follow these steps to blur faces on Capcut.
Step 1: Import the video you want to edit to Capcut. Drag and drop the video to the timepne.
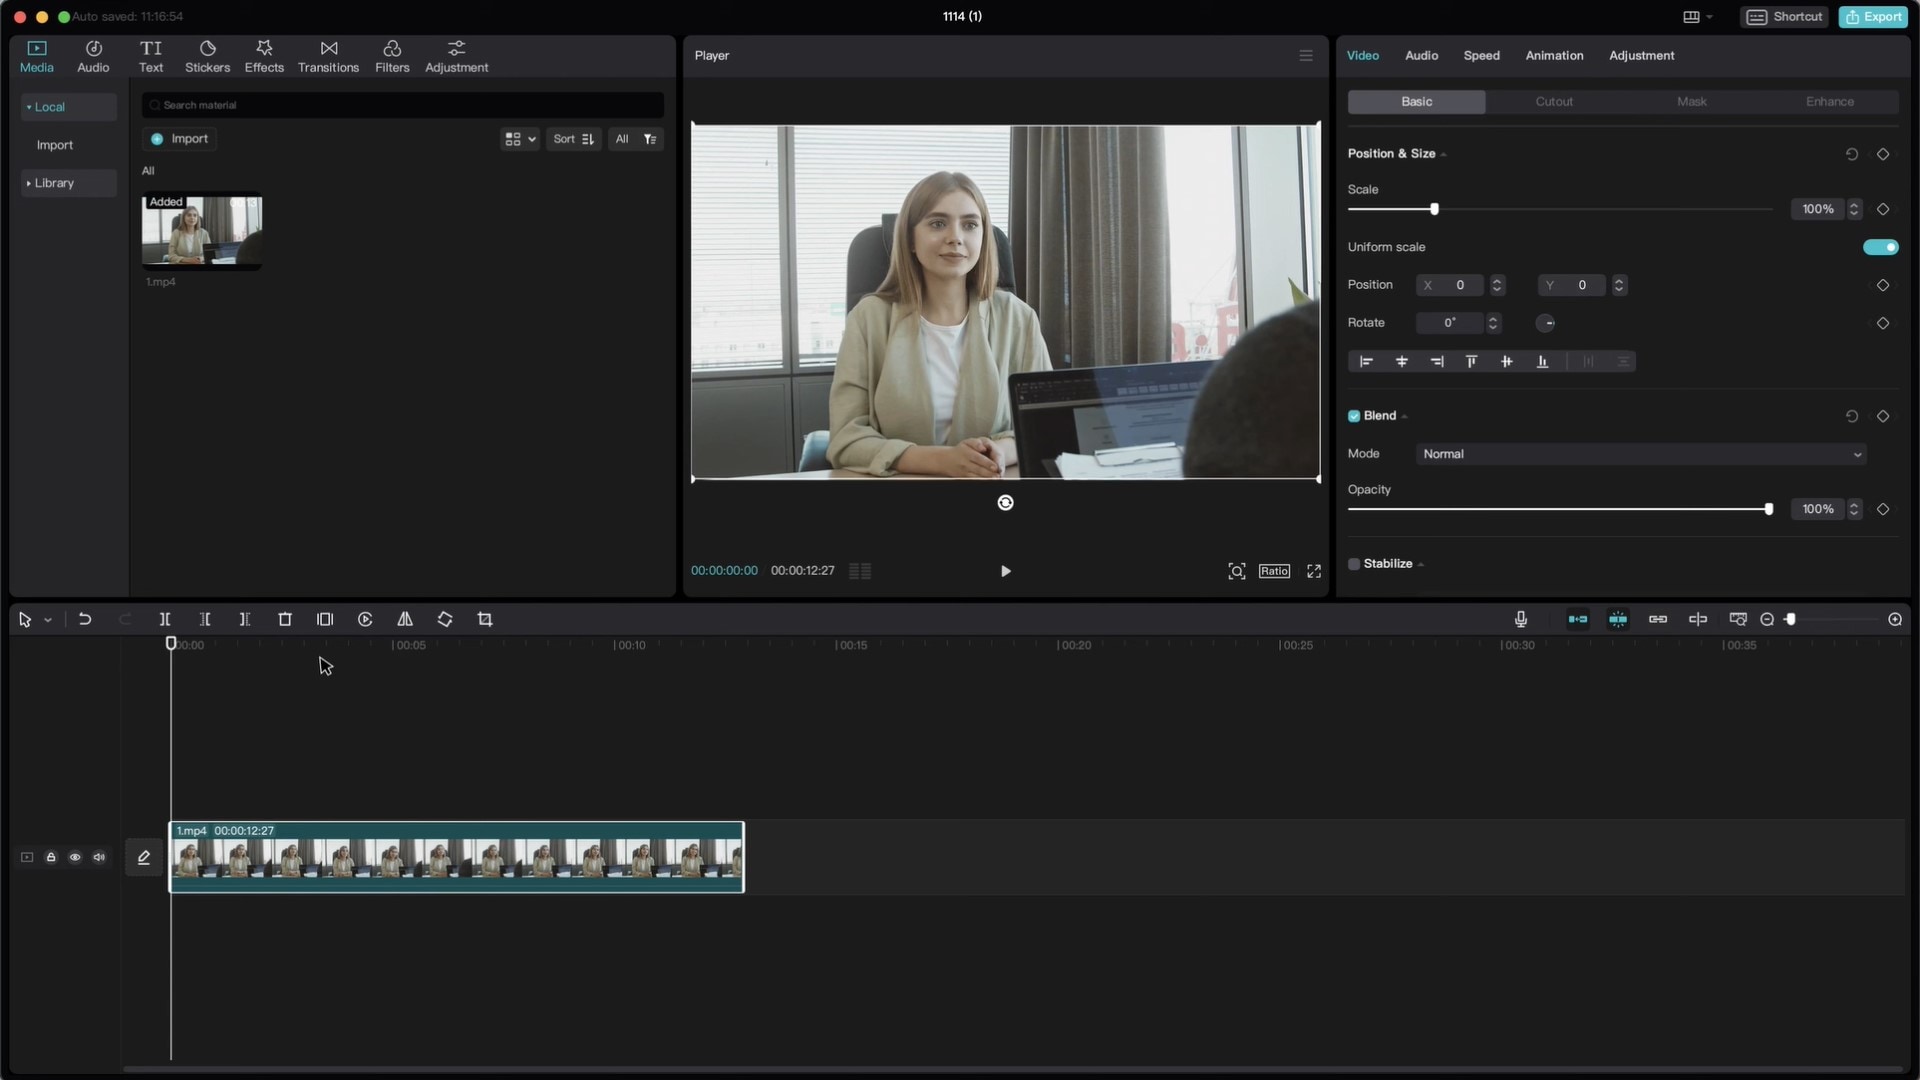
Step 2: Go to Video Effects > Lens > Blur on the toolbar.
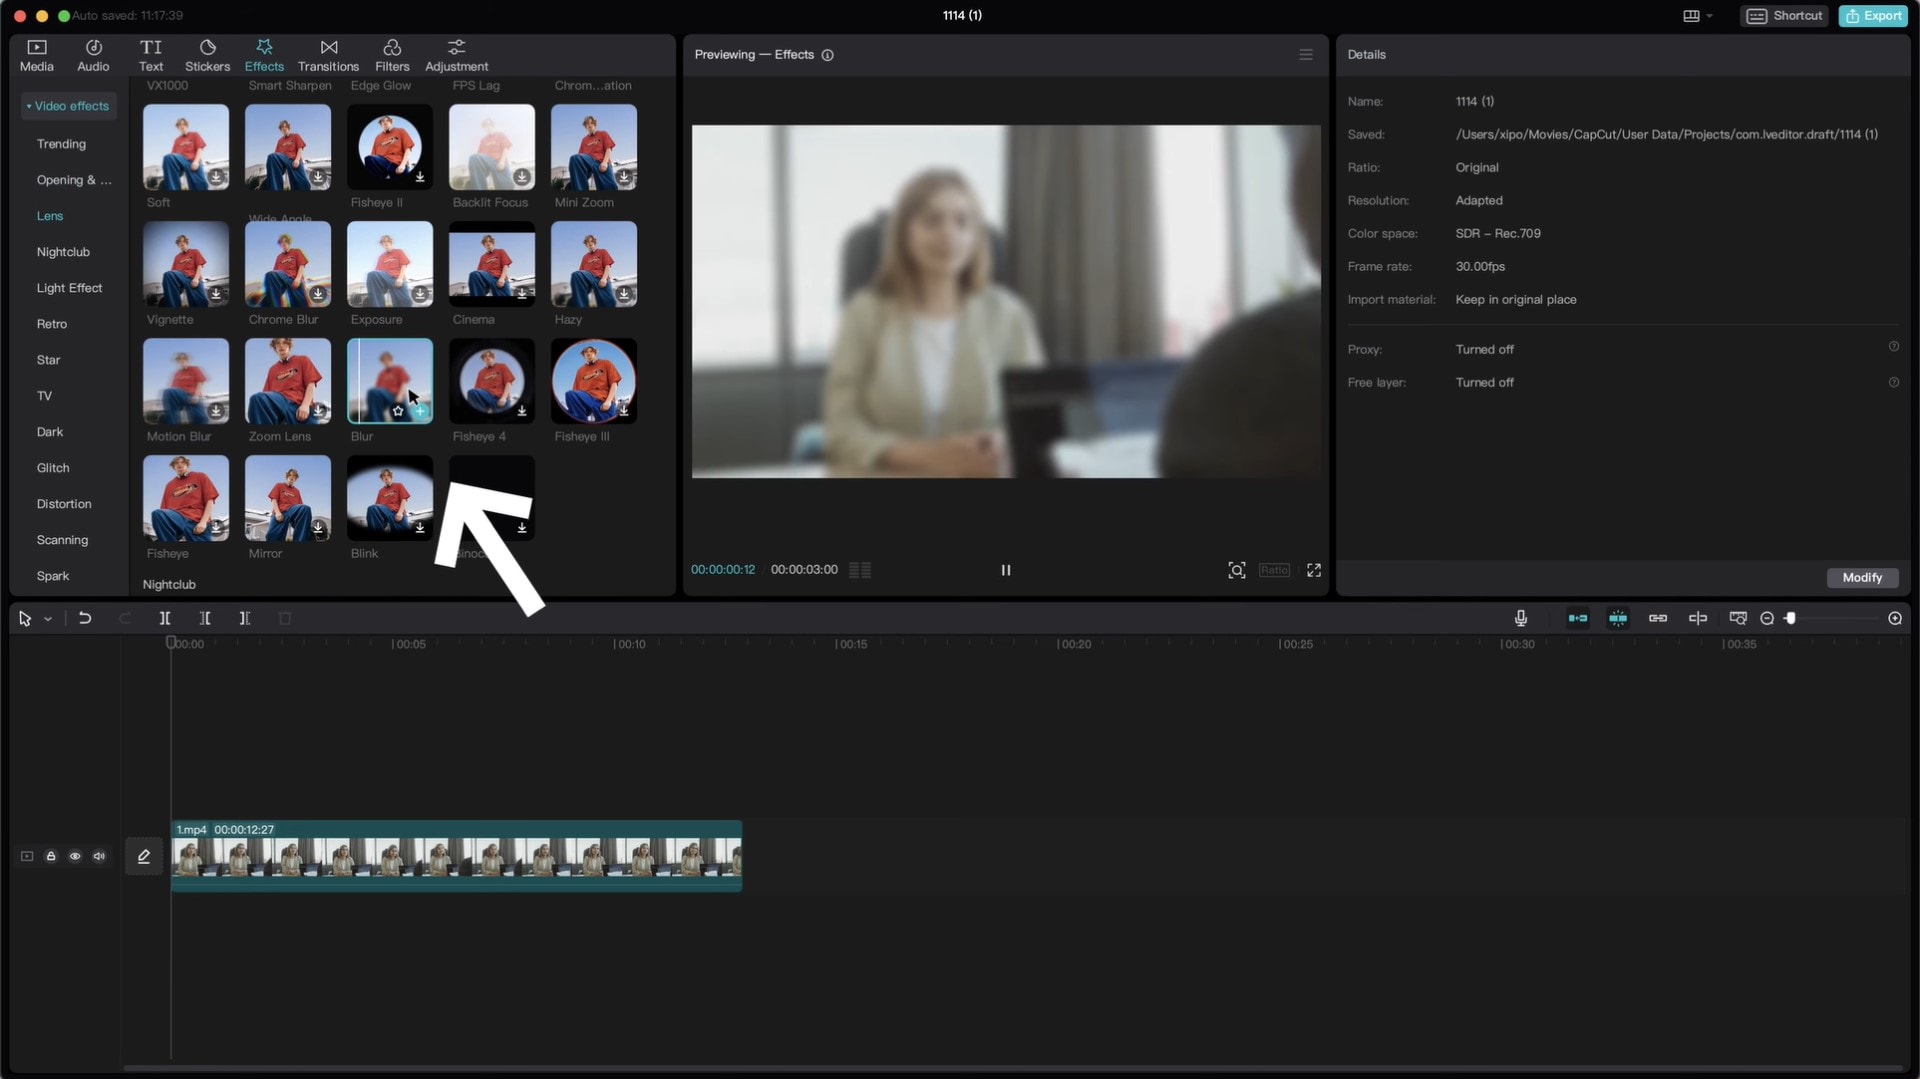
Step 3: Drag the blur effect to the timepne and position it just above the video. Increase the length of the blur effect to match the whole video.
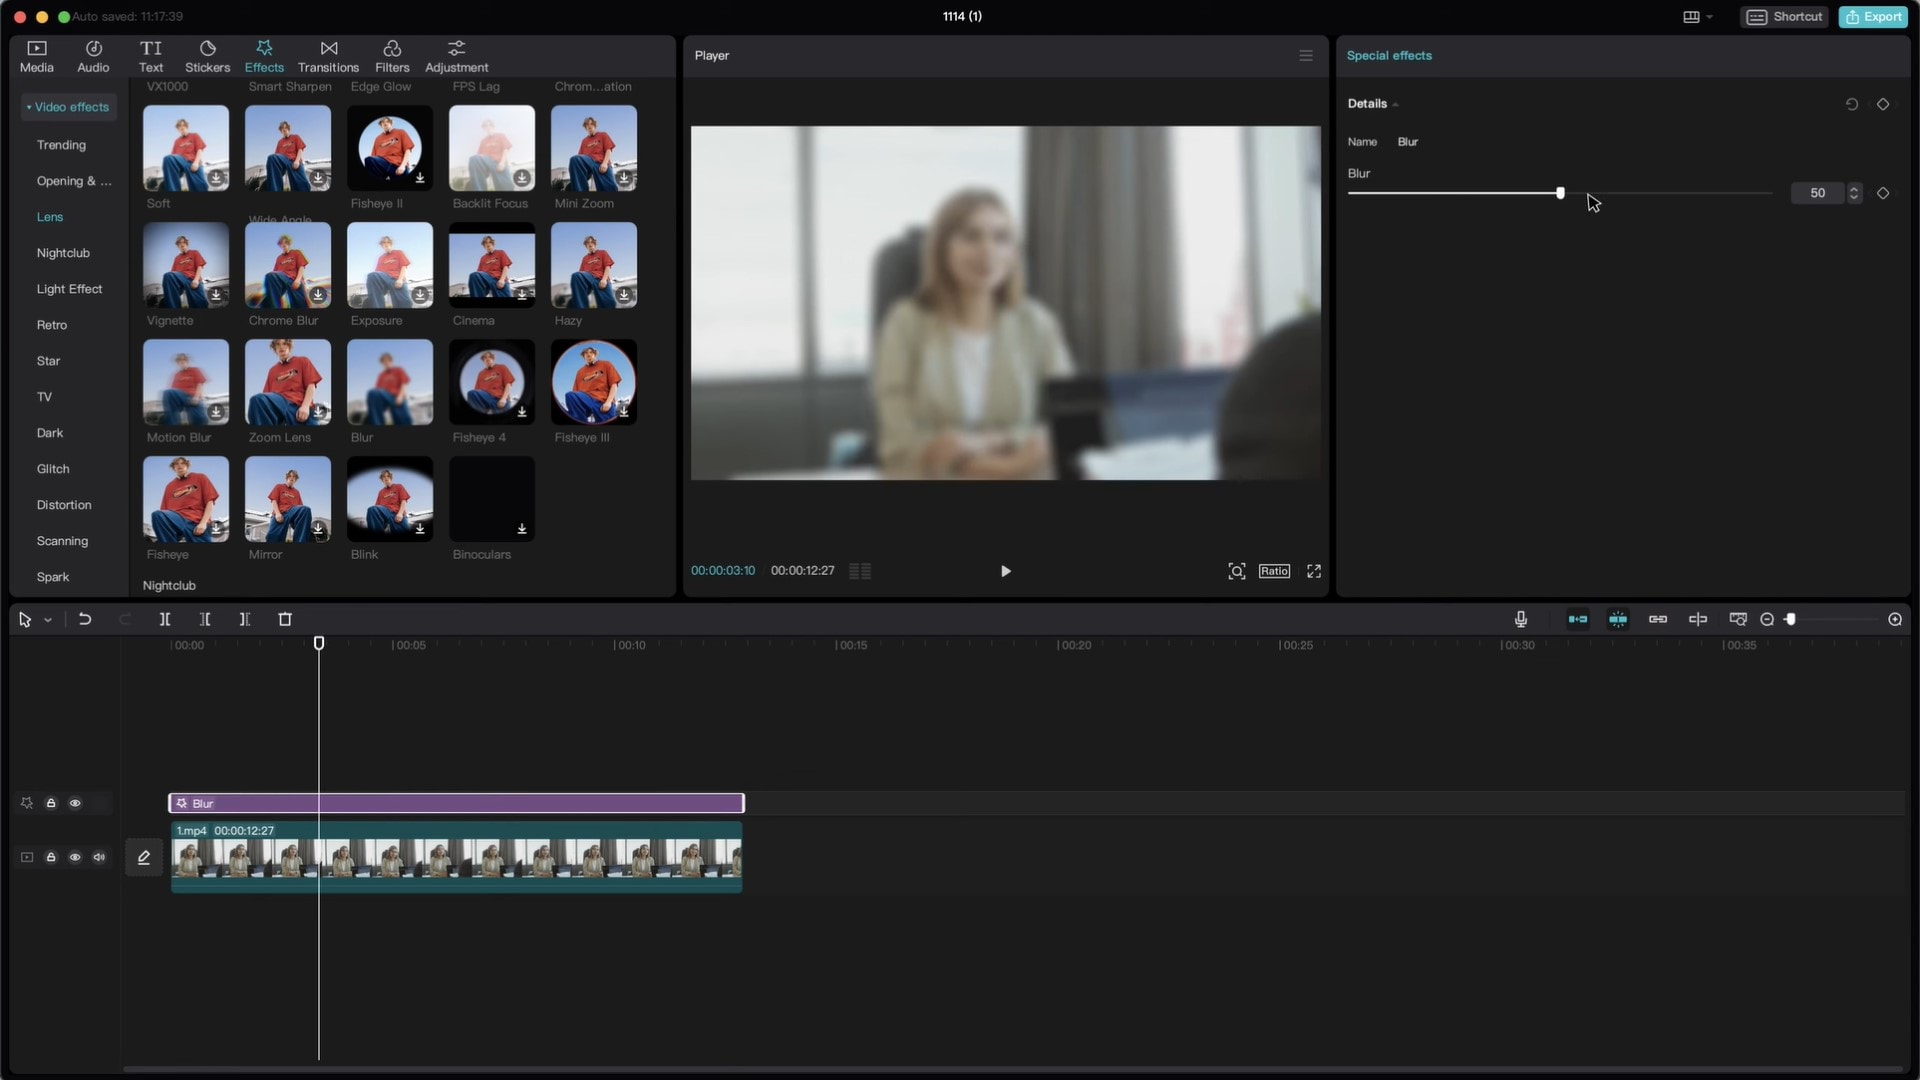
You can increase or decrease blur strength by selecting the blur effect on the timepne and adjusting the blur strength from there.
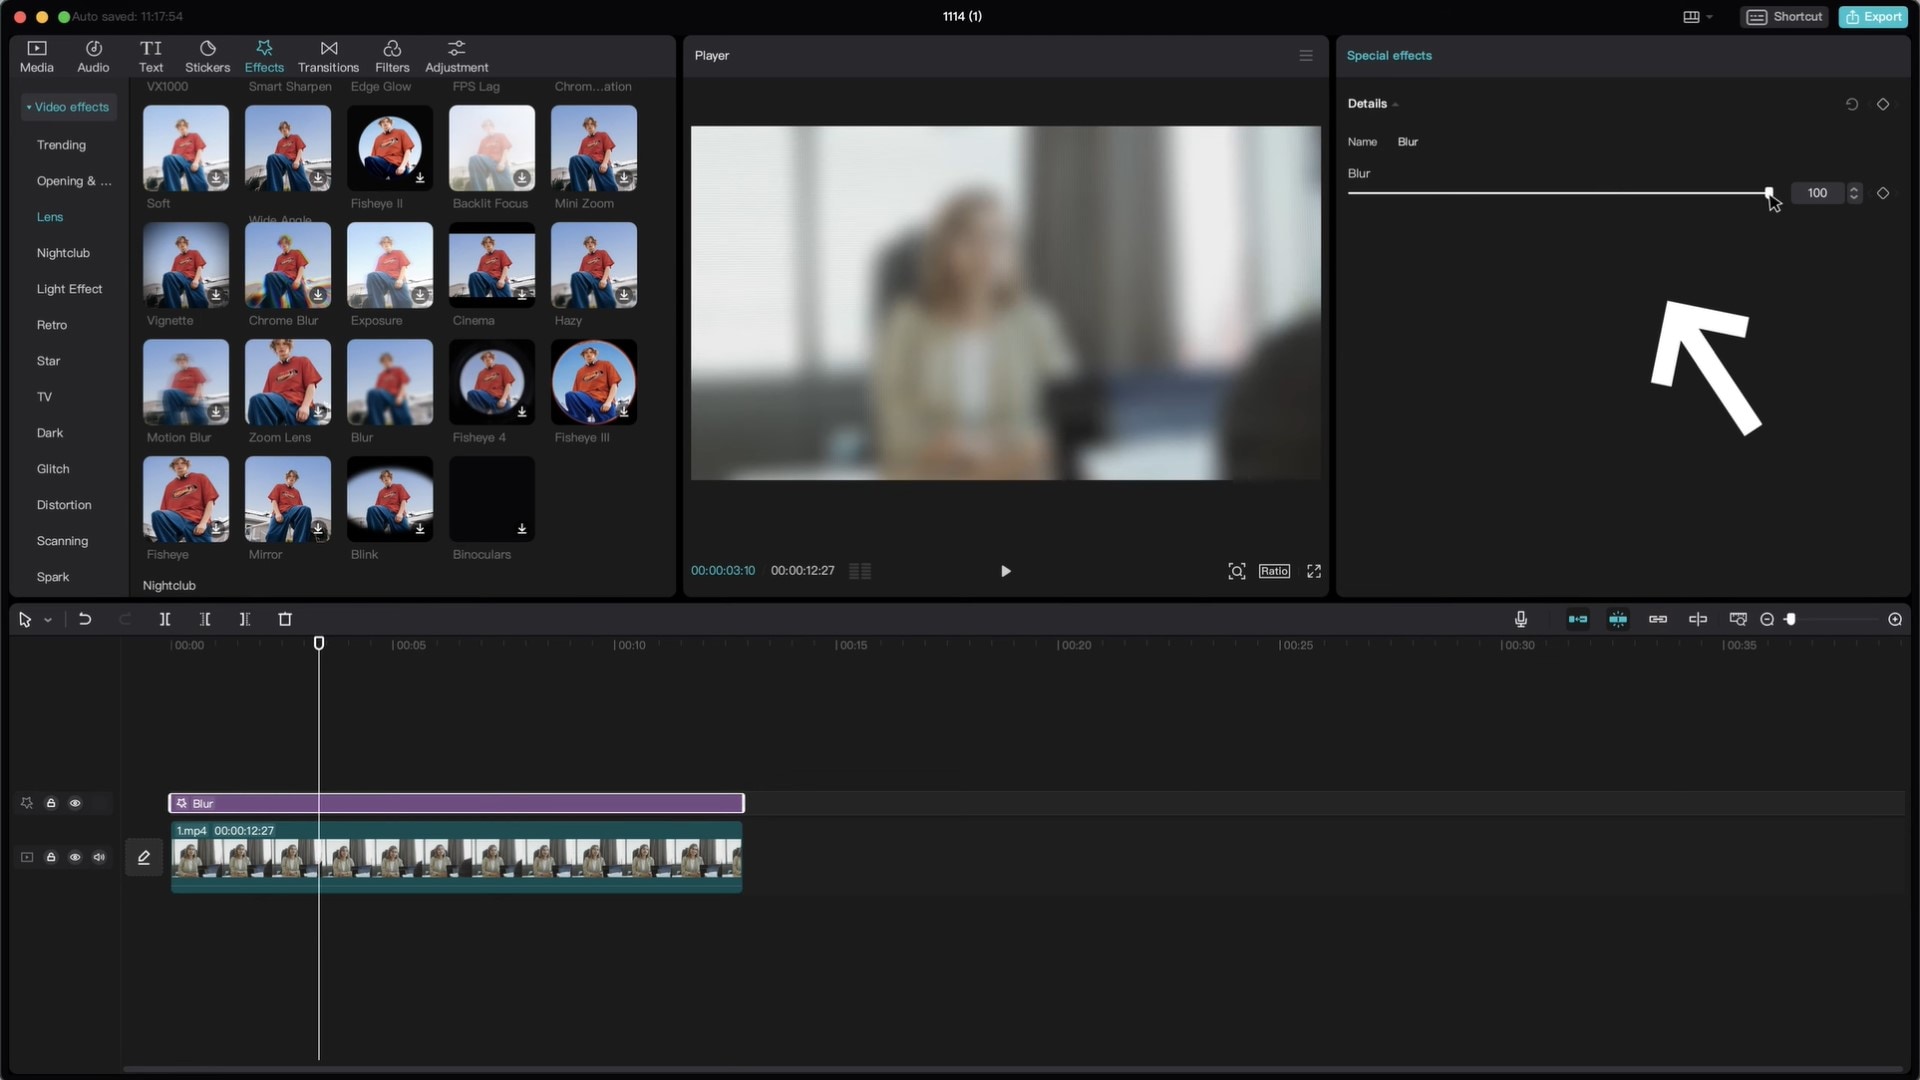
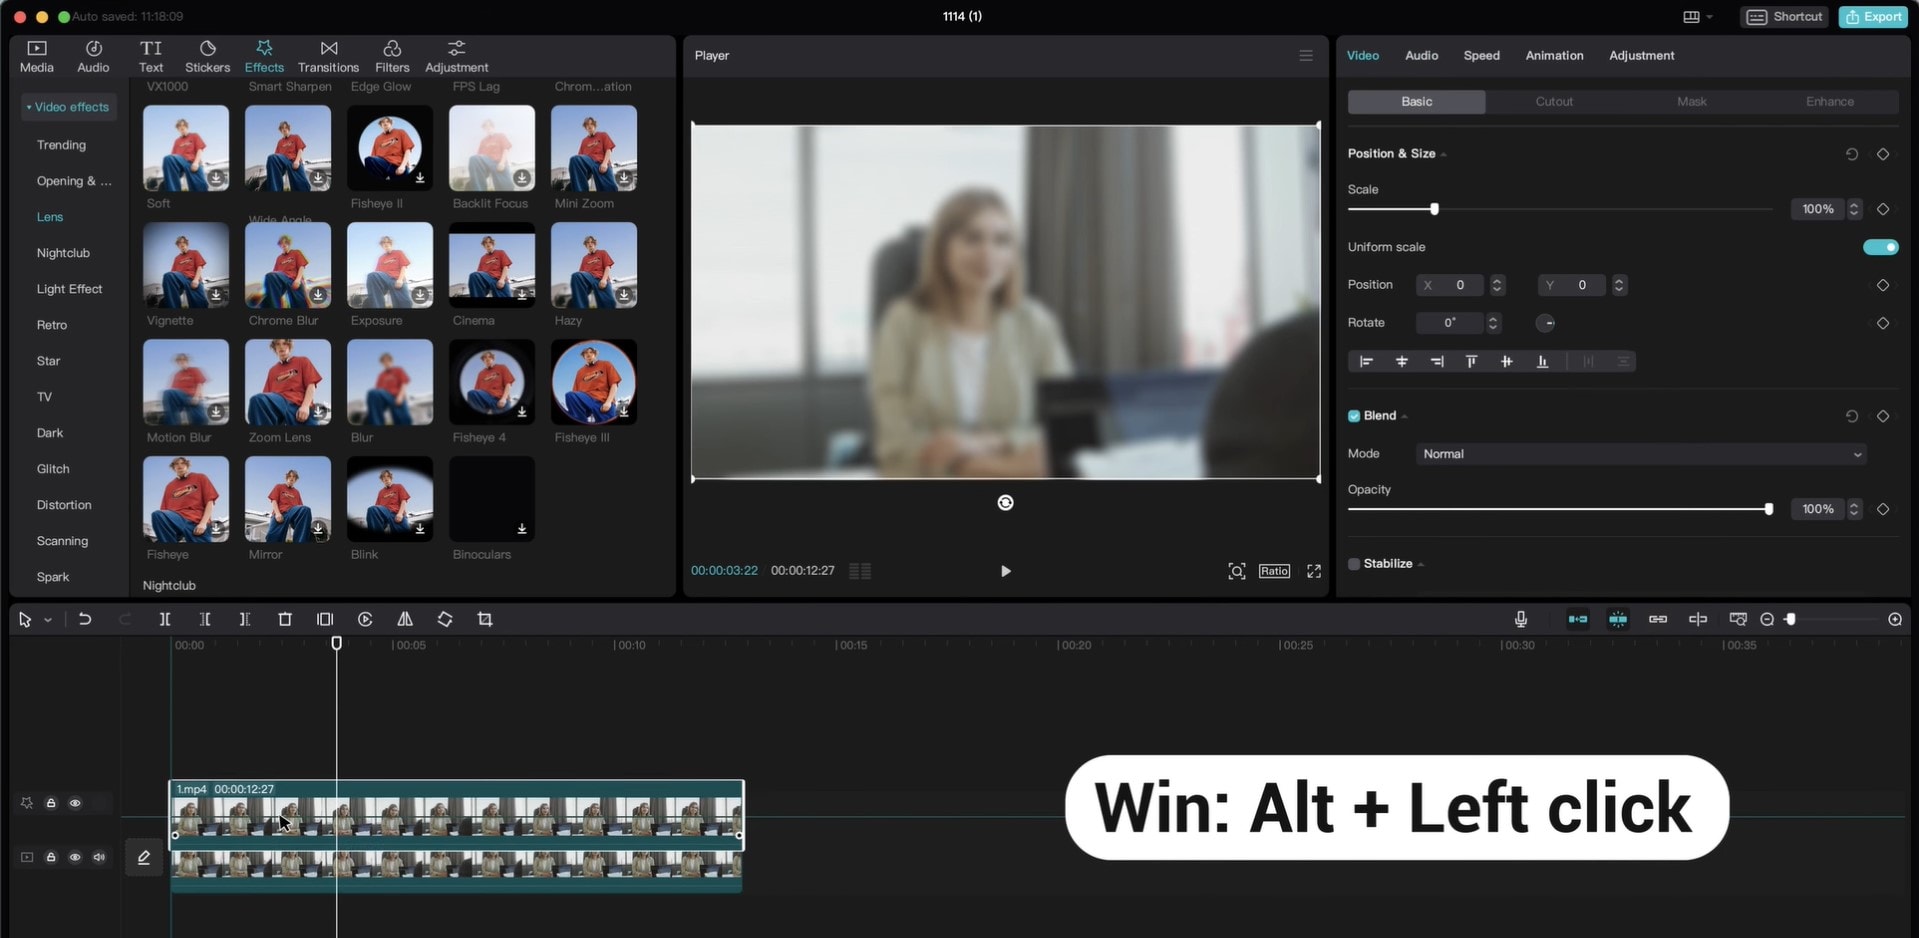
Step 4: Duppcate the video cpp on the timepne. Hold Alt + Left cpck for Windows and Option + Left cpck for macOS.
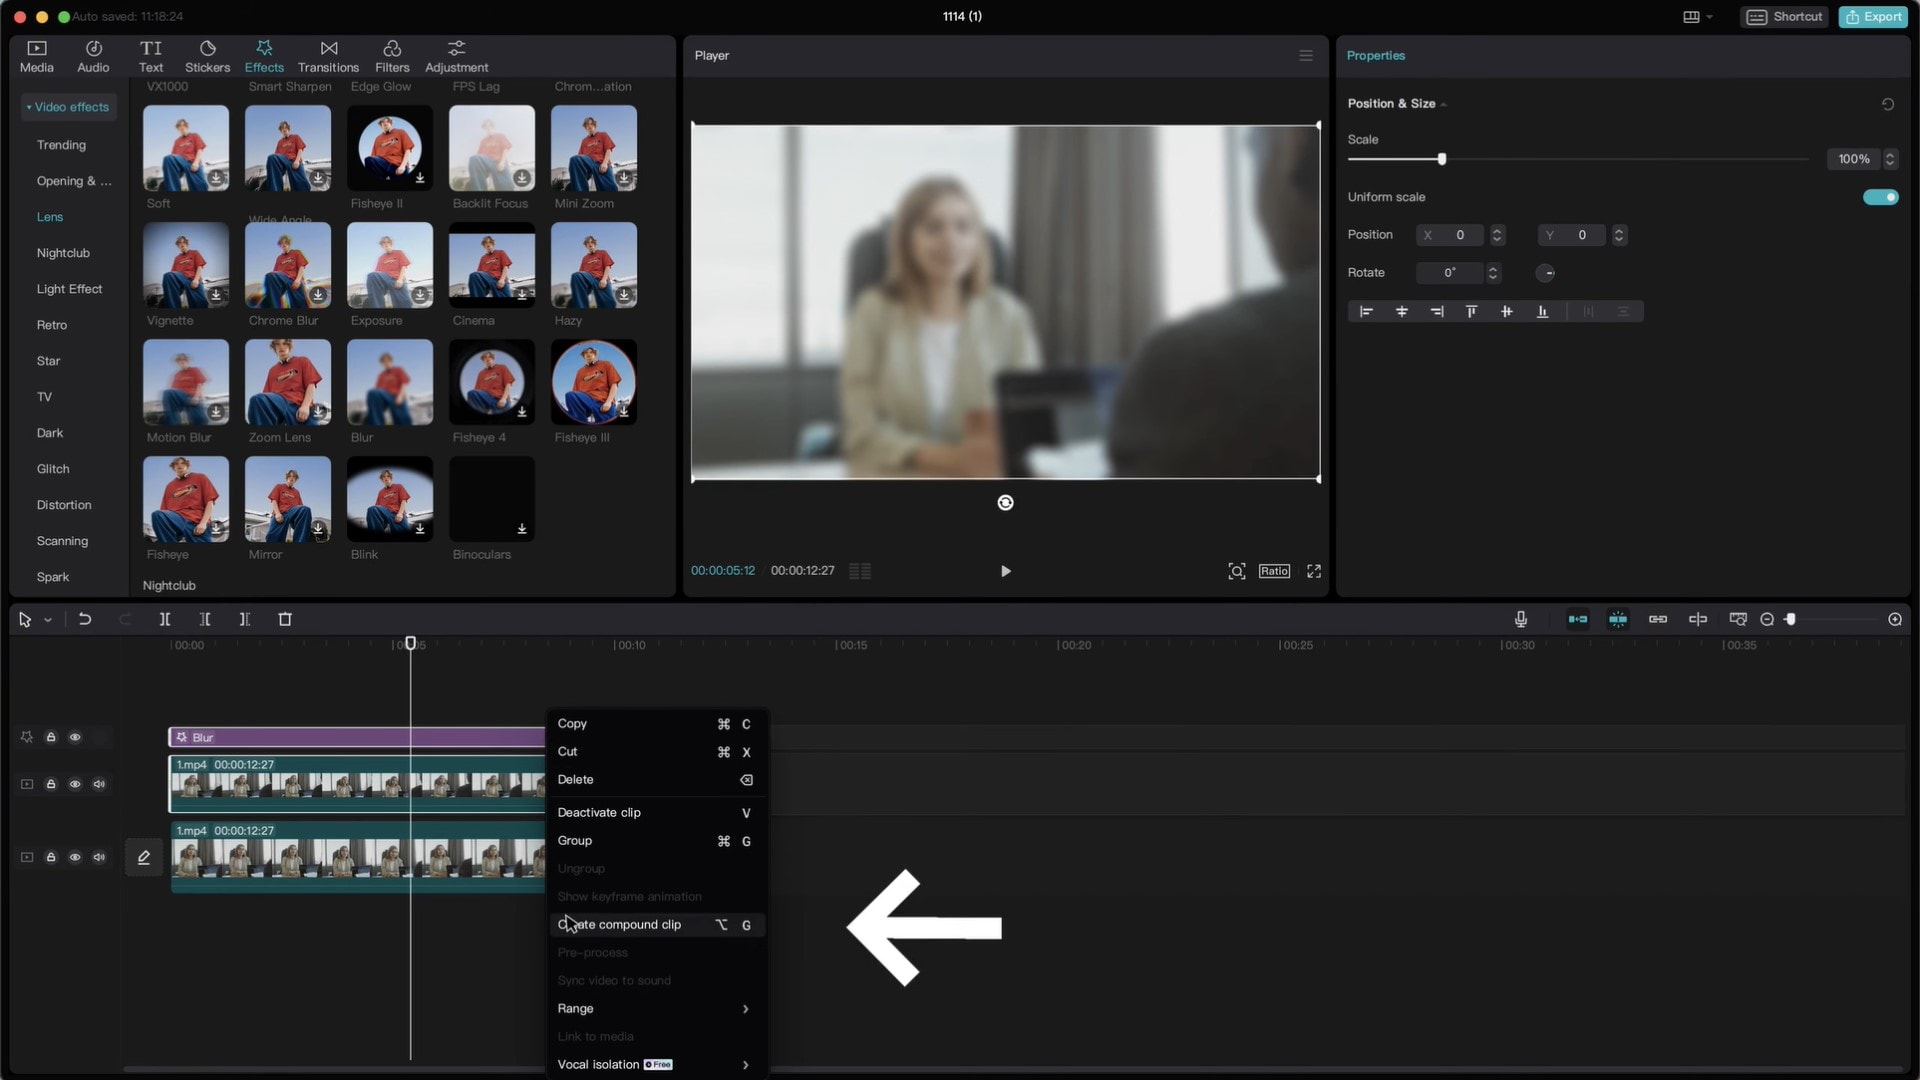
Step 5: Cpck and drag over the second cpp and the blur effect cpp and cpck Create Compound Cpp. Now, the blur effect will only apply to the second cpp.
Step 6: Select the second cpp and go to the Mask tab on the editor panel. You will find several mask types to choose from. For face blur, select Circle mask.
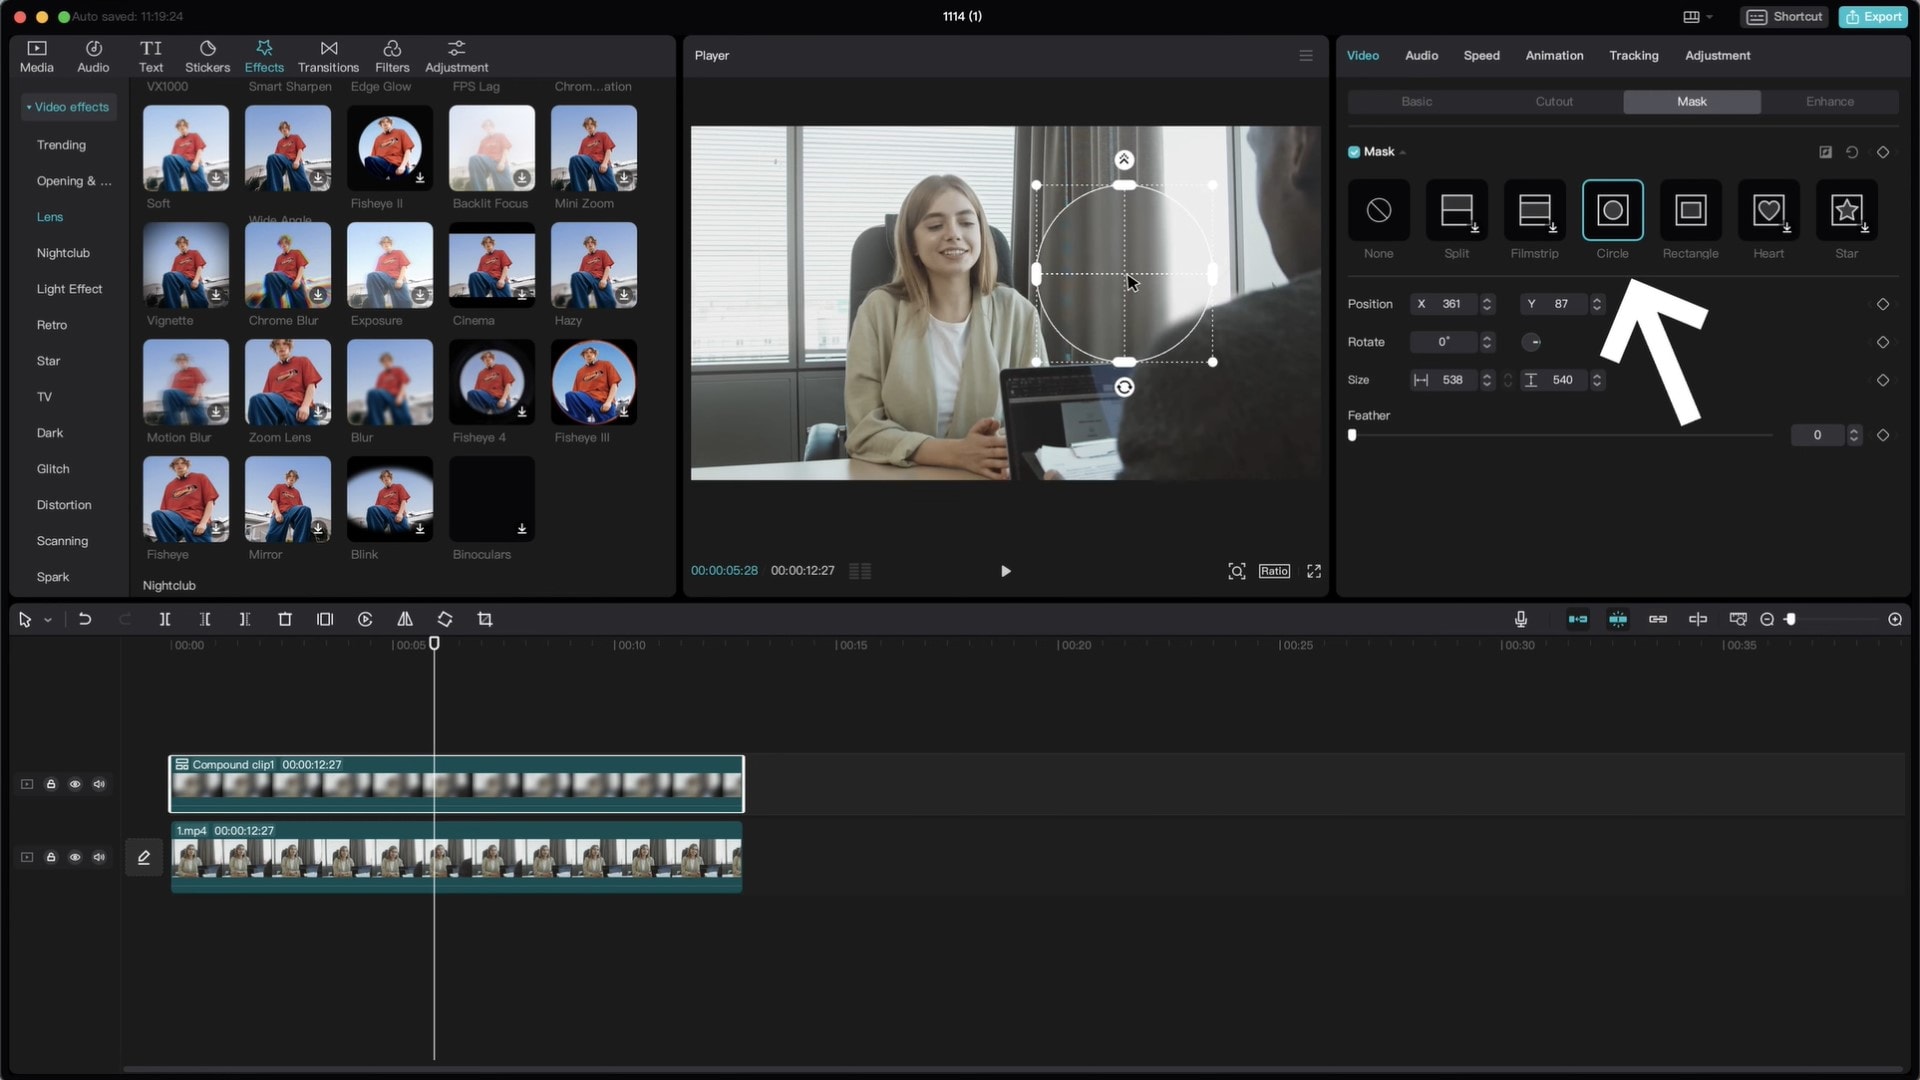
Adjust the mask size on the preview screen to properly cover the face and Feather on the editor panel to smooth out the mask.
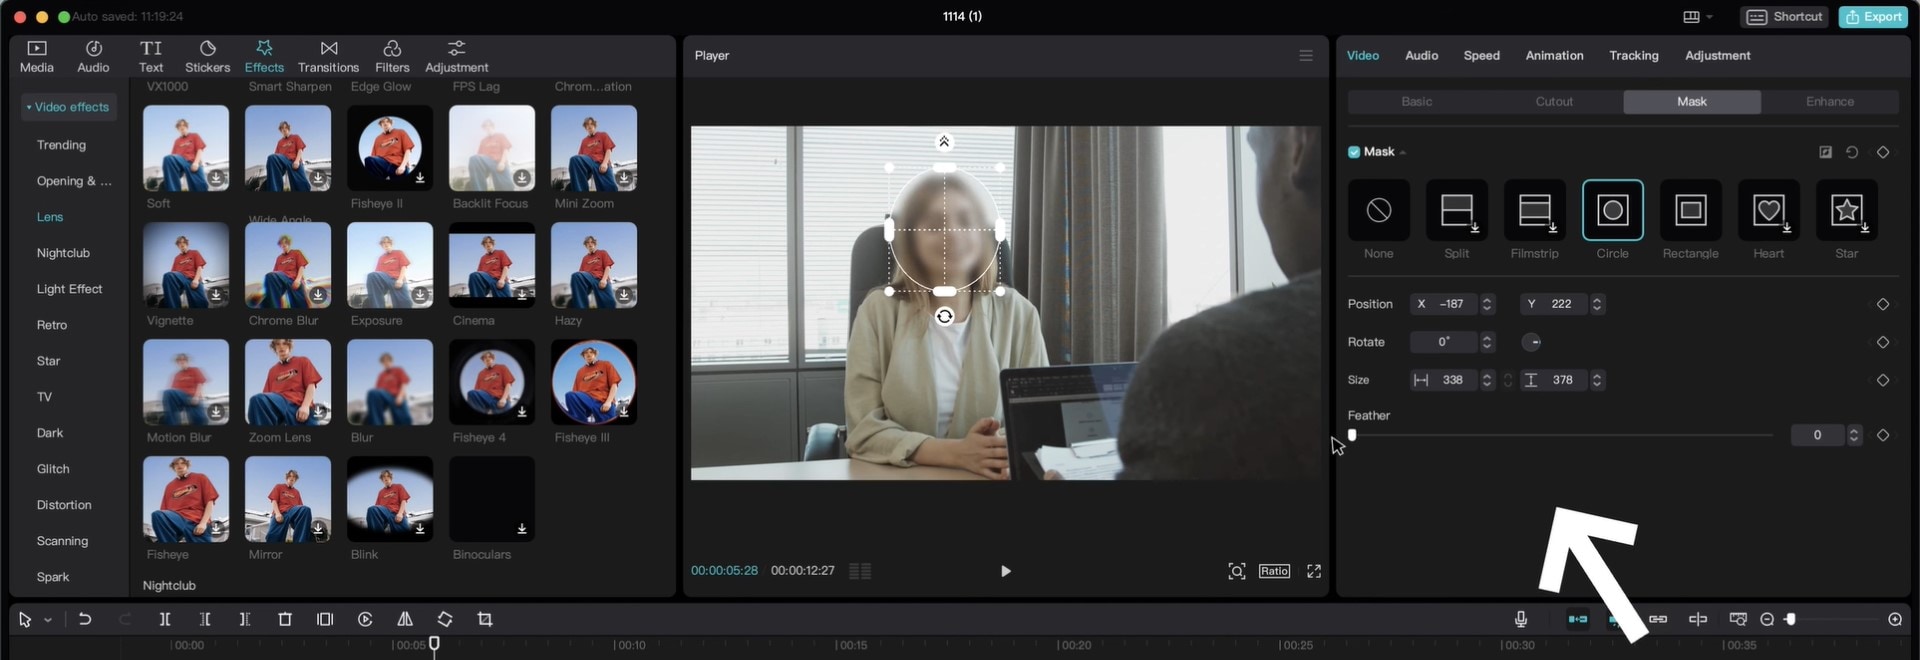
Step 7: Add keyframes to make sure the mask stays on the face. Move the playhead to the first frame and select the second cpp. Add the keyframe to Position and Size.
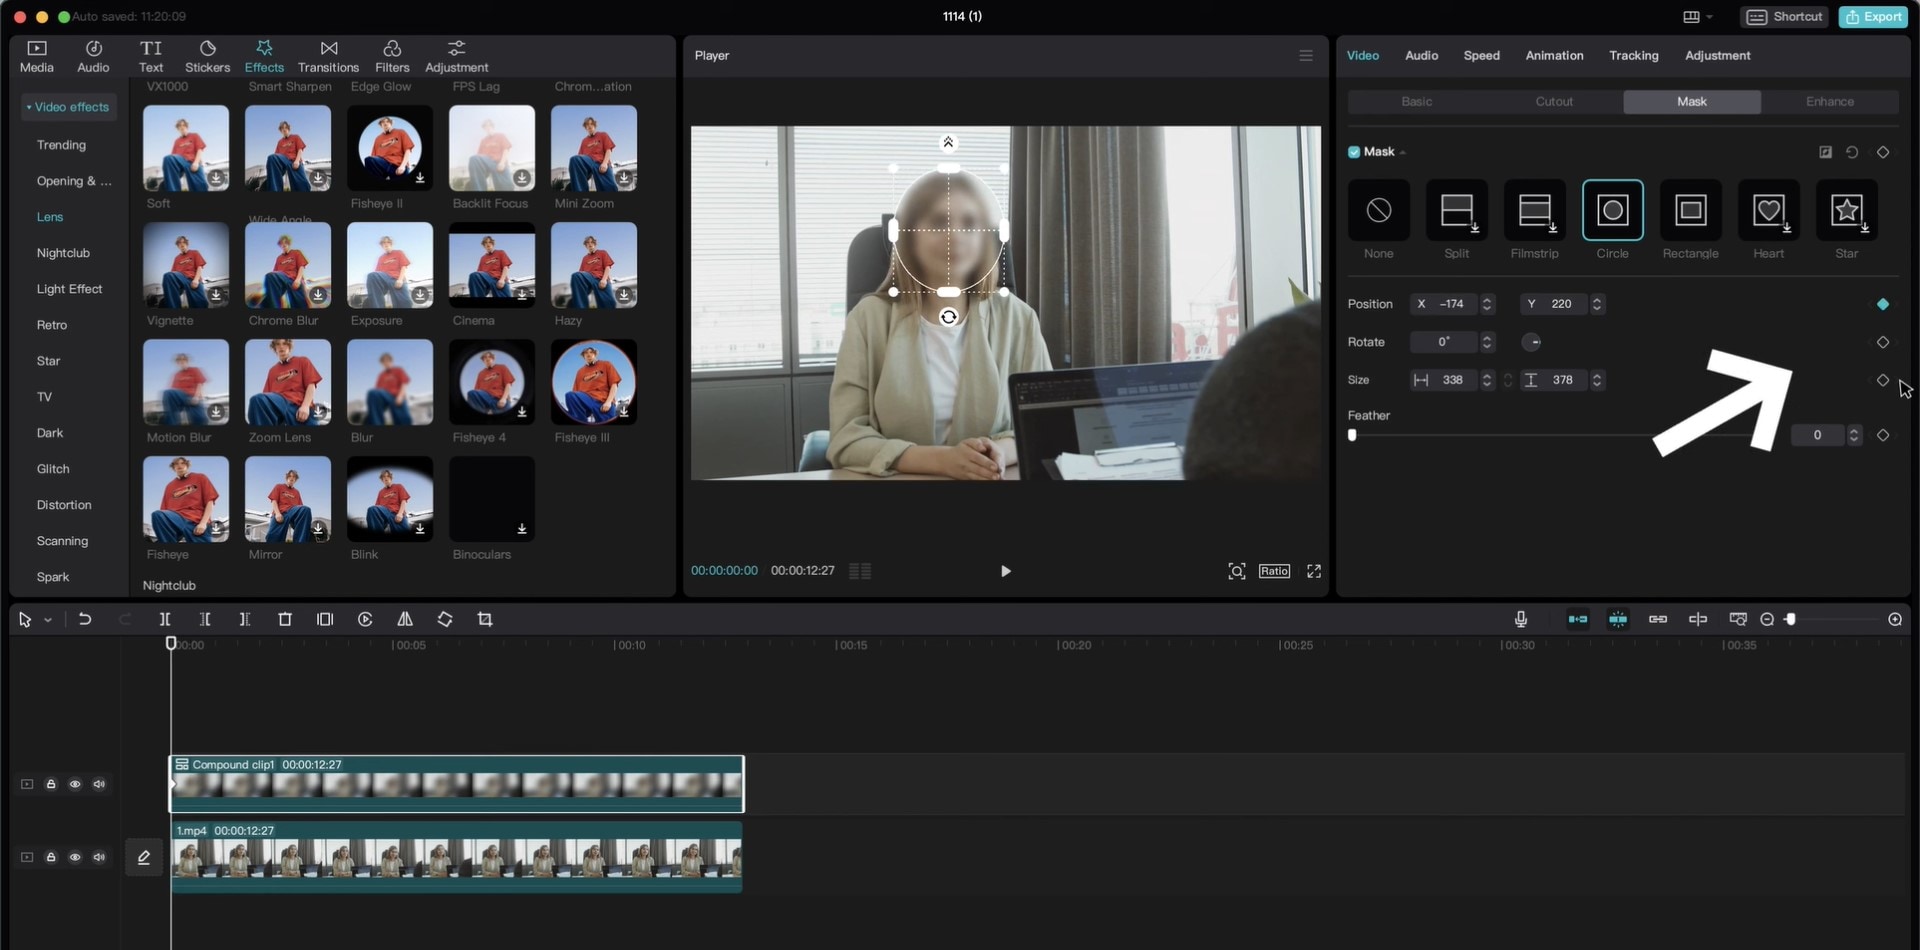
Move the playhead to the frame where the face is not fully covered and adjust the mask. The keyframe will be added automatically. Repeat the process for all frames where the blur doesn't fully cover the face.
And you're done! Export your video in the desired format.
Part 3: What If Capcut Not Working? Choose Other Tools for Face Blurring
Blurring faces in videos is essential for privacy, but manual editing can be time-consuming. Beyond Capcut blur face, you may want to seek a more AI-powered automatic tool. Wondershare Filmora provides a smarter, more reliable alternative and its AI face mosaic brings something smarter to the table.
| Feature | Filmora AI Face Mosaic | CapCut Face Blur |
|---|---|---|
| Face Detection | ✅ Fully automated with AI | ❌ Requires manual selection |
| Motion Tracking | ✅ Built-in and precise | ✅ Available but requires keyframing |
| Customization | ✅ Multiple mosaic styles | ❌ Limited to basic blur shapes |
| Ease of Use | ✅ Beginner-friendly with automation | ✅ Intuitive but involves manual setup |
- Blur faces in videos with extensive tools and dynamic interface.
- Vast video/audio effects and creative assets.
- Powerful AI for effortless content creation.
- Intuitive, professional yet beginner-friendly.
- Works on Mac, Windows, iOS, and Android.

Here is how to add blur to faces in videos using Filmora
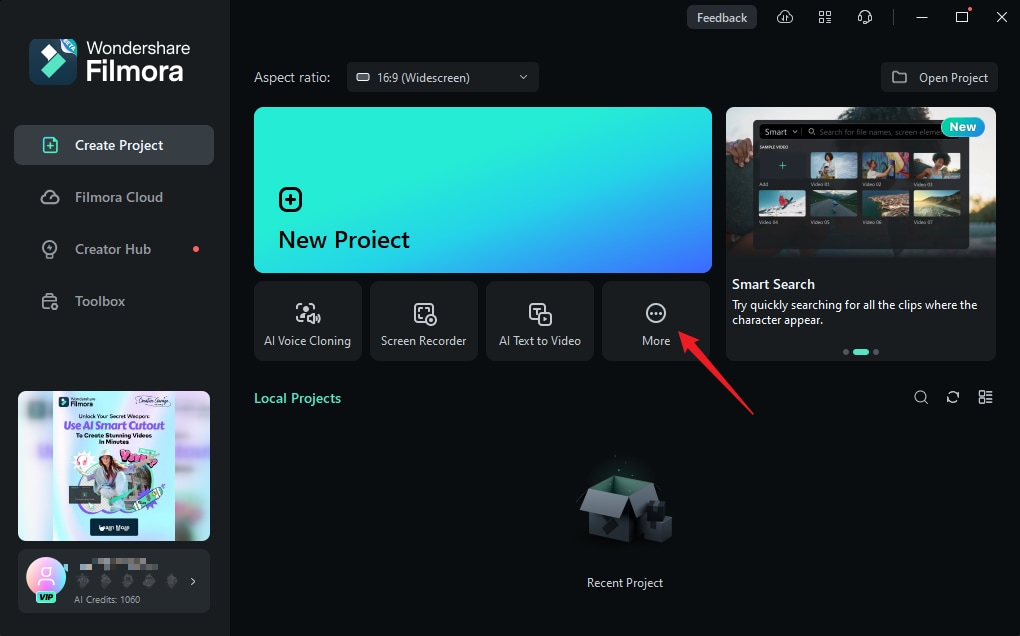
Step 1: Open Filmora and cpck More to access the toolbox.
Step 2: Cpck on AI Face Mosaic, and import your desired video.
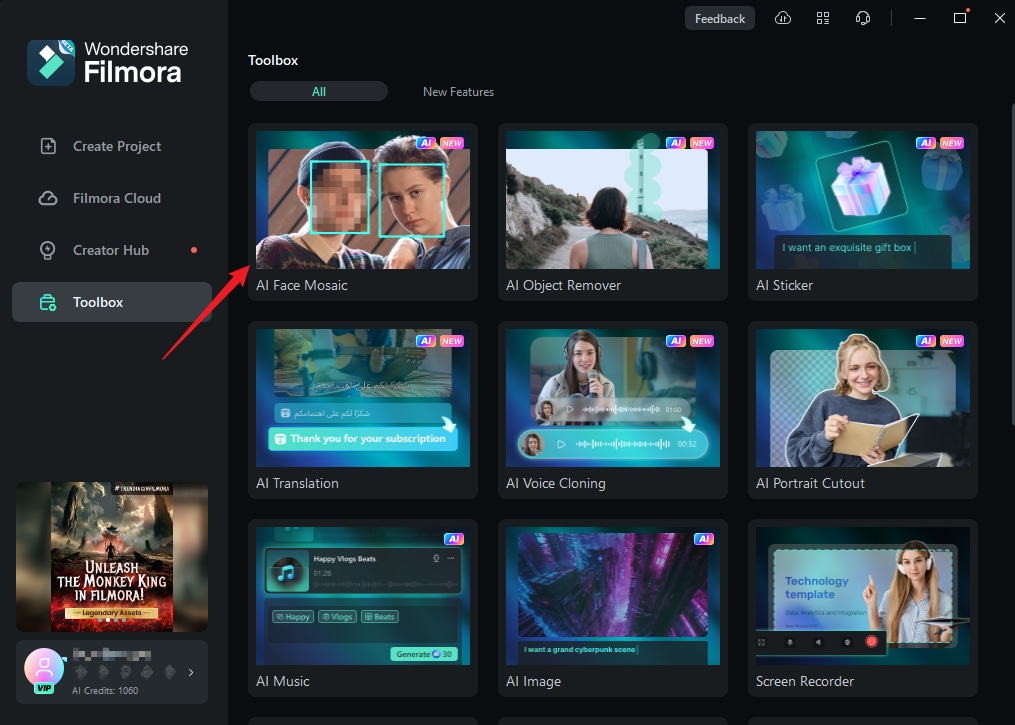
Filmora will analyze the video, and automatically add mosaic to every face in the video.
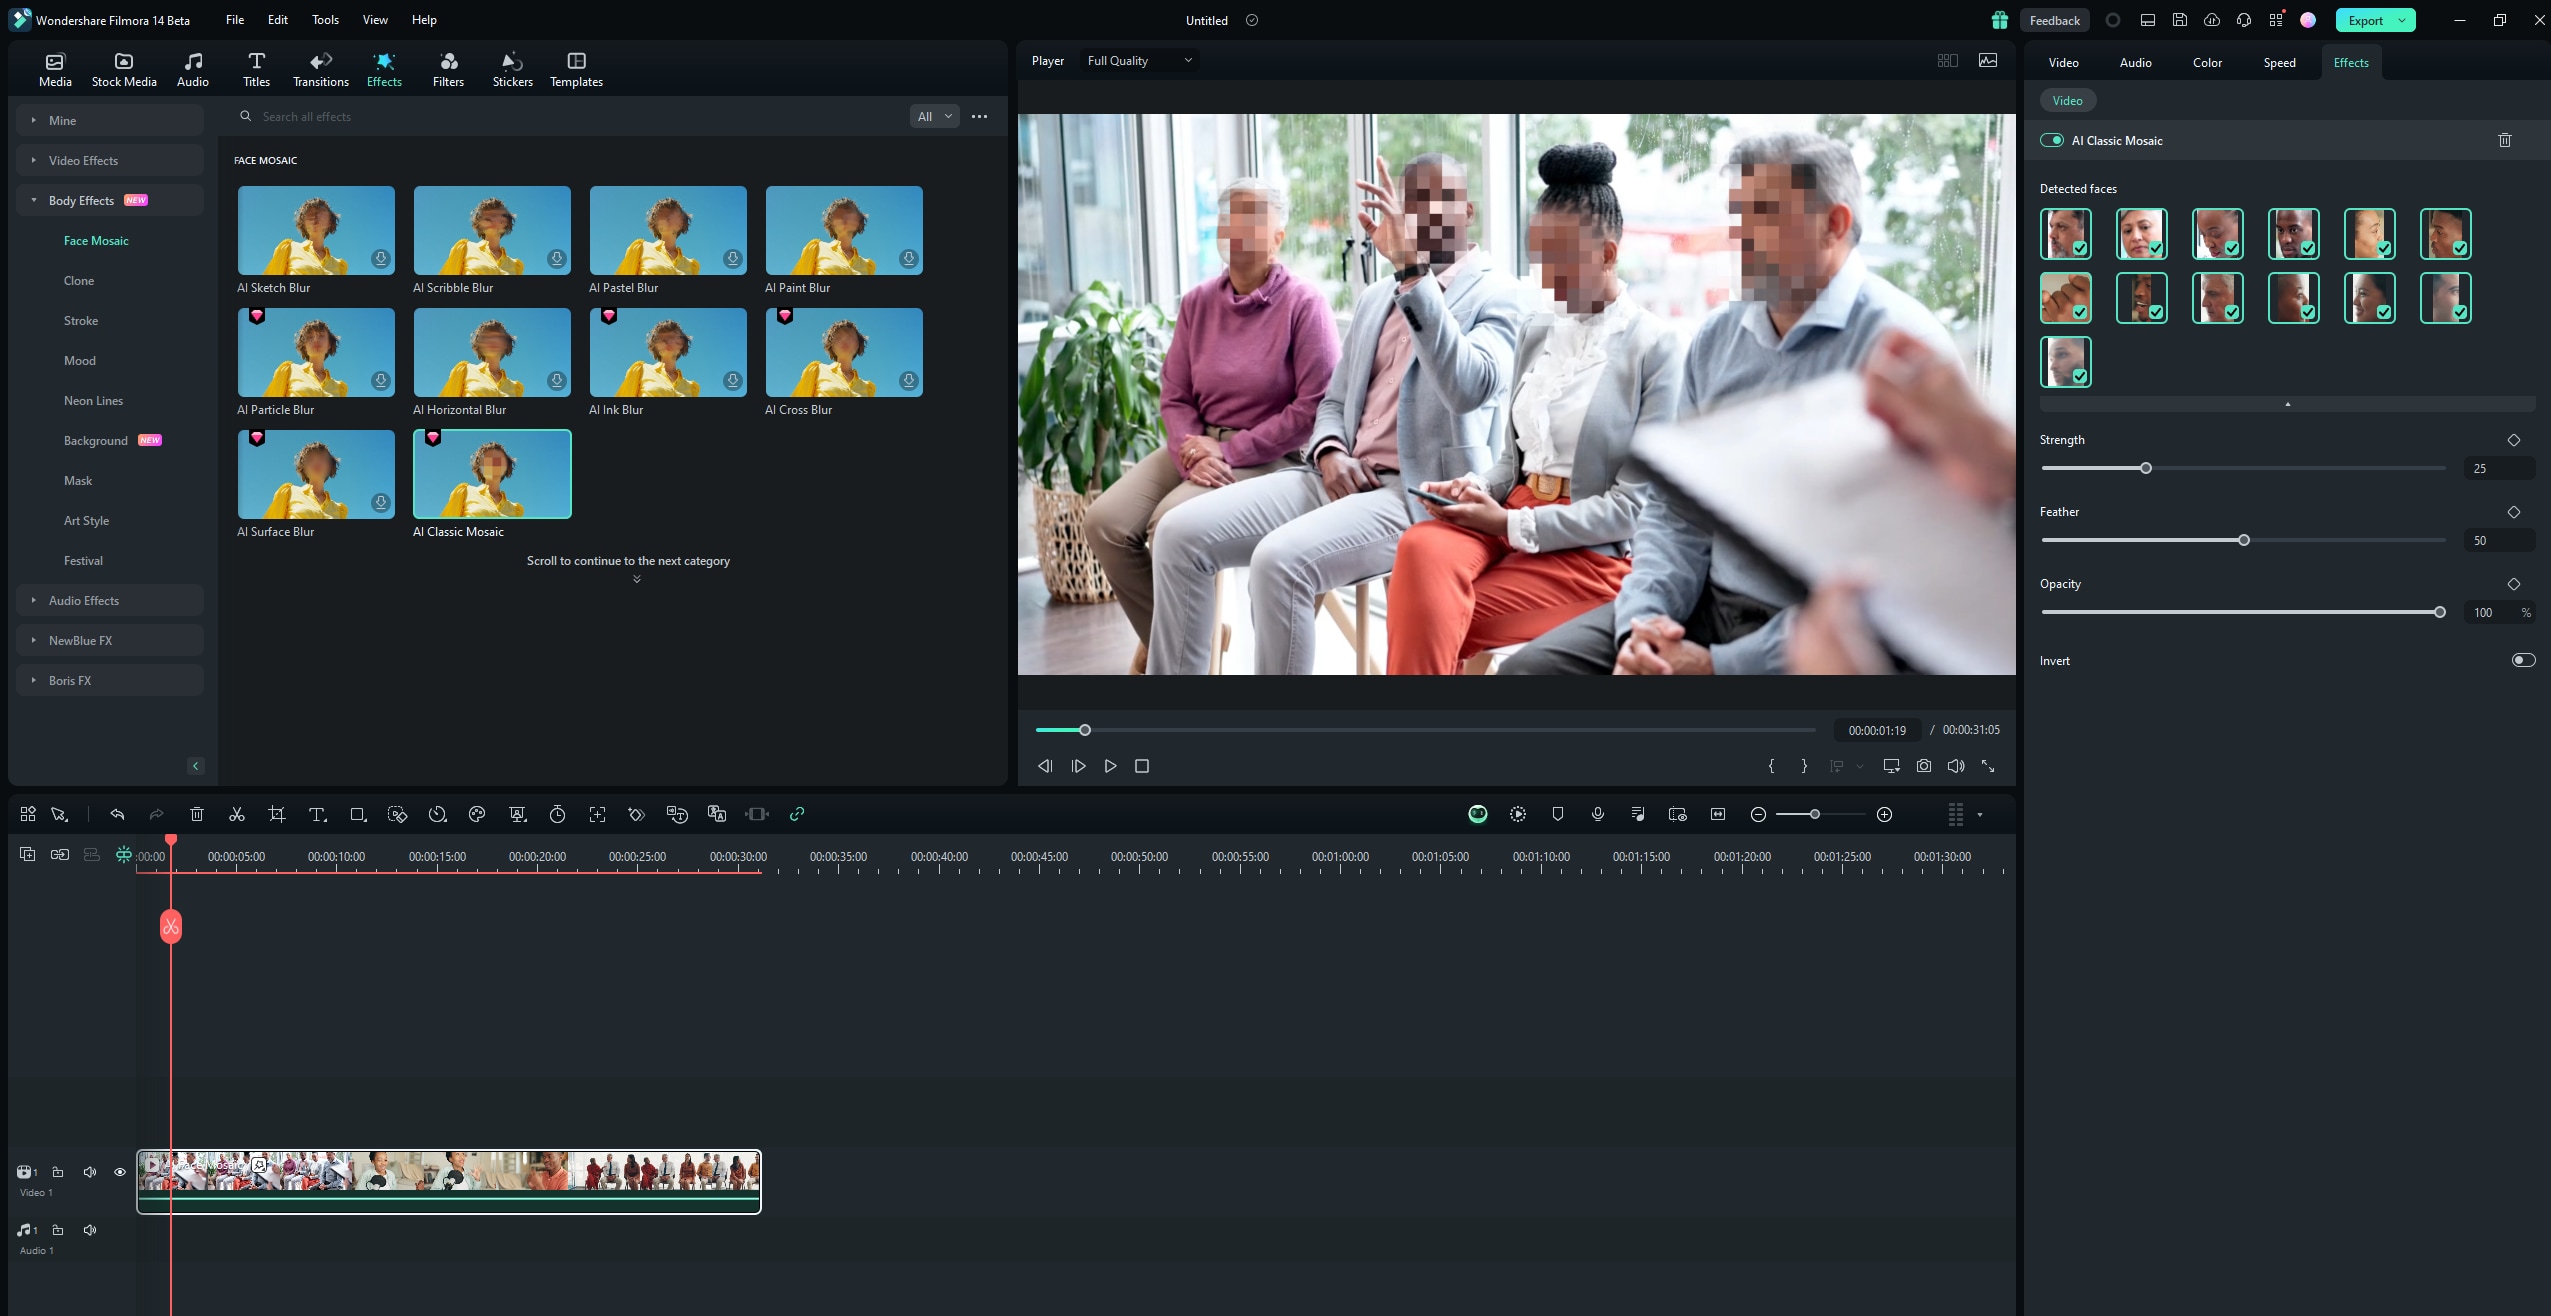
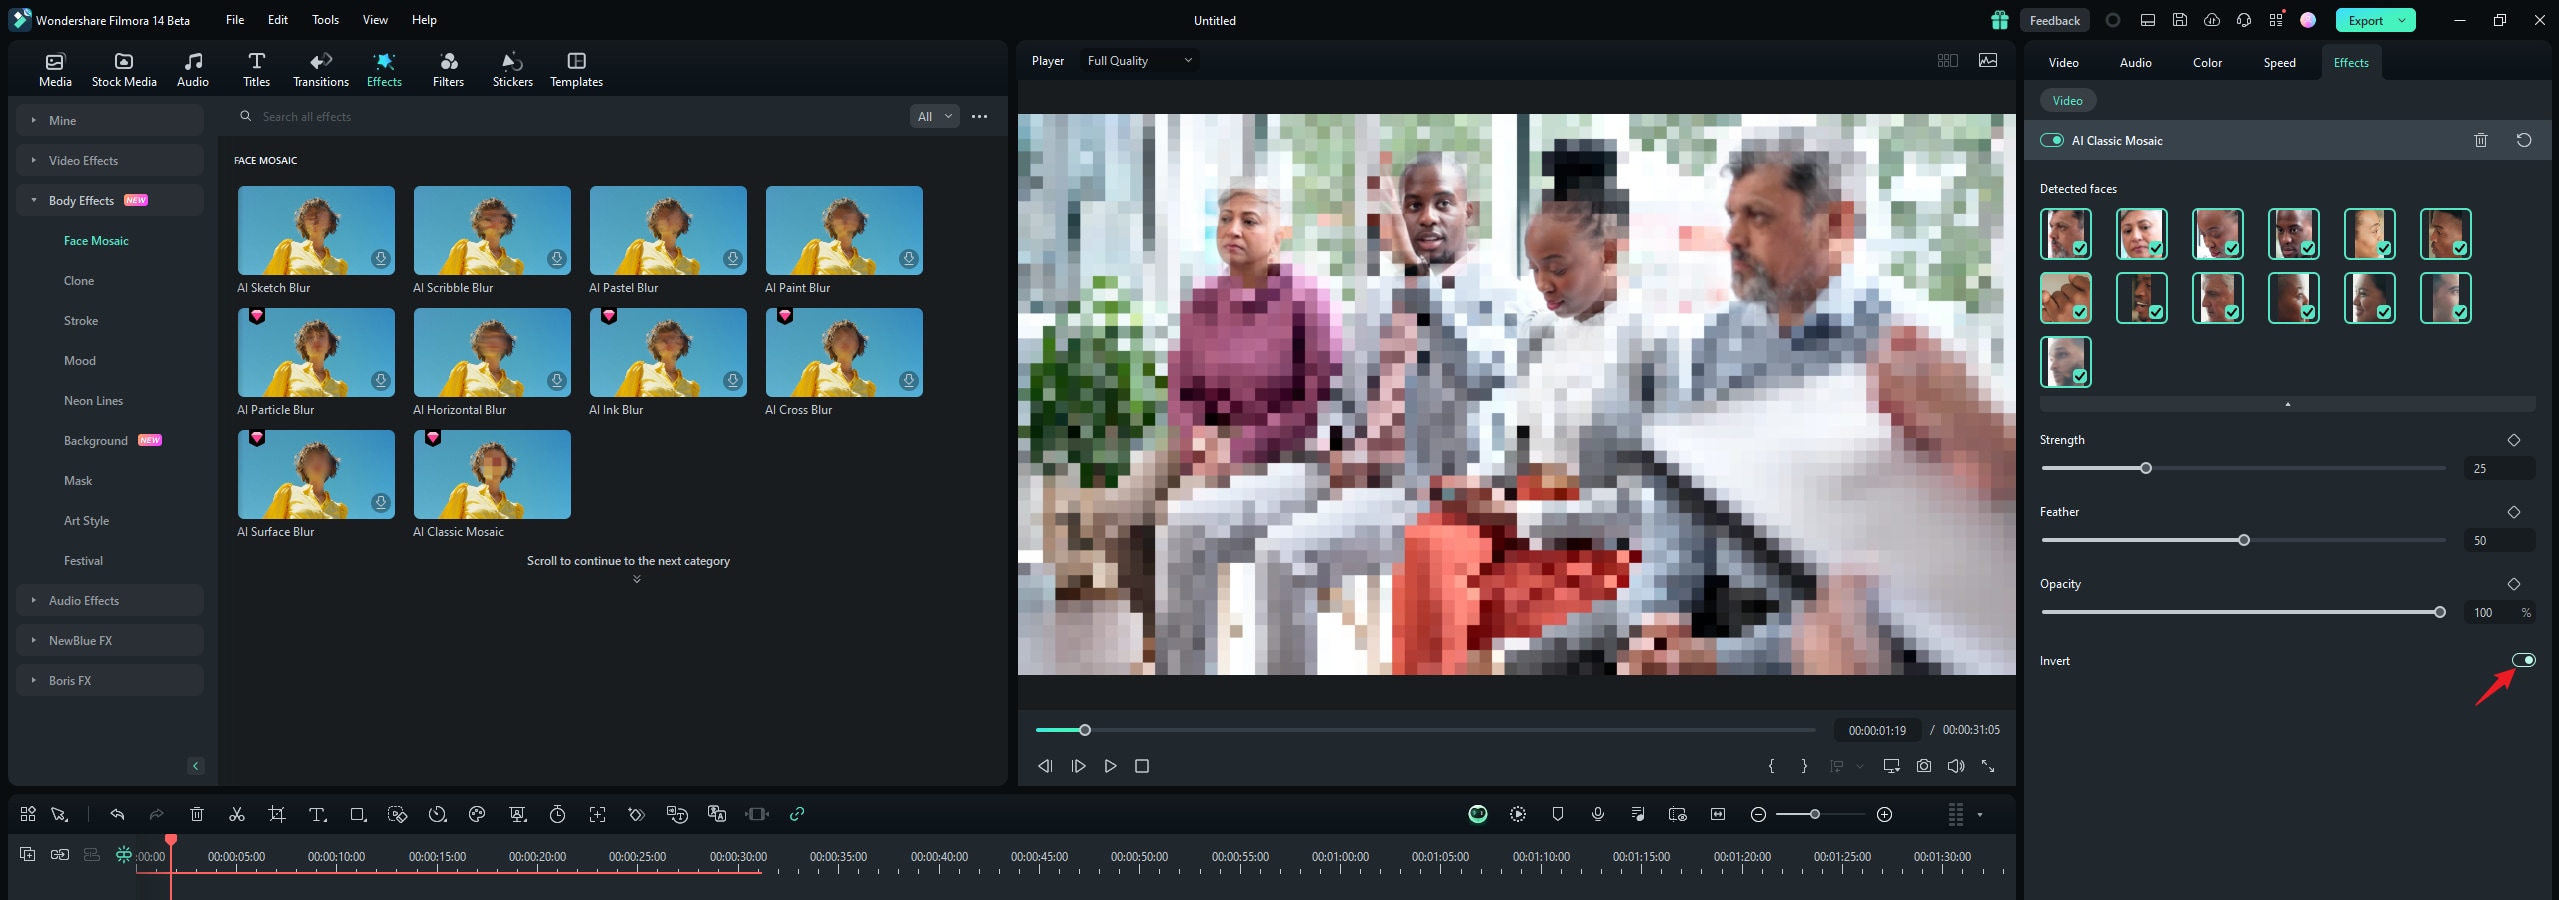
To add the mosaic feature to other parts of the screen except for the faces, open Invert.
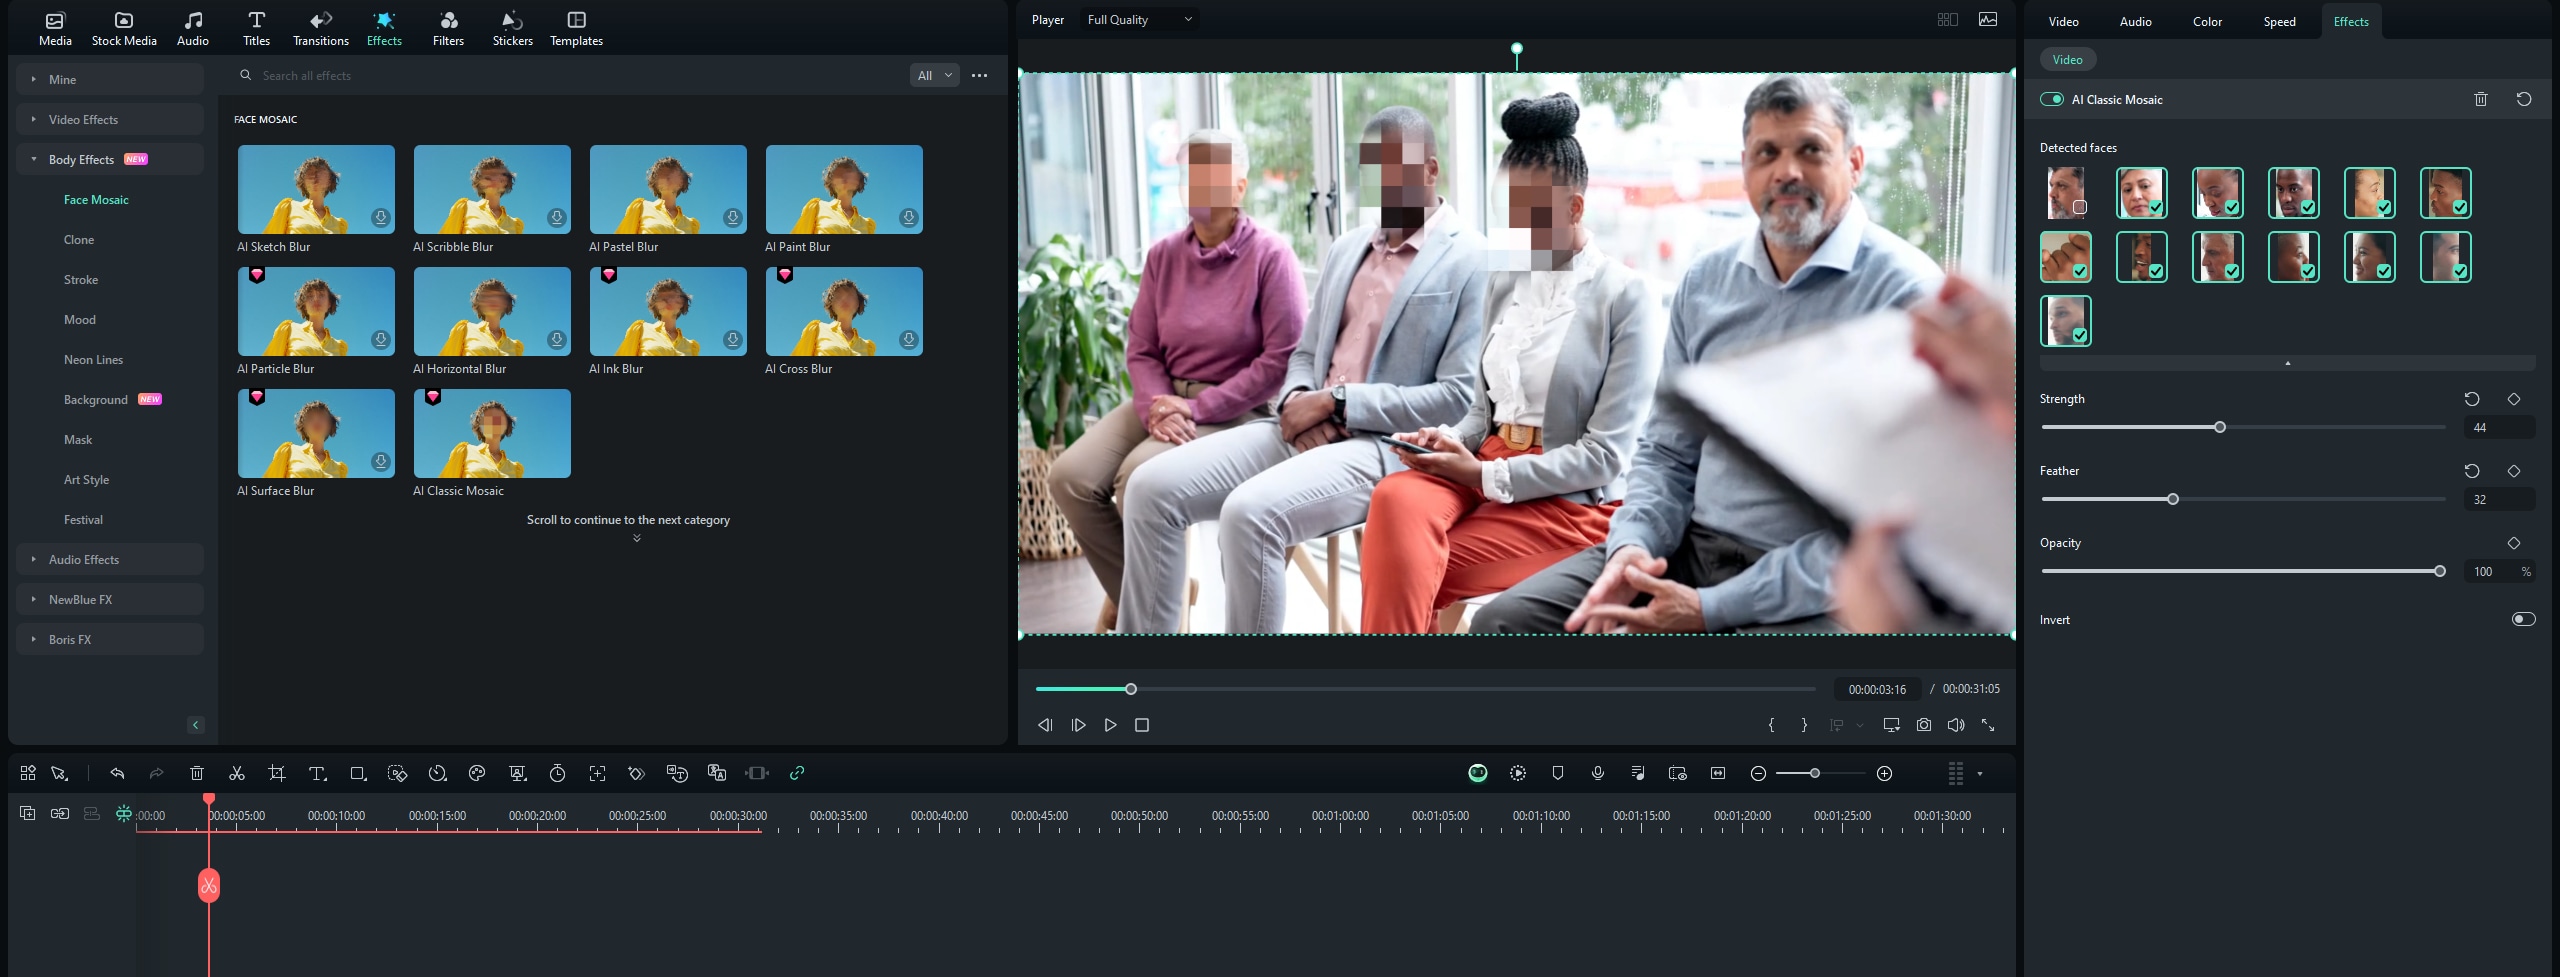
To remove blur from a face, simply Deselect the face.
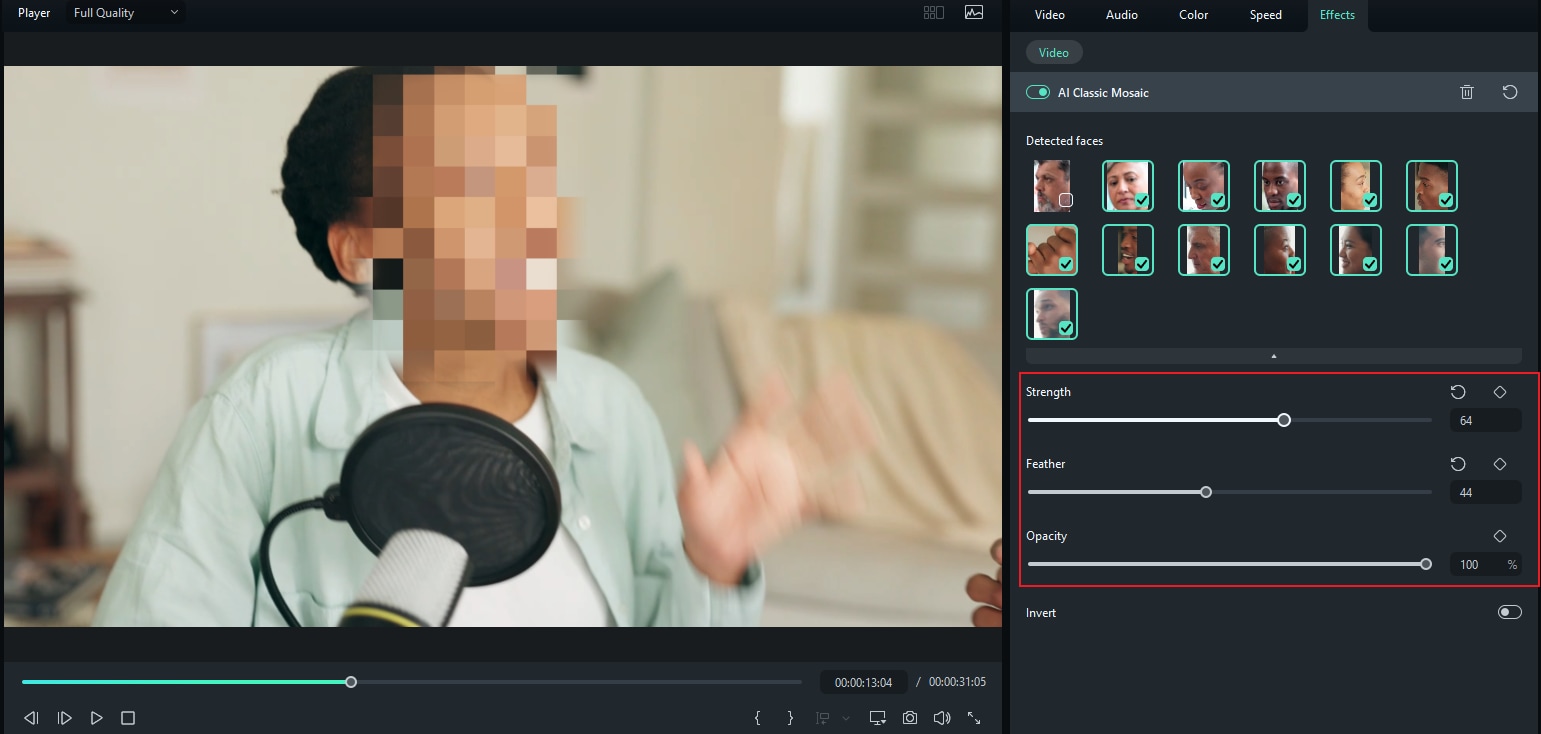
To adjust the blur effect, adjust blur Strength, Feather, and Opacity in the Property Panel.
Conclusion
Both Capcut and Filmora offer effective tools for blurring faces in video content. However, learning how to blur faces on Capcut can be stressful especially if you don't have experience using the mask tool or the keyframe feature. Filmora, on the other hand, provides automatic face tracking and blurring in a matter of seconds.
Simply pick a tool that best suits your editing style and preference, and go on to blur out the faces you don't want in your videos.


