
 100% Security Verified | No Subscription Required | No Malware


 ChatGPT
 Perplexity
 Gemini
 Claude
 Grok
Grok
Disney owns the rights to every photo taken by their PhotoPass photographers. The watermark serves as a visual copyright notice, discouraging unauthorized use or distribution of the images. But you can get past this by using a Disney PhotoPass watermark remover tool.
In this guide, you’ll learn exactly how to remove the Disney PhotoPass watermark without turning into a pixel criminal. We’ll explore tools that work, steps to follow, and what not to do because no one wants a blurry Goofy or a stretched-out castle.

In this article
Part 1: How to Get Rid of the Disney Photopass Watermark Directly

- Remove unwanted objects from videos & images in seconds.
- No manual masking—AI does the hard work for you.
- Preserve background quality with smart auto-fill.
- Works seamlessly on Windows, Mac, iOS & Android.


Removing the Disney PhotoPass watermark from your cherished photos is now more accessible, thanks to Wondershare Filmora’s advancements in AI technology. Its AI Object Remover offer a simple solution to achieve this. Below are steps to remove the watermark from Disney Photopass using Filmora:
Step 1: Launch Filmora and choose the AI object to remove the watermark from Disney Photopass

 secure download
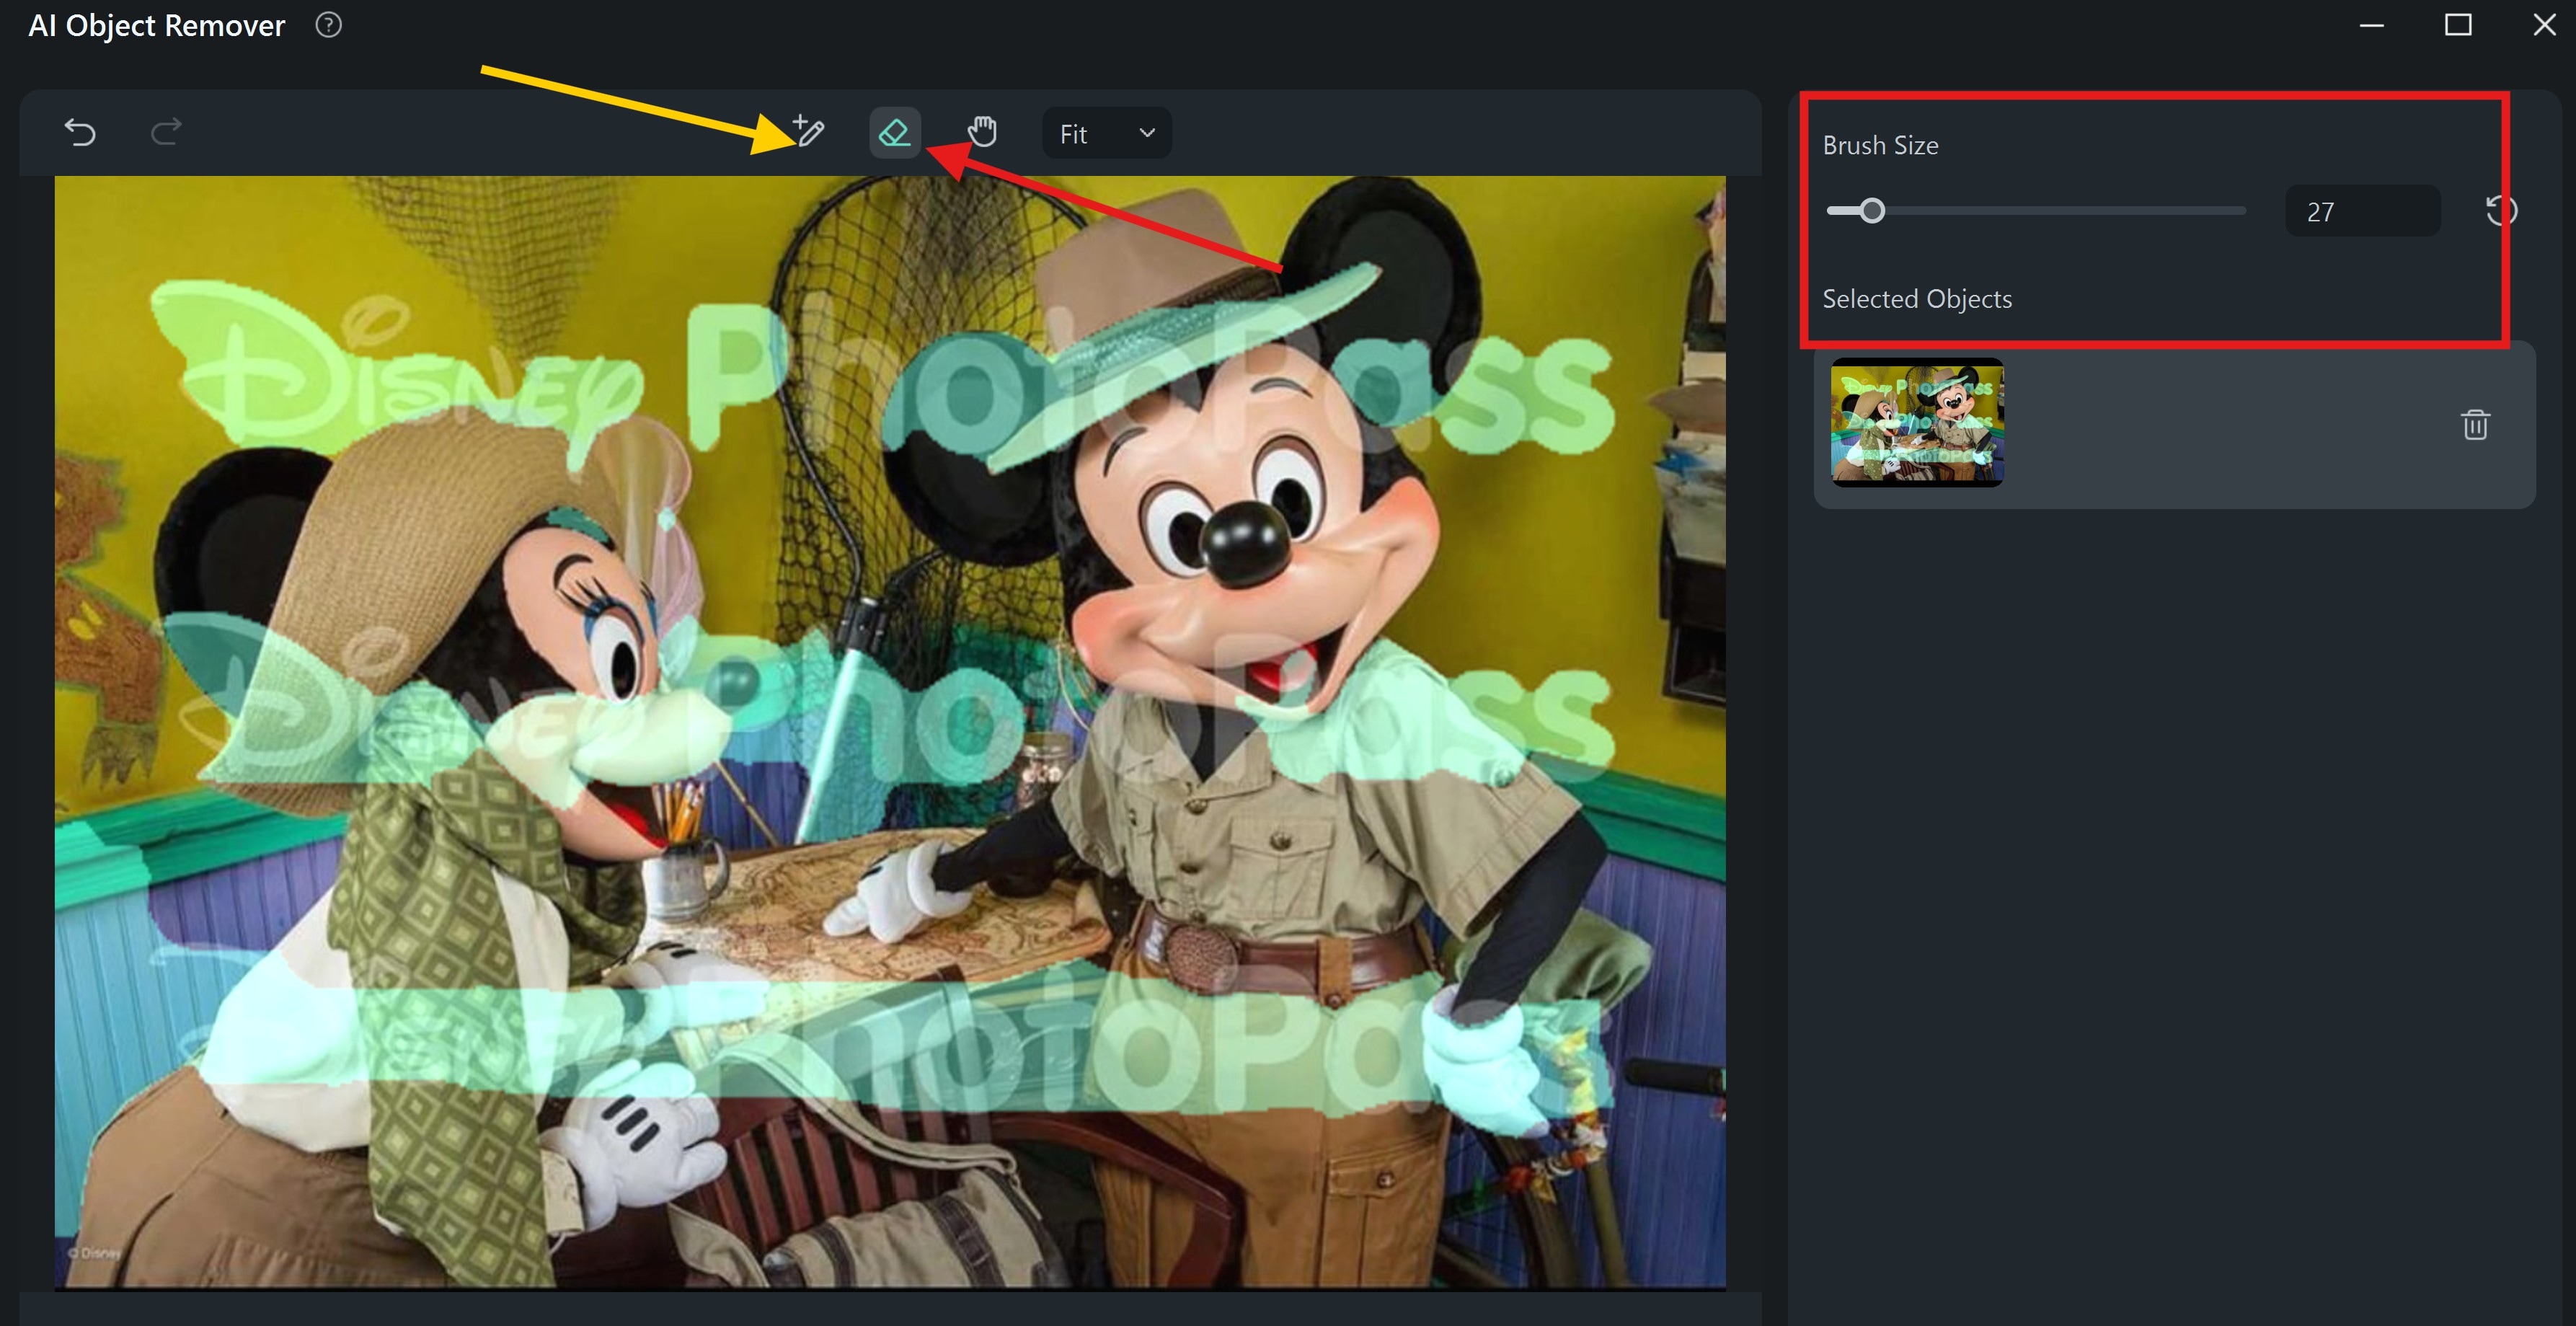
Step 2: Import the Disney PhotoPass image. Highlight the watermark area using the 'Smart Brush' to paint over the watermark area. If you accidentally highlight areas without watermarks while using the brush or if an overlay appears, use the eraser tool to clean up the unwanted highlights. There is an option to adjust the brush and eraser size for precision.
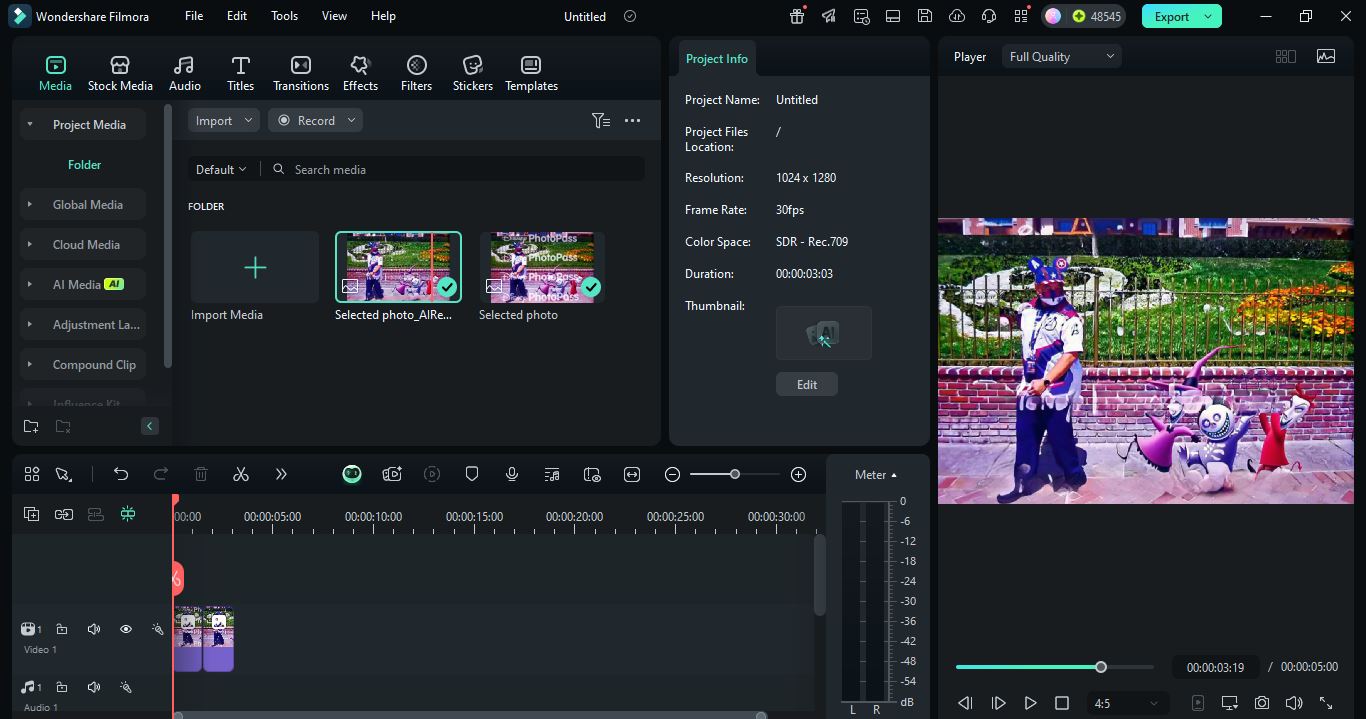
Step 3: Click 'Remove' to automate the Disney Photopass remove watermark process. Review the edited image to ensure satisfaction. The new image will be uploaded in the project media section.
Step 4: Preview the image; if you are not satisfied, you can repeat the Disney Photopass remove watermark procedure. Export and save the image when you are done.

Tips for Achieving Optimal Results and Maintaining Image Quality
When removing the Disney PhotoPass watermark using Filmora's AI Object Remover, adhering to best practices ensures both effective watermark elimination and preservation of image integrity.
- Use high-resolution, well-lit images for more accurate AI detection.
- Adjust the Smart Brush size to precisely target the watermark.
- Apply multiple passes for stubborn or complex backgrounds.
- Refine the result using tools like the clone stamp or healing brush.
- Export in high-quality formats (PNG/TIFF) to preserve image clarity.
Part 2:Are There Alternative Methods for Watermark Removal

Yes, there are alternative methods to remove the Disney PhotoPass watermark. Each technique offers distinct advantages and challenges.
1. Cropping the Watermark Area

Cropping is the simplest way to eliminate the Disney PhotoPass watermark by cutting it out of the image frame. This method works best when the watermark is placed near the edges of the photo. However, it may remove important visual elements if the watermark overlaps with key subjects.
2. Replacing with a New Image or Text

This method covers the watermark by placing a sticker, text, or another image over it. It's a creative solution, especially when blending the replacement naturally into the photo. This technique works best when the watermark is in a less detailed part of the picture.
3. Blurring or Smudging the Watermark

Blurring or smudging involves using photo editing tools to reduce the visibility of the watermark without removing it entirely. This method is useful when the watermark is over a plain background or an unimportant area. It requires a steady hand and attention to detail for a clean look.
Please note that the mentioned alternatives may not be the best option to remove the watermark from Disney Photopass images. This is because the placement of the Disney PhotoPass watermark might prevent cropping, blurring, or covering with stickers without affecting important parts of the image in some images. These methods work best if the watermarks are positioned at the edges or corners of photos.
Part 3: Which Watermark Removal Method Is Best?

When choosing a method to remove the Disney PhotoPass watermark, your top priority might be preserving both the image quality and original size. Let’s compare the Filmora AI Object Remover with the traditional alternatives:
Filmora’s AI Object Remover uses artificial intelligence to detect and erase watermarks while automatically blending the background. Unlike manual editing, this tool intelligently fills the removed area using surrounding pixels. It avoids the common flaws seen with cropping, smudging, or overlays.
Here's how it stacks up against the alternatives:
| Method | Image Size Preserved | Image Quality Maintained | Editing Skill Needed | Natural-Looking Result |
| Filmora AI Object Remover | ✅ Yes | ✅ Yes | ❌ No | ✅ Yes |
| Cropping | ❌ No | ✅ Yes | ❌ No | ✅ Yes |
| Blurring/Smudging | ✅ Yes | ❌ No | ✅ Yes | ❌ No |
| Replacing with Image/Text | ✅ Yes | ❌ No | ✅ Yes | ❌ No (unless done skillfully) |
From the table, Filmora’s AI-powered remover stands out as the best option. What’s more, it also allows you to remove watermarks from video. It is best if you want to maintain the full size and quality of their photo without spending hours editing. It’s especially ideal when the watermark sits over detailed backgrounds or important visual areas.
Note: Legal and Ethical Considerations
It's crucial to address the legality of removing watermarks from copyrighted images. The Digital Millennium Copyright Act of 1998 prohibits the removal of watermarks intended to protect copyright. Engaging in such actions may be considered a violation of the law.
Ethically, removing watermarks without permission undermines the photographer's rights and the value of their work. It's advisable to respect intellectual property and consider purchasing official, watermark-free versions for personal use.
Conclusion
Removing a Disney PhotoPass watermark can enhance how you preserve magical memories. While many users ask how to get rid of the Disney PhotoPass watermark, the right method depends on quality, intent, and ease of use.
We explored several options. Cropping may be fast, but it reduces photo size. Blurring might work, yet it risks visible damage. Replacing parts with text or images is creative, though often less natural.
The main limitation of these methods is that Disney PhotoPass images often contain multiple watermarks spread across the photo, not just in one corner. In such cases, cropping, blurring, or covering with stickers or text may damage the image's composition, reduce its quality, or cover important details. These techniques might work for simple edits, but they are rarely effective for preserving the full visual appeal of your Disney memories.
What you need to overcome this challenge for multiple watermarks is Filmora’s AI Object Remover. It removes watermarks from all angles while keeping your image sharp.
