In this article
Understanding Audio Gain
Before sound reaches your audience, it goes through various stages: recording, editing, mixing, and finally, output. Managing the volume at each of these stages is called gain staging, and it all starts with getting the gain right.
That's why understanding the audio gain definition is a must for producers aspiring to become professional sound engineers. This guide explains "what is gain in audio" and where gain staging matters most.
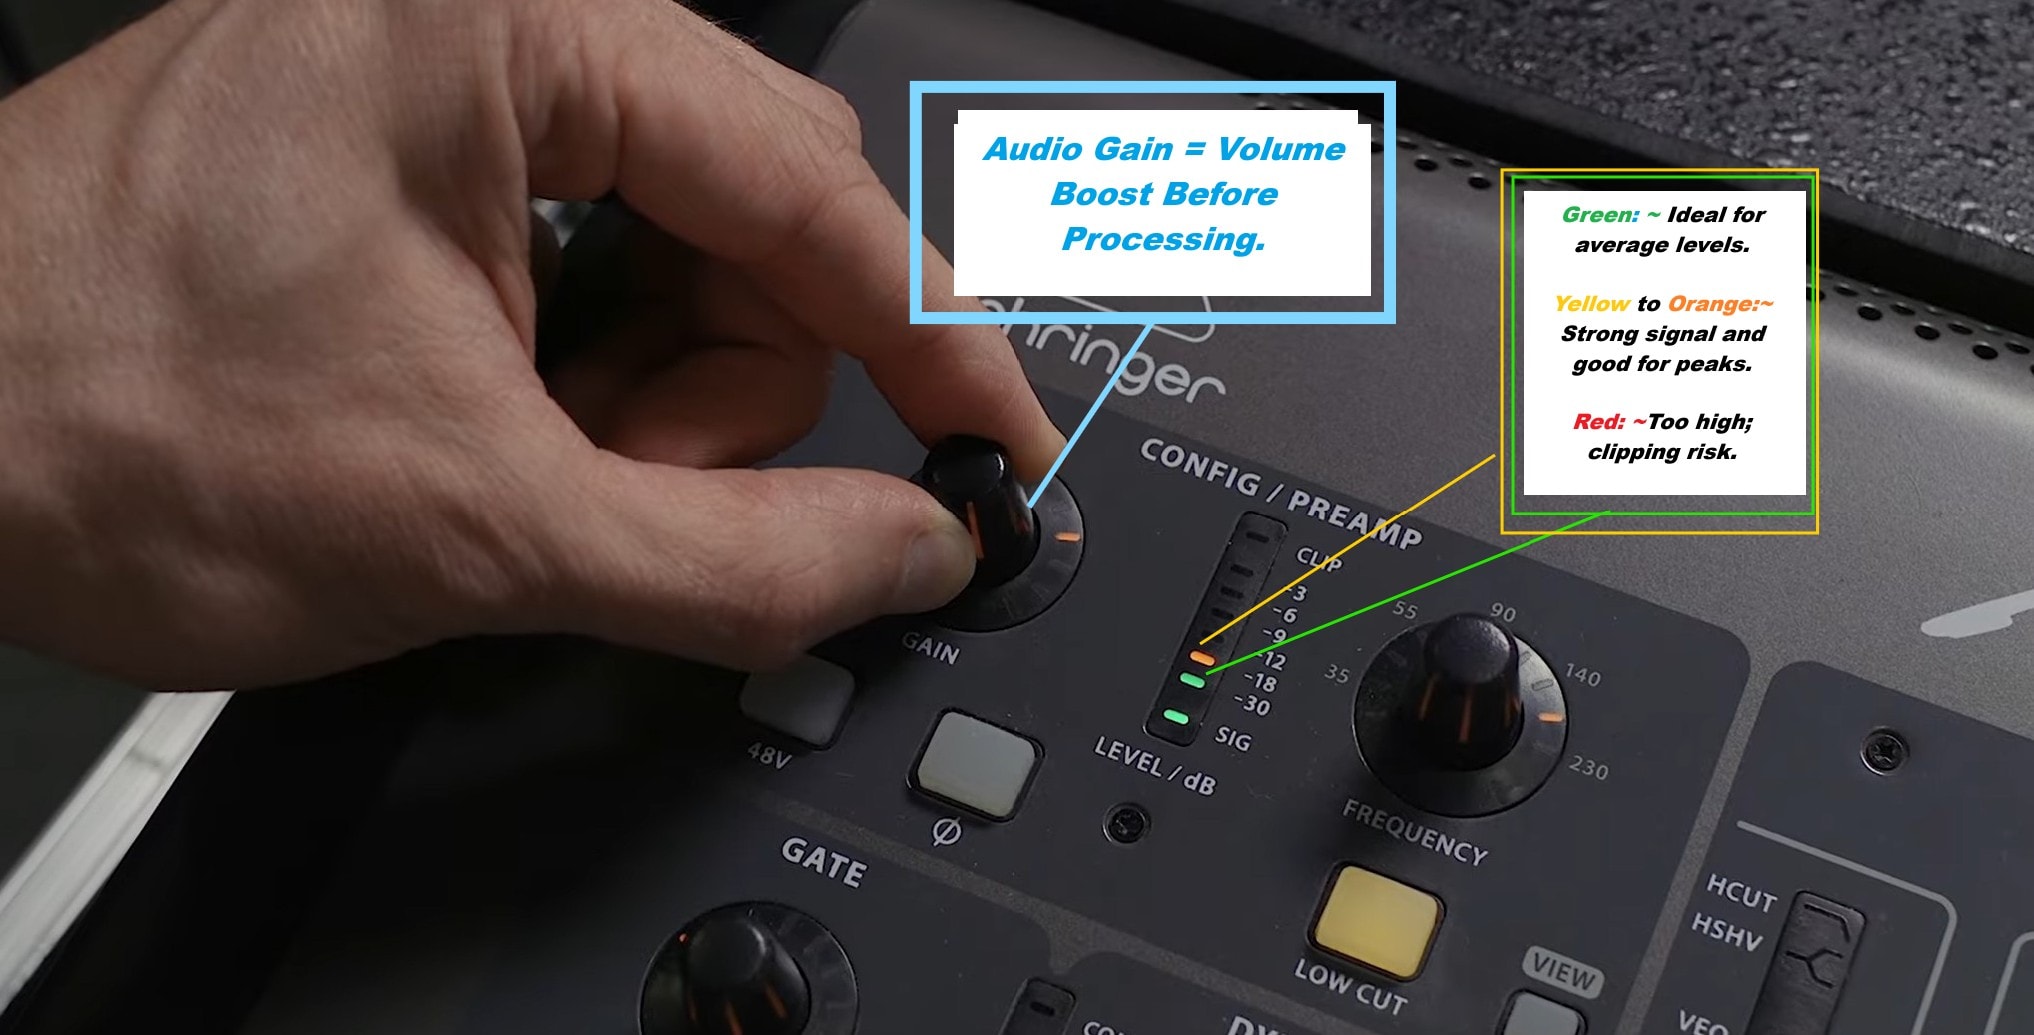
Audio gain refers to the input strength you apply to a signal, allowing it to adjust the amount of signal that enters the chain. Technically, it refers to the level of amplification applied to an audio signal before it passes through the rest of your equipment.
To answer the question, "What is gain in sound when recording? It helps you boost a quiet sound, like a soft vocal or distant guitar, so it hits the ideal level for mixing. This brings us to decibels (dB), the unit used to measure sound levels.
Key Elements of Audio Gain
In gain staging, dB levels help you balance sound without distortion or unwanted noise. Even a few dB can change the entire feel of your recording, so understanding the term "what is gain in sound?" and dB levels are key to managing the key elements of sound gain.
What Is "Clean Gain" in Audio Equipment?
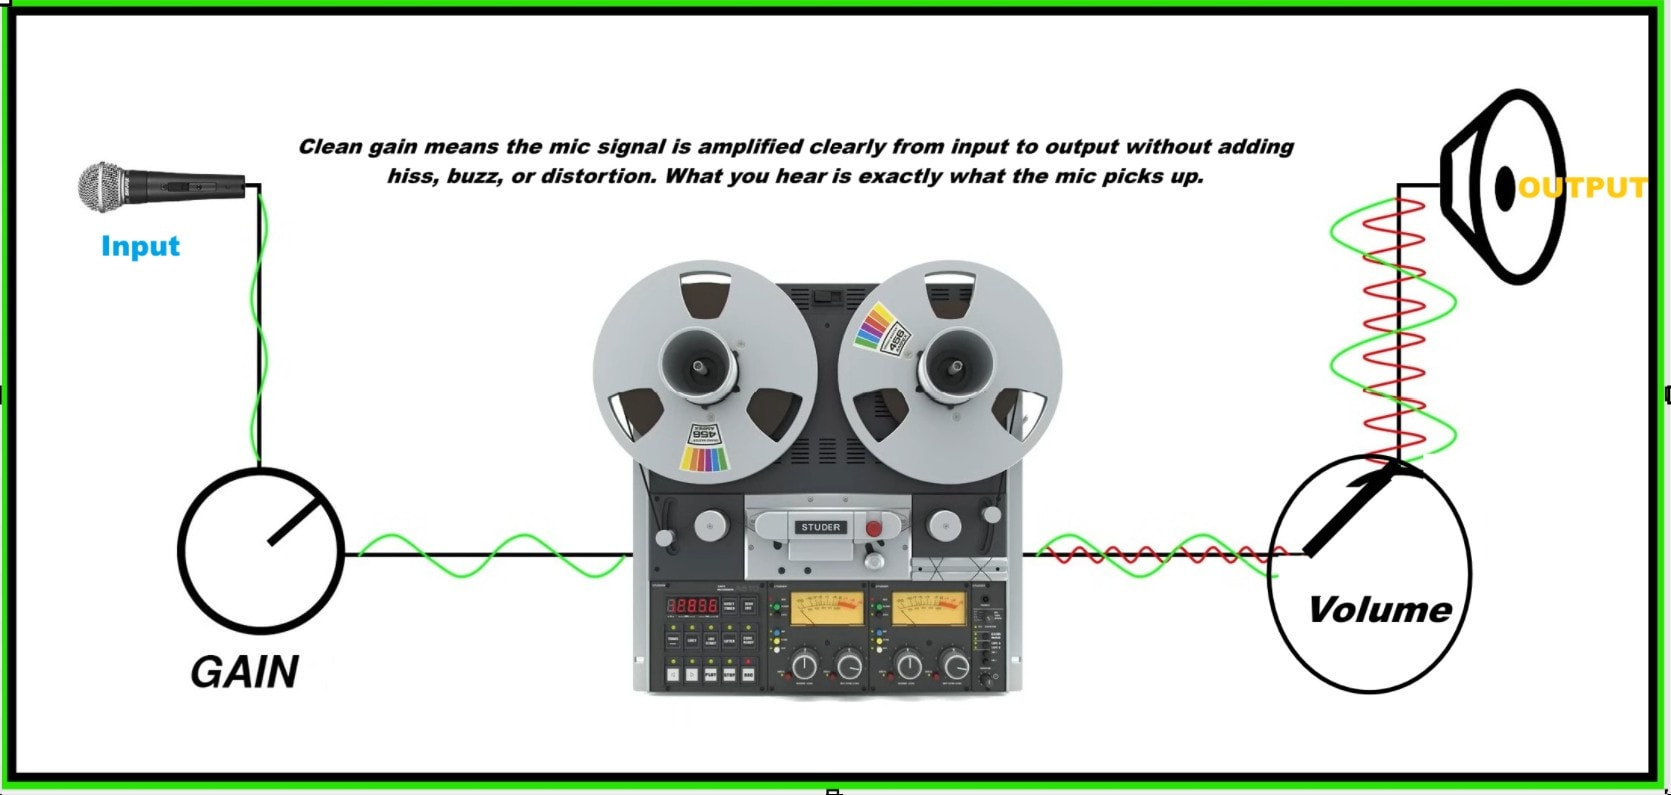
Clean gain means boosting a signal without adding hiss, buzz, or distortion. You get only what the mic captures, nothing more, nothing less. In pro setups, what "clean gain" in audio equipment comes down to is quality. A quiet preamp gives you that clean lift, so your vocal or guitar stays crisp.
Clean Gain vs. Distortion
Clean gain lets the tone breathe. You hear details. No fuzz, no grain. Distortion, on the other hand, occurs when the signal is amplified beyond what the equipment can handle, causing it to break up or sound harsh. Hence, clean gain keeps your audio clear and natural, while distortion alters the sound, often unpleasantly or unintendedly.
Understanding Gain Staging and Signal Flow
Gain staging means setting the right volume at every step in your audio path to avoid distortion or weak signals. Signal flow is the order the audio travels, like mic to interface to DAW, and getting gain right at each stop keeps everything balanced. You shape the signal flow to keep it strong and clean.
Audio Gain vs. Volume vs. EQ
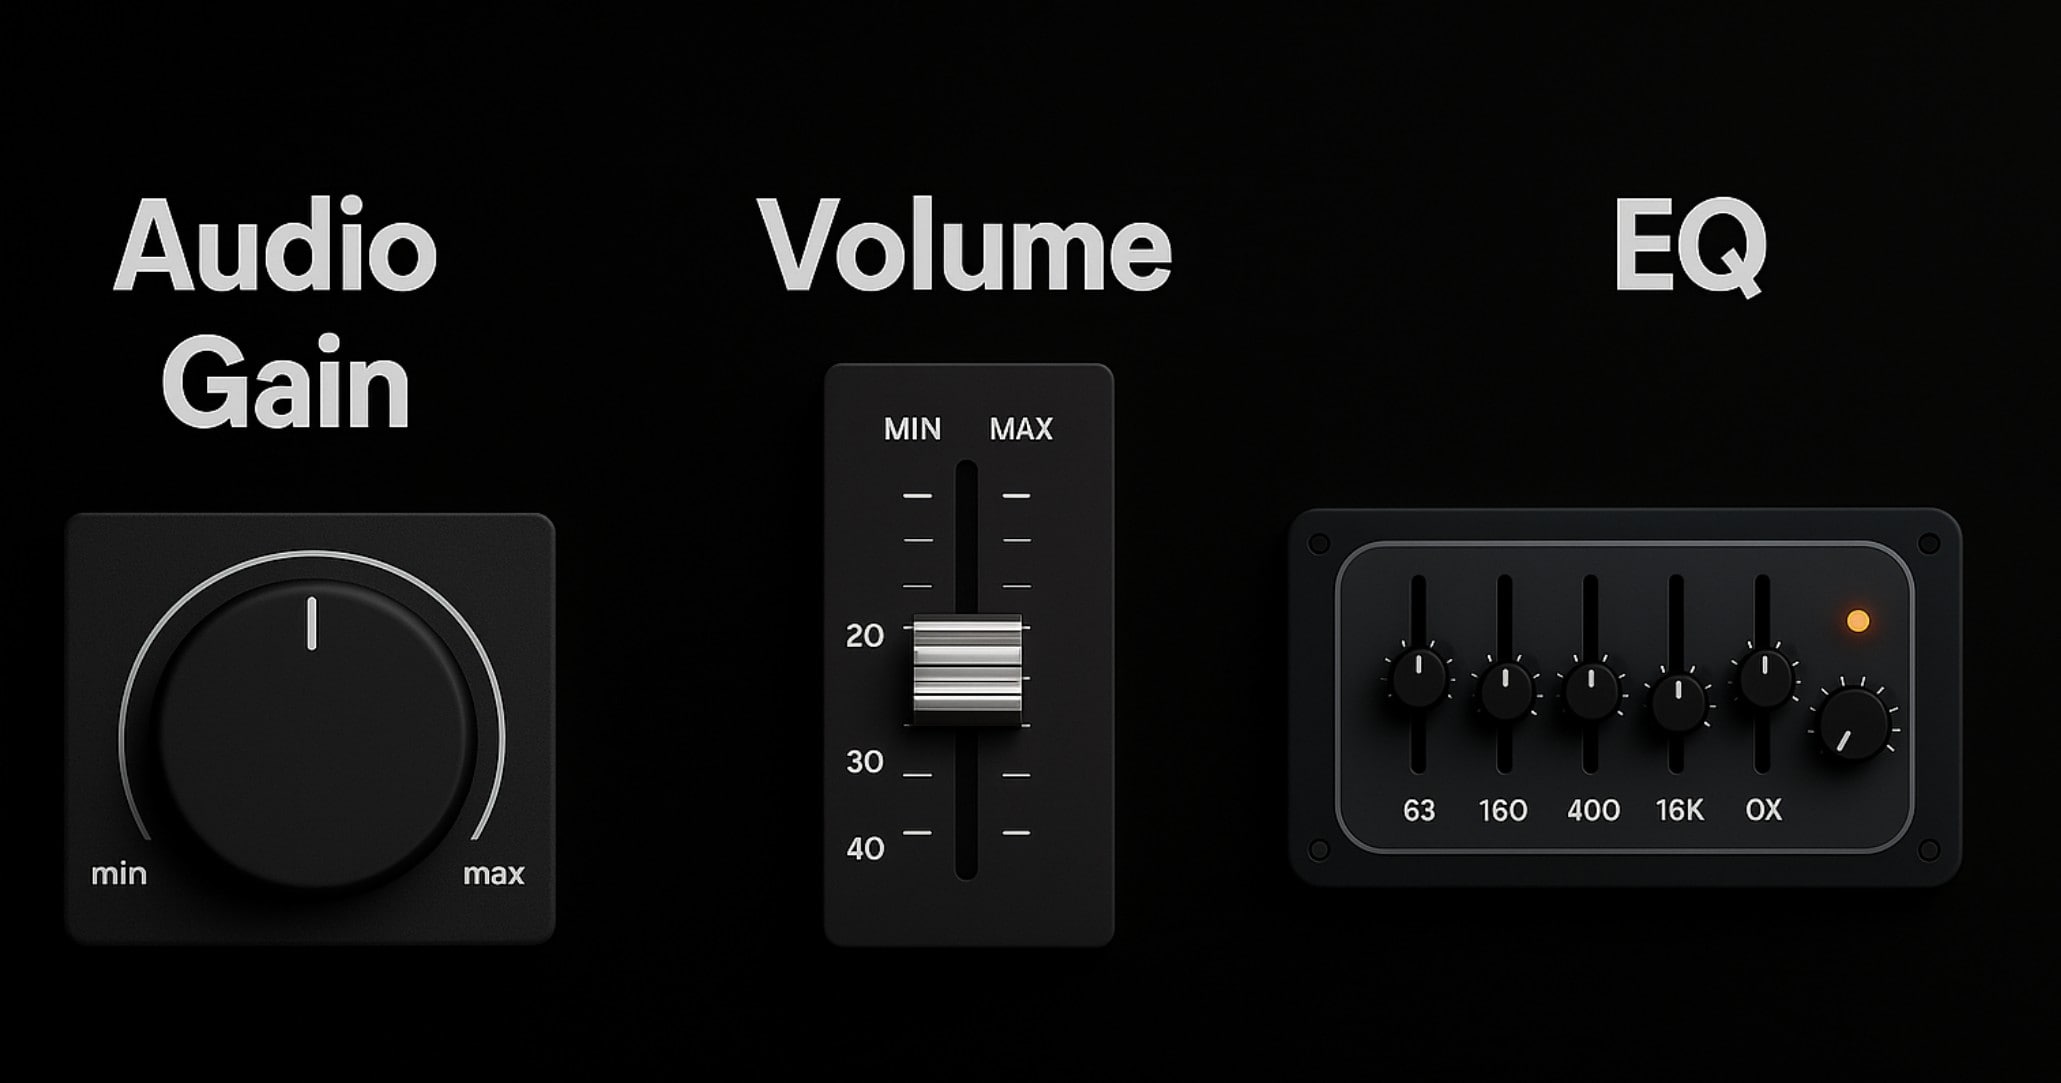
Audio gain is like your sound's first boost; it controls how strong the signal is before anything else happens. Volume comes after, adjusting how loud it sounds to your ears. EQ, or equalization, lets you shape the tone by turning up the highs, smoothing out harsh spots, or making vocals shine.
Comparison Table: Gain vs Volume vs EQ
|
Feature |
Audio Gain |
Volume |
EQ (Equalizer) |
|
What it does |
Boosts input signal level |
Controls playback loudness |
Adjusts sound tone and frequencies |
|
Stage used |
First (before effects or volume) |
Last (after gain and EQ) |
Mid-stage (after gain, before volume) |
|
Affects quality |
Yes (adds noise or distortion) |
No (only output loudness) |
Yes (shapes tone and clarity) |
|
User control |
Set during recording or editing |
Set during playback or mixing |
Set during mixing or mastering |
Real-World Use Cases: Where Gain Staging Matters Most
In real production rooms, audio gain decisions can break your entire mix. Ask any producer, and they'll tell you that proper gain staging sets you up for success. They help keep your signal clean and full. Proper gain staging starts at the mic and flows through your chain. If your input is weak or too hot, everything after it suffers.
Real-Life Applications of Audio Gain
Let's break down how it works across real situations you've probably faced (or will soon).
Examples in Popular Media


Why Your Audio Still Sounds Off: Gain Errors Explained
You've set your levels. Still, something sounds broken. Below are the most common gain errors and how to avoid them.
How Gain Affects Audio Clarity, Noise, and Overall Quality
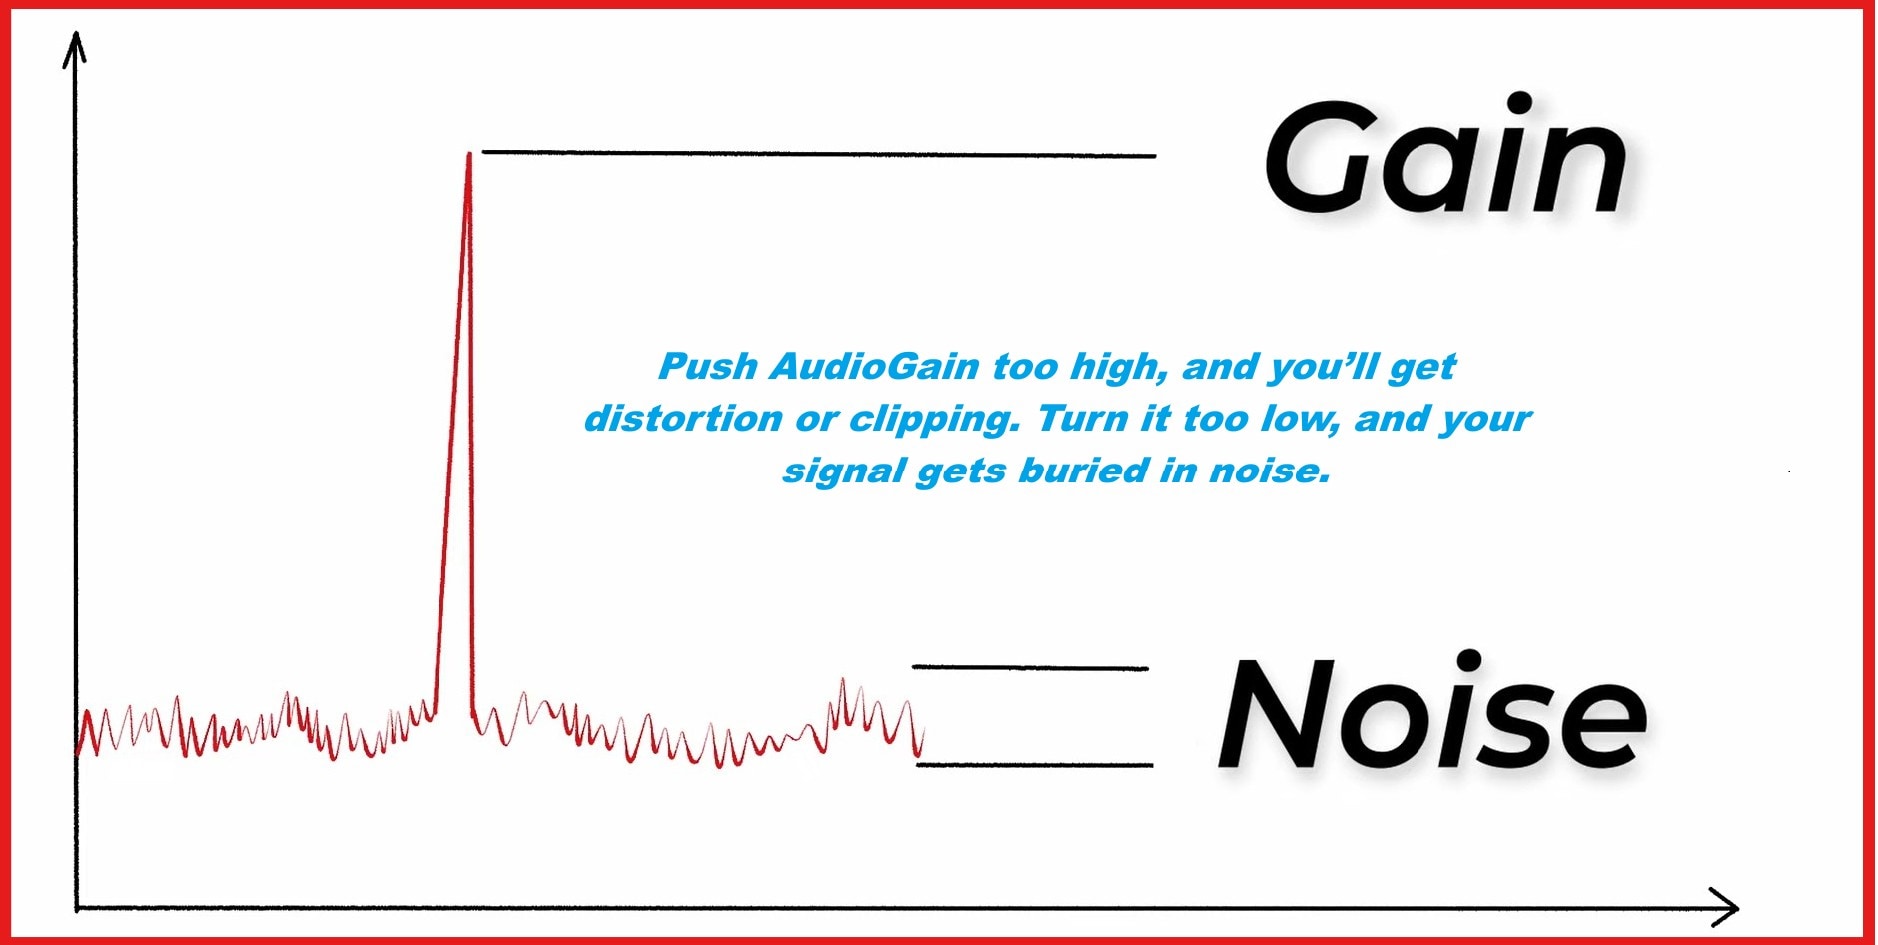
When you adjust audio gain, you set the tone for your entire recording. Correct levels preserve sound clarity. Push it too high, and you'll get distortion or clipping. Turn it too low, and your signal gets buried in noise. Engineers call this the noise floor, and you'll need clean, strong sound gain to keep it down.
Managing the Noise Floor with Gain
Noise floor is the quietest background noise your system captures. You can't eliminate it, but you can manage it. Using noise reduction plugins during mixing helps eliminate unwanted background sounds like hiss, hum, or static without damaging the clarity of your audio.
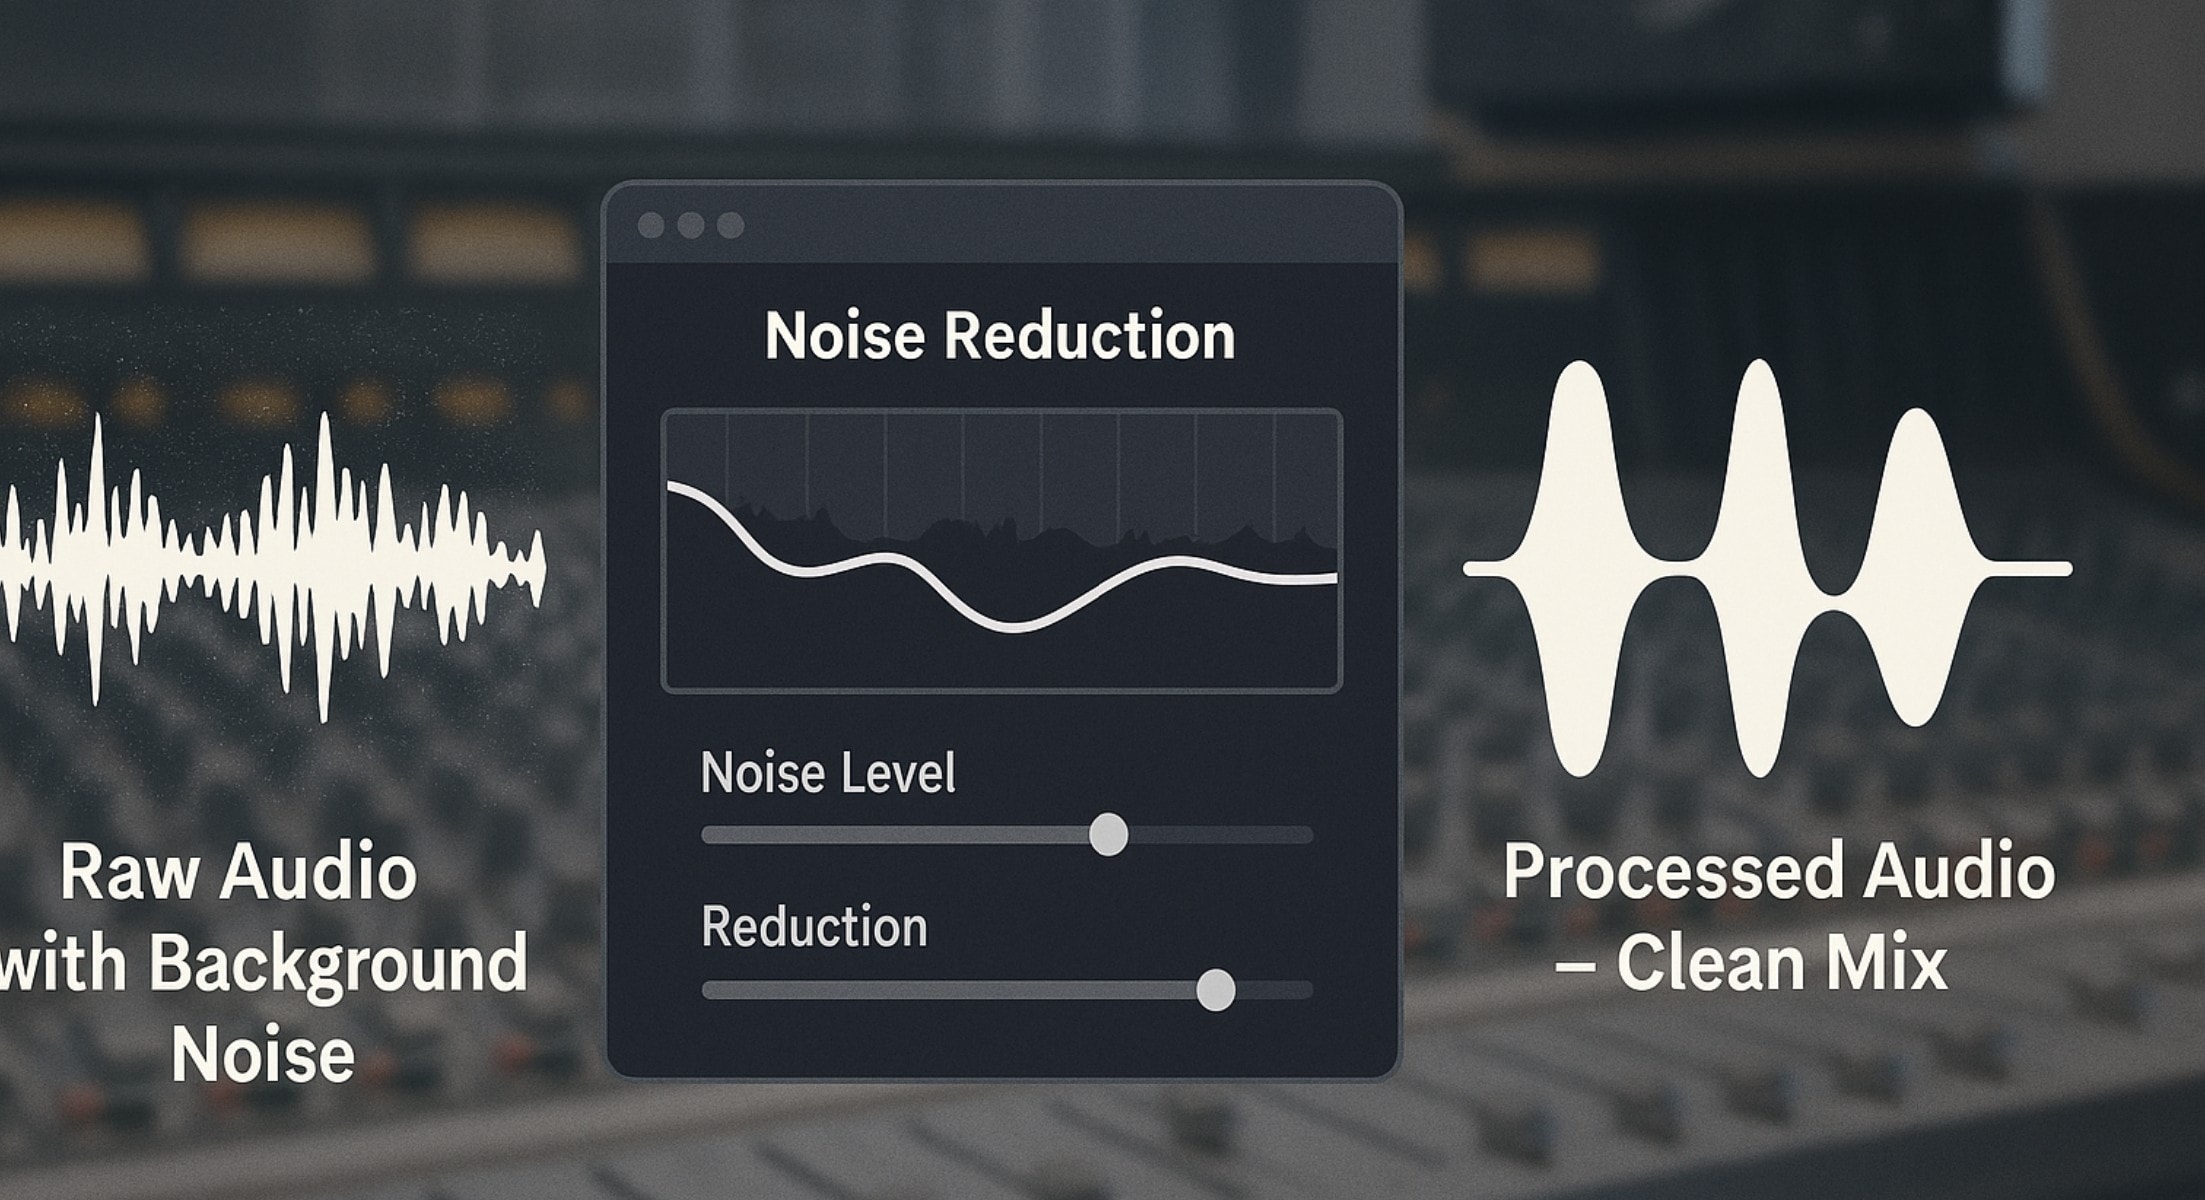
Mixers and DAWs include noise reduction plugins. You can use them after proper gain staging. They help you get a crisp, focused sound. Noise stays low. Clarity stays high.
How to Set the Right Audio Gain
Setting the right audio gain depends on your tool, voice, or instrument. You want strength, without pushing too far. Start low and then increase gradually, watching your meters.
Aim for peaks around -12 dBFS to maintain a clean signal with sufficient headroom. Avoid setting it too high, which causes clipping, or too low, which introduces noise. Always adjust gain at the preamp or mixer, so later volume changes won't affect signal quality.
Below is a breakdown of expert-level gain staging settings.
|
Scenario |
Target Levels |
Gain Settings/Notes |
|
Vocals (recording) |
-18 dBFS avg / -12 dBFS peaks |
Boost mic preamp gain until peaks hit around -12 dBFS. This leaves clean headroom and avoids overload |
|
Electric Instruments (DI) |
Peaks between -12 dBFS and -6 dBFS |
Set interface gain so clean peaks don't hit 0 dBFS. Aim for -12 to -6 dBFS peak range. |
|
Acoustic Instruments (mic'd) |
-18 dBFS avg / -12 dBFS peaks |
Treat like vocals: mic the source, then adjust gain so peaks sit near -12 dBFS. |
|
Streaming / Podcasting |
-18 to -12 dBFS input peaks |
Set mic gain so levels fall in this range; add compression and makeup gain only after tracking, not during initial gain setting. |
|
Condenser Mics |
Peaks: -18 to -12 dBFS |
Use +48 V phantom power. Adjust gain so peaks land near -12 dBFS. Avoid hiss, mic proximity, and pad switches matter. |
|
DAWs (General) |
-18 dBFS RMS avg, peaks ≤ -6 dBFS |
Use RMS and peak meters to maintain headroom. Keep the average around -18 dBFS so plugins function optimally. |
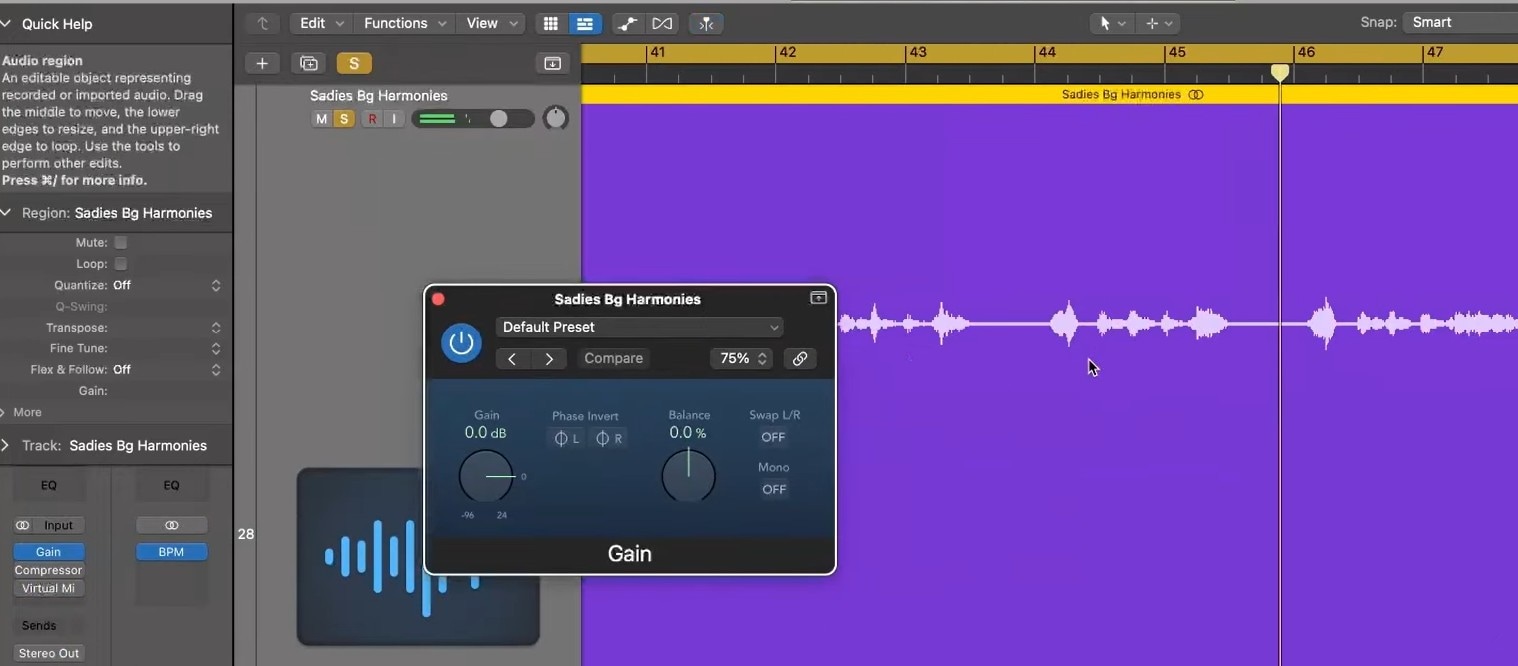
Adjusting Audio Gain in Sound Editors
In most editing tools, you edit audio after recording to make it cleaner and correct some mishaps that happened when recording. Tools like Wondershare Filmora let you tweak audio after recording. You can:
- Normalize audio to a set level or boost volume.
- Apply effects like equalization to smooth volume shifts and enhance clarity.
- Remove hum, hiss, or wind effects, etc.
How to Use Audio Gain in Filmora
Got a voice clip that sounds too soft or suddenly too loud? Filmora lets you fine-tune audio gain so your sound stays clean and balanced. Here's how to fix it in three quick steps.

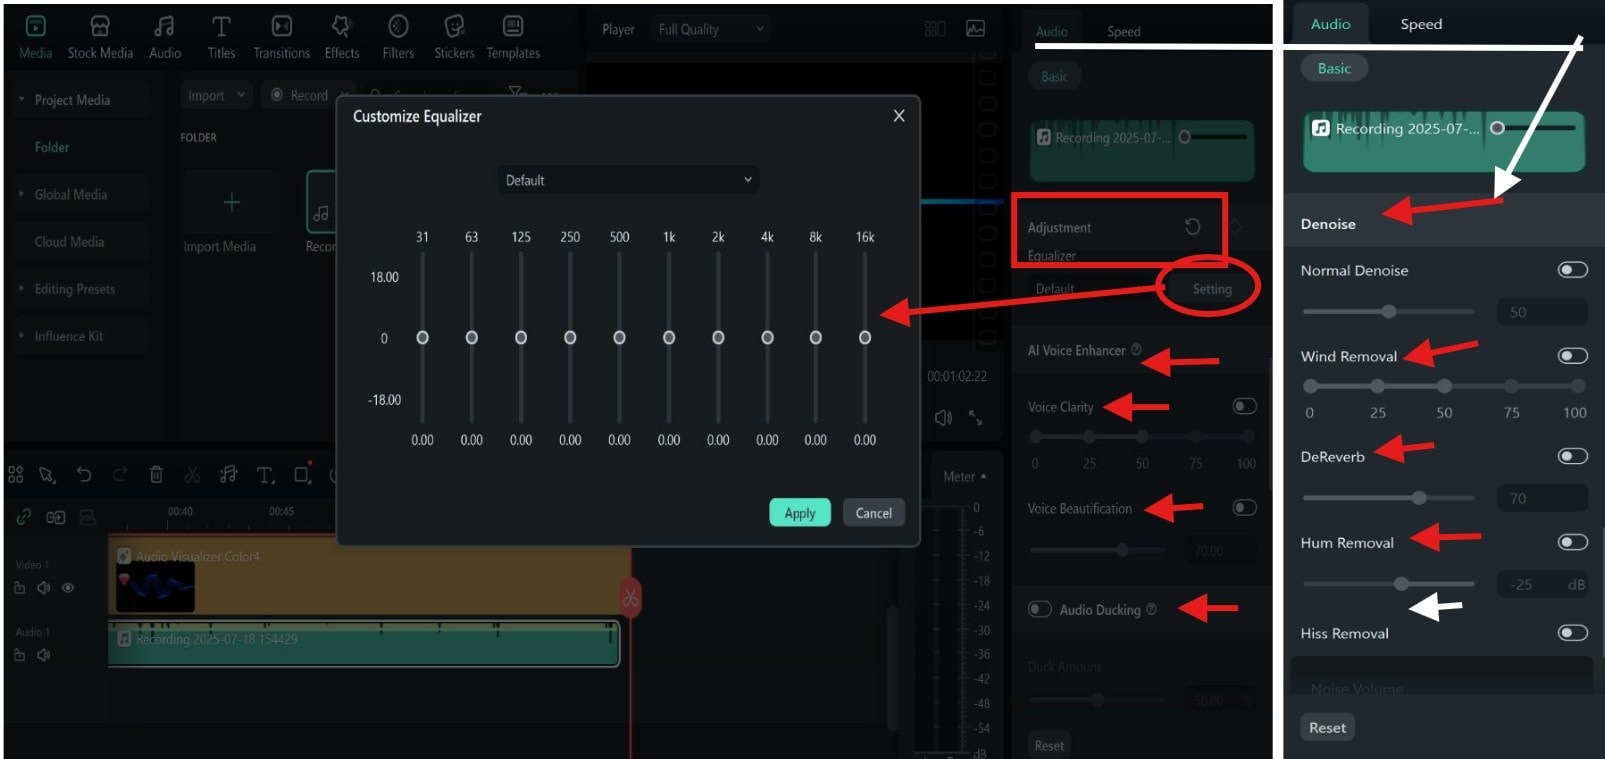

Pro Tips for Editing Audio in Filmora
Conclusion
If you've been asking, What does gain mean in audio recording?, the answer is simple: it controls your sound at the source. Mess it up, and your recording feels flat, gritty, or harsh.
Balancing your audio gets a whole lot easier with Filmora. If you didn't set the right audio gain while recording, no worries. Filmora gives you tools to clean it up after. You can boost quiet parts, smooth out peaks, and make everything sound just right.
FAQ
-
What is a Good Audio Gain Level?
A good audio gain level sits between -12 dB and -6 dB for a clean signal. This range avoids distortion while keeping your voice clear and strong. Always check levels using headphones and input meters. -
What Happens if Gain Is Too High?
If the gain is too high, your sound will clip and distort. This ruins the clarity and introduces harsh noise into your mix. Even the best tools can’t fully fix audio ruined by over-gain. -
Is Normalization the Same as Gain?
No, normalization and gain are not the same thing. Audio gain boosts the signal at the input stage before processing. Normalization adjusts the final loudness after editing is done.