Filmora
Filmora - AI Video Editor
Edit Faster, Smarter and Easier!
OPEN

What is Rotoscoping in Video Editing?

Rotoscoping is the frame-by-frame process of isolating or removing elements in video to create visual effects and composites.
James Hogan
by Video Tech Expert
updated Aug 27, 25
In this article
    1. Definition
    2. Key Elements of Rotoscoping
    1. Common Applications
    2. Common Mistakes to Avoid

Understanding Rotoscoping

If you’re new to editing, you might have heard the term but still wonder what rotoscoping animation is. At its core, rotoscoping is one of the most important techniques in visual effects and compositing. It’s widely used in filmmaking, advertising, and even social media edits.

understanding what rotoscoping is
Definition

Rotoscoping is a technique where editors trace over a subject in video footage frame by frame to separate it from the background.

In video editing, rotoscoping is used to replace backgrounds, remove unwanted objects, or apply visual effects. Unlike basic masking, which works on still or simple areas, rotoscoping provides detailed control across multiple frames. It allows editors to create precise cutouts of moving elements when standard keying methods, such as green screen, aren’t practical.

Key Elements of Rotoscoping

Tracing
Outlining objects or characters in each frame to create precise masks.
Frame-by-Frame Control
Adjusting masks across multiple frames to keep the subject isolated, even when it moves.
Realistic Motion
Ensuring the masked subject interacts naturally with the background or added effects.

How Rotoscoping Is Used in Video Production

Even after knowing what rotoscoping is in video editing, it goes beyond just separating a subject from its background. It plays a huge role in modern production, powering everything from blockbuster films to short social media edits.

Common Applications

  • Animations
  • Rotoscoping began as a tool for animators who traced live-action footage to create lifelike movement. Today, it’s still used to mix animation with real footage, for example, stylized outlines in music videos or commercial ads.

  • Visual Effects (VFX)
  • In modern filmmaking, rotoscoping is useful for background replacement, object removal, and adding CGI. Explosions, fantasy creatures, or futuristic landscapes often rely on rotoscoped masks to blend naturally with live actors.

  • Motion Graphics
  • Designers use rotoscoping to let graphics interact with real footage. Titles can slide behind a moving person, or visual particles can flow around a subject without breaking the scene’s realism.

    Common Mistakes to Avoid

    Lack of Precision

    Skipping details while tracing can cause masks to shift or miss parts of a subject.

    How to avoid

    Always zoom in on edges and adjust paths carefully across frames.

    Ignoring Motion Blur

    Fast-moving subjects naturally create blur, and ignoring it makes edits look unnatural.

    How to avoid

    Incorporating feathering or softer edges helps maintain realism.

    Choppy Edges or Poor Masking

    Harsh lines around a subject can ruin the effect.

    How to avoid

    Use smooth curves and refine the mask so the subject blends seamlessly with its new background or effects.

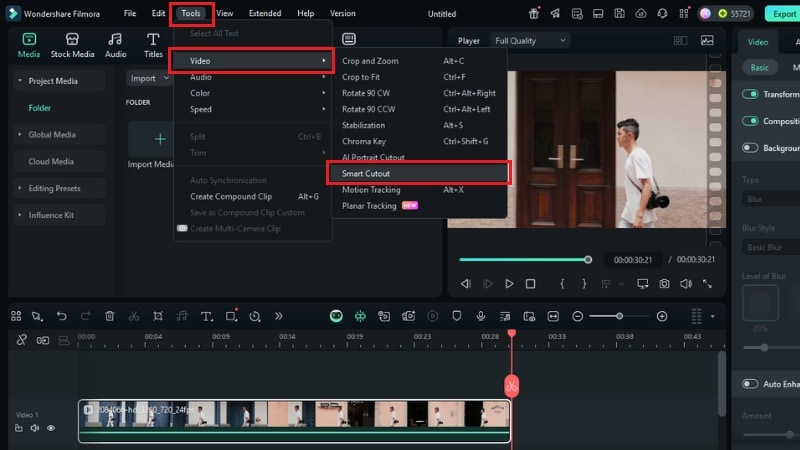
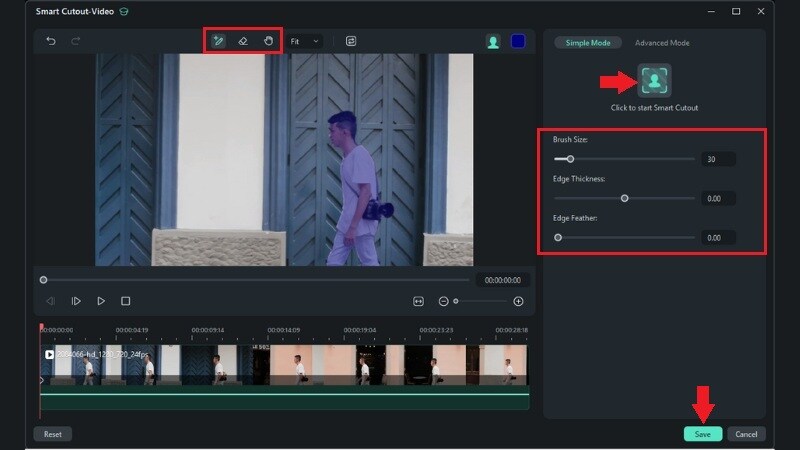
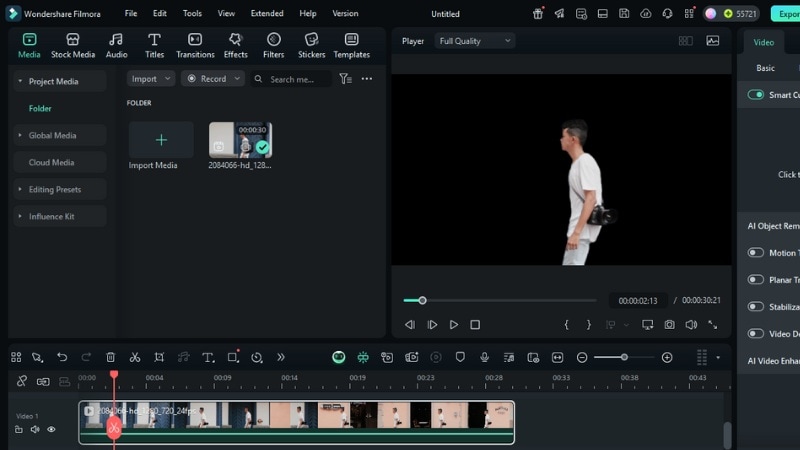
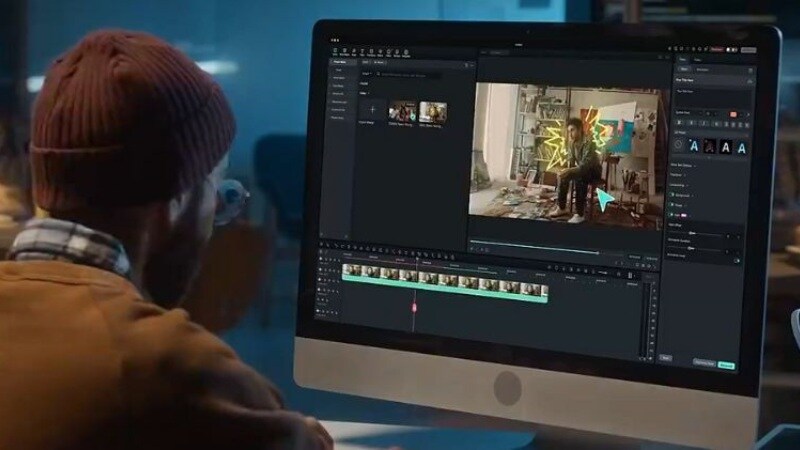
    How to Use Rotoscoping in Filmora

    Rotoscoping might sound advanced, but Wondershare Filmora’s AI Smart Cutout feature makes it easy. Instead of manually tracing frame by frame, it lets you isolate people, objects, or backgrounds in just a few clicks.

    how to use rotoscoping in filmora

    Step-by-Step Tutorial with Filmora

    Here’s how you can apply the rotoscoping technique in Filmora using the AI Smart Cutout feature:

    Step 1
    Access the AI Smart Cutout Tool: Open Filmora and drag your video clip onto the timeline. Select the clip you want to edit, then go to the toolbar and choose the Video > AI Tools > Smart Cutout option.
    Step 2
    Apply the AI Smart Cutout: Use the Brush tool to highlight the subject or area you want to keep. Filmora’s AI will automatically detect edges and create a mask. You can adjust settings like Brush Size, Edge Thickness and Edge Feather for a cleaner mask.
    Step 3
    Refine and Preview: Click Start Smart Cutout to let Filmora process the selection. Once done, click the Save button to apply the changes. Return to the editing workspace for further editing like replace the background and apply visual effects.
    import your footage
    apply ai smart cutout
    refine and preview
    Try It Free Try It Free
    qrcode-img
    Scan to get the Filmora App
    secure-icon Secure Download

    Pro Tips for Rotoscoping in Filmora

    Use Feathering on Edges
    Soften the mask edges for a smoother blend, especially when replacing backgrounds or overlaying effects.
    Keyframe Masks
    If your subject moves a lot, add keyframes to adjust the mask dynamically across different points in the clip.
    Blend with Filters or Transitions
    Combine your cutout with Filmora’s filters or transitions to make edits look natural.
    Filmora
    AI Video Editing App & Software
    Try It Free Try It Free
    qrcode-img
    Scan to get the Filmora App
    Best tool for making videos anywhere for all creators!
    Your Perfect First Video Edit Starts Here – No Experience Needed

    You May Also Like

    recom-article
    What is Video Bitrate? A Beginner's Guide
    author avatar
    James Hogan
    recom-article
    What is White Balance in Video Editing?
    author avatar
    James Hogan
    recom-article
    What is Timecode? How to Use Timecode in Video?
    author avatar
    James Hogan