Videos with moving text have more visual appeal and viewer engagement. It's a useful skill for making personal projects, promotional movies, and content for social media. With the help of this lesson, you will be able to create dynamic text animations.
Animated or moving text enhances professionalism and originality. It successfully draws in viewers and delivers information. After reading this tutorial, you can add several text effects to videos to increase their impact and engagement.
With the appropriate resources and methods, moving text into your designs is simple. Let's look at how to make attractive text animations that improve your storytelling using softwares.
In this article
Part 1. What Is Moving Text? And Why Add Moving Text to Videos?
Moving text refers to animated text that transitions smoothly across the screen. It can slide, fade, zoom, or appear in a typewriter style. Moving text emphasizes information and maintains viewer interest. It’s a powerful way to communicate messages effectively in videos.

Adding moving text to videos enhances the viewer's experience by highlighting essential details. It enhances the visual appeal and interactivity of content. Presentations, social media videos, tutorials, and ads frequently use moving text.
By adding moving text, you can make ordinary footage in your films more engaging. It enables the addition of artistic flair, background, and essential elements.
Now, let’s explore how to achieve these effects using different tools.
Part 2. How To Add Moving Text to Videos Using Software
Wondershare Filmora is well known for its broad functionality and ease of use. It's perfect for beginners and pros who want to add moving text to their videos. Filmora offers a selection of editable text effects and animations for all types of projects.
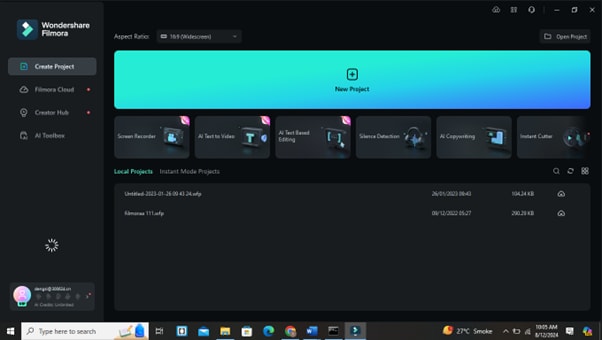
Filmora is compatible with all devices, including Windows and Mac, and is available on various platforms. The software's intuitive interface enables you to create videos that seem professional. Thanks to regular upgrades, you'll always have access to the newest features and tools.
You can quickly add text, add animations, and alter every feature in Filmora to suit your needs. Because of all of its characteristics, it's an excellent option for anyone who wants to include moving text in their videos.
Types of Moving Text Effects in Filmora
- Sliding Text: Text slides across the screen in a horizontal or vertical motion, perfect for subtitles or headlines.
- Fading Text: Text gradually appears or disappears, creating a smooth, gentle transition effect on the eyes.
- Typewriter Effect: Text appears to be typed out, letter by letter, adding a dynamic and engaging reveal.
- Zoom In/Out: Text starts small and enlarges or vice versa, drawing attention to key information or creating dramatic emphasis.
Video Guide for You To Learn Adding Text Animation
Step-by-Step Guide to Adding Moving Text in Filmora
Step 1: Open Filmora and Start a New Project
- Launch Filmora and select “New Project” to begin editing.
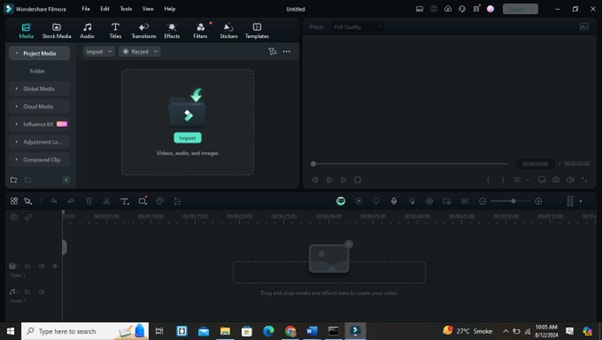
Step 2: Import Your Video
- Click on “Import” to add your video files to the media library, then drag them to the timeline.
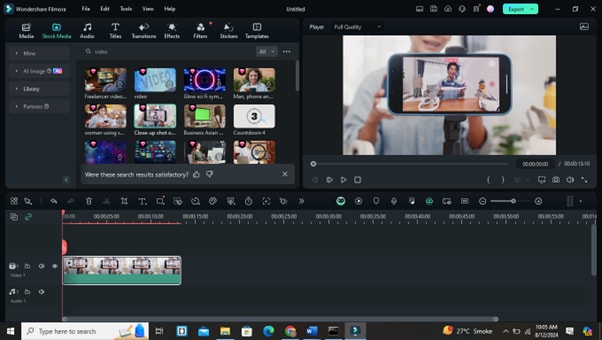
Step 3: Add Text
- Navigate to the “Titles” tab, choose a text style, and drag it onto the timeline above your video.
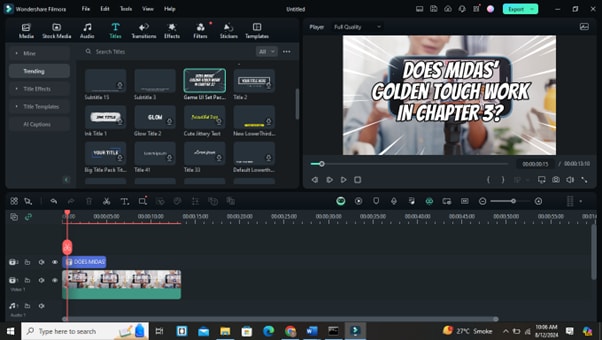
Step 4: Customize Your Text
- Double-click the text on the timeline to open the text editor. You can customize the font, size, color, and position in the text editor.
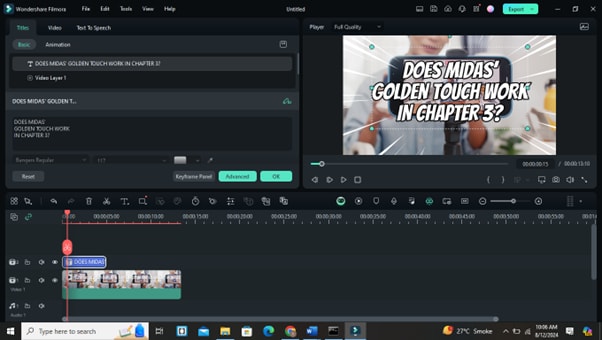
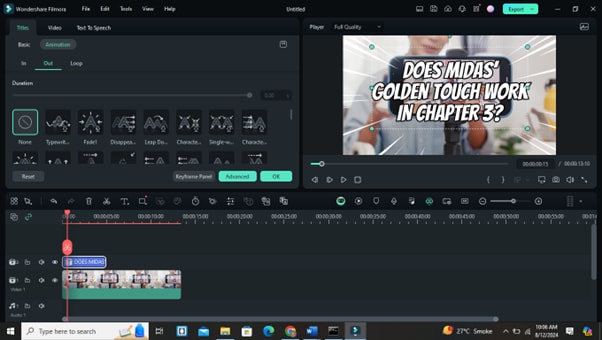
Step 5: Animate the Text
- Use the “Animation” tab to apply moving text effects like slide, fade, or typewriter.
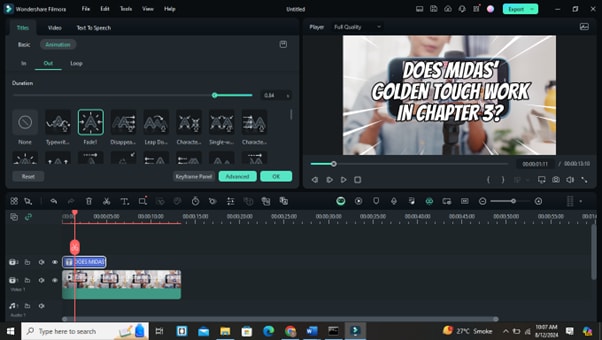
Step 6: Preview and Adjust
- Click “Play” to preview your video. Make any necessary adjustments to timing or animation.
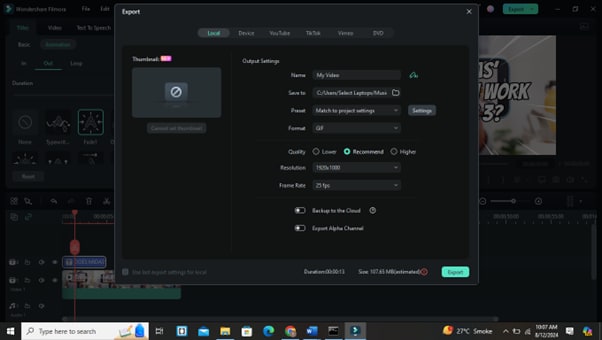
Step 7: Export Your Video
- After you're happy, click "Export" to save your video in the format of your choice.
This method is also an excellent way to add moving text to your TikTok videos. It helps your content stand out and keeps viewers engaged.
Advanced Tips: Adding Dynamic Subtitles to Your Video
Dynamic subtitles are essential for enhancing video accessibility and engagement. Here’s how to add them in Filmora:
- Step 1. Add a text box for subtitles in the “Titles” menu.
- Step 2. Position the text box at the bottom of the screen for consistency.
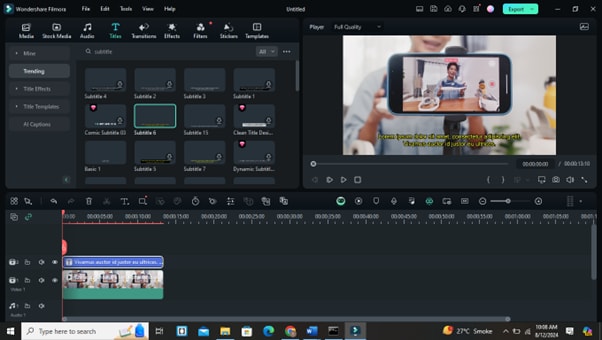
- Step 3. Customize the subtitle text and use animation to make it dynamic.
- Step 4. Ensure the text timing aligns with the audio for accurate synchronization.
Dynamic subtitles enhance viewer understanding and maintain interest. They’re crucial for videos with speech or dialogue.
Now, let's explore how to add moving text using online apps.
Part 3. How To Add Moving Text to Videos Using Online Apps
Online apps provide a convenient way to add moving text to videos without downloading software. They’re perfect for quick edits and users who need access from any device.
Many online apps offer free versions with basic features and premium options for advanced tools. They allow you to add text, apply animations, and export videos directly from your browser. Some popular online apps include Canva, Kapwing, and Animaker.
These programs are easy to use and work well for making promotional films and social media content. Let's examine how you can use them to incorporate moving text into your videos.
Steps to Add Moving Text Using Online Apps
Step 1. Choose an Online App
Choose a platform like Canva, Kapwing, or Animaker. If necessary, create an account.
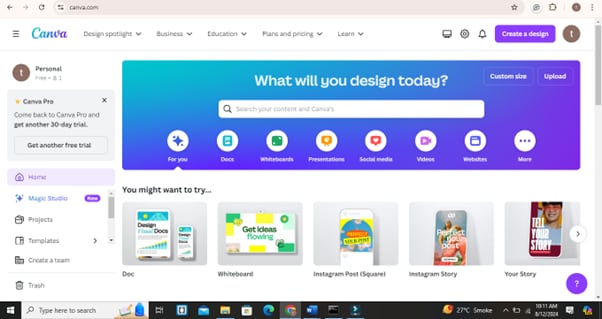
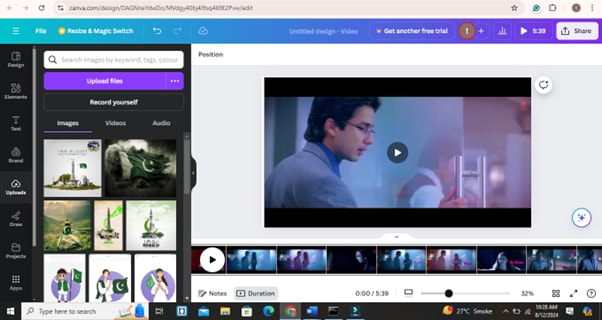
Step 2. Upload Your Video
Use the upload feature to add your video file to the platform.
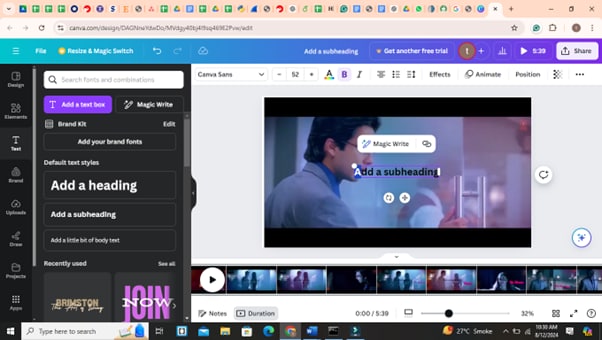
Step 3. Add Text
Use the text tool to add a text box to your video. Change the font's size, colour, and style.
Step 4. Apply Animation
Choose from fade, slide, or typewriter animations to make your text move.
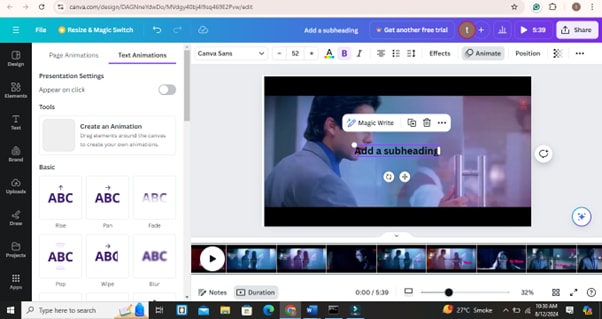
Step 5. Preview and Edit
Review your video and adjust it to ensure the text aligns correctly.
Step 6. Export Your Video
Save your edited video in the desired format for sharing or further editing.
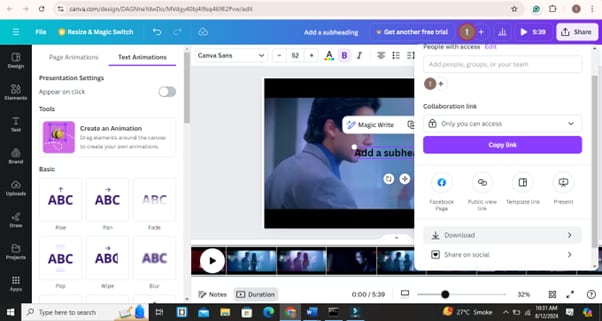
Online apps offer flexibility and convenience. They are ideal for quick projects and on-the-go editing.
Next, explore how to add moving text to YouTube videos using YouTube Studio.
Part 4: Add Moving Texts to YouTube Video Using YouTube Studio
You can improve your videos with YouTube Studio's basic editing tools. You can add basic text overlays to your content with it, even if it lacks the feature-richness of specialized editing applications.
YouTube Studio is accessible directly from your YouTube account. It’s ideal for making quick edits or adding text to videos already uploaded to your channel.
To add moving text in YouTube Studio:
Step 1. Access YouTube Studio
Log in to your YouTube account and go to YouTube Studio.
Step 2. Select Video
Choose the video you want to edit from your channel’s video list.
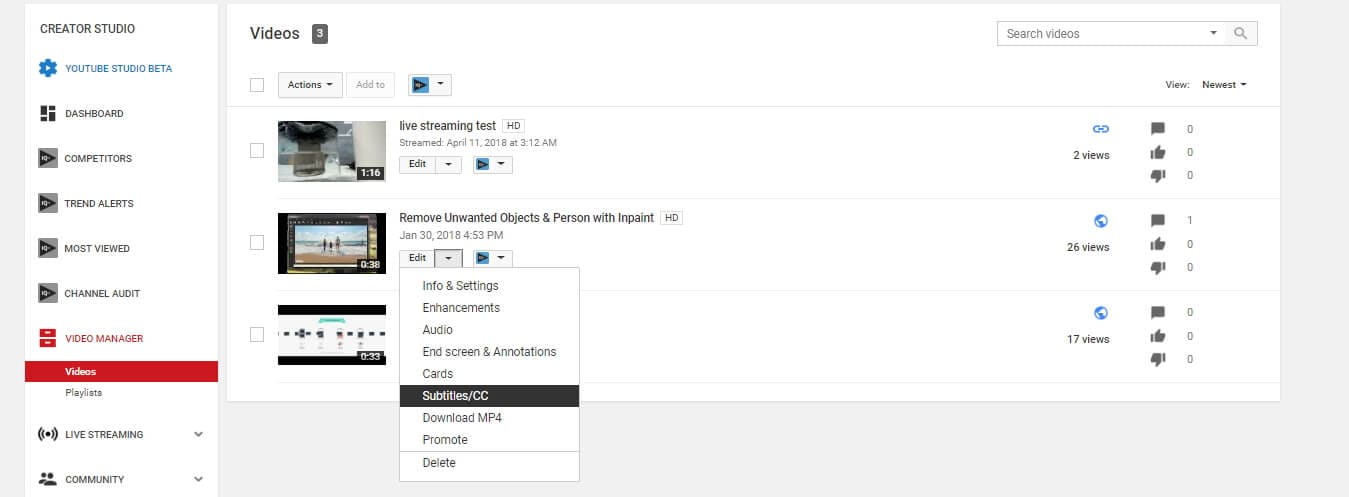
Step 3. Edit Video
Use the “Editor” tab to access editing tools.
Step 4. Add Text
Click “Add Text” and enter your desired text. You can position it on the video.
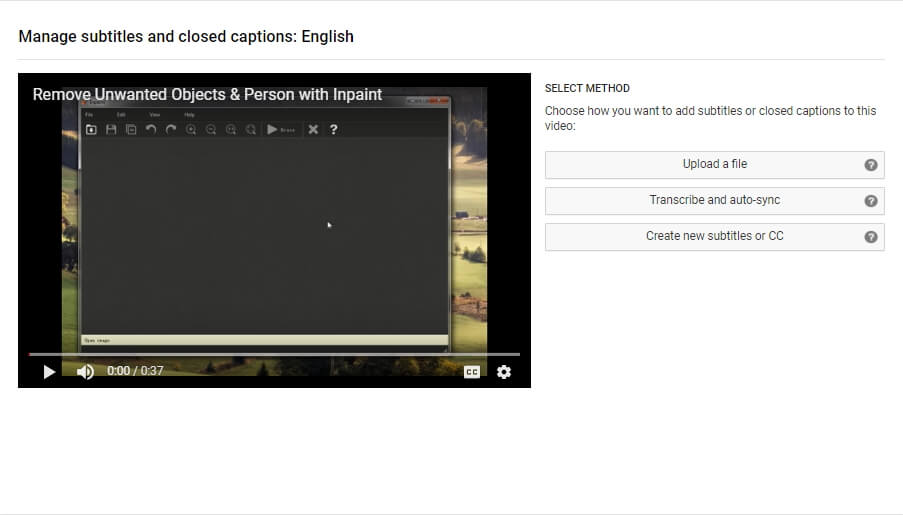
Step 5. Animate Text
Although animations are limited, you can use simple transitions to make text appear or disappear.
Step 6. Save Changes
Once you’re happy with the edits, save the changes to update your video.
YouTube Studio’s editing tools are basic but functional for quick adjustments and text additions.
Let’s move on to some frequently asked questions about adding moving text to videos.
Final Thoughts
Adding moving text to your videos can enhance visual appeal and engagement. Whether using professional software like Filmora or online apps, the process is straightforward and accessible.
Experiment with different text effects and animations to find the best for your content. Moving text helps convey information effectively and adds a dynamic element to your videos.
With practice, adding moving text will become second nature. Keep exploring new tools and techniques to continually improve your video editing skills. Happy editing!


