
Do you want to add text to your videos? To make your lecture videos more understandable. To make your social media content more engaging. To personalize your professional presentations.
Adding text is less tiring than one may think. We have devised basic and non-technical ways for you. We have everything you need, sorted out in this article. Let’s get started and learn how to insert text over videos using Final Cut Pro.
In this article
Part 1. How to Add Text on Video Final Cut Pro
Final Cut Pro is a standout choice for filmmakers and video enthusiasts. Particularly for those who value a streamlined, intuitive workflow. Its design emphasizes ease of use, which enhances the editing experience.
How to add insert text on video in Final Cut Pro? Final Cut Pro offers many options for adding subtitles, titles, or other text captions to videos.
Let’s move to the four methods to do so.
We shall discuss the step-by-step guide of each method one by one. Let’s start with the first method of adding Basic Titles.
Method 1. Add Basic Titles
Final Cut Pro provides a vast library of pre-designed templates. You can drag the titles into your timeline. You have extensive control over text, color, font size, animation, and style. To add the Basic Titles to your video, follow these steps,
Step 1. On the upper side, find and click on the Edit
Step 2. A column will open up. Find and keep your cursor over the Connect Title.
Step 3. Another column will come up. Find and click on the Basic Titles.
This will show you a text box on your selected timeline. Click on it to add text. Then, go to the Text Inspector for customization.

Method 2. Use the Keyboard Shortcut for Titles
Final Cut Pro offers several keyboard shortcuts to speed up video editing. These shortcuts also allow you to add text over video, streamlining the process. Using keyboard shortcuts enhances the productivity of the process process. To do so,
Press the Control key and T simultaneously to add the Basic Title.
Press the Control key, the Shift key, and T to add Basic Lower Title
Press the Option key and C to add Captions.

Method 3. Try the Installed Titles and Generators
The ‘Installed titles and generators’ is an essential tool of Final Cut Pro. It makes your content impactful and engaging. It integrates high-quality tax into your videos. It offers many styles and formats, from simple captions to dynamic opening credits. To access the ‘Installed titles and generators,’ follow the steps given.
Step 1. Locate the titles and generators button in the top left corner of the Final Cut Pro window. Click on the button.

Step 2. Find and click the Titles to find pre-existing titles.

Find and click the Generators to see the available generators for your video.

Method 4. Add Captions to Your Video
Adding captions in Final Cut Pro is user-friendly. You can use keyboard shortcuts to speed up the process. You can also synchronize the caption with the video and customize it accordingly. To add captions to videos, follow the given steps,
Step 1. Find and click on the Edit.

Step 2. A menu will pop down from the Edit. Find and keep the cursor on the Captions. Another menu will pop sideways from the Captions. Click on the Add Captions.

Step 3. The caption box will show up in the selected timeline of the video. Click on it to type.

Let’s move to the essential tips you can benefit from while adding text over video.
Key Tips for Inserting texts in Final Cut Pro
This section discusses the essential tips for adding custom text over video to enhance the processing. Here are four of them:
-
Use the Text Inspector for detailed customization
The Text Inspector specializes in the detailed customization of text over your video. It can customize the font style, size, color, and design.
You can align and space your text. You can experiment with text animation, layout, and effects.
-
Explore animated presets for dynamic text
Animated presets can increase the engagement and attraction of your video. You can choose from the available library of text animations. Professional effects and storytelling animations make your video more compelling.
-
Adjust text timing to match your video
Adjust the added text to match the timeline of your video. Your text should align with the point of the timeline. Text timing is critical if you’re adding captions or subtitles for the sound of your video.
-
Use keyframes for custom animations
You can add custom animations with custom text to your video. Adjust the position, format, and shade of the custom text. Custom animations will enhance your video's storytelling.
Let’s move to the step-by-step guide on how to add text over videos using Final Cut Pro for the methods mentioned above.
Part 2. What Are the Best Practices for Text Placement in Final Cut Pro
You have learned how to insert text over video via Final Cut Pro. The text you add to a video should stand out.
Let’s get to making your text as good as possible. For that purpose, read out the following bullet points.
Font design
- Use readable font style, font size, and font format.
- Text color shouldn’t get mixed in with the colors of the video.
Contrast
- Users must not use extreme contrasts.
- Users must apply appropriate contrast enough to differentiate text and video.
- Users can also use a semi-transparent overlay behind the text to improve the visibility.
Text size and spacing
- Limit the amount of text length.
- Keep words as simple as possible.
- Maintain a constant size of the text throughout the video.
- Keep enough space to avoid overcrowding of text obstructing the video.
Text placing
- Place the texts in a reachable area of the frame, keeping the sight of the video unhindered.
- Captions for dialogues should be scene-appropriate.
- Users can place dialogue captions in the lower third of the video.
Animation and effects
- Avoid overly decorative texts for informative videos.
- Text animation should be according to the content of the video.
- The animation must not be overwhelming.
- Use Keyframes to manage text animations and effects.
Part 3. Why Do I Fail to Insert Texts over Videos with Final Cut Pro?
Are you having trouble adding text over video? Don't worry. We have solutions. Let's learn how to fix them.
- Software update: Update Final Cut Pro to the latest version available. New updates often fix previous bugs.
- Animations and effects: Make sure the animations and effects do not cause the text to disappear. Reset the text properties.
- Restart the tool: Restart the tool by closing and relaunching it. If this doesn't work, restart your computer.
- Rendering problem: The text might not appear because of a rendering problem. To render the changes correctly, go to the Modify menu and select Render All.
- Text placing and color: Make sure the font size is not too small to be visible. Position the added text according to the correct duration of the timeline. The text color should be different from the background color.
- Blending mode: Blending mode makes the text blend in with the background. Make sure it is not operational.
- Layers positioning: The order of layers on the timeline should be correct. The text layer comes over the video layer and won't be visible if it's the other way around.
Part 4. The Best Alternative Way to Add Text on Video
If you’re searching for an editing program that won’t break the bank and features even more than Final Cut Pro, Wondershare Filmora is for you. It works on both macOS and Windows.


Wondershare Filmora is an excellent alternative to Final Cut Pro, with a low annual cost of around $100. Since you always tell your story twice- once when shooting and once when editing - Filmora is a great alternative.
Let’s learn more about the key editing features of Filmora.
Key Features for adding texts to videos
- Customizable Text Styles: Choose from a variety of fonts, colors, and sizes to match your video’s style, making your text stand out.
- Text Animation: Add dynamic motion to your text with various animation options, including fade-ins, slide-ins, and bounce effects.
- Text Templates: Utilize pre-designed text templates for quick and easy title creation, perfect for adding professional-looking text with minimal effort.
- Layering and Positioning: Easily layer text over video clips and adjust its position on the screen for precise placement.
- Text Effects: Enhance your text with shadows, outlines, and other visual effects to give it more depth and impact.
- Real-Time Preview: See how your text looks on your video in real-time as you edit, allowing for instant adjustments.
- Voice-to-Text: Convert spoken words to on-screen text automatically, saving time on manual typing.
- Multiple Text Tracks: Add and manage multiple text layers simultaneously, perfect for creating complex visual storytelling.
- Text Duration Control: Easily adjust how long the text appears on the screen, ensuring it matches the timing of your video.
- Text Alignment and Spacing: Fine-tune the alignment, line spacing, and letter spacing to achieve the perfect look for your video text.
Let's move to the step-by-step guide on how to add text over video using Filmora.
Step-by-Step Guide on How To Add Text Over Video Using Filmora
Follow the given instructions step-by-step to add text over video.
Step 1. You can get the tool by clicking the buttons below. And then launch the tool
Step 2. Click on the New Project.
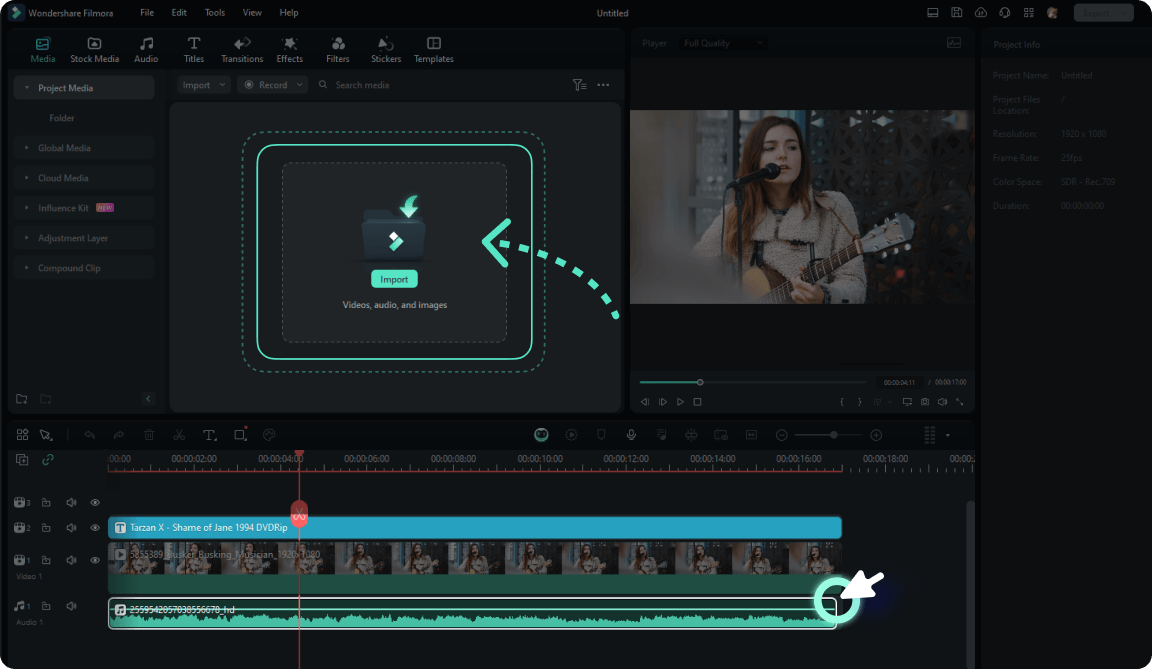
Adjust settings according to your needs. Click on the Import button to browse and upload the video.

Step 3. Drag and drop your video to the timeline. Trim, cut, or delete your video on the timeline.

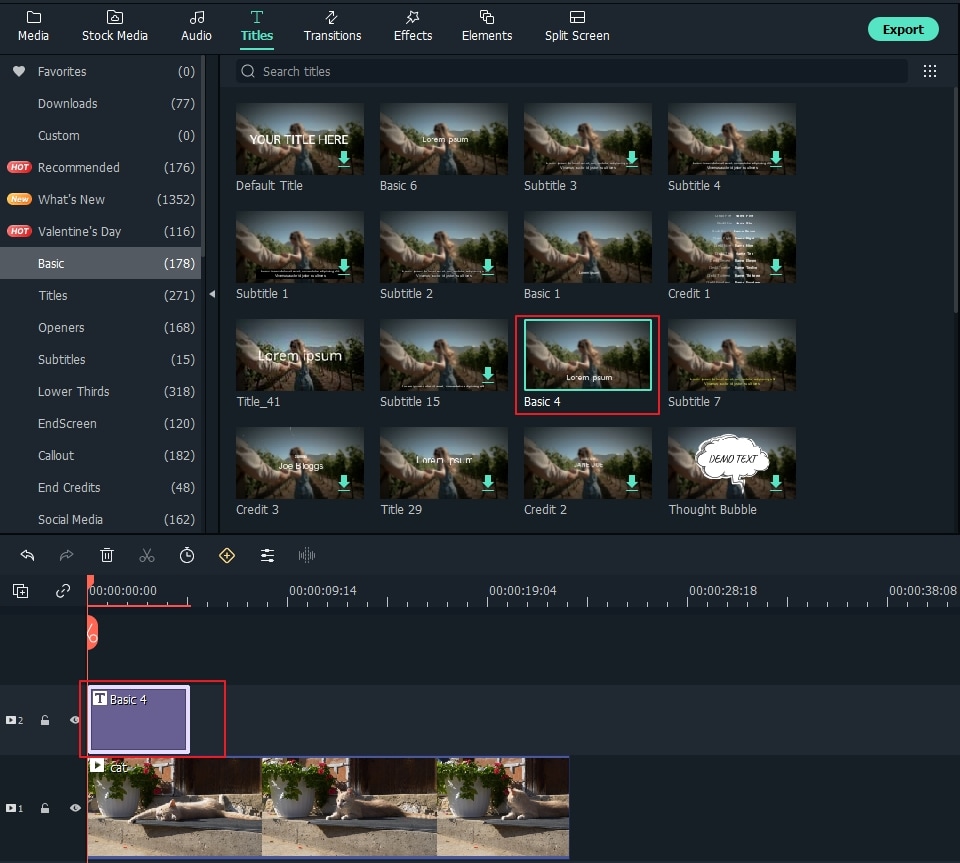
Step 4. Click on the Titles tab to open preset templates. Double-click the template to preview it before adding it permanently.

Step 5. Position the template above the timeline at the desired duration.
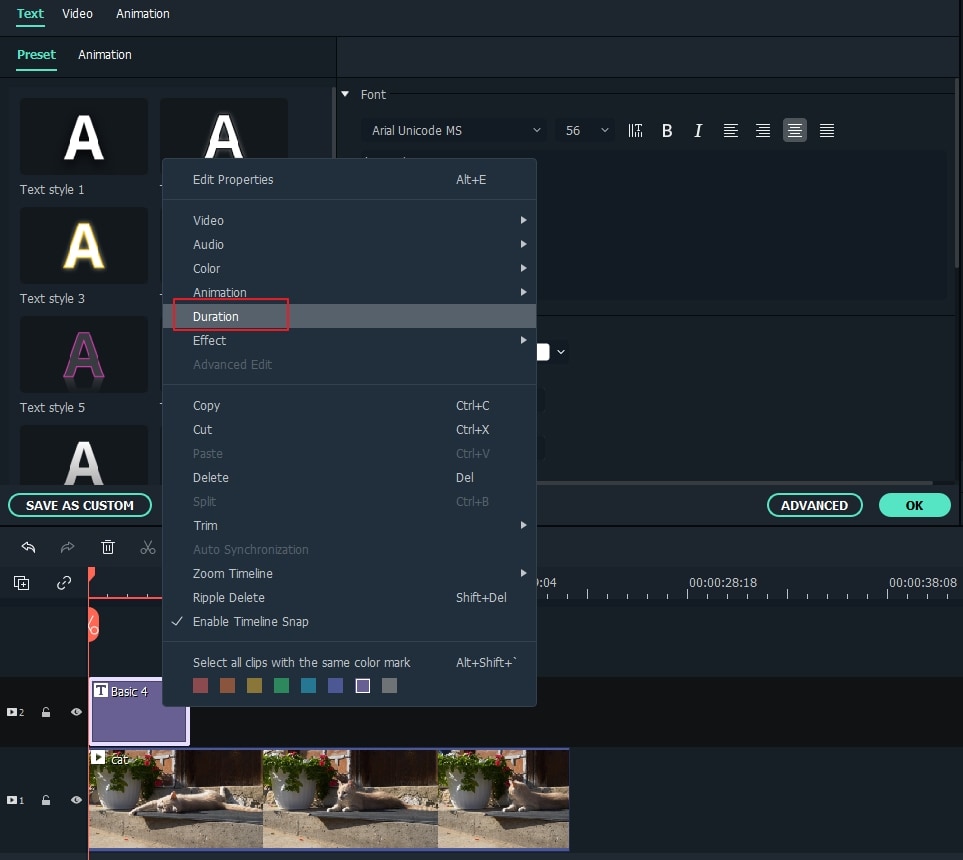
Step 6. The default duration of the template is 5 seconds. Select the timeline first, then click the Timer icon to change the duration.
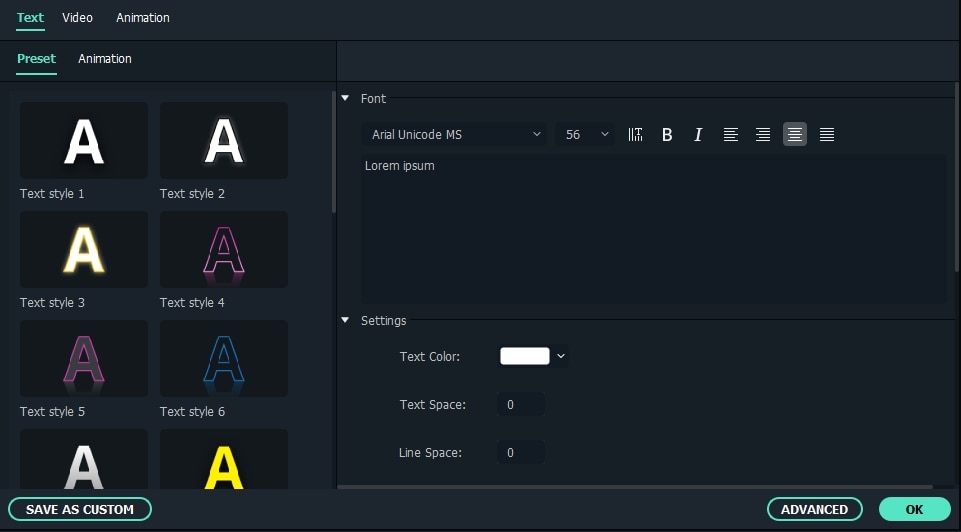
Step 7. Double-click the title frame to open the editing window. Type the text and explore the text fonts, sizes, and colors. Double-click the style you want to preview.
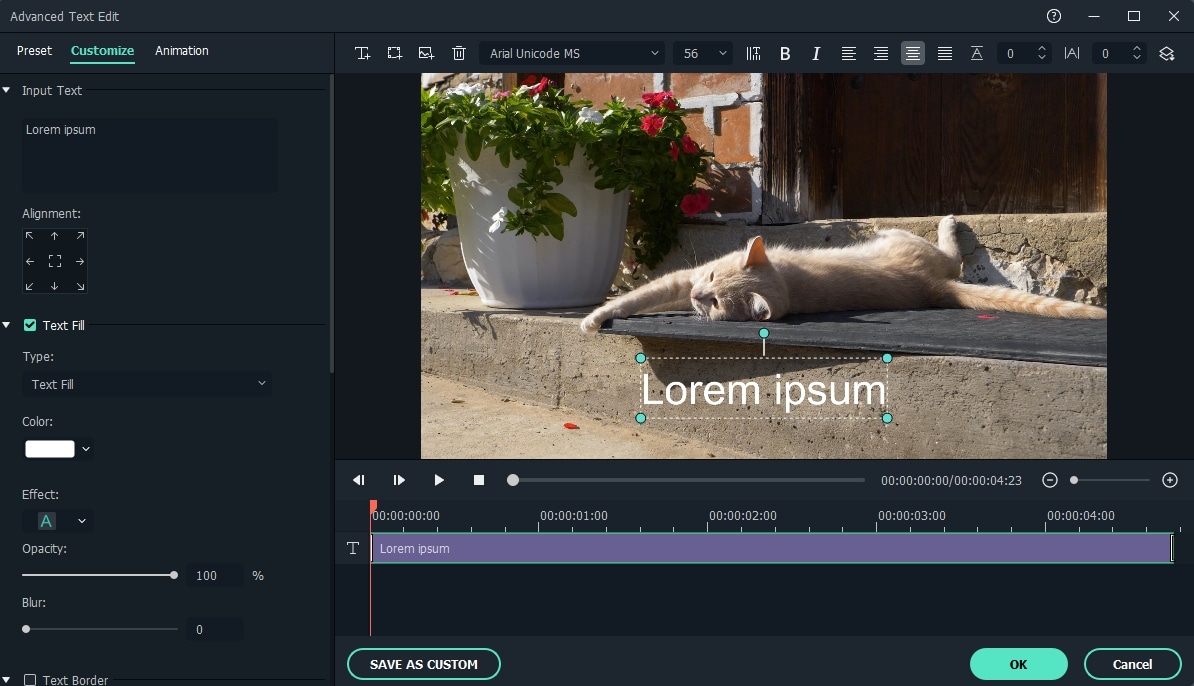
Step 8. Change the text animation by clicking on the Animation icon. To further customize, click the Advanced button.
Step 9. Preview the video with added text by clicking on the Play icon. Click on the Export button. An export window will open up. Select the output format and other advanced settings according to your needs. Click on the Export button.

Filmora offers the easiest way to add subtitles over video. The following section discusses more about it.
Providing clear and engaging subtitles automaticall in Filmora
In addition to adding texts to video with traditional methods, Wondershare Filmora's aAuto Caption feature simplifies the process of adding subtitles to your videos. This AI-powered tool automatically transcribes speech into text, allowing for quick and accurate caption generation.
- Speech-to-Text Integration: The Auto Caption feature utilizes advanced speech recognition technology to convert spoken dialogue into written captions, saving you time and effort.
- Dynamic Subtitle Effects: After transcription, dynamic subtitle effects can be applied, enhancing viewer engagement and making your videos more interactive.
- Customization Options: You can easily customize the appearance of captions, including font styles, colors, and sizes, ensuring they match the video’s branding and aesthetic.
- Multi-Language Support: The feature supports multiple languages, making it accessible for a global audience.
- Easy Editing: Once captions are generated, you can edit them directly within Filmora to correct any inaccuracies or adjust timing.
- User-Friendly Interface: The intuitive interface makes it easy for both beginners and experienced editors to add captions seamlessly.
Let's move to the step-by-step guide to learn how to add automatic captions.
A Step-by-Step Guide on How to use Auto Caption to Add Text over Video
Follow the given instructions step by step to add text via Auto Caption,
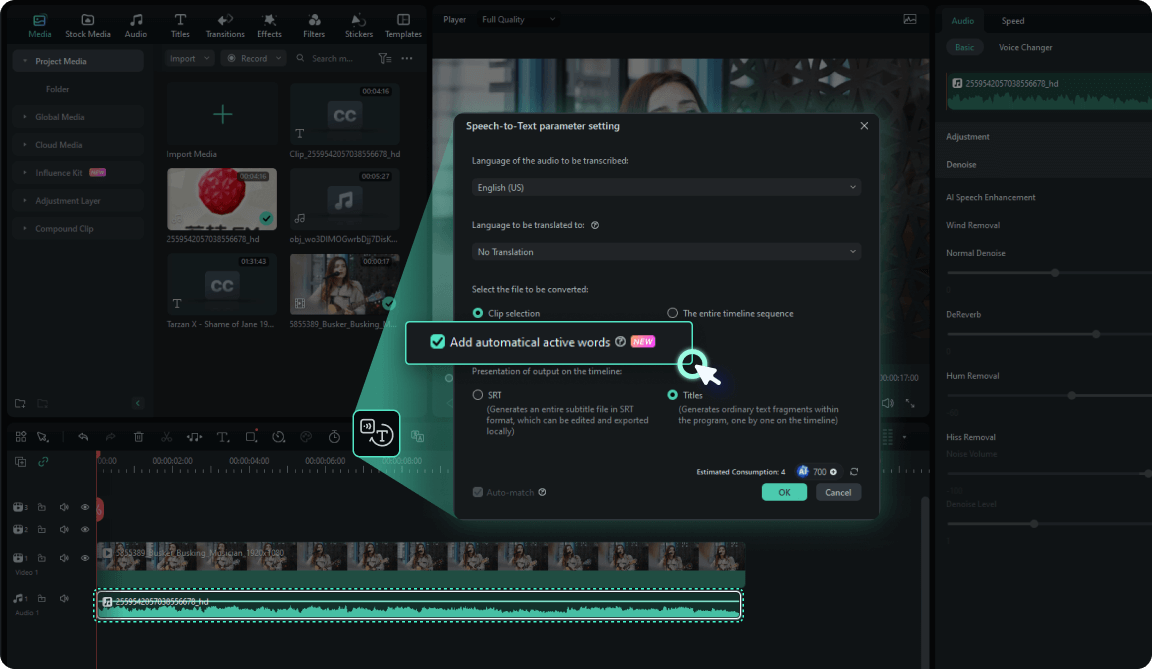
Step 1. Upload your file. Find and select the Speech To Text feature (above the timeline shown in the picture).
Step 2. To generate dynamic caption animations, enable the Add automatic active words option in the STT settings.
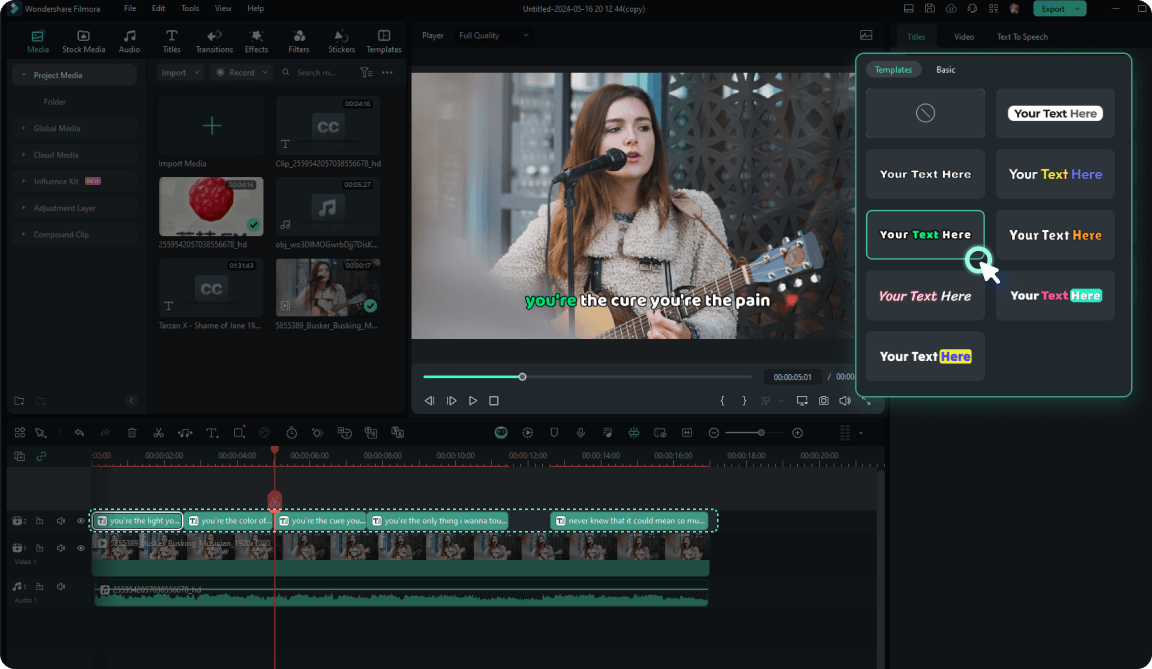
Step 3. Select from the preset templates. Further, customize it to engage your viewers.
The following part discusses the frequently asked questions by users regarding adding text over video.
Conclusion
You have mastered how to insert text over video by using Final Cut Pro and Filmora. Adding text makes your videos more understandable. Both Filmora and Final Cut Pro are excellent at what they do.
Filmora is a universal tool. Users of all kinds can benefit from it. Filmora stands out for its Speech-To-Text feature. Final Cut Pro is more professional. It provides a higher level of customization tools.
Remember the dos and don’ts discussed in this article to avoid any mishaps. We hope you find this article helpful.
