


If your animation looks too sharp, After Effects motion blur can make it look more natural. It simulates the blur caused by fast movement between frames, with the degree of blur influenced by shutter settings such as Shutter Angle.
In this guide, you’ll learn how to add and adjust motion blur, troubleshoot common issues, and compare the workflow with an easier video editor like Wondershare Filmora.
Part 1. How Motion Blur Works in After Effects
A logo sliding across the screen can look strangely sharp when every frame shows it as a perfectly defined object. In real camera footage, a moving subject usually appears blurred because it moves while the camera shutter is open.
Motion blur in After Effects can recreate that effect, making animated movement appear smoother and less like a series of separate positions.
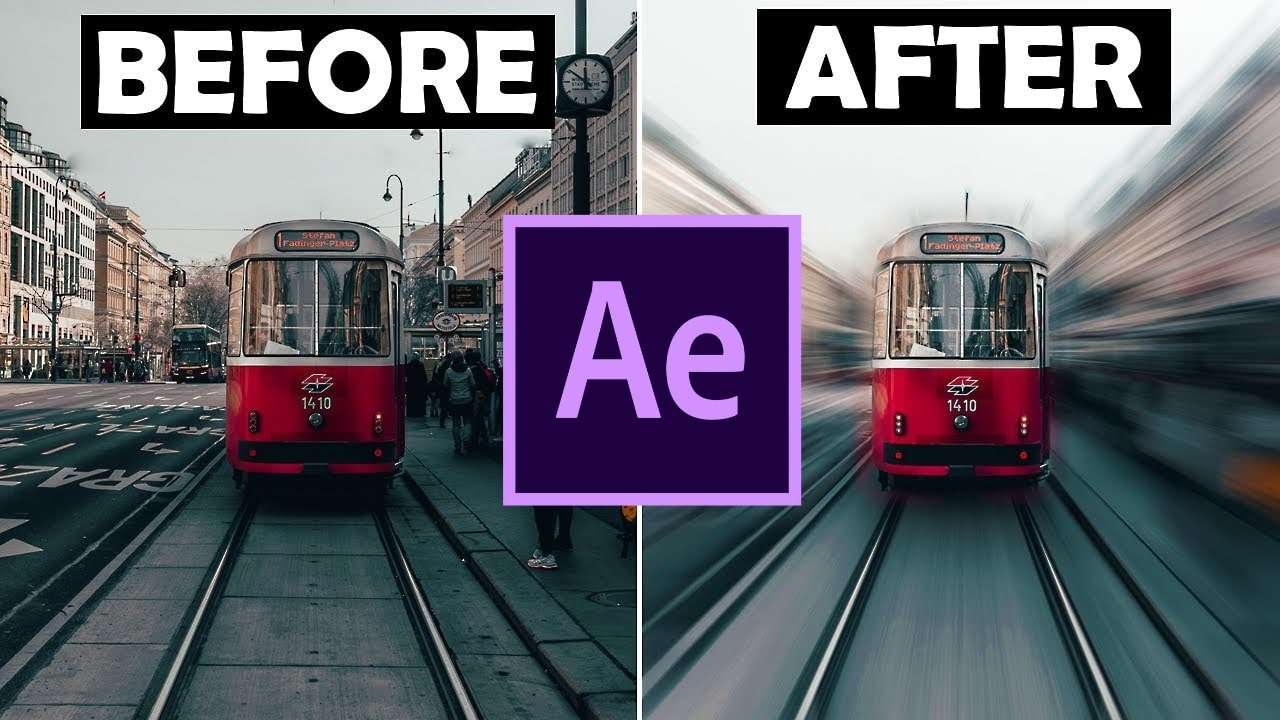
For animated layers, After Effects has a Motion Blur switch that applies blur based on the layer’s movement. You control the effect at the composition level through settings such as Shutter Angle and Shutter Phase. A higher Shutter Angle produces more motion blur, while Shutter Phase controls the timing of the simulated exposure relative to each frame.
When Should You Use Motion Blur?
Applying a motion blur effect in After Effects is useful when quick animation looks too sharp or stuttery. Common examples include:
- Text and logo animations: Smooth out text or logos that slide, spin, scale, or fly onto the screen.
- Moving graphics: Add blur to fast changes in position, rotation, or scale.
- Transitions: Make quick zooms, spins, and wipes feel less abrupt.
- Fast object movement: Give animated objects a more convincing sense of speed.
- Camera movement: Add blur when a camera moves quickly through an animated composition.
- Animated UI elements: Soften fast-moving panels, menus, and other interface elements.
Part 2. How to Add Motion Blur in After Effects
A sliding logo, spinning text, or fast-moving graphic can look too sharp without motion blur. After Effects offers two ways to add it:
- Using the built-in Motion Blur switch for animated layers
- Using CC Force Motion Blur in After Effects as an effect
Method 1. Enable Motion Blur
For most keyframed animations, After Effects has a built-in Motion Blur switch that follows the layer’s movement.
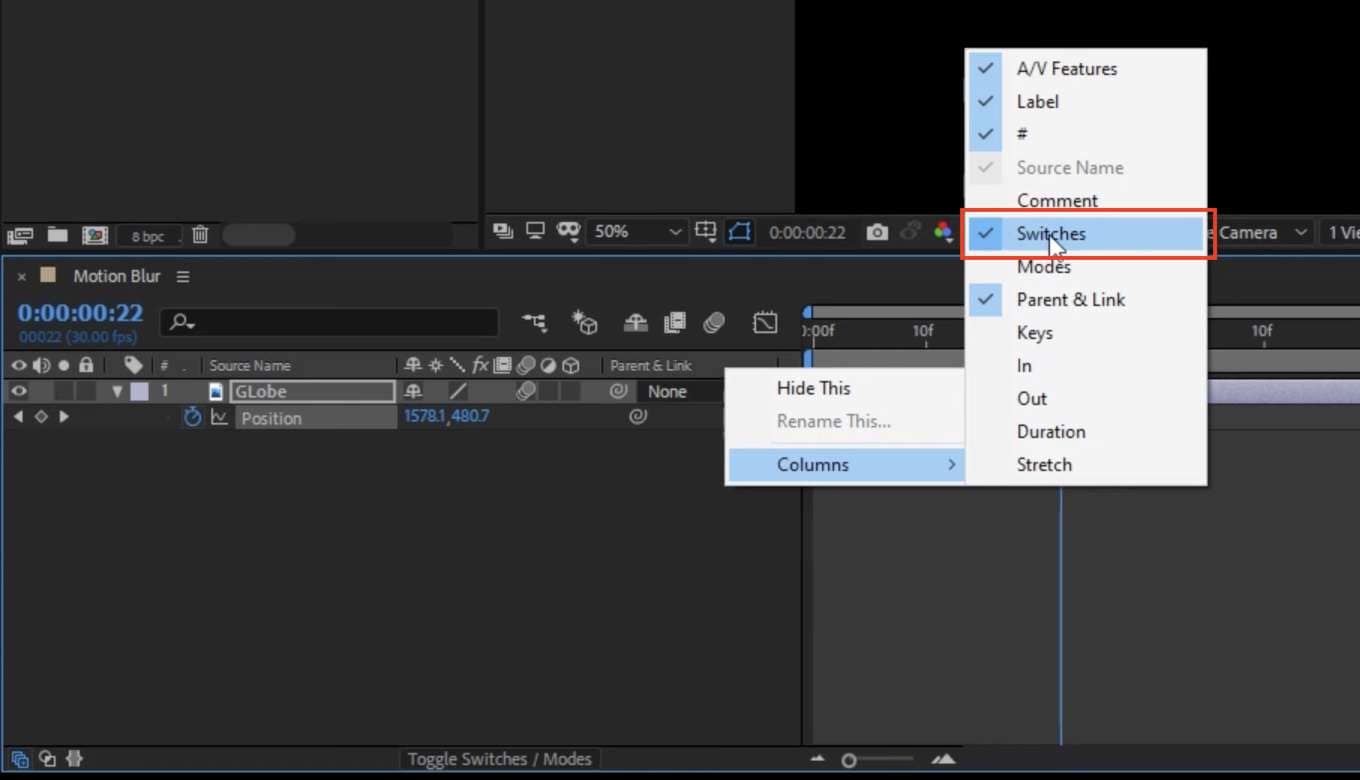
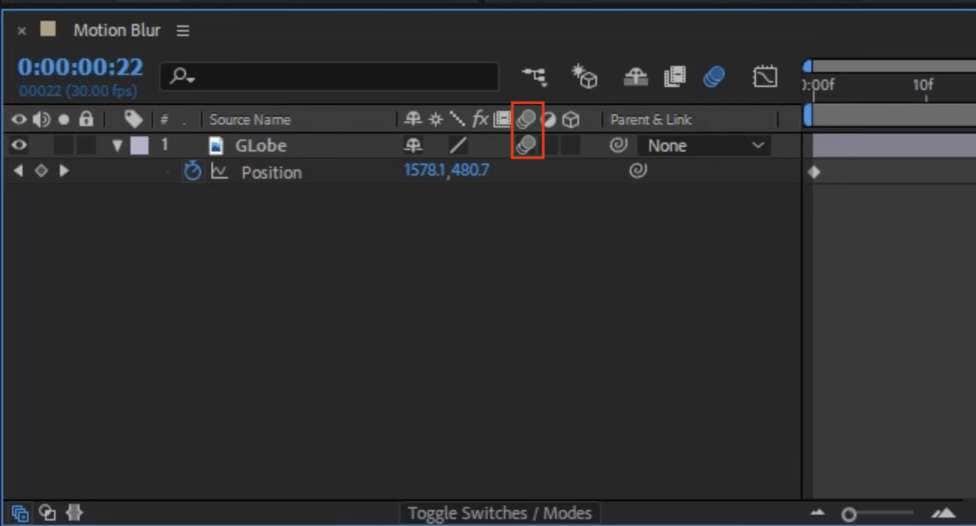
Method 2. CC Force Motion Blur Effect
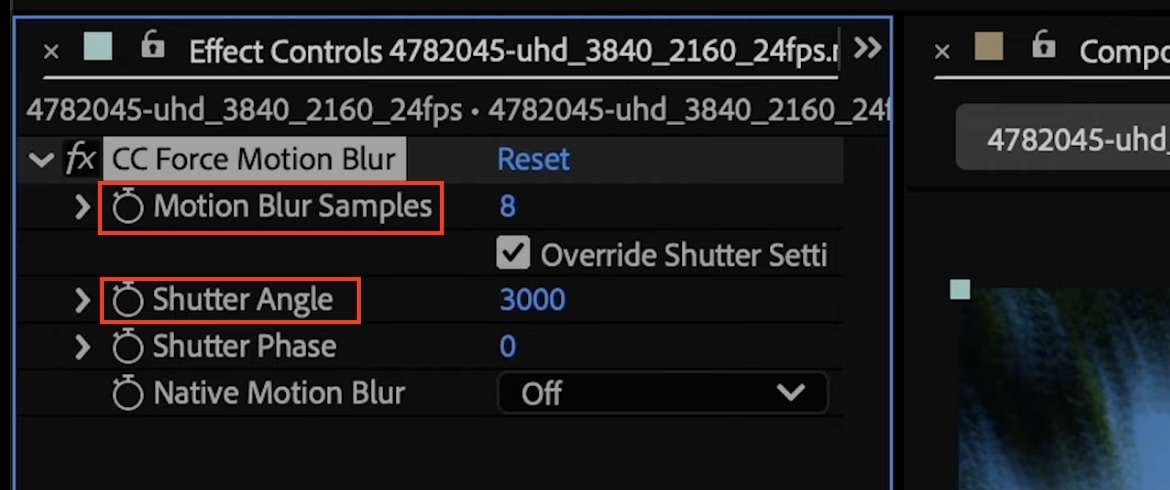
After Effects CC Force Motion Blur is a separate effect that can add motion blur to a layer. It is useful when you want to apply blur through an effect rather than rely only on the standard layer Motion Blur switch.
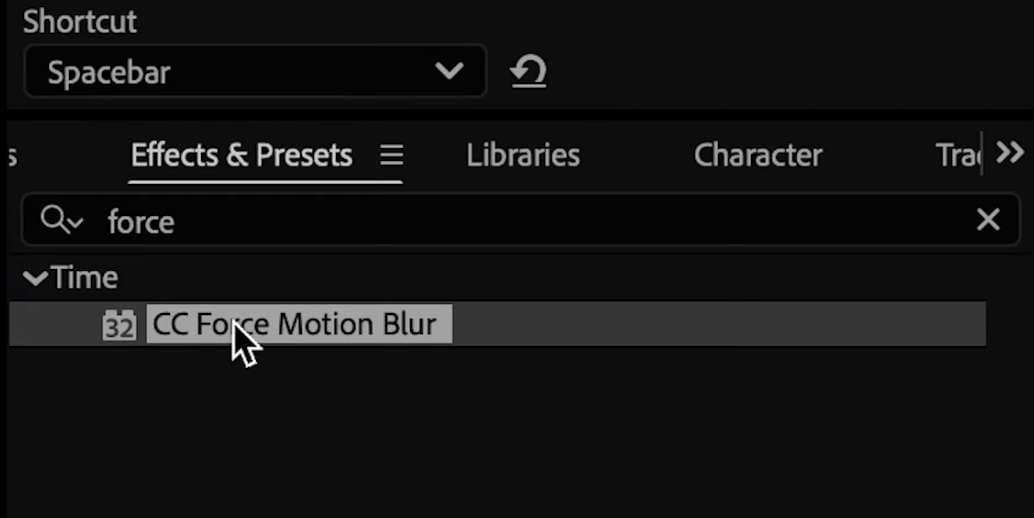
Part 3. How to Adjust Motion Blur in After Effects
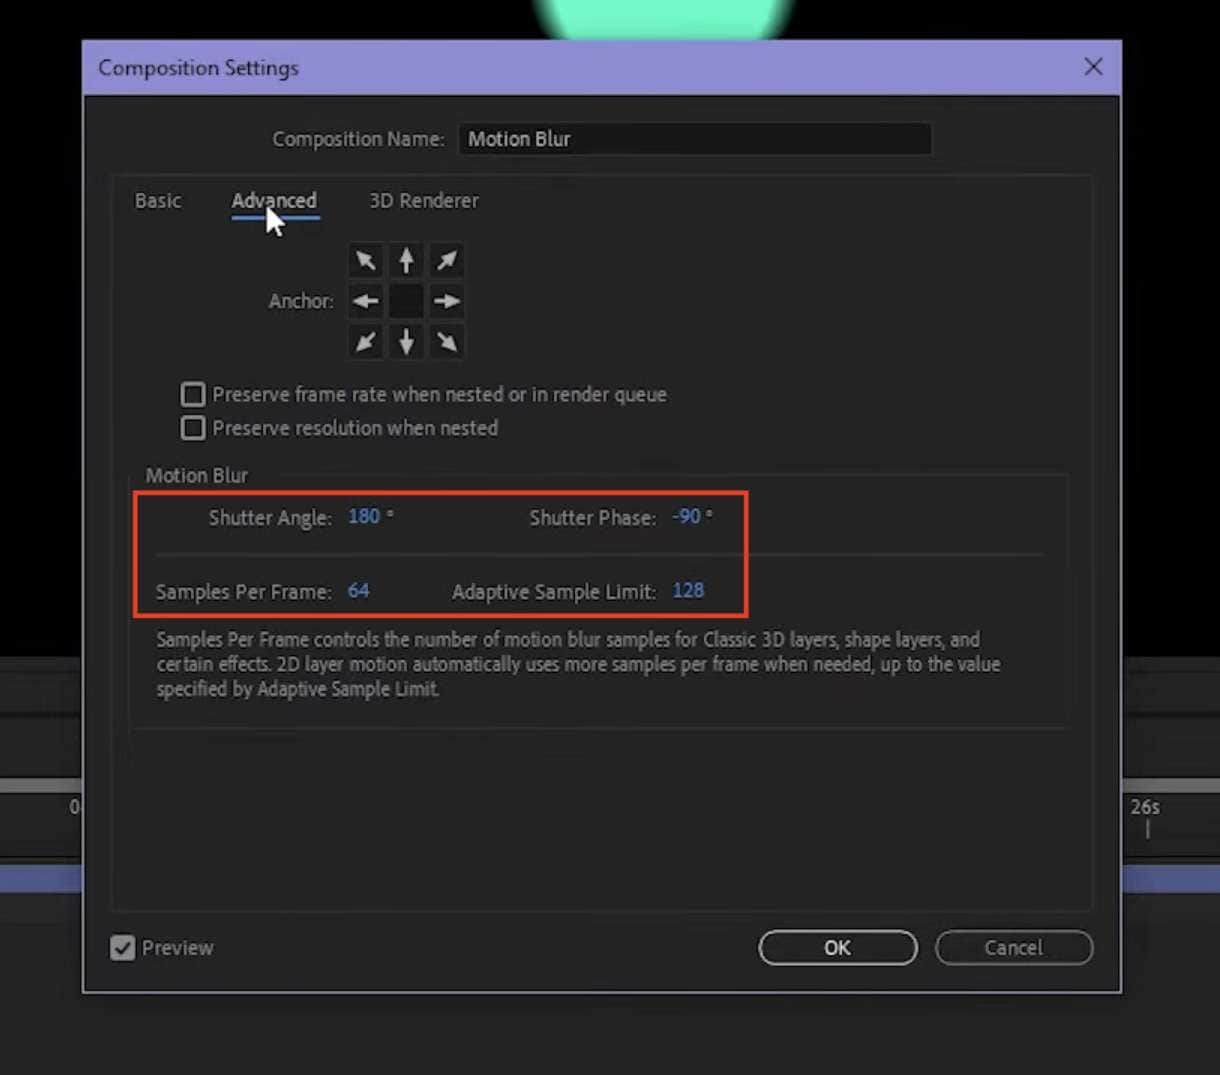
Once Motion Blur is enabled, you can adjust motion blur in After Effects under Composition > Composition Settings > Advanced > Motion Blur. The four controls affect how much blur After Effects creates and how it samples the movement:
- Shutter Angle: Controls the amount of motion blur. Higher values produce more visible blur, while lower values keep movement sharper.
- Shutter Phase: Controls when the simulated shutter opens relative to the start of each frame, affecting where the blur appears around the moving object.
- Samples Per Frame: Sets the minimum number of samples After Effects uses when it cannot determine adaptive sampling from the layer’s motion. It also applies to 3D and shape layers.
- Adaptive Sample Limit: Sets the maximum number of samples After Effects can use for motion blur. Higher values can improve the sampling of complex movement but may increase rendering time.
What Are the Best Motion Blur Settings in After Effects?
There’s actually no single best motion blur setting for every animation. But for most animations, 180° is a solid starting point for motion blur. Use a lower Shutter Angle value when you want movement to remain sharp, or increase it when fast movement needs more visible blur.
The settings below are starting points you can adjust to match your animation:
| Look | Shutter Angle | Suggested Use |
| Subtle | 90° | Slow text, logos, and gentle movement |
| Natural | 180° | General motion graphics and animated elements |
| Strong | 270-360° | Fast transitions and energetic movement |
| Very Strong | 360°+ | Stylized effects or extremely fast movement |
|
Show More
Show Less
|
||
If the animation still looks too sharp, increase the Shutter Angle. If the moving elements become too blurry, decrease the value. For complex motion, increase the sampling setting only if necessary, since higher sampling can increase rendering time.
Part 4. After Effects Motion Blur Not Working? Check These First
If motion blur in After Effects is not working, check the basics before changing your animation. The effect depends on both layer and composition settings, and it only works on movement created within the layer.
1. Check the Layer Motion Blur Switch
Make sure the Adobe After Effects Motion Blur switch is enabled on the layer you want to blur. If the button is disabled, that layer won’t receive motion blur.
2. Check the Composition Motion Blur Switch
Check the Render Queue settings. The Timeline's Enable Motion Blur switch controls motion blur in previews, while the Render Queue's Motion Blur setting determines how motion blur is handled in the final render. If it is set to Current Settings, the render follows the layer and composition Motion Blur switches.
3. Make Sure the Layer Is Actually Moving
The standard Motion Blur switch works with movement created by an animated layer. Check that the layer has Position, Scale, or Rotation values through keyframes or another animation method.
The standard Motion Blur switch responds to movement of the layer itself, such as Position, Scale, or Rotation animation. It does not analyze movement that is already present inside video footage.
4. Check the Shutter Angle
A very low Shutter Angle can make the blur difficult to notice. Increase the value in the Motion Blur settings under Composition Settings > Advanced, then preview the result. Higher values create more pronounced blur.
Switch to a Simpler Alternative for Motion Blur: Filmora
If you want to add motion blur in videos without a complex compositing workflow, Wondershare Filmora offers a few easy options:
- Keyframe Motion Blur creates motion trails for animated elements
- Motion Blur applies blur to the entire clip
- Motion Blur Effects add stylized particles and overlays to enhance the sense of movement.
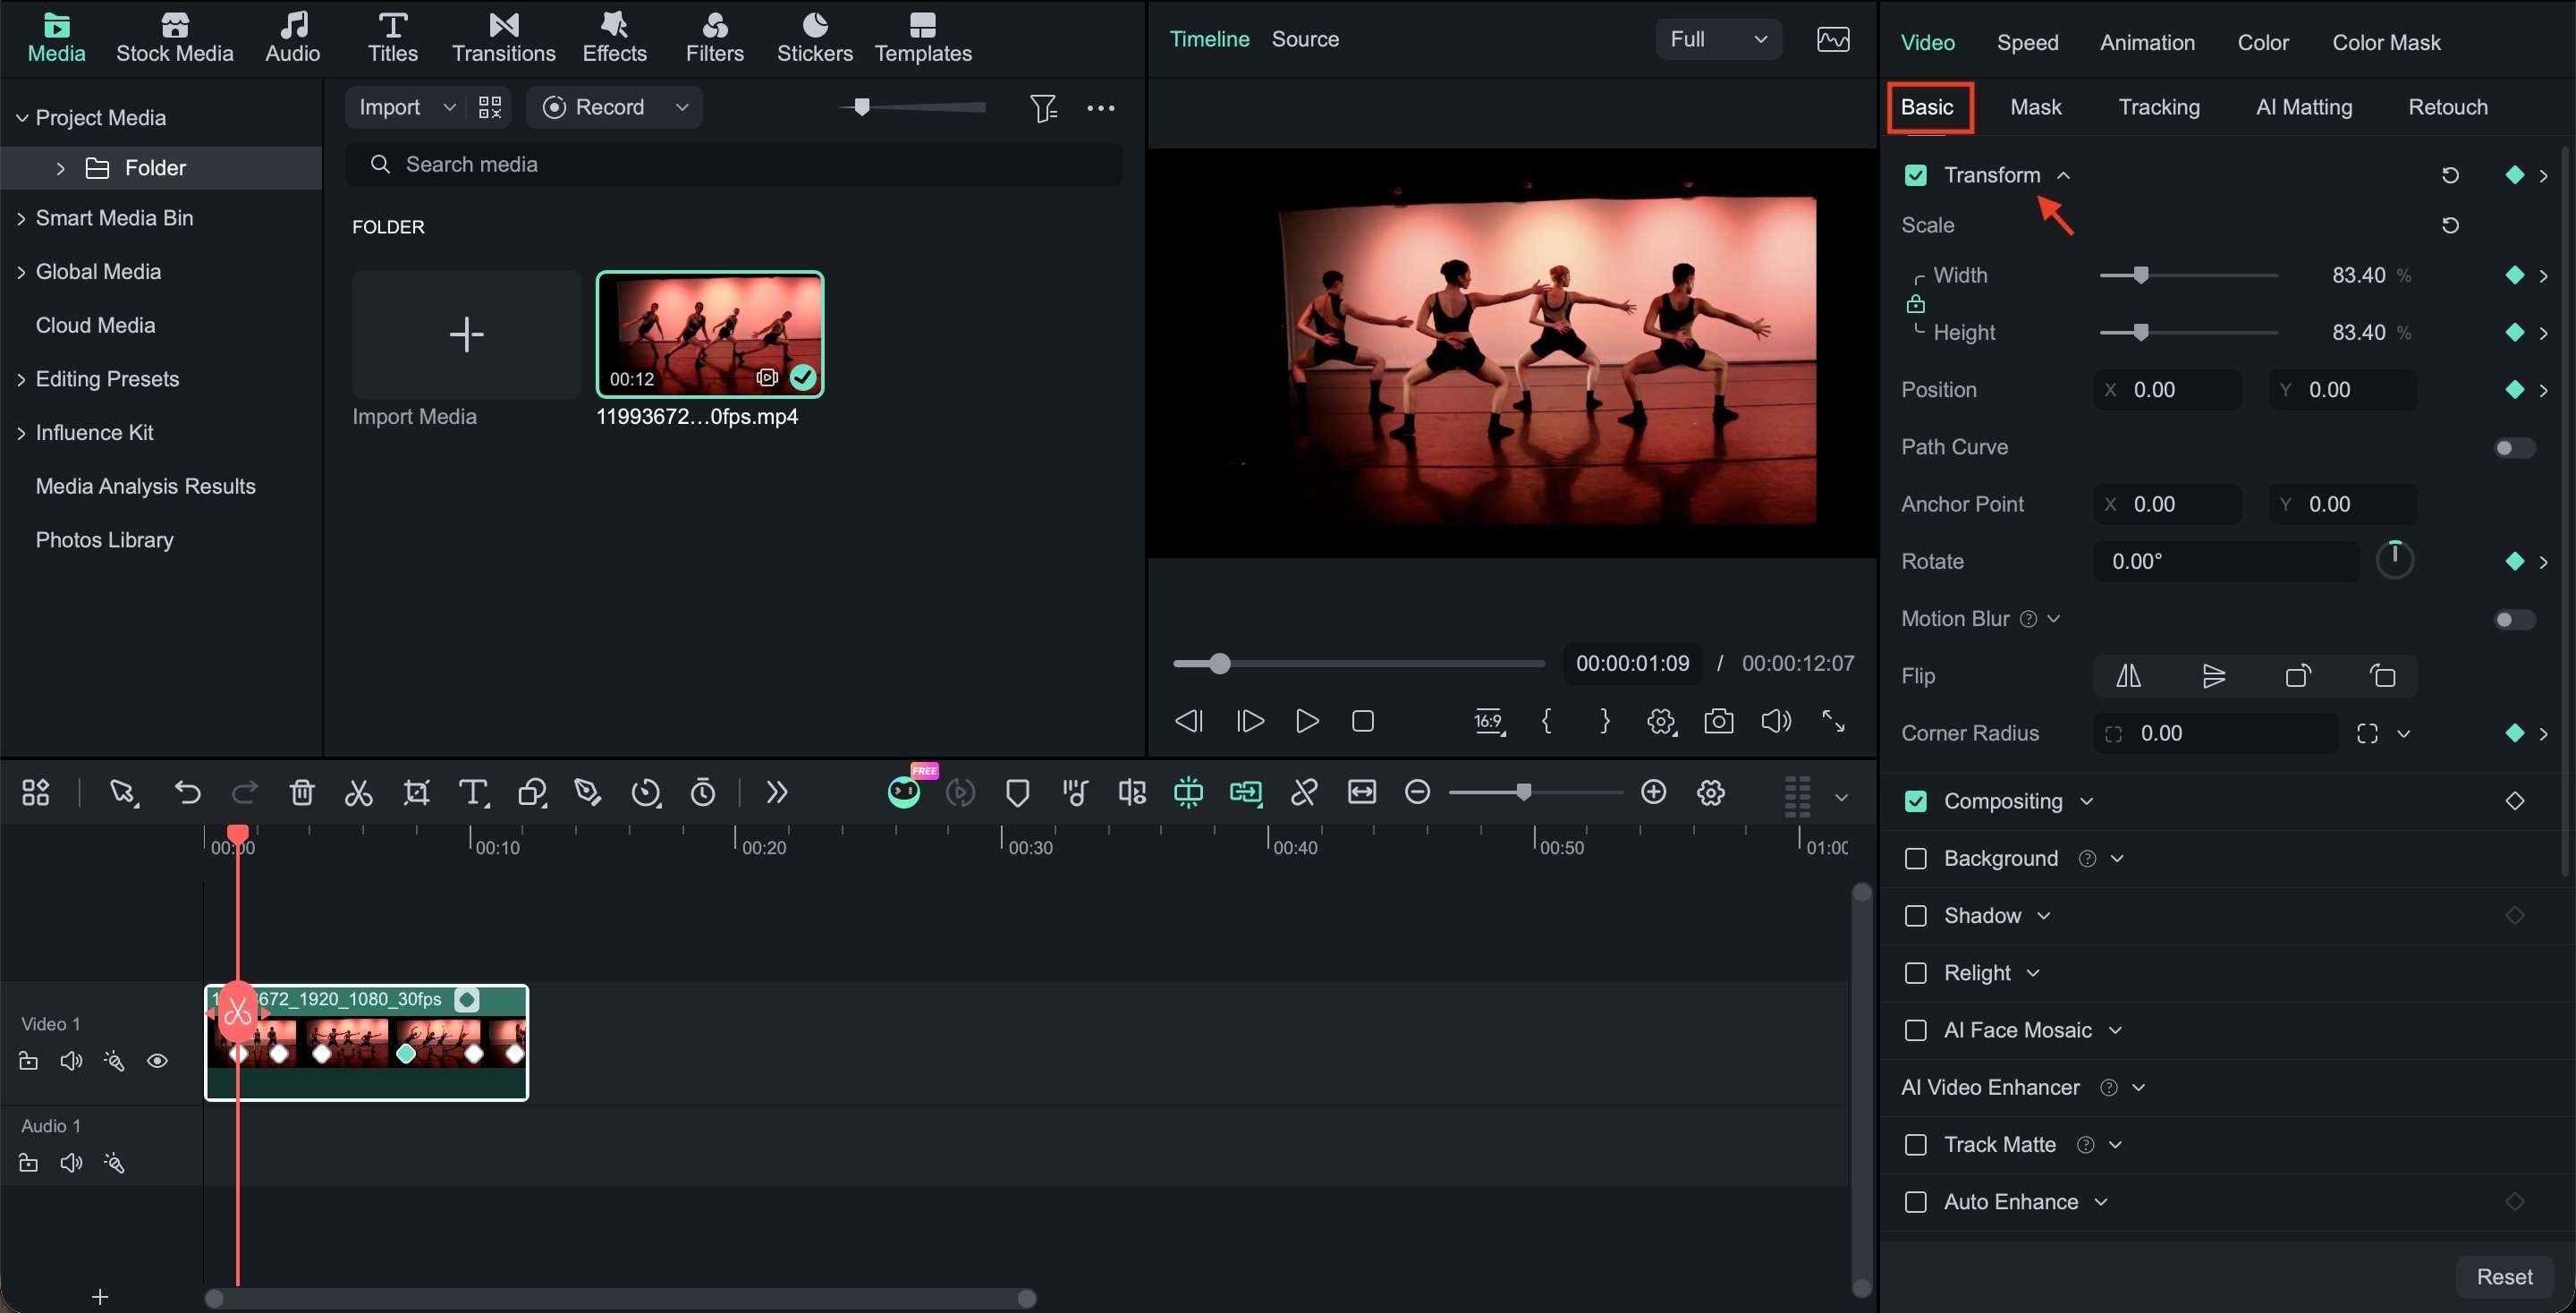
Method 1. Use Keyframe Motion Blur
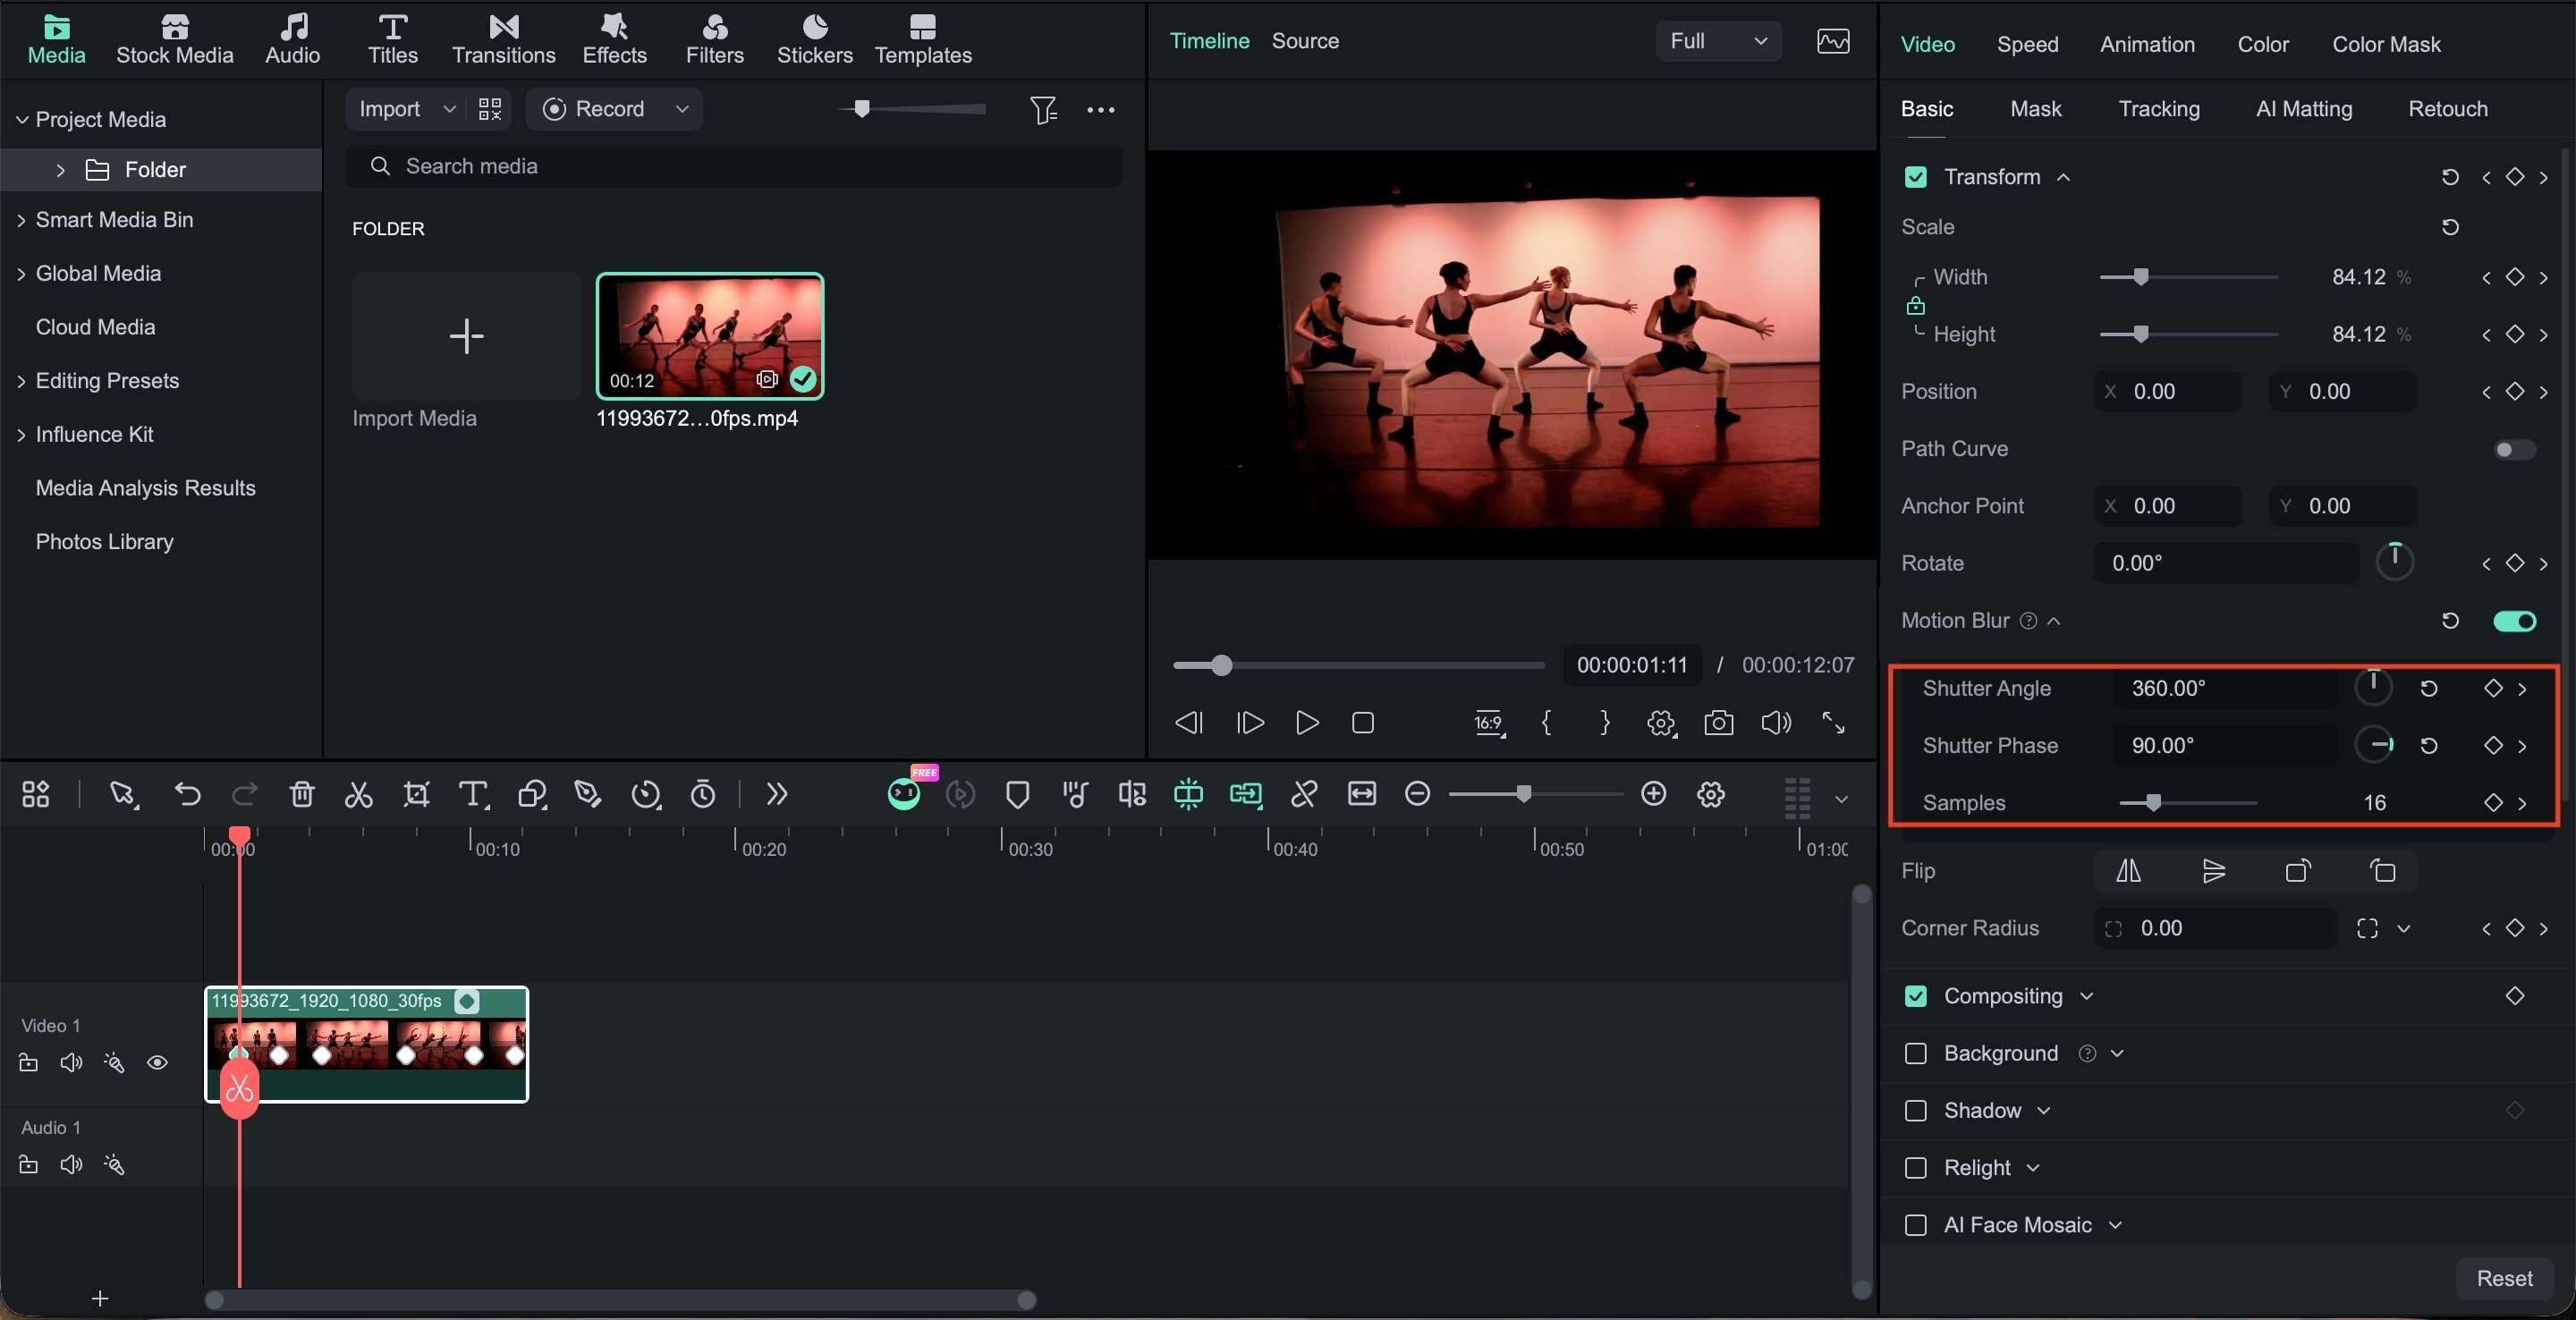
Filmora’s keyframe motion blur is designed for movement created with keyframes, such as a logo sliding across the screen or an image zooming into frame. After enabling Motion Blur, Filmora lets you adjust the Shutter Angle, Shutter Speed, and Sample Rate.
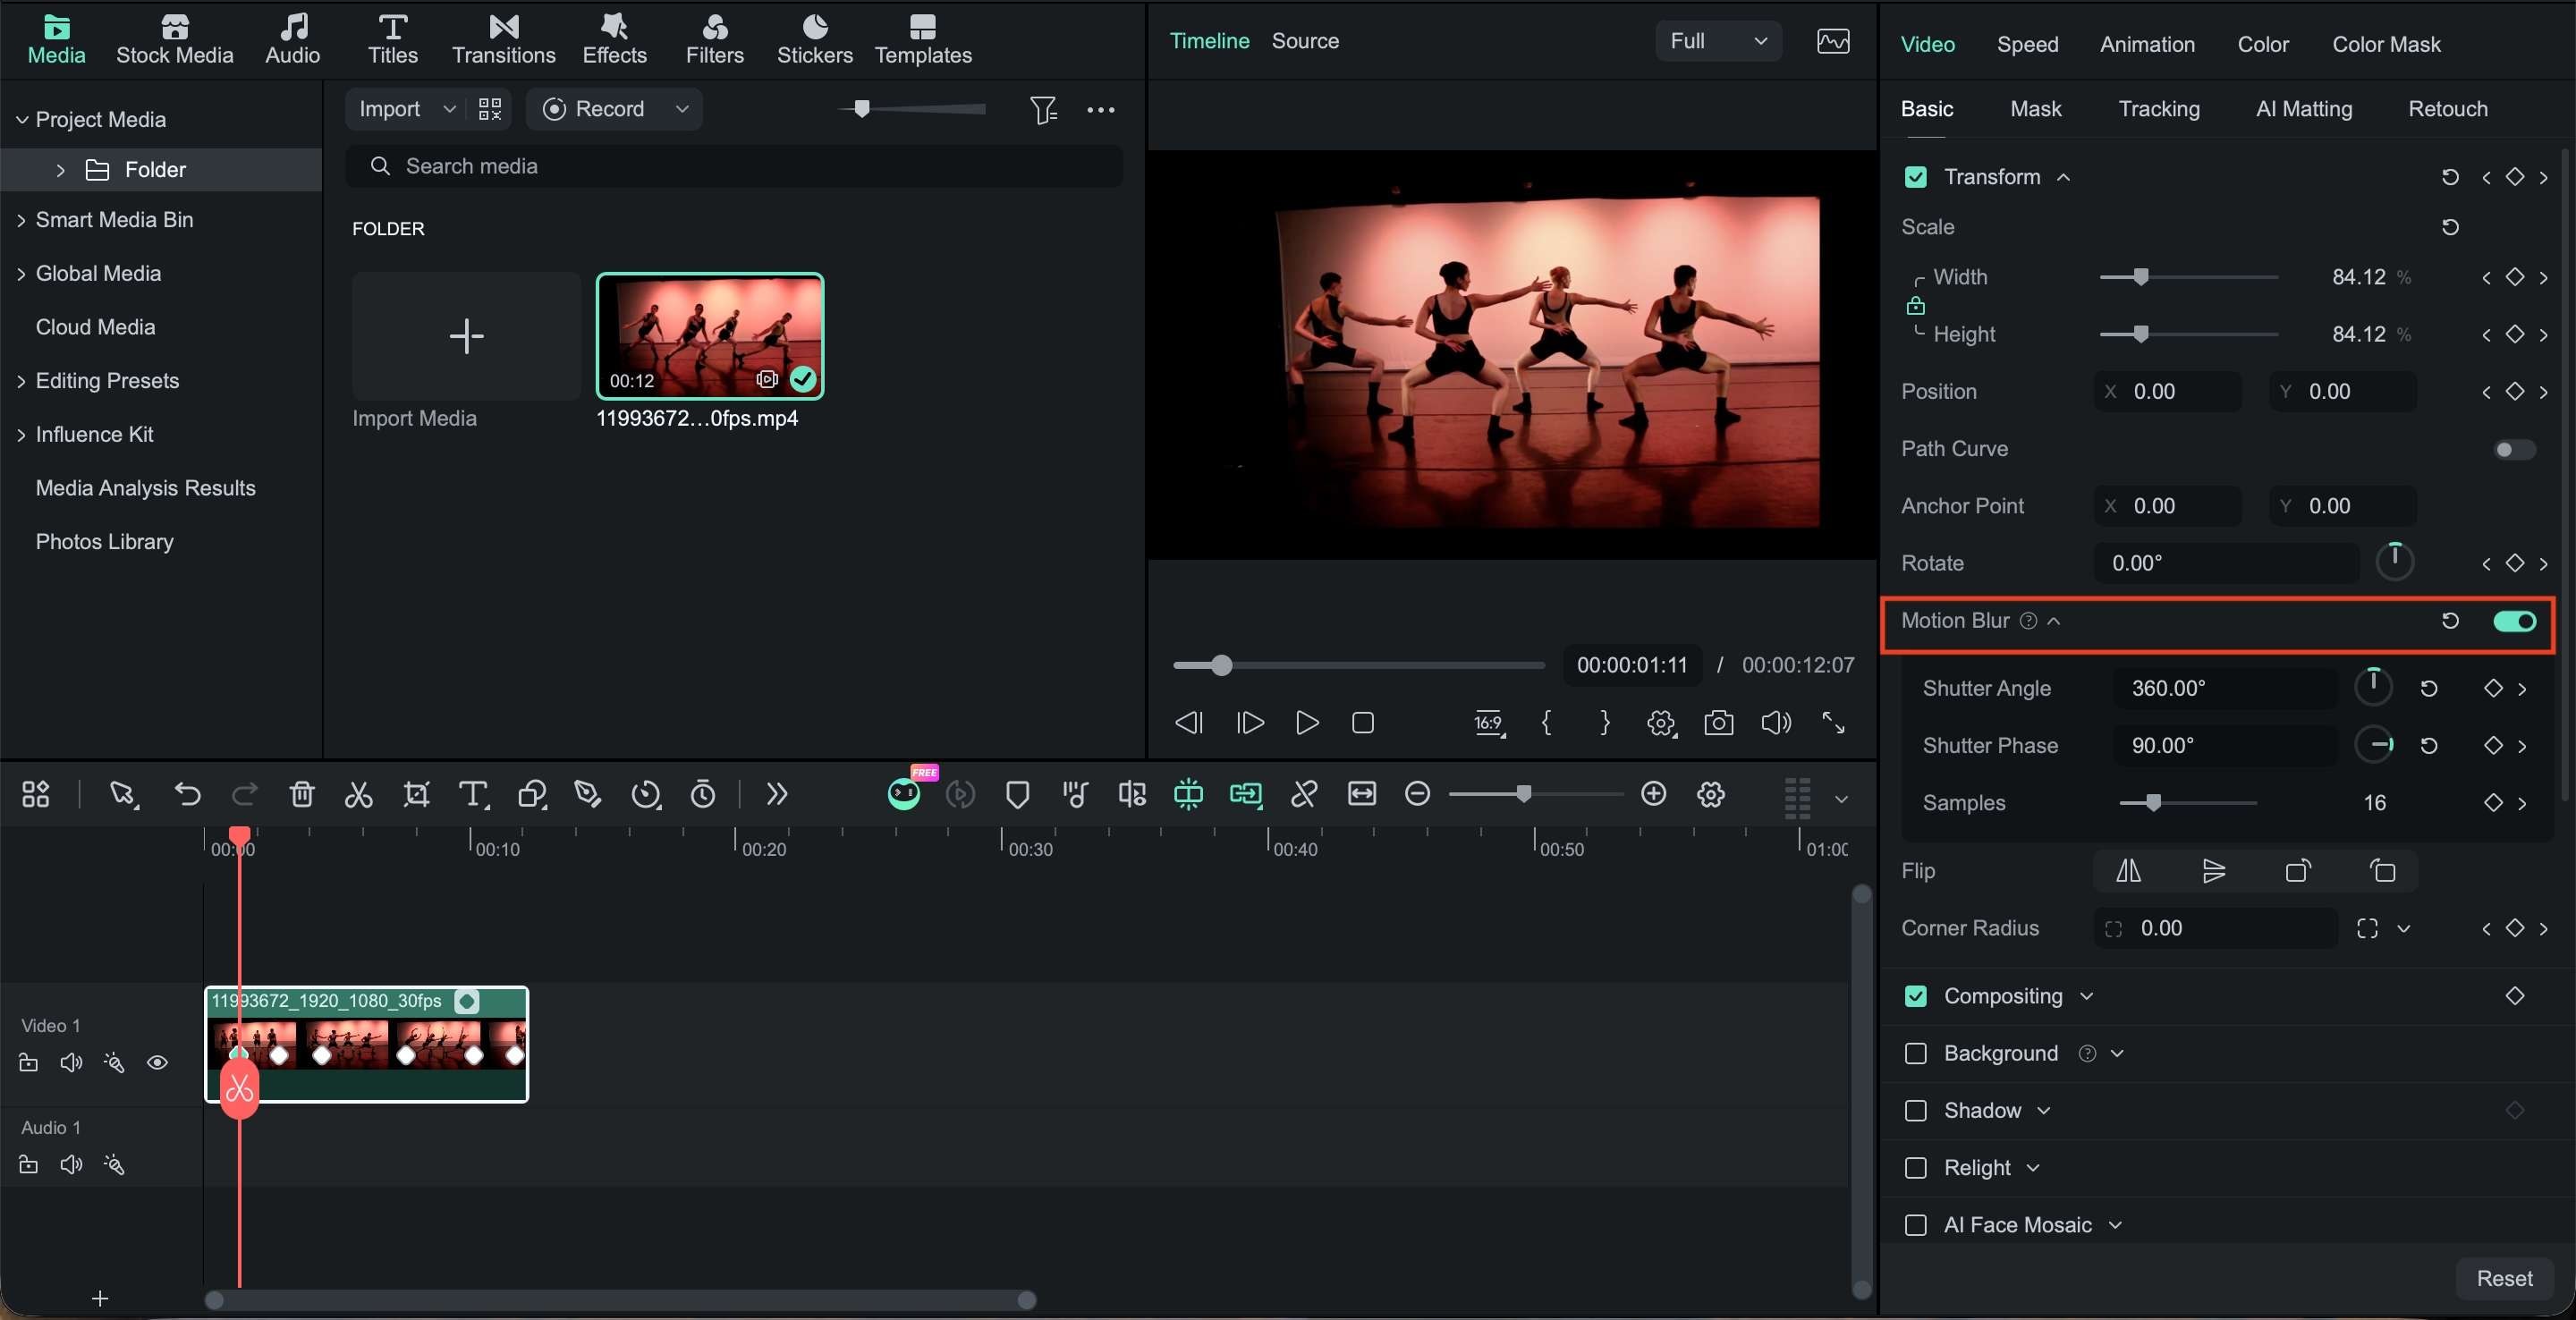
Method 2. Apply Motion Blur
Filmora’s Motion Blur tool applies blur directly to your video clip, making fast movements look smoother and more dynamic. It works well for footage with quick camera movements, drone shots, or speed-ramping effects.
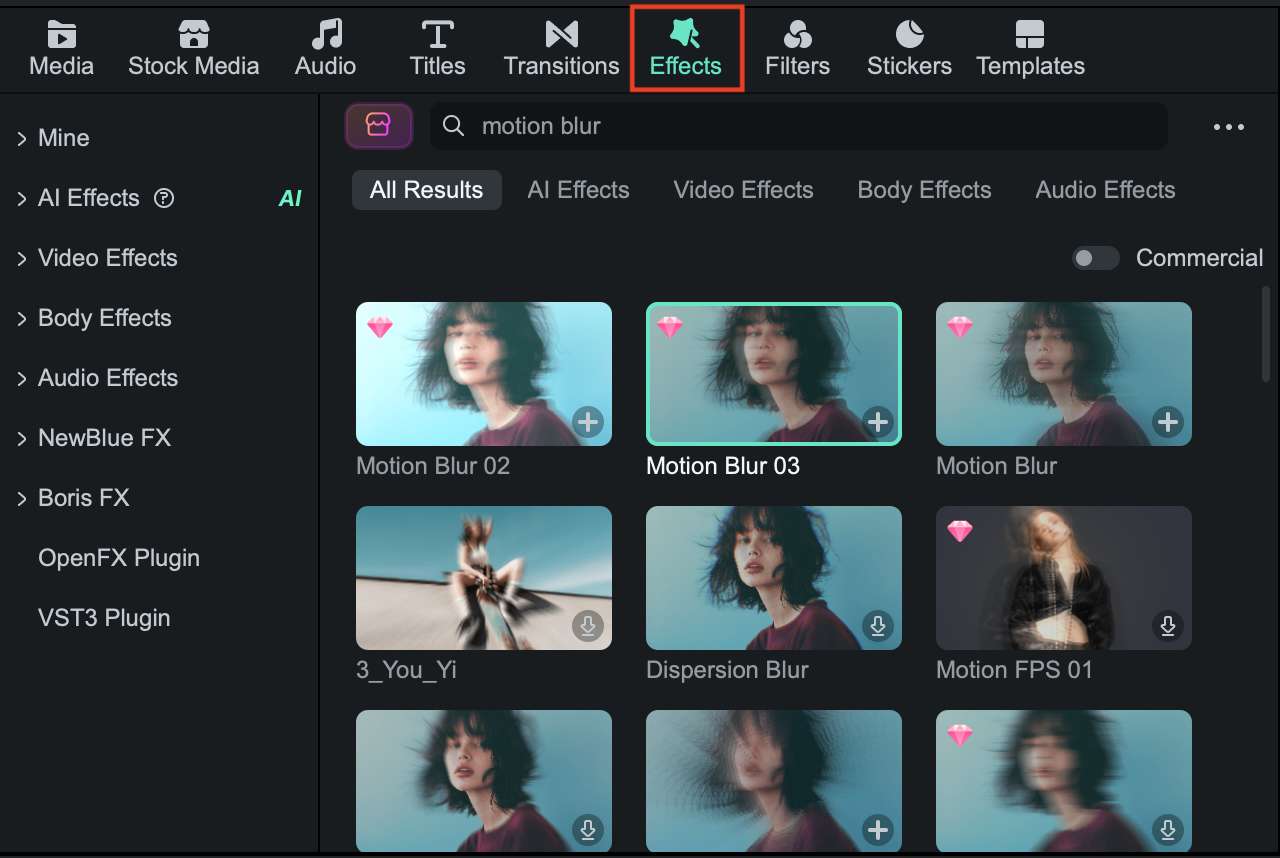
Method 3. Use the Motion Blur Effects
For a more stylish result, you can use motion blur effects from Filmora's Effects library. These effects can add visual movement without requiring keyframe animation.
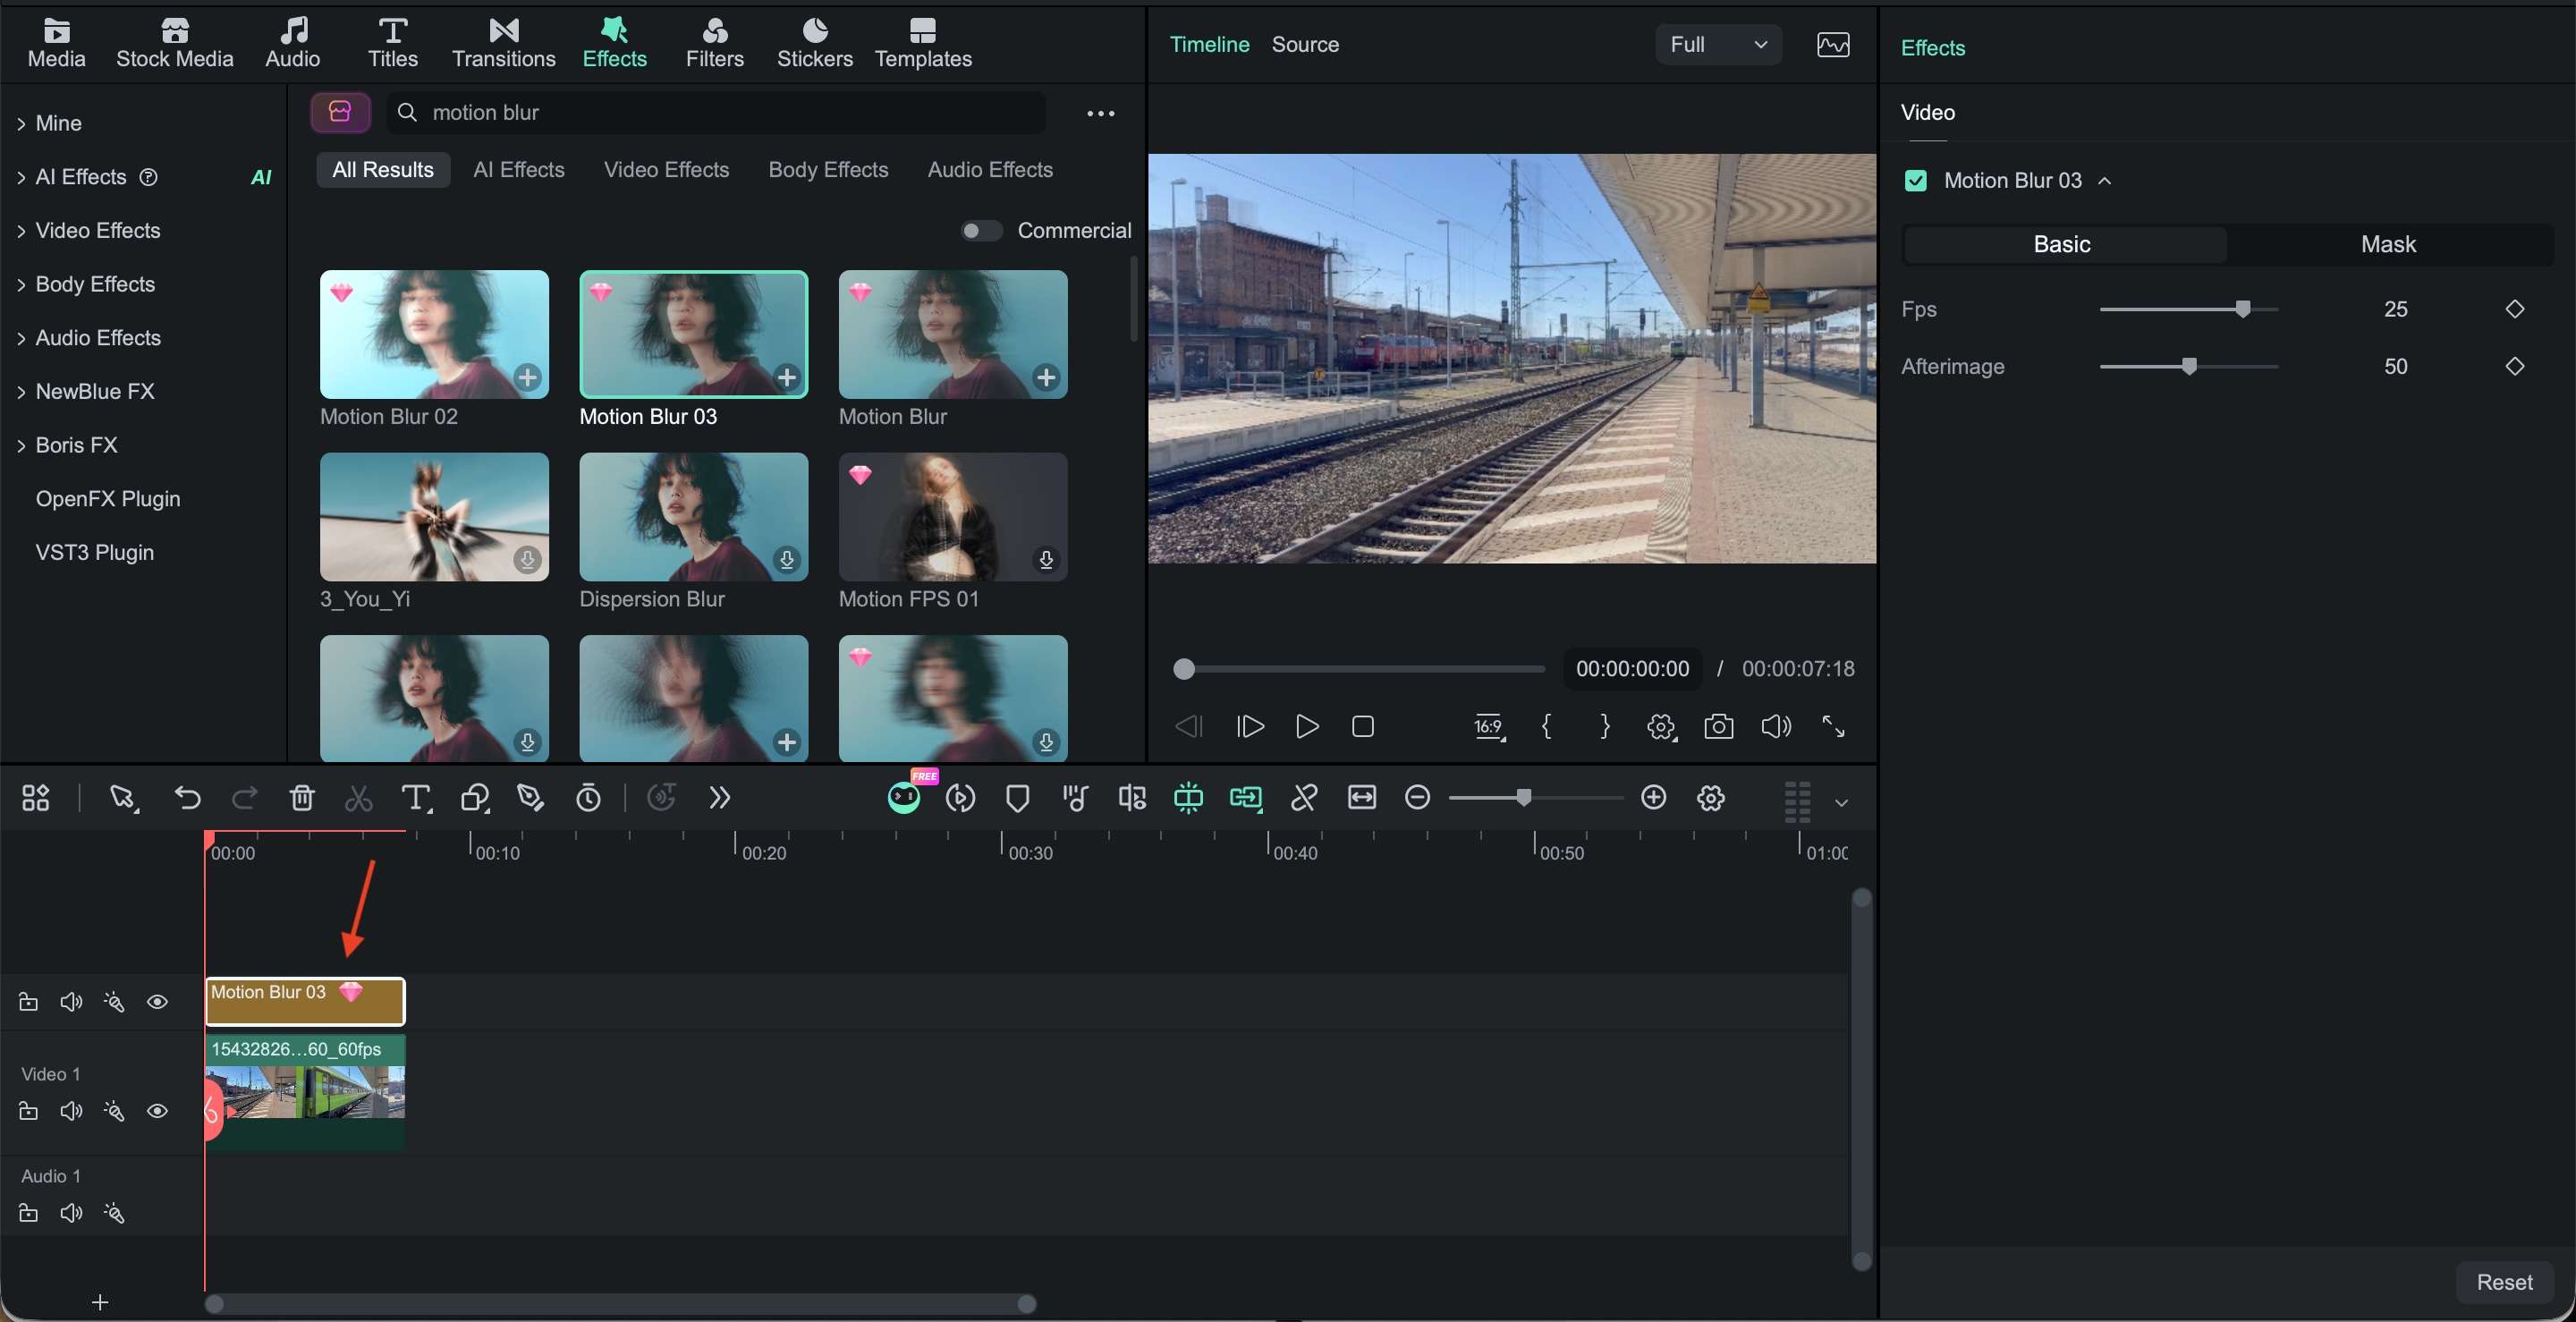
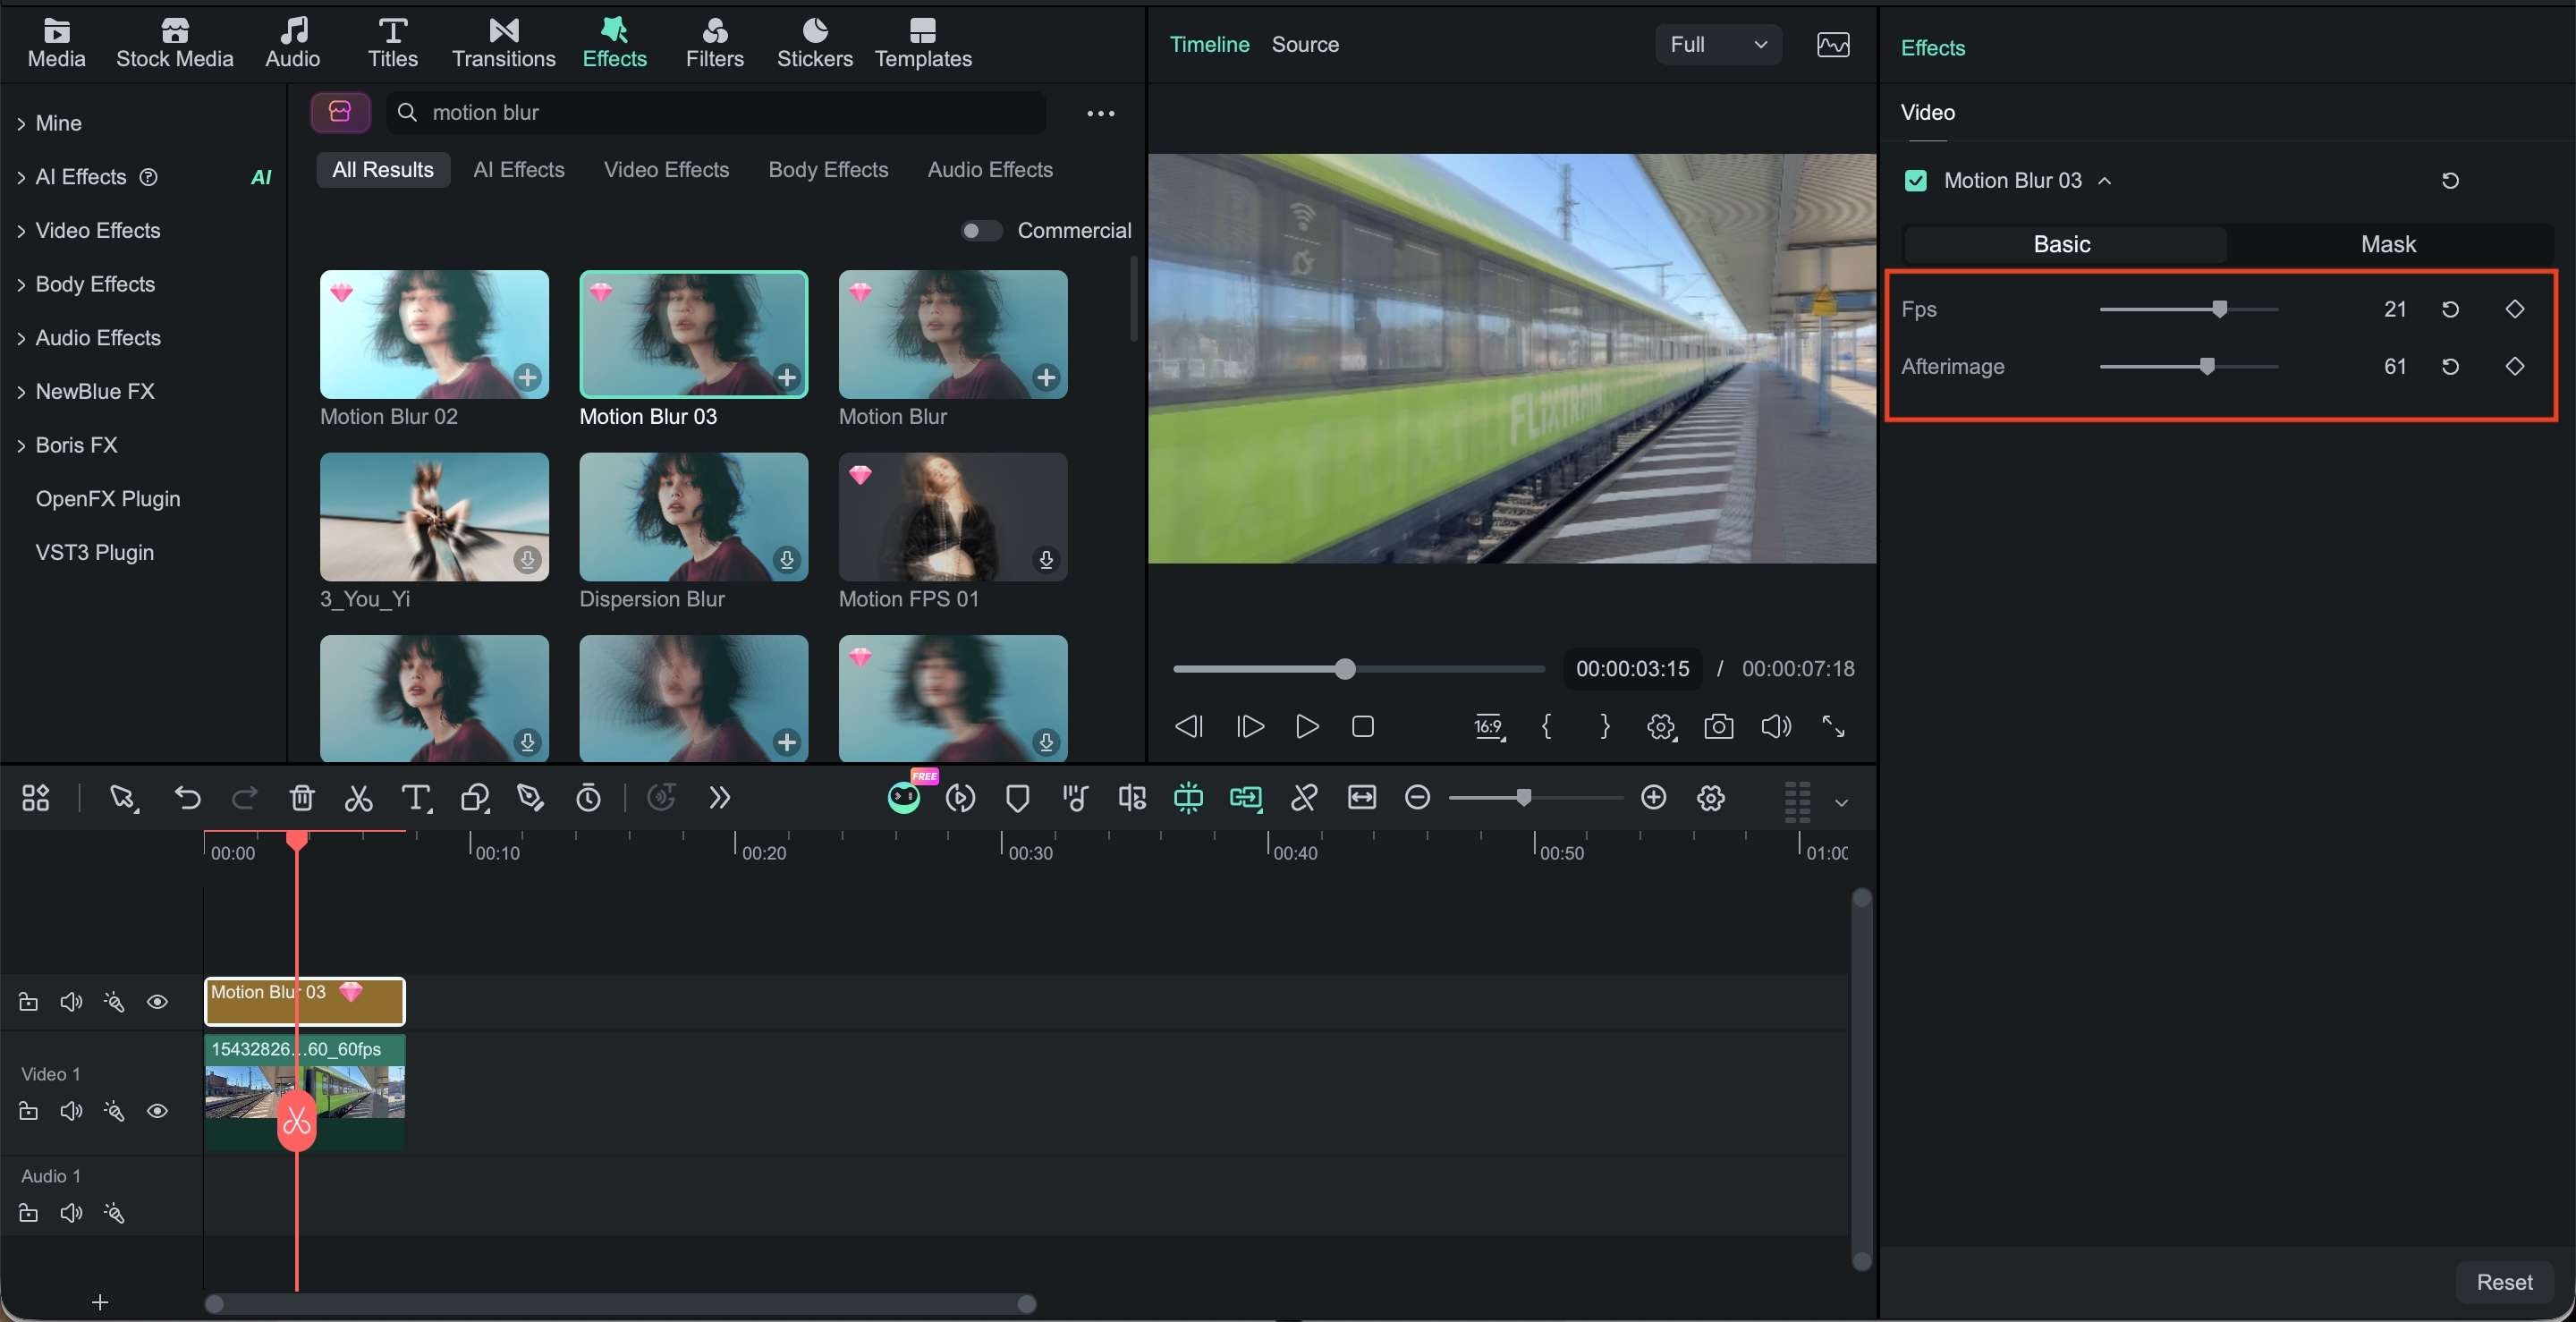
Part 5. After Effects vs. Filmora for Motion Blur
Both After Effects and Filmora can add motion blur to animated movement. After Effects offers more control over compositing, sampling, and motion analysis. Filmora keeps keyframed motion blur inside the clip’s editing controls, making the workflow more convenient for everyday video projects.
| After Effects | Filmora | |
| Blur controls | Shutter Angle, Shutter Phase, Samples Per Frame, and Adaptive Sample Limit, plus Pixel Motion Blur controls | Shutter Angle, Shutter Phase, and Samples for keyframe motion blur |
| Keyframe animation | Motion Blur switch works with animated layers | Motion Blur works with Position, Scale, Rotation, and other supported keyframed movement |
| Existing footage | Pixel Motion Blur analyzes pixel movement and creates blur from motion vectors | Motion Blur can be applied to footage through its editing controls |
| Compositing | Extensive compositing, masking, tracking, 2D/3D animation, and effects workflows | Primarily designed around video editing, effects, transitions, and keyframe animation |
| Control over blur | More detailed control over exposure and adaptive sampling | More direct controls for common keyframe animation needs |
| Ease of use | More settings and a steeper learning curve | Simpler editing workflow with motion blur available within clip properties |
| Best suited to | Complex motion graphics, compositing, VFX, and detailed animation work | Video editing, social content, titles, graphics, and straightforward animated movement |
|
Show More
Show Less
|
||
Which One Should You Use?
- For layered animations, tracking, masks, and VFX, After Effects gives you more control over how motion blur behaves across the composition. Its standard Motion Blur system handles animated layers, and Pixel Motion Blur can create blur from movement already present in footage.
- For keyframed text, images, logos, and simple moving elements, Filmora keeps motion blur within the clip’s editing controls. You can adjust Shutter Angle, Shutter Phase, and Samples without setting up a full compositing workflow.
Choose based on the edit: After Effects fits complex motion graphics and VFX, while Filmora is a more direct option for everyday video editing with keyframed movement.
 Secure Download
Conclusion
Logos, titles, and fast-moving graphics can look harsh when each frame leaves them perfectly sharp. Motion blur in After Effects softens that movement, making animations feel smoother without changing their timing. You can enable the Motion Blur switch in After Effects for animated layers, adjust Shutter Angle and Shutter Phase, or use Pixel Motion Blur for footage with existing movement.
Filmora offers a simpler workflow for keyframed elements, with motion blur controls built into its editing tools. Choose the setup that suits your project, then fine-tune the blur so fast movement looks smooth without making text, graphics, or other details hard to see.
FAQs
-
Can motion blur affect text and shape layers in After Effects?
Yes. Motion Blur works on animated text and shape layers, so a title sliding across the screen or a shape rotating can pick up blur based on its movement. Turn on the layer’s Motion Blur switch and the composition’s Motion Blur switch. -
Can After Effects add motion blur to a still image?
Yes, but the image needs to move. Keyframe its Position, Scale, or Rotation, then enable Motion Blur. If the image stays in the same position, After Effects has no movement to blur. -
Can you use motion blur on a masked layer in After Effects?
Yes. A masked layer can still use Motion Blur when the layer is animated. For example, you can reveal part of an image with a mask while moving the layer across the frame, and the visible portion will blur with that movement.
