


Motion blur can make a still photo feel like it's moving. It can show speed in a passing car, soften rushing water, or turn night traffic into light trails. To create this effect, you mainly need to control how long the shutter stays open, since a slower shutter speed lets movement register as a streak instead of a sharp edge.
Below, you will find what causes motion blur, four examples worth trying, and a step-by-step guide on how to capture motion blur. Even if the moment has already passed, we will show you how to add the effect in Wondershare Filmora.
Part 1. What Is Motion Blur?
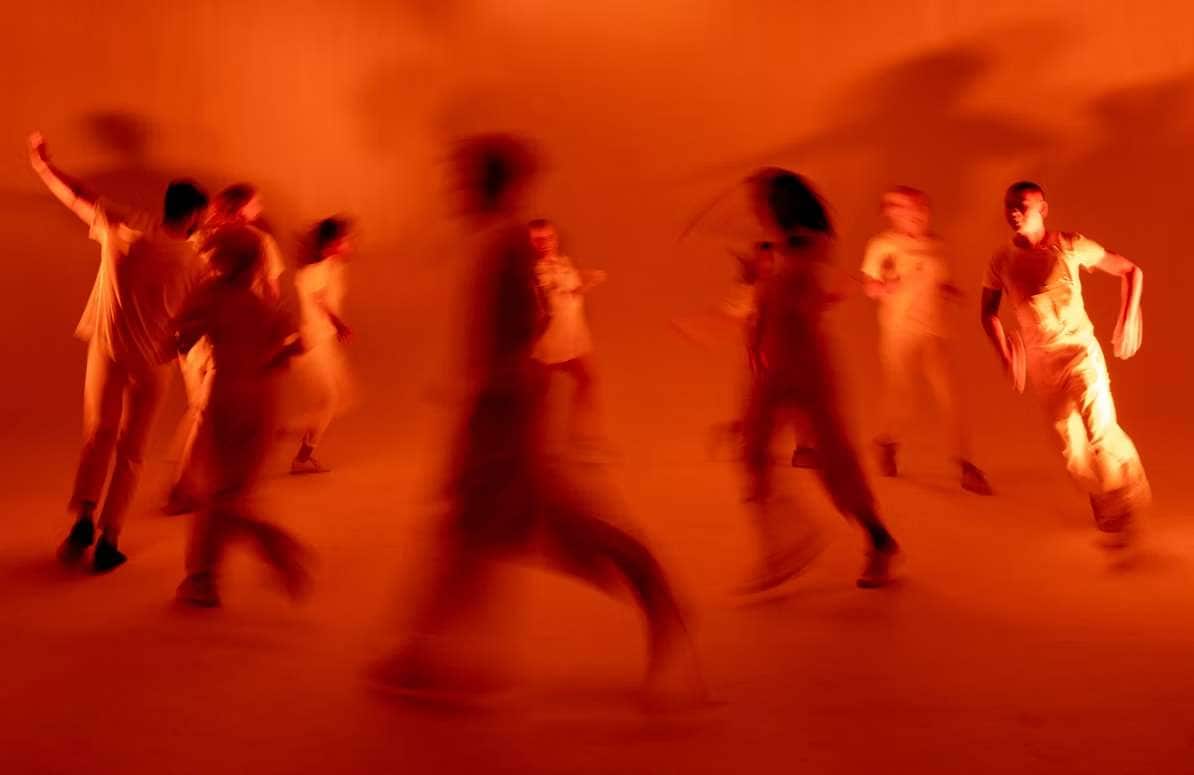
Motion blur is a photography effect that makes moving subjects or parts of an image appear blurred or stretched. It happens when a moving subject or a moving camera changes position while the shutter is open. The sensor records the movement as a smear or streak instead of a sharp edge. Photographers often use it to show speed, energy, and movement in an image that would otherwise feel frozen.
What Causes Motion Blur in Photography?
- Shutter speed: Shutter speed controls how long the camera sensor is exposed to light. The longer the shutter stays open, the more distance a moving subject travels during the exposure. Slow shutter speeds create more blur. Fast ones freeze movement.
- Subject speed: A fast subject blurs more than a slow one at the same shutter speed. A running dog and a walking person need very different settings.
- Camera movement: Panning, handheld shake, or deliberate camera motion all add blur. A tripod removes camera-caused blur, so only the subject looks blurred.
- Focal length: Focal length is the distance between the lens's optical center and the camera sensor, usually measured in millimeters (mm). Longer lenses magnify both the subject and any camera shake, so blur shows up more easily. A wide lens makes distant subjects look smaller and slower in the frame.
- Lighting conditions: Dim light forces slower shutter speeds if you want a normal exposure. Bright daylight makes long exposures harder, so photographers often add a neutral density (ND) filter to cut the light.
Part 2. Motion Blur Examples in Photography
Motion blur shows up in many types of photography. The four examples below show common techniques for blur action photography, with each one using the effect to create a different visual result.
1. Moving Cars
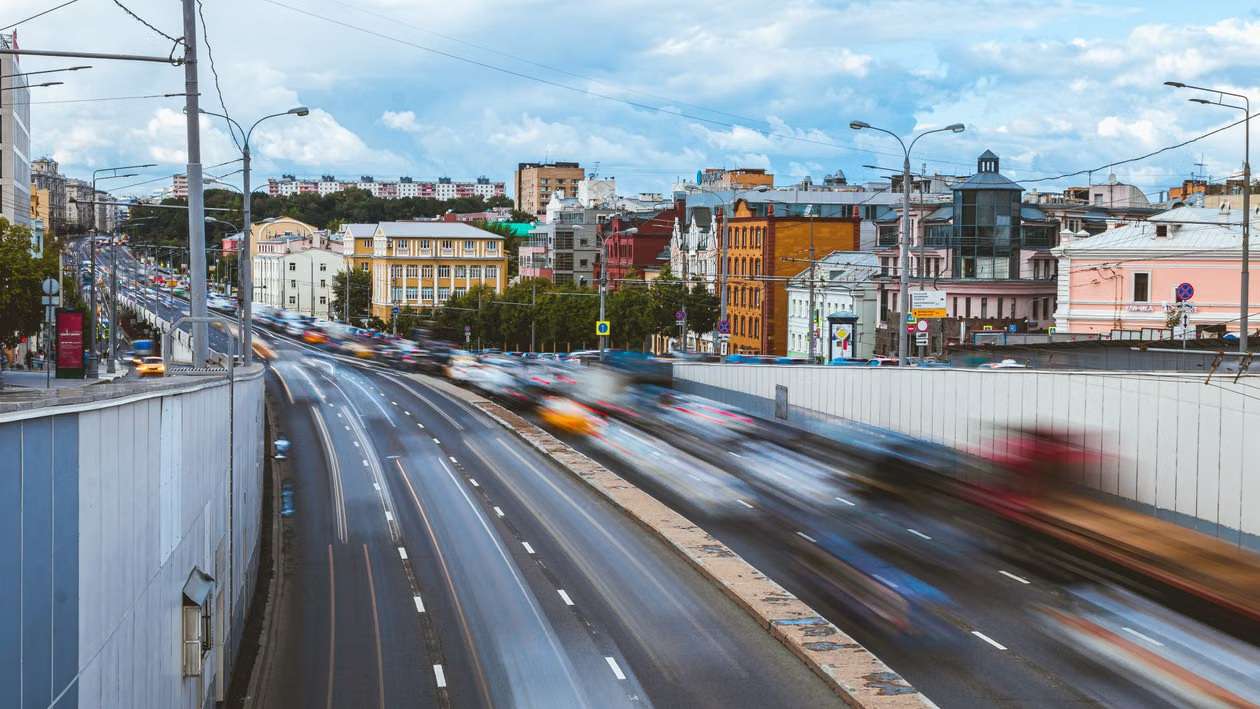
Cars and other vehicles are common subjects for motion blur photography. A slow shutter speed can turn headlights and taillights into long streaks, especially when photographing at night. It can also blur the car itself as it moves through the frame, and creates a stronger sense of speed and movement.
2. Sports or Blurred Movement Photography
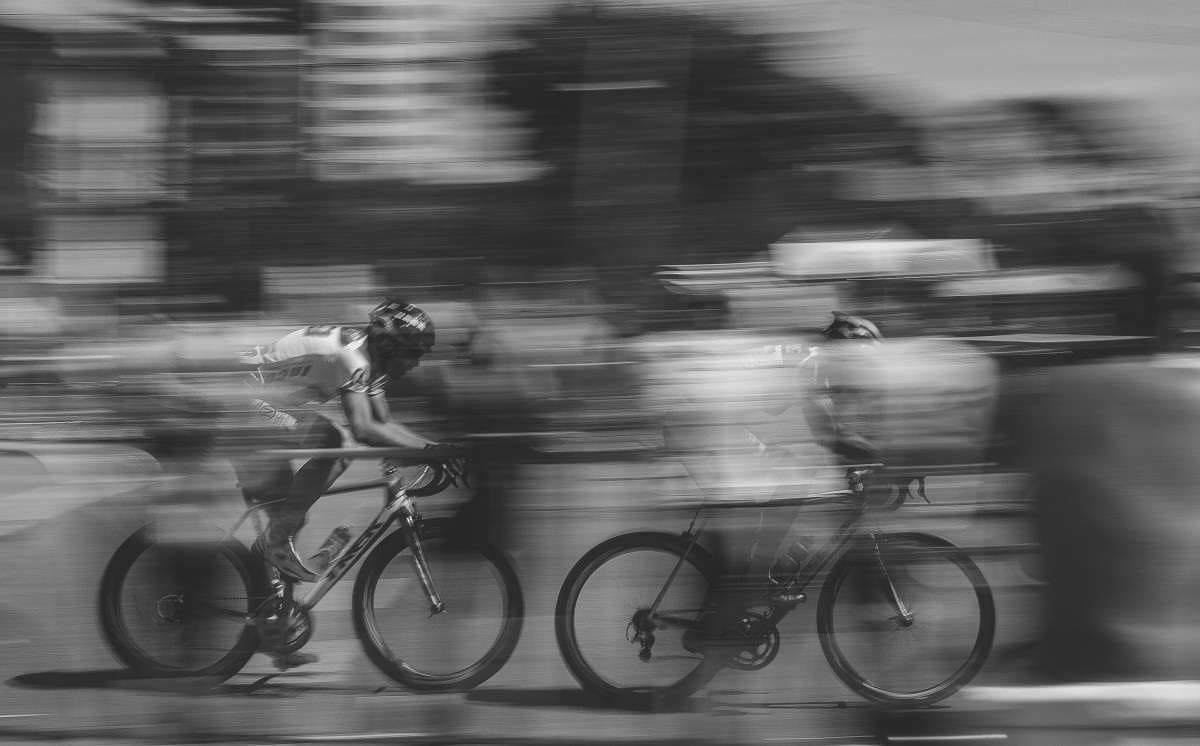
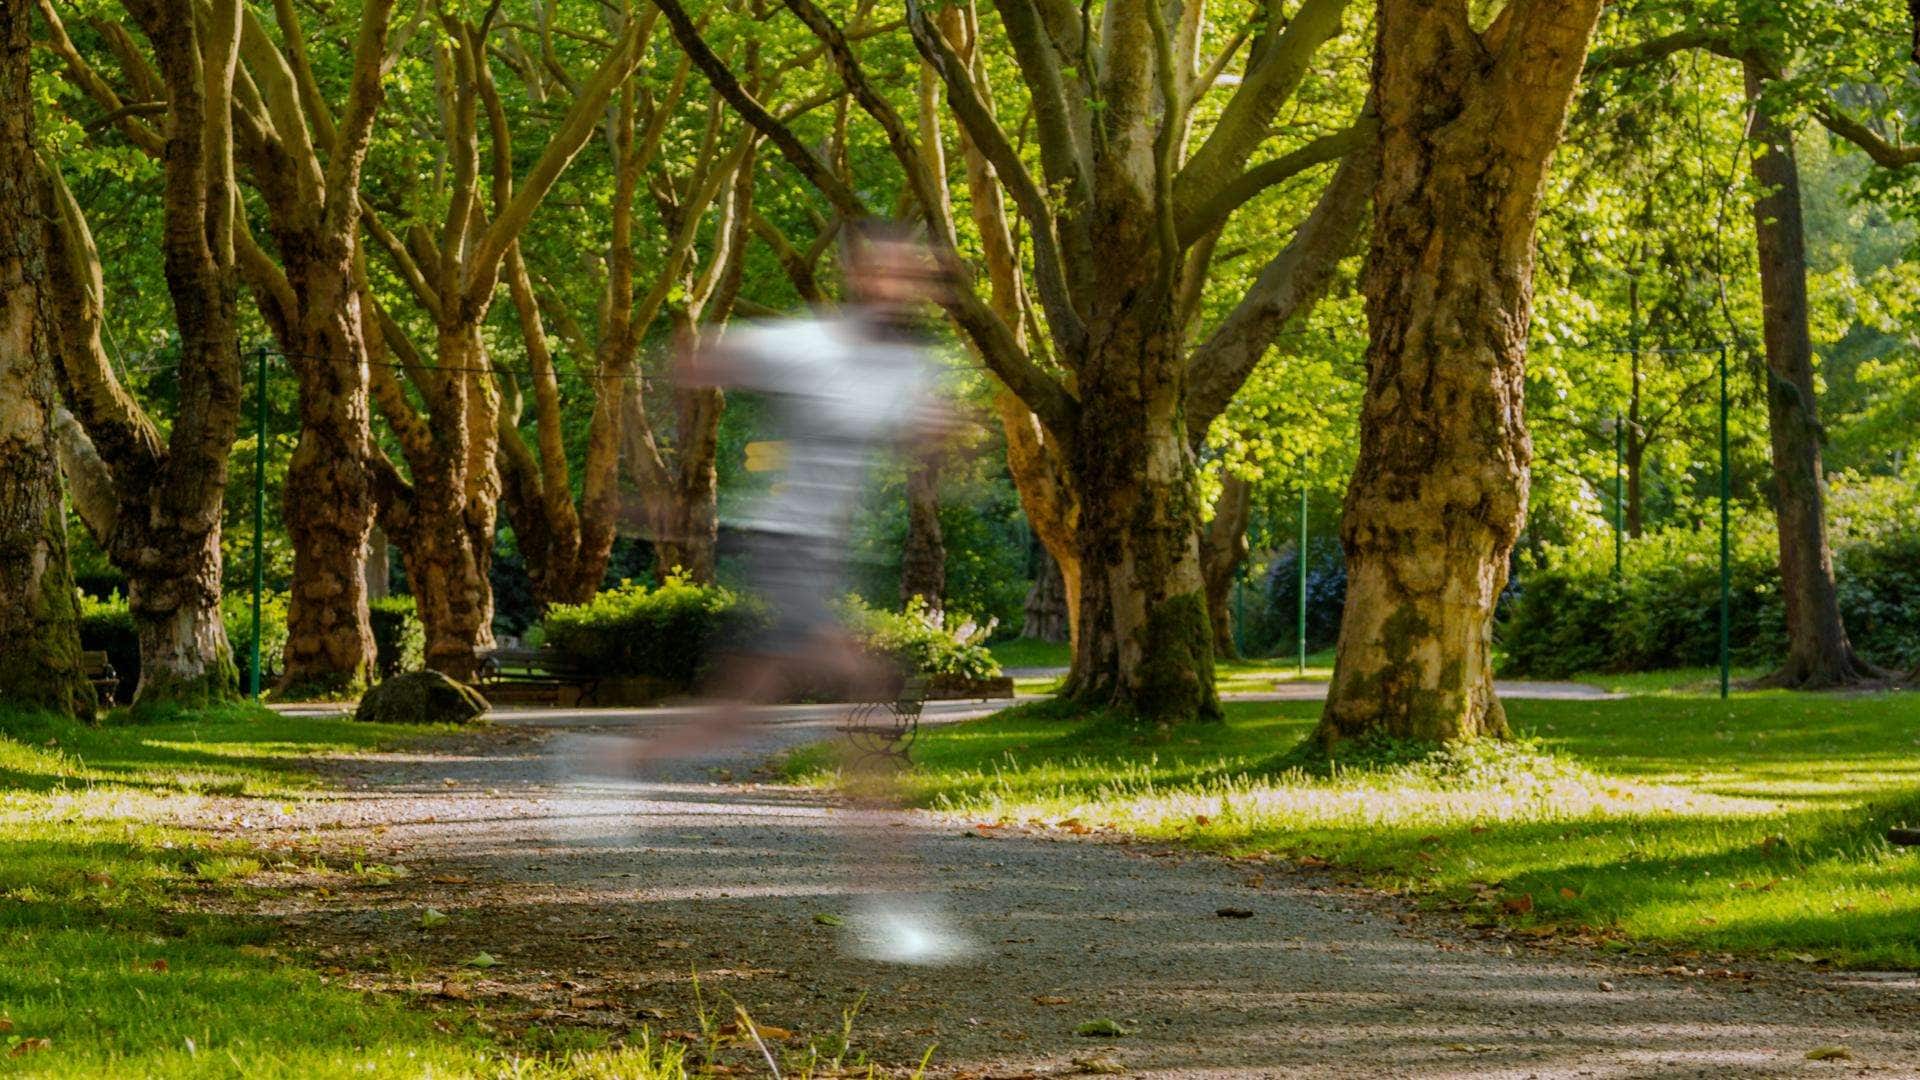
Sports provide plenty of opportunities to use motion blur. Running athletes, cyclists, dancers, and other fast-moving subjects can all create interesting results. A slower shutter speed can capture their movement as a soft blur, while keeping parts of the subject sharp can make the action feel more dynamic.
3. Waterfalls and Moving Water
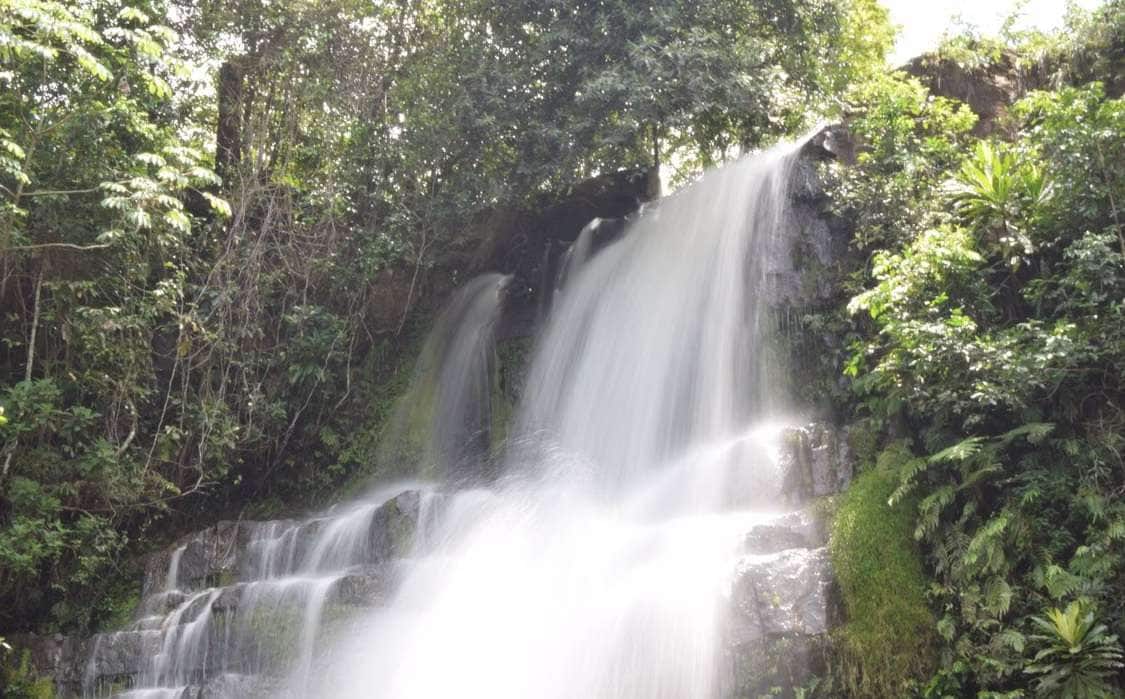
Water is a popular subject for long exposures. A shutter speed around half a second to a few seconds can turn rushing water into a soft, silky flow you often see in professional photography. In daylight, a neutral density filter can help reduce the amount of light entering the lens so you can use a longer exposure without making the photo too bright.
4. Light Trails
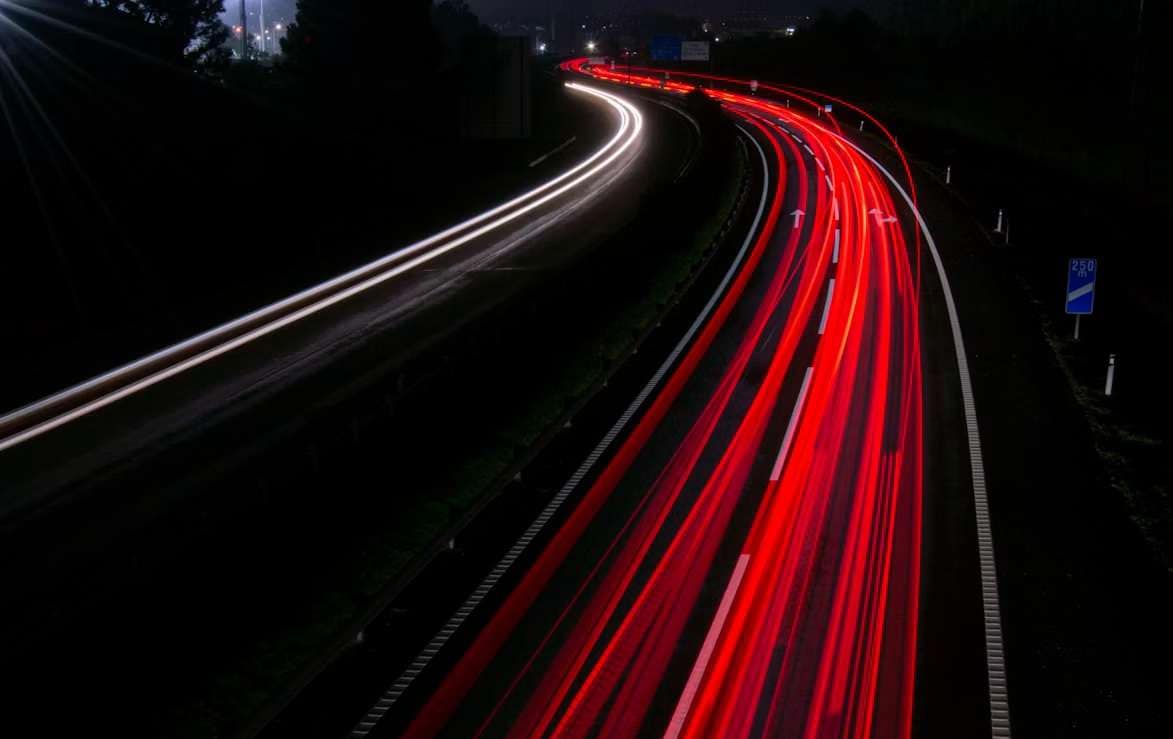
At night, moving lights can create bright lines and streaks across the frame. Some popular examples are car headlights on a highway, a Ferris wheel, or a boat with lights. To create such effect, you need to keep the camera completely still during the exposure.
A longer exposure gives the moving lights more time to travel across the frame, which creates longer and more visible trails as a result.
Part 3. How to Capture Motion Blur in Photography
Motion blur is easy to try with the gear you may already have. What you need is a camera with control over shutter speed and, for some shots, a tripod. Follow the steps below on how to capture motion blur:
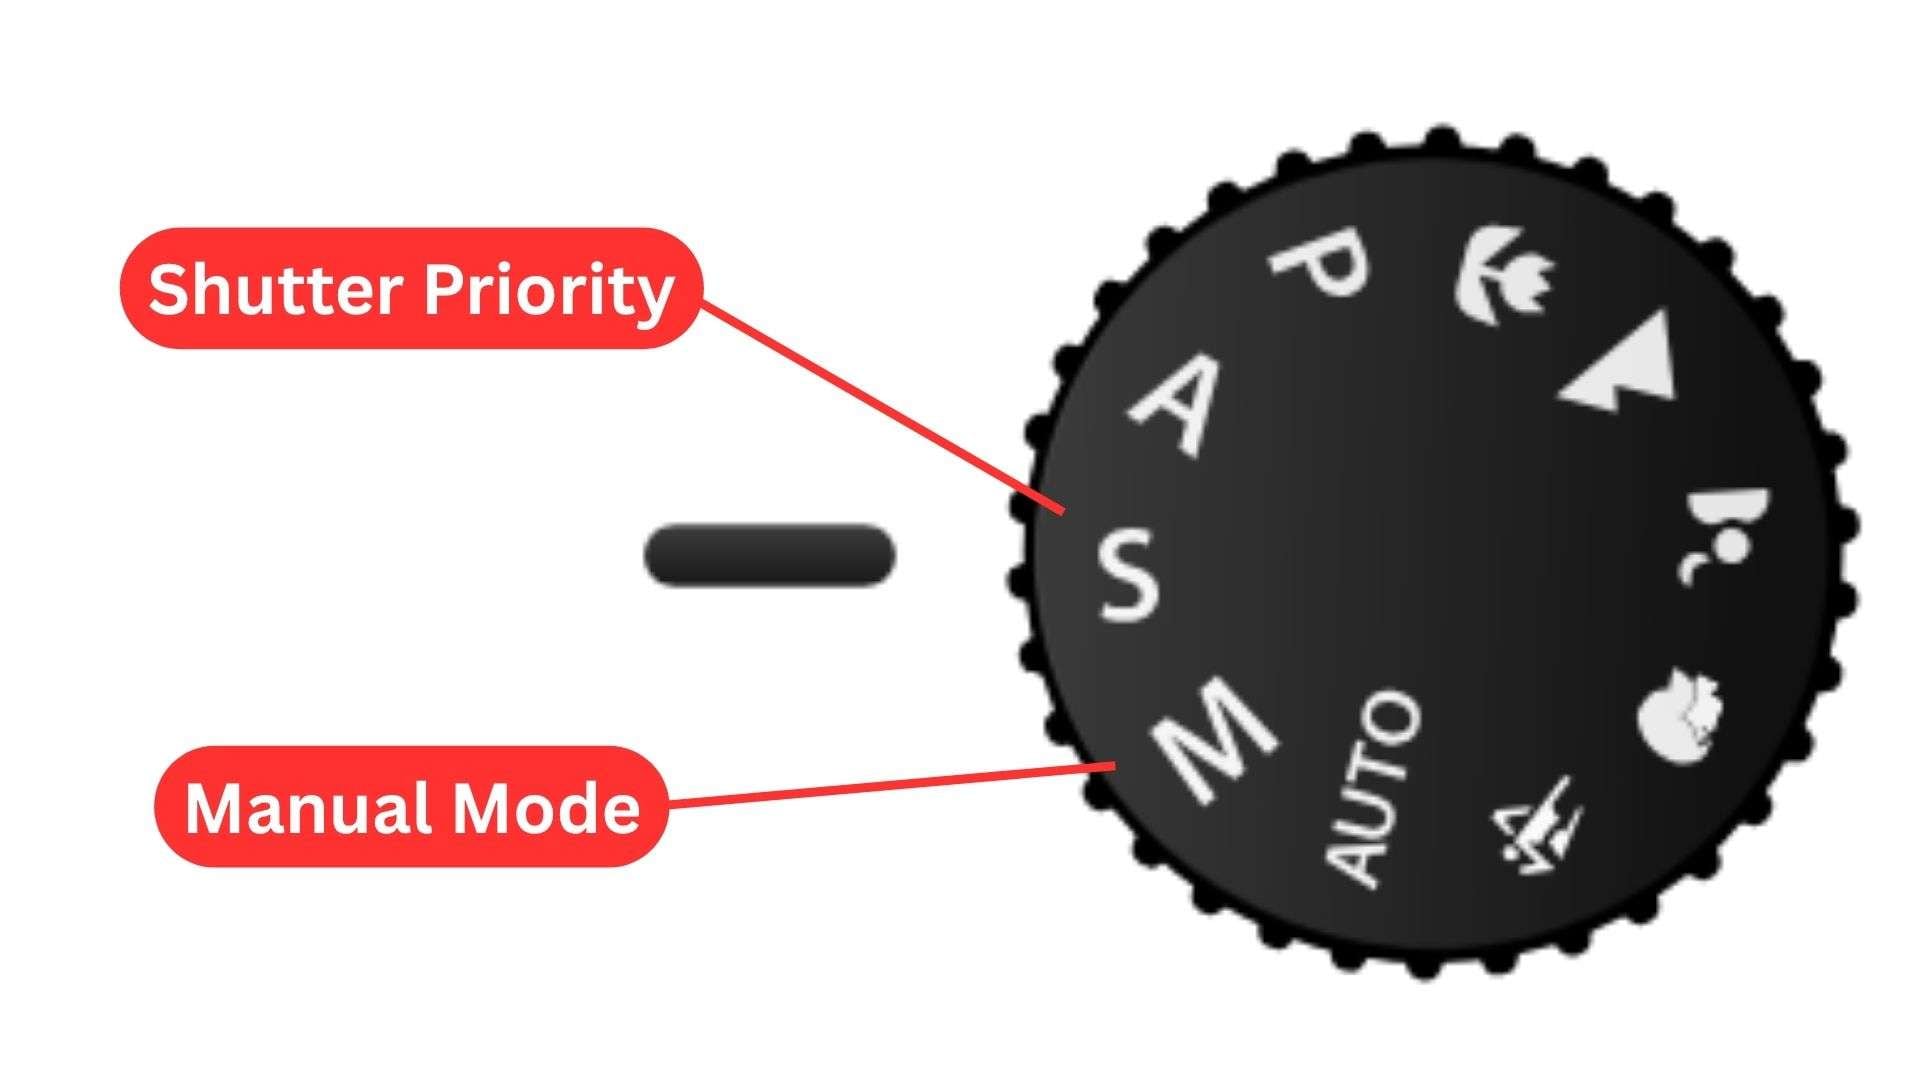
For beginners: Use Shutter Priority (S or Tv) if your camera supports it to set the shutter speed while the camera adjusts the aperture.
For more experienced photographers: Use Manual mode to control the shutter speed, aperture, and ISO yourself.
| Shutter Speed* | Typical Result |
| 1/500 sec or faster | Freezes most movement with little visible blur |
| 1/250 to 1/60 sec | Shows subtle movement while keeping more detail |
| 1/30 to 1/15 sec | Creates noticeable motion blur |
| 1/8 to 1 sec | Creates stronger blur and longer light trails |
| 1 sec or slower | Creates heavy blur and smooths moving elements |
|
Show More
Show Less
|
|
*) These are starting points, not fixed rules. The result can be different depending on subject speed, distance, lens, lighting, and camera movement. Very fast subjects may require much faster shutter speeds to freeze completely.
For predictable movement: Try pre-focusing on the area where the subject will pass.
For long exposures of static scenes: Focus first, then switch to manual focus so the camera doesn’t refocus.
Take the shot and check the result on your camera. Motion blur can take a few attempts to get right, so expect some missed shots at first. You will get better results as you experiment more.
Part 4. How to Add Motion Blur to a Photo in Editing
Even without a camera, you can still add motion blur to a photo by editing. Wondershare Filmora is a video editor that can help you add motion blur to photos and other visual assets. It’s useful when you missed the shot, want more control, or need to composite work.
There are a few ways to do motion blur editing in Filmora, depending on how much control you want over the movement:
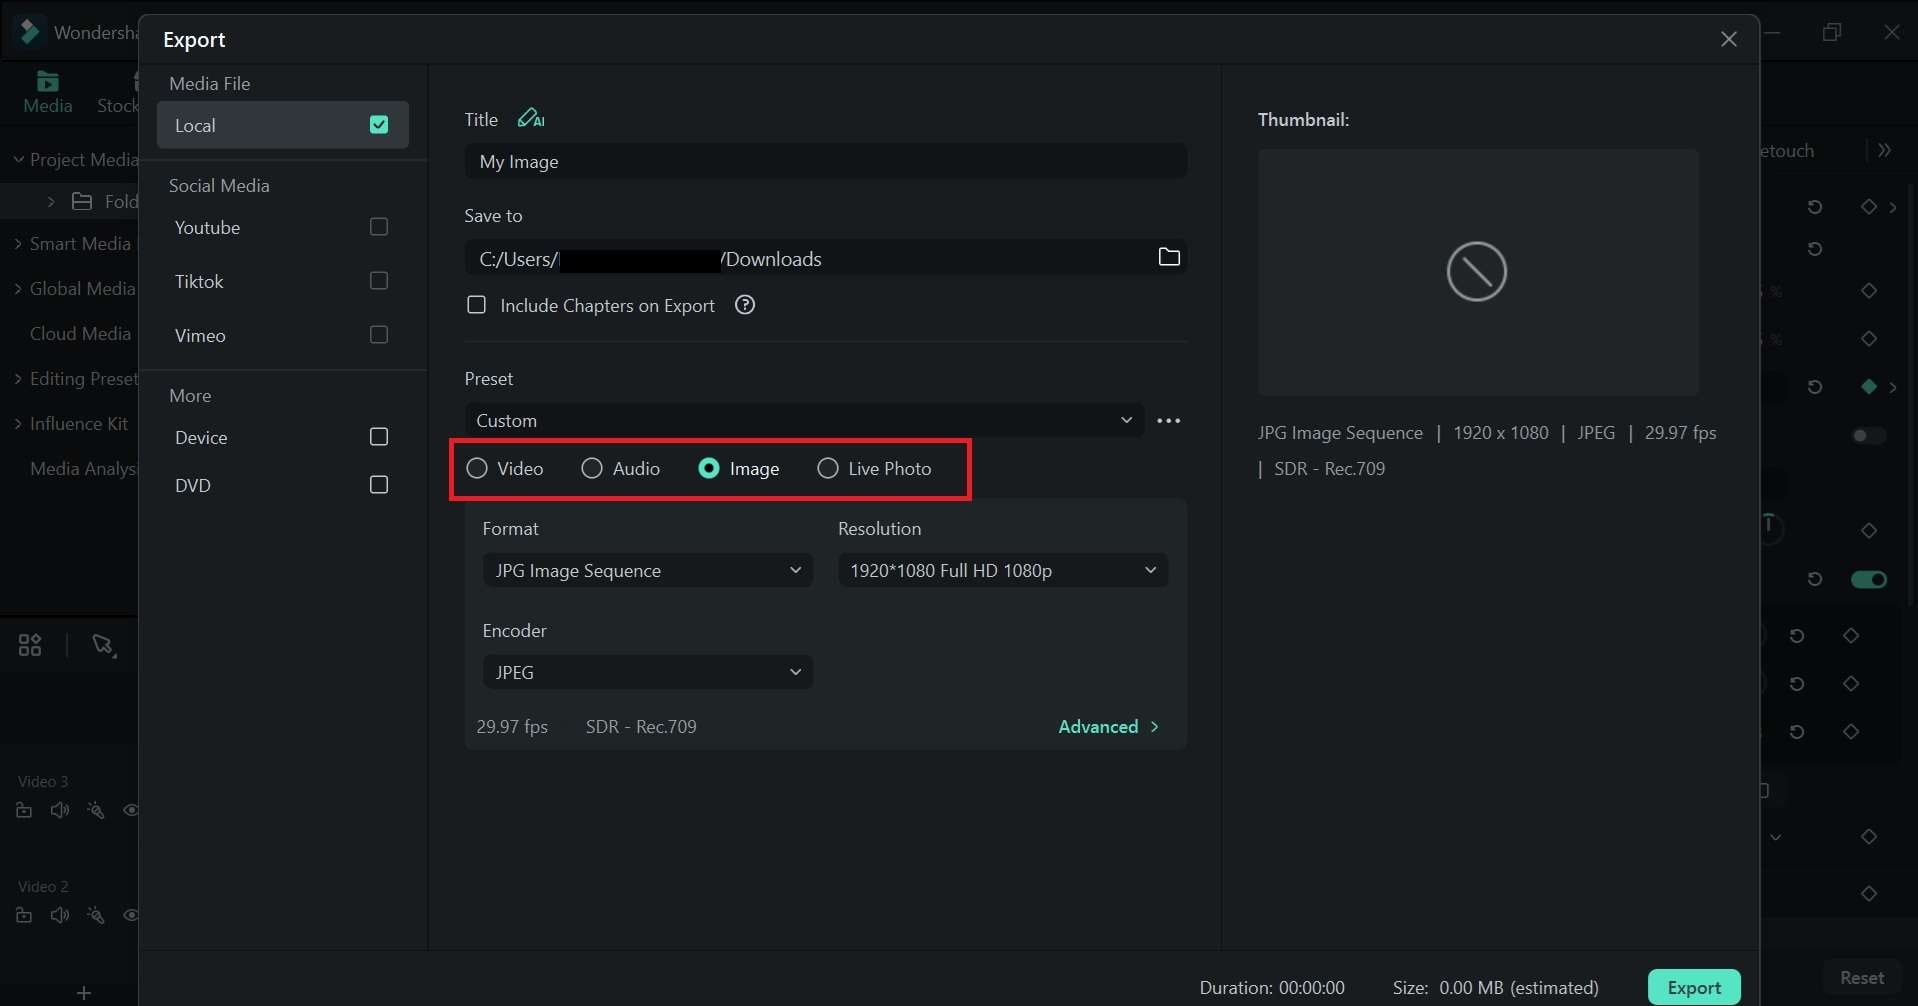
- Keyframe Motion Blur: Animate the photo using keyframes, then apply motion blur to make the movement look smoother. This option gives you more control over the direction, timing, and intensity of the blur.
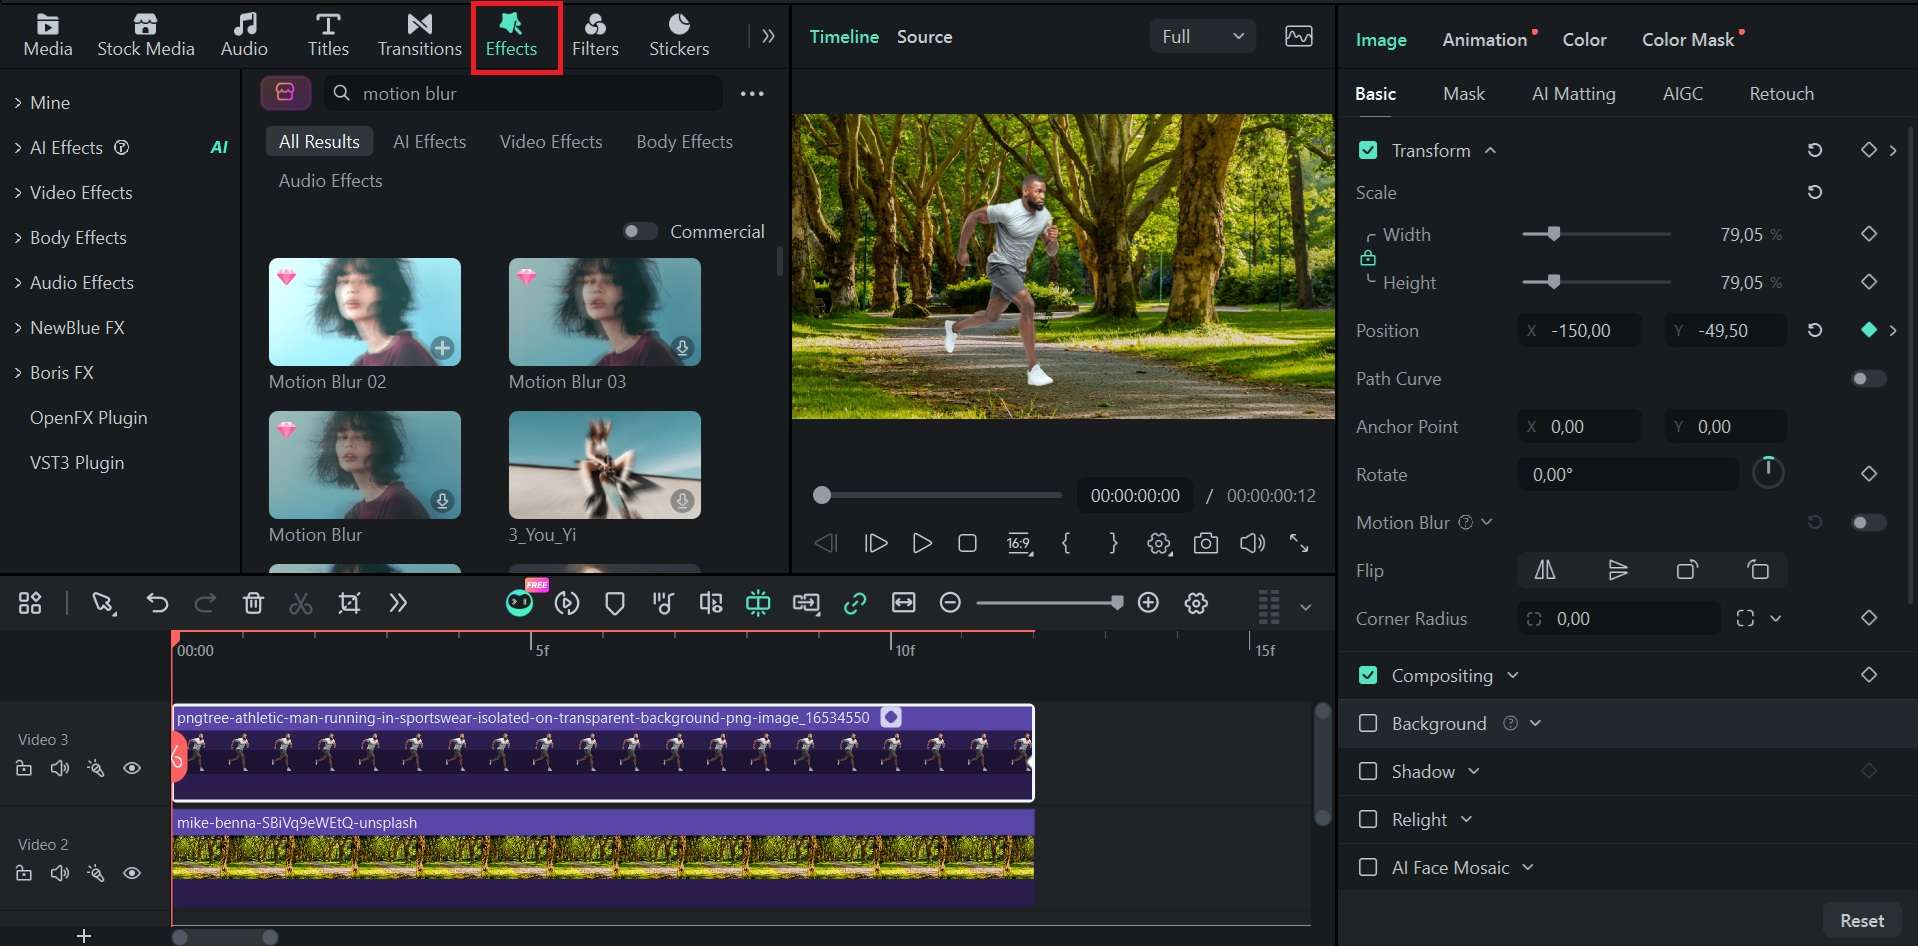
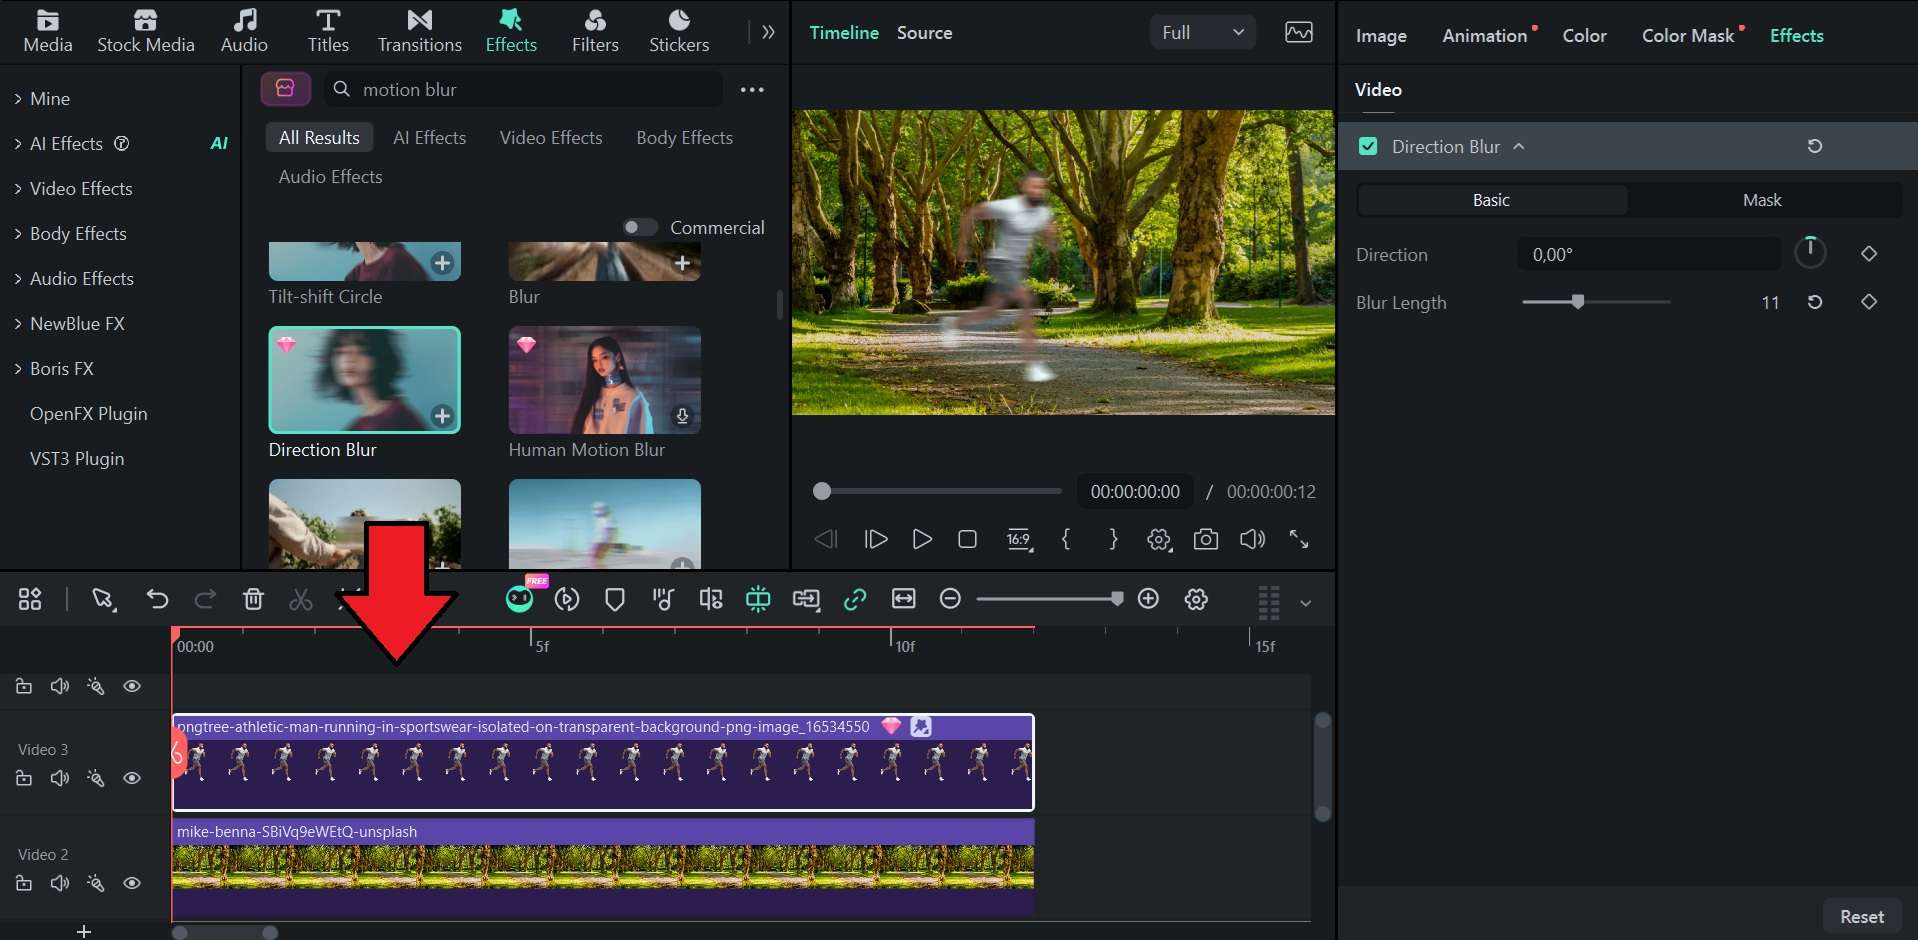
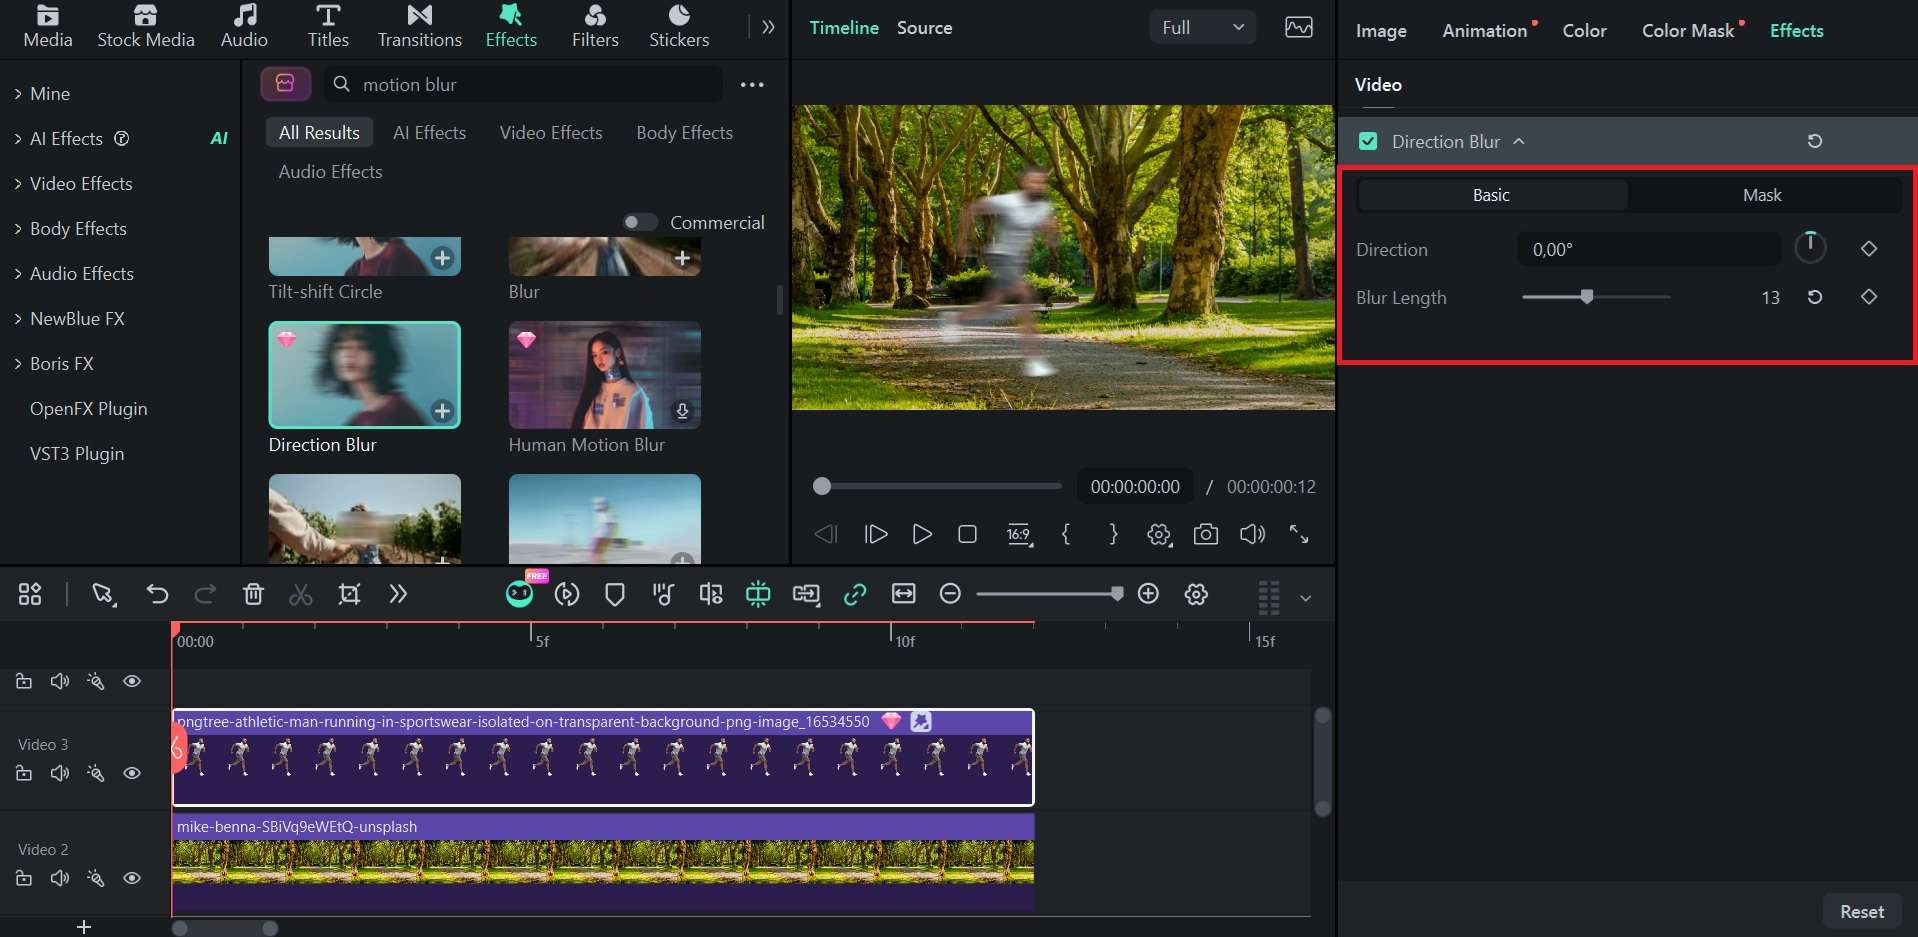
- Motion Blur Effects: Apply a ready-made motion blur effect directly to your photo or video clip for a quicker way to create the look without setting up keyframe animation.
1. Using Keyframe Motion Blur
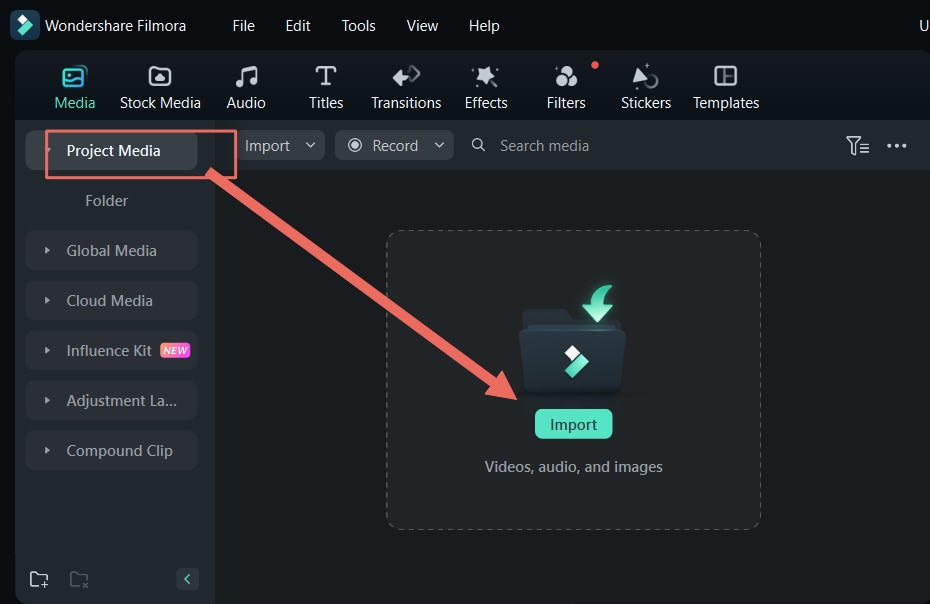
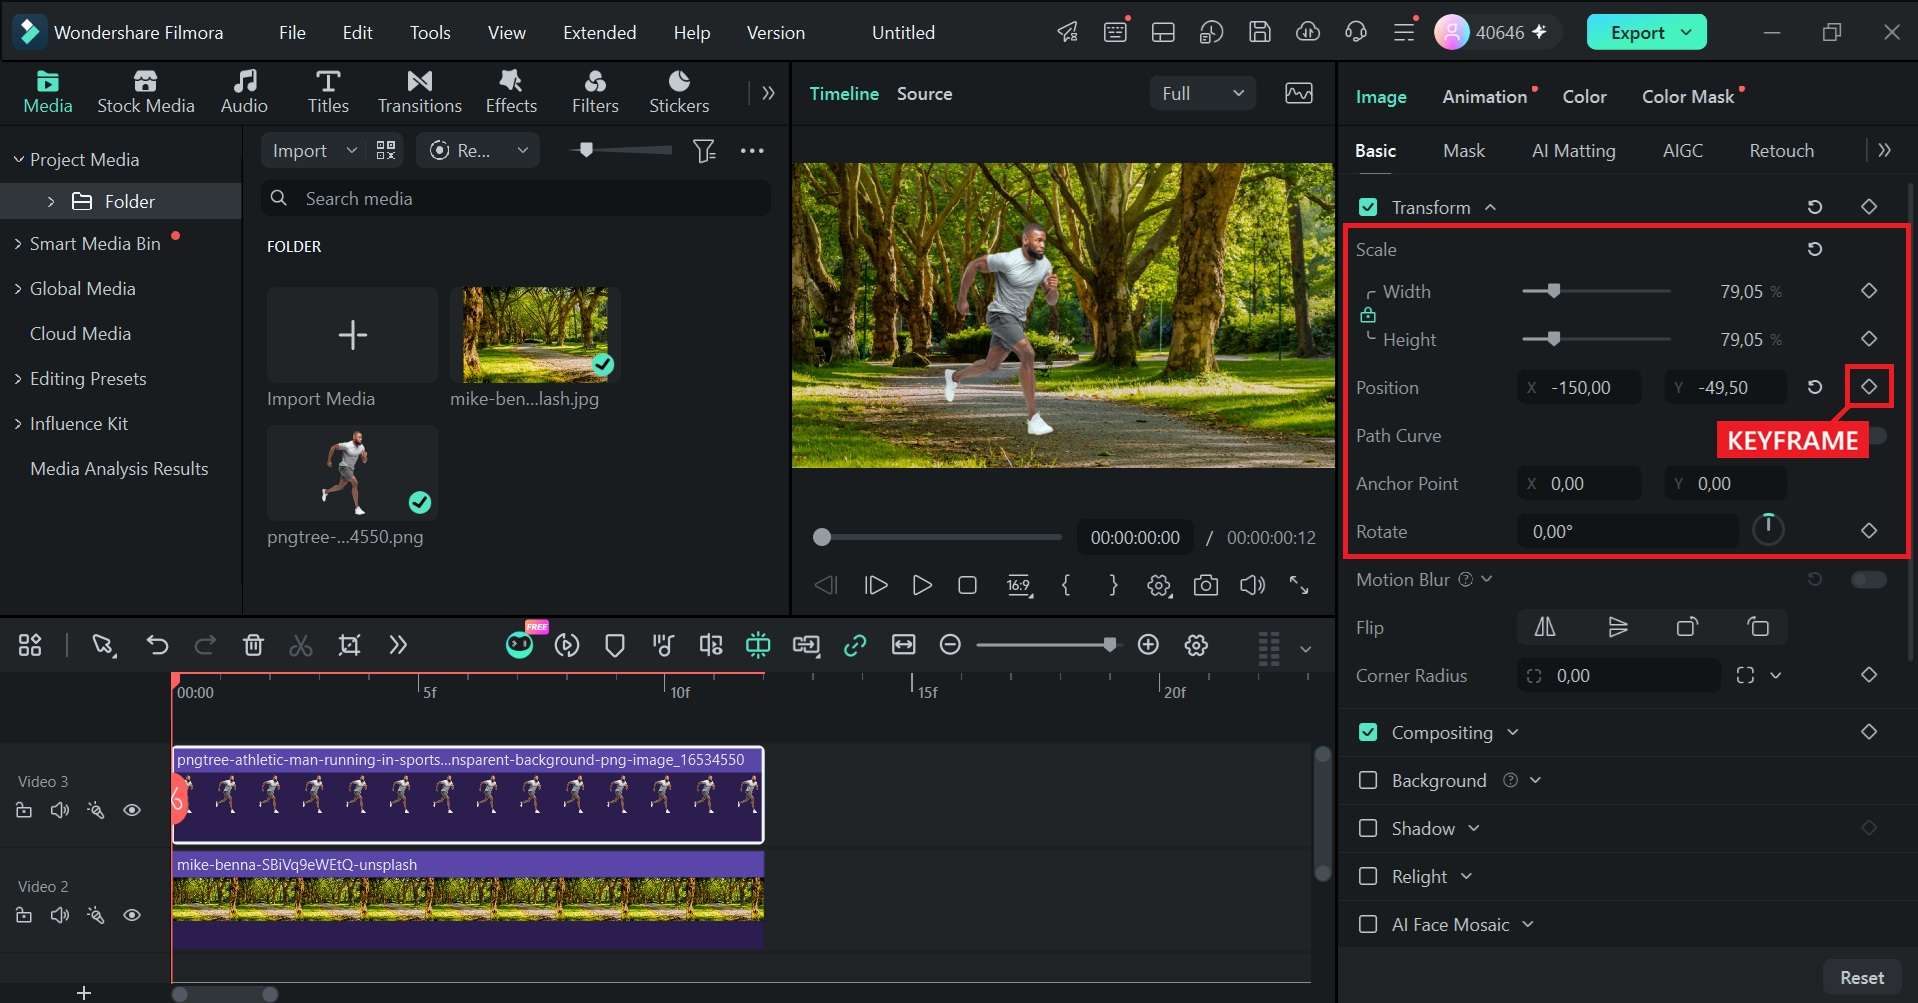
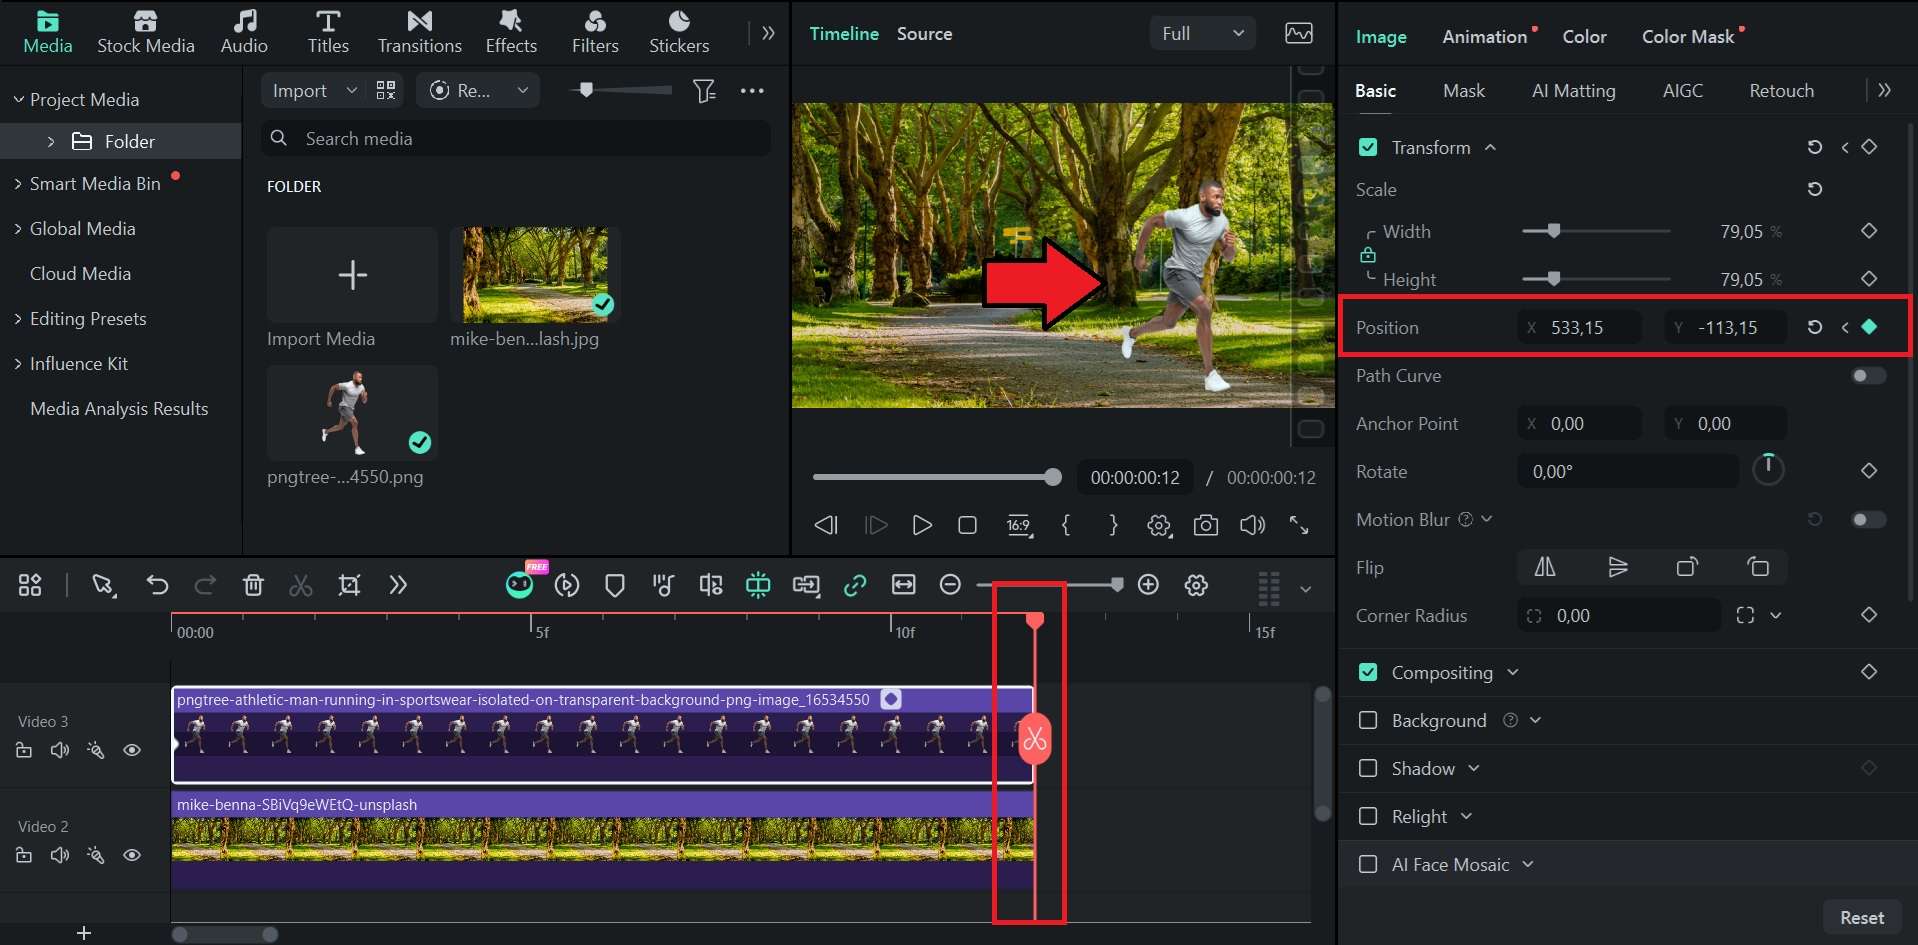
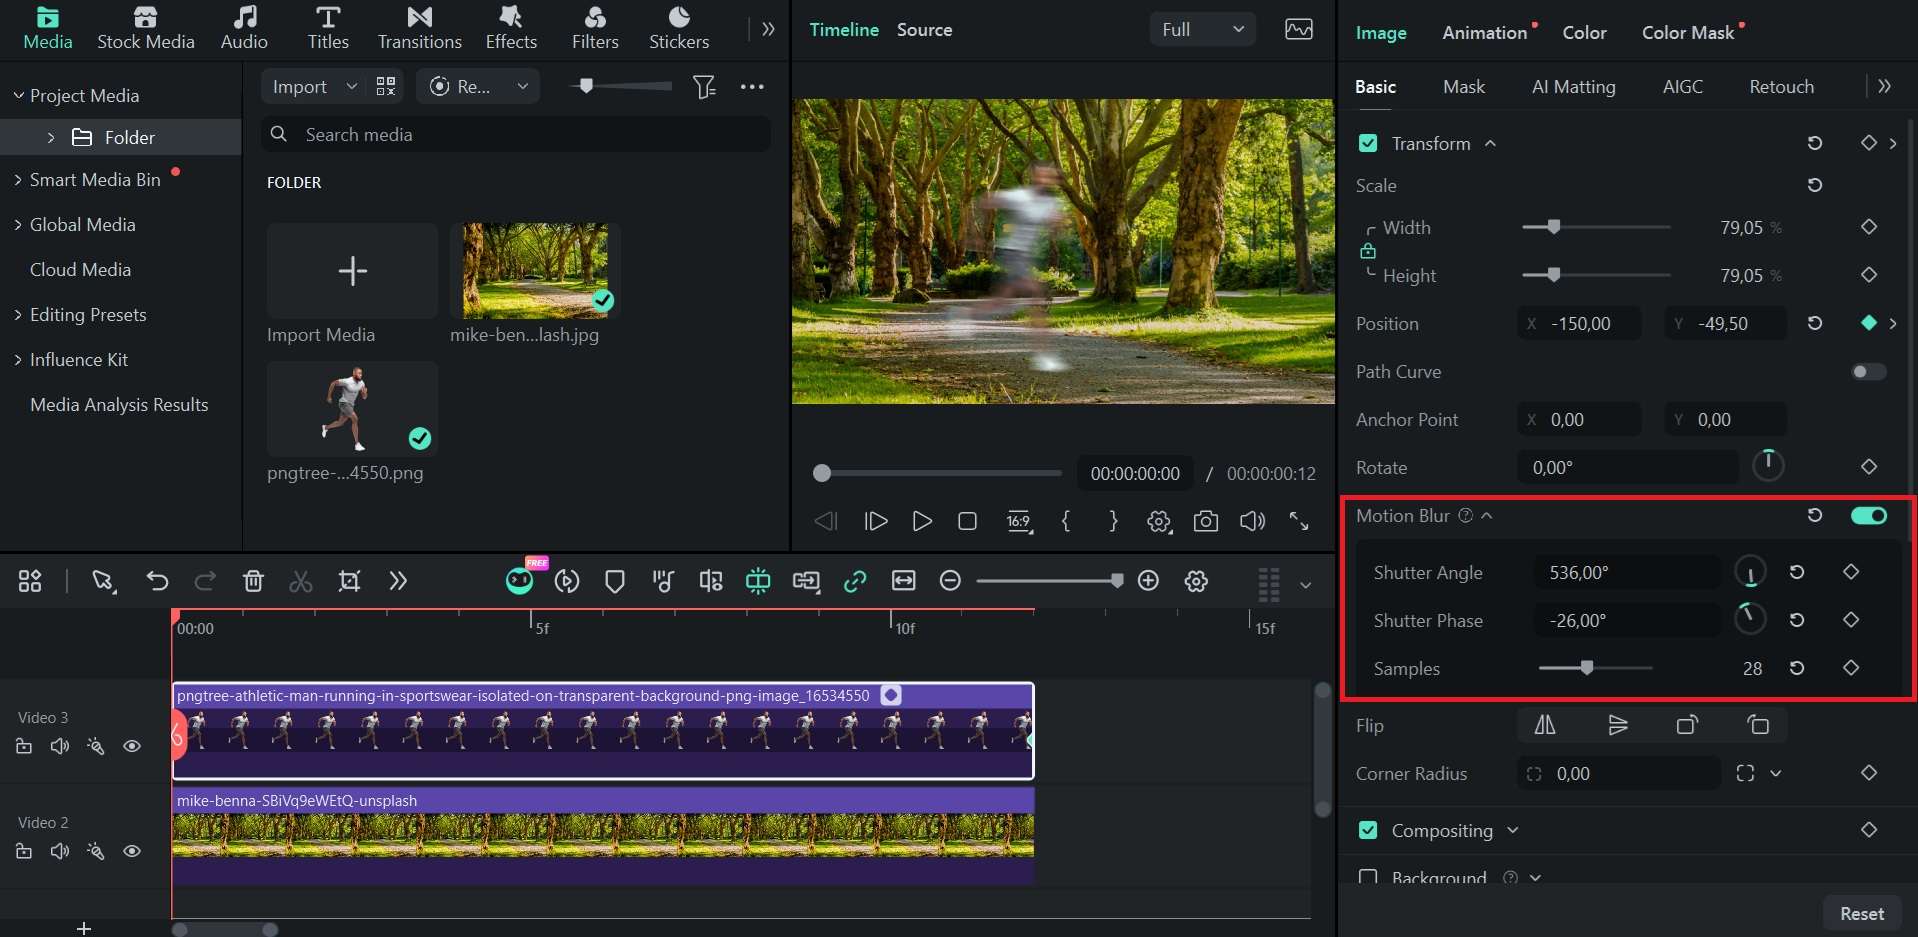
 Secure Download
2. Using Motion Blur Effects
Conclusion
Capturing a good motion blur takes a bit of practice. The key is to lower your ISO, start with a slower shutter speed, and adjust after each test shot. Then, use a tripod when you want only the subject to blur, and an ND filter when shooting in bright light.
When the camera did not give you the look you wanted, you can still add motion blur to a photo in Filmora. Apply motion blur with keyframes to shape the movement, or choose a ready-made effect for a faster result.
FAQs
-
How do I remove motion blur in a photo?
Removing motion blur depends on how strong the blur is. Some AI tools can reconstruct lost edges and restore fine detail in slightly blurred photos. However, heavy blur is much harder to fix because the detail was never recorded. -
What is the difference between motion blur and camera shake?
Natural motion blur comes from a moving subject or a deliberate camera movement, and it is often intentional. Meanwhile, camera shake usually comes from unwanted handheld movement, so the whole image looks soft with no sharp point anywhere. -
How do you capture motion blur without a tripod?
If you don't have a tripod to keep the camera steady, you can still capture motion blur by bracing yourself against a wall, railing, or table and keeping your elbows close to your body. Turn on image stabilization if your camera or lens has it. -
Why are my motion blur photos too dark?
When your motion blur photos turn out too dark, the settings are usually cutting out too much light. A small aperture (like f/22), a low ISO, a strong ND filter, and a fast shutter speed can all darken the shot. Try opening the aperture a little, switching to a weaker ND filter, or raising the ISO slightly. -
Can you create motion blur with a smartphone camera?
Yes. Many smartphones now offer a long exposure option, such as Live Photo effects on iPhone or a Pro mode with manual shutter speed on many Android phones. You can also use third-party camera apps to set a slower shutter speed.
