
For the Best Results, Use the Latest Version.
-
Preparations
-
Account
-
Get Started & Basic Settings
-
Compatibility & Tech Specs
-
Performance Settings
-
-
Creating Projects
-
Creating New Projects
-
-
Importing & Recording
-
Video Editing for Windows
-
Basic Video Editing
- Enable/Disable Clip in Windows
- Magnetic Timeline for Windows
- Dual Monitor Setup for Video Editing on Windows
- Select All Clips on Timeline for Windows
- Timeline and Track Management
- Auto Ripple for Windows
- Split & Trim Video
- Crop & Pan & Zoom Video in Filmora for Windows
- Compositing
- Change Video Speed on Windows
- Reverse Video for Windows
- Mark In and Mark Out for Windows
- Markers for Windows
- Group editing
- Customizable Backgrounds for Videos and Images in Windows
- Video Snapshot
- Using Freeze Frame in Filmora for Windows
- Logo Reveal For Windows
- Auto Enhance in Filmora for Windows
- Applying drop shadow
- Adjustment layer for Windows
- Apply Transforming for Windows
- Video Editing Ruler – Windows
-
Advanced Video Editing
- Keyframe Motion Blur for Windows
- Drawing Tools for Windows | Filmora Guide
- Camera Tracking for Windows
- Create Multi-Camera Clip in Filmora for Windows
- Compound Clip for Windows
- Multi-Clip Editing for Windows
- Filmora Motion Blur | Windows
- 360° Video Reframing for Windows
- Track Matte for Windows
- Video Chapters in Filmora on Windows
- Filmora Flicker Removal Guide | Windows
- Create Multi-Screen Videos in Filmora on Windows
- Masking in Filmora on Windows
- Creating a PIP Effect for Windows
- Keyframe Graph Editor for Windows
- Animation Keyframing for Windows
- Keyframe Path Curve
-
AI-Powered Video Editing
- Smart Scene Cut for Windows
- Smart Short Clips for Windows
- AI Face Mosaic for Windows
- Filmora AI Eye Contact- Windows
- AI Video Enhancer for Windows
- AI Text-to-Video for Windows
- Planar Tracking for Windows
- AI Idea to Video for Windows
- AI Media Analysis for Windows
- Filmora Image to Video for Windows
- Filmora Image to Prompt for Windows
- Instant Cutter Tool for Windows
- AI Extend
- Filmora AI Relight - Windows
- Filmora AI Image Enhancer Guide - Windows
- AI Script to Video Guide for Windows
- AI Text-Based Editing for Windows
- AI Mate Editing for Windows
- Instant Mode for Windows
- ChatGPT Plugin - AI Copywriting
- AI Smart Cutout for Windows
- Lens correction on Windows
- Auto Reframe Video for Windows
- AI Portrait Cutout
- Scene Detection for Windows
- AI Smart Masking for Windows
- Motion Tracking on Windows
- Video Stabilization for Windows
- AI Video/Photo Object Remover for Windows
- AI Smart Search for Windows
- AI Skin Tone Protection for Windows
- AI Image for Windows
- Chroma Key (Green Screen) for Windows
- Super Slow Motion with Optical Flow for Windows
- Video Denoise for Windows
-
-
Audio Editing for Windows
-
Basic Audio Editing
-
Advanced Audio Editing
-
AI-Powered Audio Editing
- Auto synchronization
- AI Sound Effects in Filmora for Windows
- Smart BGM Generation on Windows
- AI Voice Enhancer in Filmora
- AI Voice Cloning in Wondershare Filmora
- AI Music Generator for Windows
- Audio To Video
- AI Vocal Remover for Windows
- AI Auto Beat Sync for Windows
- AI Audio Stretch for Windows
- AI Audio Denoise for Windows
- Silence Detection on Windows
-
-
Text Editing for Windows
-
Basic Text Editing
-
Advanced Text Editing
-
AI-Powered Text Editing
-
-
Video Customizations
-
Video Effects
- Filmora VST3 Plugins for Windows
- Filmora OpenFX Plugins for Windows
- Retouch Guide for Windows
- Filmora Pen Tool Tutorial: Motion Paths & Animation Guide
- Animated Charts
- Mocha Filmora - For Windows
- Different Types of Video Effects
- NewBlue FX effects
- Boris FX effects | Filmora Windows Guide
- Body Effects for Windows
- Filmora -Filmstock Asset
-
Audio Effects
-
Transitions
-
Stickers
-
Filters
-
Color Editing
-
Animations
-
Templates
-
Asset Center
-
-
Exporting & Share & Cloud Backup
Add Keyframe Motion Blur in Filmora (Windows)
Fast pans, zooms, rotations, and animated position changes can sometimes look too sharp between frames. Filmora's Motion Blur softens that movement with natural-looking trails. You can control the blur with Range, Intensity, and Direction, while keyframes let you combine the effect with changing position, scale, rotation, or other motion over time.
Apply Motion Blur With Keyframes in Filmora
Follow the steps below to add keyframed movement and adjust Motion Blur for a smoother result:
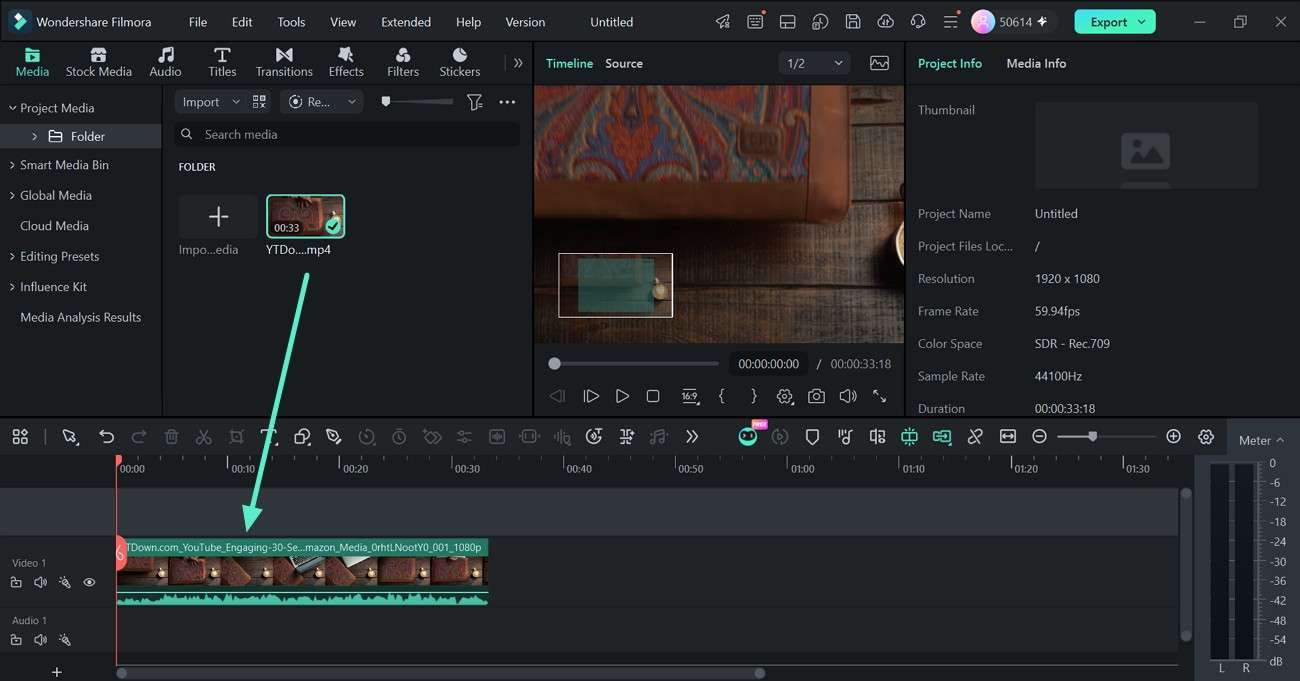
Step 1. Add the Clip to the Timeline
Import your video into Filmora, then drag the clip from Project Media onto the Timeline. Click the clip so its editing controls appear in the panel on the right.
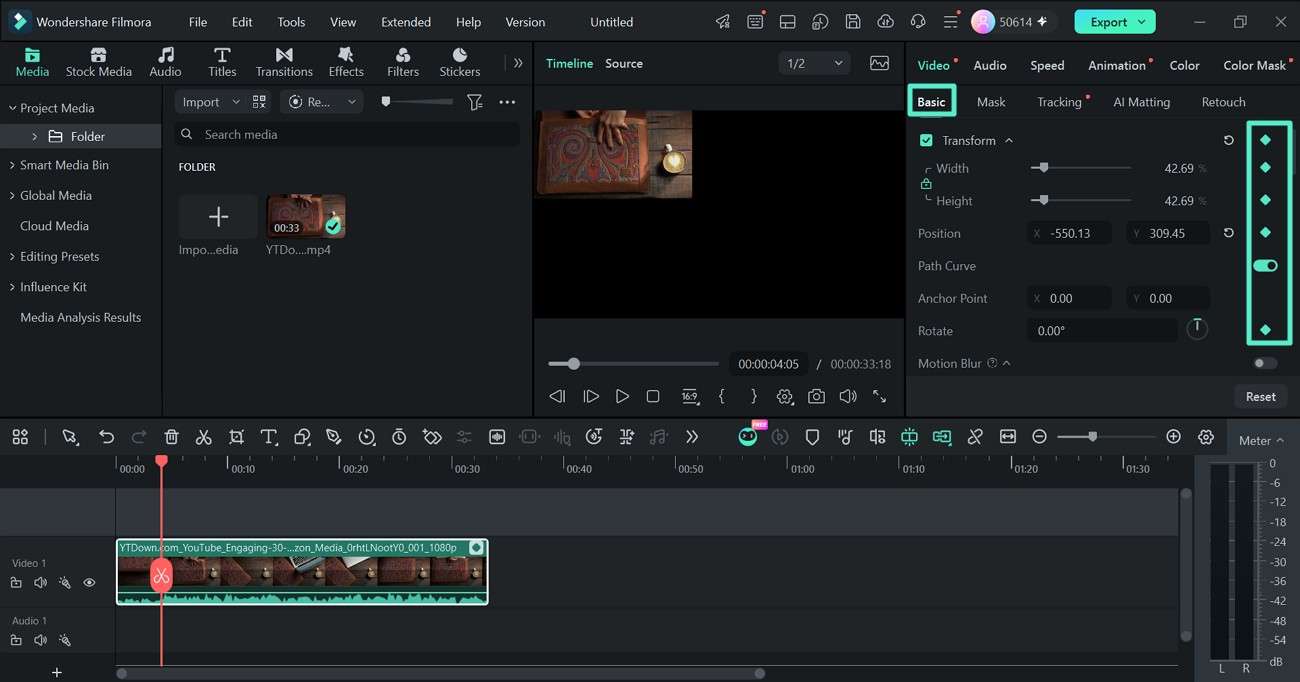
Step 2. Add Keyframes to the Movement
Go to Video > Basic > Transform. Place the playhead where you want the movement to begin, then click the Keyframe icon beside the property you want to animate.
Step 3. Turn On and Adjust Motion Blur
Scroll down to Motion Blur under Video > Basic and switch it on. Adjust Shutter Angle to control how much motion blur appears and use Shutter Phase to change where the blur sits around the movement. You can set Samples to control how smoothly the blur is rendered. You can also click the Keyframe icons beside these settings to change the motion blur at different points in the clip.
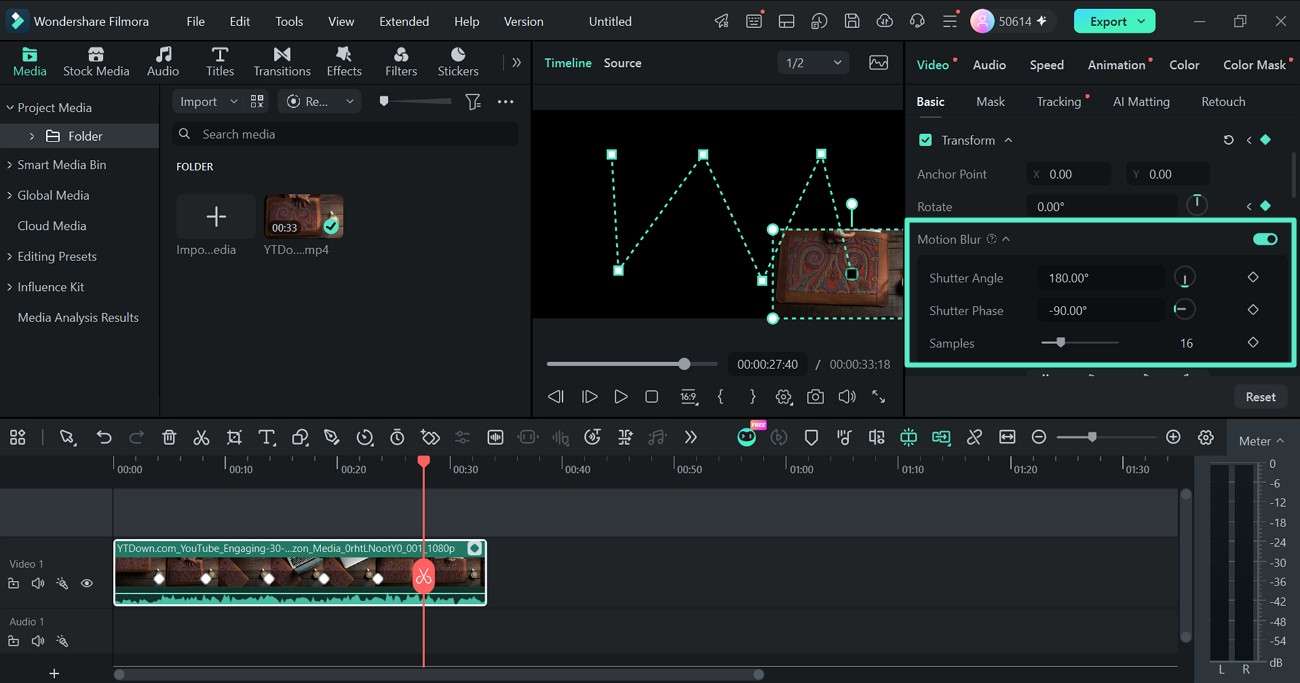
Note: The Motion Blur works with the movement created by your keyframes, helping fast position, scale, or rotation changes look less abrupt.
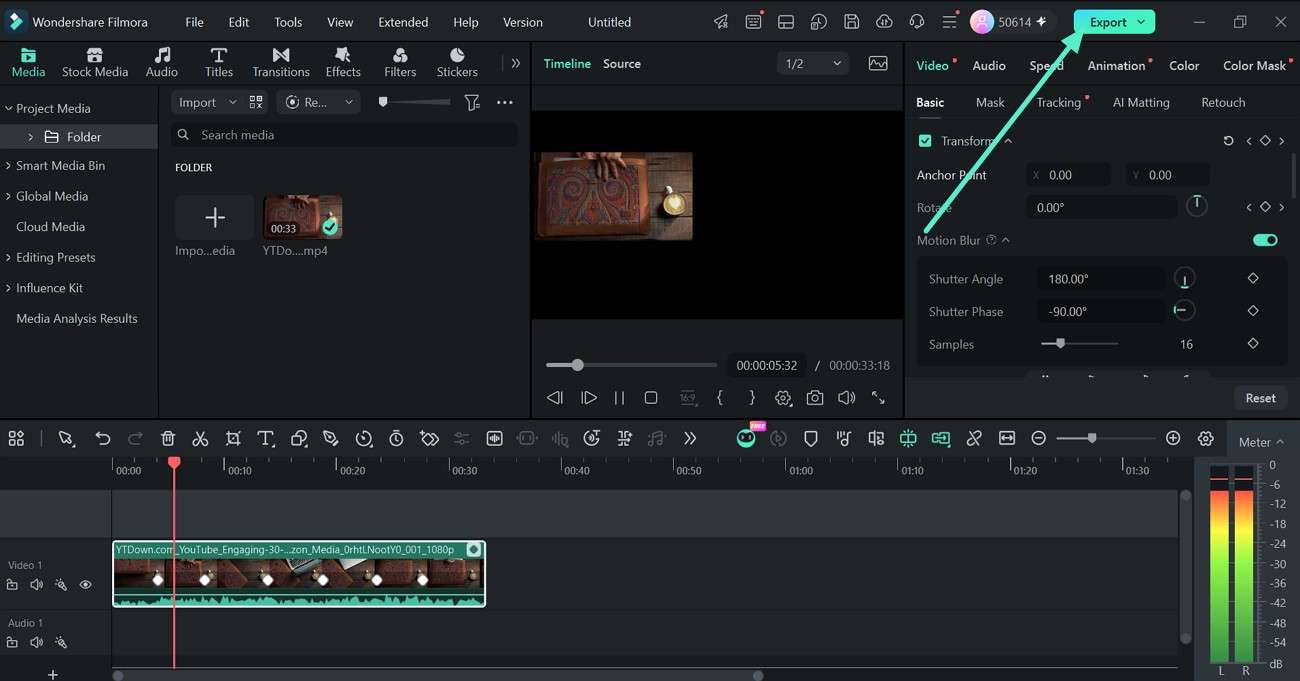
Step 4. Preview and Export
Play the section around your keyframes and check whether the movement and blur look natural together. Reduce Intensity or Range if the image becomes too soft, or change the Direction if the trail does not match the movement. Once the result looks right, click Export to save the video.
Related Posts
Featured Articles
Best Transparent Logo Makers in 2026 for Your Branding
Want to add a logo to your branding without any background issues? Here are the top 8 transparent logo makers to help your brand look clean, polished, and professional.
10 Apps to Make Videos with Pictures and Music | Updated
Explore the 10 best apps to make videos with pictures and music. From free apps to advanced editors, find the perfect tool for creating stunning videos on mobile and desktop.
FonePaw Screen Recorder | Features, Price and How to Use
This FonePaw screen recorder review will tell you everything about this tool from its features, pricing, performance, how to use it plus its best alternative.
Recommended User Guide
Compound Clip for Windows
Users can try out one of the new functionalities in Filmora, navigating under the name of compound clip.
Drawing Tools for Windows | Filmora Guide
This guide tell you how to use Drawing Tools feature in Filmora for Mac.
360° Video Reframing for Windows
Learn how to reframe 360° videos in Filmora for Windows by adjusting the viewing direction, scale, position, and rotation to create the desired frame.
