
For the Best Results, Use the Latest Version.
-
Preparations
-
Account
-
Get Started & Basic Settings
-
Compatibility & Tech Specs
-
Performance Settings
-
-
Creating Projects
-
Creating New Projects
-
-
Importing & Recording
-
Video Editing for Windows
-
Basic Video Editing
- Enable/Disable Clip in Windows
- Magnetic Timeline for Windows
- Dual Monitor Setup for Video Editing on Windows
- Select All Clips on Timeline for Windows
- Timeline and Track Management
- Auto Ripple for Windows
- Split & Trim Video
- Crop & Pan & Zoom Video in Filmora for Windows
- Compositing
- Change Video Speed on Windows
- Reverse Video for Windows
- Mark In and Mark Out for Windows
- Markers for Windows
- Group editing
- Customizable Backgrounds for Videos and Images in Windows
- Video Snapshot
- Using Freeze Frame in Filmora for Windows
- Logo Reveal For Windows
- Auto Enhance in Filmora for Windows
- Applying drop shadow
- Adjustment layer for Windows
- Apply Transforming for Windows
- Video Editing Ruler – Windows
-
Advanced Video Editing
- Keyframe Motion Blur for Windows
- Drawing Tools for Windows | Filmora Guide
- Camera Tracking for Windows
- Create Multi-Camera Clip in Filmora for Windows
- Compound Clip for Windows
- Multi-Clip Editing for Windows
- Filmora Motion Blur | Windows
- 360° Video Reframing for Windows
- Track Matte for Windows
- Video Chapters in Filmora on Windows
- Filmora Flicker Removal Guide | Windows
- Create Multi-Screen Videos in Filmora on Windows
- Masking in Filmora on Windows
- Creating a PIP Effect for Windows
- Keyframe Graph Editor for Windows
- Animation Keyframing for Windows
- Keyframe Path Curve
-
AI-Powered Video Editing
- Smart Scene Cut for Windows
- Smart Short Clips for Windows
- AI Face Mosaic for Windows
- Filmora AI Eye Contact- Windows
- AI Video Enhancer for Windows
- AI Text-to-Video for Windows
- Planar Tracking for Windows
- AI Idea to Video for Windows
- AI Media Analysis for Windows
- Filmora Image to Video for Windows
- Filmora Image to Prompt for Windows
- Instant Cutter Tool for Windows
- AI Extend
- Filmora AI Relight - Windows
- Filmora AI Image Enhancer Guide - Windows
- AI Script to Video Guide for Windows
- AI Text-Based Editing for Windows
- AI Mate Editing for Windows
- Instant Mode for Windows
- ChatGPT Plugin - AI Copywriting
- AI Smart Cutout for Windows
- Lens correction on Windows
- Auto Reframe Video for Windows
- AI Portrait Cutout
- Scene Detection for Windows
- AI Smart Masking for Windows
- Motion Tracking on Windows
- Video Stabilization for Windows
- AI Video/Photo Object Remover for Windows
- AI Smart Search for Windows
- AI Skin Tone Protection for Windows
- AI Image for Windows
- Chroma Key (Green Screen) for Windows
- Super Slow Motion with Optical Flow for Windows
- Video Denoise for Windows
-
-
Audio Editing for Windows
-
Basic Audio Editing
-
Advanced Audio Editing
-
AI-Powered Audio Editing
- Auto synchronization
- AI Sound Effects in Filmora for Windows
- Smart BGM Generation on Windows
- AI Voice Enhancer in Filmora
- AI Voice Cloning in Wondershare Filmora
- AI Music Generator for Windows
- Audio To Video
- AI Vocal Remover for Windows
- AI Auto Beat Sync for Windows
- AI Audio Stretch for Windows
- AI Audio Denoise for Windows
- Silence Detection on Windows
-
-
Text Editing for Windows
-
Basic Text Editing
-
Advanced Text Editing
-
AI-Powered Text Editing
-
-
Video Customizations
-
Video Effects
- Filmora VST3 Plugins for Windows
- Filmora OpenFX Plugins for Windows
- Retouch Guide for Windows
- Filmora Pen Tool Tutorial: Motion Paths & Animation Guide
- Animated Charts
- Mocha Filmora - For Windows
- Different Types of Video Effects
- NewBlue FX effects
- Boris FX effects | Filmora Windows Guide
- Body Effects for Windows
- Filmora -Filmstock Asset
-
Audio Effects
-
Transitions
-
Stickers
-
Filters
-
Color Editing
-
Animations
-
Templates
-
Asset Center
-
-
Exporting & Share & Cloud Backup
How to Edit and Reframe 360 Video in Filmora
Turn one 360-degree recording into multiple creative shots. With Filmora, you can choose the viewing angle after shooting, adjust the perspective, animate camera movement, and finish your video on the familiar timeline.
Before You Start
360 video captures the scene in every direction, giving you more freedom to decide what viewers see during editing. Before importing your footage into Filmora, prepare the following:
- Compatible 360-degree footage, preferably in MP4 format.
- Sufficient storage space for high-resolution 360 video files.
- Filmora installed on your computer.
Compatibility note:
- Filmora supports compatible 360 MP4 footage. On Windows, compatible Insta360 INSV footage and DJI Osmo 360 footage exported as MP4 can also be used, depending on the current Filmora version and system.
- To use this feature, your device must run Windows 10 or later and have an Intel Core 8th Gen or AMD Ryzen 3000 Series processor or later, at least 16 GB of RAM, and an NVIDIA GTX 1660 or higher-performance graphics card.
How to Edit and Reframe 360 Video
Step 1. Import Your 360 Footage
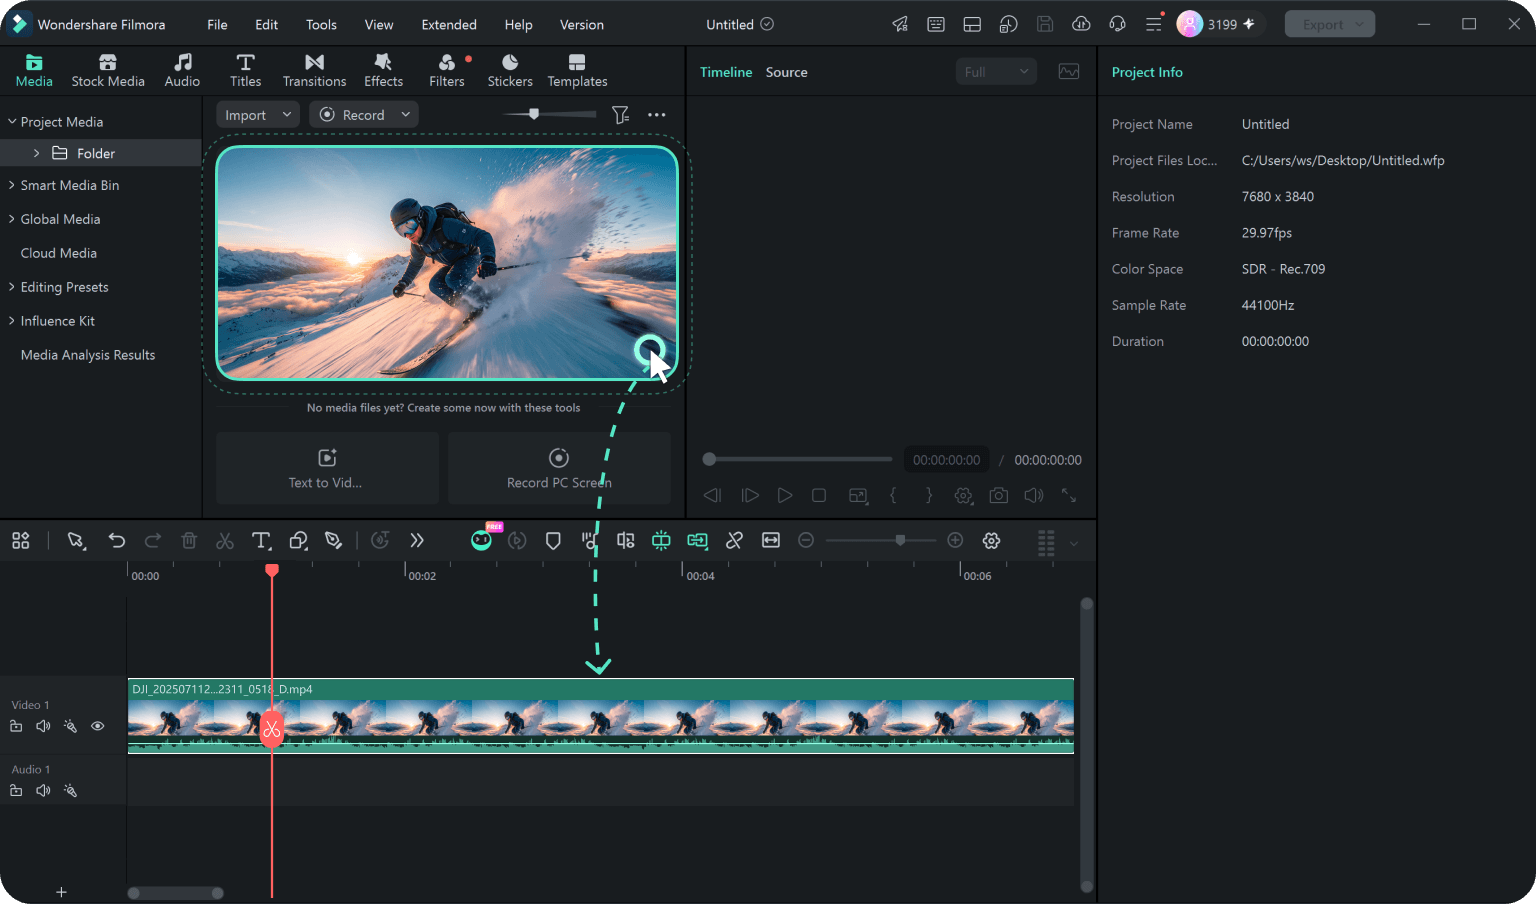
Import your compatible 360 footage into Filmora and drag it onto the timeline. Filmora automatically recognizes compatible 360 MP4 footage so you can begin editing without converting the file first.
Step 2. Reframe and Adjust Your View
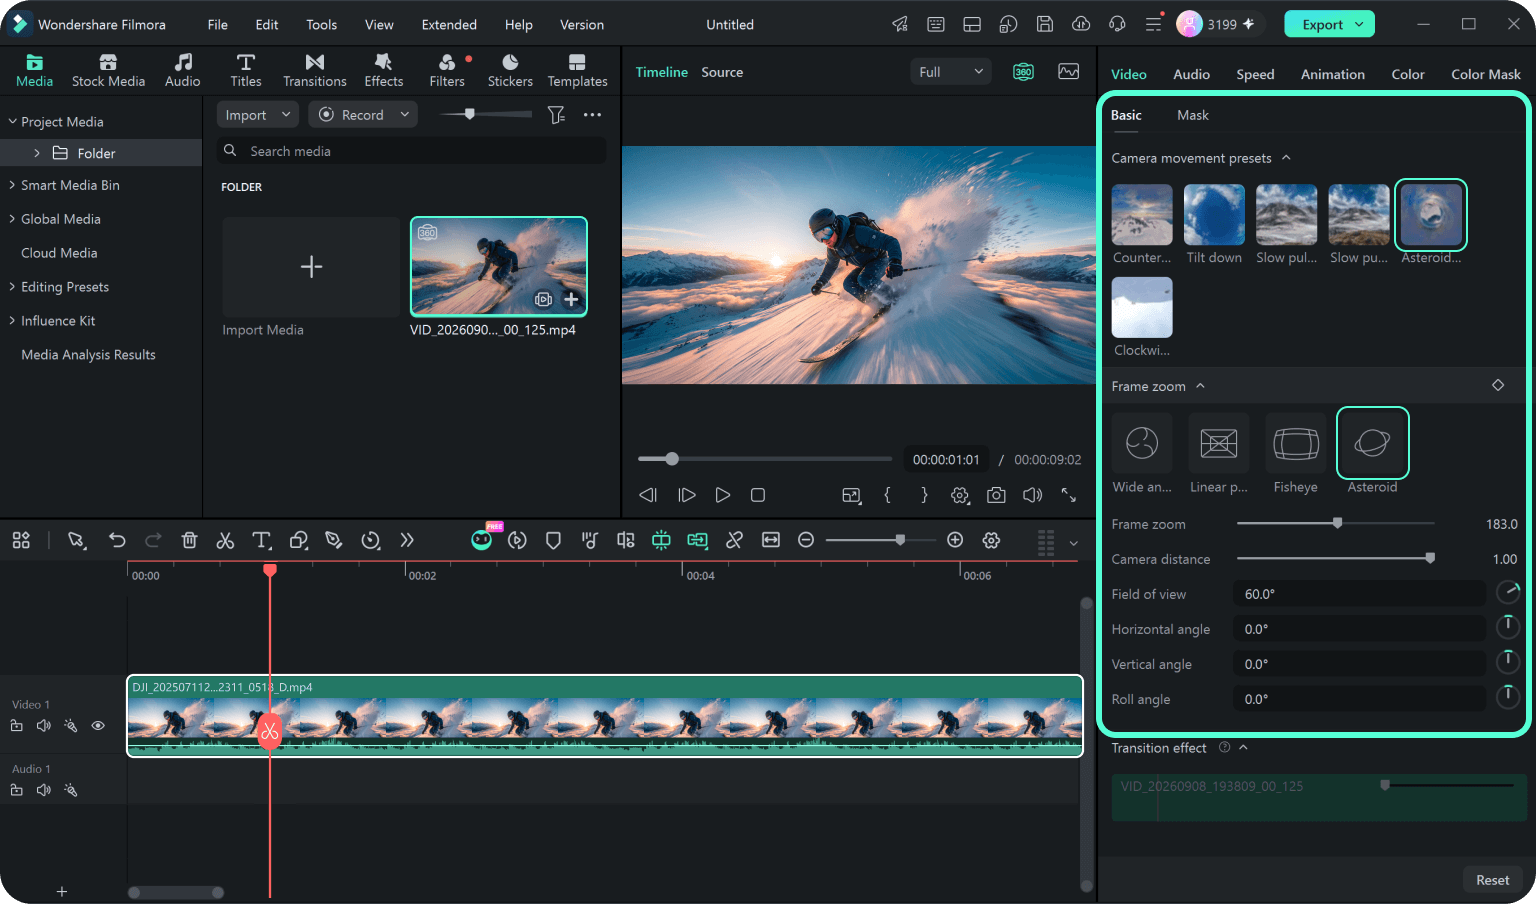
Select the 360 clip, then drag directly in the player to change the viewing direction. Scroll to zoom in or out, and adjust the perspective, field of view, or orientation until the framing feels right.
Step 3. Edit and Export Your Video
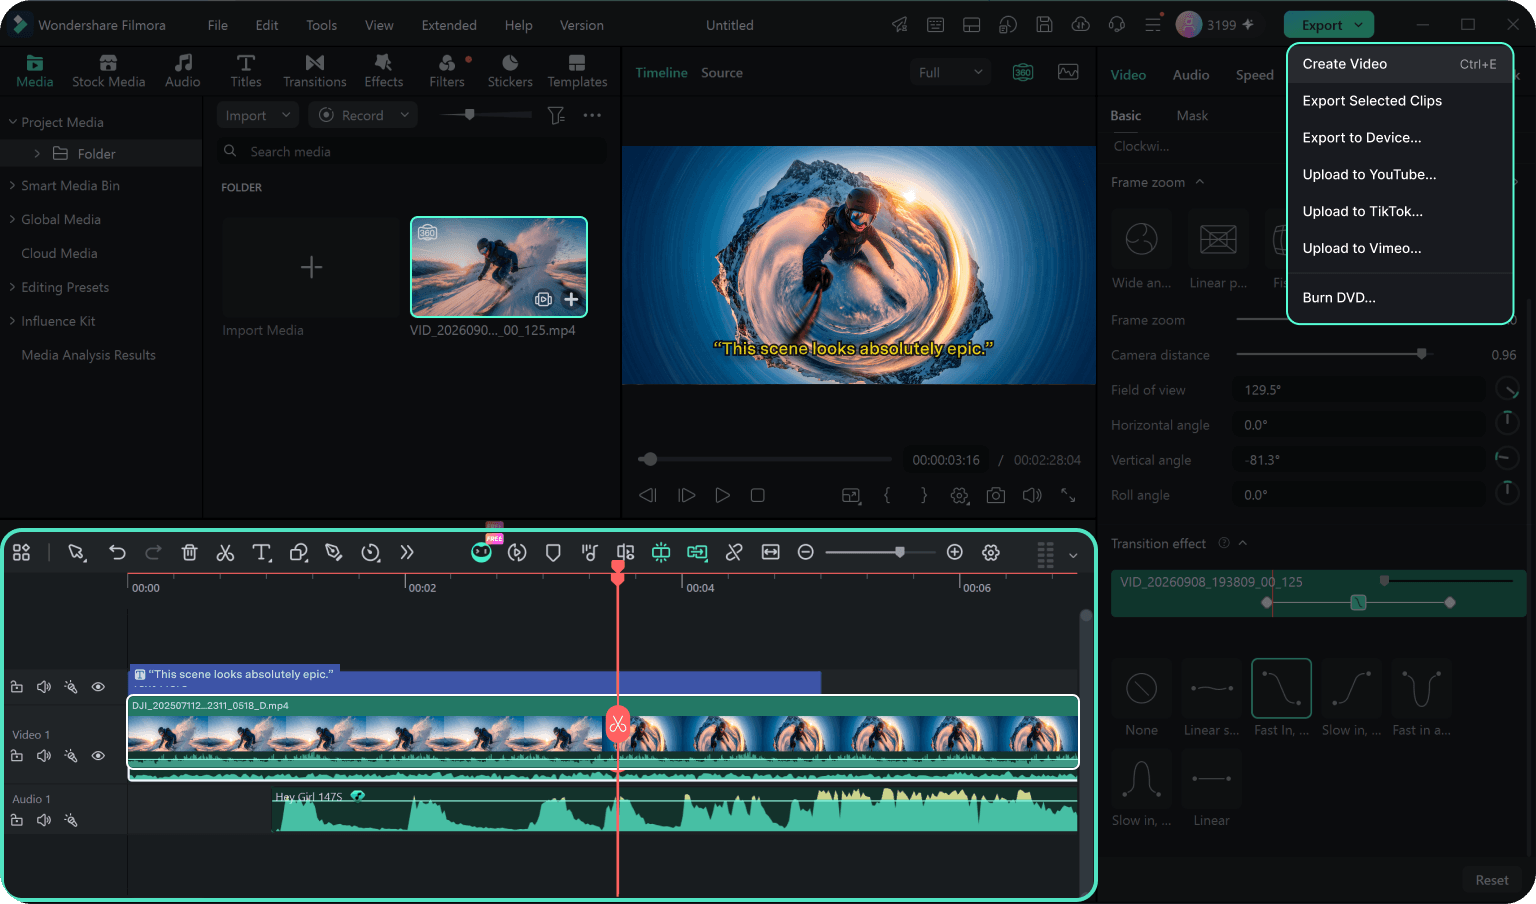
Continue editing the reframed clip on the Filmora timeline. Trim unwanted sections, add effects or transitions, and export the finished result as a standard video ready to share.
Related Posts
Featured Articles
15 Best TikTok Fonts for Videos in 2026: Selection & Customization Guide
Explore 15 best TikTok fonts to make your captions stand out and videos grab attention in 2026. Get expert tips on selecting and customizing popular font styles with generators & editing tools.
8 Ways | How to Record a FaceTime Call
Learn how to record FaceTime with audio easily on all devices, including iPhone, Mac, Android, and PC. Discover step-by-step guides and tips for capturing FaceTime conversations.
Updated in 2026: How to Create Transparent Videos
Creating a transparent video is not as hard as you think if you have suitable software. This article discusses how to make a transparent video using Wondershare Filmora and the steps to creating one.
Recommended User Guide
Masking in Filmora on Windows
Learn how to use Masks in Filmora.
Keyframe Graph Editor for Windows
With the new "Keyframe Graph Editor" in Filmora, adjust your animations within videos to make them smooth and lifelike.
Camera Tracking for Windows
Learn how to use Camera Tracking in Filmora for Windows to track camera movement, create tracking points, and make 3D text and other elements follow your scene.
