
For the Best Results, Use the Latest Version.
Filmora User Guide for Mac
-
Preparations for Mac
-
Account (Mac)
-
Get Started & Basic Settings (Mac)
- Release Notes for Mac
- Latest Version and Features for Mac
- Get Started on Mac - Full Guide
- Download/register/uninstall on Mac
- Panel Layout on Mac
- Keyboard Shortcuts in Mac
- Touchbar on Mac
- Change playback quality on Mac
- Render preview files on Mac
- Manage Timeline in Mac
- Media for use on Mac
- Logo Reveal For Mac
- Marked Favorites for Mac
-
Compatibility & Tech Specs (Mac)
-
Performance Settings (Mac)
-
-
Creating Projects - Mac
-
Creating New Projects (Mac)
-
-
Importing & Recording - Mac
-
Importing (Mac)
-
Recording (Mac)
-
-
Video Editing for Mac
-
Basic Video Editing for Mac
- Edit Live Photos on Mac
- Enable/Disable Clip for Mac
- Magnetic Timeline For Mac
- Dual Monitor Setup for Video Editing on Mac
- Select All Clips on Timeline for Mac
- Auto Ripple for Mac
- Split & Cut Videos on Mac
- Compositing on Mac
- Crop and zoom on Mac
- Playback Zoom Level for Mac
- Change Speed on Mac
- Play Video in Reverse on Filmora for Mac
- Mark In and Mark Out for Mac
- Markers for Mac
- Group Clips in Filmora for Mac
- Customized Backgrounds for Videos and Images in Mac
- Video snapshot on Mac
- Freeze Frame on Mac
- Auto enhance on Mac
- Applying Drop Shadow for Mac
- Adjustment Layer for Mac
- Mark Clips in Filmora for Mac
- Video Editing Ruler – Mac
- Apply Transforming for Mac
-
Advanced Video Editing for Mac
- Keyframe Motion Blur for Mac
- Camera Tracking for Mac
- Keyframe Path Curve for Mac
- Text Animation Path for Mac
- Create Multi-Camera Clip for Mac
- Filmora Motion Blur | Mac
- Drawing Tools for Mac | Filmora Guide
- Track Matte for Mac
- Compound Clips for Mac
- 360° Video Reframing for Mac
- AI Video Enhancer for Mac
- Video Chapters in Filmora for Mac
- Filmora Flicker Removal Guide | Mac
- Multi-Clip Editing for Mac
- Keyframe Graph Editor for Mac
- Create Multi-Screen Videos in Filmora on Mac
- Animation Keyframing for Mac
- Masking in Filmora on Mac
- PIP (Picture in Picture) in Filmora on Mac
-
AI-Powered Video Editing for Mac
- Smart Scene Cut for Mac
- Smart Short Clips for Mac
- Filmora AI Eye Contact - Mac
- Filmora Image to Video for Mac
- AI Idea to Video for Mac
- AI Text-to-Video for Mac
- AI Media Analysis for Mac
- Instant Cutter Tool on Mac
- AI Face Mosaic for Mac
- Filmora Image to Prompt for Mac
- Filmora AI Image Enhancer Guide – macOS
- Planar Tracking for Mac
- Filmora AI Relight - Mac
- AI Extend For Mac
- AI Script-to-Video for Mac
- AI Text-Based Editing in Mac
- Create With Instant Mode on Mac
- ChatGPT Plugin - AI Copywriting on Mac
- AI Smart Cutout in Filmora for Mac
- Auto reframe on Mac
- Lens Correction in Filmora for Mac
- AI Portrait Cutout on Mac
- Scene detection on Mac
- AI Smart Masking for Mac
- AI Mate Editing for Mac
- Motion Tracking on Mac
- Video Stabilization for Mac
- AI Video/Photo Object Remover for Mac
- AI Smart Search for Mac
- AI Skin Tone Protection for Mac
- Green screen on Mac
- Super Slow Motion with Optical Flow for Mac
- AI Stylizer for Mac
- Video Denoise for Mac
-
-
Audio Editing for Mac
-
Basic Audio Editing for Mac
-
Advanced Audio Editing for Mac
-
AI-Powered Audio Editing for Mac
- Audio To Video for Mac
- AI Sound Effect for Mac
- Smart BGM Generation on Mac
- AI Voice Enhancer for Mac
- Audio Stretch for Mac
- AI Audio Denoise for Mac
- Auto Synchronization on Mac
- AI Vocal Remover for Mac
- AI Auto Beat Sync for Mac
- AI Music Generator for Mac
- AI Voice Cloning on Mac
- Silence Detection on Mac
-
-
Text Editing for Mac
-
Basic Text Editing for Mac
-
Advanced Text Editing for Mac
-
AI-Powered Text Editing for Mac
-
-
Video Customizations for Mac
-
Video Effects (Mac)
-
Audio Effects (Mac)
-
Transitions (Mac)
-
Stickers (Mac)
-
Filters (Mac)
-
Color Editing (Mac)
-
Animations (Mac)
-
Templates (Mac)
-
Asset Center (Mac)
-
-
Exporting & Share & Cloud Backup - Mac
Filmora Tutorial Videos
Filmora 15 User Guide in PDF
Filmora 13 & 14 User Guide in PDF
Filmora 12 User Guide in PDF
Filmora 11 User Guide in PDF
Filmora 9 & 10 User Guide
360 Video Framing in Filmora (Mac)
Filmora introduces 360° Video Reframing for turning immersive footage into conventional videos with controlled camera movement. Mac users can edit recognized 360 clips on the timeline, adjust viewing angles, choose projection styles, and create movement with presets or keyframes.
The feature also provides an interactive 360 preview for finding the right perspective before export. On macOS, 360° Video Reframing requires macOS 11.0 or later and an Apple M1 chip or newer.
Guide to Perform 360° Video Framing in Filmora Mac
Step 1. Create a Project and Import the 360 Video
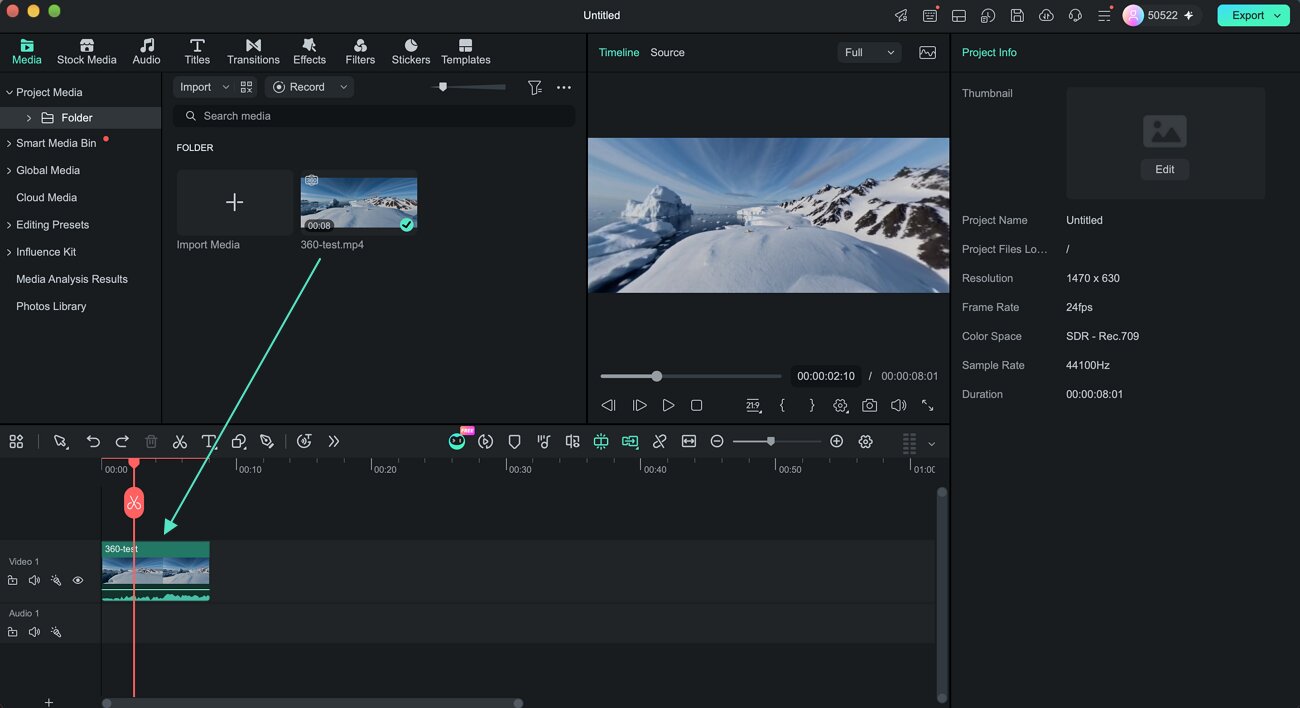
Launch Filmora on your Mac and select Create Project to open the editing workspace. Import your supported 360 video into the Project Media, and drag it onto the timeline. For standard MP4 footage, Filmora can identify compatible 360 content through spherical or equirectangular metadata.
Note: DJI .osv footage should first be exported as MP4 using DJI's official software before importing it into Filmora.
Step 2. Edit the 360 Clip on the Timeline
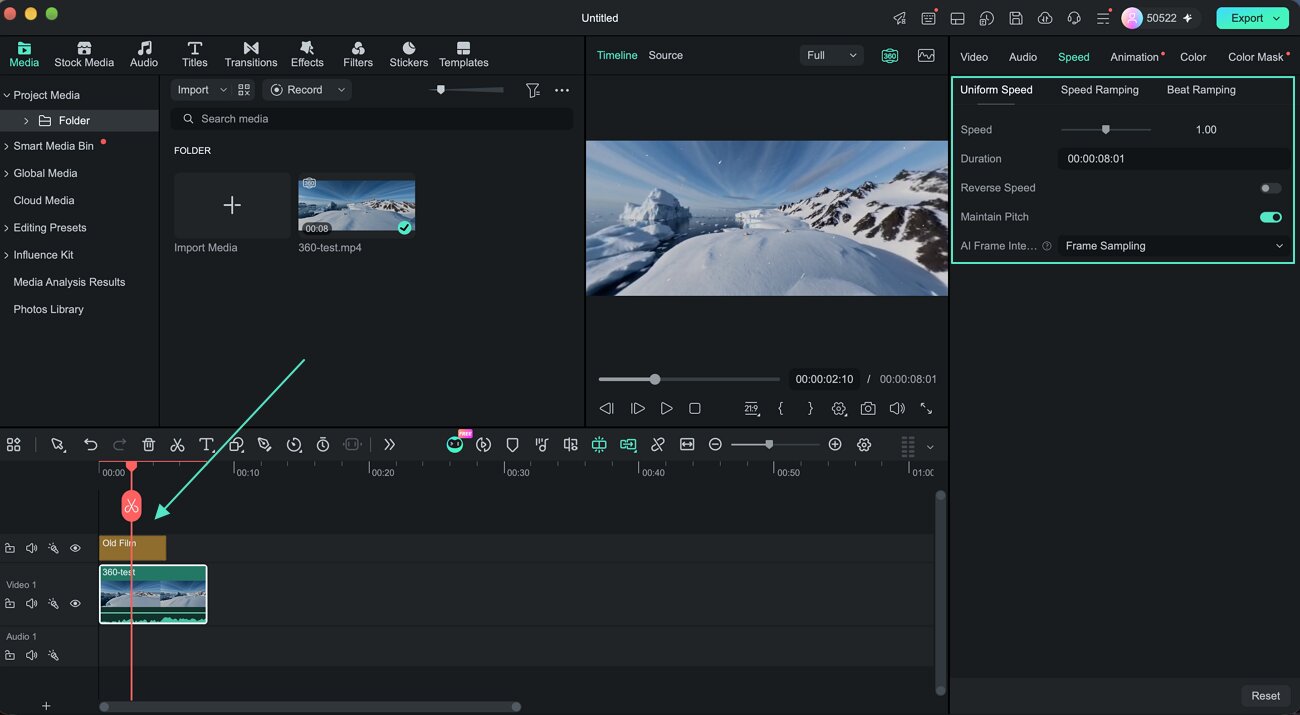
Once Filmora recognizes the footage as a 360 clip, you can edit it much like a standard video. From trimming unwanted sections to splitting the clip into separate segments, a lot is possible. Use the playback adjustment option to manage the speed of the video. Consequently, apply different video effects to make your 360 clip look elegant.
Step 3. Navigate to Frame Zoom Controls
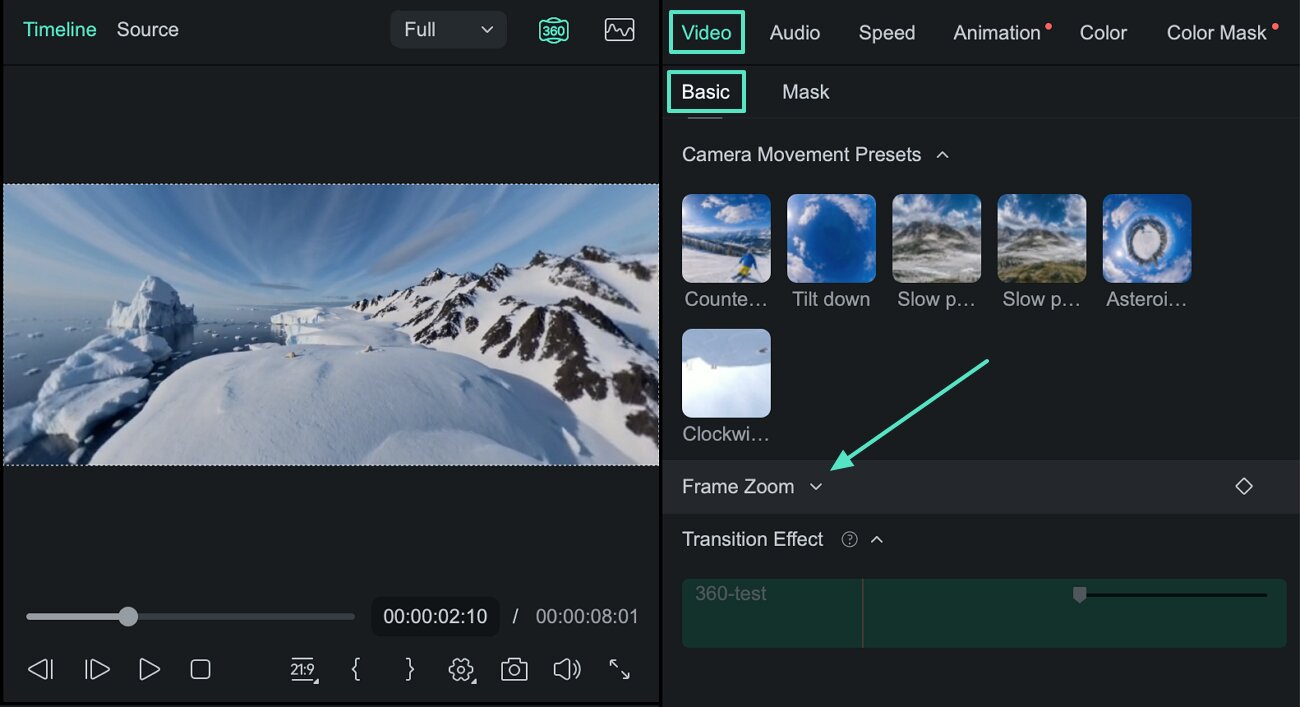
Select the clip on the timeline and navigate to the Video section in the Property Panel. Proceed to Basic > Frame Zoom and reframe the spherical footage to determine what appears in the final frame.
Step 4. Adjust the 360 Camera View
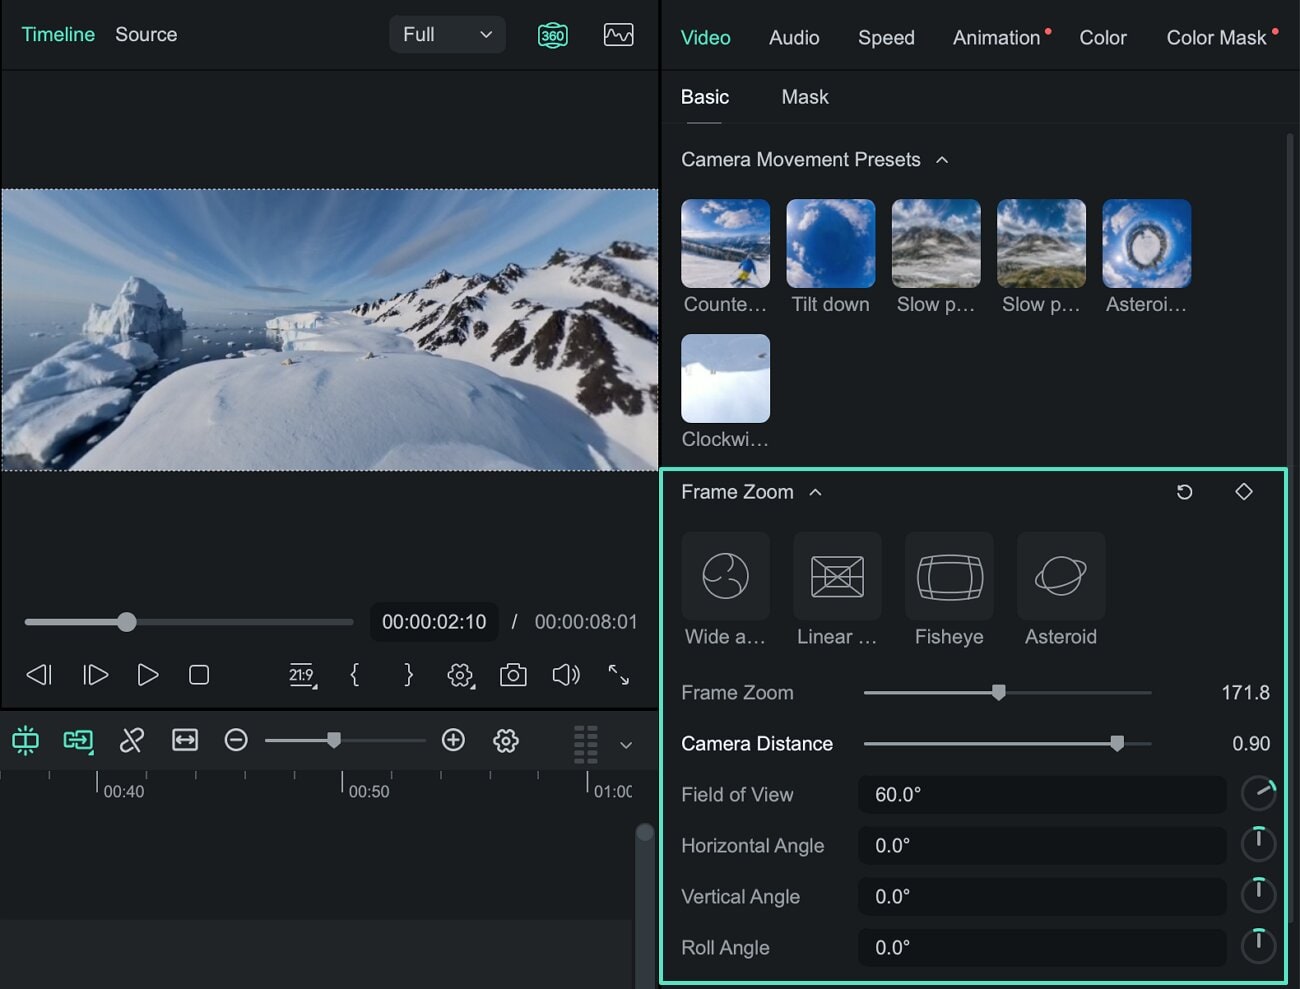
With the available parameters, establish a required perspective on your 360 footage. Adjust the following controls so that the important subject or area appears correctly inside the frame:
- FOV: Zoom the view in or out.
- Horizontal Angle: Pan the camera viewpoint left or right.
- Vertical Angle: Tilt the viewpoint upward or downward.
- Frame Zoom & Camera Distance: Change the perceived spherical perspective.
- Roll: Rotate the view and correct the horizon.
Step 5. Apply the 360 Preview
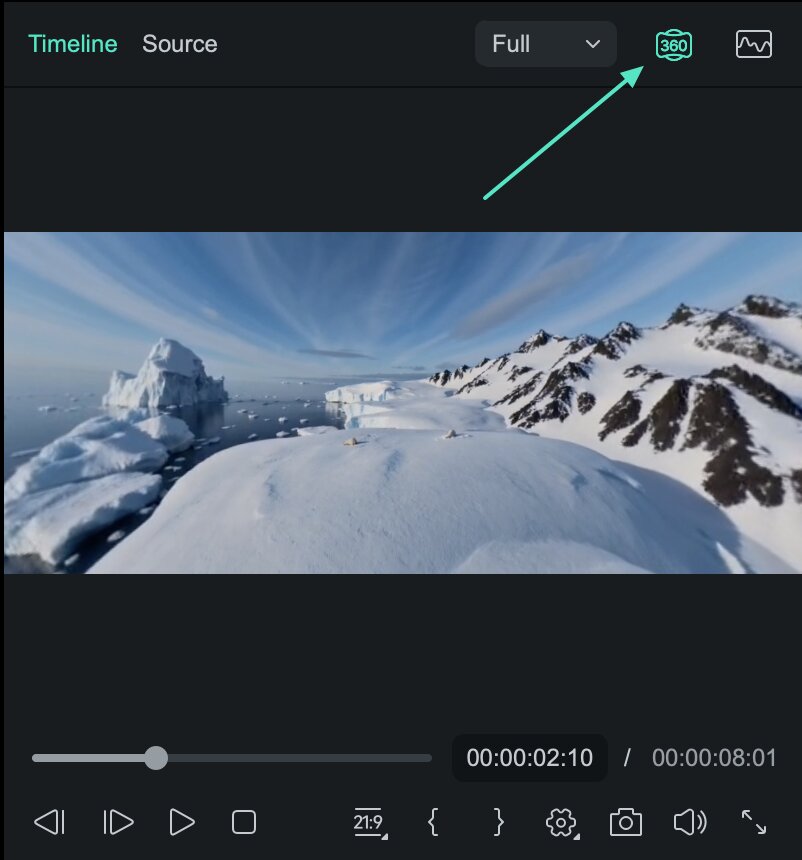
You can switch to the 360 Panorama Monitor for exploring the spherical footage more naturally. Drag inside the player to look around the scene. It will help you position the virtual camera before applying detailed reframing adjustments.
Step 6. Choose a Display Mode Preset
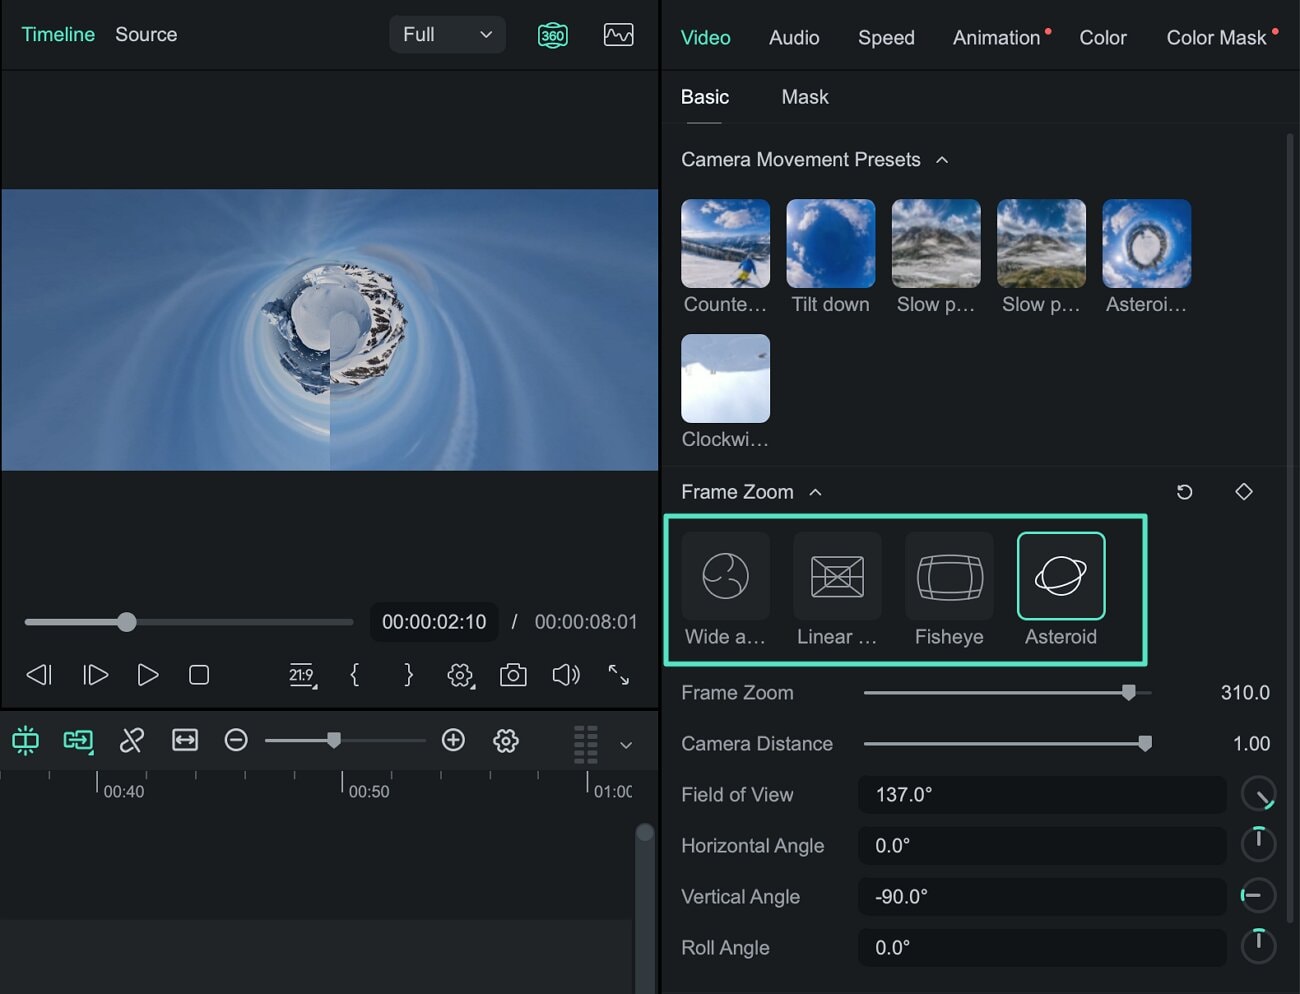
Use the different display modes to change how the 360 scene is projected:
- Wide Angle
- Linear
- Fisheye
- Tiny Planet
Step 7. Add Motion Presets
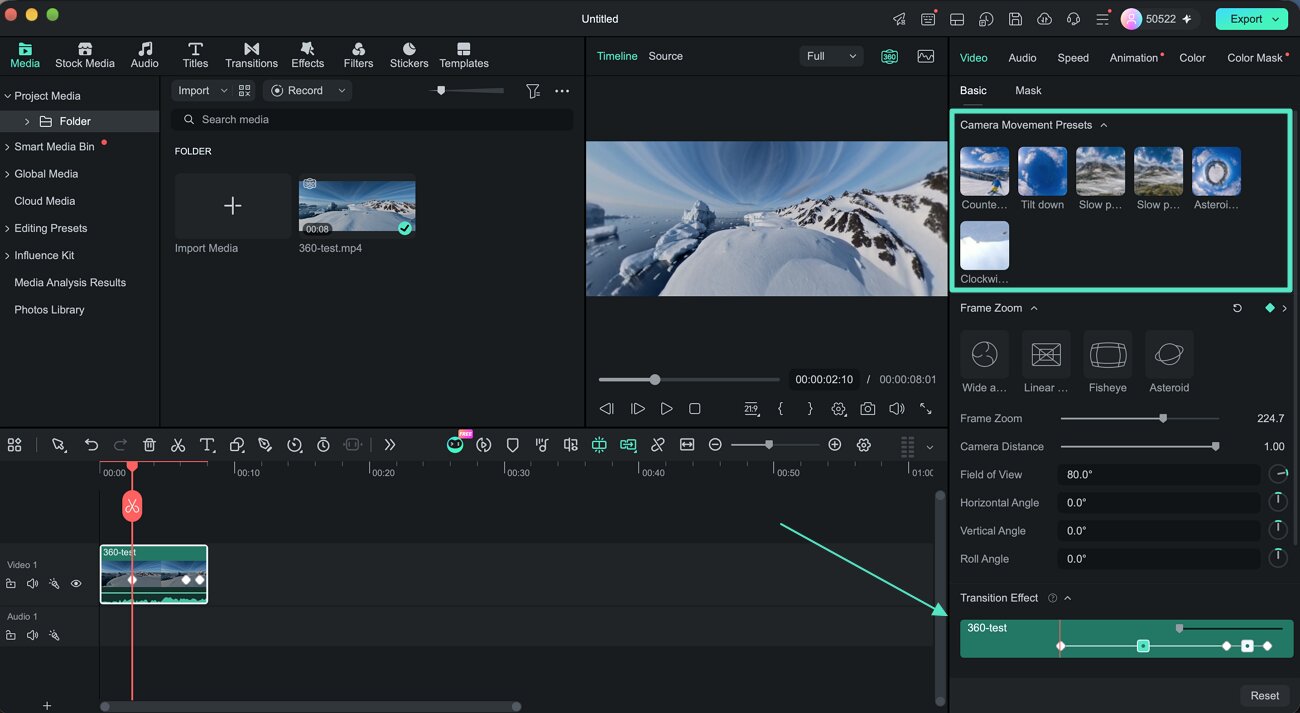
To include faster camera movement, Filmora offers downloadable motion presets to reframe the scene over time:
- Slow Push
- Slow Pull
- Orbit
- Tiny Planet Unfold
- Tilt Down
- Sky Flip
Step 8. Refine the Reframing With Keyframes
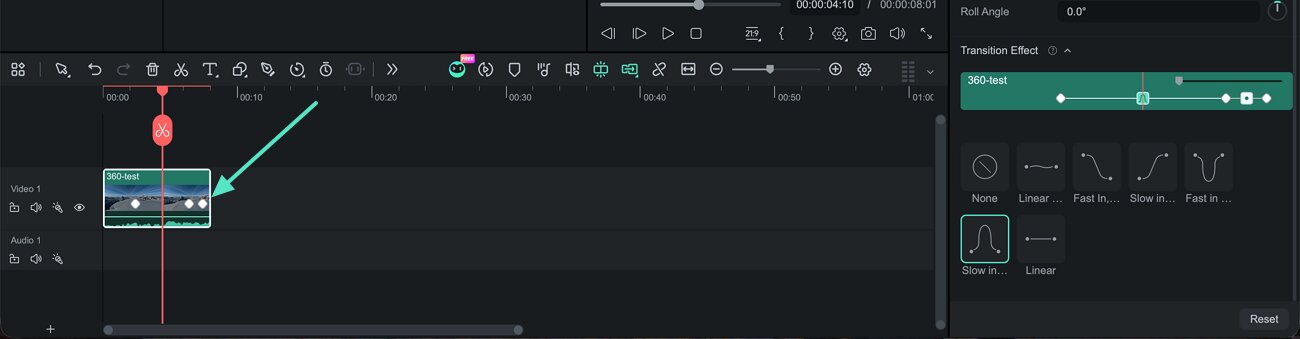
For more precise movement, use keyframes with supported FOV-related Panorama parameters. Set different parameter values at separate points on the timeline. Filmora then creates the movement between those positions. This approach can create controlled pans, zooms, rotations, or other viewpoint changes instead of relying only on preset motion.
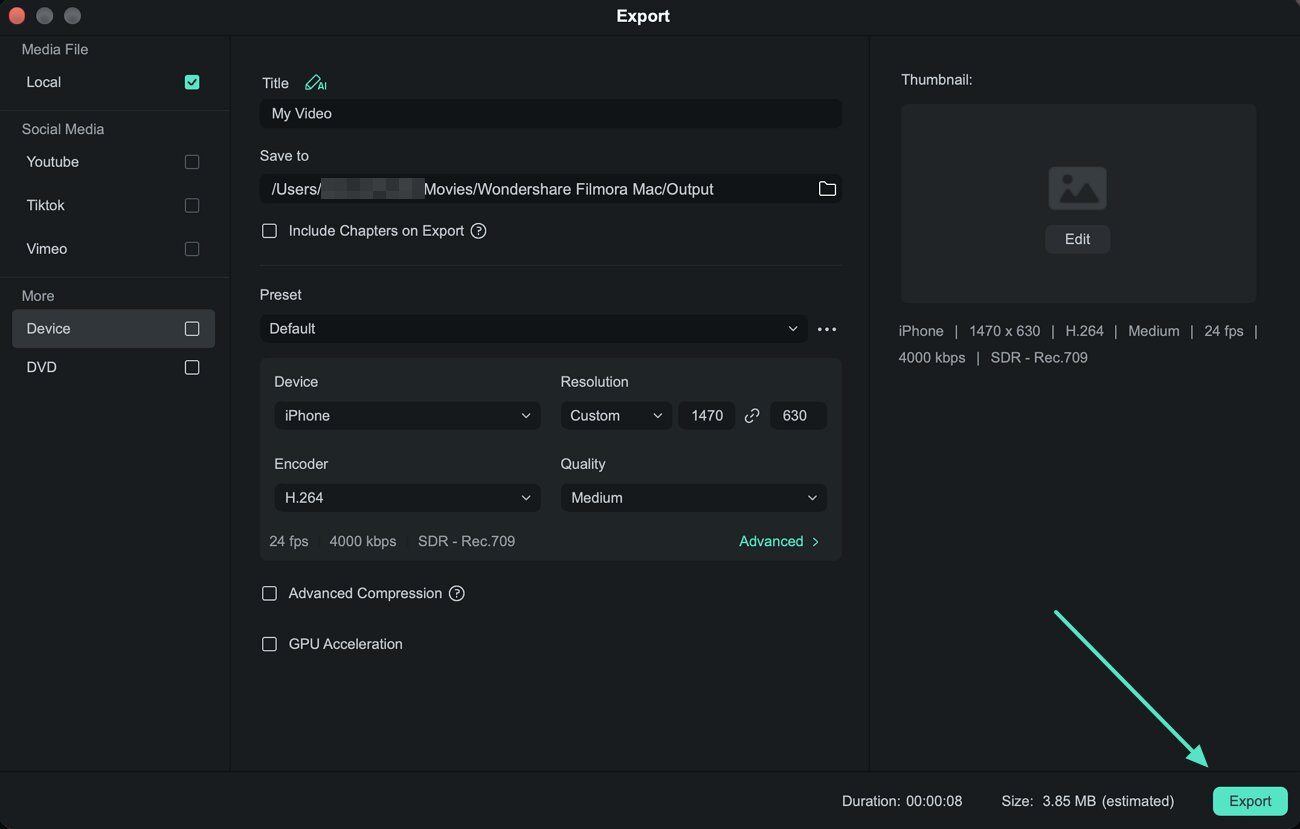
Step 9. Preview and Export the Reframed Video
Play the sequence again and check the framing, projection mode, camera motion, keyframes, and timeline edits. Once everything looks correct, proceed to Export and render the finished video.
Note:
Filmora 16 currently exports the reframed result as a flat video using the selected viewpoint, keyframes, and motion effects. Exporting the edited project as a complete interactive 360-degree video is not supported yet.Related Posts
Featured Articles
Learn more popular articles from Wondershare.
20 Best Stable Diffusion Pose Prompts for Beginners (Realistic & Creative Ideas)
Looking to generate realistic Stable Diffusion poses? Learn the best prompt writing practices for beginners to create AI-generated pose images.
Twitch Video Banner Size: Maintaining the Right Limits
Learn about Twitch video banner size, profile dimensions, and expert tips to optimize banners. Discover how to simplify resizing for perfect banner media.
How To Use Voicemod On Discord
And when it comes to voice changers, none is as easy to operate as the Voicemod in Discord. Here is a detailed guide about how to use Voicemod on Discord on mobile and desktop devices.
Recommended User Guide
Learn how to use more features.
Compound Clips for Mac
With the latest version of Filmora, users can explore the newly added features, including the Compound Clip functionality.
Camera Tracking for Mac
Learn how to use Camera Tracking in Filmora for Mac to automatically track a head, body, or custom area and keep your subject properly framed as it moves.
