Reversing video clips is a popular technique used to add artistic effects or simply a bit of fun into video projects. But if you've ever attempted to reverse a video in iMovie on iPhone, you might have discovered that this feature is unfortunately missing.
Don't let this discourage you, though. You don't have to compromise on your creative vision! There are alternative methods and apps available that allow you to reverse your video clips on iOS. We will cover everything you need to know to find and use these alternatives effectively.

In this article
Part 1. Reverse Video in iMovie on iPhone/iOS
For iPhone or iOS users, iMovie is often the default choice for video editing since it comes pre-installed on their devices. That’s why many iOS users who rely on iMovie for its convenience may be surprised to learn that iMovie does not support reversing video clips on iPhone, especially given the popularity of reverse effects in video editing. This feature is available only on iMovie for Mac, not iPhone.
Instead, iMovie for iOS only offers the following capabilities:
- Organize, merge, and refine video clips.
- Add animated titles, background music, filters, and other creative effects.
- Use ready-made templates suitable for various video projects, including cooking tutorials, product reviews, or science experiments.
- Modify and adjust the playback speed of your videos.

Although you can’t reverse video on iPhone by iMovie, this setback actually opens the door to exploring other video editing applications available on the iOS platform that offer this feature. If one tool doesn’t have what you need, there’s always another that might just be perfect for you.
Part 2. Other Top-pick Solution to Reverse Video on iPhone
As a solution to reverse video in iMovie on iPhone, you can use Wondershare Filmora. With Filmora, reversing video clips only takes a few taps. No sophisticated technique or complex editing skills are required, just like when using iMovie.
But compared to iMovie, Filmora offers even greater flexibility and a host of additional features. If you often need to switch between apps to edit your videos, you won’t face this inconvenience with Filmora. This app has been a one-stop solution for all video editing needs.

In addition to creating reverse video effects, some of Filmora's features are:
- Over 900 free video effects that can elevate the visual appeal of your project
- A built-in stock library featuring music, sound effects, and an AI Audio generator to create custom sound
- Ability to directly share your creations to popular social media platforms such as TikTok and YouTube
- Flexible video playback speed controls, ranging from 0.1x to 10x
As an alternative to iMovie on iOS to reverse video, Filmora supports multiple platforms, not just Apple's ecosystem. Even if you are using Android, you can still use this app to edit your video.
How to reverse video on iPhone using Filmora
Step 1: Create a New Project and Import the Video
- Superb video stabilization with low distortion.
- Vast video/audio effects and creative assets.
- Powerful AI for effortless content creation.
- Intuitive, professional yet beginner-friendly.
- Works on Mac, Windows, iOS, and Android.

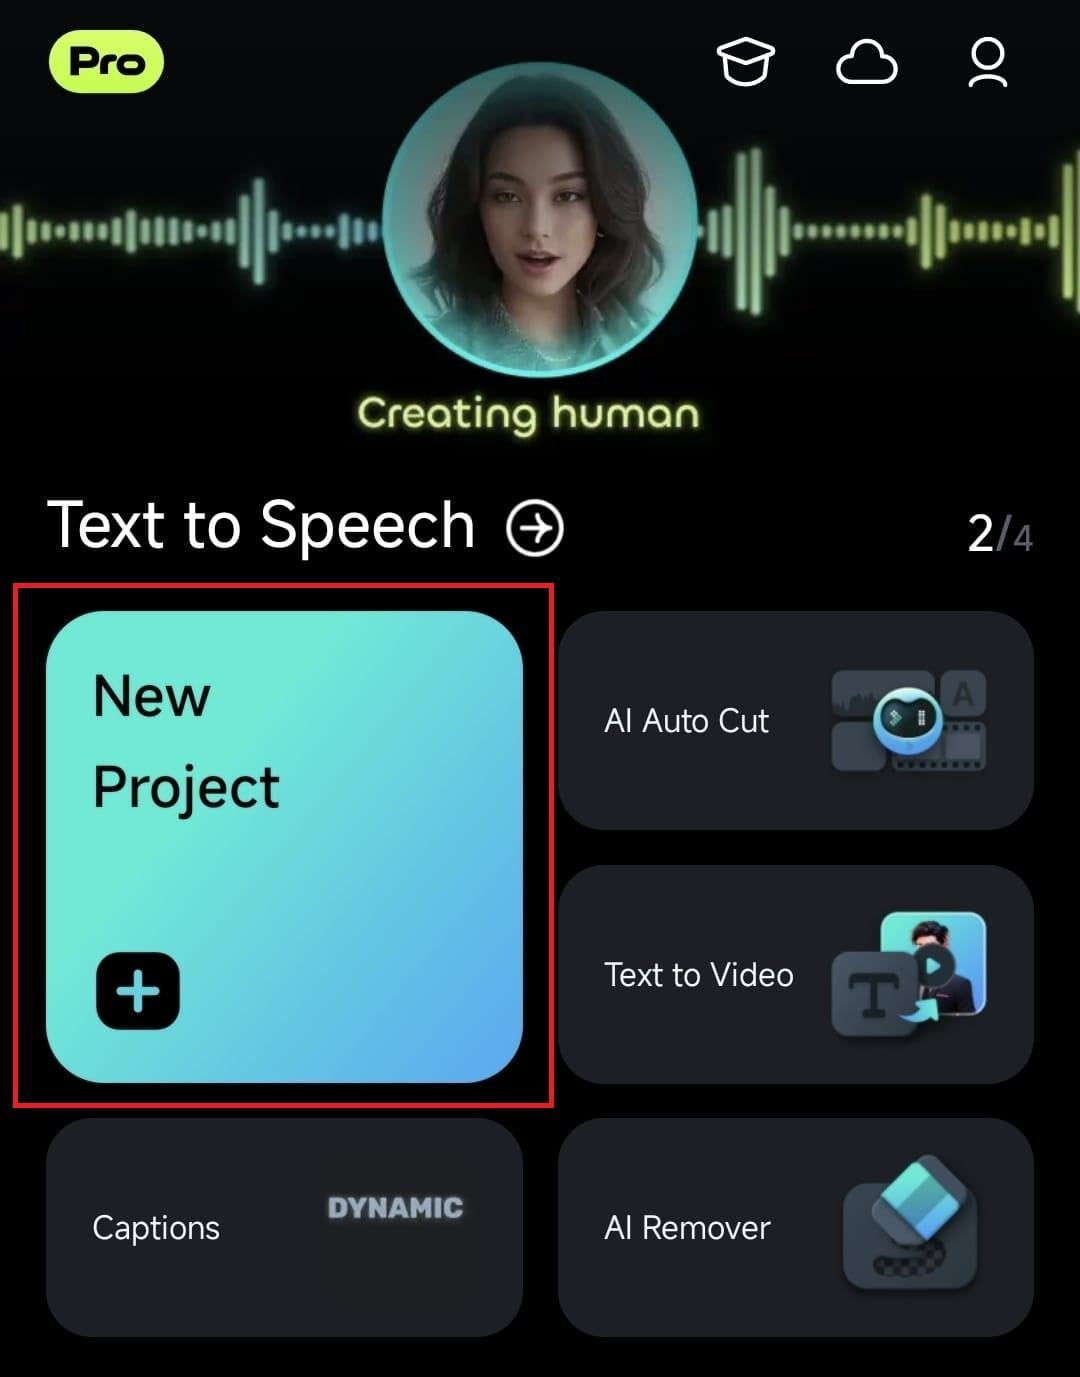
Once you’ve installed Filmora, open the app and tap “New Project.”

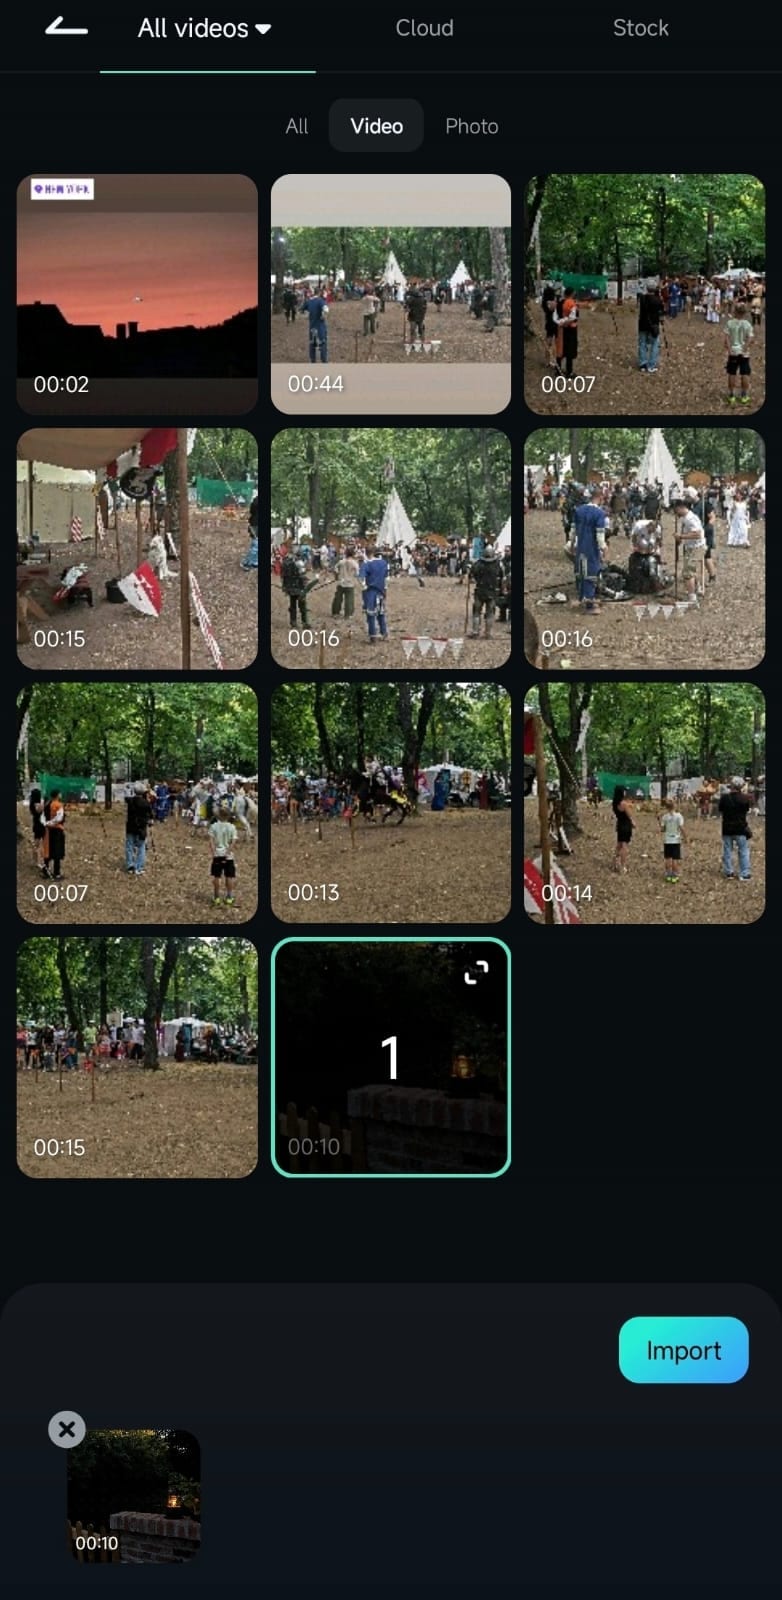
Then, you’ll get to import and add your video to edit.

Step 2: Reverse the Video
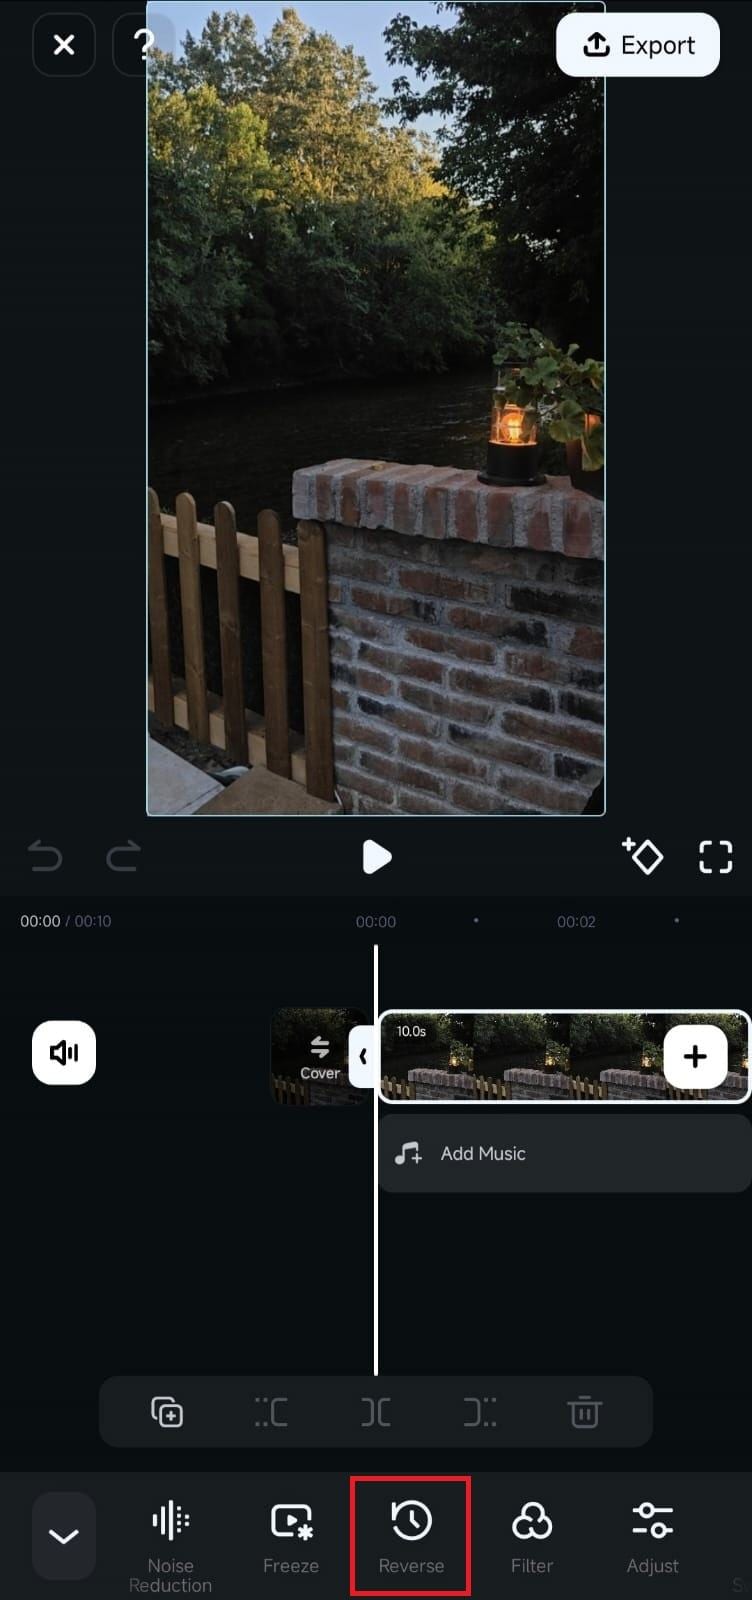
After adding your video, tap on the clip in the timeline to select it. This action will open up the available editing tools for your video. Look for and select the "Reverse" option to apply the effect.

Wait for Filmora to finish reversing the video, which usually takes only a few seconds to a few minutes. Then, you can preview the reversed clip to see the effect in action and make any additional edits, such as changing the video speed, applying video effects, and more before exporting.

If you're looking for inspiration, check out the ideas in the next section for some creative ways to use reverse video effects!
Part 3. Content Ideas Using Reverse Video Effects
Now that you’ve learned how to reverse video on an iPhone, even without iMovie, it’s time to try out some creative ways to use it. Reverse video effects can give your footage that unique, eye-catching twist. Here are some fun ideas to spark your inspiration:
1. Create Satisfying Reverse Videos
If you plan to make viral content, try reversing everyday actions to give them a satisfying twist. There’s something satisfying about watching things happen in reverse. That’s why these types of videos get tons of views on social media!
For instance, capture an ice cream cone melting under the sun and reverse it so it looks like it magically reforms into a perfect scoop. Simple, everyday moments like these become oddly mesmerizing and are bound to keep viewers watching!

2. Use Reversed Video to Create Magic Tricks
Who doesn’t love a little magic? With the reverse effect, you can make objects disappear, reappear, or defy gravity without CGI! Film yourself throwing a deck of cards into the air, then reverse the footage to show them leaping back into your hands in one clean sweep. It’s a perfect way to create mind-bending illusions that feel like pure magic.

3. Highlight Sports Action
There’s no denying the thrill of a perfectly executed sports play, but have you ever seen a game-winning goal or a slam dunk played in reverse? This can add an unexpected and exciting element to your sports videos and show little details that you might miss.

4. Make a Compelling Narrative
Next, you can also use this reversed video technique to tell your own story in reverse, capturing dramatic or heartfelt moments and revealing their origin point as the video progresses. This approach can add an artistic, cinematic quality to your content, perfect for music videos, short films, or any project with a story to tell.
If you’re looking for inspiration, Coldplay’s The Scientist music video is a good example of reverse storytelling. The entire video plays out backward, unraveling a narrative that aligns perfectly with the song’s emotional tone.

5. Traveling Back in Time Transition
The reverse effect is also a popular technique for creating a "traveling back in time" transition. To achieve this effect, reverse your footage to make it appear as if you’re rewinding through past moments. Then, accelerate the speed of the reversed video to create a smooth transition that connects the present moment to earlier scenes. This accelerated rewind effect gives viewers the impression of moving quickly through time.

Conclusion
The fact that iMovie on iOS lacks the reverse video feature may seem like a creative roadblock. However, this limitation is easily overcome with the wealth of alternative video editing tools available, such as Wondershare Filmora.
Filmora not only nails the reverse video trick with just a few taps but also brings a whole arsenal of cool features to play with. If you’ve ever been stumped on how to reverse video on iMovie iPhone, now you’ve got all the knowledge and tools you need to push your projects to the next level!


