Thanks to its robustness, Open Broadcaster Software (OBS) gained a position among the most configurable tools when it comes to video streaming and content creation, as it offers its users an array of professional options to tweak their broadcasts. Simple coloring or elaborate special effects, with the help of OBS video filters, streamers are able to further improve the visual & artistic aspects of their streams to a whole new level.
Whether you’re a beginner looking to make your videos pop or a seasoned content creator aiming for the next level of professionalism, OBS filters give you the power to transform your stream in real time. In this guide, we’ll explore various types of OBS filters, show you how to configure and add them to your streams and introduce you to using Wondershare Filmora to take your filter game even further.
In this article
Part 1: Types of OBS Video Filters
OBS includes a number of virtual effects that are meant to enhance the visuals, add flavor, and make the broadcasting more compelling. Here are the few most common filters that you may apply to your video to make it more distinctive:
1.LUT (Look-Up Table) Filters
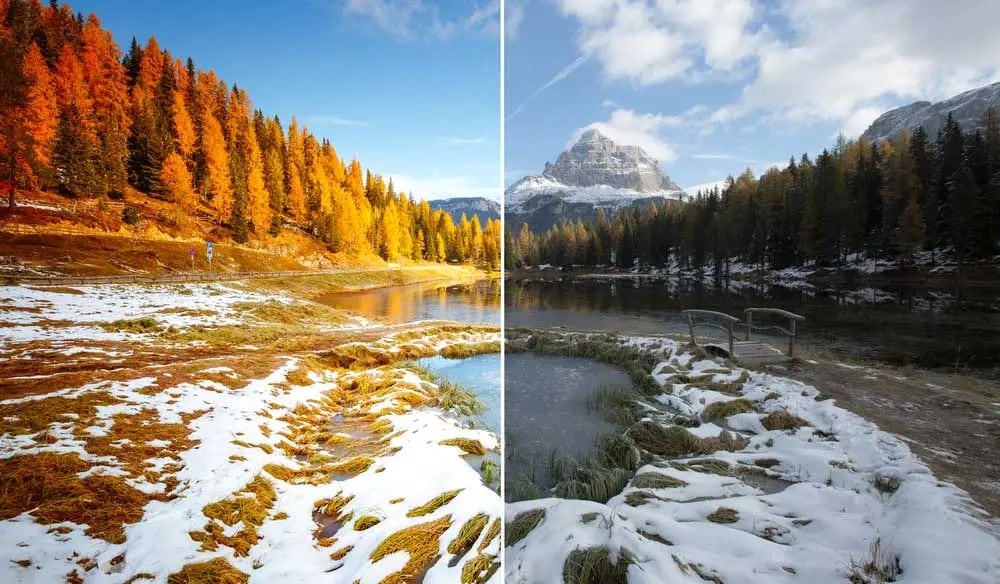
LUT filter or look-up tables can be defined as the filter parameters that further enhance the qualities of any user’s video by enhancing the performance or function of its hue, saturation, and contrast. They are especially valuable for anyone who desires to achieve a cinematographic style. While using LUT, the color palette can be altered to a great extent, and making one scene cooler, warmer, or even more stylized can be done in seconds.
Popular Uses: Give your stream a professional, film-like appearance or match specific moods for different types of content (e.g., a warm LUT for casual chatting streams or a cooler one for gaming).
2.Color Correction
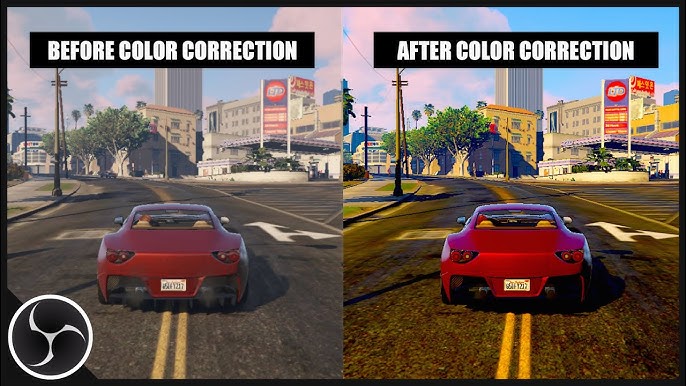
This is one of the most used filters in OBS because it enables you to fine-tune the brightness, contrast, hue, and saturation of your video feed. With color correction, you can bring out the best in your environment, ensuring everything from skin tones to background colors appears natural and well-balanced.
Popular Uses: Adjust for lighting discrepancies if streaming from different locations, or fix any washed-out or overly dark areas to create a consistent look across sessions.
3.Chroma Key (Green Screen)

A classic filter in video production, the Chroma Key allows you to remove a green or blue background and replace it with any image or video. This is perfect for streamers who want to insert themselves into different environments or enhance their gaming content with custom backdrops.
Popular Uses: Switch out the backgrounds with live in-game action, put branded backgrounds to add a professional touch, or move yourself to other places.
4.VHS Filter
For those aiming to create a retro, vintage vibe, the VHS filter offers that distinct 80s look with subtle static and flickering effects. This filter adds character and nostalgia to your videos, perfect for themed streams or channels that embrace a throwback aesthetic.
Popular Uses: Create a “retro” gaming session, add a fun effect for specific video segments, or set up nostalgic movie nights.
5.Sharpness Filter
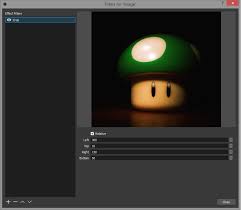
When used properly, sharpening techniques improve the contrasts of the detail range within an image space and visually make an image appear sharper than its original. It is recommended to avoid long usage of such filters or effects as its overuse may result in the introduction of unwanted hard edges.
Popular Uses: An excellent tool for close-up shots or tutorials as it engages the viewer’s attention on the details.
Part 2: How to Add and Configure Video Filters in OBS
In OBS, adding video filters is relatively easy. But the trick to the success of the project is understanding how to configure them to one’s requirements. The following section discusses how to apply and change video filters in OBS in detail.
Step 1: Open Your Video Source in OBS
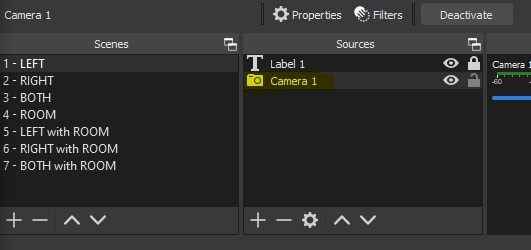
To achieve these aims, the very first step that has to be done is to start the OBS and select the source for the video that shall be filtered. This could be a webcam feed, a screen capture, or a game window.
Step 2: Access the Filters Menu
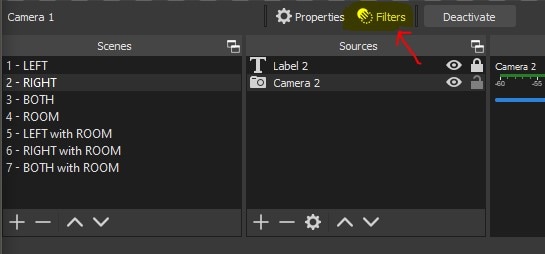
Right-click on the video source in the OBS preview window or the Sources panel. From the context menu, select Filters. This will open a new window where you can add and adjust filters.
Step 3: Add a Filter
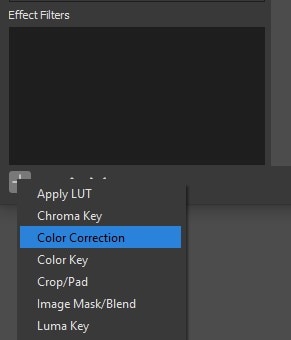
In the Filters window, you’ll see two sections: Effect Filters and Audio/Video Filters. Click the + icon below the Effect Filters section to display the available video filters. Select which filter to be used, such as color burning or using a LUT (‘Look Up Table’)
Step 4: Configure Filter Settings
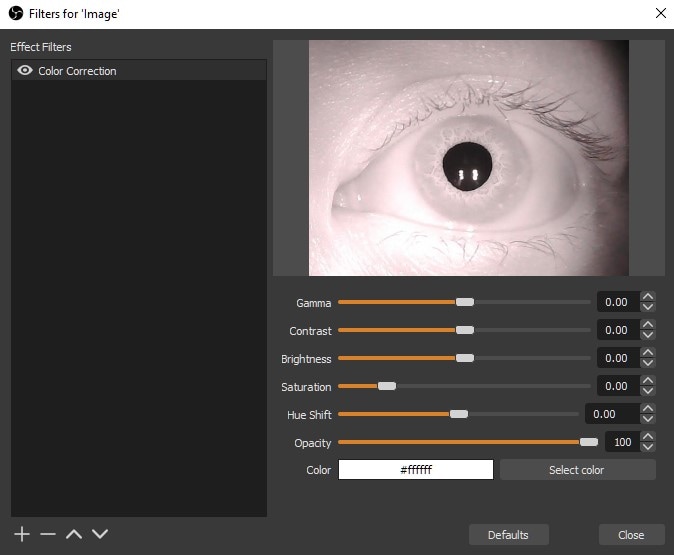
Definitely, each kind of filter from the ‘Effect’ section has its parameters that can be applied best to the desired effect. For example, LUT filters ask for a user to upload a . LUT file, while color correction only includes controls for brightness, contrast, and saturation as sliders.
Pro Tip: Please note that OBS captures, and you see the effect, so do it in small increments; it is very easy to get carried away with effects and adjust them too much.
Step 5: Save and Apply
When you have finished making adjustments, the next step is to close the Filters window. OBS will take care of the changes automatically while the filters that you have set up are still applied to the source video you are currently on.
Part 3: Using Filmora to Enhance OBS Filters
Although OBS offers great options when it comes to built-in filters, using it together with Wondershare Filmora can greatly extend one’s creative potential. Filmora is a video editing software with a simple interface and a wide range of effects, which allows the creating of built-in filters and importing them into OBS.
Creating Custom LUTs in Filmora
Filmora gives you the opportunity to make your LUTs which will definitely make the color grading of your videos come out neat and clean. Here’s how you can go about this process:
Step 1: Edit Your Footage in Filmora
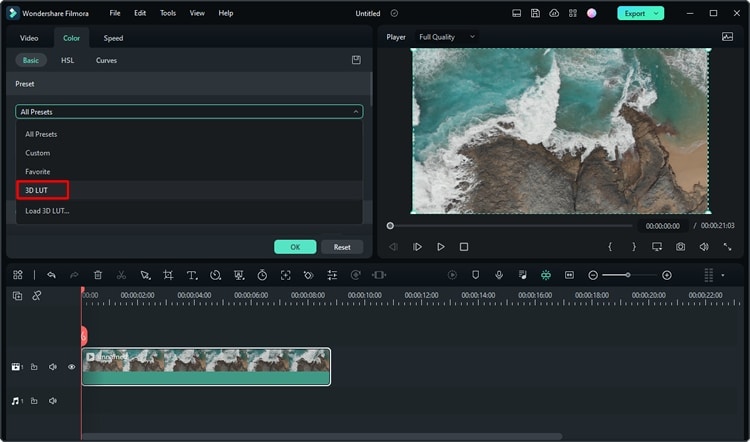
Go ahead and start by importing your video footage into Filmora. You can do some color corrections, put some effects, and change the saturation, contrast, and brightness to a level that pleases you.
Step 2: Export the Color Grading as a LUT
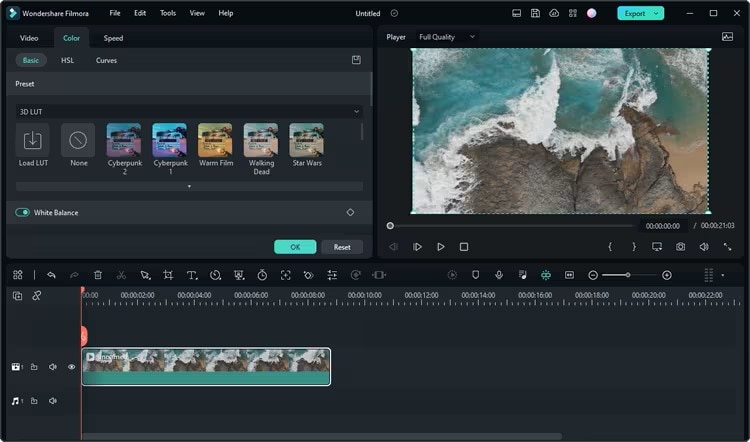
As soon as you have achieved the look desired, go ahead and export the crag file as a LUT file. On this note, Filmora has made available a number of exporting options, including one that works well with OBS.
Step 3: Import the LUT into OBS
The LUT file needs to be transferred to OBS using the processes given in Part 2 and then applying LUT as a Look-Up Table filter on your video source. This way, you can use the advanced editing facilities of Filmora to make your live-stream visuals more interesting.
Using Filmora for Pre-Recorded Content in OBS
Filmora is more than a creative tool—it also allows one to edit and record content that will be uploaded in the future. Posting high-quality edited footage ensures that your OBS streams are of a high standard, and Filmora provides all the tools necessary for this.
Step 1: Edit and Add Effects in Filmora
Make edits and changes to be recorded in future streams by utilizing the many video effects, transitions, and animations that Filmora encompasses. Such elements can be included in your pictures as Filmora enables advanced options such as overlays and greenscreen positions.
Step 2: Import Edited Videos into OBS
Once edited, export the video and import it into OBS as a media source. In this way, it becomes possible to have smooth and well-executed productions, as you can include excellent snippets that have already been recorded.
Part 4: Best Practices for OBS Video Filters
The use of filters is not a walk in the park. It is an art that encompasses thorough planning and a sound equilibrium. Here are some of the steps you can follow to avoid the pitfalls:
Consider the style and mood of your stream before choosing a filter. For example, a clean, minimal look might work better with subtle color correction, while a gaming stream might benefit from more dramatic effects, like LUTs or VHS filters.
- Avoid Overloading with Filters
While filters can be exciting, using too many can clutter the visual experience and create distractions. Stick to one or two filters that enhance, rather than overpower, the video.
- Test Filters in Advance
It’s always best to test your filters before going live. Spend time adjusting settings, ensuring your lighting complements the filter, and running a test stream to see how everything appears in real time.
- Optimize Lighting for Filters
OBS filters work best in well-lit environments. Even a slight adjustment in lighting can drastically affect the output. Use soft lighting for color correction or Chroma Key effects to ensure a balanced, professional look.
- Experiment with Custom LUTs
Explore your creativity by making your LUTs in Filmora and putting a distinct look on your stream. Custom LUTs work best for brands or stimulates that are theme-orientated.
Conclusion
OBS video filters empower streamers and content creators to elevate the quality and creativity of their broadcasts. From subtle color corrections to bold, thematic LUTs and green screen effects, OBS offers a variety of tools to help you stand out. When combined with the editing power of Filmora, you can create custom visuals and polish pre-recorded content to bring a professional edge to your live stream.
Make sure that you practice and try working with Filmora because there are a variety of filters which can potentially make your OBS streams look stunning. Now that you have this guide, you can now go ahead and indulge yourself in the world of imagination where you can think of several ways of using video filters in OBS to enhance your content.


 100% Security Verified | No Subscription Required | No Malware

