
 100% Security Verified | No Subscription Required | No Malware


 ChatGPT
 Perplexity
 Gemini
 Claude
 Grok
Grok

Freezing a video frame is perfect for highlighting an action, reinforcing a brand message, or drawing attention to specific information like data or product features. The same goes for slowing down a video to emphasize a moment for dramatic effect or showcase details in fast-action shots.
Many video editors provide those features, but Final Cut Pro is an excellent choice for Mac users. You can quickly create Final Cut Pro X freeze-frames and slow-mo videos for cinematic effects.
Before walking you through Final Cut Pro X slow motion and freeze-frames, let's see how frame rates impact slow motion. We'll also introduce a fantastic FCP alternative, so keep reading.
In this article
How Do Frame Rates Impact Slow Motion?
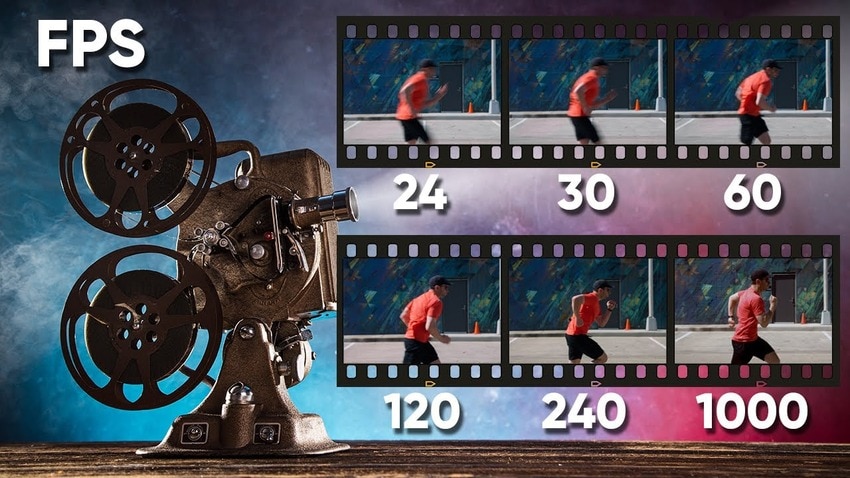
The higher the frame rate, the smoother the slow-motion playback. For instance, slowing down a 60 FPS video to a standard 24 FPS translates to 40% of the original video speed. That means fluid motion because you're essentially stretching your video. More frames per second ensure no gaps that could make movements look unnatural.
The effect is even better with higher frame rates like 120 FPS, 240 FPS, 480 FPS, and 1,000 FPS (which high-end professional cameras support). You could slow down a video to 20%, 10%, 5%, or 2.4% (respectively) of the original speed. Talk about ultra-slow motion, showing all the intricate details.
On the other hand, slowing down a 24 FPS video makes each frame linger longer, resulting in a choppy playback. Why?
Because your video editing software has fewer frames to work with when stretching the footage. Advanced video editors can smooth the motion with frame interpolation for optical flow, but you're still better off recording at a higher frame rate.
Now that you understand how frame rates impact slow motion, it's time to see how to freeze and slow down videos in Final Cut Pro.
How to Add Freeze-Frames in Final Cut Pro
Final Cut Pro's freeze-frame functionality is intuitive, helping you freeze a frame within seconds and seamlessly adjust its duration. However, if you're a first-time user, you must create a library before adding a project (which goes into a date-specific event folder), so we'll walk you through the whole process.
Here's how to freeze a video in Final Cut Pro:
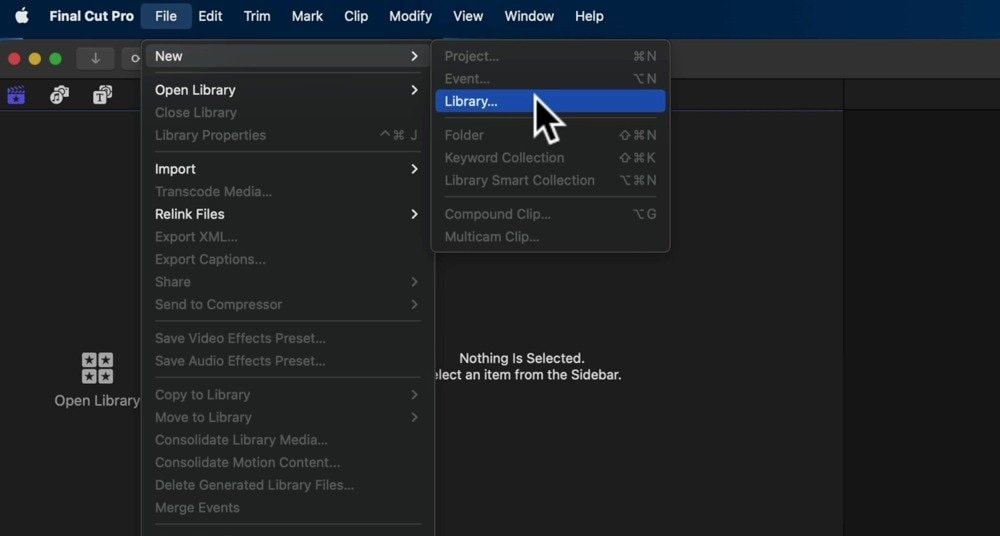
- Step 1: Go to File > New > Library. FCP will automatically create an event for your project.
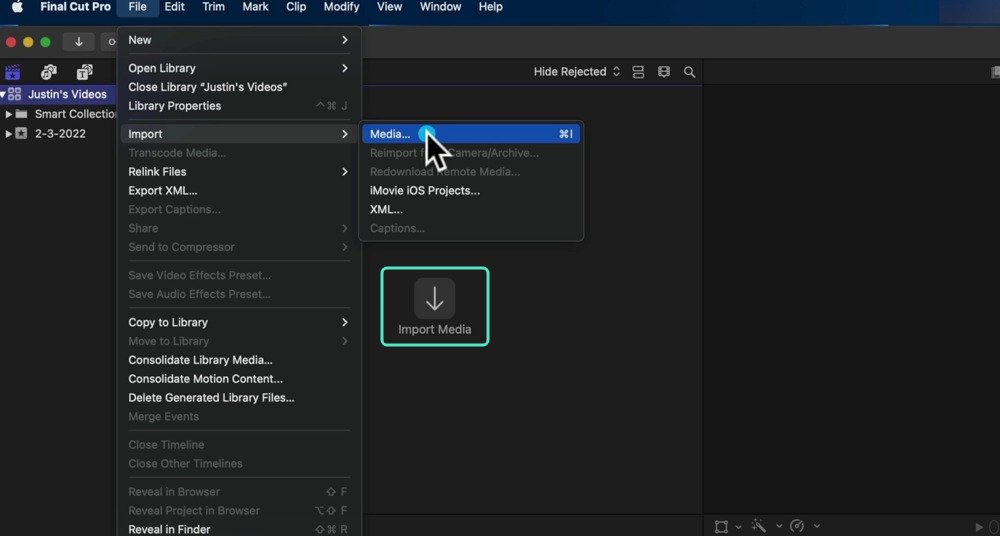
- Step 2: Go to File > Import > Media (or click the designated button on the Browser panel) and choose a video.
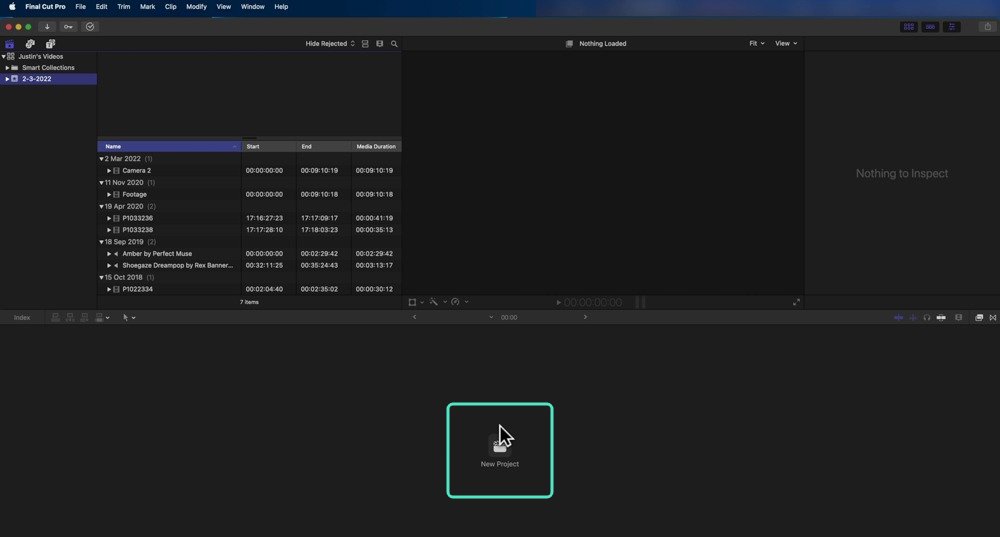
- Step 3: Click New Project or File > New > Project. You can also use the Command + N shortcut.
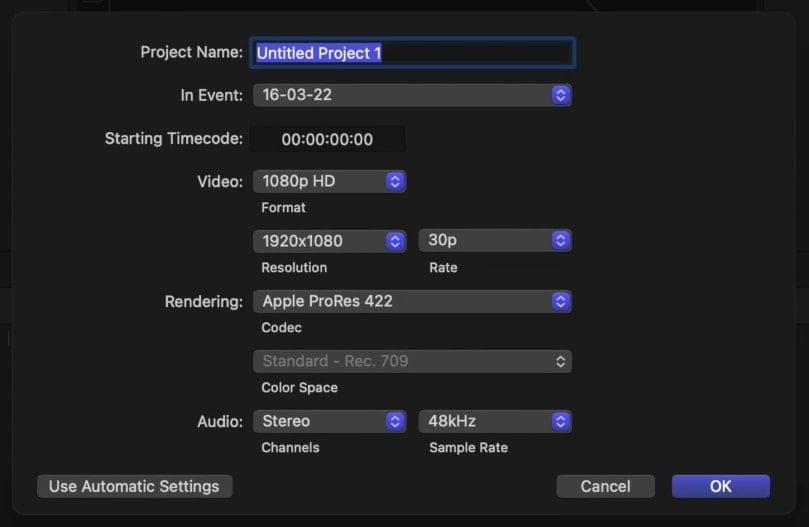
- Step 4: Name your project and customize the settings, like resolution and frame rate. Click OK.
- Step 5: Drag your imported video to the timeline. Then, position the playhead on the frame you wish to freeze.
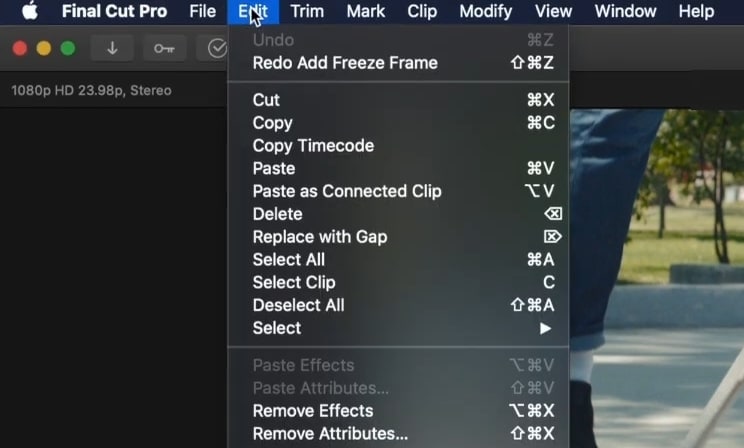
- Step 6: Click Edit in the menu bar.
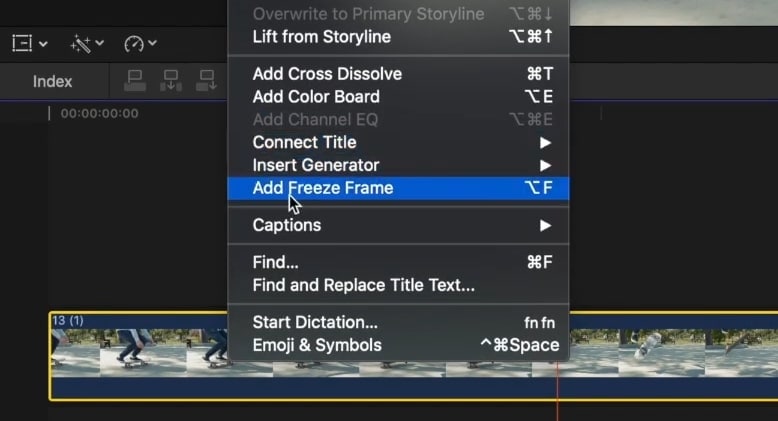
- Step 7: Click Add Freeze Frame. You can also use the Option + F shortcut.
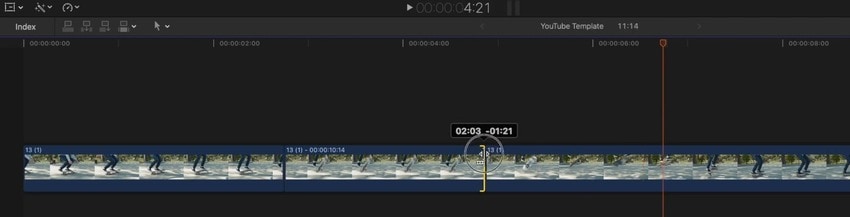
- Step 8: Select your frozen frame and double-click the timecode display below the Viewer panel (or hit Control + D) to adjust the duration. The default is four seconds.
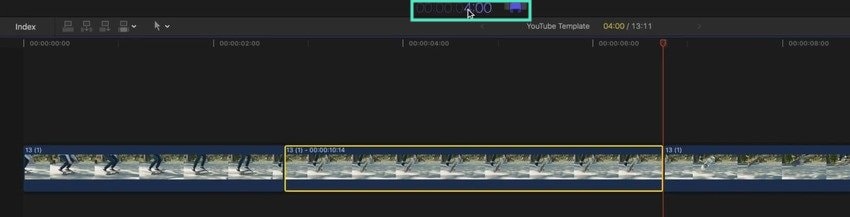
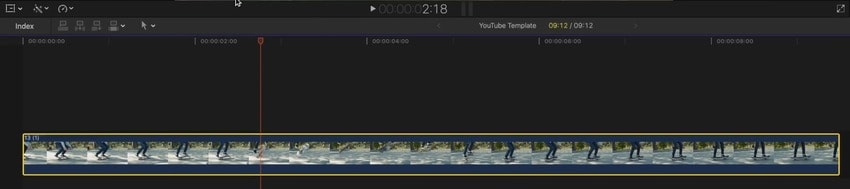
- Step 9: Another way to modify the freeze-frame duration is to move its edges manually. Click and drag either to see the desired length and frame number on the timecode display. In our example, it's four seconds and 21 frames.
How to Slow Down a Video in Final Cut Pro
Final Cut Pro slow motion is also an intuitive functionality. It offers default speed rates and lets you customize them. It also has an automatic setting for slowing down a video according to its frame rate, but you can slow it down further and achieve fluid motion with optical flow.
Here's how to slow down a video in Final Cut Pro:
- Step 1: Once you create a project and add a video to the timeline, select the video and hit Command + R to show the Retime Editor.

- Step 2: Move your cursor to the retime handle at the end of your video.
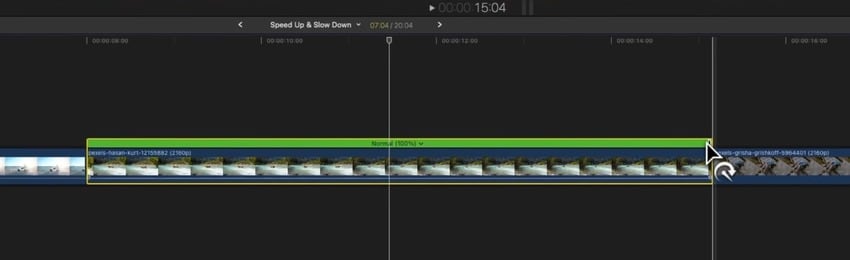
- Step 3: Drag the handle to the right to slow down the video.

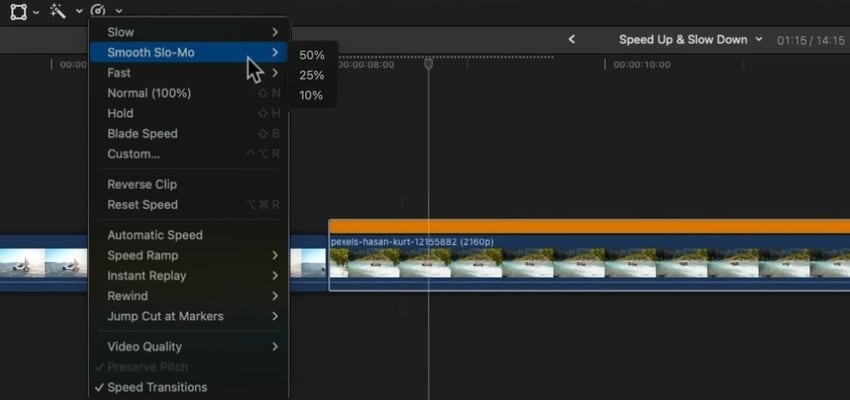
- Step 4: You can also choose a default slow rate. Click the Retime button below the Viewer to select 50%, 25%, or 10% under Slow. If you have a Mac with an Apple silicon chip, you'll also see the Smooth Slow-Mo option for automatically setting the best video quality for optical flow.
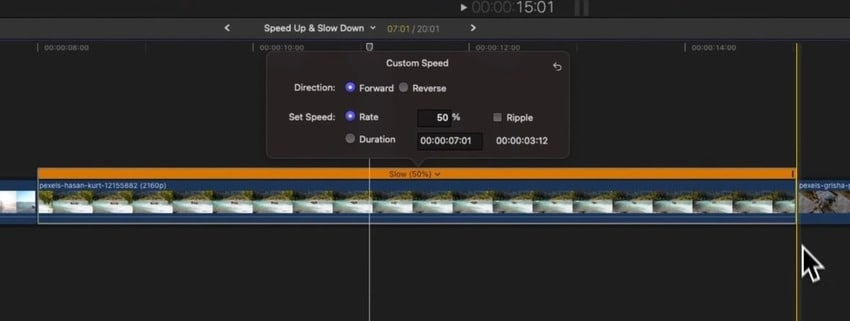
- Step 5: To retain the original video length, expand the menu in the Retime Editor and select Custom. Set any speed rate and untick the Ripple checkbox.
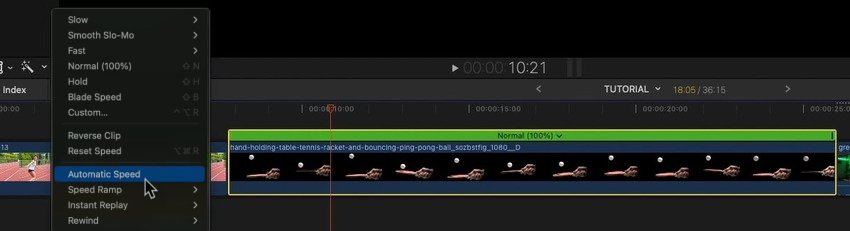
- Step 6: To slow down your video according to its frame rate, select it on the timeline and click Retime > Automatic Speed.
- Step 7: Final Cut Pro will set the maximum slow motion for the original frame rate (48% in our 50 FPS video), but you can slow down the video further. Go to Slow, Smooth Slo-Mo, or Custom in the Retime Editor and pick a rate.

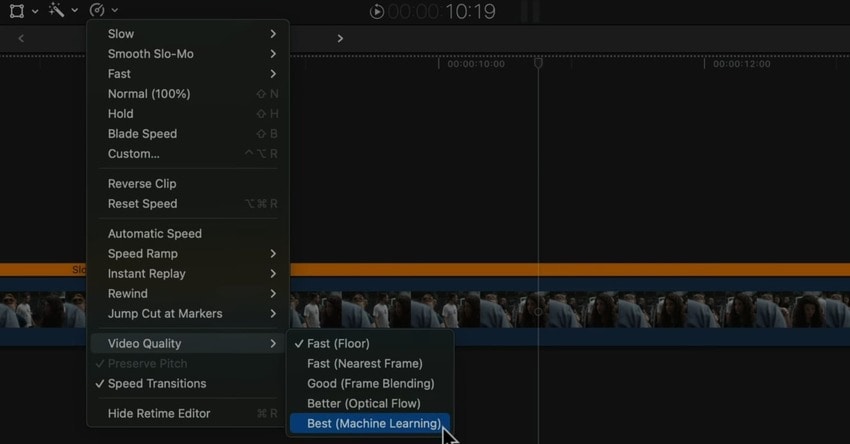
- Step 8: The playback may be choppy if you don't choose the Smooth Slo-Mo, so click Retime > Video Quality and select Better or Best for a smoother effect. The former considers directional pixel movement for optical flow, while the latter uses machine learning for bidirectional optical flow, reducing motion blur and artifacts.
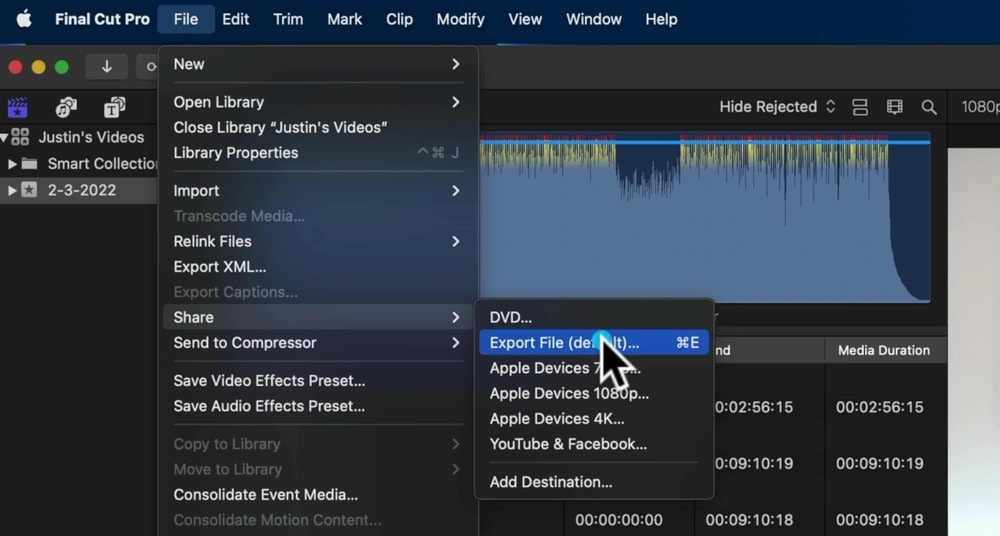
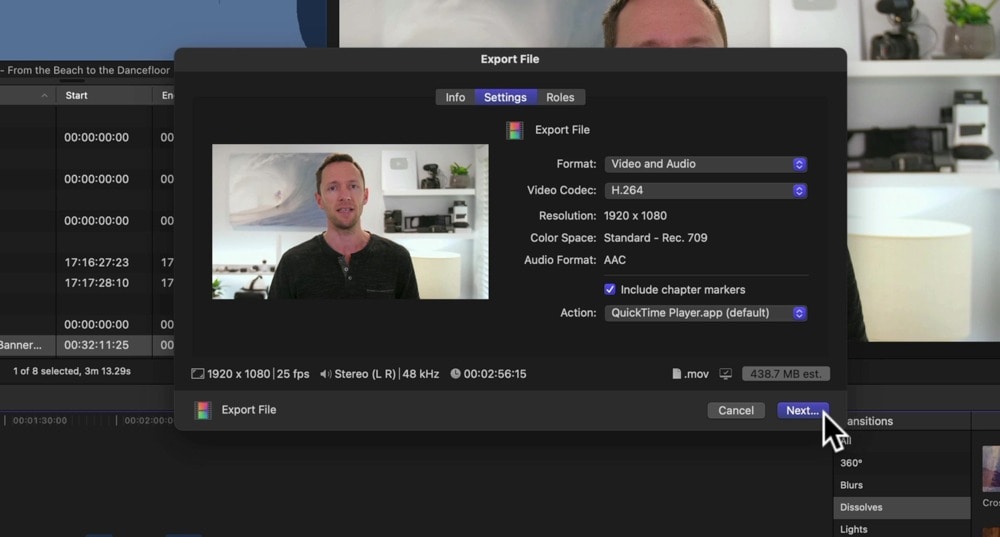
- Step 9: After fine-tuning everything, go to File > Share > Export File (or hit Command + E) to save the video to your device.
- Step 10: Adjust the export settings (if necessary) and click Next. Name your video, pick a destination, and hit Save.
Alternative to Final Cut Pro for Freeze-Frames and Slow Motion: Filmora
A statement can be made that Final Cut Pro isn't beginner-friendly enough. Freezing video frames and applying slow motion may be straightforward, but the software has a steep learning curve. It's better for filmmakers and professional video editors. Most importantly, it doesn't have AI features, auto-reframing, or a screen recorder, leaving much to be desired.
Wondershare Filmora, an advanced video editor with screen recording capabilities, is perfect for beginners and semi-professionals. It has an intuitive UI, cutting-edge AI features, millions of creative assets, and all the tools you need for stunning videos.
It has a user-friendly functionality for freezing frames and can help you make slow-motion videos using AI frame interpolation for smooth optical flow.
- Superb video stabilization with low distortion.
- Vast video/audio effects and creative assets.
- Powerful AI for effortless content creation.
- Intuitive, professional yet beginner-friendly.
- Works on Mac, Windows, iOS, and Android.


The best part? You can use Filmora on macOS, Windows, iOS, and Android, making it a no-brainer if you don't exclusively use macOS. Download it to your device to try it for free. In the meantime, check out how to freeze frame and slow down videos in Filmora.
How to Freeze Frames in Filmora for Mac
Follow these steps to create a freeze-frame effect in Filmora:
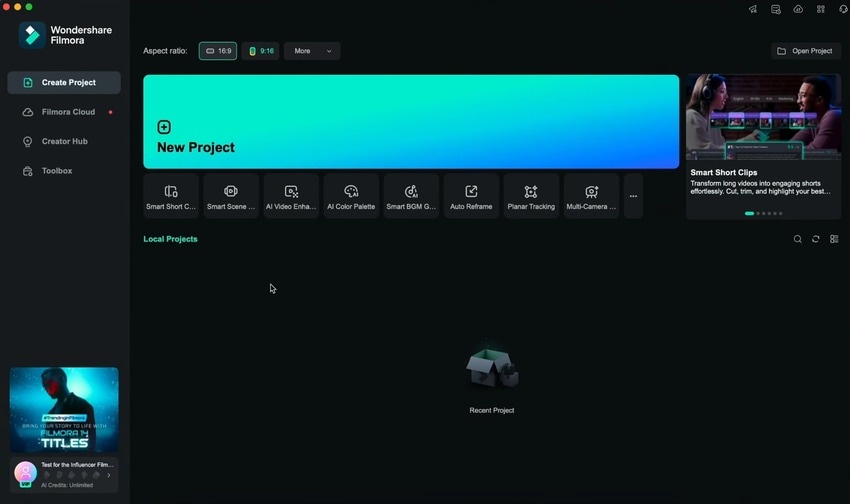
- Step 1: Launch the program and click New Project.
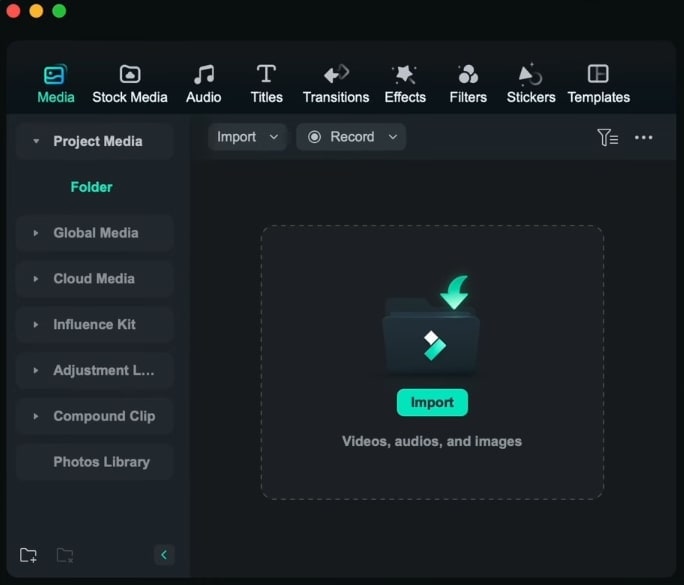
- Step 2: Click Import and select a video.
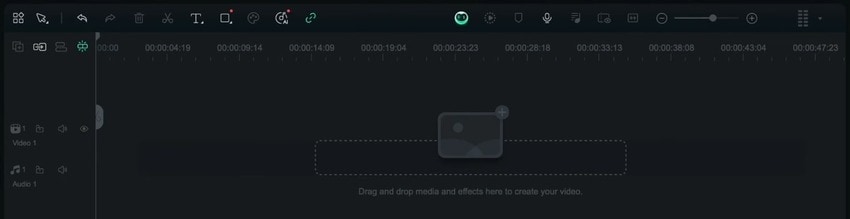
- Step 3: Drag and drop the video onto the timeline.
- Step 4: Choose a frame to freeze by positioning the playhead.
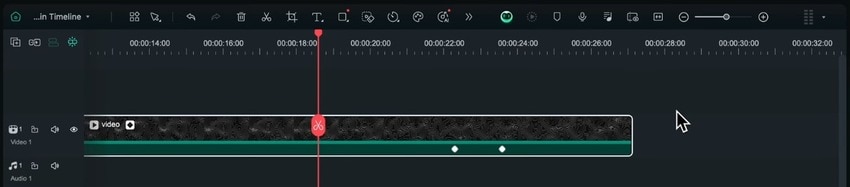
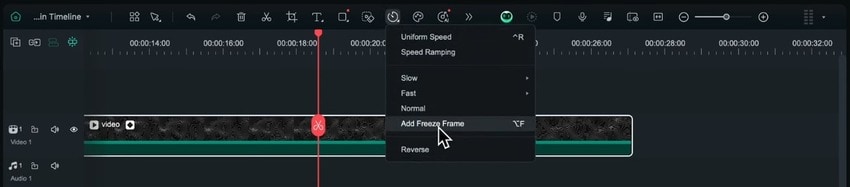
- Step 5: Click the Speed button in the timeline toolbar and click Add Freeze Frame (or hit Option + F).
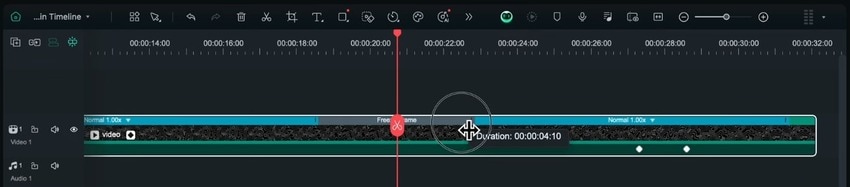
- Step 6: Drag the handle at the end of the Freeze Frame segment to modify the duration.
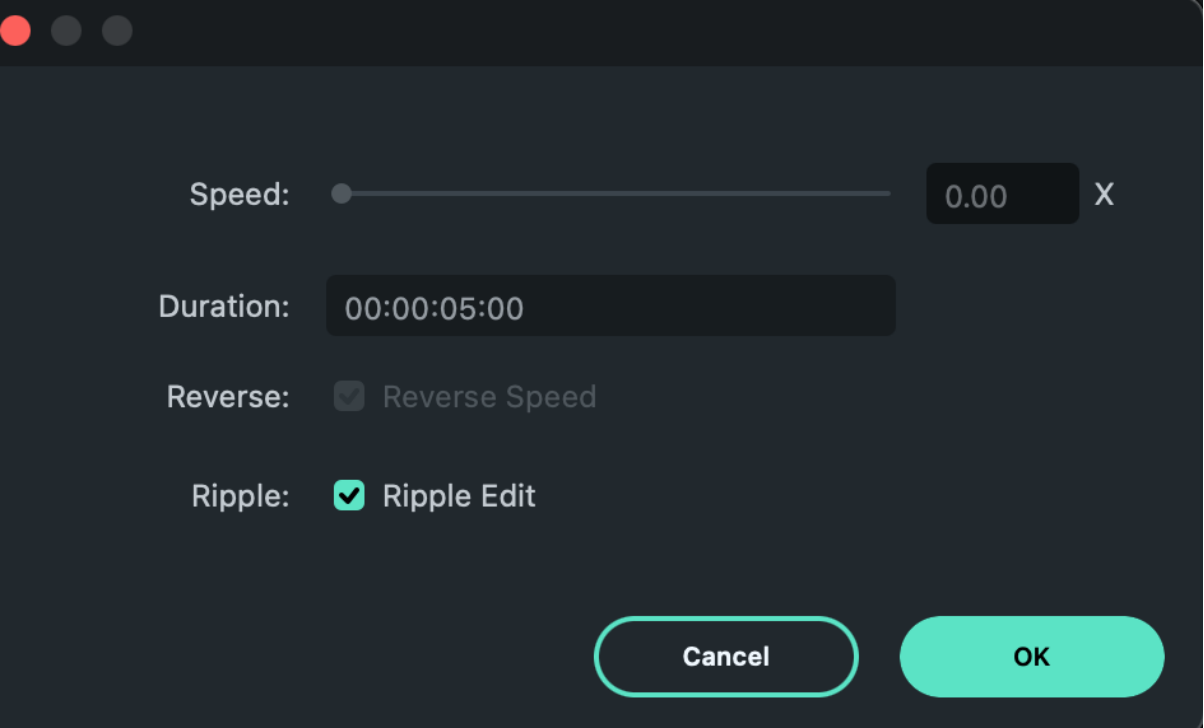
- Step 7: Right-click the frozen frame and select Duration to customize it. Set the desired length and hit OK. Adjusting the speed will affect your video.
- Step 8: You can slow down or speed up the beginning and end of your video. Simply drag their respective handles.
How to Make a Slow-Motion Video in Filmora
Besides slowing down clips in freeze-frame videos, Filmora lets you turn any footage into a slow-motion work of art. It can interpolate frames using AI algorithms for frame sampling, blending, and optical flow. The last option adds extra frames for fluid motion, producing out-of-this-world results.
Here's how to make a slow-motion video in Filmora:
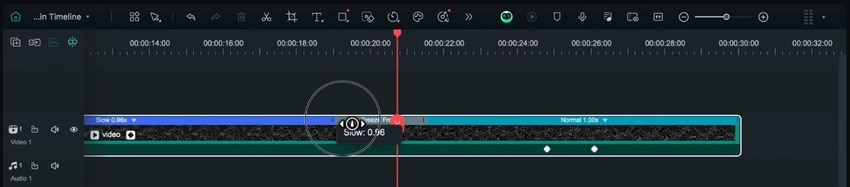
- Step 1: Once you add your video to the timeline, click the Speed button in the toolbar to choose a preset rate under Slow or Uniform Speed for super-slow motion.

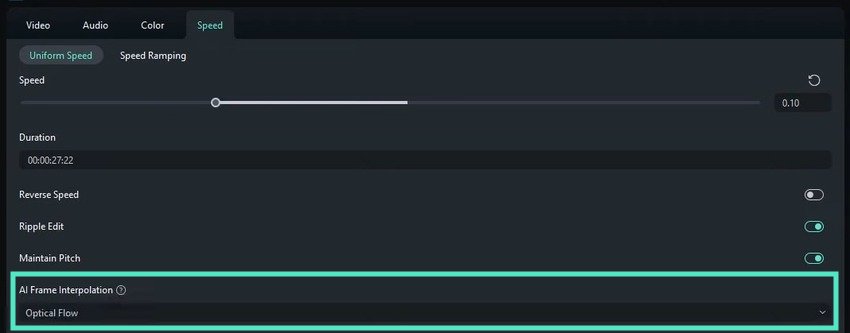
- Step 2: The Uniform Speed option will open advanced settings in the Properties panel. Specify the speed and select Optical Flow under AI Frame Interpolation.
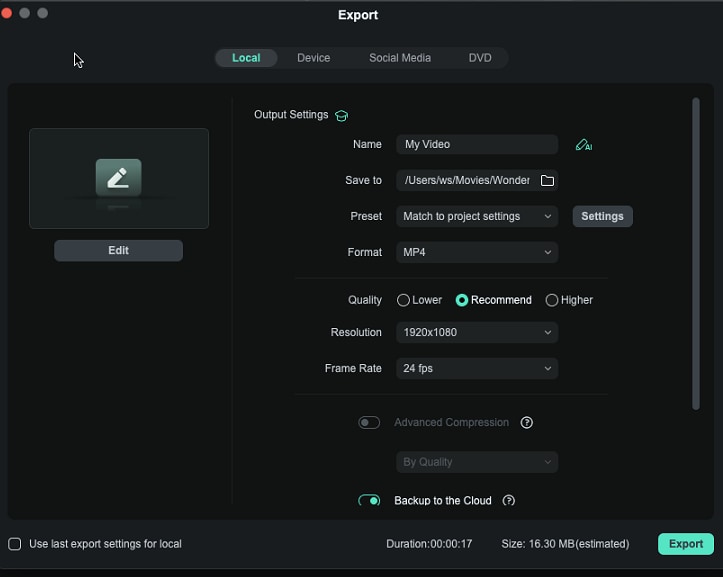
- Step 3: Click Export to save your slow-motion video.
- Step 4: Specify the name, location, format, quality, and other parameters and hit Export.
Conclusion
Using Final Cut Pro to slow down a clip or add freeze-frames is straightforward. However, the software has a steep learning curve for many functionalities, no AI editing tools, and no Smooth Slo-Mo feature for Mac computers with Intel-based processors.
Filmora ticks those and many other boxes, making video editing a walk in the park. Try it today to open up a world of infinite possibilities.
