Inserting a Picture-in-picture (PiP) possibility helps put one video or image on another, making the footage alive. With the help of the iMovie Picture-in-picture effect, you can do it on both Mac and iPhone/iPad, which makes it beneficial for all video creators who intend to add more content layers. This guide aims to show how to create an iMovie picture-in-picture video and present another video-creating application that can do it quickly.
In this article
Part 1: Picture-in-picture Video Editing Options in iMovie
iMovie for Mac, iPhone, and iPad has various simple features that can be used to trim PiP videos. Here's a breakdown of the editing options:
- Reposition: You can relocate the PiP image anywhere on the screen by dragging it to that particular position.
- Resize: A two-finger pinch gesture is used to scale the size of the larger extended image to make it larger or to minimize it according to the extent of prominence desired on the image.
- Add Borders: Your PiP clip can have frames with thick-to-thin borders and any color you prefer, making its bead stand out more.
- Add Shadow: Shadows can also be applied to boost the said PiP effect more, to the extent of looking professional.
- Apply Changes: Make all the changes you need to, and after you have made the selection, ensure that you click the "apply" button.
Part 2: How to Make iMovie Picture-in-picture Effect on Mac
The iMovie software on Mac is a handy application with more features than the basic ones. For instance, picture in picture. Here's how you can add this effect on Mac:
Step1Open iMovie and Click on the New Project button
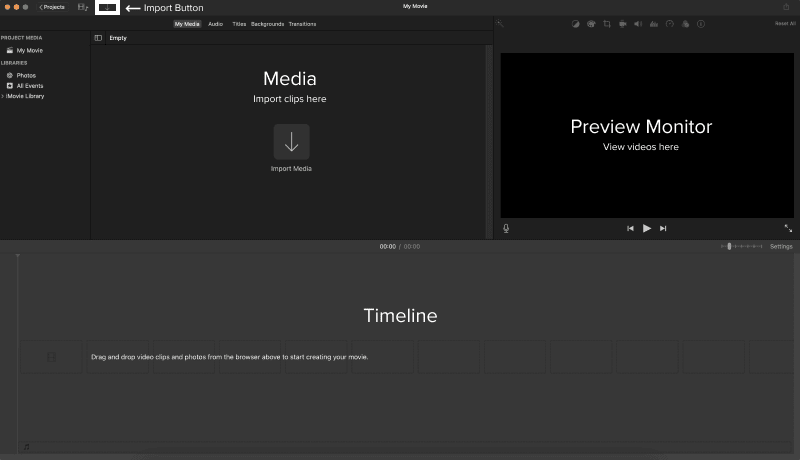
Launch the iMovie software on the Mac. Then, to capture the desired scenes, you need to begin a new project. To start with, right at the home page, click on the "Create New" button beside the search bar, and in the drop-down list, choose "Movie".
Step2Import Your Media
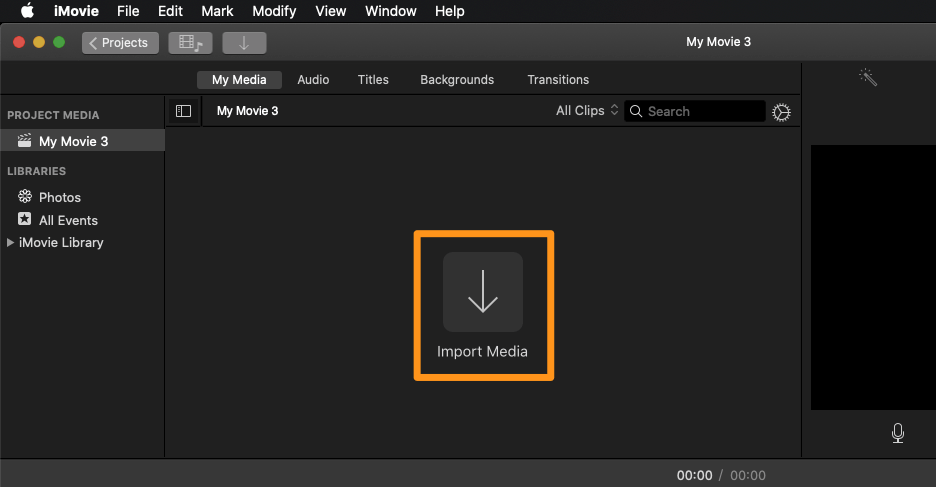
After the project is made, you need to add the video or images you want to use. You can do this by navigating to the pull-down menu beside the videos, selecting "Import Media", and then browsing to your computer to choose the correct files.
Step3Open Your Timeline, place your Main Video
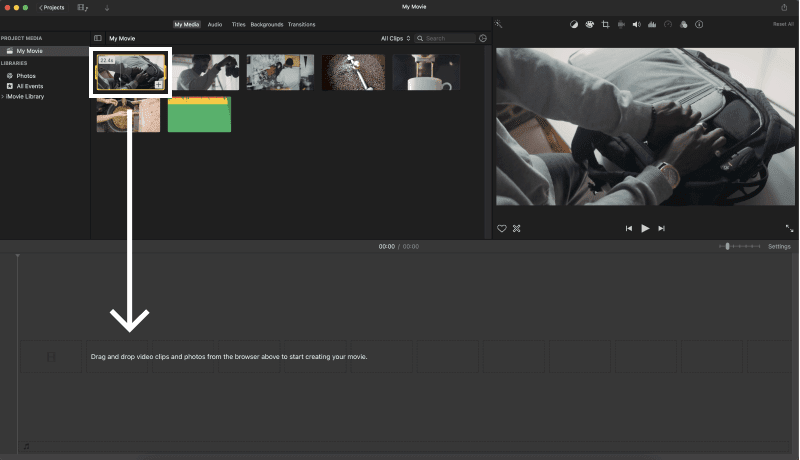
Drag your primary video clip down to the timeline at the bottom part of the screen. This will form the background for the Picture-in-picture effect.
Step4Turn "Show Advanced Tools" on
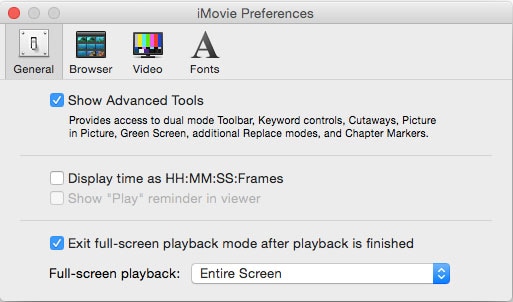
Another critical step is to use advanced tools to activate the Picture-in-picture option in iMovie. To do so, select the application's title bar at the top, then select “Preferences. " Look for the "Show Advanced Tools" checkbox and tap it.
Step5Connect the video and load with Picture-in-picture
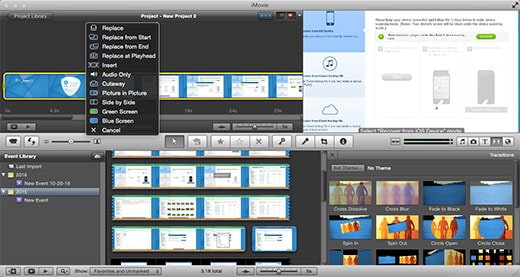
In the Event Browser, select the video clip with which you want to use the picture-in-picture effect and pull it into the Project Library. A menu will appear, and by clicking on it, select 'Picture-in-picture' to enable a video picture in a picture in iMovie.
Step6Prepare and fine-tune the iMovie picture in picture clip preview
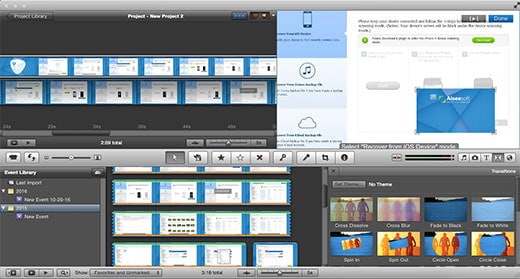
Once the Picture-in-picture clip has been loaded, the video clip can appear in the project library above the video. In the Preview window, you can adjust the size and location of the video Picture-in-picture clip image and preview the display for the big image video and the location of the picture-in-picture video clip image to determine the effect.
Step7Apply Changes and Export
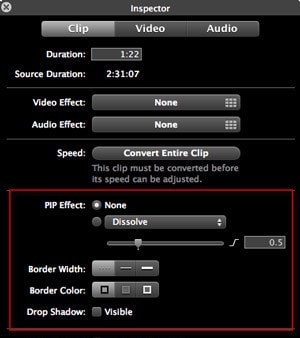
Once you're happy with the adjustments, click the "Apply" button to save your changes. After completing your project, click "File" in the menu bar, then select "Export" to save your Picture-in-picture video.
Part 3: How to Make Picture-in-picture Effect in iMovie on iPhone/iPad
If you're editing on your iPhone or iPad, iMovie has a slightly different interface, but it still allows you to create PIP effects with ease. Follow these steps:
Step1Open the iMovie App
Open the iMovie app on your iPhone or iPad, and create a new project by tapping on the "Create Project" button.
Step2Import Your Media

Import your video clips or images by tapping on the "+" icon. Select your main video clip and drag it into the timeline to set it as the background video.
Step3Add the Picture-in-picture Clip

To add a PiP clip, select another video or image from your media library and drag it onto the timeline above the main clip.
Step4Enable Picture-in-picture Mode
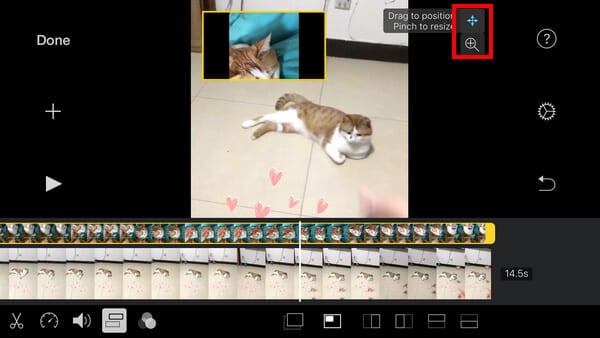
Tap on the newly added clip in the timeline, then tap the "More" button (three dots) to reveal additional options. Select "Picture in Picture" from the list of overlay options. An overlay means to insert the video as "picture in picture"
Step5Adjust the Picture-in-picture Clip
Once the PiP mode is enabled, you can adjust the clip by tapping and dragging the PiP clip to move it to a different location on the screen. You can also resize the picture in picture or change picture position by means of two setting buttons on the right.
You can also use other settings to modify pip video according to your choice. For example,
- Pinch the clip with two fingers to make it smaller or larger.
- Add borders or shadows to your PiP clip by accessing the overlay settings.
Step6Export Your PiP Video
Once you're done, tap the "Done" button and then tap the "Share" button to export your video with the PiP effect.
Part 4: More Advanced and Versatile Alternative to iMovie for PIP - Filmora
While iMovie is a fantastic tool for creating PiP videos, it may not be the fastest option for everyone. If you're looking for a quicker, more user-friendly alternative with more built-in effects and templates, Filmora might be a better fit. Wondershare Filmora has several solutions to the above shortcomings seen in iMovie, making it more preferable for the users with more complex video editing requirements. Here's how Filmora addresses iMovie's shortcomings:
- Multiple Video Layers: While with iMovie the maximum number of video layers is two, Filmora provides the opportunity to work with several tracks and create PiP and overlay videos.
- Advanced Color Correction: Filmora has more color correction tools than iMovie, these include color correction wheel, color correction for red, green and blue channels, and very precise white balance adjustments.
- Customizable Titles and Animations: Filmora offers many titles that are editable in terms of font, animation, and effect.
- Nested Timelines: Filmora has multiple timeline tracks to help users organize sequences into nested sequences to simplify complex projects.
- Powerful Editing Tools: It also has features such as cut, split, join and others, which makes it suitable for use.
- Beginner-Friendly: Despite the lack of technical skills, anyone can easily master the usage of Filmora to produce high quality videos.
- Superb video stabilization with low distortion.
- Vast video/audio effects and creative assets.
- Powerful AI for effortless content creation.
- Intuitive, professional yet beginner-friendly.
- Works on Mac, Windows, iOS, and Android.

Steps to Create PiP in Filmora on Mac
Step1Import Videos
Launch Filmora software on your Mac and create a new project.
Import the two video clips you want to work on to achieve the PIP effect. Drag both clips into the media library to be ready for editing.
Step2Add Videos to the Timeline
Drag your main video into the first video track on your timeline in your video editing program. Finally, slide the overlay video (the video that will lie on top) above the main video into the second video track.
Step3Dynamically reposition and resize Overlay Video
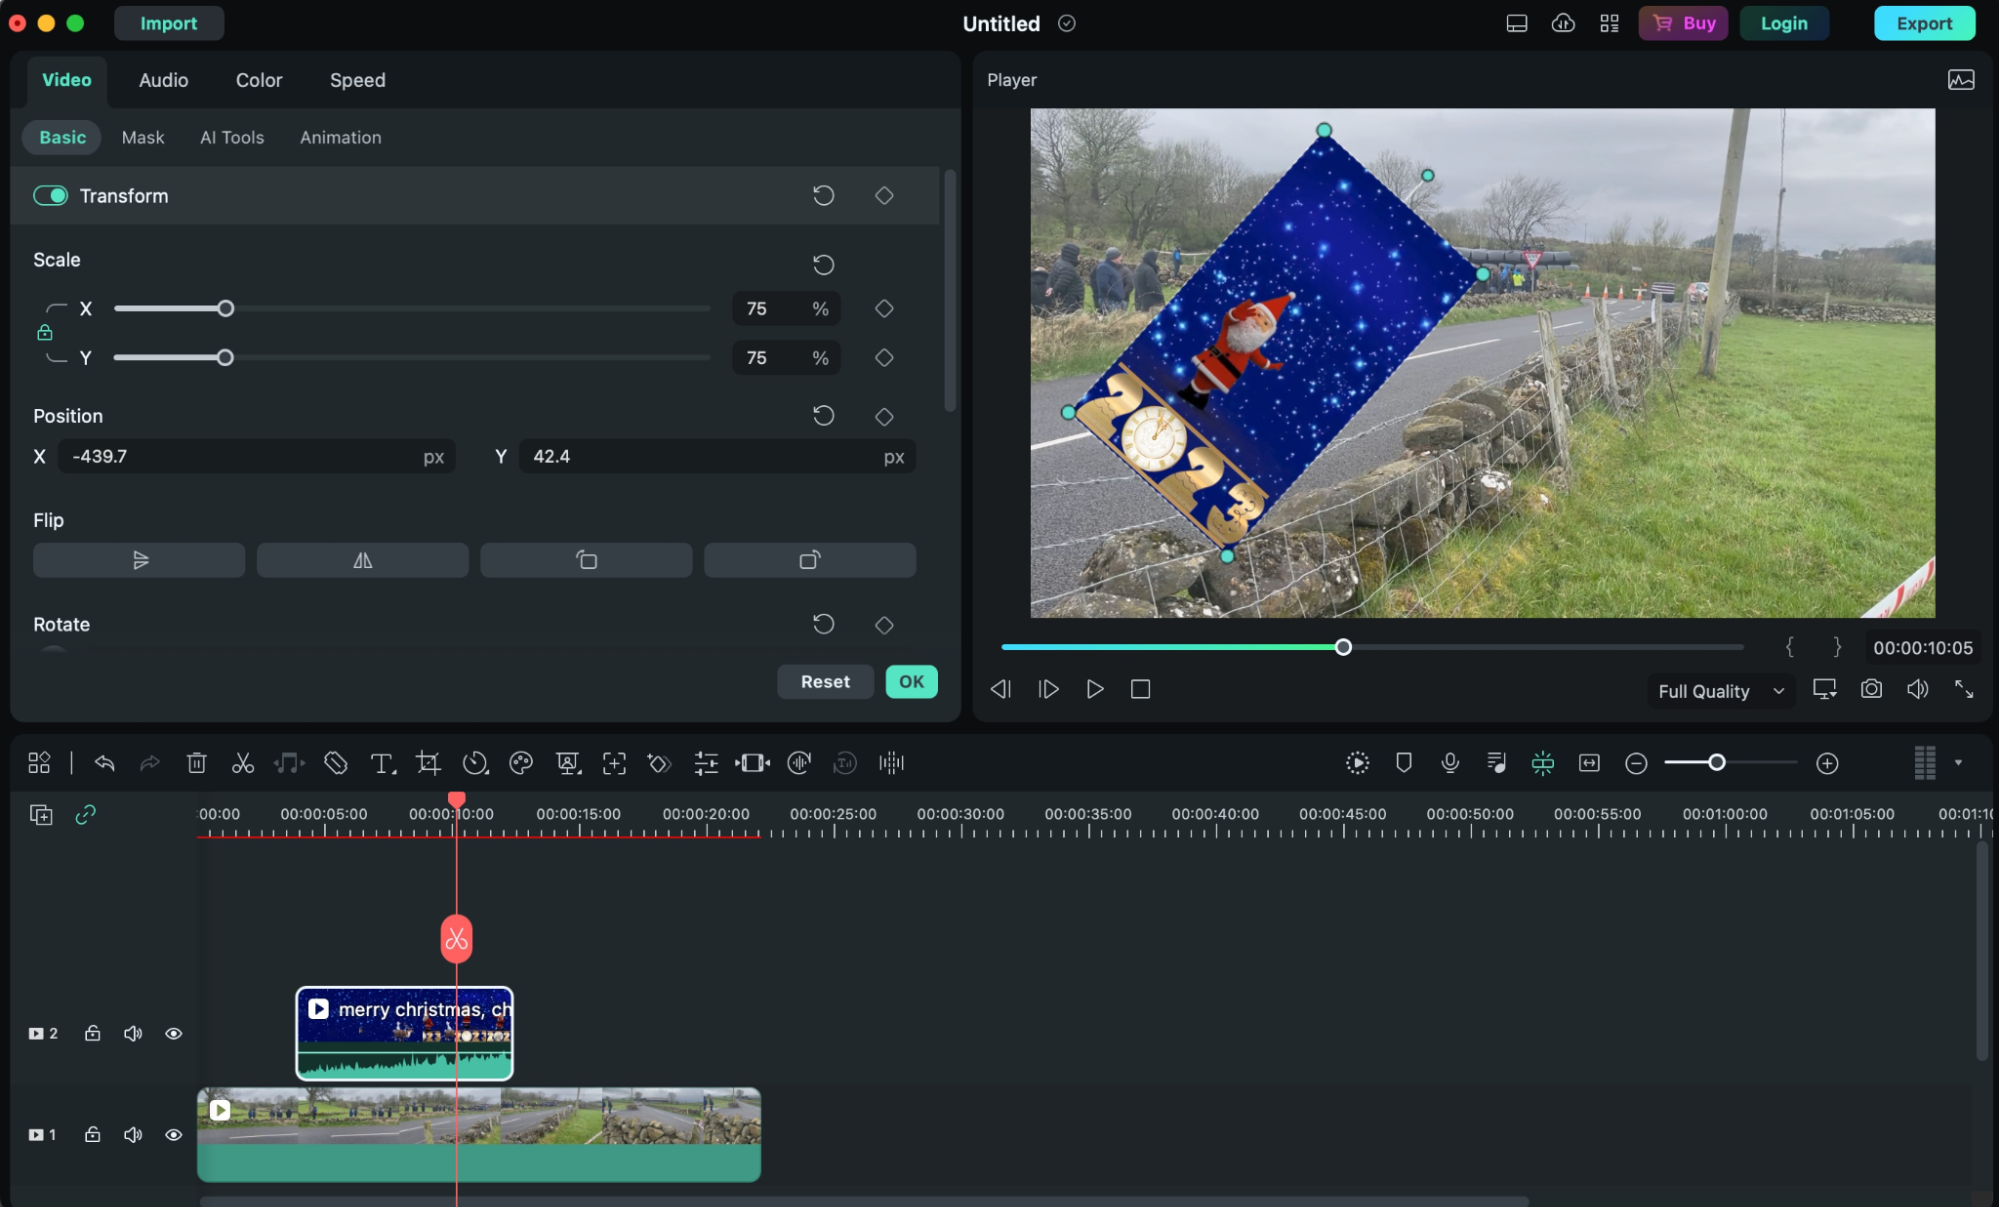
Go to the overlay video in the timeline and click on it twice. Click on the overlay video in the preview window and move or resize it. You can change its size by clicking its border and moving that border, and you can post it in any position on the preview window you want.
Step4Customize Overlay Video
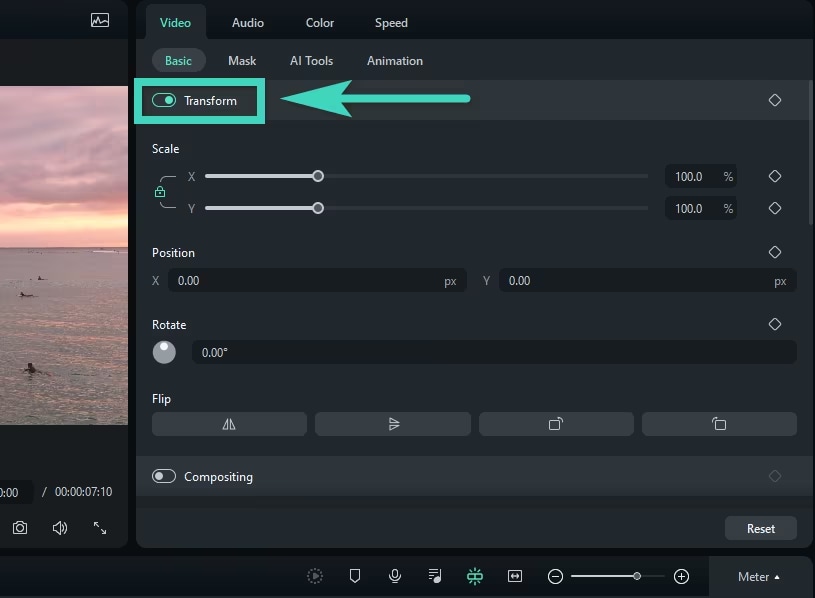
On the left side is a strip of options where you can edit everything you need. In Transform, you can rotate, mirror, zoom in or out, or even move around the overlay video.
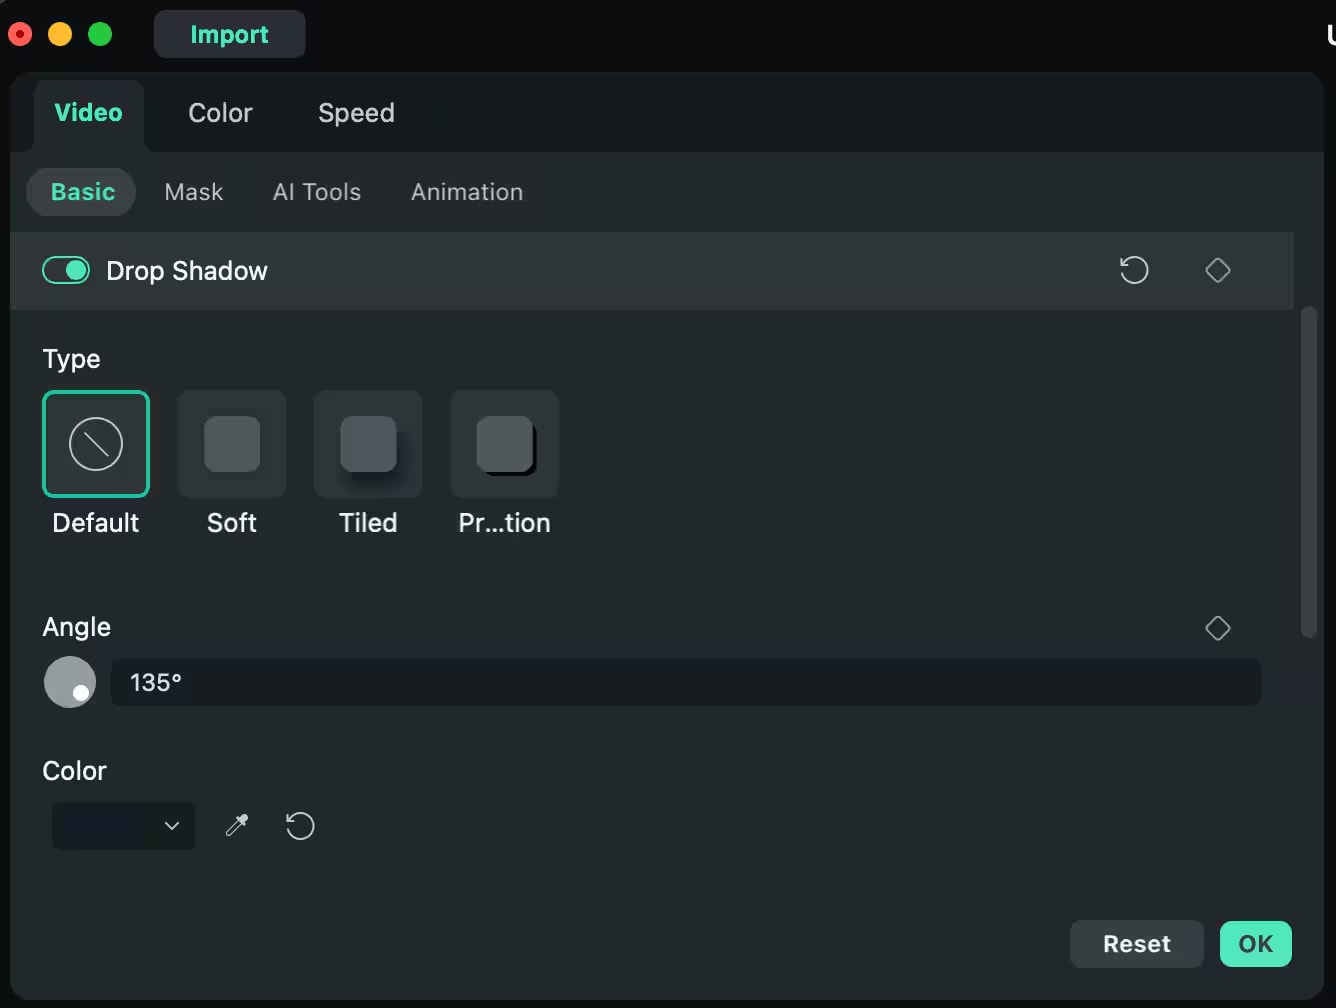
In the Compositing section, mix the mode and track alpha to balance the overlay part of the video with the rest. To the overlay video, you can also include a Drop Shadow where you can control the shadow's distance, blur, opacity, and direction.
Step5Apply Green Screen (Optional)
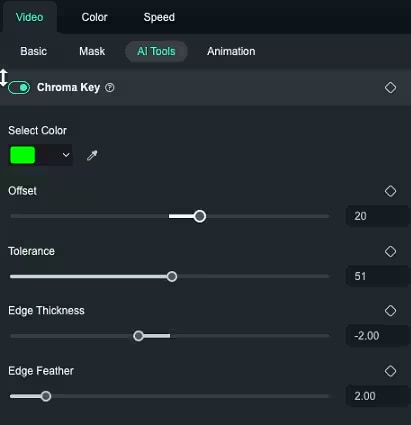
If your overlay video has a green background, you can set it to Green Screen to eliminate the green background on your video. Make changes to the color, increase the tolerance, reduce the edge thickness, and change the alpha channel until the overlay video is no longer green-screened and can blend perfectly with the main video.
Step6Add Motion Tracking (Optional)

Go to AI Tools on the right side and turn on "Motion Tracking". Motion Tracking of Filmora makes it possible to track a specific object in the main video and enable the overlay video to follow it. This is handy if you want the overlay to be active within the frame part and to slide within this part.
Step7Lens Correction (Optional)
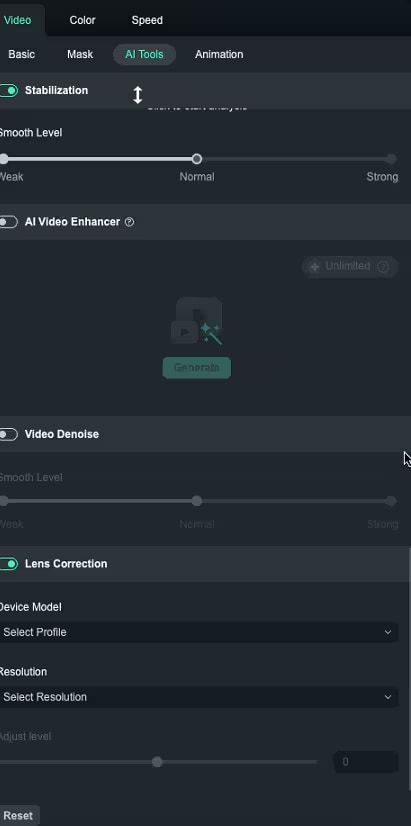
If you shoot your video with a wide or action camera, you can use Lens Correction to solve the distortion problem. Select Camera Profile and Resolution to enable the camera to automatically correct the lens.
Step8Preview and Export
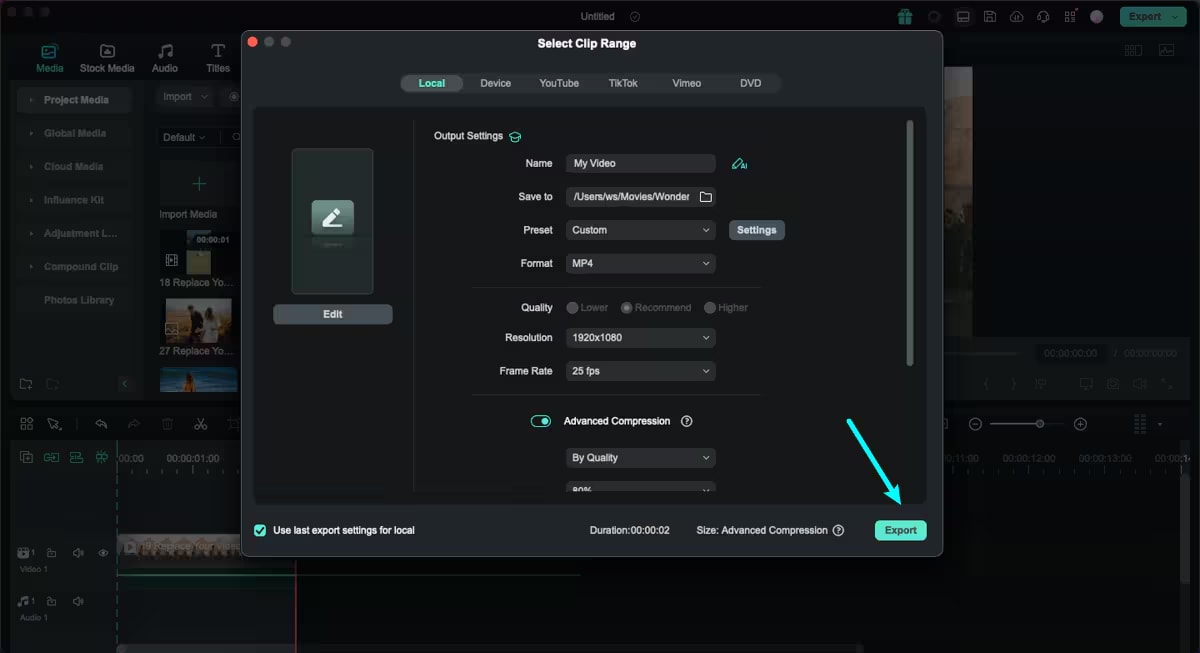
Once all the changes have been made, you should view that video again to ensure everything is fine. Once again, you can choose the format you want your video in, after which you will click on the Export button.
Using Filmora on your Mac, you can relatively easily create a high-quality PIP video, provided you follow these steps.
Filmora for Mobile Filmora for Mobile Filmora for Mobile Filmora for Mobile Filmora for Mobile
Edit Videos on Your Mobile Phone with 1-Click!
- • Powerful Brand New AI Features.
- • User-friendly video editing for beginners.
- • Full-featured video editing for professional.
How to edit vertical videos on your phone using Filmora:
Step1Download Filmora Mobile App for iphone
First, download the Filmora app from the apple store if you haven't already.
Step2Import Your Video
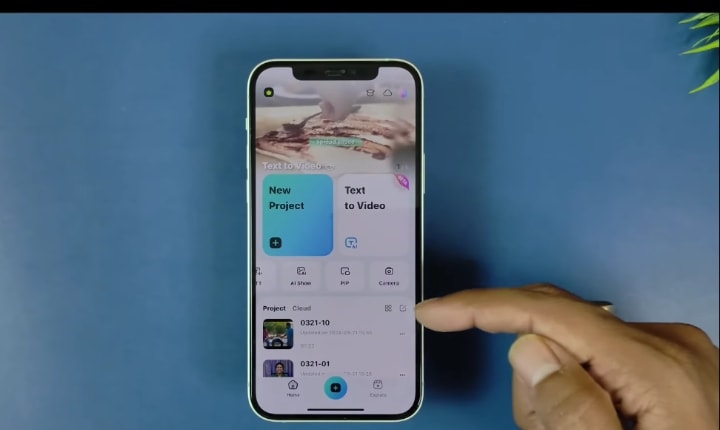
After installing the program, launch it and select New Project. Open the gallery on your phone and import the video you wish to modify.

Step3Add overlays
The PIP option allows you to add overlay, which allows you to import a different video that will be displayed on the original video.

You can also adjust the opacity of the overlay video so the main video remains visible.

Step4Export and Share
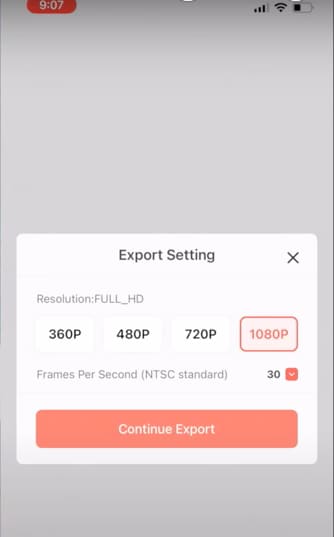
After editing is complete, export the PIP movie with the frame rate and resolution you want. By exporting and sharing, you may post the PIP video straight to social media sites like Instagram or TikTok.
Conclusion
The Picture-in-picture effect in iMovie is easy to create using a Mac, iPhone, or iPad computer device. Such aspects include how you choose your primary and overlay clips, how you enable the PiP mode, and other parameters that will help you change the appearance of the video. For those who want a faster version with more templates, Filmora is the best tool they can try. With iMovie or Filmora, PiP is a valuable feature to apply when working on videos.


 100% Security Verified | No Subscription Required | No Malware


