
 100% Security Verified | No Subscription Required | No Malware


 ChatGPT
 Perplexity
 Gemini
 Claude
 Grok
Grok
When an object is physically distant, but you need to record it from close in your video, your iPhone's zoom capabilities come to the rescue. This is the reason the iPhone introduced its zoom-in and zoom-out features, so you can view an object closely without losing resolution or pixelation. However, it is an art, and not everyone can do it while capturing detail at the desired magnification.
Want to know how to zoom in/out a video on iPhone easily without the quality loss? This article makes the zooming in and out process easier by discussing everything in detail.
In this article

Part 1. What is The Purpose of Zooming In/Out a Video?
The following are some of the major purposes of zooming in/out of a video while filming:
- Zooming in to highlight the important details by showing them from close and zooming out to show the full scene.
- A slow zoom-in on a character's face can reveal their emotional state, and zooming out can make the scene more impactful.
- It improves clarity in tutorials or product demos as it helps explain both small actions and big setups.
- The speed of zoom can influence the pace of the video, such as a fast crash can add energy, while a slow zoom can build anticipation.
- If the zoom-in and out are smooth, they help with the scene transitions and keep the audience engaged.
Part 2. [Direct] How To Zoom In/Out a Video on iPhone Across Photos App?
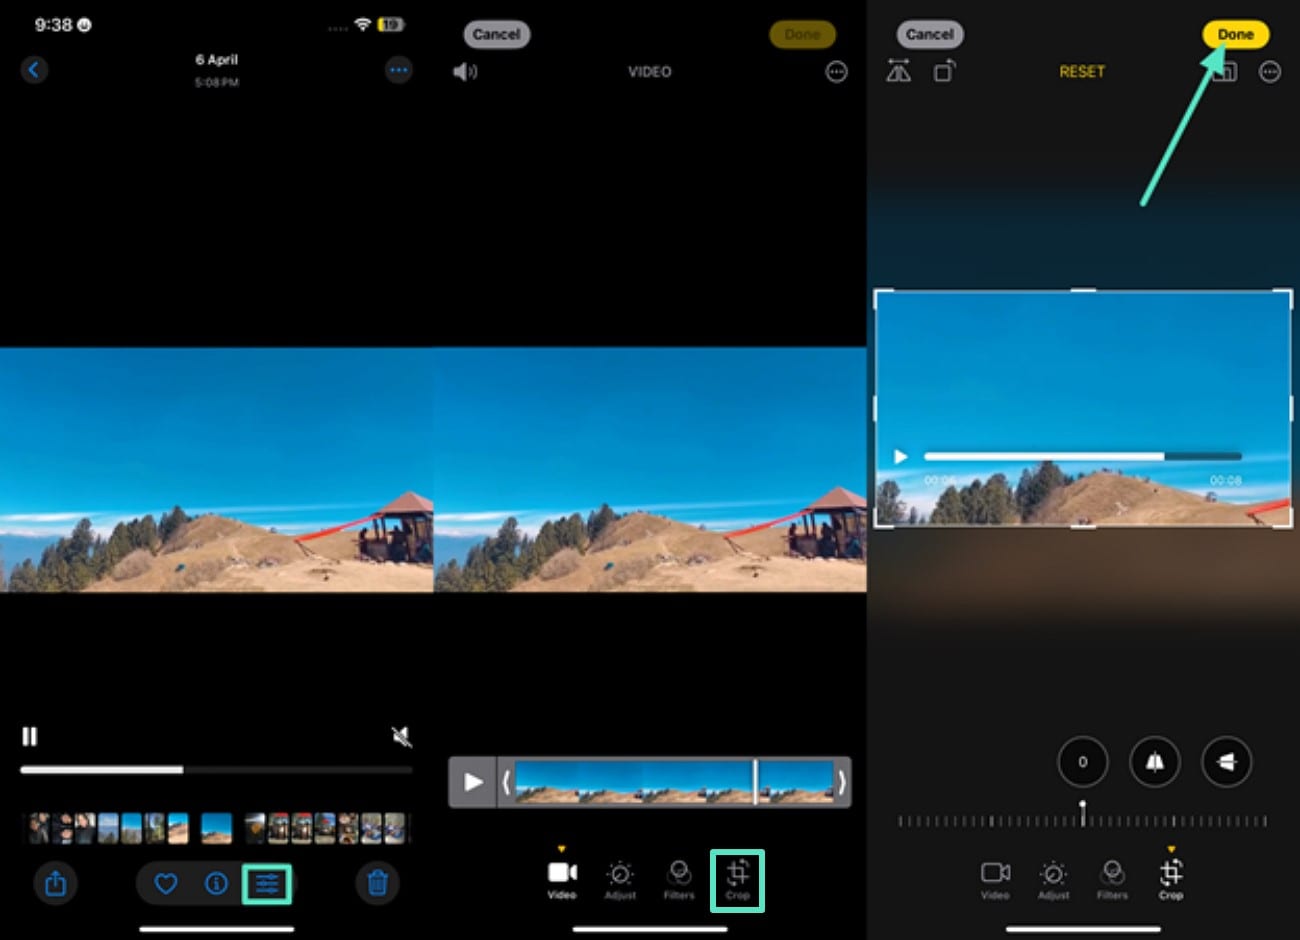
In iPhone, the Photos app enables you to zoom in and out of images and edit according to your requirements. The following is an instruction that you can follow on how to zoom in on iPhone across photos:
Instructions. Open the Photos app on your iPhone, pick a photo, and enable editing by using the "Three bars" icon. Next, go to the "Crop" icon and then pinch your two fingers together to zoom in and out, spread them apart, and press "Done" when completed.
Part 3. How To Zoom In/Out a Video While Recording on iPhone?
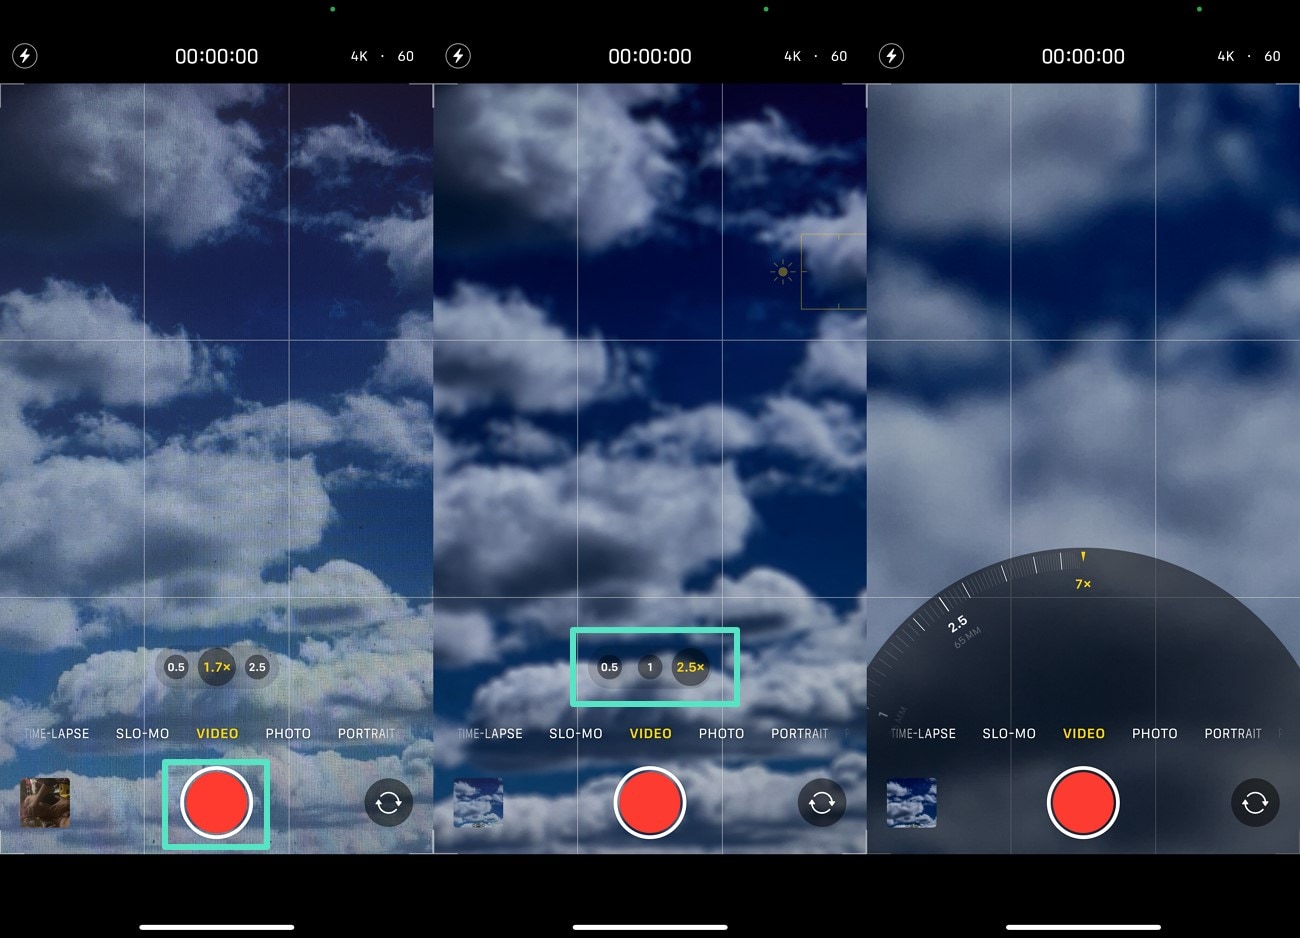
Here is a guide that you can follow to zoom in and out of a video while recording the cloudy sky or any scene on your phone:
Instructions. Open the Camera on your phone and hit the "Video" button to start it. There, you can choose from multiple magnification degrees, such as "1.7x", "2.5x", and "7x", to completely zoom in on the sky during the recording.
Part 4. iMovie: A Quick Alternative to iPhone Video Zoom
iMovie is a free video editing software and an excellent choice for beginners and casual editors who need polished videos without learning complete editing. It is pre-installed on most Apple devices and helps you cut unwanted portions of your video and divide it into smaller segments. With this app, users can make Hollywood-style trailers by choosing from the templates and customizing them. Here's how to use Zoom video iPhone using iMovie:
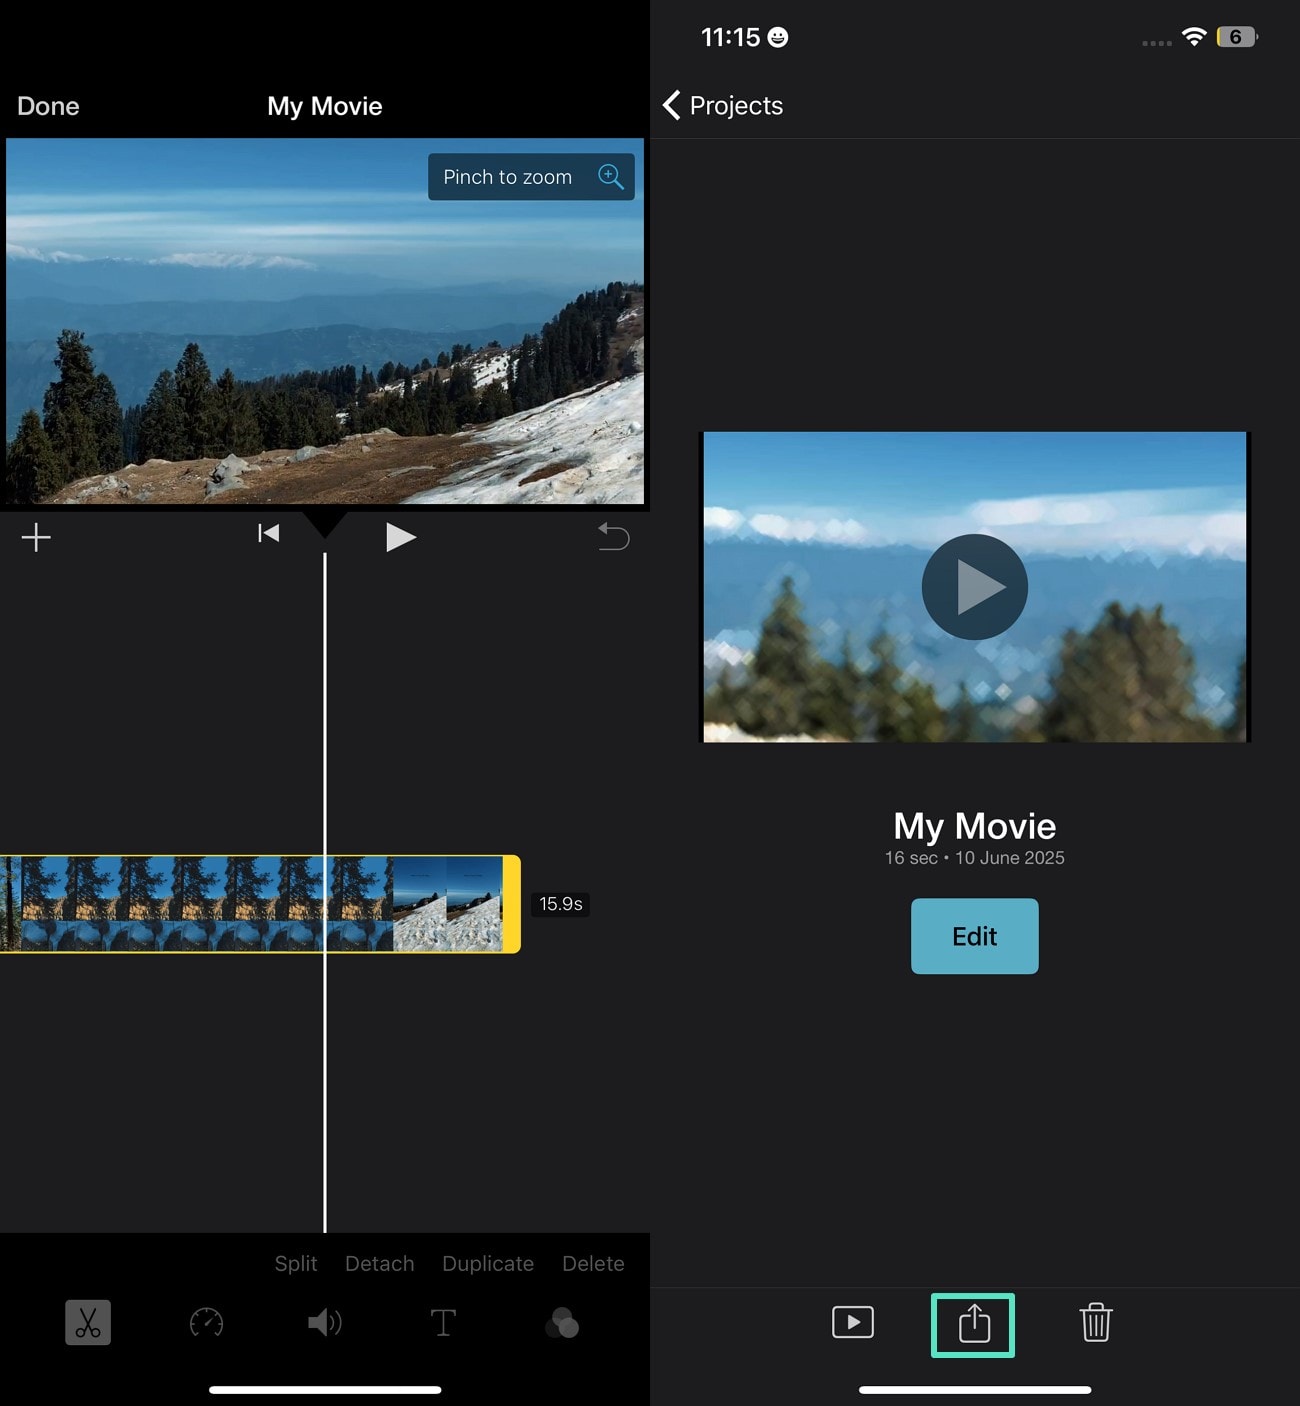
Step 1. Open iMovie on your phone and hit the "Magnifying Glass" to zoom in. To increase the intensity, click "Pinch To Zoom," and the app will magnify the scene for you.
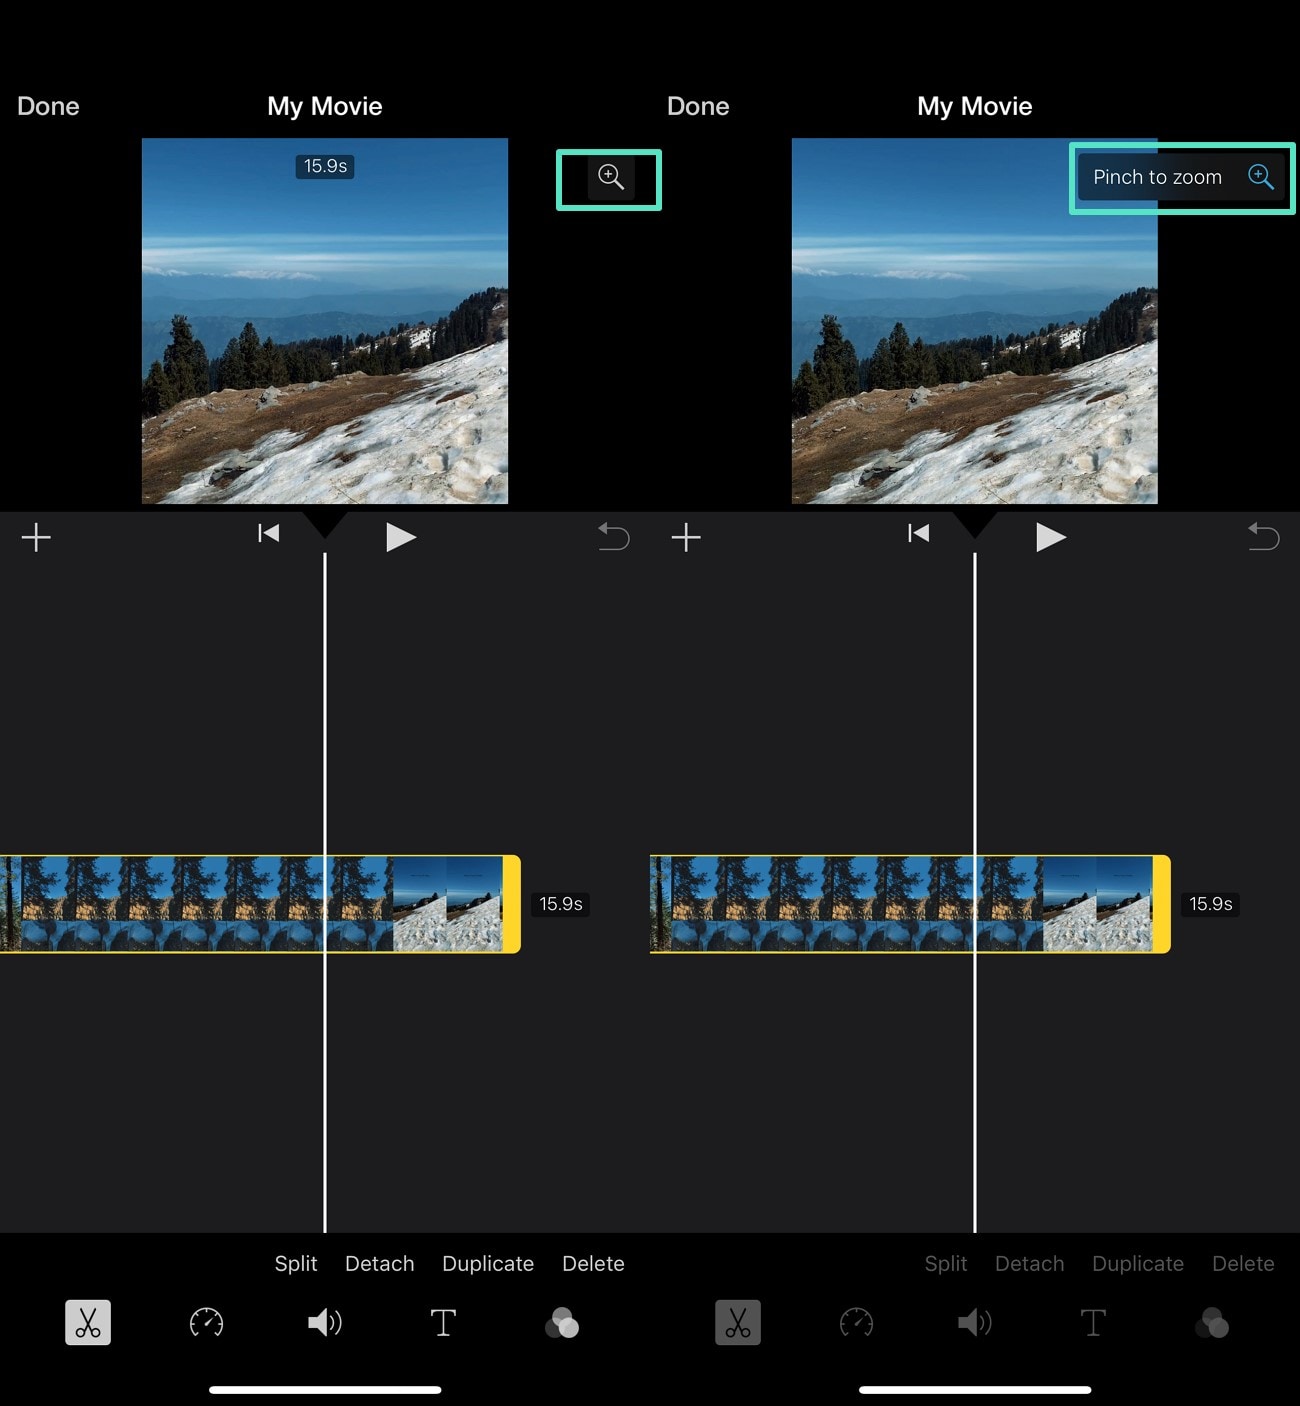
Step 2. Next, place your fingers on the screen to zoom in more, and use the "Edit" button to make any changes in your recorded video. Finally, select the "Export" icon below to save the video.
Why Consider iMovie For This Purpose?
Although the iPhone's built-in camera offers zooming capabilities, here are several reasons behind using iMovie for this purpose:
When you zoom in too much while using the iPhone's camera, the quality degrades, but the case is not the same with iMovie.
With iMovie, users can record a wider and higher-resolution shot and zoom in on specific areas without disrupting the original file.
If you have to use digital zoom while recording in a pinch, you can use iMovie to make the cropped area look as refined as possible.
Part 5. A Perfect Solution To Flawless Video Editing: Wondershare Filmora
If you've learned how to zoom out a video on iPhone and are looking for more than basic editing features, then you can choose another tool. Several tools are available that contain AI-integrated abilities and let you edit your clips without destroying the original one. Wondershare Filmora is the perfect choice where you can completely edit a clip and not just simply zoom in and out.
Editing Your Video With the Filmora App
Having discussed how to zoom video on iPhone, here are the steps you must follow while editing the clip with the Filmora App:
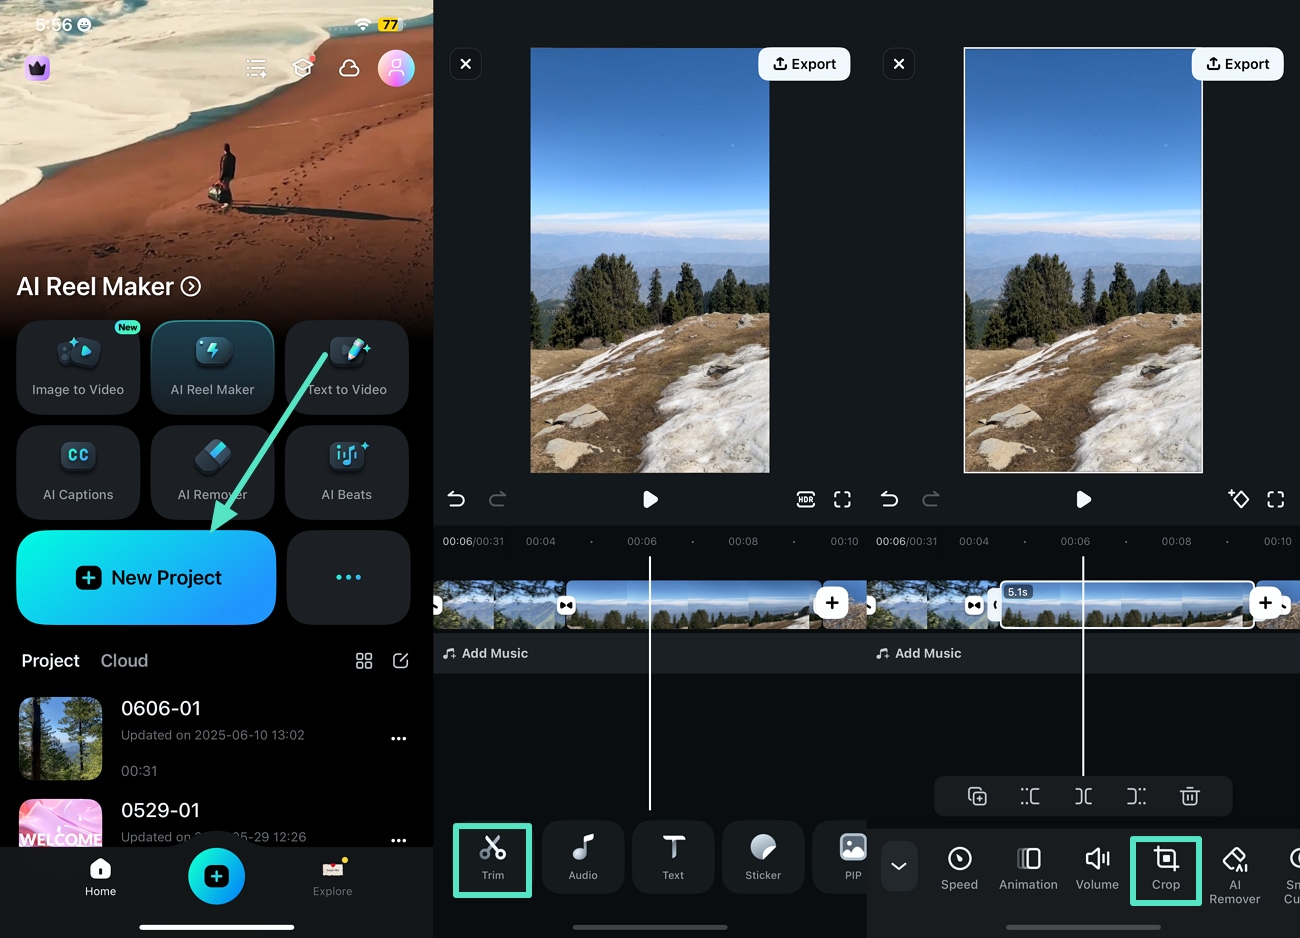
- Step 1: Use the New Project Option to Add a Video for Zoom In. To initiate, use the "New Project" option from the homepage, pick a video from your gallery, and import it. Now, use the "Trim" icon from the bottom to access further options in Filmora, such as cropping according to the platform. Then, select the "Crop" icon from the bottom options to zoom in according to the aspect ratio of different platforms。
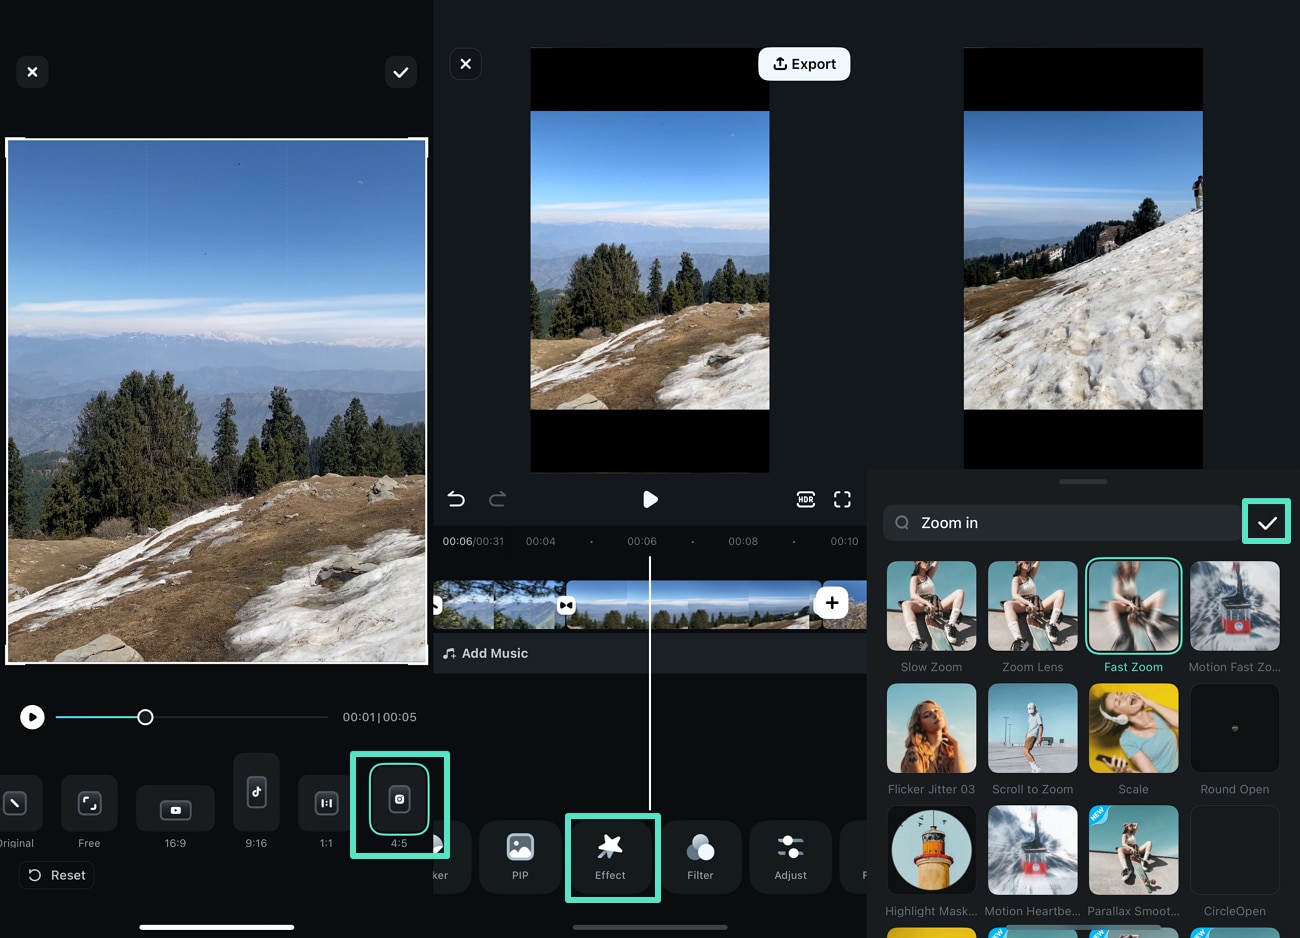
- Step 2: Choose the Instagram Reel as Pick a Zoom In Effect. Next, pick the "Instagram Reel" aspect ratio and hit the "Tick" button in the top-right corner. Then head to the "Effects" tab from the bottom and type "Zoom In" in the search bar to get a certain effect on it by hitting the "Tick" icon。
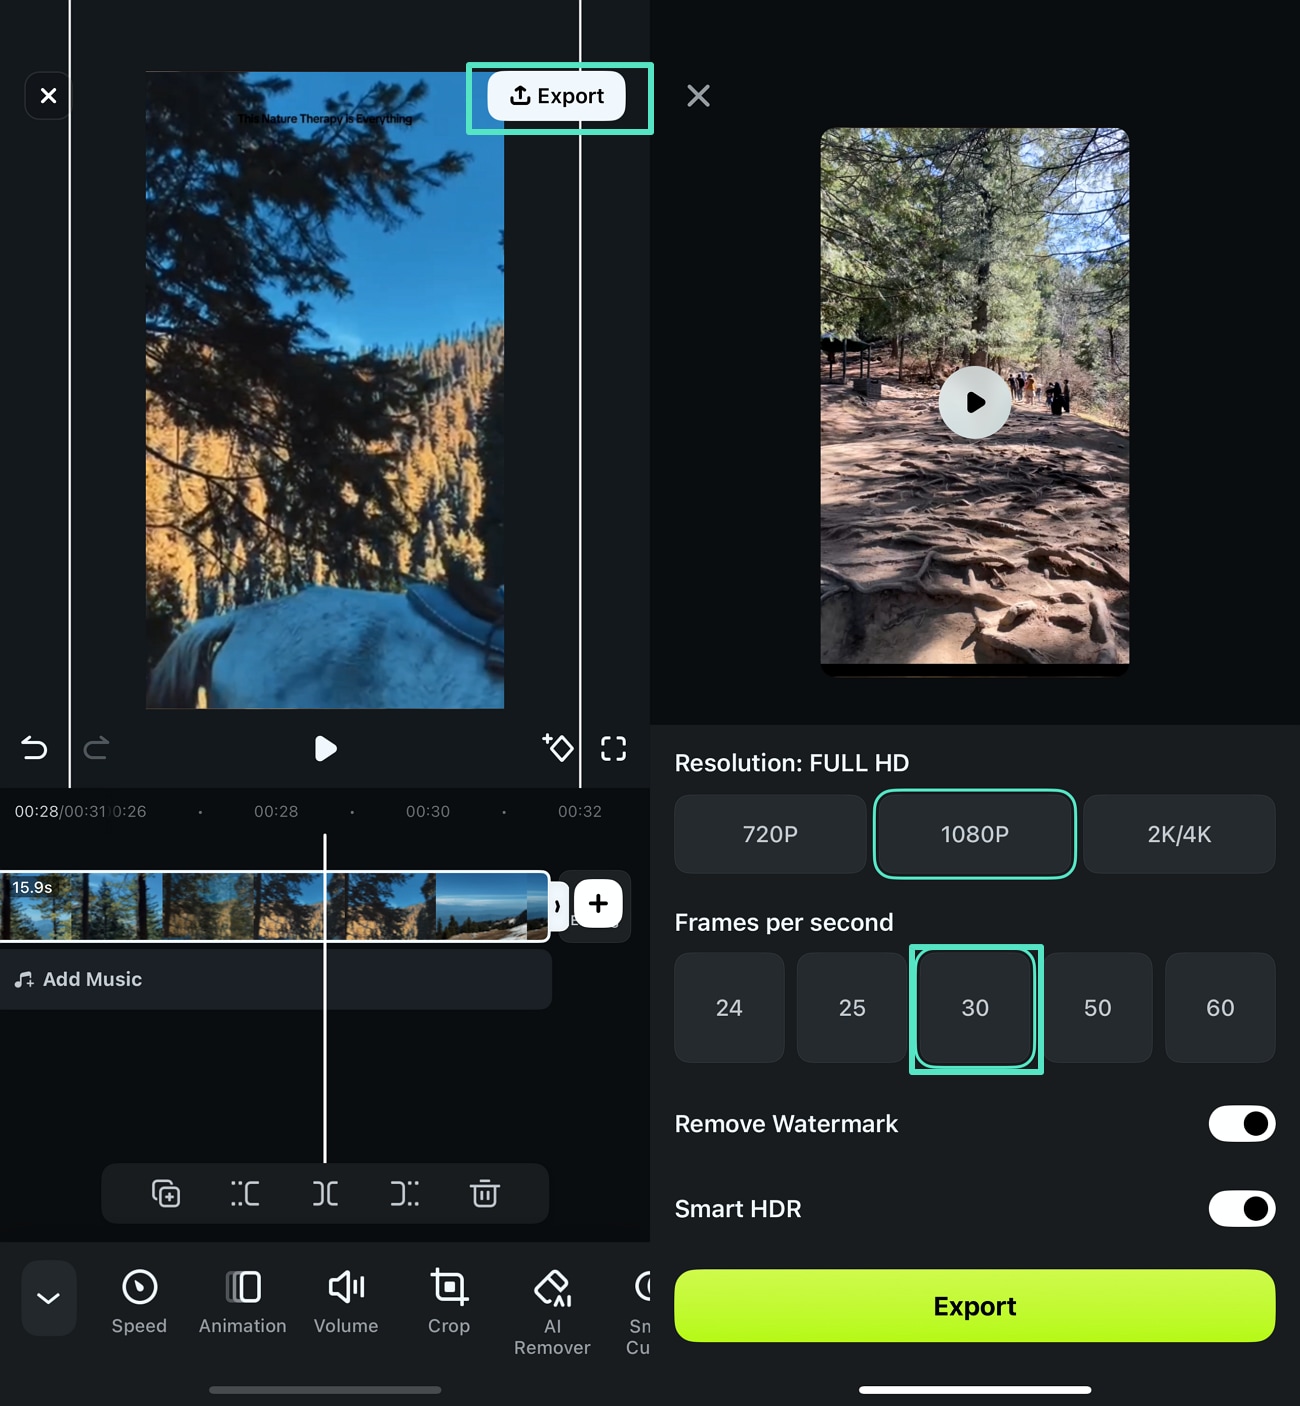
- Step 3: Export Your Final Product With a Set Frame Rate. Once you finalize it, use the "Export" icon from the top-right corner to save it to your gallery. Then, decide the resolution and "Frames Per Second" so the zoom in looks smooth before exporting the final product to your phone。
 secure download

Editing Your Video on Filmora Desktop
Having discussed zoom out iPhone, here is a step-by-step guide to follow for editing your clip with Filmora desktop:
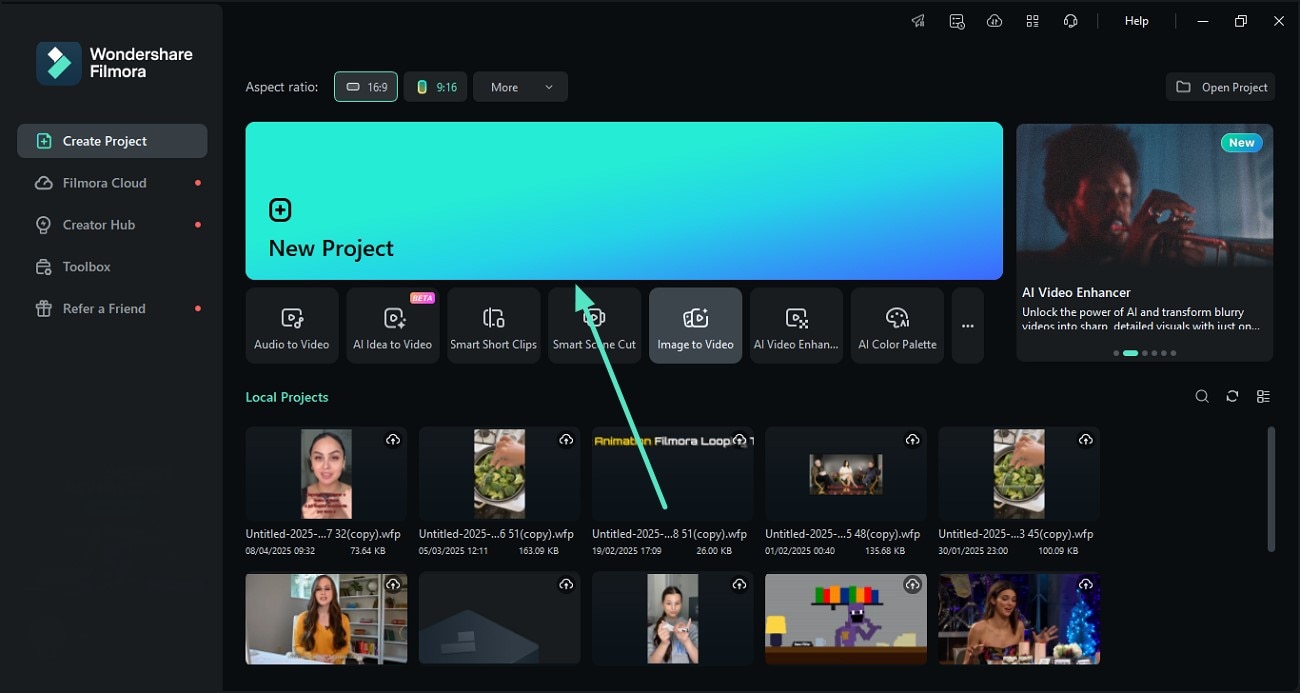
- Step 1: Create a New Project For Zooming In Your Clip. After you have recorded a clip from your iPhone, launch Filmora and hit the "New Project" option to drag and drop that clip on the editing interface for making amendments。
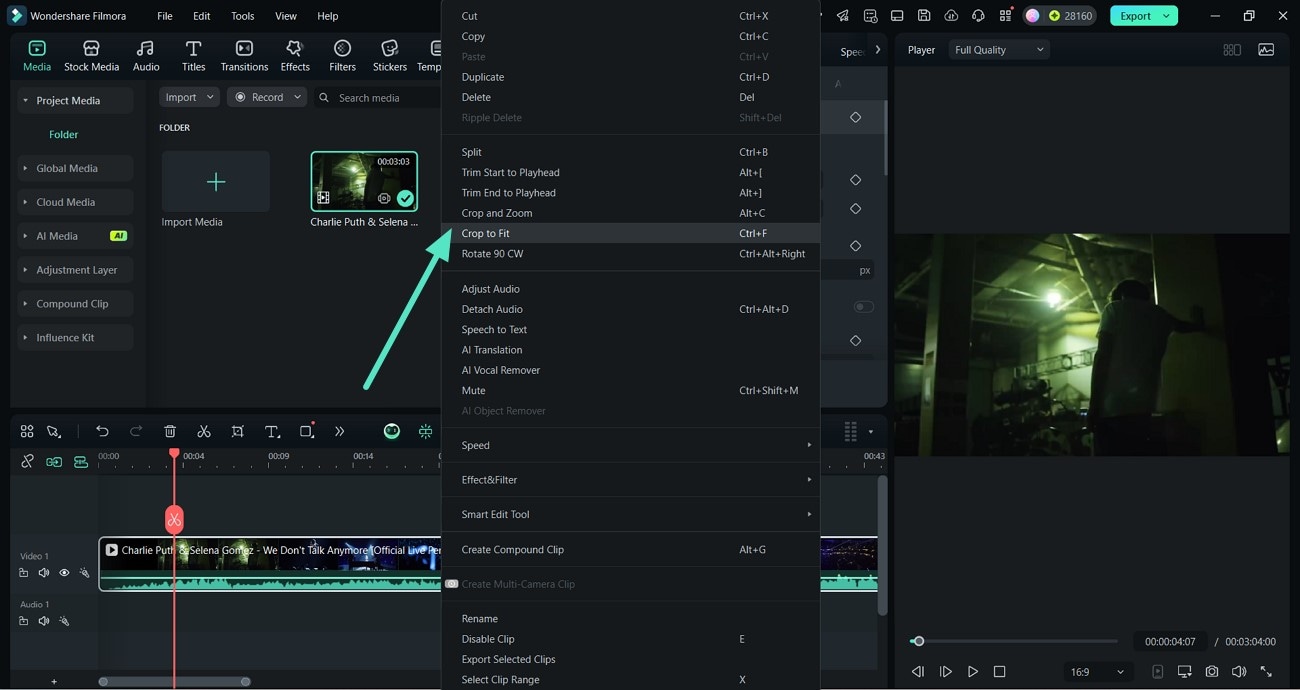
- Step 2: Use the Crop to Fit Option to Zoom In on the Clip. Next, right-click the clip from the editing interface to access various options and click on "Crop To Fit" to zoom in on the clip。
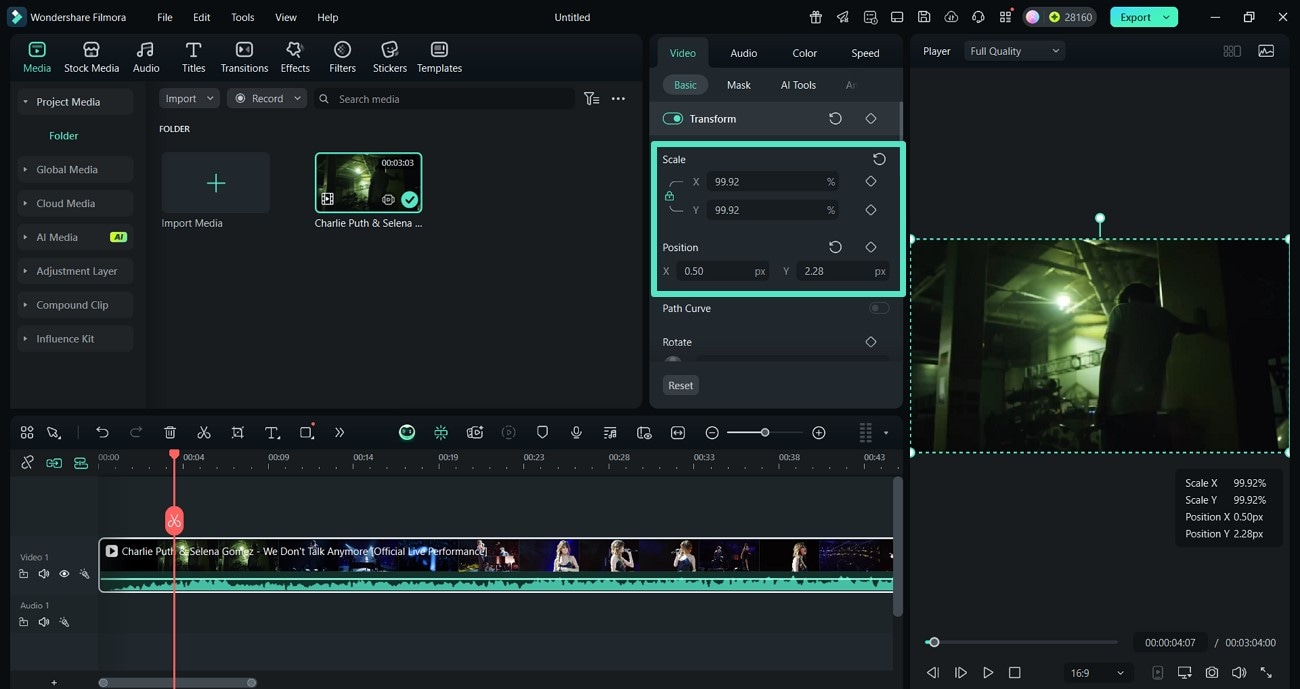
- Step 3: Customize the Scale and Position to Zoom In and Out. Now, add the numbers in the "Scale" and "Position" to zoom in on the recorded video from your iPhone。
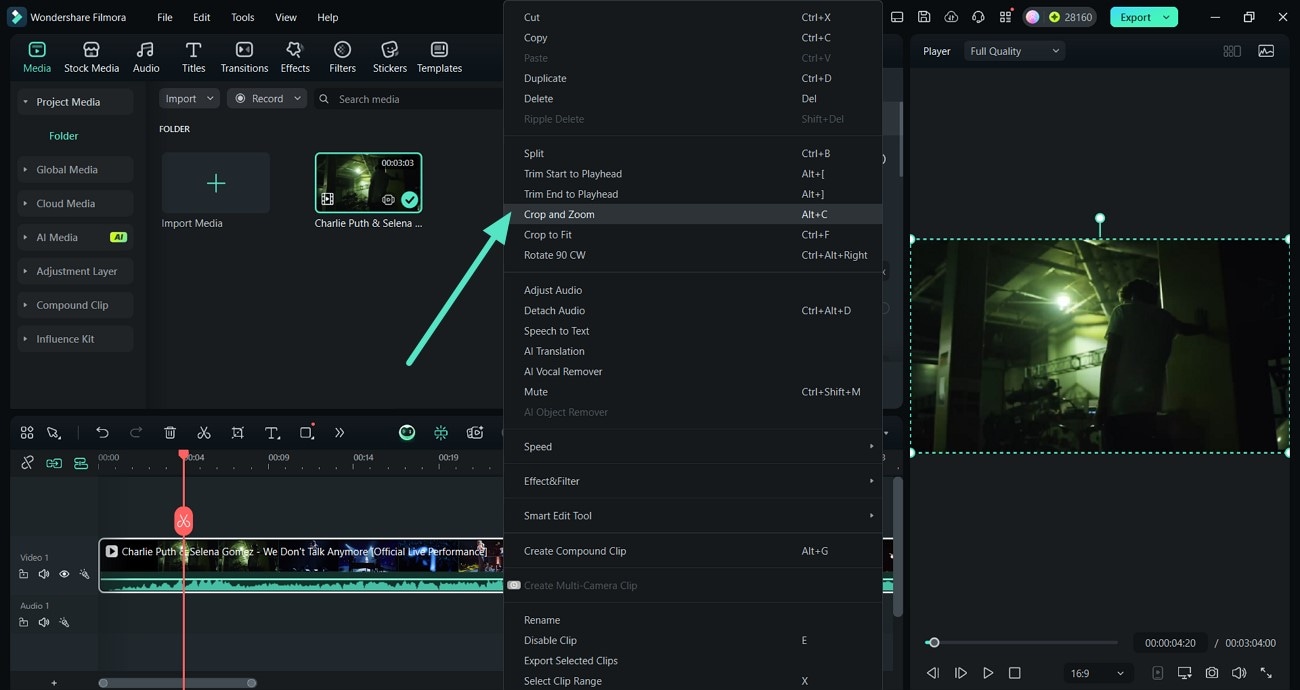
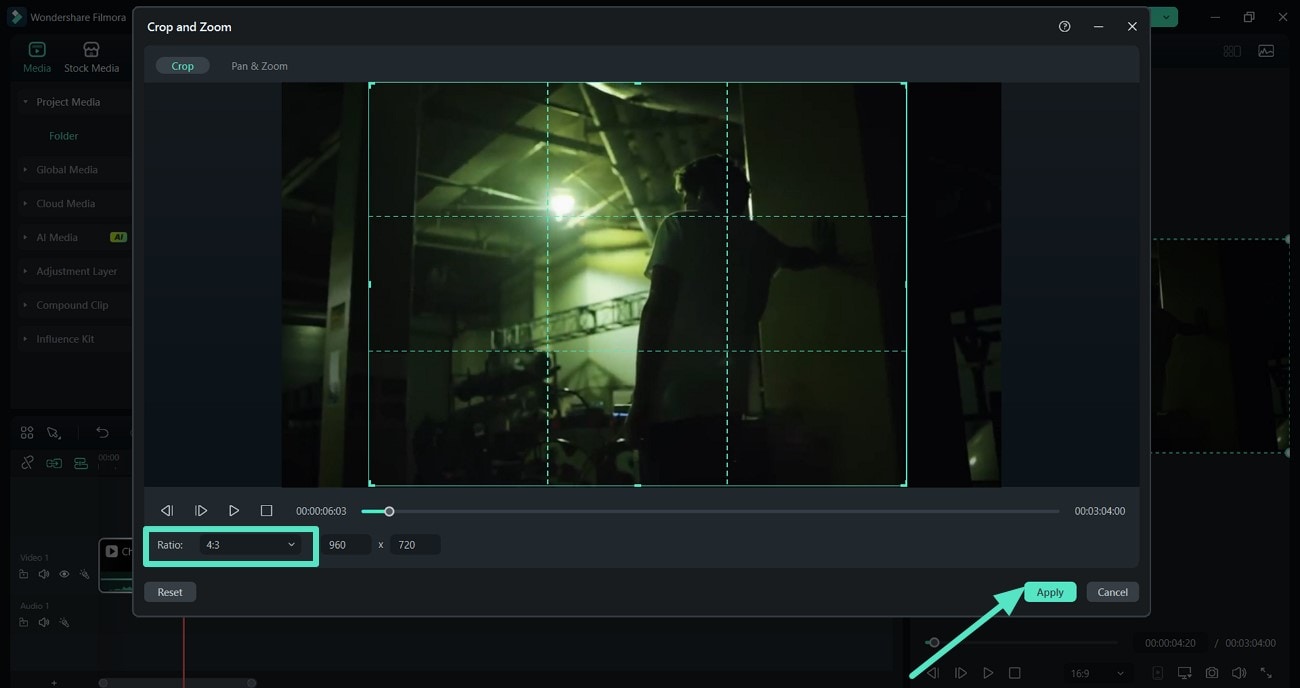
- Step 4: Use the Crop and Zoom Options to Get Further Options. Then, right-click on the clip from the editing timeline again and use the "Crop and Zoom" option to access different zoom settings。
- Step 5: Set a Specific Zoom Ratio and Apply. Afterward, pick a specific zoom-in "Ratio" from below, and when you finalize it, use the "Apply" button。
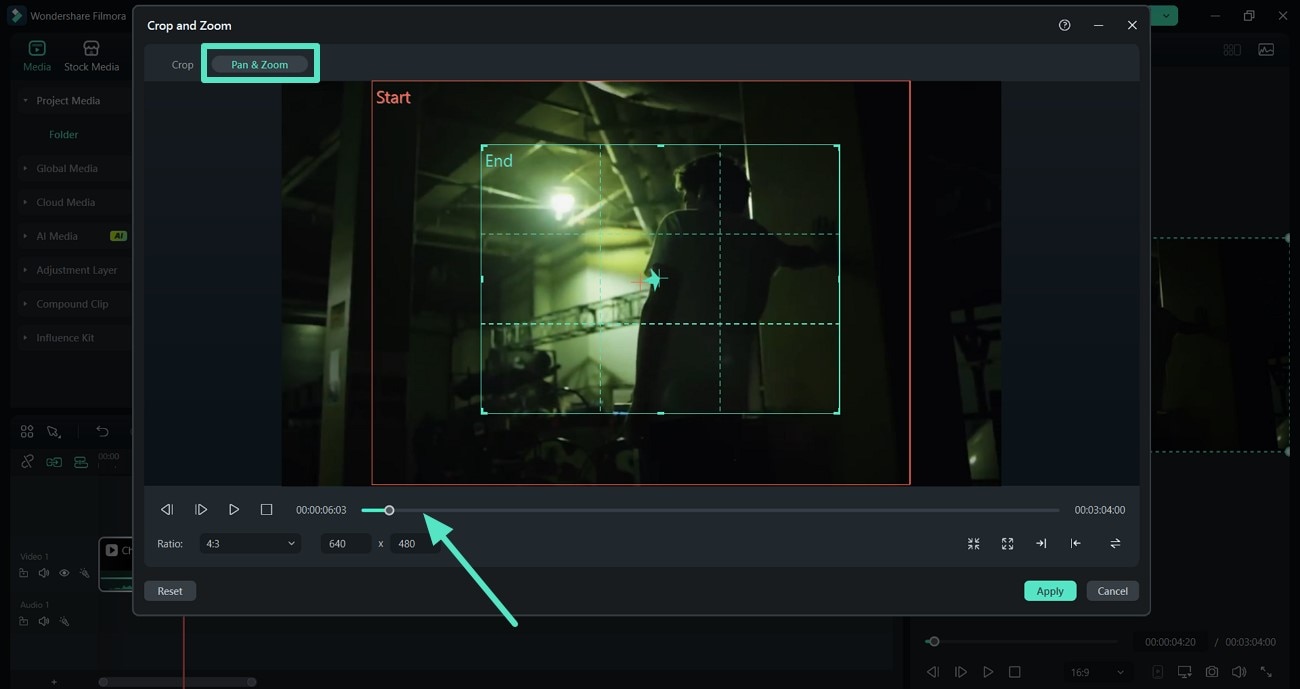
- Step 6: Utilize Pan & Zoom to Highlight Important Details. To divert the viewer's attention to the main figure, use the "Pan & Zoom" option and make the camera slowly zoom in。
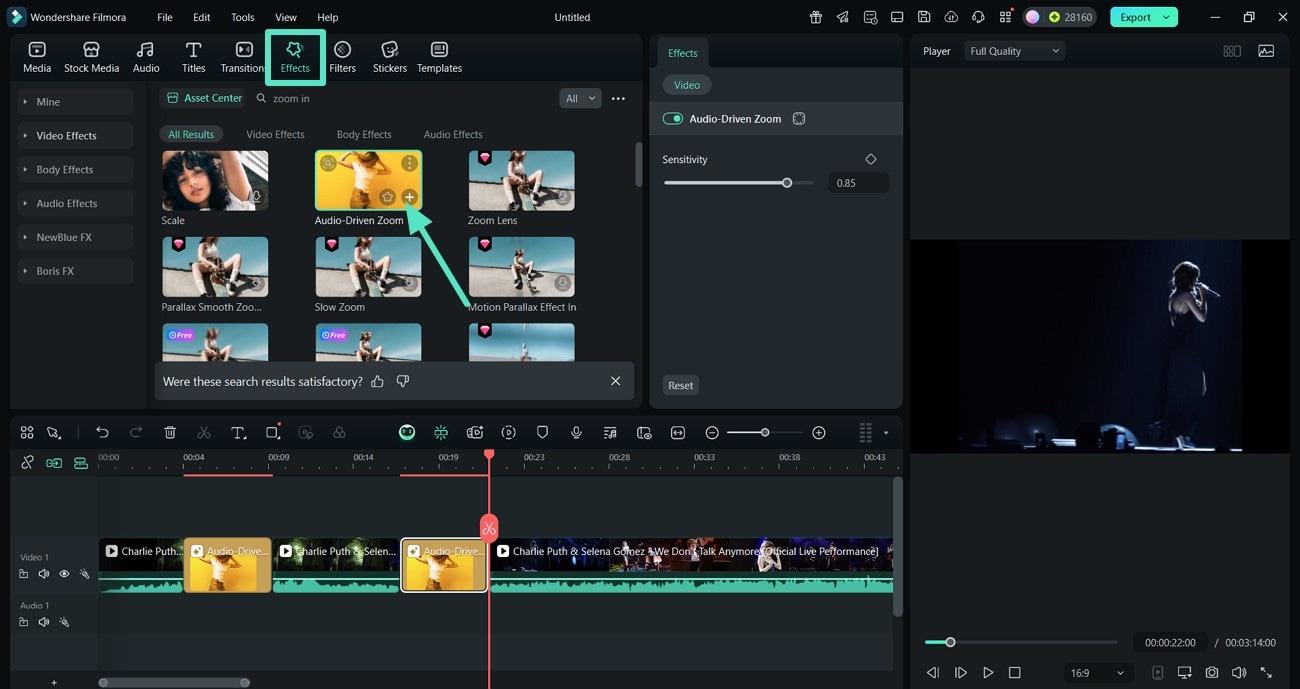
- Step 7: Add Zooming in From the Available Effects. Now, select the "Effects" option from the above and type "Zoom In" in the search bar. After finding a suitable effect, hit the "+" icon on it to add that effect to your clip。
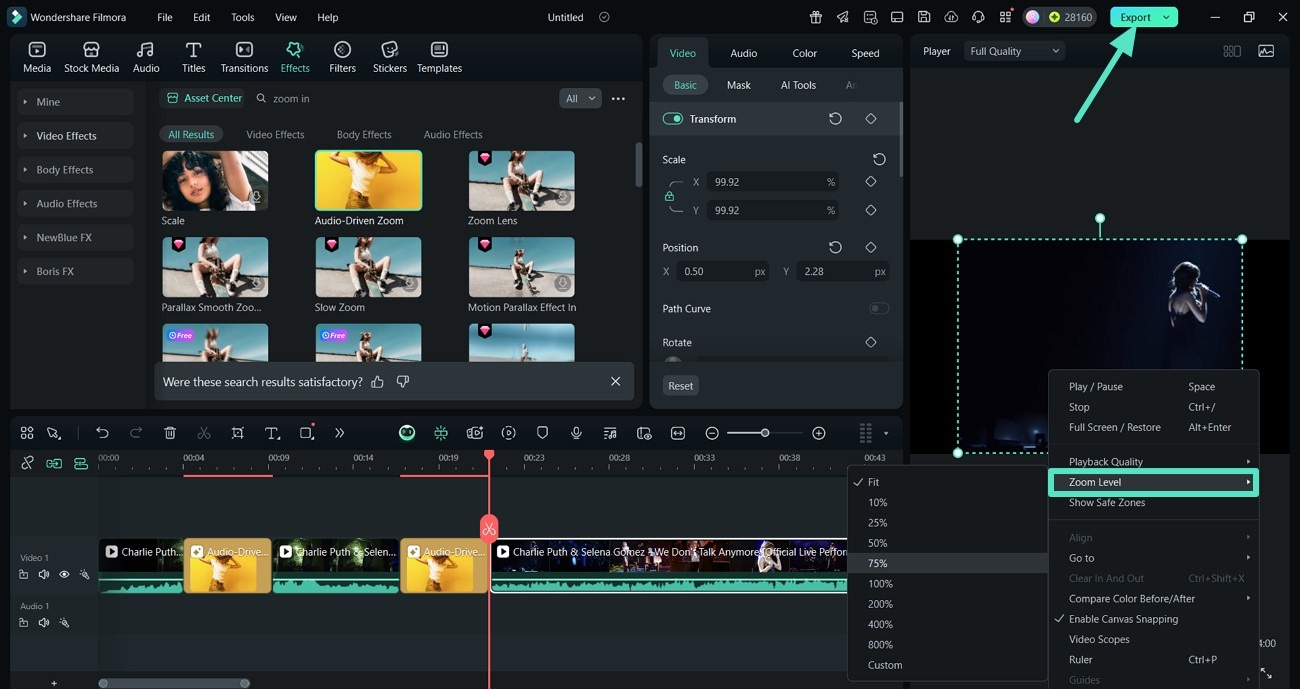
- Step 8: Decide a Zoom Level and Export Your Final Clip. When your clip looks perfectly fine, click on it to access the "Zoom Level" option. Finally, after selecting a percentage, use the "Export" option from the top-right corner to save it to your device。
secure download
Part 6. Tips To Keep in Mind When Zooming In/Out a Video
Here are the essential tips you must keep in mind while doing a Zoom out iPhone or recording video from another device:
- Always know why you're zooming in or out, and don't do it only to create an effect.
- Use gradual zooms to make it look smooth, and avoid distracting your viewers.
- Ensure to maintain quality and avoid zooming in and out where it drops immensely.
- Your object must be in the center of the frame so it remains the object of attention.
- The zoom in and out must match the mood, such as fast zoom is for action, while slow zoom is to show emotions.
Conclusion
To conclude, this article discussed how to zoom in/out a video on iPhone like a pro easily. It also mentioned an alternative tool, Wondershare Filmora, that you can use for cropping your video and zooming in as much as you can without destroying the quality. Moreover, you can zoom in by rotating the angle and setting the scale according to your requirements.
