Photography is an art that requires attention to detail. Have you ever looked at certain photographs and felt amazed at how beautifully they capture every small detail, like the shadows, reflections, and the play of light? It’s probably because the photographer used reflection photography to take the picture. With a little practice — you can do it too!
When you train your eyes to look for reflections, you’ll notice that they are pretty much everywhere and by capturing these reflections in your photos, you can take your photography to the next level. In this article, we’ll share some useful reflection photography tips for iPhone and how you can take your reflection photography to the next level with Filmora.
In this article
Part 1: Tips for Taking Stunning Reflection Photos on Your Phone
Follow these reflection photography tips for iPhone to improve your reflection photography skills:
1. Use symmetry
Try playing around with symmetry! Using reflections to make your photos symmetrical is a simple trick to add balance. It’s easy—just picture something at the top of your shot; it’ll show up at the bottom as a reflection.
You can even split the scene with a reflection to get some cool effects or make lines lead off into the distance for that extra bit of depth. Once you start noticing symmetry, it will sneak into your shots without you even having to think about it.

2. Pay attention to the composition
Think about your composition!
Every photo looks better with good composition, and that goes double for shots with reflections. Framing the reflection right can add a whole new vibe to the shot.
A simple trick? Use the rule of thirds. Try putting the horizon a third of the way from the top or bottom—this lets you decide which part of the reflection really pops.
But if the reflection isn’t the main focus—maybe it’s a person, tree, or something else—try sliding it over to the side, about a third from the edge. It keeps things balanced and makes the shot more interesting.

3. Keep it simple
Photos don’t have to be packed with a lot of stuff to look great. In fact, sometimes less is more, especially with reflections. A single, strong subject and its reflection can be all you need to make the photo pop. Adding too many other details just distracts from the main focus.
Try framing your subject against a plain, uncluttered background to make it stand out even more. This technique—called negative space—works wonders for drawing attention to what really matters in the shot.

4. Balance reality and reflection
It’s easy to get caught up in just the reflection, but don’t let it overshadow the real scene. If the reflection is too perfect and that’s all you focus on, the shot might end up looking like a standard pic of the subject itself.
Aim for a mix of the actual subject and its reflection to really show off the power of reflective photography. Luckily, iPhones make this easy! With burst mode, you can capture tons of shots quickly, which is great if there’s movement. Just hold down the shutter button, and it’ll keep snapping until you let go.

5. Try framing with mirrors
Mirrors can add a whole new vibe to your shots. By using the reflection to frame your subject, you get this cool “picture within a picture” effect. The background stays in view, but the mirror reflection totally grabs the spotlight and gives the image a unique, layered look.
When you’re setting this up, make sure to focus on the reflection itself—skip the stuff around or behind the mirror. Want an extra pop? Try adding some background blur by adjusting the depth of field. It’ll make the reflection stand out even more and give the shot a pro feel! Experiment with angles too; sometimes tilting the mirror a bit can give you an even cooler effect.

6. Get low to the surface
When you’re shooting water, try getting right down close to it. It’ll fill the shot with awesome reflections of the sky or whatever you’re focusing on. Plus, it’ll help clean up the background and keep things looking nice and simple.
Being low also brings out cool details in the water, like ripples, waves, or the sunlight sparkling off the surface. It’s a quick way to make your photo more interesting!

7. Capture weather conditions
The weather can totally set the mood of your reflection shots and add some serious vibe. On sunny days, when the clouds cast cool shadows, pay attention to how they look in the water or other reflective surfaces.
Misty mornings? They can make your photos feel mysterious and moody. And if a storm’s rolling in, the reflection can make everything feel even more intense. Clouds can look wild and take on new shapes when flipped in the reflection. It’s a great way to add drama to your shots!

8. Shoot during the golden hour
The golden hour refers to a particular time before the sunset and right after the sunrise. At this time, the sun is low in the sky. The golden hour is loved by photographers as during this time, the light of the sun gives off warm colors, including red, yellow, and orange, which creates a seriously dramatic backdrop for photos. In reflection photography, a colorful sunset reflecting off the water—whether it’s a sea, lake, or puddle—can look absolutely stunning.
Plus, the light is much softer during the golden hour, which makes it easier to shoot into the sun. When you do that, your subject can turn into a beautiful silhouette against the sky, and you’ll get a neat reflection, especially if you’ve got a little water to work with.

Part 2: Enhance Your Reflection Photography Images With Filmora
The Filmora mobile app is your go-to for easy, on-the-go photo editing! It’s packed with tools that are super simple to use, so you can turn any pic into a standout with just a few taps. Plus, Filmora’s mobile version offers a huge range of eye-catching filters, effects, and customizable text and stickers to add that extra style. Whether you want bold drama or just a little touch-up, Filmora mobile makes it a breeze to create scroll-stopping, shareable pics anytime, anywhere.
1. Adjust the Brightness/Contrast
Step 1: Open the Filmora app on your phone and click on “New Project” to import the image you want to edit.

Step 2: Click on the photo and then click on “Adjust” from the bottom tab.
Step 3: You can tweak the Brightness, Exposure, Contrast, and other image settings by manually adjusting them according to your preference to make the reflection pop.
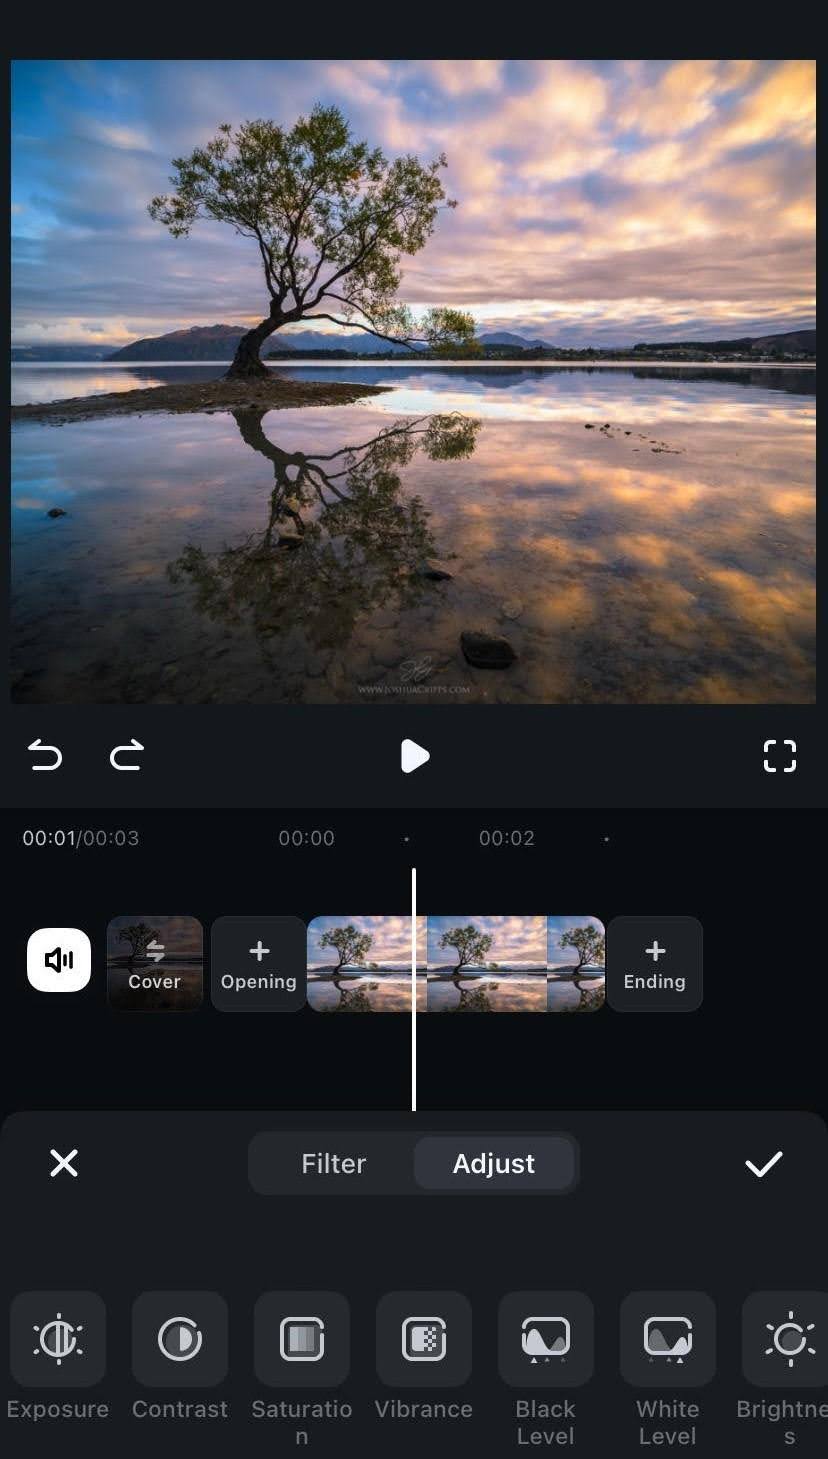
Step 4: Play with the Shadows and Highlights to make it look even better, then hit OK.
2. Add Filters
Step 1: Click on the Filters.
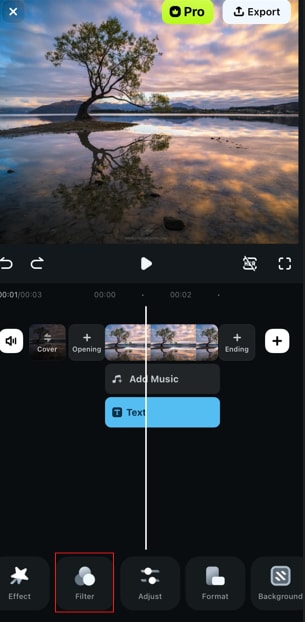
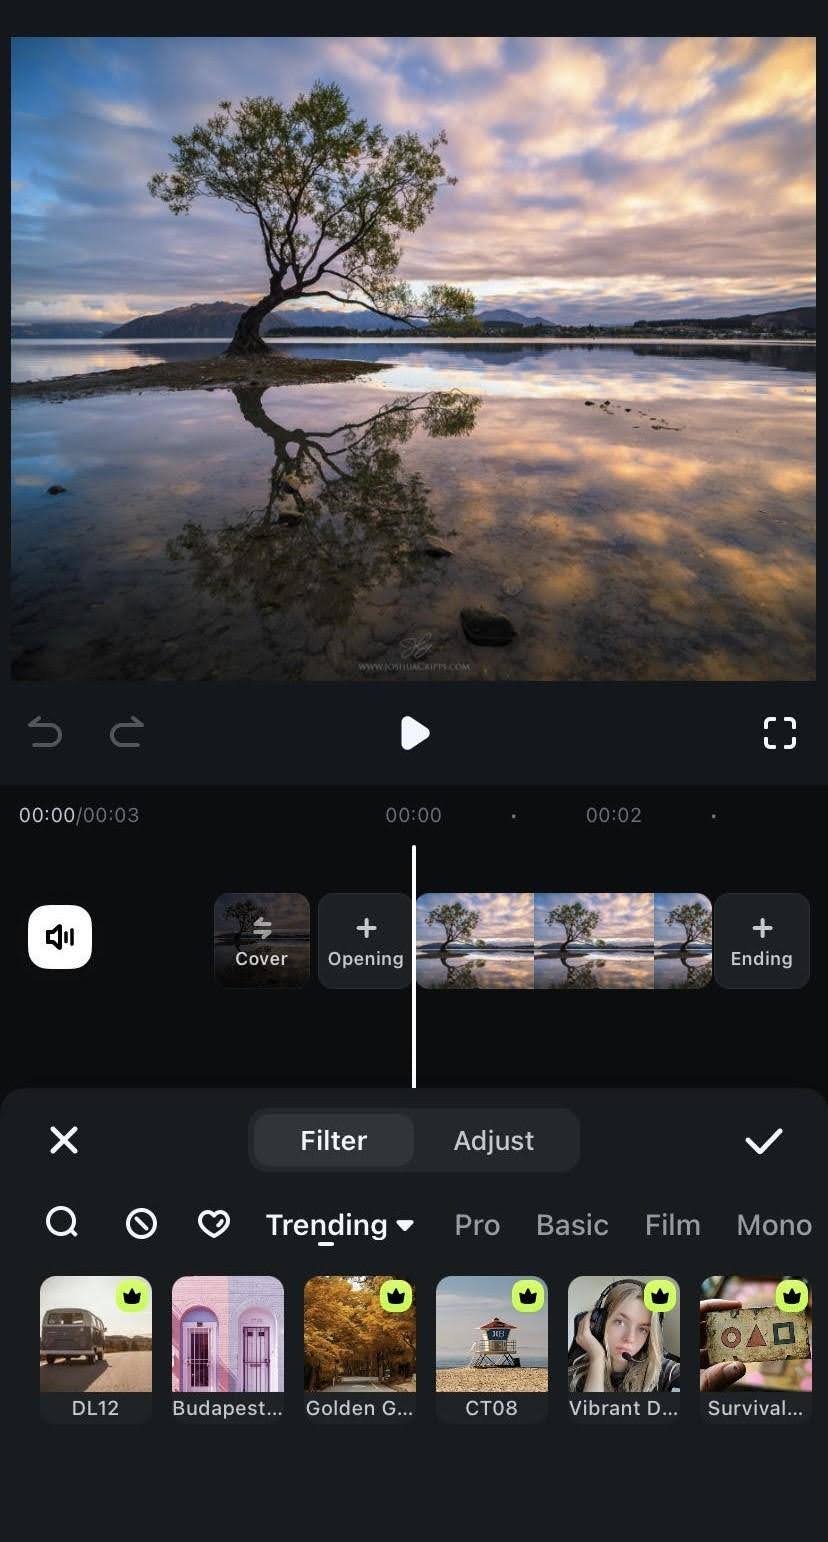
Step 2: Browse through filters and pick one that fits the vibe.
Step 3: Click the filter of your choice to apply it to the image.
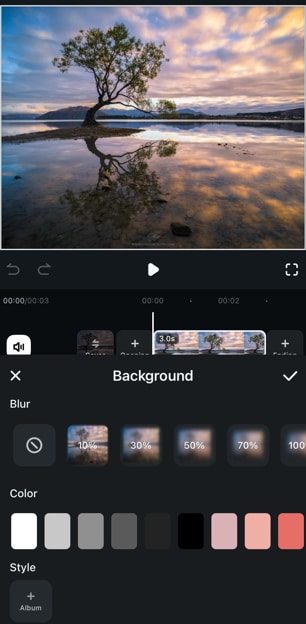
3. Blur the Background
Step 1: Click on the Background tab.
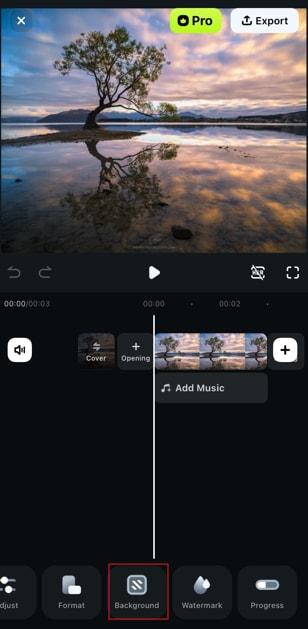
Step 2: Browse through the blur intensity options available and choose the one that best fits the picture.
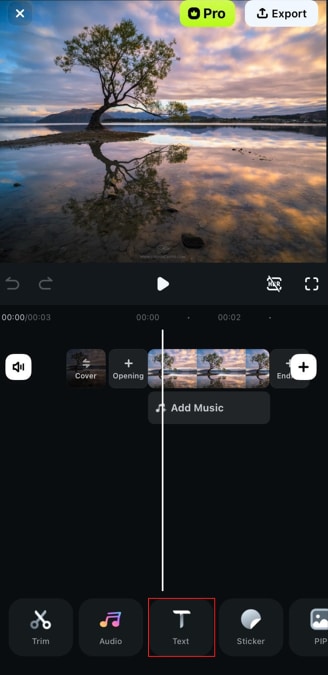
4. Add Text or Titles
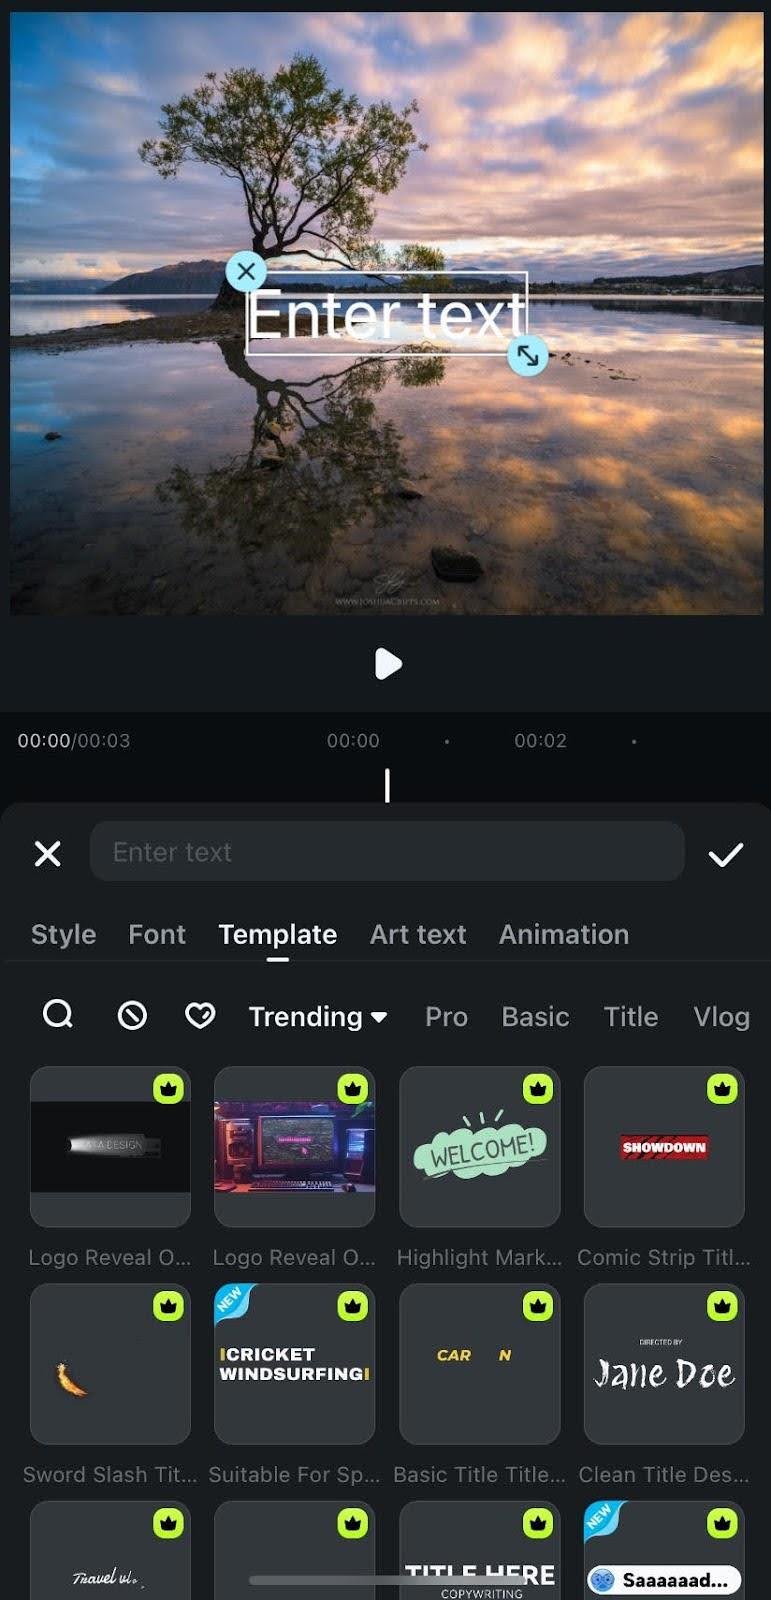
Step 1: Click the Text tab and add the desired text to the image.
Step 2: Choose the text template of your choice. You can also adjust the font, size and position it wherever you want.
Conclusion
There you have it! By keeping the above-discussed reflection photography tips for iPhone in mind and having an easy-to-use editing app like Wondershare Filmora at hand, you can take your reflection photography to the next level. Whether you wish to capture stunning sunset reflections or experiment with mirror effects, Filmora makes it super simple to enhance your photos. So, grab your iPhone, get creative, and start snapping some amazing reflection photos that’ll stand out on any feed!


