People love having time for themselves and watching some of their favorite videos while having coffee or tea. Some even make their own videos – maybe because they’re influencers, professional editors, or just casual fans of editing.
Whatever the case, everybody agrees that it can get a bit frustrating when you don’t have the right tools to potentially rewind the videos if you want to, add subtitles to them, or speed them up.
That’s why you need the right extensions and tools to make the sailing smooth and adjust the clips to your liking. The market is vast, though, and the abundance of options can often do the opposite and leave users confused.
That’s why this article has found its way to you today, so let’s talk about the Video Speed Controller.
In this article
What Is the Chrome Extension Video Speed Controller?
Video Speed Controller is a useful tool that can help you speed up or slow down your videos promptly and efficiently!
It’s a free extension of Chrome, and it was developed to suit the needs of an average user who wants to control HTML video speed, rewind, and advance with keyboard shortcuts. You can use it on OTT platforms such as YouTube, Netflix, and PrimeVideo, and it’s super easy to install.
Now that you know what it is, let’s talk about its main features and why it’s a good option!
Main Functions of the Chrome Video Speed Controller Extension
With this controller, you definitely feel in control since it’s effortless to navigate. It’s one of the most praised extensions out there! It allows you to speed your videos up at 0.5x, 1.5x, and 2x the normal speed.
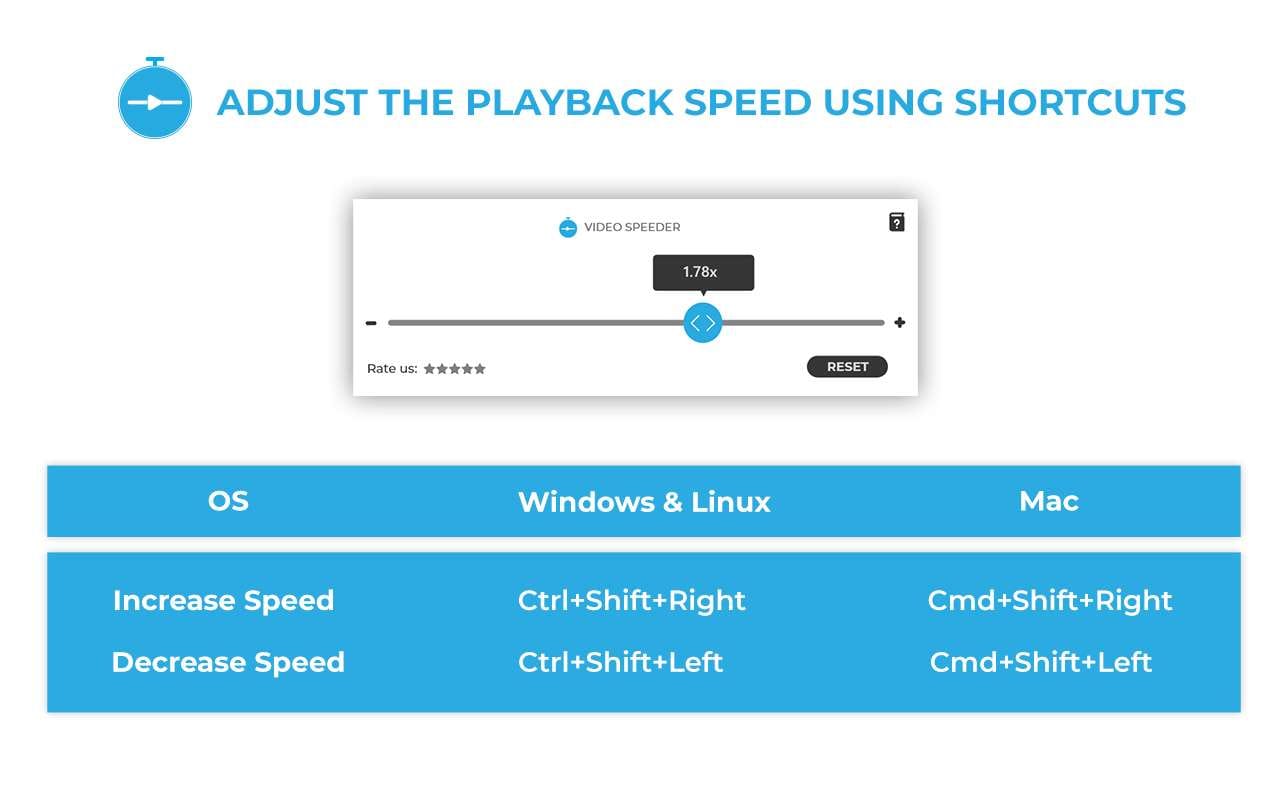
As mentioned, its primary function is to let users modify video speeds using keyboard shortcuts. For example, press X on your keyboard to advance your video by 10 seconds, and if you want to slow it down, just press S. If you’d like to rewind it, then all you have to do is press Z. When you choose to speed the video up, press Ctrl+Shift+Right. It’s that simple!
As with most free tools, though, some problems will occasionally occur.
Pros of this free handy helper are that it’s very user-friendly and prompt because of its shortcut functions and slider controller.
Cons, on the other hand, are that it’s not designed to work outside of Chrome, and you have to click on it every time. Otherwise, it’ll stay hidden, and you may forget it’s even there.
How to Install the Chrome Video Speed Controller Extension?
We said it’s super easy to install, so let’s see just how easy!
Just follow these steps, and you’ll have it on your computer in no time.
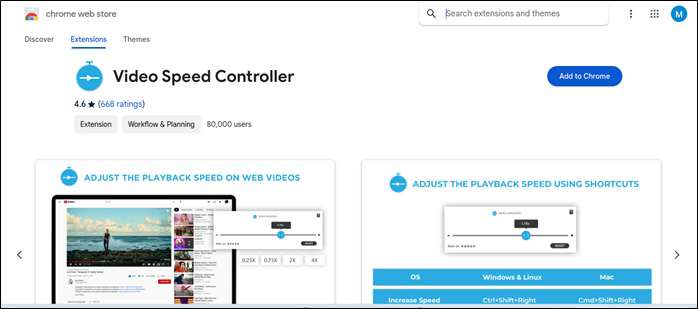
- The first thing you want to do is type Chrome Extension Video Speed Controller in your browser.
- Enter the Chrome Store.
- In the store, you’ll see a blue bar on the right saying Add to Chrome.
- After you click it, it will lead you to the Add Extension window. Now, just click and download it.
It’s adaptable to whatever OS you use, whether it’s Windows, Linux, or Mac.
How to Use the Chrome Video Speed Controller Extensions?
So now that you’re set and have it installed, you naturally want to explore it a little and see if you like it, love it, or it’s just not up to your standards, right?
Then let’s speak about how to use this extension in the optimal way and get the most out of it!
After you visit one of your preferred streaming sites, you’ll be able to adjust the playback settings and set them up to your requirements.
If you hover over the speed indicator in the upper left corner, you’ll be able to accelerate or slow down the speed of the clip, without damaging the video quality.
So, if you want to enjoy the videos at your own pace, this is a great way to do just that and not have a headache because of various unnecessary commands and keys.
How to Permanently Change the Speed of a Video?
Okay, so far, we’ve covered the features, usage, and possibilities of the Chrome extension, but now it’s time to expand our horizons even more and talk about how to change the speed of our videos permanently.
Changing the video speed might occur for several reasons, e.g., if you want to:
- Speed through the material and info due to time limits;
- Respect the time limits of the platforms and sites that you upload on;
- Catch some details that you’d miss in the original video speed;
- Layer the segments of the video and mix up the effects.
Adjusting the speed of a clip in the editor differs from adjusting the speed of the final product!
What does this mean? Well, it simply means that the editing software is duplicating or subtracting the frames, depending on what you decide to do. Still, the frame rate in the final cut will remain original, and the video will always play in a specific frame rate chosen in the project.
Now, you’re left standing with two options. You can choose a great extension, like those Chrome offers, or try professional editing software with a far greater range of options.
Though the first option will definitely help you, it will only take you so far before you start seeing limitations and flaws when you really don’t need them.
So, let’s hop on to the next section and see what other options you can select!
Professional Video Editing Software
Although free video editing software progressed heavily in the last couple of years and increased its quality significantly, there are still many limits to its capabilities.
On the other hand, well-established professional video editing software companies offer premium services and more functions you can take advantage of. One of those fantastic companies, is one of the leading ones on the market, a highly effective, prompt, and trustworthy software, Filmora.
Filmora is a high-quality video editing software with the perfect balance between offering all the professional tools for editing and being very user-friendly, so people of all skill levels can enjoy and create with it! It’s up to all current video standards, offering both playback of HD and 4K videos.
What skyrockets it above all the other competitors is how straightforward it is to use, so even novice and moderate editors can almost effortlessly make beautiful, memorable edits and professional-looking videos!
These next steps will show you how to control and adjust video speed using this fantastic software!
Detailed Steps to Use Wondershare Filmora to Change Video Playback Speed
Here’s all you need to know about using Wondershare Filmora:
Step 1: Open the Editor and add your files
Wondershare Filmora supports many video formats, like MP4, FLV, MPG, AVI, FLV, ASF, M2TS, DV, EVO, MTS, and more.
Whether you’re a Windows user or you love Mac, you’re safe and covered!
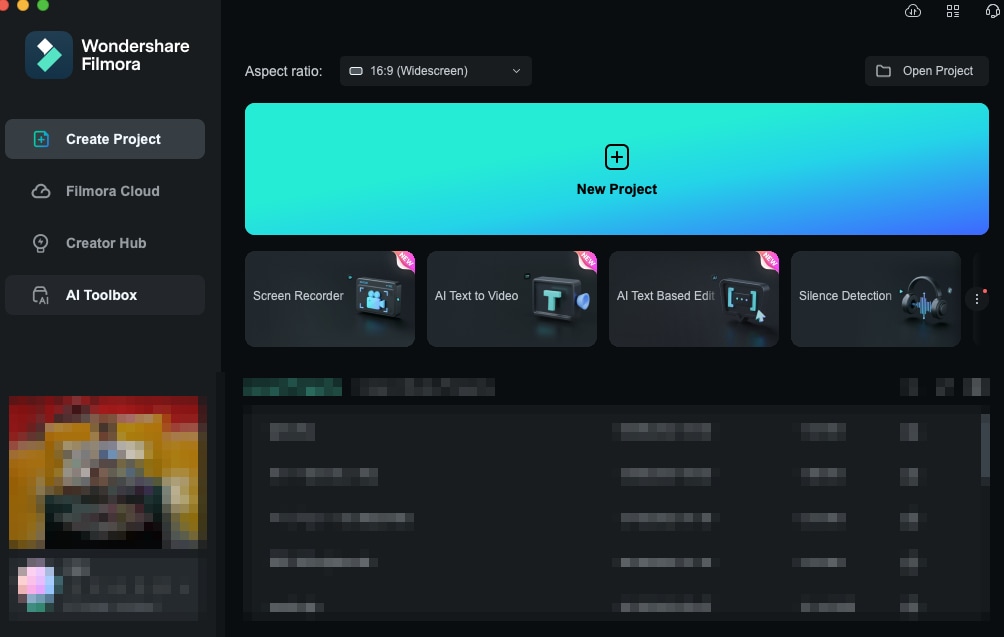
After opening the editor, to add the videos from the library, click on New Project and select your desired clips!
Step 2: Super easy Speed adjustments
When you enter the project, you can set your desired resolution and frame rate.
Drag your video to the timeline, then, right-click and choose Speed and Duration. A pop-up window will appear next, and you’ll have a speed slider in front of you, which you can move left or right. The left side is the one for slowing your video down, and the right one for speeding it up!
The numbers next to the slider will indicate precisely how fast the effects are: 1 representing the original speed, 0.5 being half of that, 2 being double the normal pace, etc. That’s the part where Filmora flies above the rest because you can speed your video up to not only 4 times the speed, not even 5 or 6, but 10 times, etc.

Step 3: Use Speed Ramping
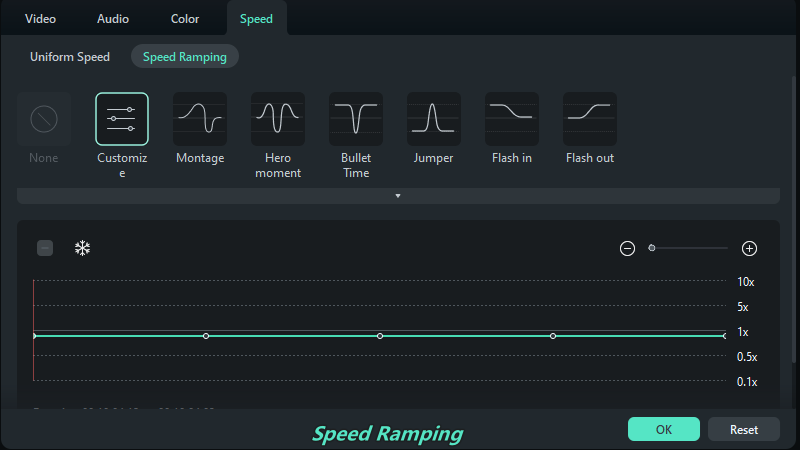
Double-click on the video you’re editing. It will present you with a pop-up window where you will click on Speed and then Speed Ramping.
It’s an excellent addition to the software because it provides a panel with various options like Customize, Hero moment, Flash in, etc, where you can set up your preset.
Then, you can go ahead and place the playhead in the exact places where you’d like to increase or decrease the speed of the clip. Now click the Add icon to insert speed key-frames, and if you are pleased with the result, just click OK, and it’ll automatically be saved.
Conclusion
There are many reasons why people love making videos. Some love the technicality and proficiency of it, some do it to inspire others, while the rest find pleasure in being super creative with their ideas and making memories.
Whatever your reasons for making videos are, one thing is certain – you deserve the best and most up-to-date tools to bring your imagination to life and let it influence others to continue the beautiful circle of creativity.
Even though many free apps offer some great features, they seem to always leave users limited, so they cannot express themselves and do their best work at their own pace. Professional, proven, and premium tools never leave you behind.


 100% Security Verified | No Subscription Required | No Malware

