
 100% Security Verified | No Subscription Required | No Malware


 ChatGPT
 Perplexity
 Gemini
 Claude
 Grok
Grok
Filters are everywhere today. People use them to enhance selfies, add a vintage twist, or improve and polish the quality of their photos. But what happens if you want to remove the filter from photos and revert to the original? Is this even possible?
There are many instances where you would need a filter removal tool. Perhaps you have an over-edited post on Instagram, and you want a reminder of how the photo looked before you applied all those image editing tricks. On a more serious note, you might be a designer who is looking to source raw assets, or you might be a journalist who needs to verify image authenticity.
Whatever the case, this article will solve the filter remover mystery.
In this article:
Question: Is It Even Possible to Remove a Filter from a Photo?
Of course, the answer to this question is a resounding YES! With the many advancements in AI, photo manipulation, and editing technology, it is now possible to remove filters from photos using two very different methods.
Use AI Photo Filter Removers
Some AI tools utilize the algorithm to remove filters from photos. However, there are also some tools that have announced the removal of filters from photos, but most of them are only using AI object removers to remove cute Snapchat face filters and stickers, and the results may not be satisfactory.
Use a Powerful Editor to Negate the Filter
Generally speaking, you can use a powerful editor to apply custom color corrections and add new filters, or adjust color, brightness, saturation, and more parameters to the photo to negate the filter.
We have an example for each of these top methods, accompanied by an easy tutorial on how to use each type of tool.
- 100+ advanced photo/video editing features.
- Vast video/photo effects and creative assets.
- Powerful AI for effortless content creation.
- Intuitive, professional yet beginner-friendly.
- Works on Mac, Windows, iOS, and Android.


Method 1: How to Remove Filters from Photos Using an AI Filter Remover?
The best AI filter remover we found comes from Bylo AI. This company has released several image editing AI tools, and here's a quick tutorial on how to use one.
- Visit their Remove Filter from Photo with AI landing page, upload your photo, add a prompt, pick an aspect ratio, and then click on Generate.
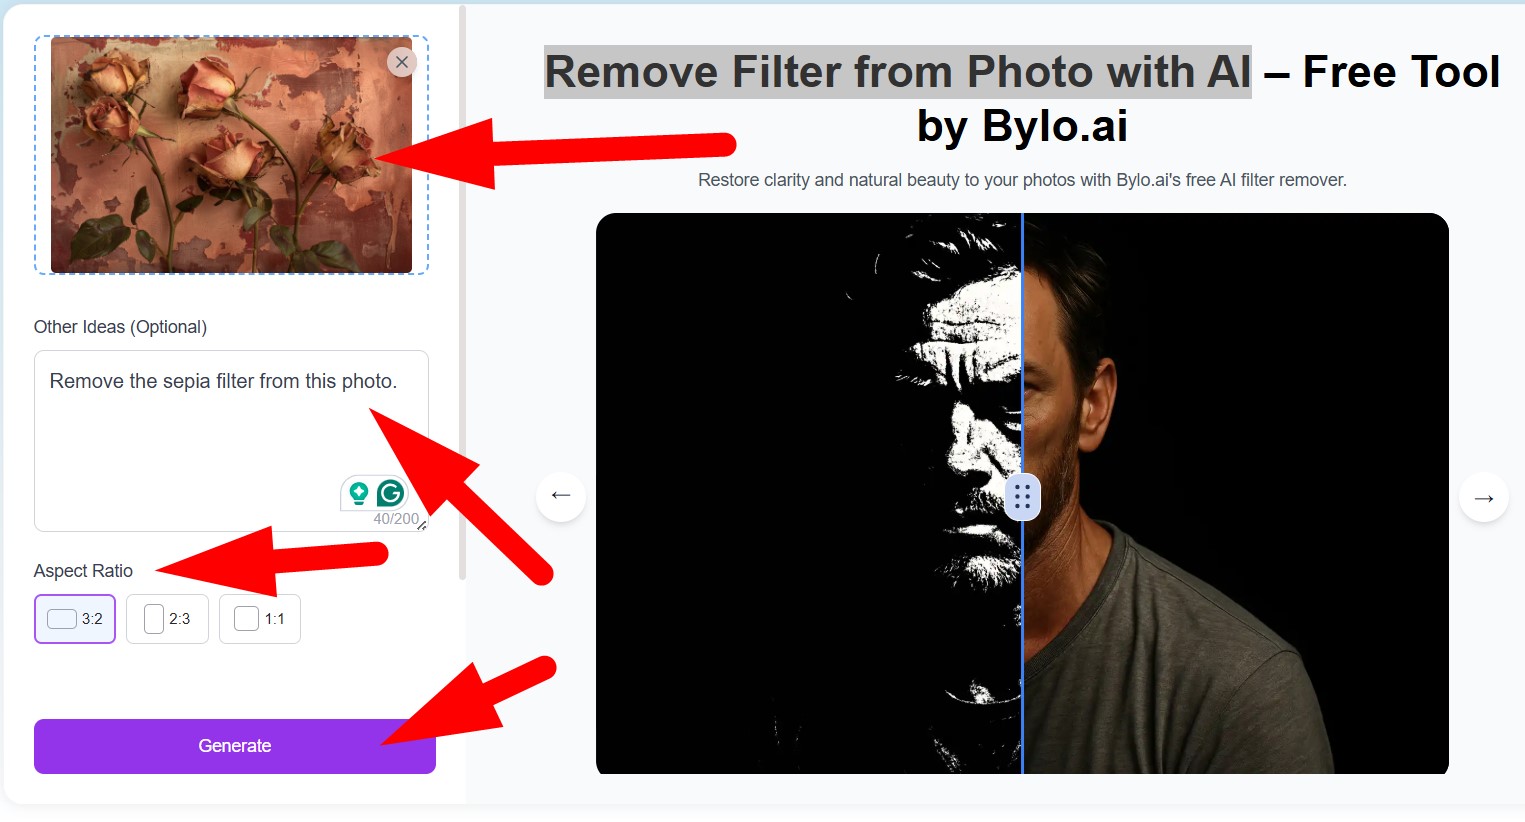
- Review the results and click on the Download icon to save the file to your device.
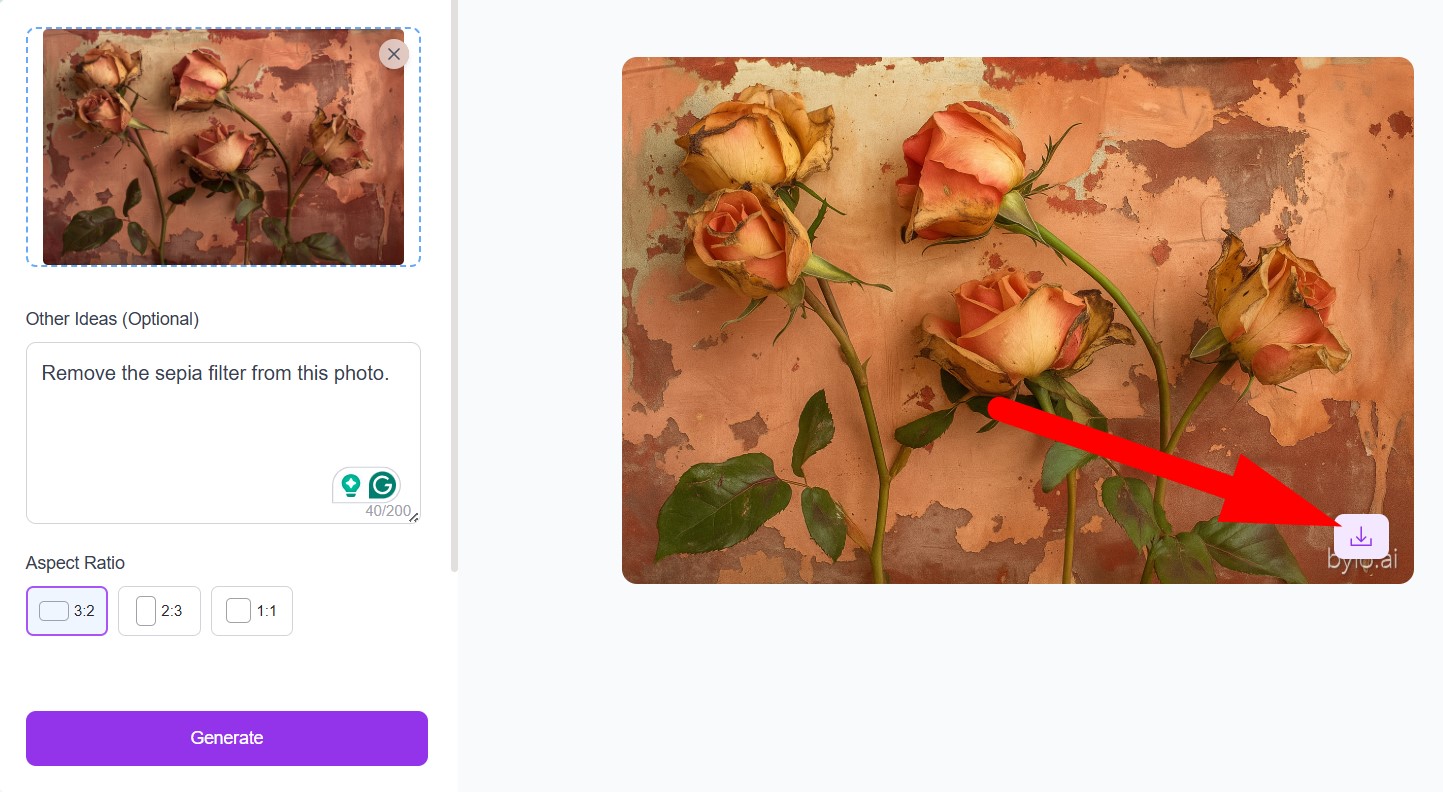
- Check out this quick comparison photo. The first photo is on the left, while the photo where the AI removed the filter is on the right.

As you can see, this tool did a fine job, and the sepia filter seems to be reduced. However, there are no customization options. What you see is what you get. There is also the watermark at the bottom right to worry about.
That's all for AI photo filter removers. Let's see how to remove filters from photos with a powerful editor.
Method 2: How to Remove Filters from Photos Using a Powerful Editor?
The best approach we can offer is to use Filmora. This is the best video editing tool with stellar image editing capabilities. The best part about it is that you can try four separate features to achieve your editing goals.
We will give you a short guide on how to use each tool, but before we get into it, make sure to download and install Filmora on your Windows or Mac device, open it, create a new project, import the image you want to edit, and drag the photo to the timeline.
Now, you're ready to go. Let's start.
 secure download
 Use the AI Auto Enhance Feature
One of the many AI features available in Filmora is the Auto Enhance feature, which will improve the quality, resolution, and colors of your photo.
- Go to Image > Basic and activate the feature.
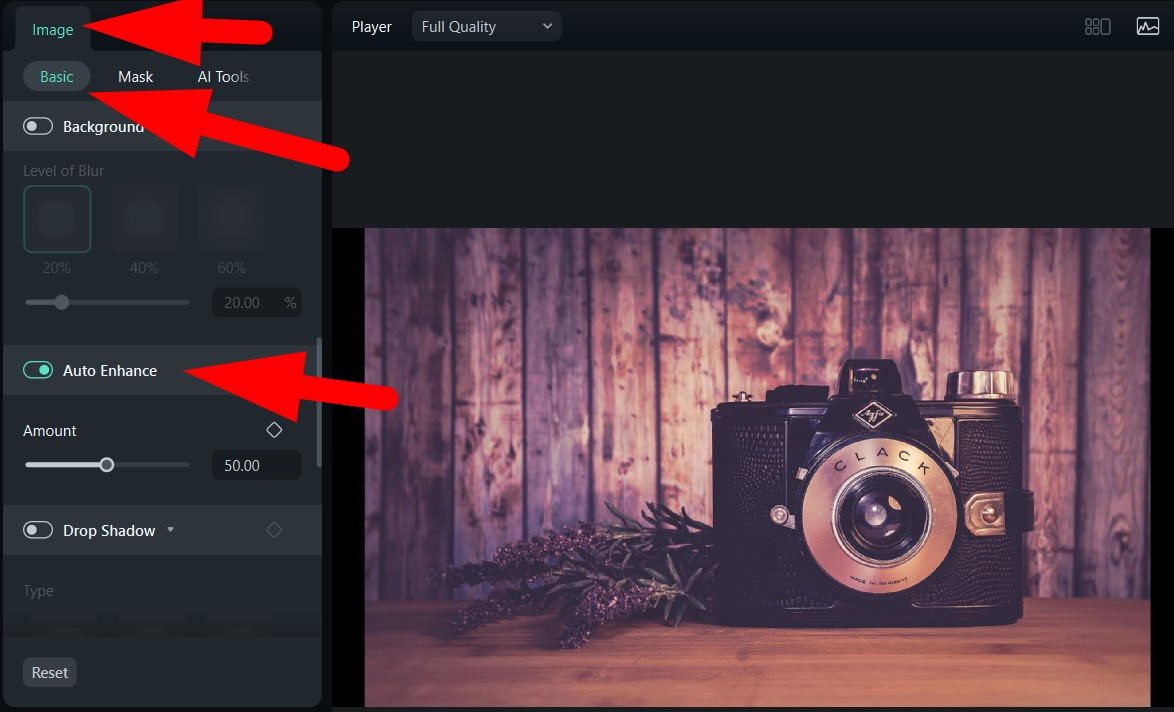
- Take a look at the comparison photo. The original is on the left, while the enhanced photo is on the right. There is a slight difference between the two in terms of colors, but in terms of image quality, the enhanced photo is much better.

Enable the AI Color Palette Feature
This AI Color Palette feature lets you pick a reference photo to alter the colors in your image based on a reference photo. For that photo, pick a natural photo that has natural colors. To use this feature, follow the steps below.
- Go to Color > Basic and activate the AI Color Palette feature. Then click on Local File and click again to upload a reference photo.
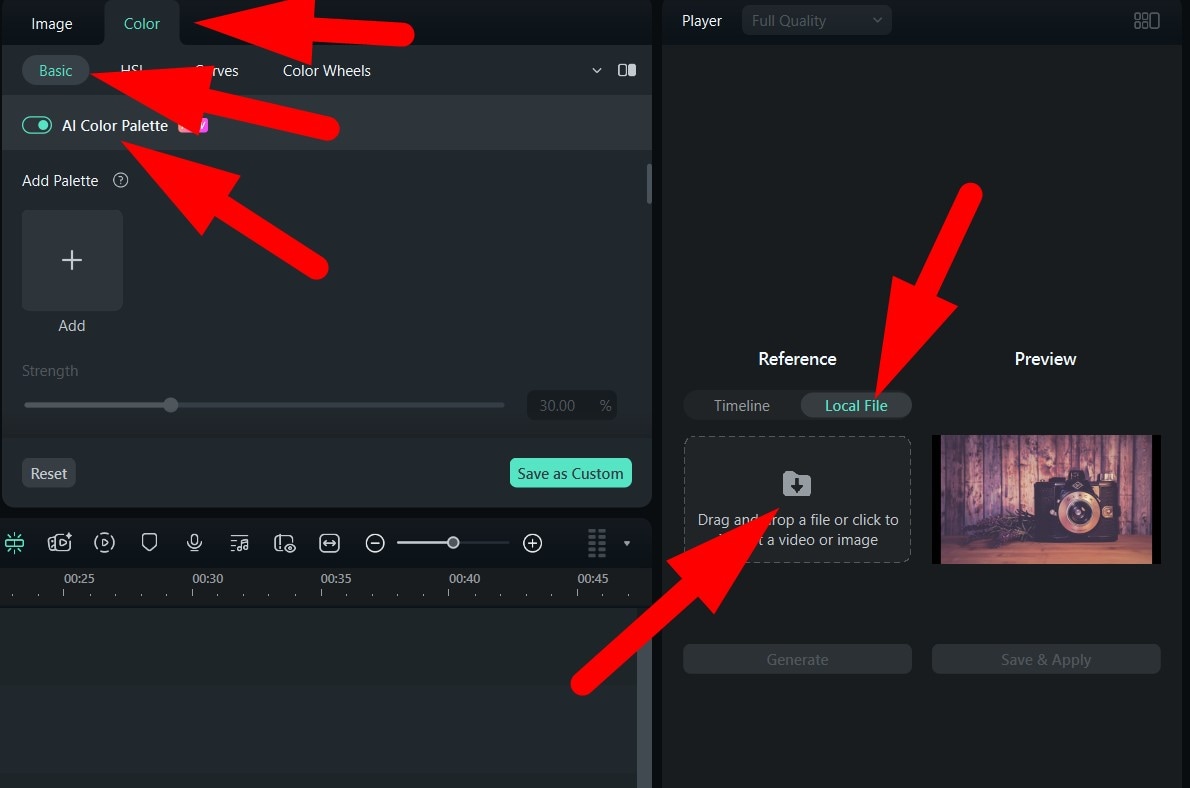
- Now, click on Generate.
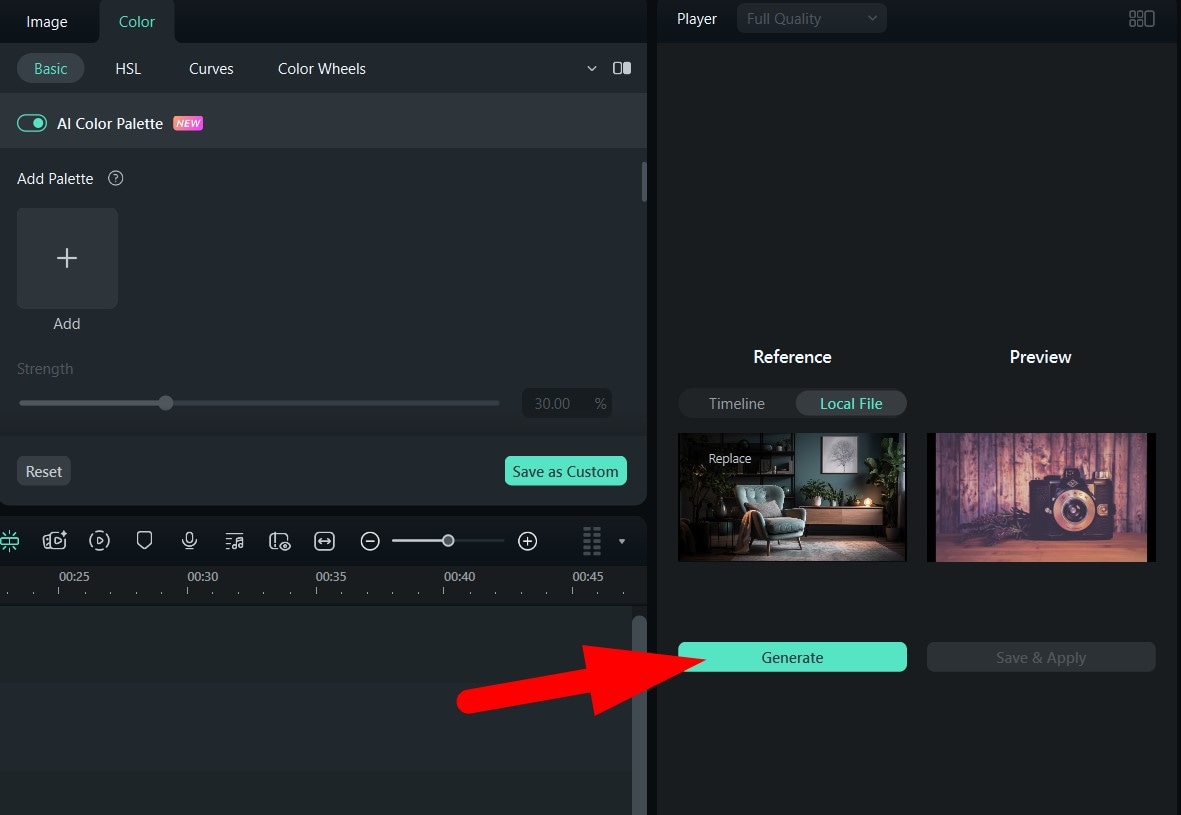
- Finally, click on Save & Apply.

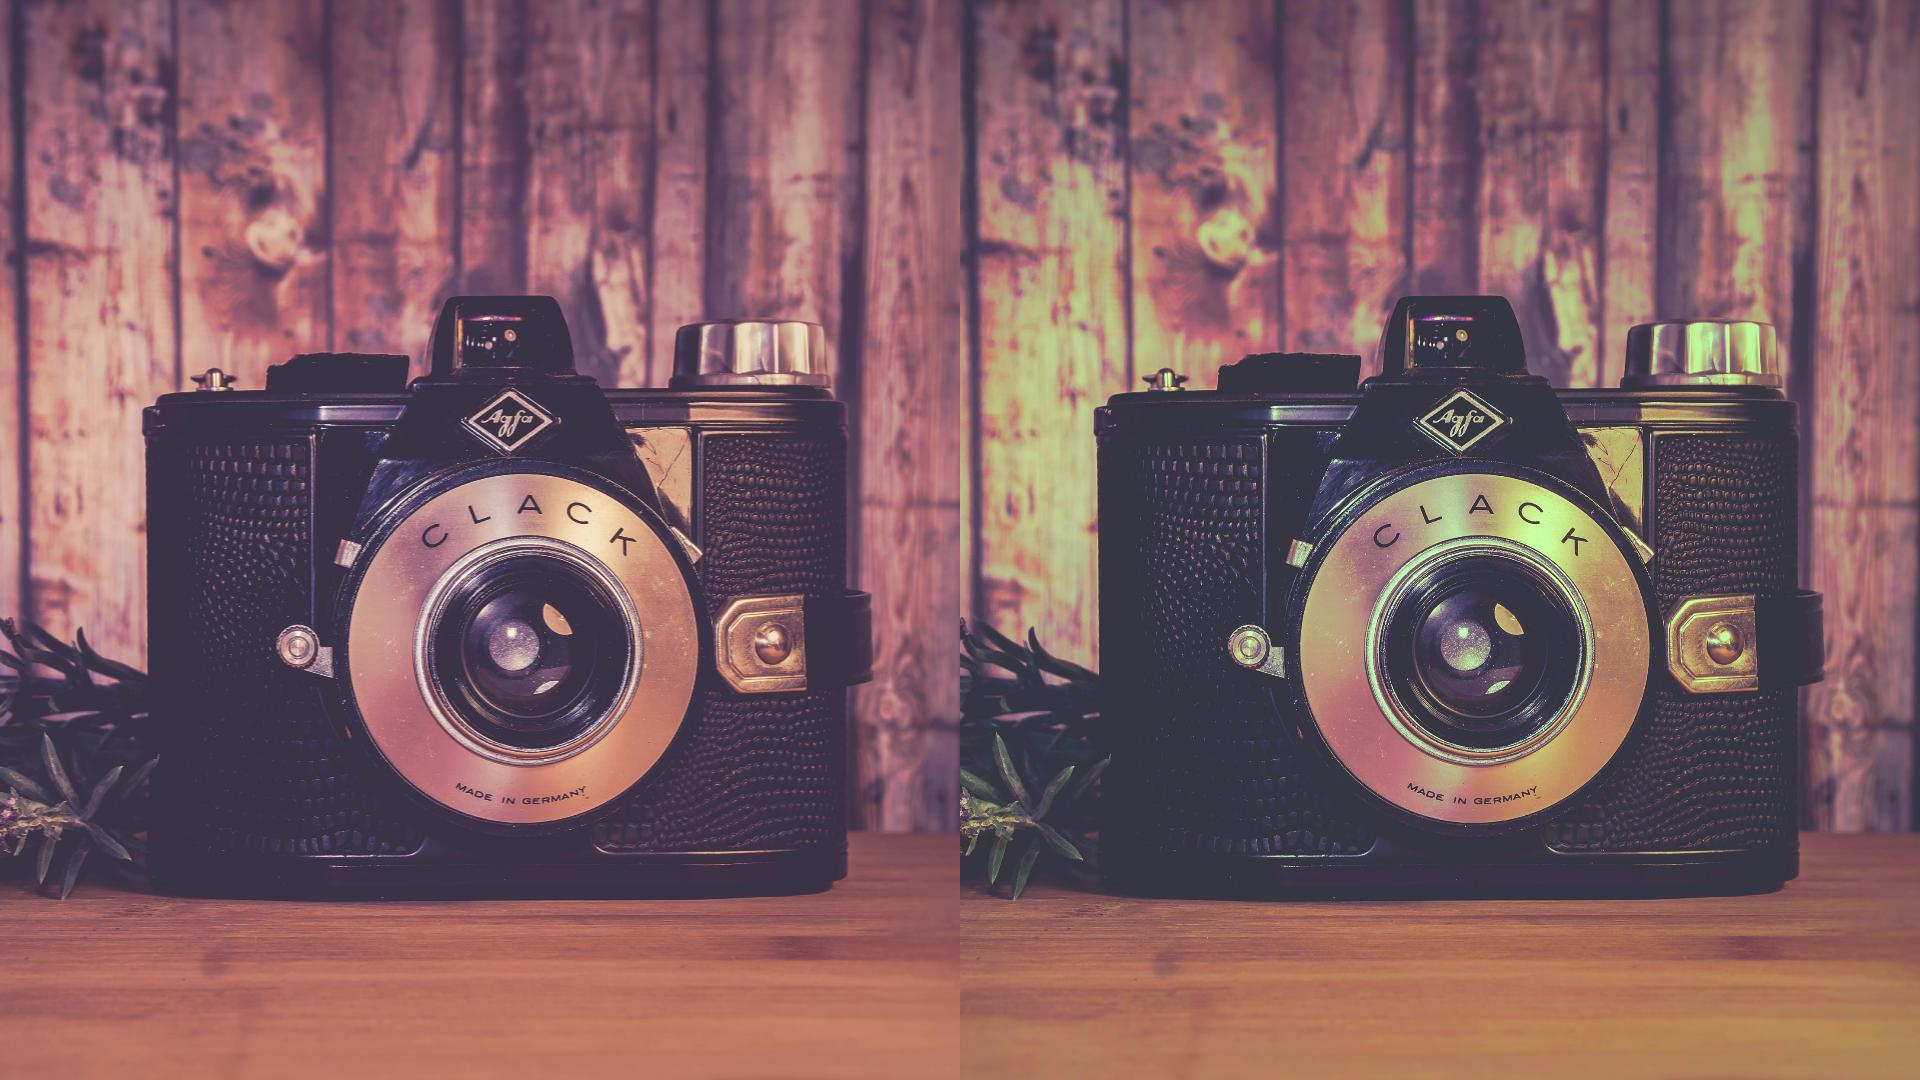
Here's a quick comparison.
Try to Negate the Filter with a Different Filter
Filmora's extensive filter library offers so many creative assets that it's impossible to count them. You are bound to find something that will negate the filter you are trying to remove. Here is a quick tutorial on how to use Filters.
secure download - Find the Filters tab at the top and start clicking through the available options. When you find something you like, drag it to the timeline above your photo.
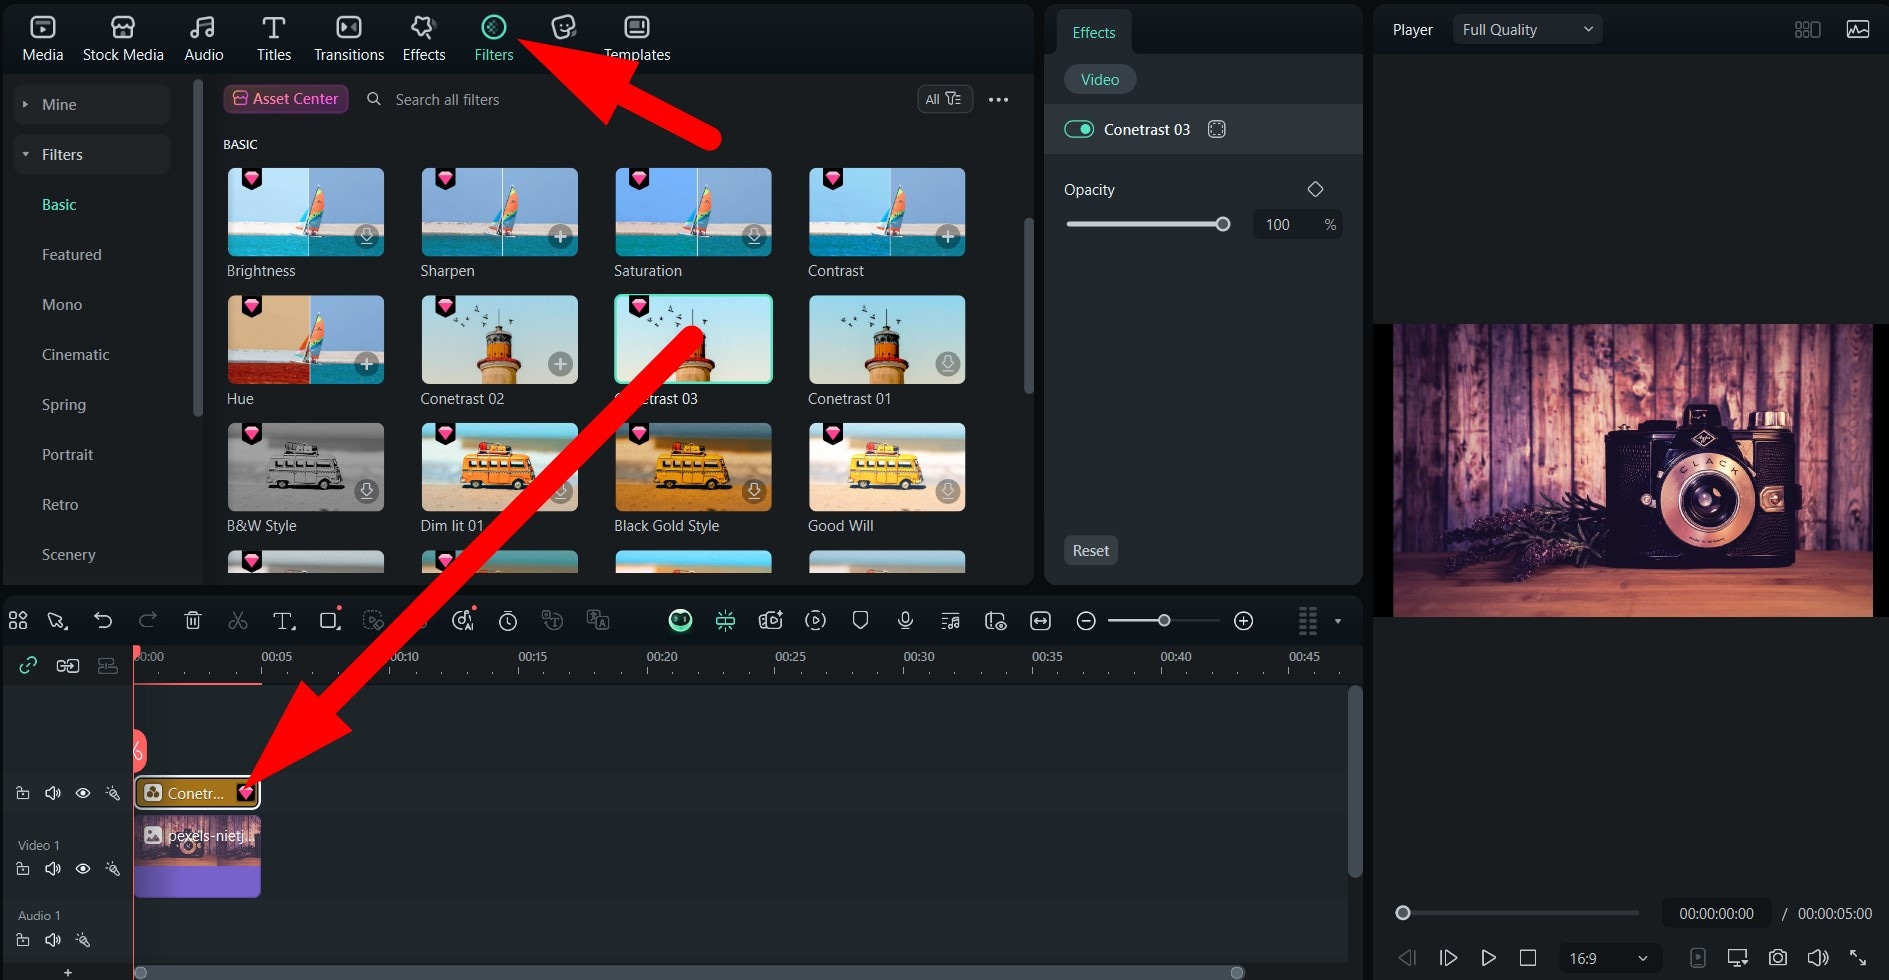
- Check out the comparison photo now and notice the difference between this and the previous one.

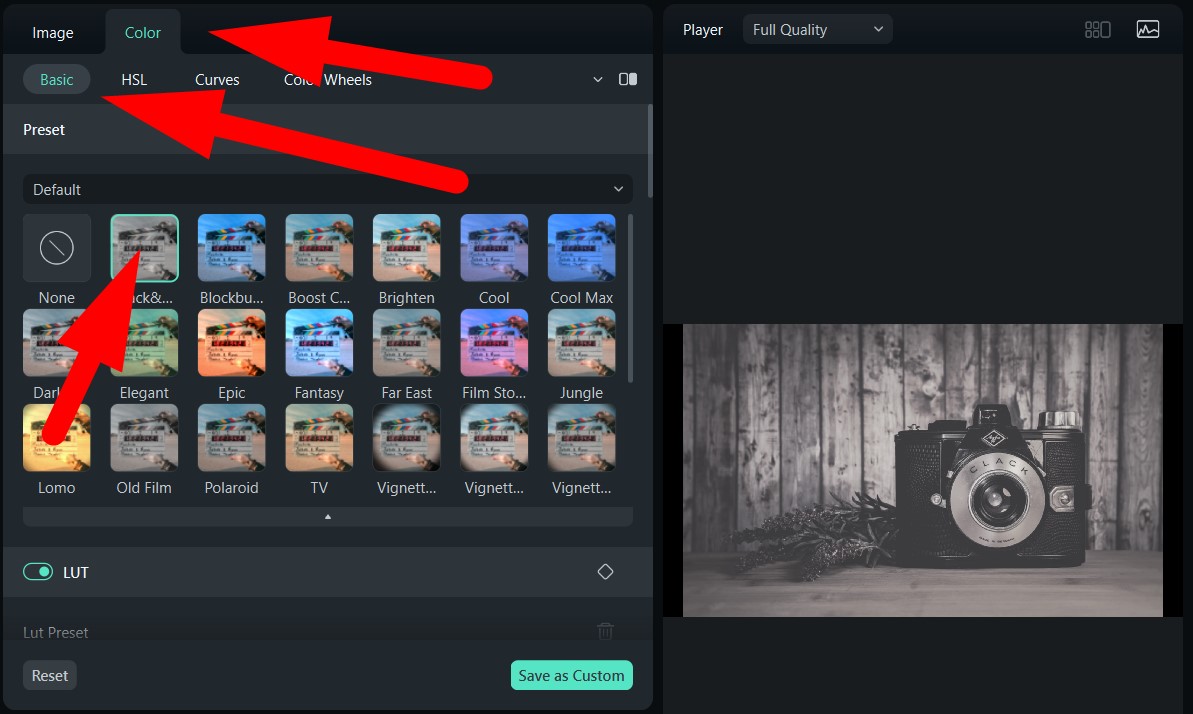
Adjust Colors to Neutralize Filters
If you want to tweak the colors until you get the perfect result, Filmora offers all the color correction features you will ever need. Here's how to use them.
secure download - Go to Color > Basic and try a color preset. For example, you can remove the filter from your photo by turning it black and white.
- You can also go to Color > HSL and pick specific colors to adjust.

- Finally, you can go to Color > Color Wheels and manually adjust colors until you reach the desired color scheme.
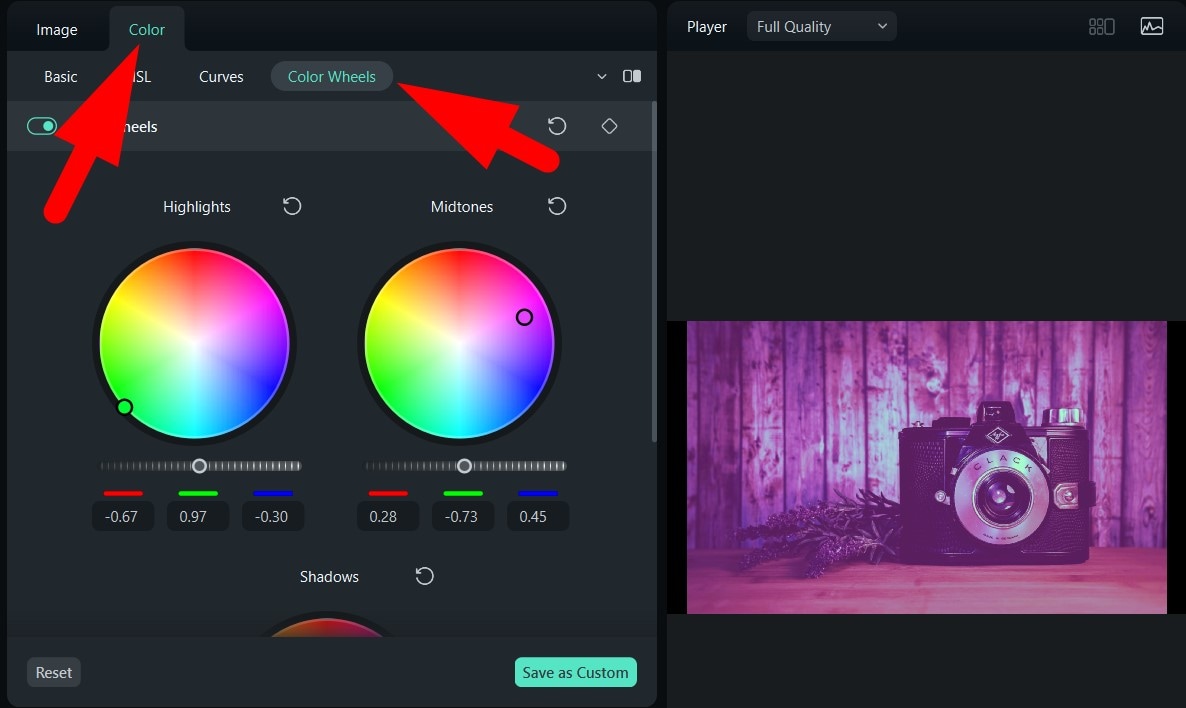
This option offered by Filmora allows you to get really creative. Play with these sliders and color wheels until the photo looks like it never even had a filter.
Conclusion
As we have learned from this article, you have two options for removing filters from pictures. You can go the AI route and try to get a good result with basic prompts (or lose your way exploring object remover features that cannot even do the job), or you can try Filmora and have fun with its amazing features to eliminate the filter in creative and satisfying ways. Ultimately, you can pick an option that suits you best.
If you prefer to edit photos and videos on the go, Filmora is also available as a mobile app for Android and iOS. Give that version a whirl as well.
secure download FAQs:
-
How do I remove a filter from iPhone photos?
If you edited the photo using iPhone's proprietary Photos app, the process is simple: Open the photo using the app, tap Edit, and finally tap Revert to restore it to its original state. -
Can you unfilter an Instagram photo?
If you want to do this on Instagram, then the answer is no. Once you add a filter and post or save the image, you cannot revert. You can try other tools like Filmora and use creative assets to negate the filter. -
Is there a way to use AI to remove beauty filters from someone's photo?
Actually, it is quite difficult to do, but you can try using AI models to see if it can help remove beauty filters according to your prompts.
