
 100% Security Verified | No Subscription Required | No Malware


 ChatGPT
 Perplexity
 Gemini
 Claude
 Grok
Grok
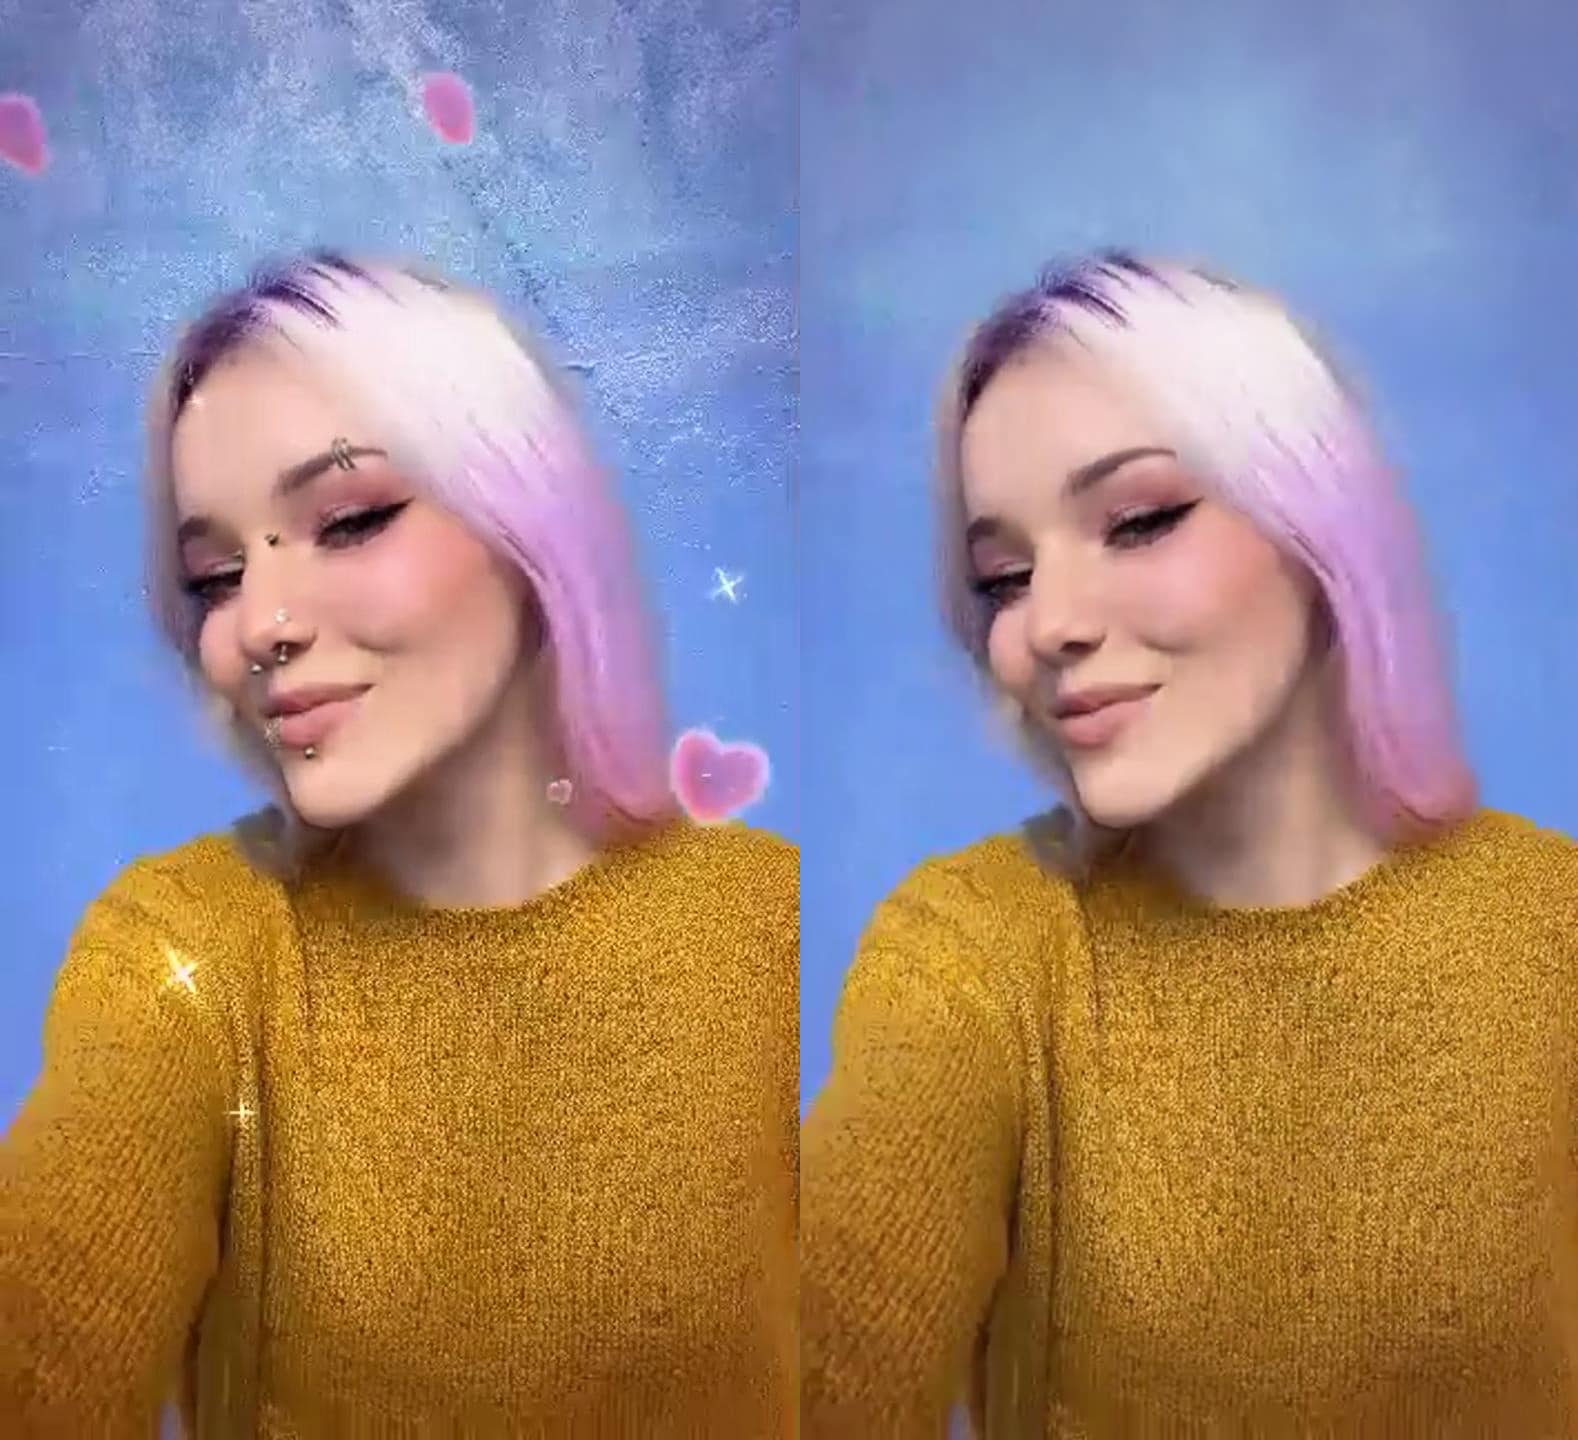
Snapchat is incredibly popular, especially among teens and young adults, and a big part of its charm is all the fun and quirky filters that people can use.
People have many reasons to remove all the extra elements and create a simple image, whether they need a professional photo for their CV, want to create a photo album with everyone looking natural or require a clean image for further editing.
If you're wondering how to remove Snapchat filters from photos, you're not alone. Many users seek effective ways to reverse or erase these filters without damaging image quality.
In this article, we will help you learn how to remove a Snapchat filter or sticker from a saved photo using AI, and we'll give you a few tips on editing it afterward.
In this article:
How to Remove a Snapchat Filter from a Saved Photo with an AI Model
While most people use various AI tools to generate new images, the latest versions allow you to edit your existing photos in different ways. It's not just about adding new backgrounds or elements – you can also remove snapchat stickers and filters like dog faces, cat ears, bunny ears and more.
The FLUX Playground AI from Black Forest Labs is an excellent option because it has a really powerful model that can make all kinds of changes without affecting the quality of the original image, and you can use it for free.
Here's how to take a filter off a Snapchat picture using Flux Playground.
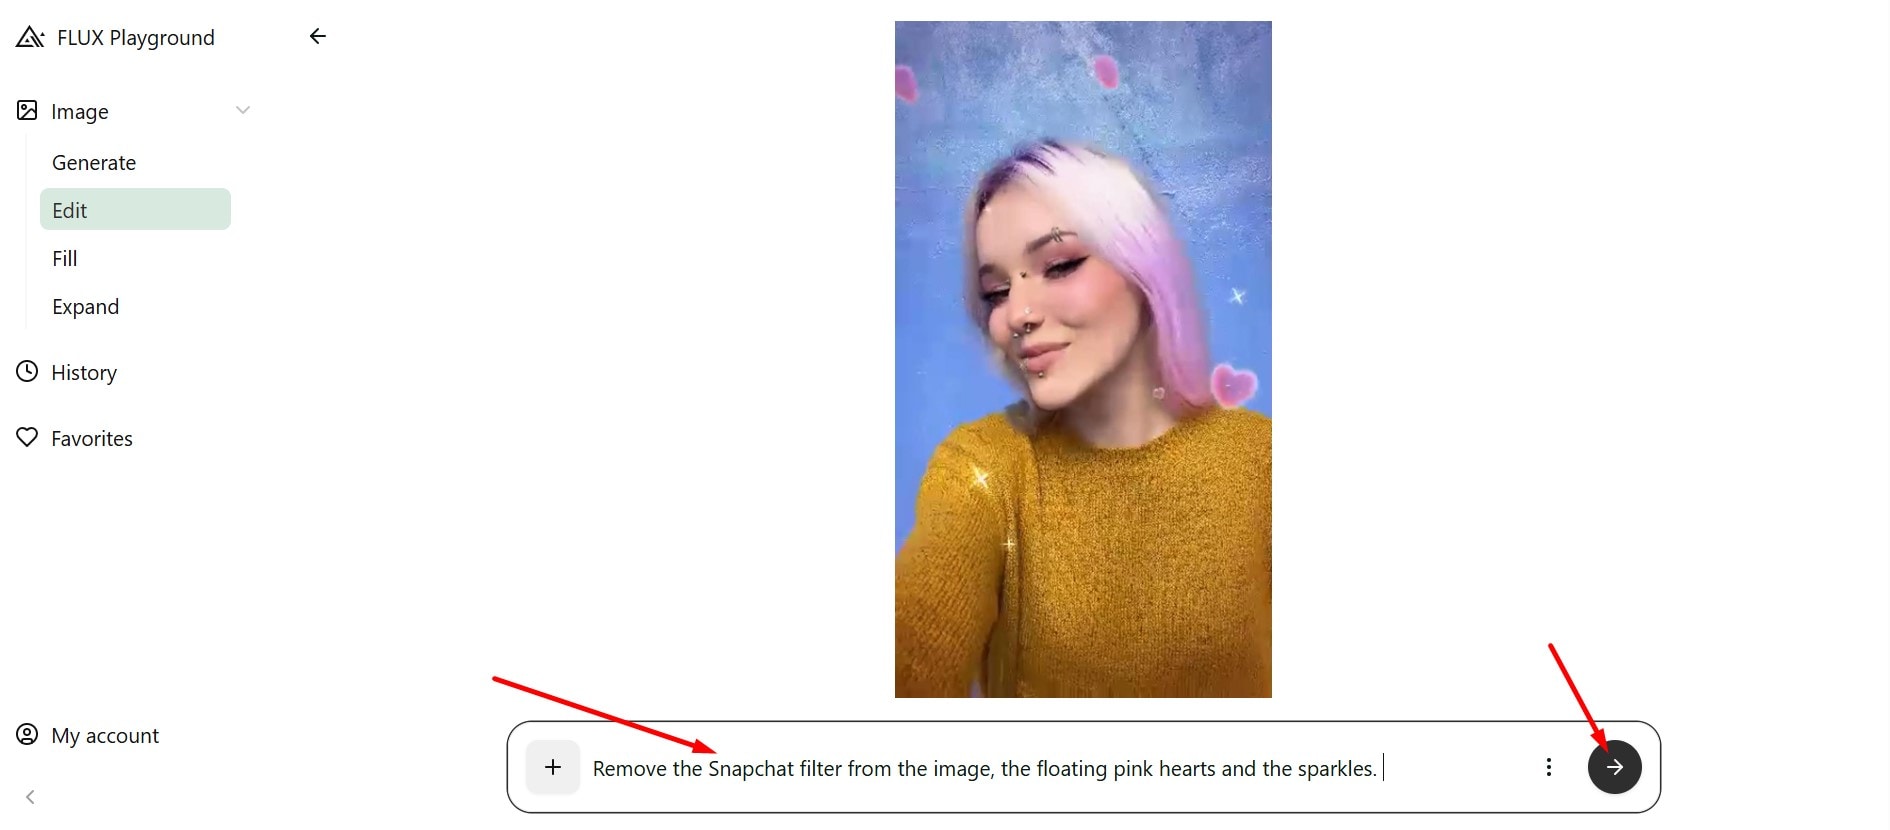
Step 1: Go to the website and click on Edit, then drag and drop the image you want to modify.
Step 2: Enter your prompt. Be sure to mention that you want to edit out the Snapchat filter, but provide a short description of the elements that are involved to ensure better precision. You can also remove additional things like facial piercings.
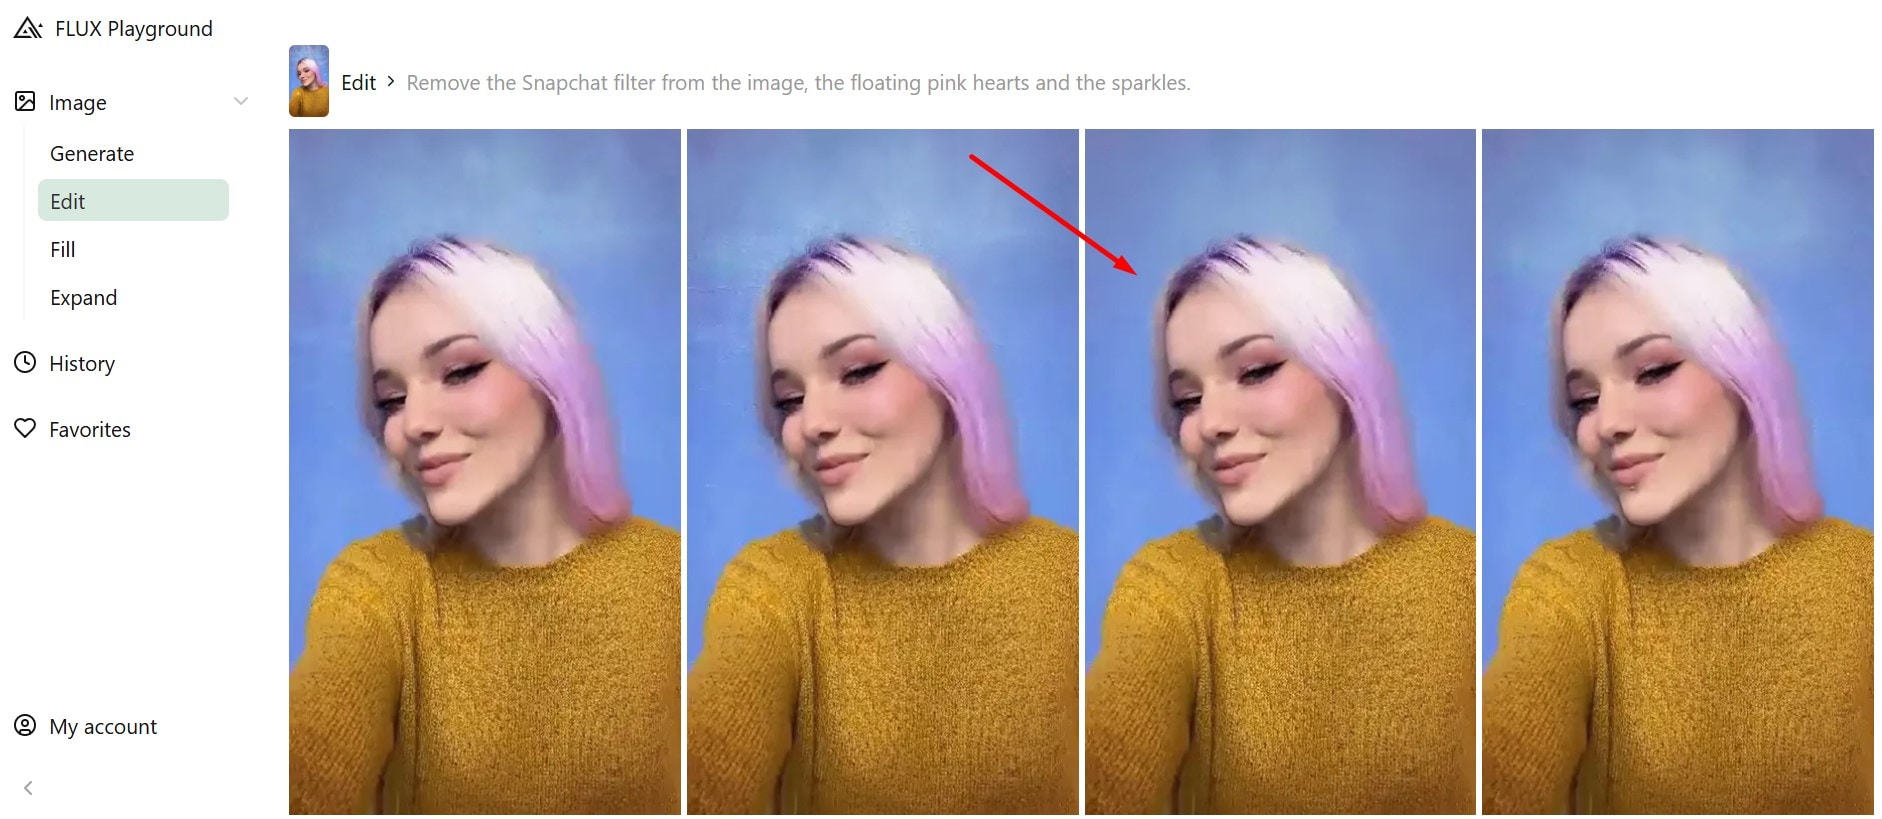
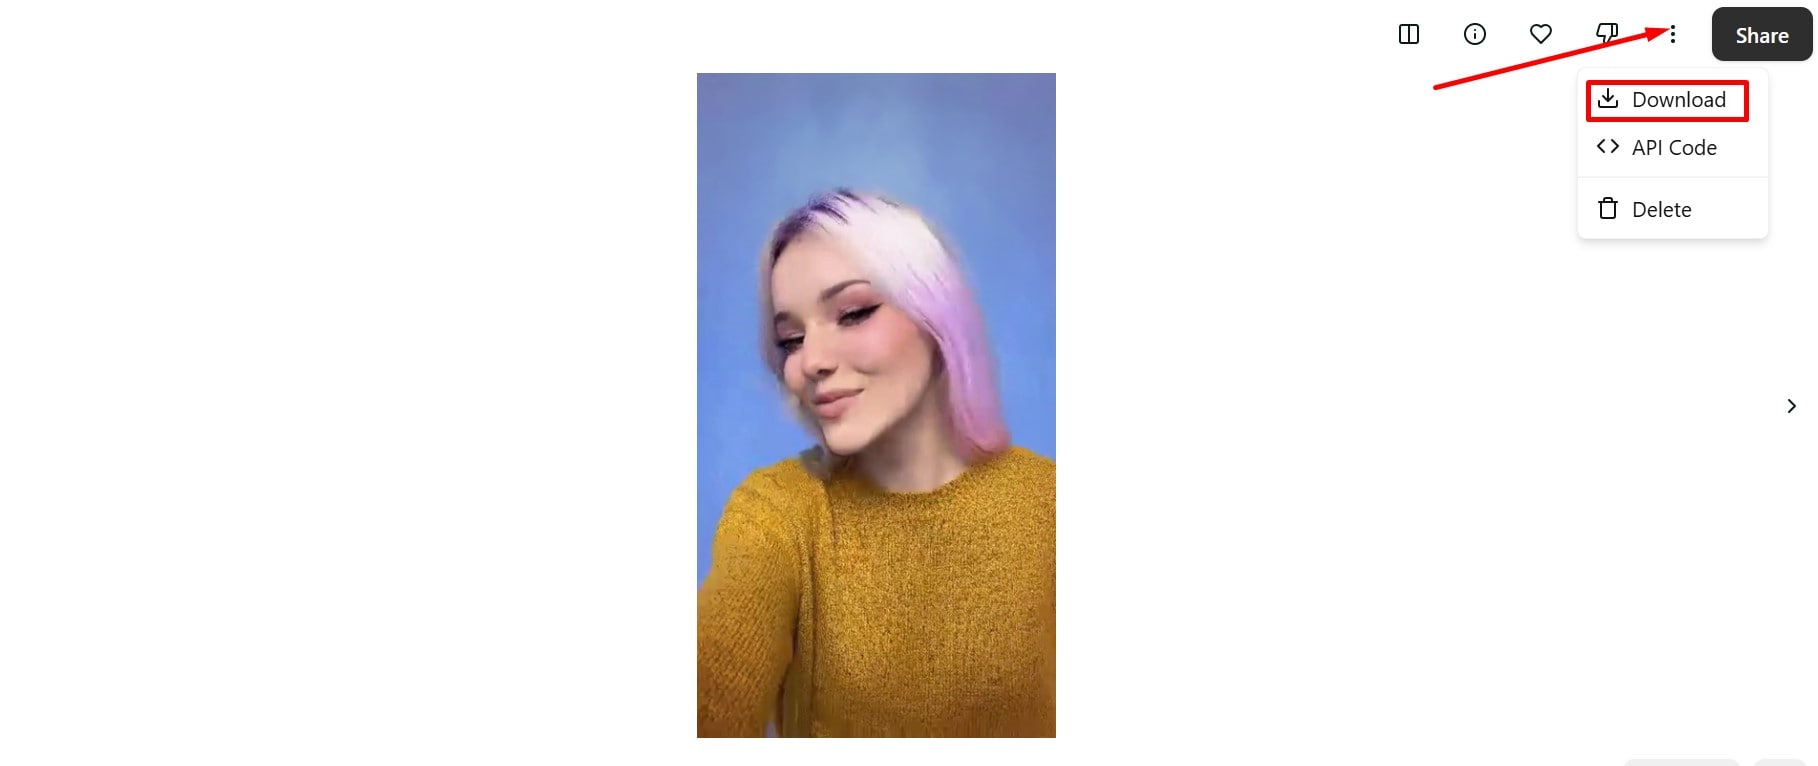
Step 3: Choose the result you like the most, then click on the three dots in the upper right corner, and then on Download to save the edited image.
As you can see, it only takes a couple of minutes to get a clean photo without any of the added Snap filters, but let's look at some of the cool things you can do with it to make it even better.
Enhance Snapchat Photos After Removing Filters
Now that you know how to edit out a Snapchat filter, you can focus on making further corrections or adding different filters and effects to make it pop.
Wondershare Filmora is the perfect program for this, as it has a variety of video and image editing features and its own powerful AI tools. You can use it to enhance the quality of your Snapchat images after removing cute face filters or stickers, such as adding new filters and effects, upscaling image quality, and animating static photos into viral short videos.
What's more, as a stunning video and photo editor, Filmora offers many more advanced features that can make pro-level editing, such as applying image masks, making double exposure effect photos, and more.
Let's explore some of the main features that can really take your images to the next level.
 secure download

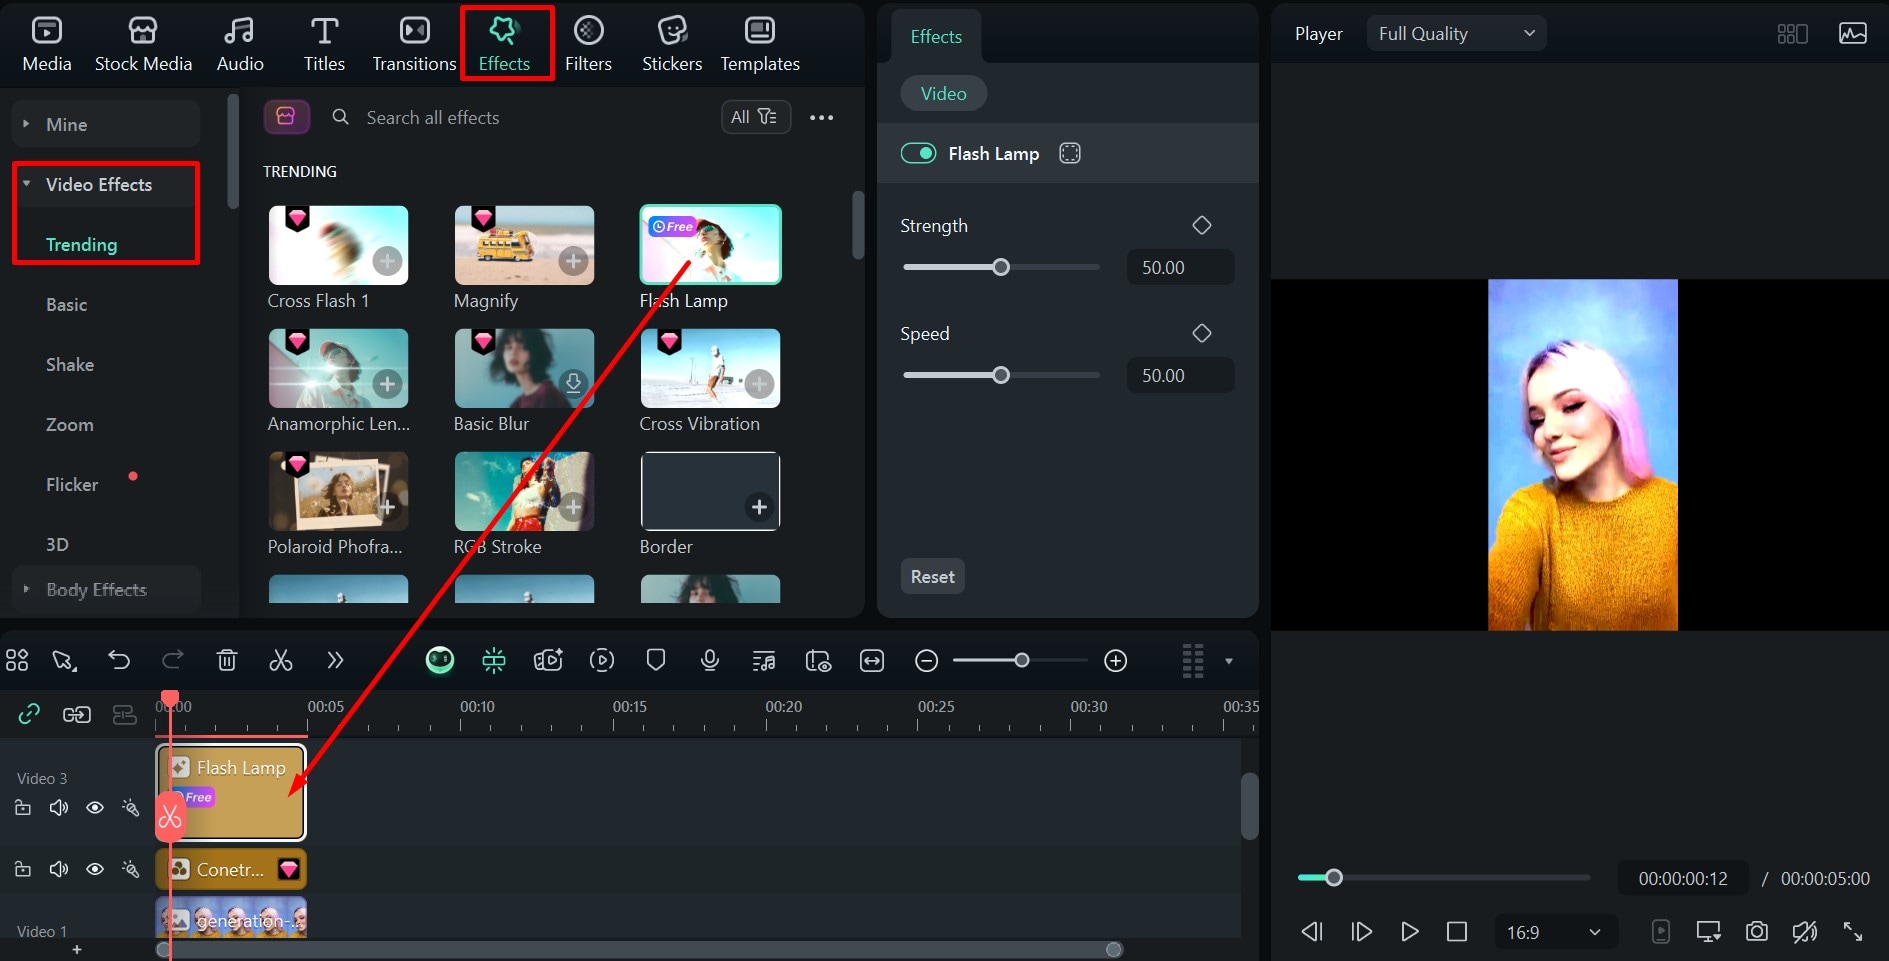
Add New Filters, Stickers, and Effects
These are part of the basic editing features in Filmora, and you'll find icons for each of them at the top of the screen when you run the program. They are quite easy to use, and you get to play around with a lot of fun options.
If you want to add something a bit different or change the mood and the lighting quickly, here are a few easy steps:
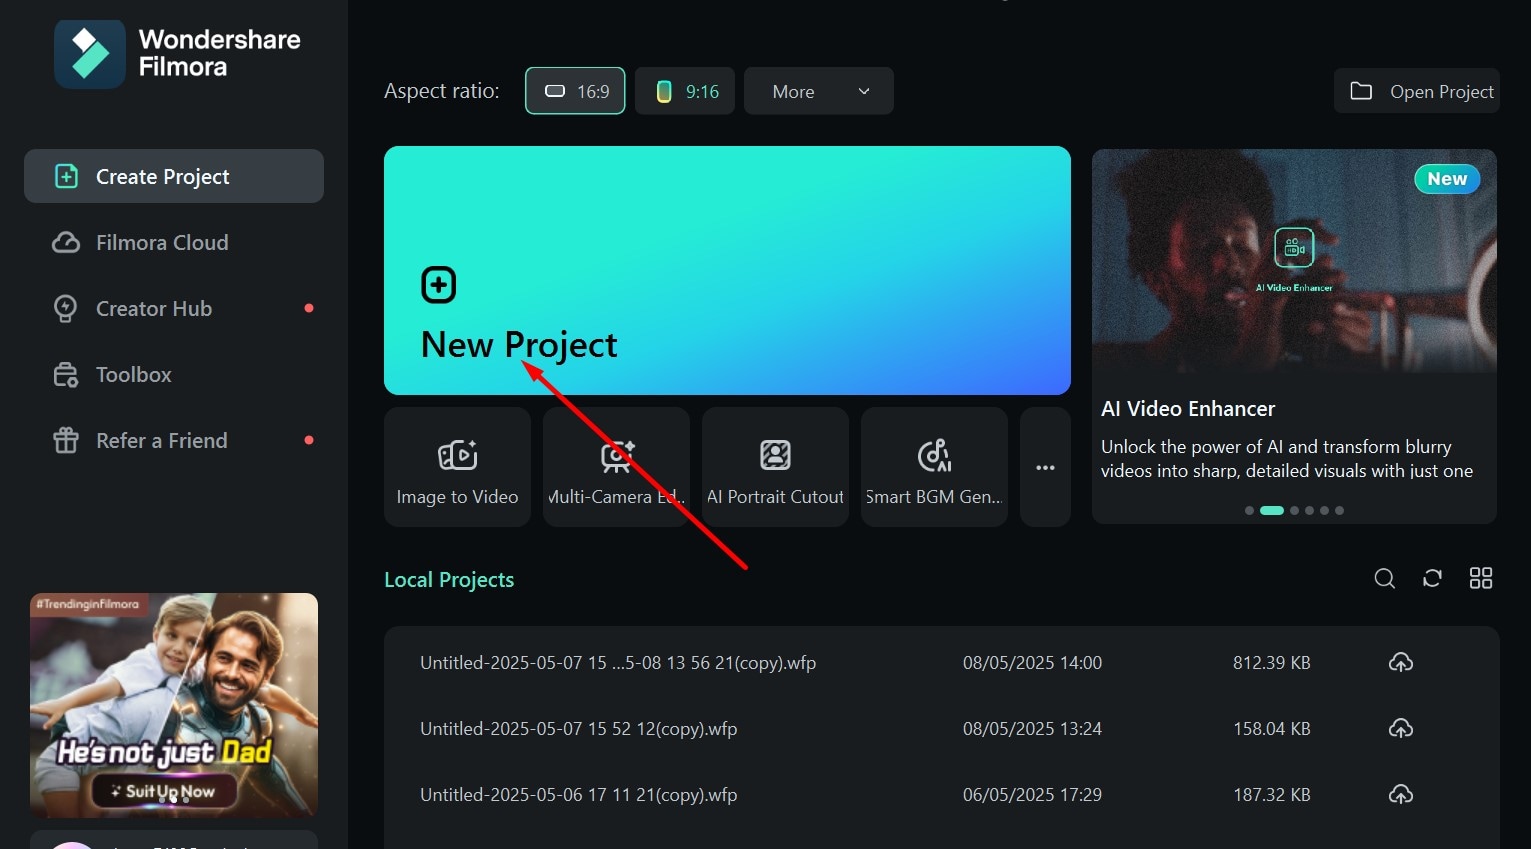
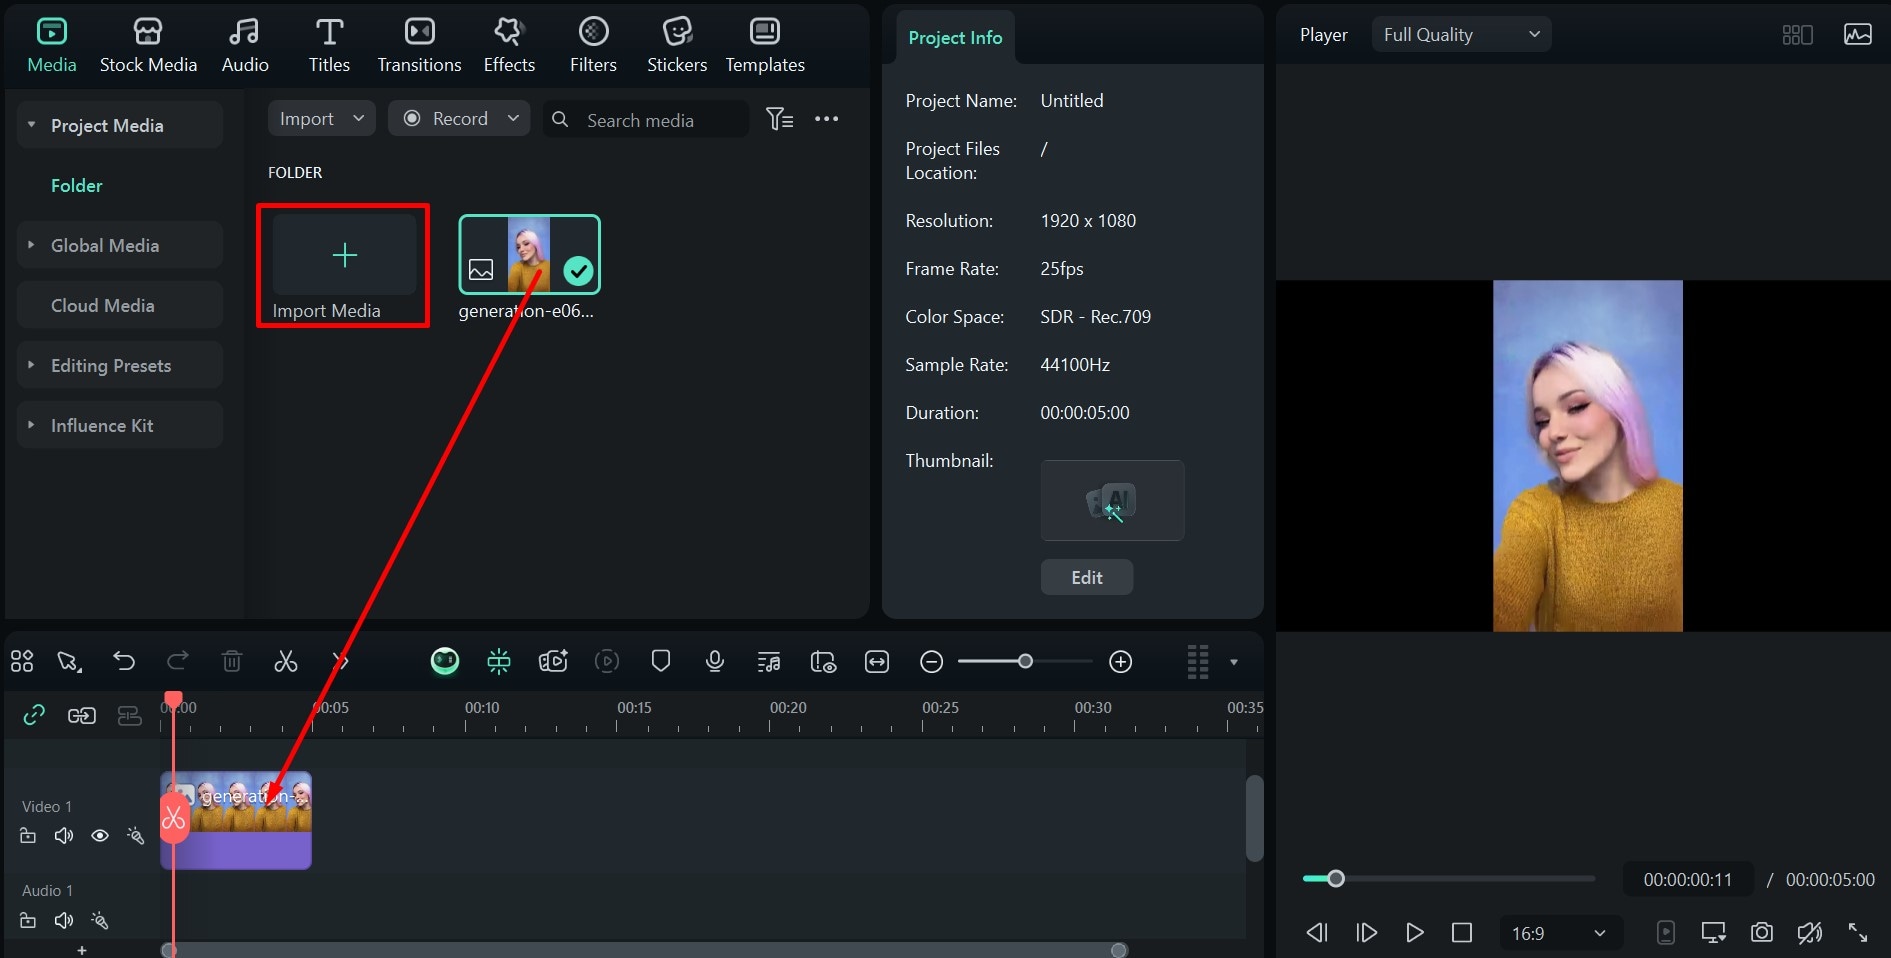
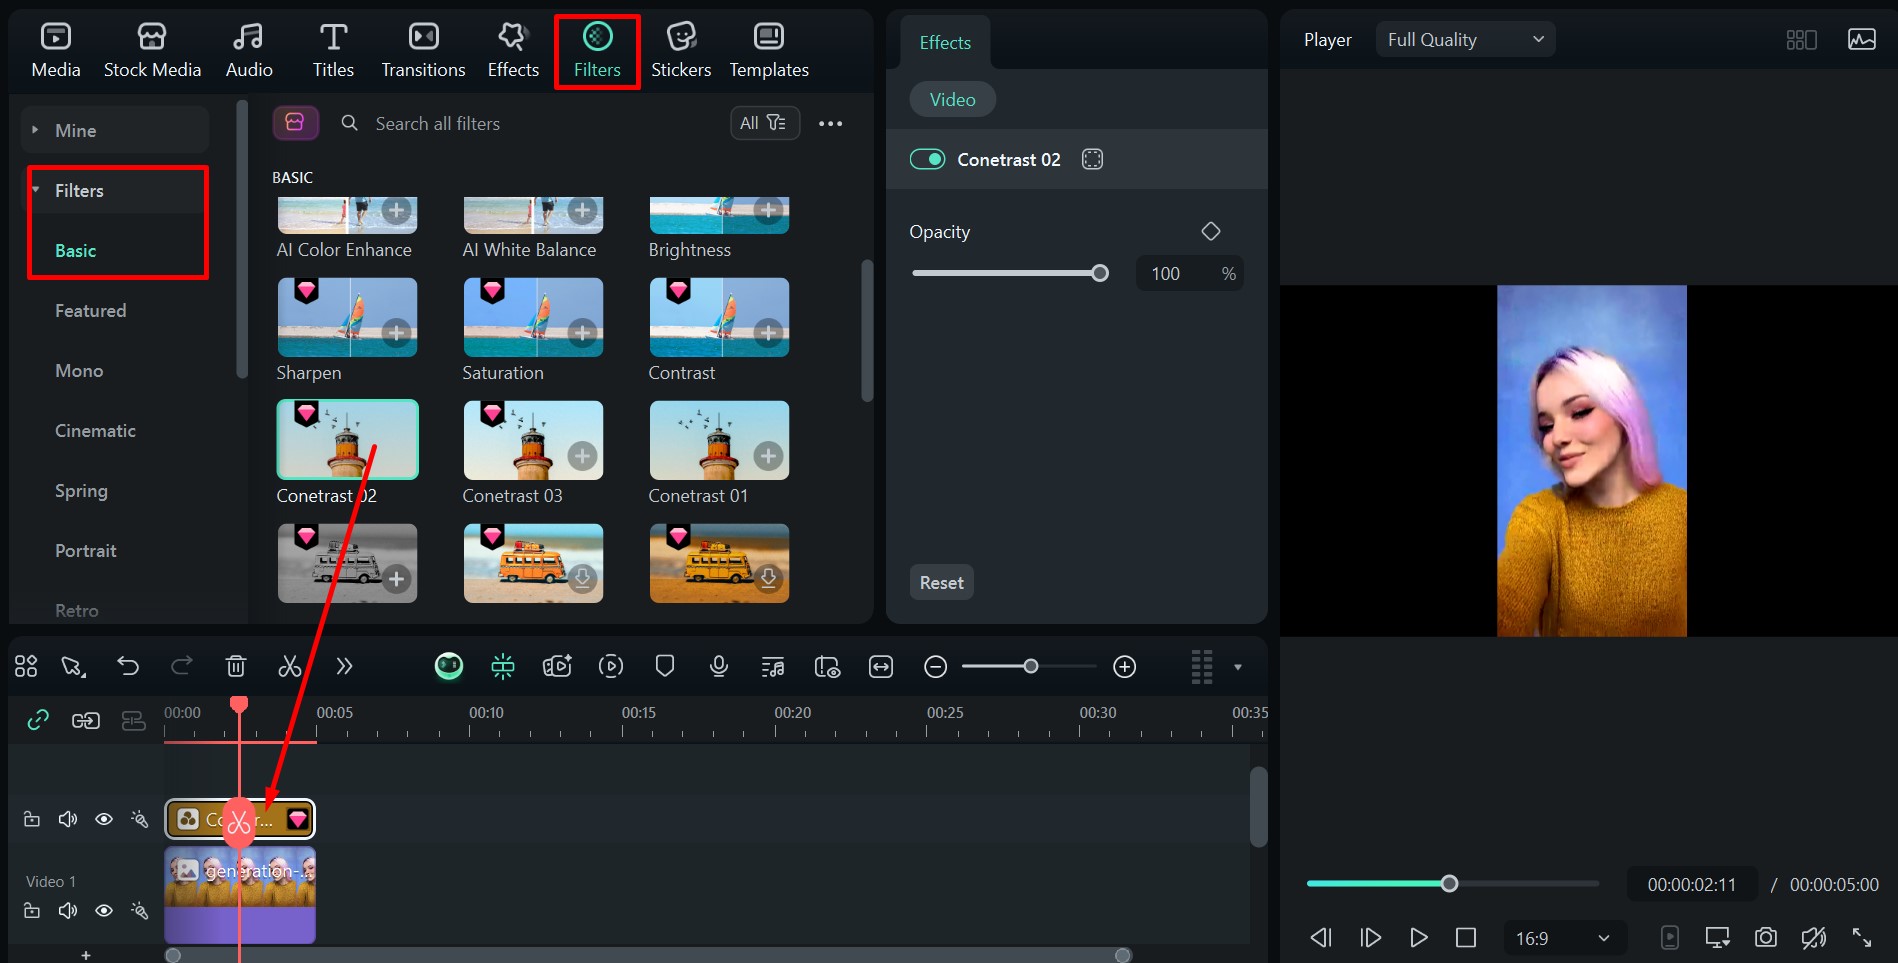
Step 1: Start the app, click on New Project, then Import Media, and drag the image to the timeline. You can now go to the Filters tab, choose the option you like, and place it above the image in the timeline.
Step 2: Go to Stickers, choose a category, and drag the one that you like to the timeline. For example, there are plenty of meme-inspired stickers.

Step 3: Click on the Effects icon at the top, go over all the different options, and when you find the right one, place it above the image and any other filters or stickers already on the timeline.
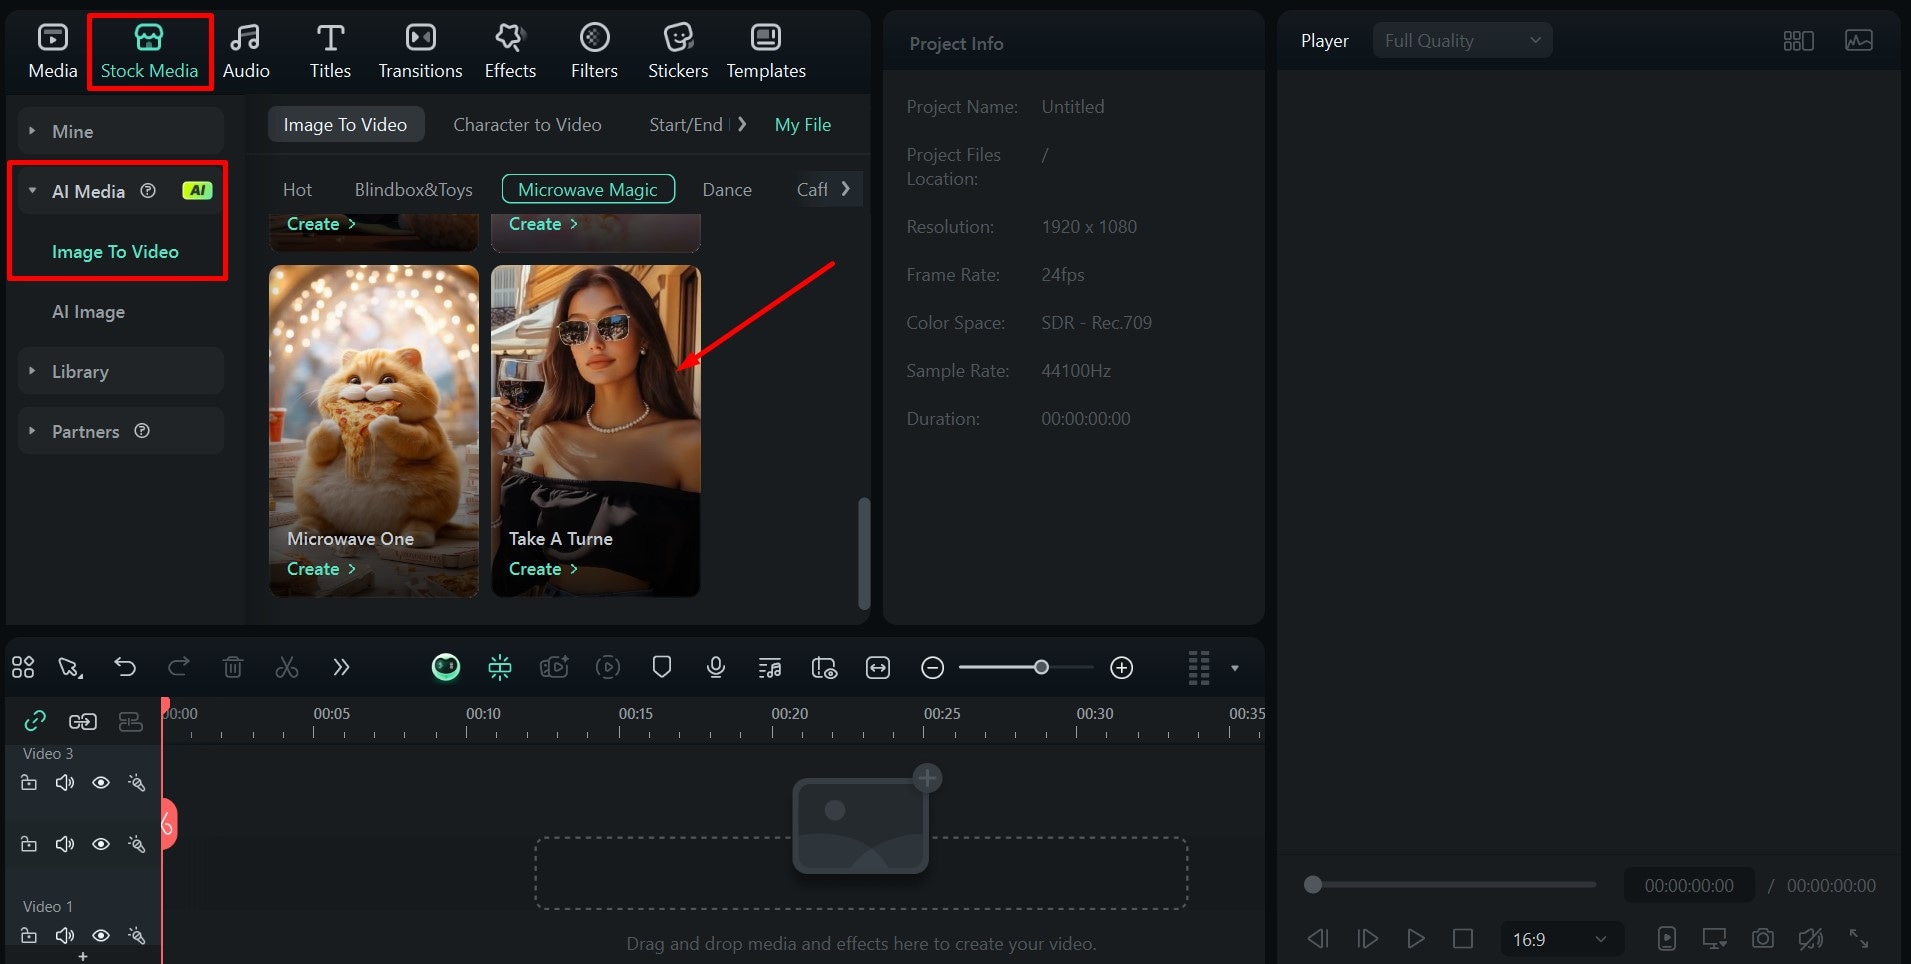
Turn Photos into Videos with AI
You can always take things to a whole new level using the AI Image to Video feature. It takes your image and applies one of the premade templates you choose to it, creating a unique effect. There are transformations, different motions and interactions, dances, romantic gestures, etc.
In this example, we will use a simple rotating animation that turns the subject into a 3D version and takes them for a full 360-degree spin. Here's how it works:
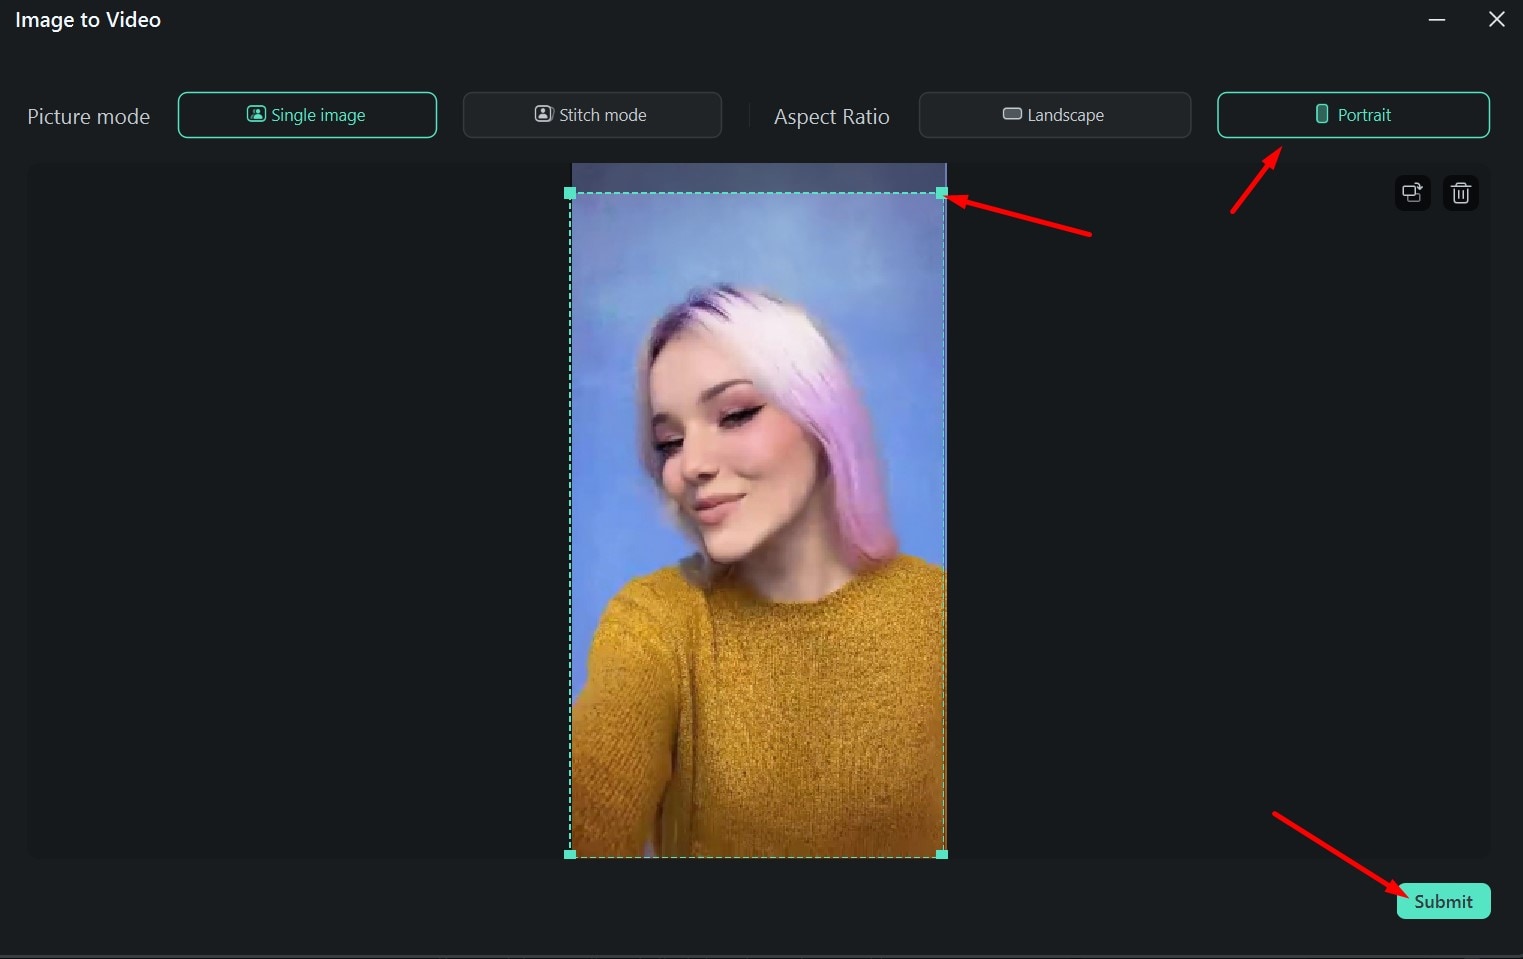
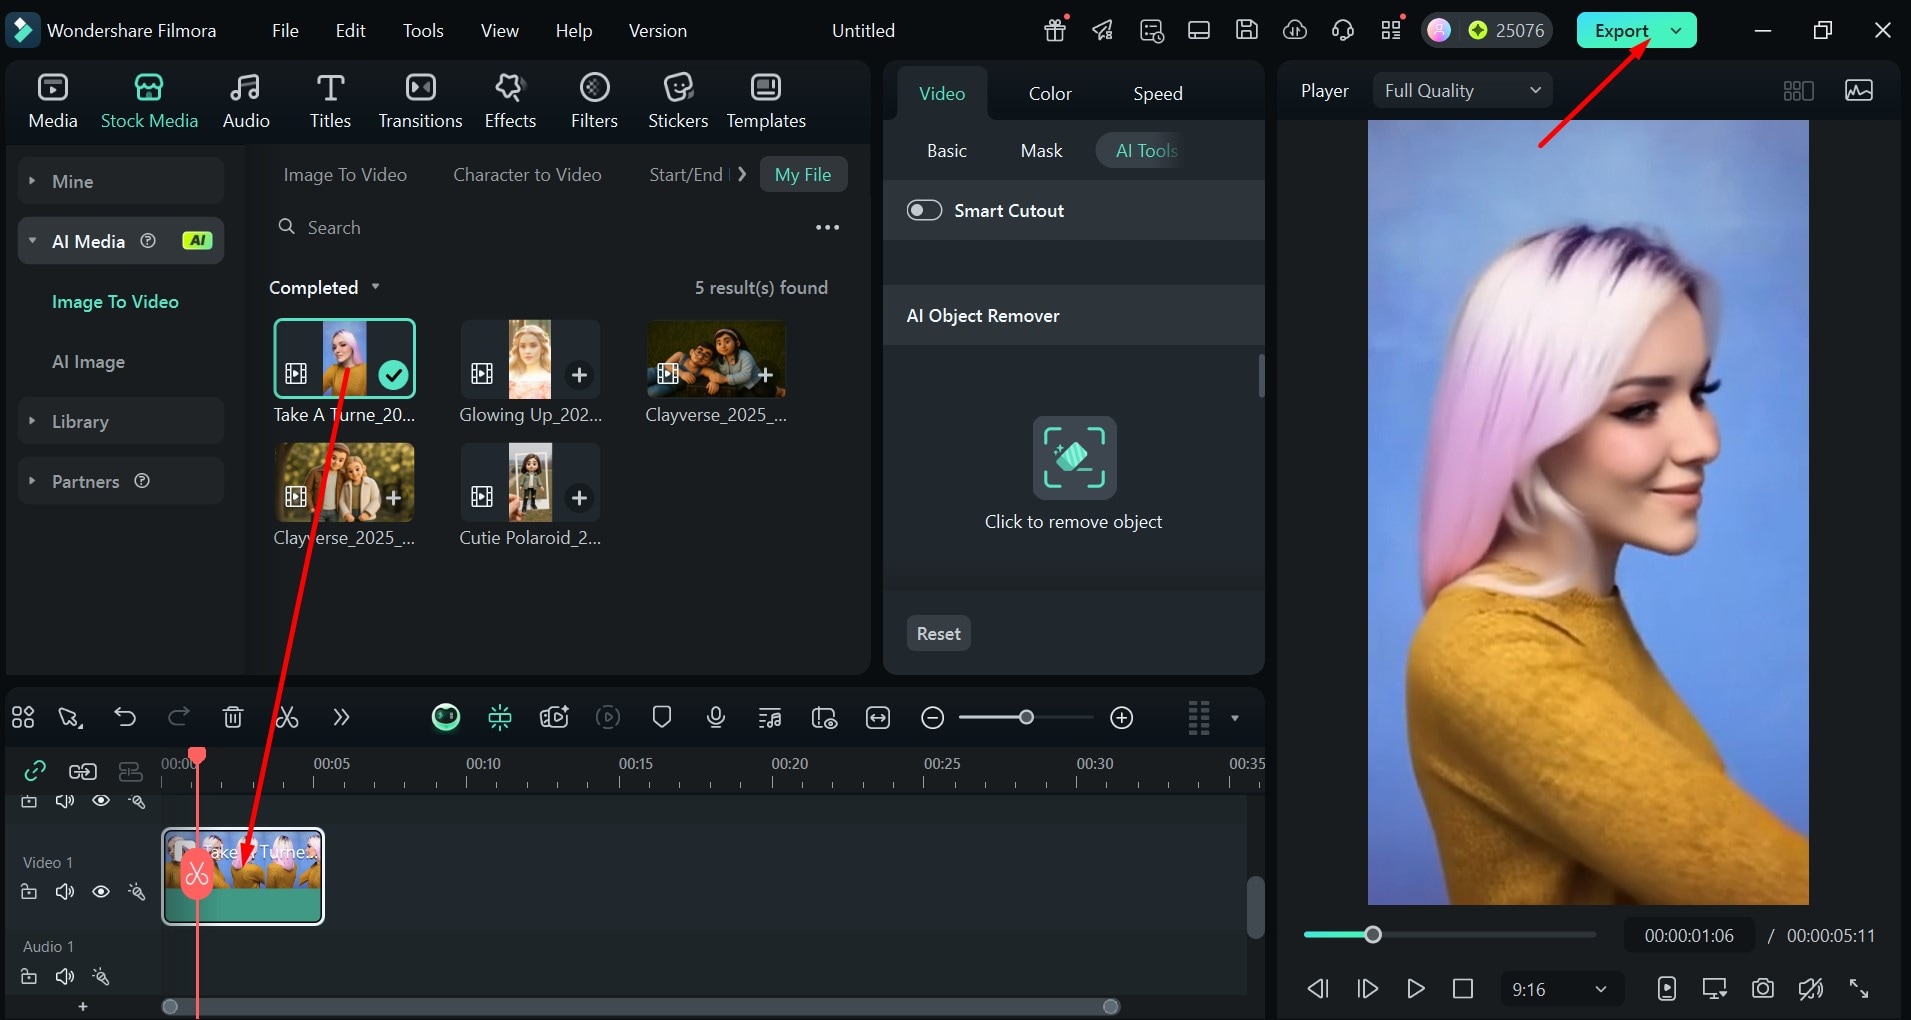
secure download Step 1: Go to Stock Media > AI Media > Image to Video and find a template you like. Here we are using the Take a Turne option from the Microwave Magic category.
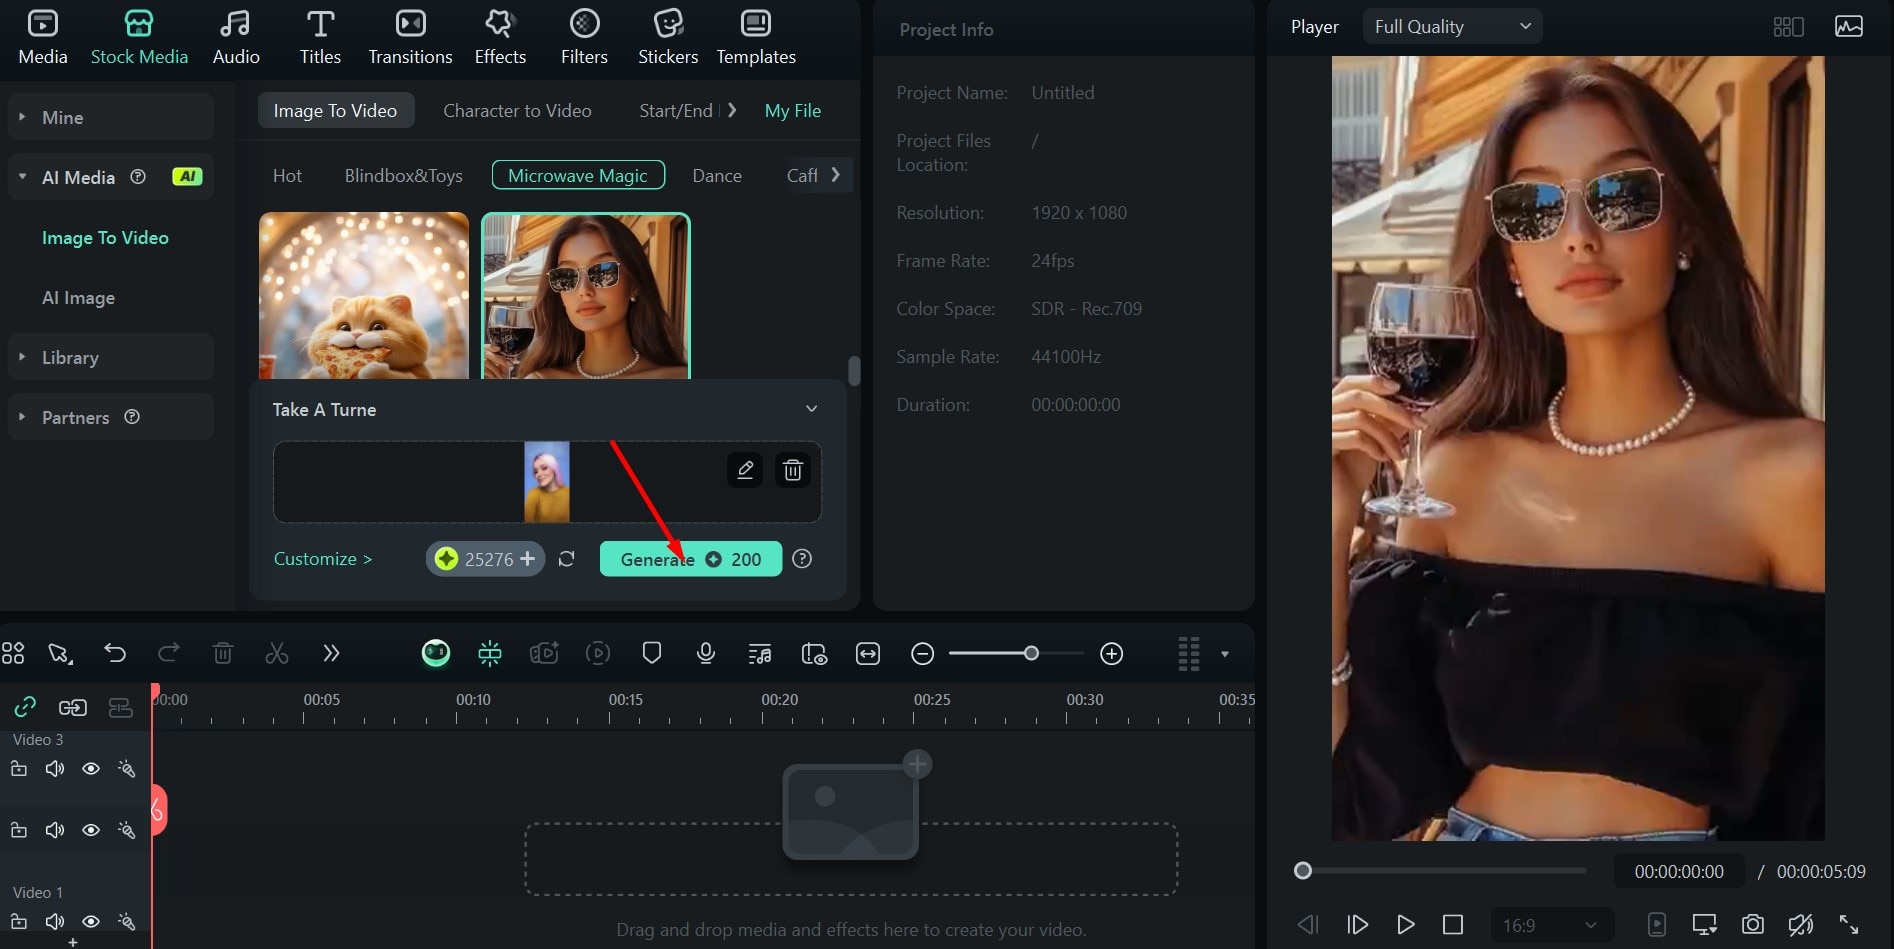
Step 3: Drag the newly created video to the timeline and click on Export to save it to your computer.

If you want to animate your photo after removing the Snapchat filter on your phone, Filmora's mobile app now integrates the game-changing Nano Banana Pro AI model—designed to turn your filter-free photos into dynamic, share-worthy videos with zero hassle! Boasting 36+ exclusive preset templates (from playful "Inflated Head" humor to trendy "Time Travel Comic Strip" narratives) and optional prompt customization, it's the perfect way to elevate your post-filter-removal edits into viral content. Here's how to unlock this creative power:
- After removing the Snapchat filter, launch the Filmora mobile app and navigate to Templates > Trending > Switch to the Nano Banana Pro section.

- Pick a template that matches your vibe — whether you want to add silly charm with "Inflated Head," tell a story with "Time Travel Comic Strip," or keep it subtle with a gentle motion effect. Tap Use, then import your clean, filter-free photo.
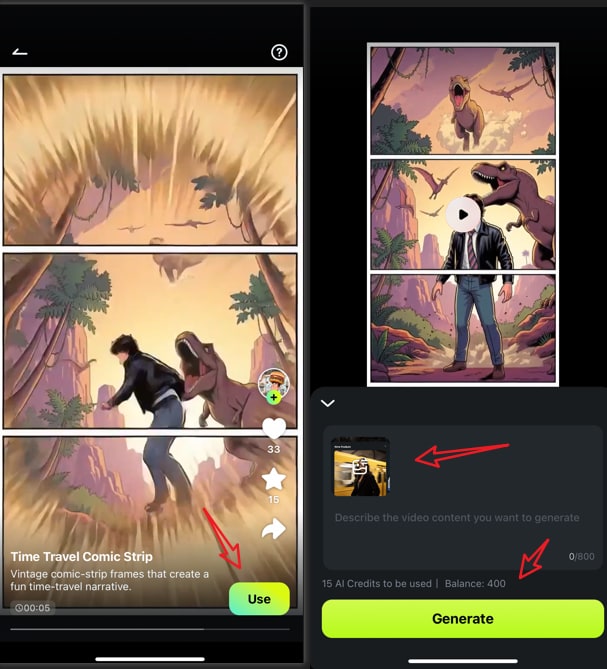
- Customize as you like: Add a short prompt to refine the video (e.g., "Make the subject dance playfully" or "Add vintage comic book borders") or skip it to let AI handle the magic. Tap Generate—Nano Banana Pro will transform your static photo into a dynamic video in minutes.
- Polish further with Filmora's built-in tools: Add background music, captions, or extra filters, then export to share on TikTok, Instagram, or with friends.
Auto Enhance Picture and Video Quality
After you've generated a fun little AI video, you can add the finishing touch by enhancing the video quality. It's a quick and easy way to iron out all the little issues, especially if you've taken the photo in low light or using a lower-quality camera.
The AI Video Enhancer feature in Filmora can truly do wonders, giving your video the final polish before you share it with friends and family, or your audience on social media.
It only takes a couple of quick steps to apply it.
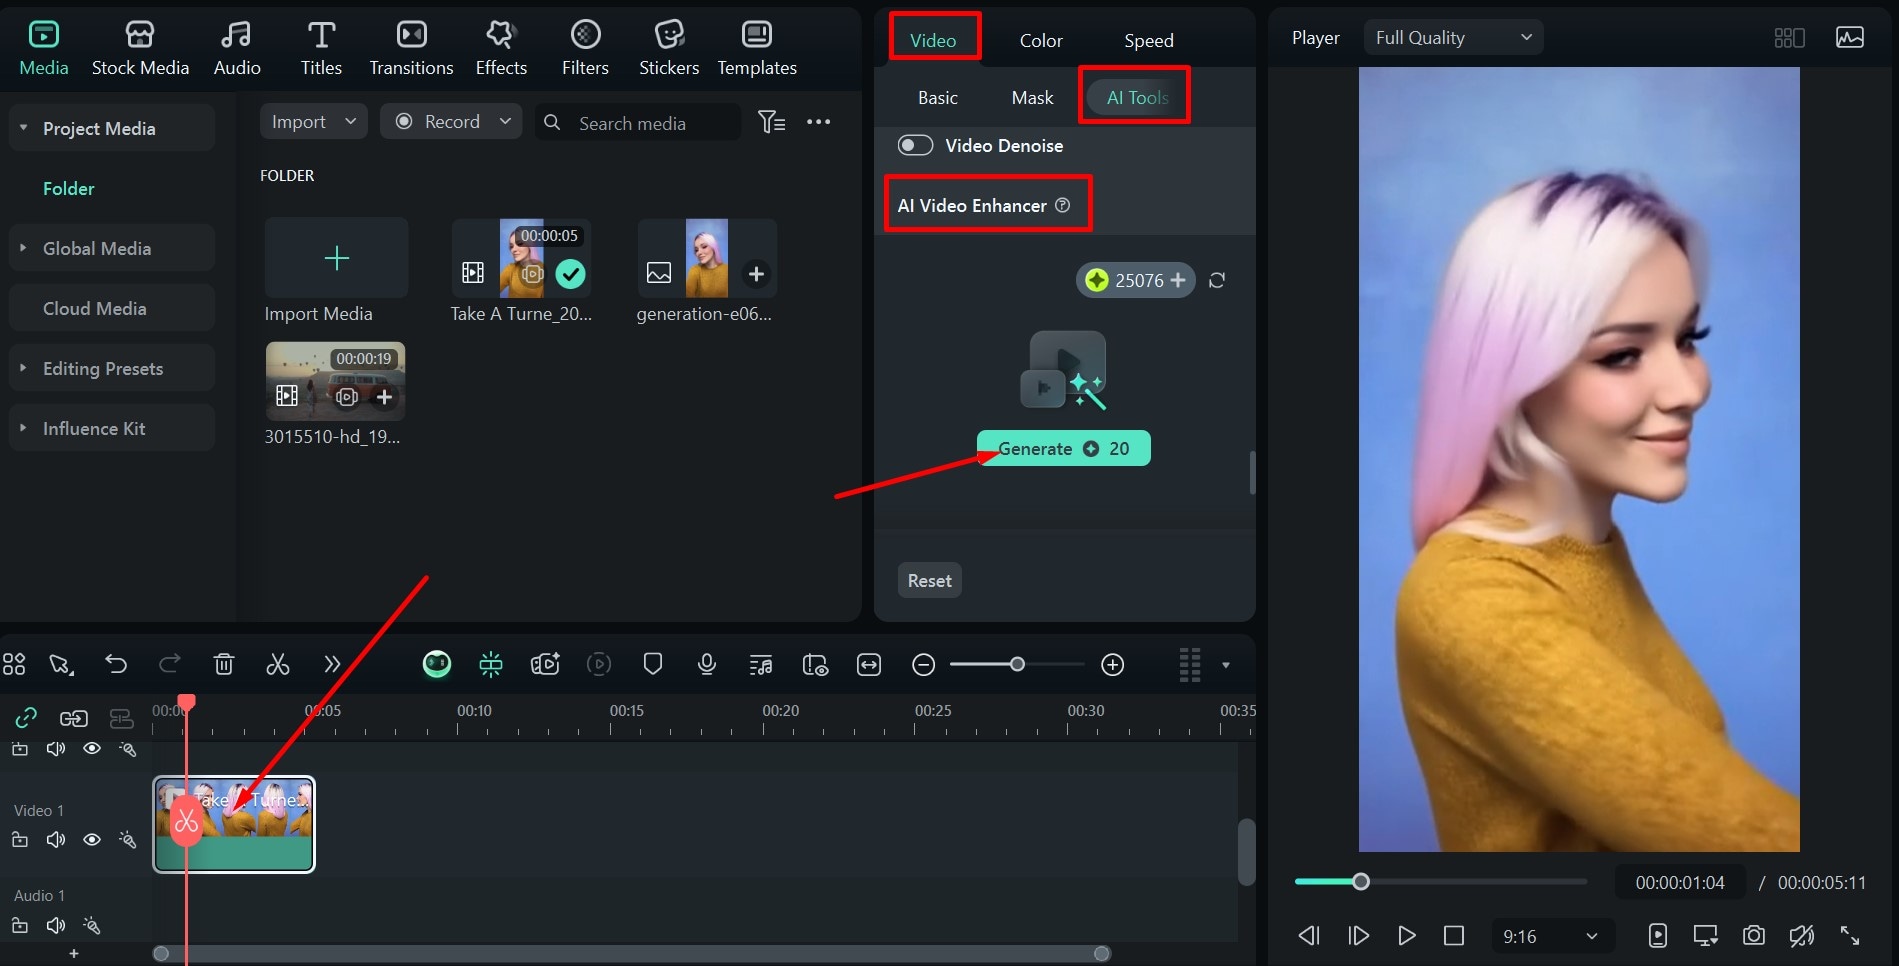
secure download Step 1: Add your video to the timeline. If you are using the previously generated video, it should already be there, so just click on it.
Step 2: Go to Video > AI Tools and scroll down to find the AI Video Enhancer, then click Generate.
Conclusion
You may think it is difficult to remove Snapchat filters and stickers from photos before, but in this article, we have picked an easy and free solution that can help you completely remove Snapchat filters.
If you also want to edit your photo further or turn images into viral shorts, you can try Filmora.
secure download 