- Vegas Pro
How to Create Split Screen Video in Vegas Pro
Jul 14, 2025• Proven solutions
Put two video side by side on the same frame or place multiple videos one same screen will give people an intuitive feeling when you are comparing those videos together. Many professionals love to do this activity and it definitely provides an intuitive feeling about video editing. If you also want to try the same trick then it is good to use professional video editing software and Sony (Magix) Vegas Pro is one of the best tools in this list. The article below contains complete guidelines about how to split videos and then use track motion tool or Event Crop/Pan tool to check their performance.
Vegas Pro can be used on Window environment only and its high price range also makes it difficult to access for common users. Thus if you are searching for easy to use and less costly video editing tool then Wondershare Filmora is one of the best option. This software works on Windows as well as Mac devices and the efficient user interface can be used by beginners too with ease.
Video tutorial on how to create a split screen video with Filmora:
How to create split screen video in Vegas Pro
The task is described in two different sections for ease of understating; follow the steps given below and soon you will be able to create attractive videos.
- Section 1: Create Unique Videos with the help of Event Crop/Pan Tool
- Section 2: Create a Split Screen with the help of Track Motion Tool
Section 1: Create Unique Videos with the help of Event Crop/Pan Tool
Step 1: Import Videos
First of all you need to add your desired video clips on software timeline; they must be dragged to separate tracks.

You might also interested in: How to make PIP video using Sony Vegas Pro
Step 2: Resize Screen
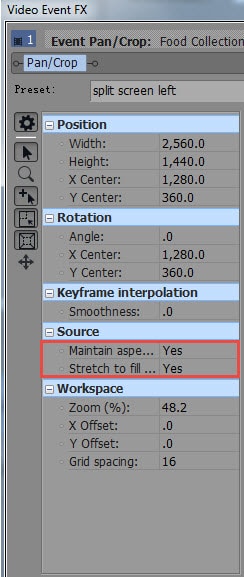
1. Next task is to perform screen resizing, for this simply hit the icon for Event Crop/Pan Tool that is available on first video clip; it will directly open a pop up window. When you make effort to resize your video, ensure that aspect ratio is well maintained and it must be stretched properly so that frame over source tab can be completely covered.

2. Now multiply its width by factor 2; for example in case if you are working on 1280 then use factor 1280*2 in order to get 2560 width. It will help to reduce the overall width of first half of video clip and as a result you can easily present both videos on same screen without losing any information. Once you have done these settings then soon your resized first clip will start floating over the second clip.
3. Drag this clip to the left direction.

4. Now save this editing by hitting option for Split Screen Left and then hit close.

5. Next task is to use Event Crop/Pan Tool icon for your second video clip available on screen. Simply choose the option for splitting screen left using present menu and the same effect will start appearing on first video clip.
6. This is time to drag this video clip to right direction and finally hit close.

Step 3: Preview
In order to check your editing results before saving final details you can make use of preview window. When you wish to initiate the preview then hold your cursor on video clips and then use space bar for direct preview window opening.
Video tutorial on how to make video side by side using Pan/Crop Tool
Section 2: Create a Split Screen with the help of Track Motion Tool
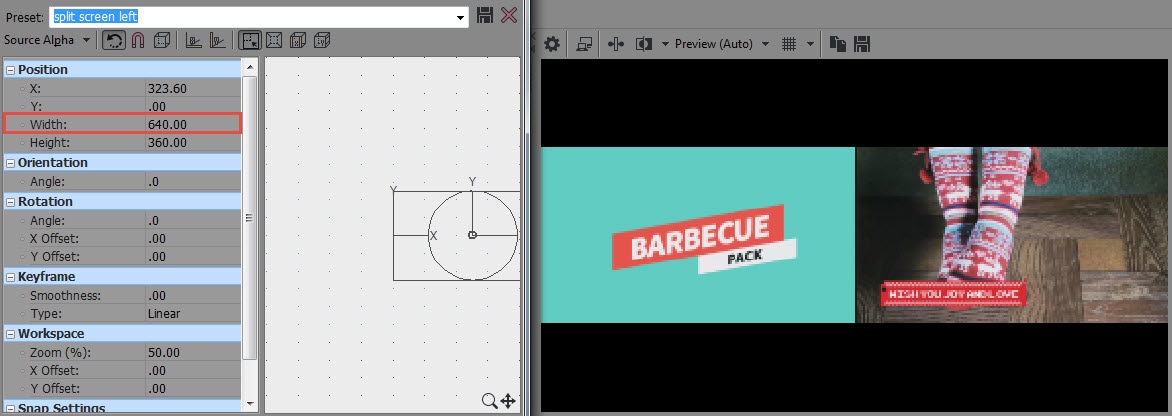
Most of the steps are completely same as that of Event Crop/Pan tool but the only change that you need to observe is that here width is divided by 2 instead of doing multiplication as above method. For example if you are working on 1280 width then for resizing it you have to enter 640 and it will be easily adjusted on screen.


