

 TL;DR:
To add text in Vegas Pro, drag a preset from the Media Generators tab to a new timeline track above your video, which provides professional manual keyframing control, whereas Wondershare Filmora serves as a faster alternative for beginners using one-click animation templates.
● The text editing workflow remains identical across all older Sony Vegas builds (versions 13, 14, and 15) and the newest Magix Vegas Pro releases.
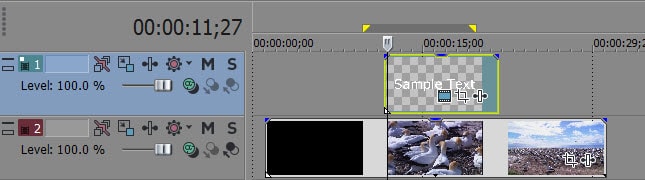
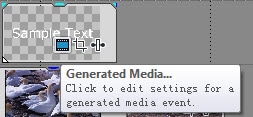
● If your text fails to appear on screen in Vegas Pro, you must verify that its track is physically positioned above the main video track and that the Generated Media transparency settings are not hiding it.
● For projects requiring a large amount of timed text, use Vegas Pro's dedicated Subtitles media generator instead of the basic Text and Title tool to manage multiple subtitle blocks efficiently.
Ask AI for a summary
 ChatGPT
 Perplexity
 Gemini
 Claude
 Grok
Grok
Adding text in Vegas Pro (formerly Sony Vegas) is essential for storytelling. Whether you're creating a YouTube intro or adding subtitles, this guide shows you the exact steps to insert and animate text in Vegas Pro. If you find the Sony Vegas interface too complex, we'll also show you a faster way using Filmora.
How to Add and Animate Text in Sony Vegas & Vegas Pro: A Complete Guide
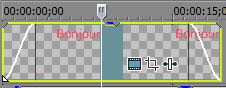
You will be glad to know that Sony Vegas comes with advanced built in type Media Generators tab that helps to make easy selections for text/subtitles/titles, patterns, credit rolls, solid colors etc. as per need of project file. This tab is situated over software timeline and you need to follow these steps to make easy text adjustments:


- Scaling: Controls the zoom effect on text.
- Location: Move the text box to any area on your video.
- Tracking: Adjust spacing between letters.
Complete Tutorial: How to Add & Animate Text in Sony Vegas and Magix Vegas Pro
If you are looking for a simplified solution with various text inclusion options, you can use Wondershare Filmora. This platform provides a clear idea of how to add text in this Sony Vegas alternative using their computer and smartphone, likewise.
Filmora vs. Vegas Pro: Why Filmora is Easier for Text & Animation
While Vegas Pro is a powerful, professional tool, many users struggle with its steep learning curve, especially when trying to create stylish text and complex animations. Filmora solves this with a focus on speed and ease-of-use:
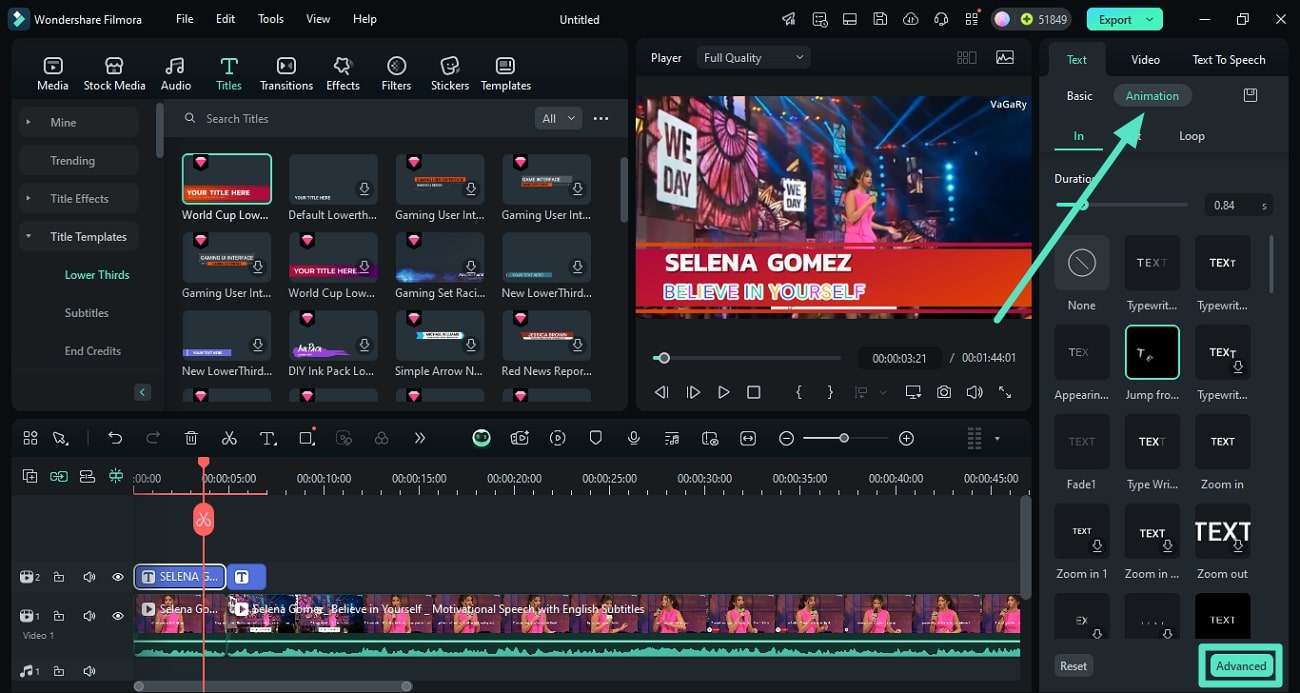
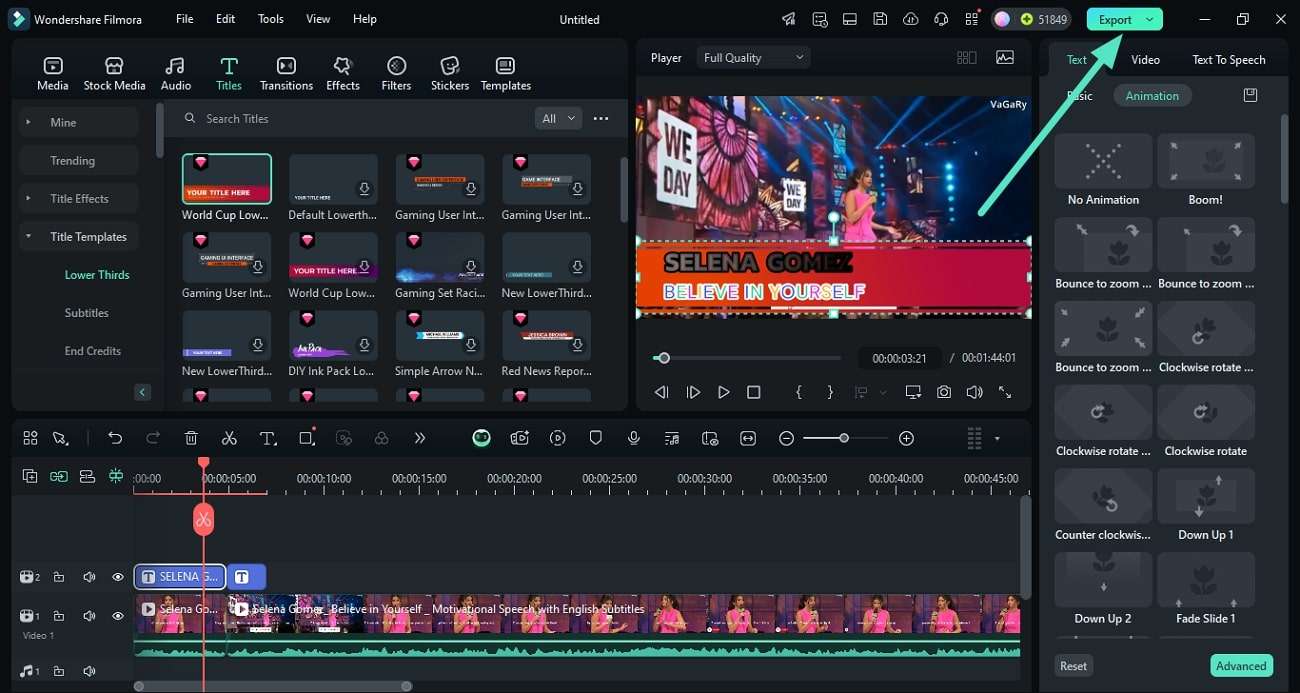
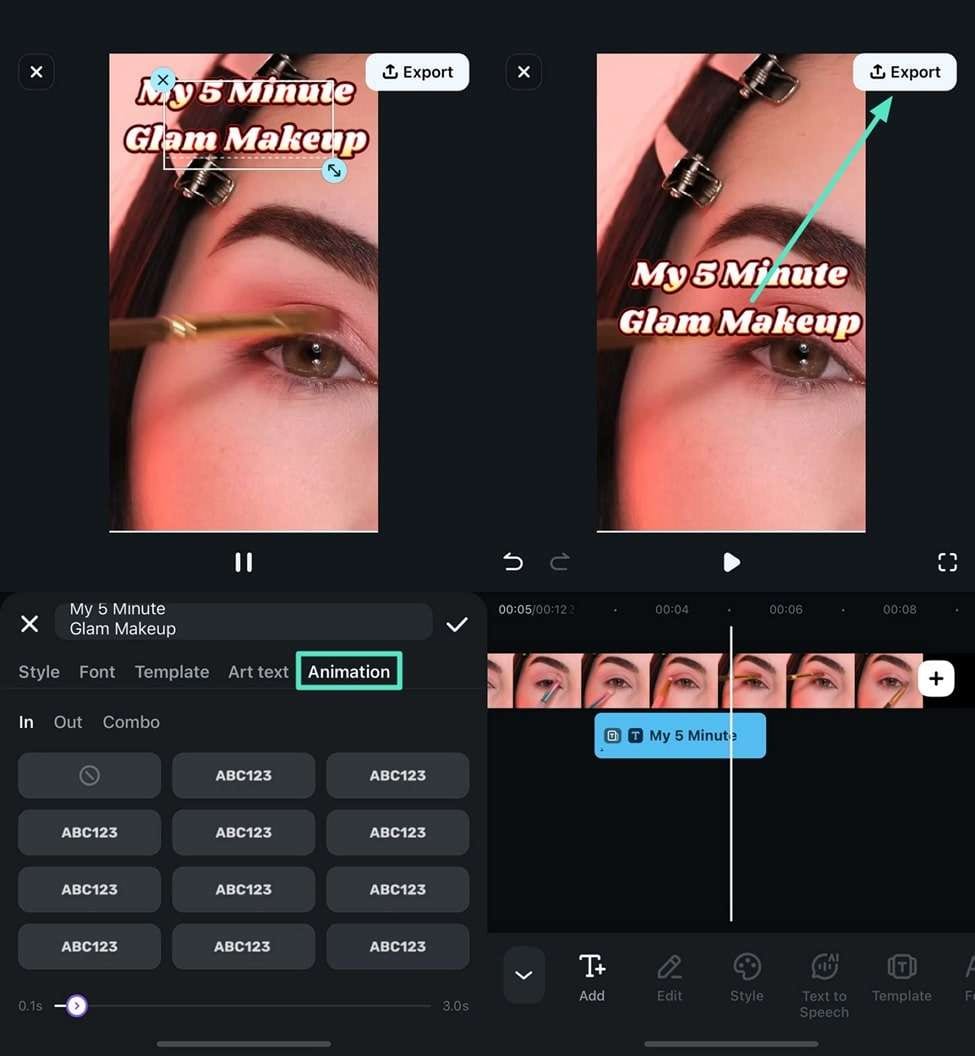
- Animation: In Vegas Pro, custom animations require manual keyframing. Filmora provides hundreds of preset text animations (like bounces, fades, and typewriter effects) that you can apply instantly, saving hours of work.
- Templates: Vegas Pro text is often built from basic generators. Filmora offers themed text templates (e.g., gaming, travel, social media) that include pre-set colors, fonts, and motion, allowing for immediate, professional results.
- User Interface: Vegas Pro's Text Generator panel can be overwhelming. Filmora places all essential text controls and templates in a clean, intuitive interface, making it faster to find and apply the exact look you need.
| Editing Tool | Ease of Use | Text Animations | Advanced Presets | Best For |
| Vegas Pro (Sony Vegas) | Steep Curve | Manual Keyframing | Pro Editors | |
| Wondershare Filmora | Intuitive/Simple | One-Click Motion | Fast Creation |
Filmora for Desktop
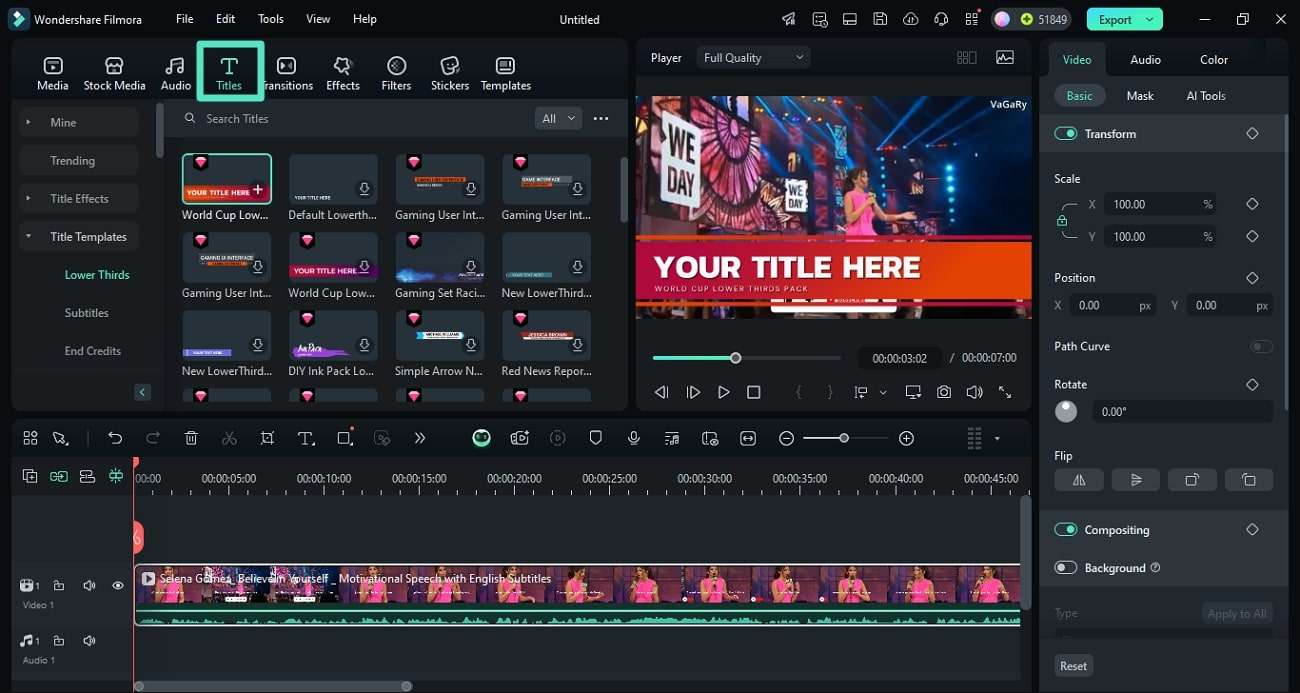
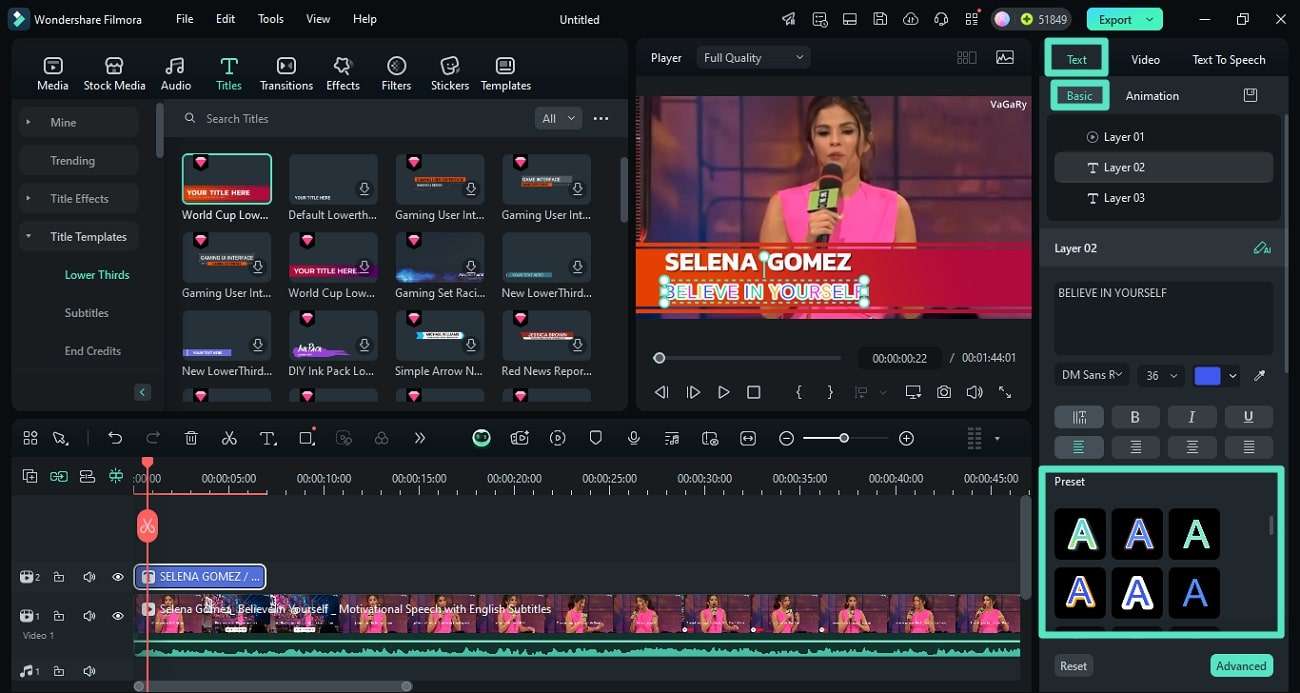
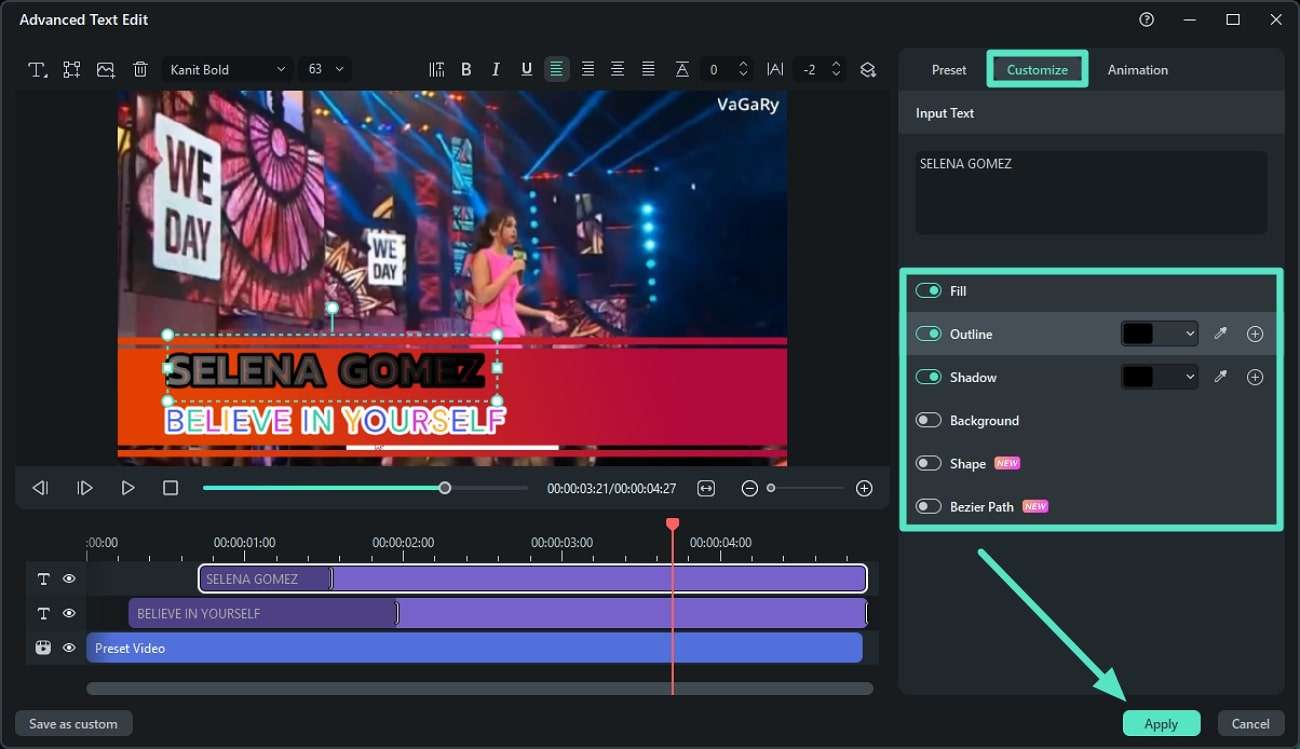
This all-in-one multimedia editor allows users to make their content understandable by adding text and titles according to their preferences. Users get various title templates to select from according to their video type and customize them accordingly. It allows you to adjust different attributes of the text, including size, font, color, and more. Moreover, users also get the ability to add compelling animations to their added text titles.
The incredible tool also provides a vast library of title effects to give the text a more dynamic effect. To learn how to add text in the Sony Vegas alternative, read the step-by-step guide provided next:
Filmora App For Text
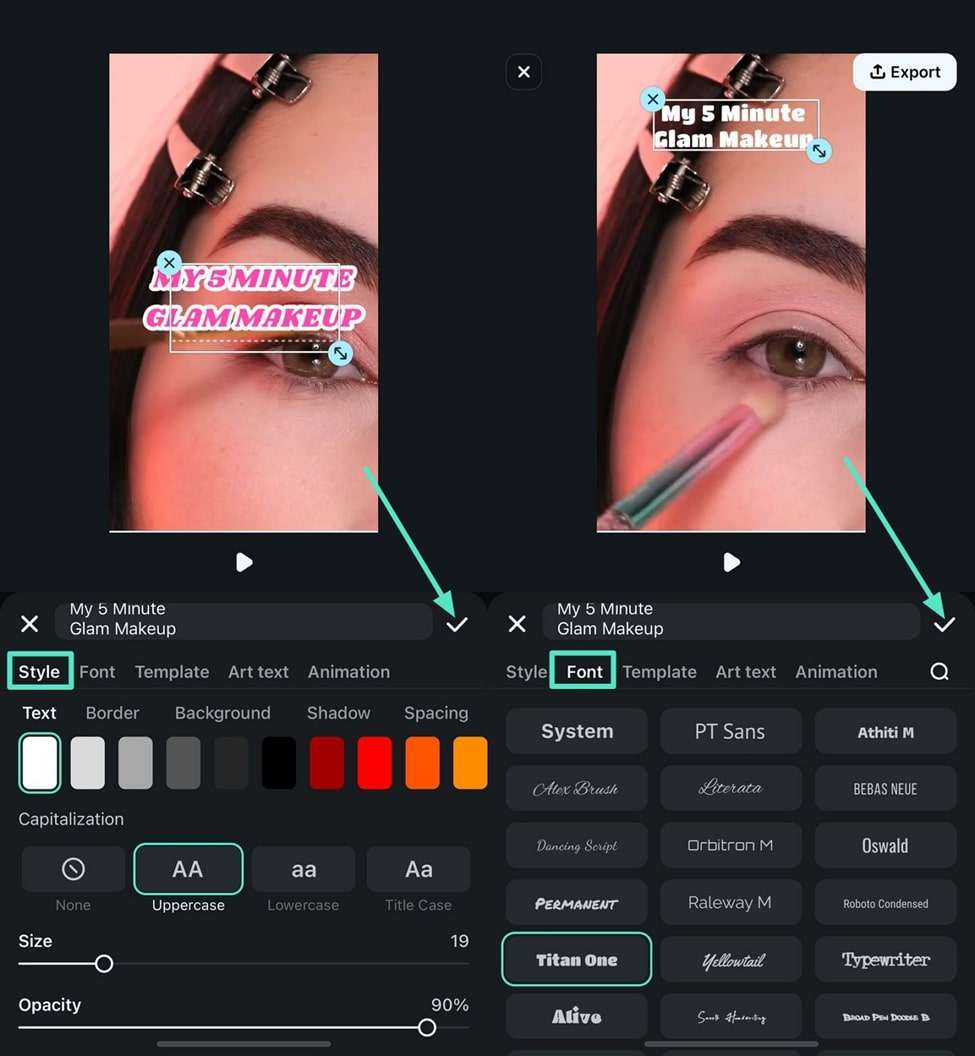
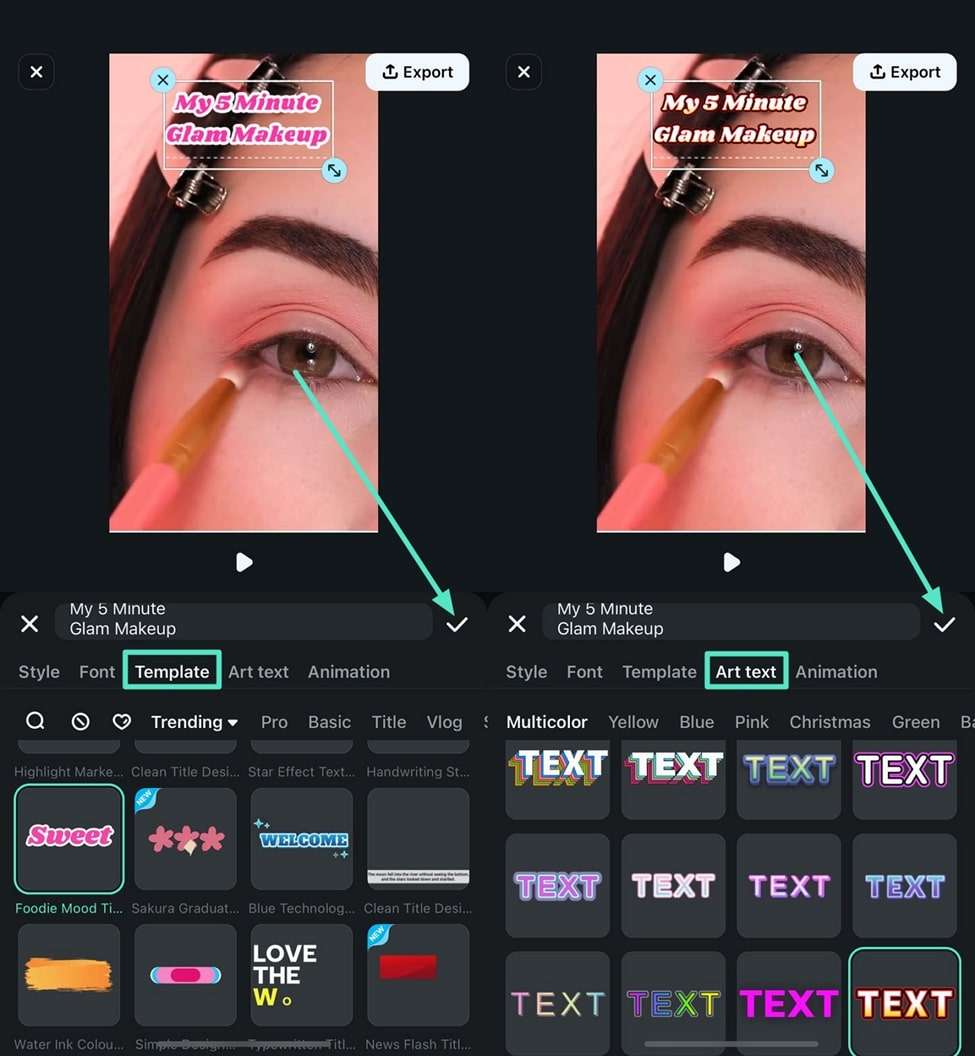
If you are on the go and want to quickly add a title to your video before posting it on social apps, you can use the Filmora App [iOS/Android]. Users get various text settings to make the content look more appealing with text.
You can add animations and text art as per the topic of your video. Moreover, it helps adjust the position and opacity of the added text according to your preferences. Provided below is a quick guide on how to add text in Sony Vegas alternative app:
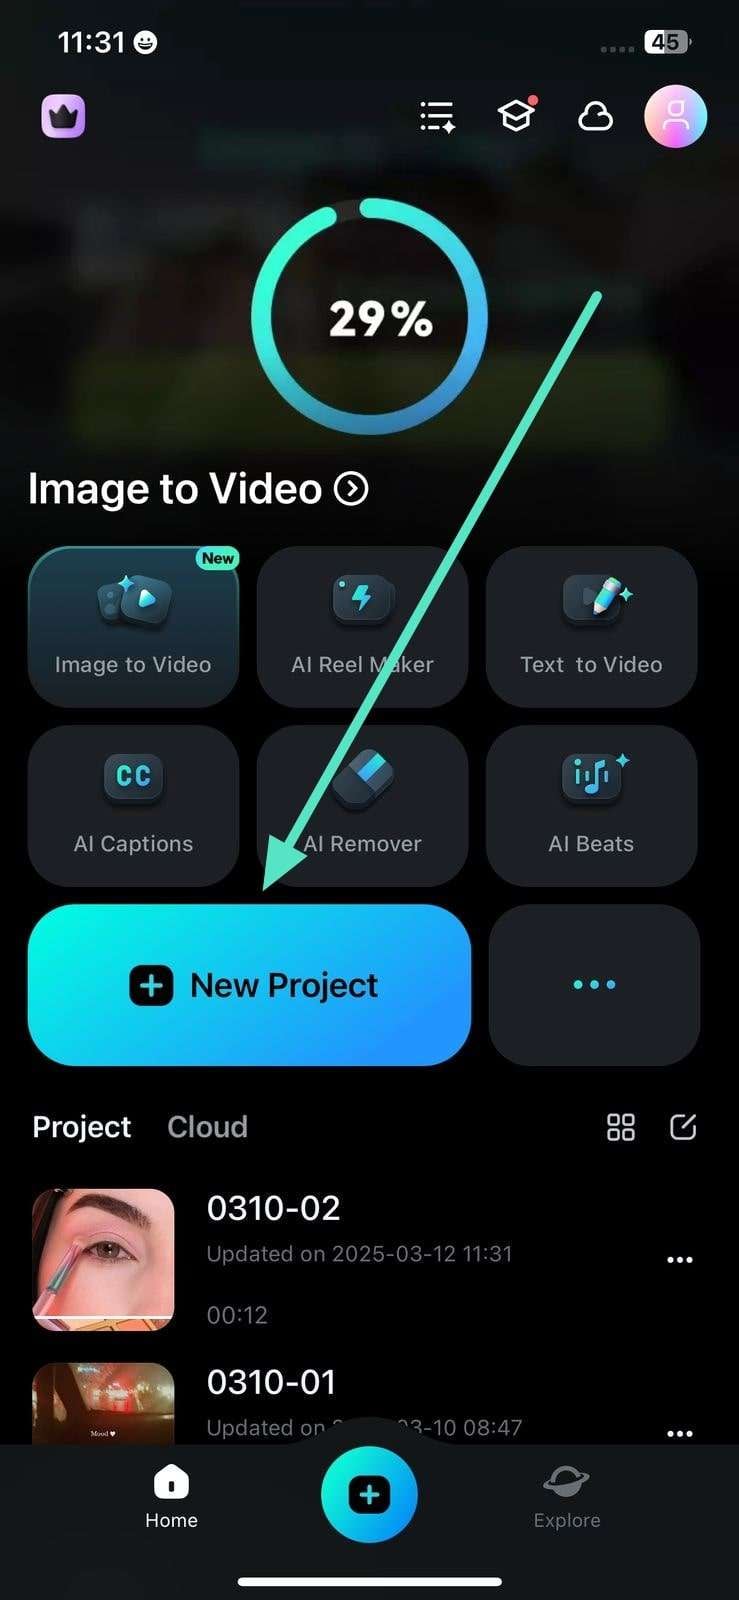

Filmora for Mobile Filmora for Mobile Filmora for Mobile Filmora for Mobile Filmora for Mobile
Edit Videos on Your Mobile Phone with 1-Click!
- • Powerful Brand New AI Features.
- • User-friendly video editing for beginners.
- • Full-featured video editing for professional.


Conclusion
Adding text in Vegas Pro offers professional-grade control for editors who don't mind a manual workflow and keyframing. However, if you want to save time and access hundreds of stylish animated text templates, subtitles, and lower thirds without the steep learning curve, Wondershare Filmora is the superior alternative.
Whether you are a beginner or a pro looking for efficiency, Filmora simplifies the process of adding text to video on Windows, Mac, and Mobile, allowing you to focus more on your creativity and less on technical hurdles.
FAQ
-
How to add text in Sony Vegas 13/14/15?
The process is identical: Navigate to Media Generators > Titles & Text. Although older versions are branded as Sony Vegas, the workflow remains the same as the newer Magix Vegas Pro versions. -
Does this guide work for all versions of Vegas Pro?
Yes, the core steps for adding text and titles are largely the same across different versions of Vegas Pro, including Vegas Pro 13, 14, 15, and the latest versions. The user interface might have slight variations, but the overall process remains consistent. -
Why is the text I added not showing up in my Vegas Pro video?
This is a common issue. First, make sure the text track is placed on a track above your main video track in the timeline. The higher a track is, the more likely its content is to appear on top. Also, double-check the "Generated Media" properties window to ensure the text is not transparent or set to a very small size. -
How can I add subtitles to my video in Vegas Pro?
Adding subtitles in Vegas Pro follows a similar process to adding regular text. You can use the "Text and Title" media generator, but for a large number of subtitles, using a dedicated "Subtitles" media generator is more efficient. This feature allows you to manage multiple subtitle blocks and their timings easily within the timeline. -
Is it difficult to add animated text in Vegas Pro?
Vegas Pro offers various built-in presets like "Action Flip," "Bounce," and "Float" for quick animations. For more complex or custom animations, you can use keyframes to control the text's position, size, and rotation over time. If you're looking for a simpler way to add dynamic, professional-looking animations, an alternative like Filmora offers a vast library of templates that are much easier to apply.
