

 TL;DR:
Adding motion blur in VEGAS Pro involves manipulating the global Video Bus Track envelope for native effects or applying third-party plugins for automated pixel-tracking, though macOS users or beginners can utilize Wondershare Filmora as a more streamlined alternative.
● Native VEGAS Pro motion blur requires activating the Video Bus Track and dragging the Motion Blur Amount envelope, which inherently applies the effect across the entire timeline unless you manually add keyframes or use the localized Motion Blur OFX plugin for a single clip.
● Processing advanced action shots with optical-flow-style smoothing requires paid third-party tools like ReelSmart Motion Blur or Boris FX Continuum, which provide superior pixel-tracking but can double or triple final video export render times.
● VEGAS Pro is strictly limited to Windows setups and serves professional editors who prefer manual math rendering styles, whereas Wondershare Filmora operates on macOS and Windows using simplified directional sliders optimal for fast social media edits.
Ask AI for a summary
 ChatGPT
 Perplexity
 Gemini
 Claude
 Grok
Grok
For Windows users, VEGAS Pro has long been one of those familiar names in professional video editing. It gives you timeline editing, color tools, effects, AI features, audio controls, and VEGAS Pro motion blur, too.
That said, motion blur VEGAS Pro settings are not always obvious if you are new to the software. Some blur options live in project settings, some need the Video Bus Track, and plugin-based motion blur works differently again. So, this guide walks through what the effect does, how to add motion blur in VEGAS Pro, when plugins make sense, and why another editor may feel easier if you just want smooth motion without digging through too many panels.
Part 1. Motion Blur in VEGAS Pro: What It Actually Does
Motion blur is one of those effects you notice most when it is missing. A fast pan, zoom, whip transition, running subject, or animated text can look too sharp and jittery without it. Add the right amount of blur, and the movement feels smoother, faster, and closer to how real cameras capture motion.
In VEGAS Pro, motion blur can be used for:
| Use Case | Why It Helps |
| Fast camera pans | Reduces the harsh, choppy look |
| Speed ramps | Makes sudden acceleration feel smoother |
| Gaming edits | Adds energy to quick cuts and flick shots |
| Text animation | Makes moving titles feel less stiff |
| Transitions | Helps clips blend more naturally |
| Action footage | Softens fast movement without fully hiding it |
| Motion graphics | Makes keyframed movement feel more realistic |
|
Show More
Show Less
|
|
VEGAS Pro Motion Blur Pricing & Access
Here's the thing: the native VEGAS Pro motion blur tools are included inside the software, so you do not pay extra for motion blur once you own the app. The catch is that VEGAS Pro itself is paid software. It currently comes in three main tiers: VEGAS Pro, VEGAS Pro Plus, and VEGAS Pro Ultimate. Take a look at the table below to see the differences:
| Plan | Price | Key Features | Best For |
| VEGAS Pro | $17.95 / month | Native motion blur, AI tools, color grading, titling tools, Storyblocks | Core editing and basic motion blur |
| VEGAS Pro Plus | $24.95 / month | Mocha VEGAS, CrumblePop VST, Particle Illusion, Sound Forge | Tracking, audio cleanup, and extra effects |
| VEGAS Pro Ultimate | $39.95 / month | Continuum Plugins, Mocha Pro, CrumblePop SoundApp, Optics | Advanced effects and plugin-heavy editing |
Fortunately, the VEGAS Pro itself offers a 15-day free trial with full access to features, so you can test the motion blur VEGAS Pro workflow before buying. Another important note: VEGAS Pro is a Windows editor. Its current system requirements focus on Microsoft Windows 11, so Mac users will need another option unless they use a Windows setup.
Part 2. How to Add Motion Blur in VEGAS Pro
Adding motion blur in VEGAS Pro can be simple or a little fussy, depending on the method you choose. But generally, it boils down to two main paths: native tools and plugins. Let's look at how both methods work so you can choose the best one for your current project.
How to Add Motion Blur in VEGAS Pro without a Plugin
Best for: Basic motion blur on fast-moving clips, transitions, or timeline sections.
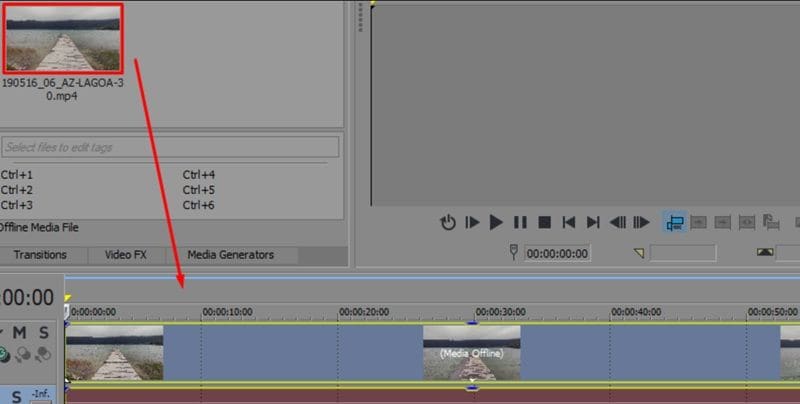
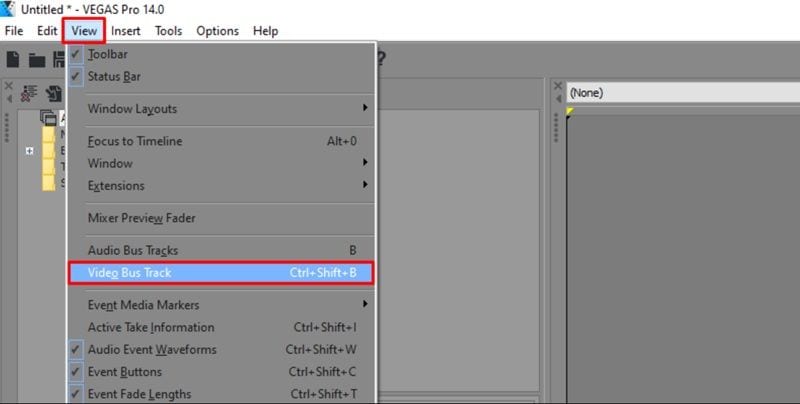
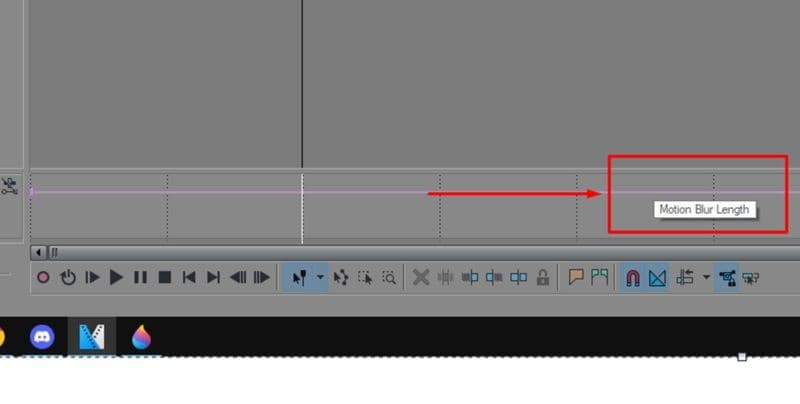
The native VEGAS Pro motion blur workflow mostly works through the Video Bus Track and Motion Blur Amount envelope. Guided by an official tutorial from BorisFX, a company that has now acquired VEGAS Pro, follow the steps below to learn how to add motion blur in VEGAS Pro:


How to Add Motion Blur in VEGAS Pro with a Plugin
The built-in options of VEGAS Pro motion blur feature can work, but plugin-based blur usually gives you more control, especially for action shots, animation, fast edits, and footage that needs optical-flow-style smoothing.
Two common plugin options are ReelSmart Motion Blur (RSMB) or Boris FX Continuum:
| Plugin | Best For | Main Advantage |
| Boris FX Continuum Motion Blur | Professional effects and stylized blur | Strong control and masking options |
| ReelSmart Motion Blur | Natural-looking motion blur | Pixel-tracking blur for smoother motion |
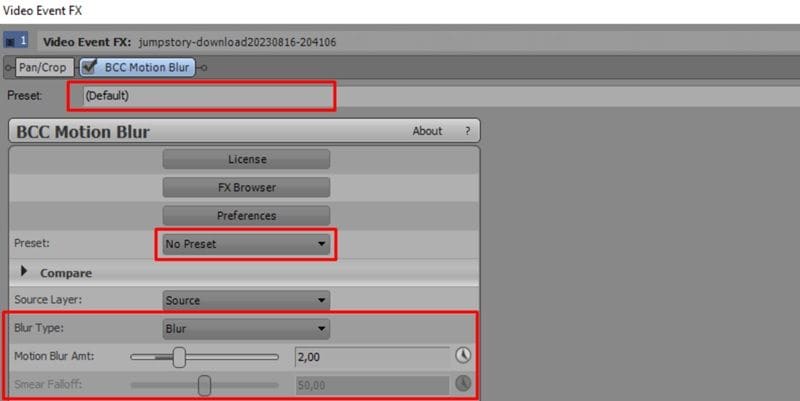
Both of these plugins do a much better job of tracking moving pixels automatically. But for this tutorial, let's try using the Boris FX Continuum, since Boris FX is now connected with VEGAS Pro.

- Blur amount
- Blur type
- Direction
- Focus

Part 3. Pros & Cons: Weighing the Good and the Bad
After trying the native route and looking at plugin methods, you surely now have a better understanding of the motion blur VEGAS Pro workflows. Now, it is easy to see where this software shines and where it starts to stumble. After all, every editing feature has its quirks, so let's look at the honest breakdown of what works and what doesn't.
- Envelope Control Feels Precise: Once you understand the pink envelope line, it becomes easy to fade motion blur in and out across specific parts of the timeline.
- Useful for Hiding Slight Jitter: It will not fix bad footage completely, but it can soften some choppy motion and make movement feel less harsh.
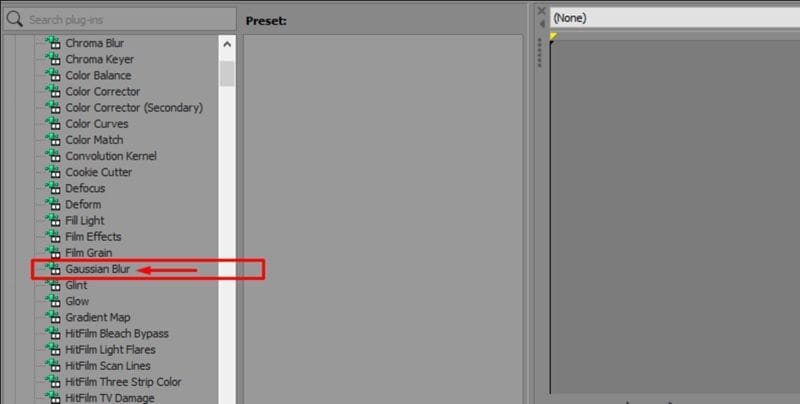
- Multiple Math Styles: Having choices between Gaussian, Box, and Pyramid rendering gives you distinct stylistic options.
- Pro Plugin Integration: The software hooks perfectly into professional toolsets like Boris FX without crashing.
- Plugin Costs Add Up: If you want the best motion blur results, you may need paid plugins on top of the VEGAS Pro license.
- Windows-Only Limits Some Creators: VEGAS Pro is mainly for Windows users, which is a dealbreaker if your editing setup is on Mac.
- Clunky Internal Tracking: The native pixel-tracking filter isn't nearly as smart as modern artificial intelligence tools.
- Heavy Render Times: Adding these effects can easily double or triple the time it takes to export your final file.
Part 4. A Simpler, Faster Alternative to Try Right Now
While messing around with motion blur in VEGAS Pro can yield great results, the entire process can be too much for beginners. It is complicated, heavy on your system resources, and completely unavailable if you happen to use a Mac.
So, if you are tired of fighting with hidden timeline envelopes and crashing previews, there is absolutely no harm in looking at other options that make the entire process effortless. One beginner-friendly option is Wondershare Filmora.
In their latest updates, Filmora's slick creative suite introduced a dedicated, motion blur feature that bypasses all the manual math. It is lightweight, works beautifully across both Windows and Mac, and transforms a frustrating fifteen-minute editing chore into a quick single click.
What Makes Filmora Motion Blur Great
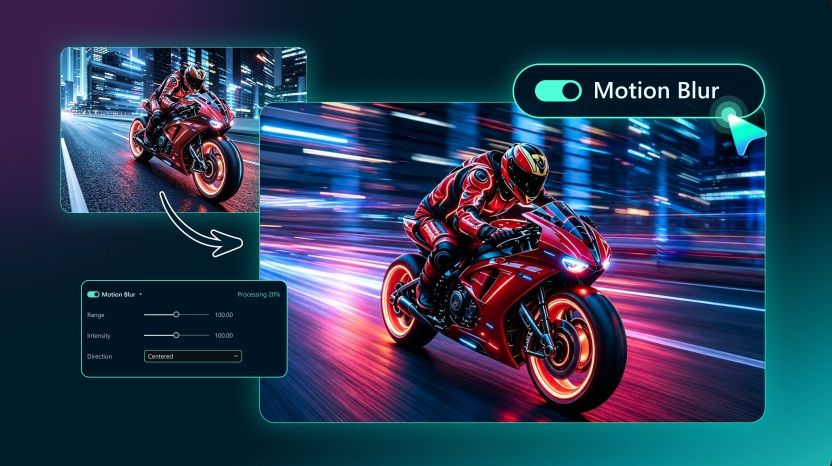
- One-Click Application: You don't have to hunt down hidden bus tracks or use keyboard shortcuts. You simply check a box in the video editing panel, and the software instantly applies the effect to your clip.
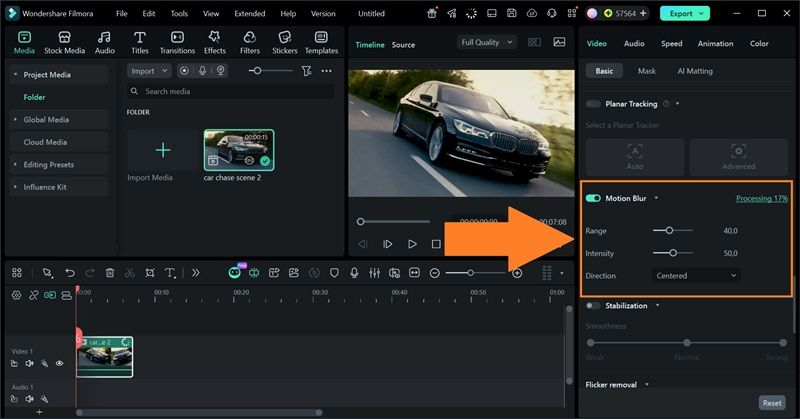
- Control Range and Intensity: You can use sliders to control how far the blur spreads and how strong it looks. This is easier for beginners because you can adjust by feel instead of guessing through hidden timeline controls.
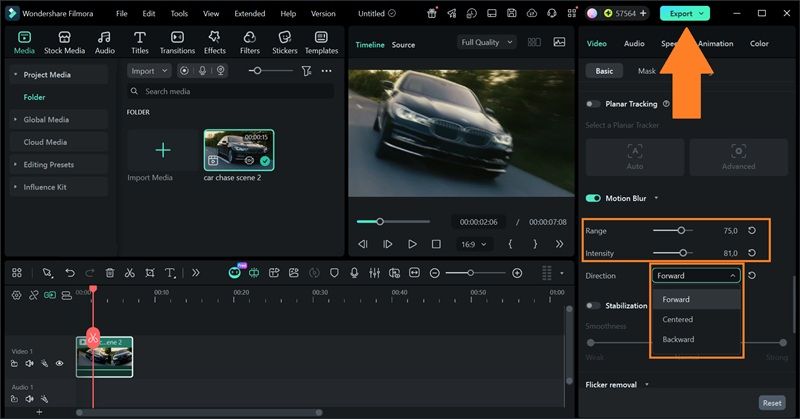
- Control Direction: Filmora lets you tell the engine exactly how to stretch the blur. You can set it to pull forward, drag backward, or stay perfectly centered over the moving objects for total artistic control.
- Real-Time Preview: As you adjust the settings, the preview updates, so you can see the effect before exporting. This saves time because you do not have to render just to check every small change.
- Available on Mac: VEGAS Pro motion blur feature is built around Windows, while Filmora works on both Windows and Mac. That makes it more flexible for creators who edit across different devices.
- Better for Quick Social Videos: If you are editing Reels, Shorts, TikToks, gaming clips, product videos, or fast promo content, Filmora's easier controls can help you get the look faster.
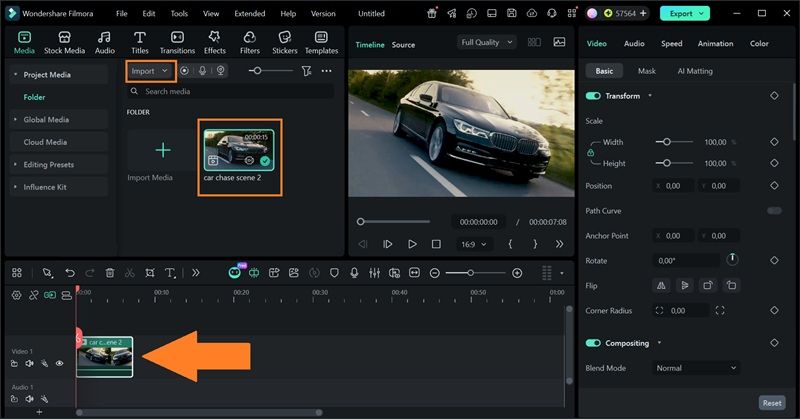
How to Add Motion Blur in Filmora
Quick Comparison: VEGAS Pro vs Filmora for Motion Blur
| Feature | VEGAS Pro | Filmora |
| Native Motion Blur | Yes | Yes |
| Learning Curve | Higher | Lower |
| Plugin Support | Strong | Strong |
| Motion Blur Controls | Envelope/settings based | Slider-based |
| Platform Support | Windows only | Windows, macOS |
| Best For | Pro editors who like manual control | Creators who want faster results |
|
Show More
Show Less
|
||
Conclusion
VEGAS Pro motion blur is useful, especially if you want to smooth out fast movement, add energy to transitions, or make animated elements feel less stiff. And after learning how to add motion blur in VEGAS Pro, we know that the tool can be a stellar choice for power users who love tweaking every tiny setting on a PC timeline. The downside is that the workflow can feel less direct than it should, especially for beginners.
If you want something faster, Filmora is the easier option to try. Its motion blur controls are more visual, the sliders are simple to understand, and it works on both Windows and Mac. VEGAS Pro is still strong for deeper manual editing, but Filmora is a better fit when you want smooth motion blur without spending too much time setting it up.
FAQs
-
Does VEGAS Pro motion blur work on every type of footage?
It can be applied to most footage, but the result depends on the motion in the clip. Fast pans, action footage, and animated objects usually show the effect clearly. Static shots will not benefit much from motion blur. -
Why does motion blur in VEGAS Pro make my video look too soft?
The blur amount is probably too high, or it may be affecting a wider part of the timeline than you intended. Lower the Motion Blur Amount envelope or apply blur only to the section that needs it. -
Can I apply the VEGAS video bus blur to just one single clip?
Not directly through the master track envelope. The Video Bus track applies the effect globally to everything underneath it. If you only want to blur one specific clip, you need to use the native Motion Blur OFX plugin from your Video FX window and drop it straight onto that single event.
