Picture-in-picture (PiP) is a popular video editing effect that overlays a smaller video window within a larger one. This effect is widely used in tutorials, reaction videos, gaming content, and presentations to keep viewers engaged while providing additional perspectives. This guide will walk you through how to use picture in picture, using 3 easy ways with versatile and user-friendly video editing tools especially Filmora that simplifies PiP editing the most.
In this article
Part 1: Common Applications of Picture-in-picture Effect
- Tutorials and Demonstrations: Adding PiP helps show your face or provide additional visual aids while explaining a topic.
- Reaction and Commentary Videos: Content creators can add a smaller video of themselves reacting to the main video, popular in the gaming and reaction video niches.
- Video Calls and Interviews: PiP can present a speaker and their presentation slides simultaneously, ideal for business or educational purposes.
- Unboxing and Review Videos: Allows creators to show close-up views of a product alongside their main video.
PiP offers endless creative possibilities, making it an essential tool for many video editing projects.
Part 2: How to Use Picture-in-picture Effect (Top 3 Methods)
Method 1: Use Filmora to Create Picture in Picture Effect
Wondershare Filmora allows up to 100 tracks for you to add videos so you can create a lot of cool and interesting video overlays. Moreover, the shape of overlays can be changed too, which enables many strange shapes to enhance your video and then make it more attractive. Using Filmora you can overlay a photo or an image on a video, overlay a video on a video, adjust position, size and mask of the photo overlay/video overlay and add animation and the element of the video overlay.
The PIP options available in Filmora do not just add creativity to your production but also allow several video clips to be positioned perfectly when used. This feature combined with the ease of operation filtration makes it easy for both amateurs and experienced editors. Having access to features such as motion tracking, split-screen, auto beat detection, speed ramps, and editable presets, Filmora contains every tool necessary for content creation.
- Superb video stabilization with low distortion.
- Vast video/audio effects and creative assets.
- Powerful AI for effortless content creation.
- Intuitive, professional yet beginner-friendly.
- Works on Mac, Windows, iOS, and Android.

Here's a step-by-step guide on how to create a PiP effect in Filmora:
Step1Import your photo and video files to Media Library
Download and install the Filmora video editor. Then import your video overlay or photo overlay media, and your main video clips, to the Media library.
Step2Add Video Overlay/Photo Overlay to Timeline
Drag the primary video to the main video track of the timeline and then drop overlay material (video or image) to another track.
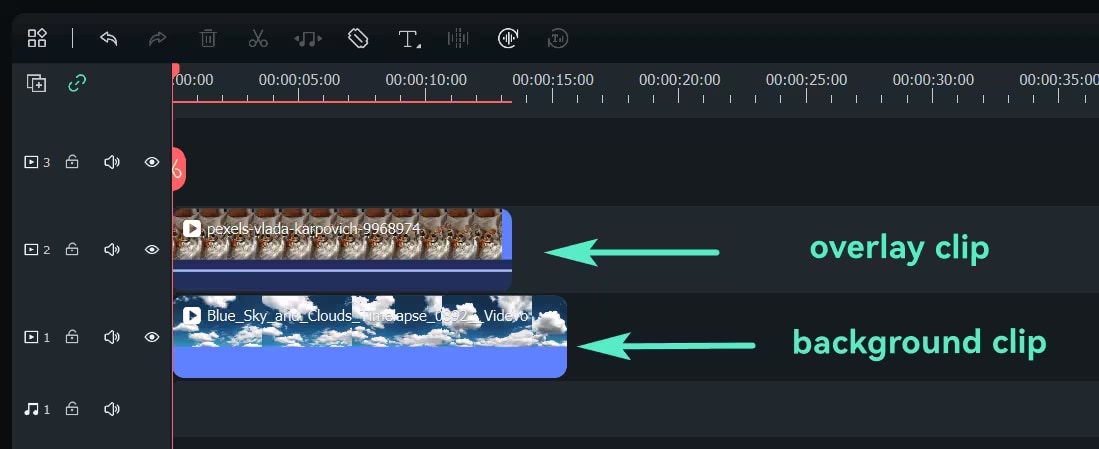
If the overlay is a photo, you can drag the corners to shorten or lengthen the correct overlay length. If it's a video overlay, you can change it so it only stays that length and it fits inside the video at the part you want.
Step3Customize the video overlay in Picture-in-picture Track
You then have a huge selection of easily customizable options to set up your Picture-in-picture overlay track. To do this, double click the video or picture you just added in the timeline and the editing panel will appear. To add the video overlaying motion effect, you can just simply double click the video to apply.
Adjust Position of Overlay Video: You will see there's a green box around the media of the preview window if you click the image or video in the PIP overlay track. You can simply drag it to anywhere in the video.
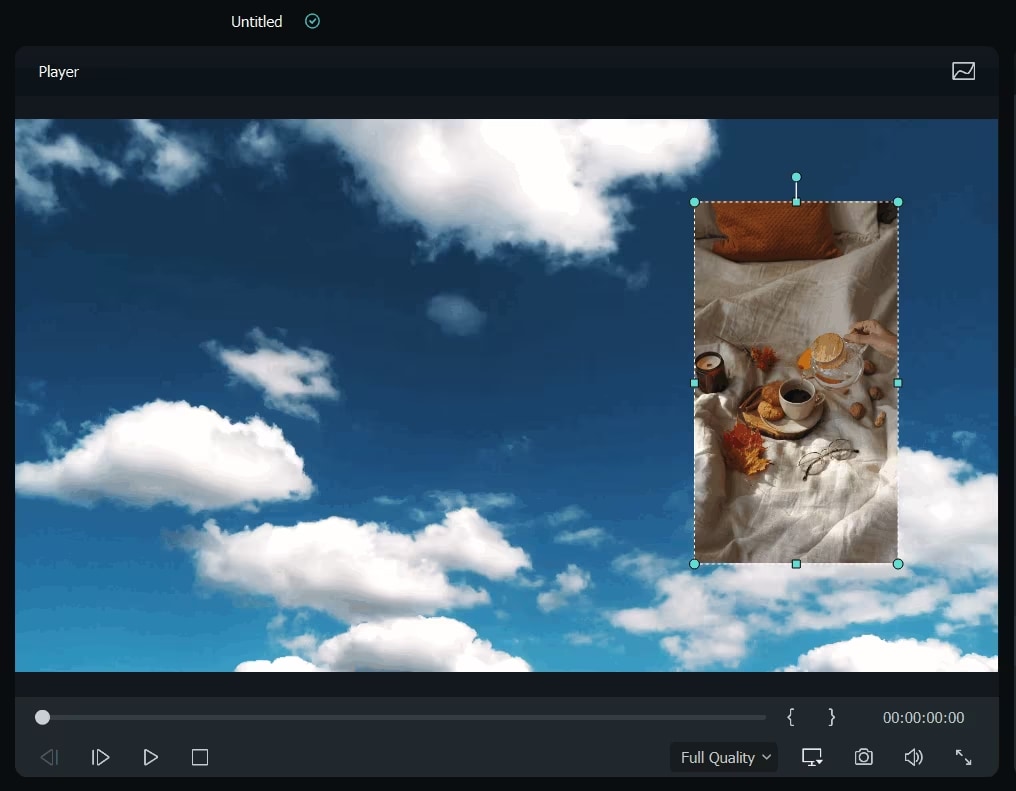
Change Overlay Video Size: Resizing the playing window of Picture-in-picture video/images can be achieved by dragging and the rectangle handles.
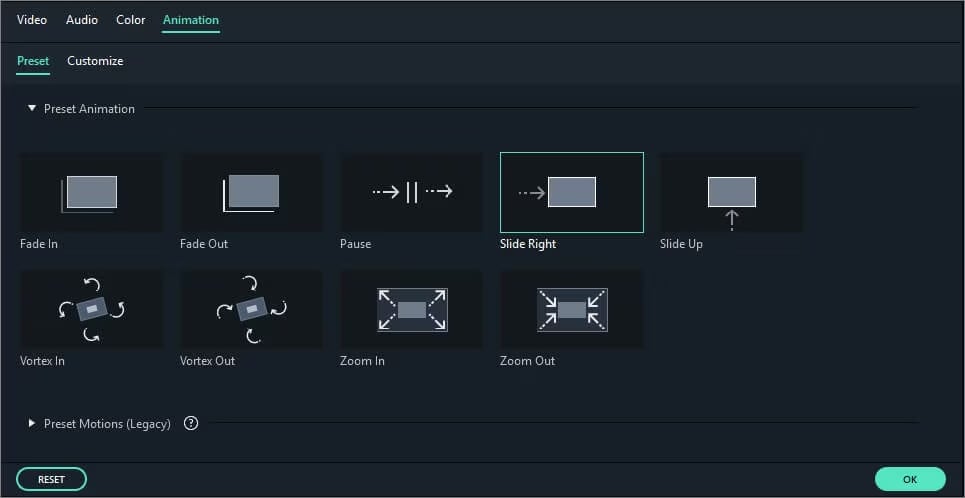
Apply Motion to Overlay Video: Picture-in-picture overlay video/images are animated with more than 60 motion effects. When a motion is added to a PIP there will be a sign.
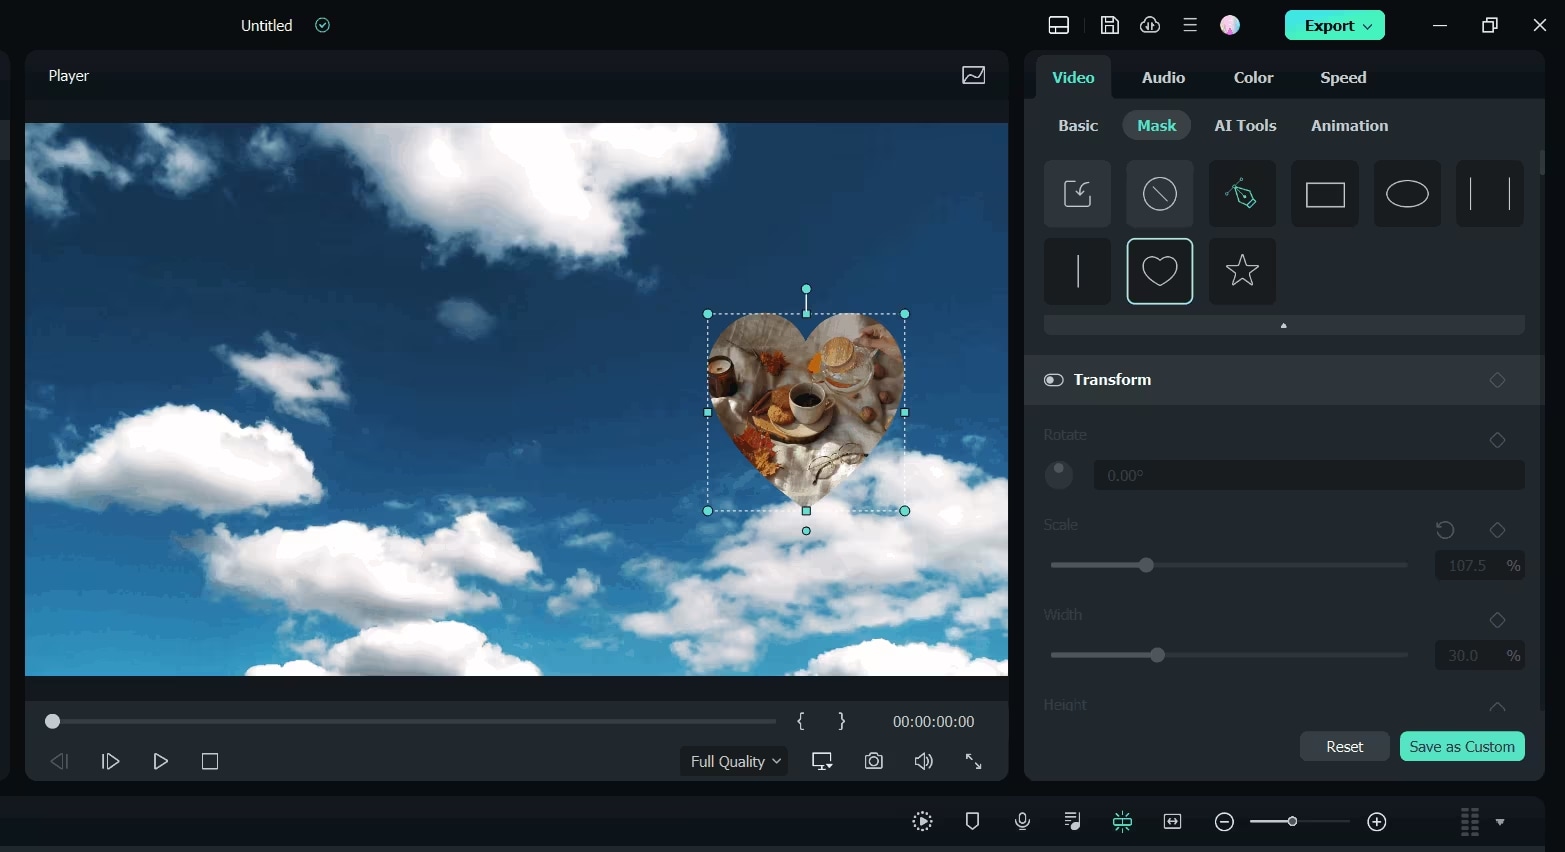
Add Mask to Photo/Video Overlay: Go to Effects. Choose Utility on the left, and then ' Image Mask or Shape Mask can be applied to video/image overlay. Each mask could be adjusted with these options: Double click on the overlay to have X, Y, Width, Height, and Feather.
Step4Fine Tune Overlay video & image with the main video
Filmora lets you composite overlay video/image with the main video, better, by mixing up blending mode and opacity. To double click on the overlay timeline. If your overlay is video, you can pick a target blending mode out of Darken, Multiply, Color Burn, Screen and more, and then fiddle with the video's opacity. In the preview window, you can always preview the blending effect.
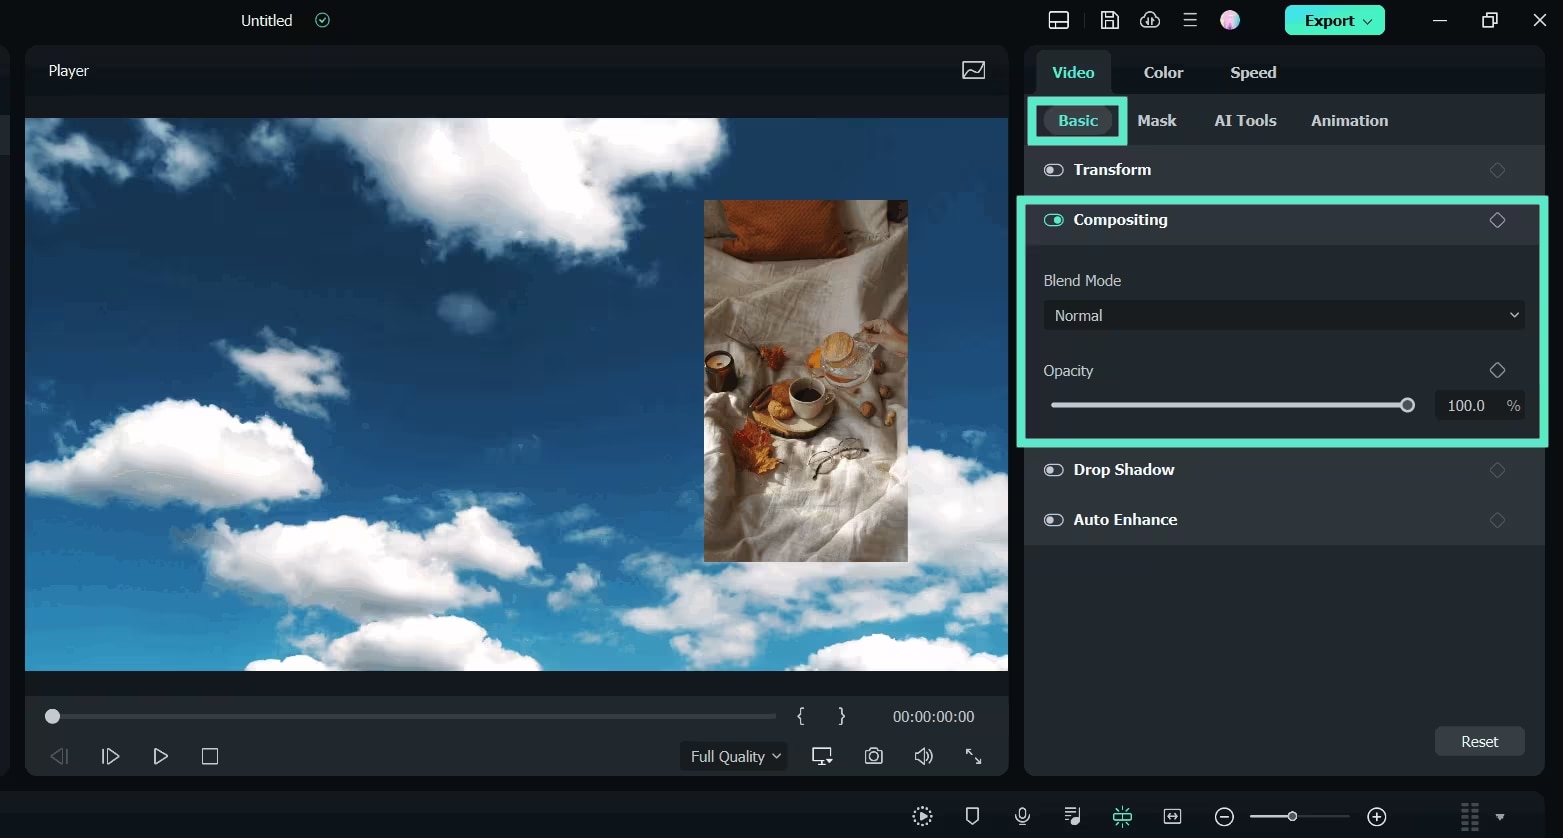
Step5Save Picture-in-picture Video
After you are done with Picture-in-picture effects, press the Export button on the right and you will be able to save our Picture-in-picture video on DVD, device, YouTube. You can export your video as MP4 or MOV or AVI, etc, any format you want.
Method 2: Use OBS Studio to Create Picture-in-picture Effect
Video game streamers often use the picture in picture (PIP) effect using OBS studio, where they have their webcam stream overlay over their screen capture and often in the corner. In this guide, we'll walk through how you can do the same thing yourself using a webcam as the main source and then overlay another media layer in a corner.
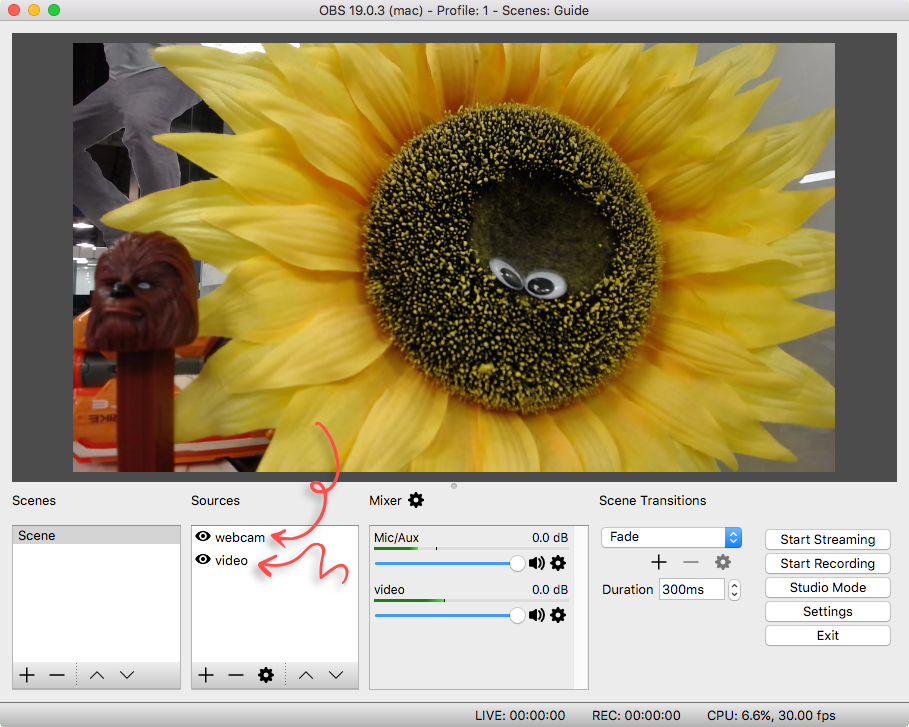
Step1Set Up Your Layers
To create a PIP effect you need to have at least two media layers in OBS. At the center of the video may be your primary video source, like a screen capture, and a secondary source, such as a webcam. Add both webcam and media sources if needed, via OBS guides.
Step2Arrange the Layers
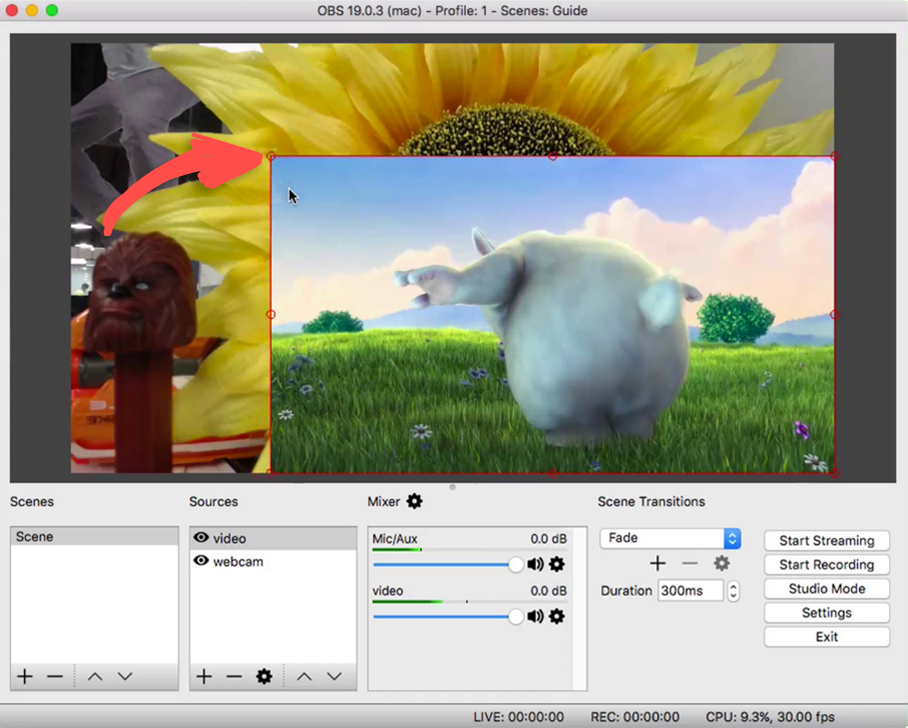
When you're ready to use your layers, drag the layer you want to overlay to the top of the layer stack. In a PIP view, this top layer will be what's displayed, but it'll remain in place while the background layer (your main video) stays in place beneath it.
Step3Resize the PIP Layer
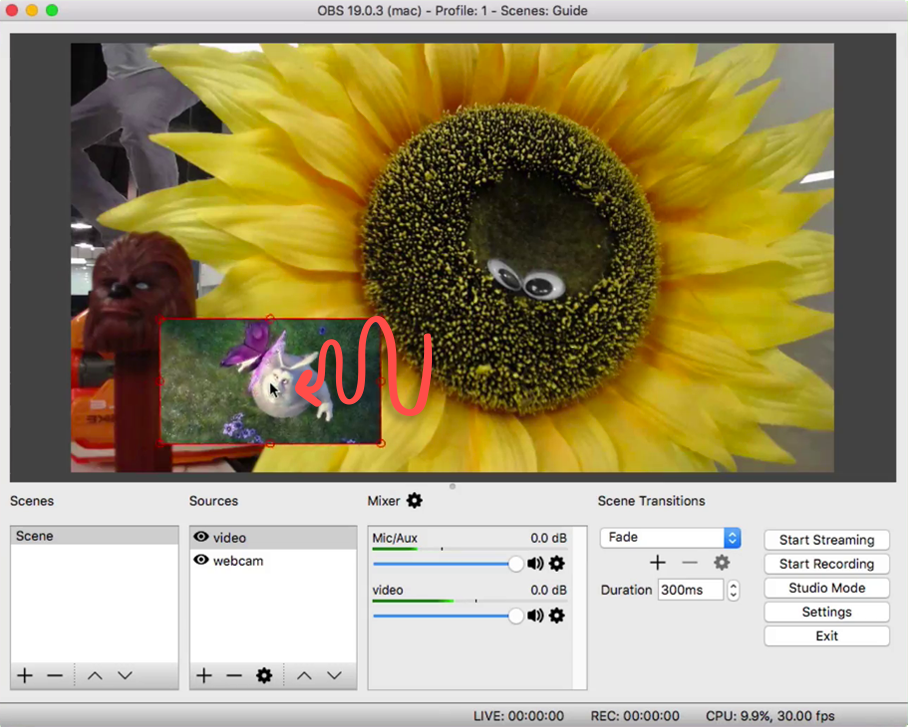
For the PIP effect, click into that layer to get it selected. In this screen, a red outline will appear around it. To change the size of this layer, click and drag one of the red corner handles until the layer size is what you want it to be.
Step4Position the Overlay Layer
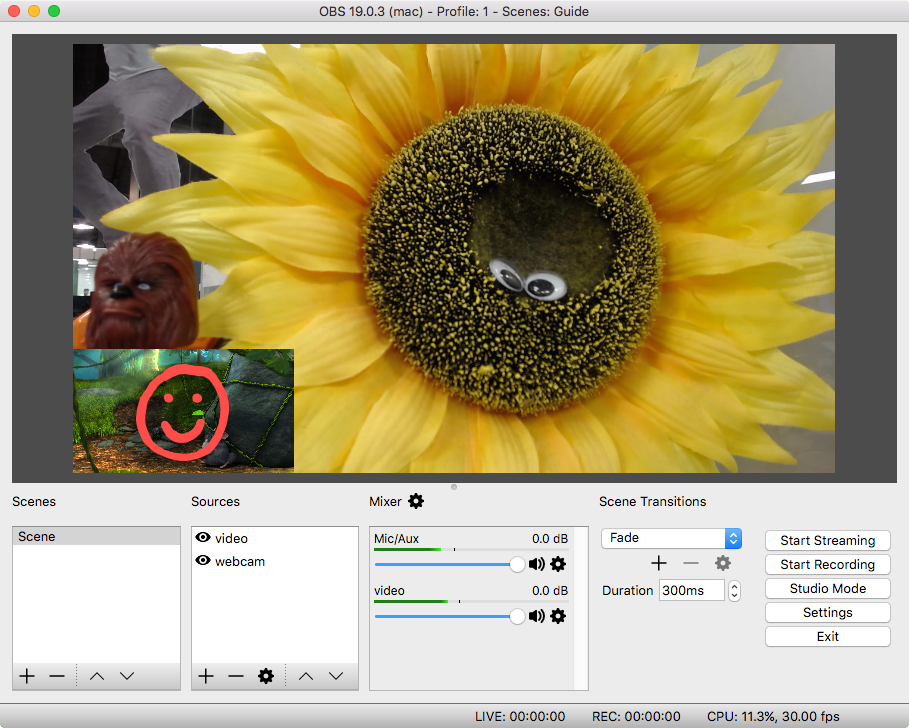
In order to place the overlay wherever you want it, click on the PIP layer and drag it to wherever on the preview canvas you would like to place it. Placement is common at the top or bottom corner, whichever best completes the main content.
With these steps, you'll be able to resize and position any OBS layer to fit your PIP needs.
Method 3: Use WeVideo to Create Picture in Picture Effect
WeVideo is a versatile, cloud-based video editing tool suitable for creating professional-looking videos directly in your browser. With its intuitive interface, WeVideo makes it easy to apply effects like Picture-in-Picture (PIP), allowing users to overlay videos or images
Step1Add media to Timeline
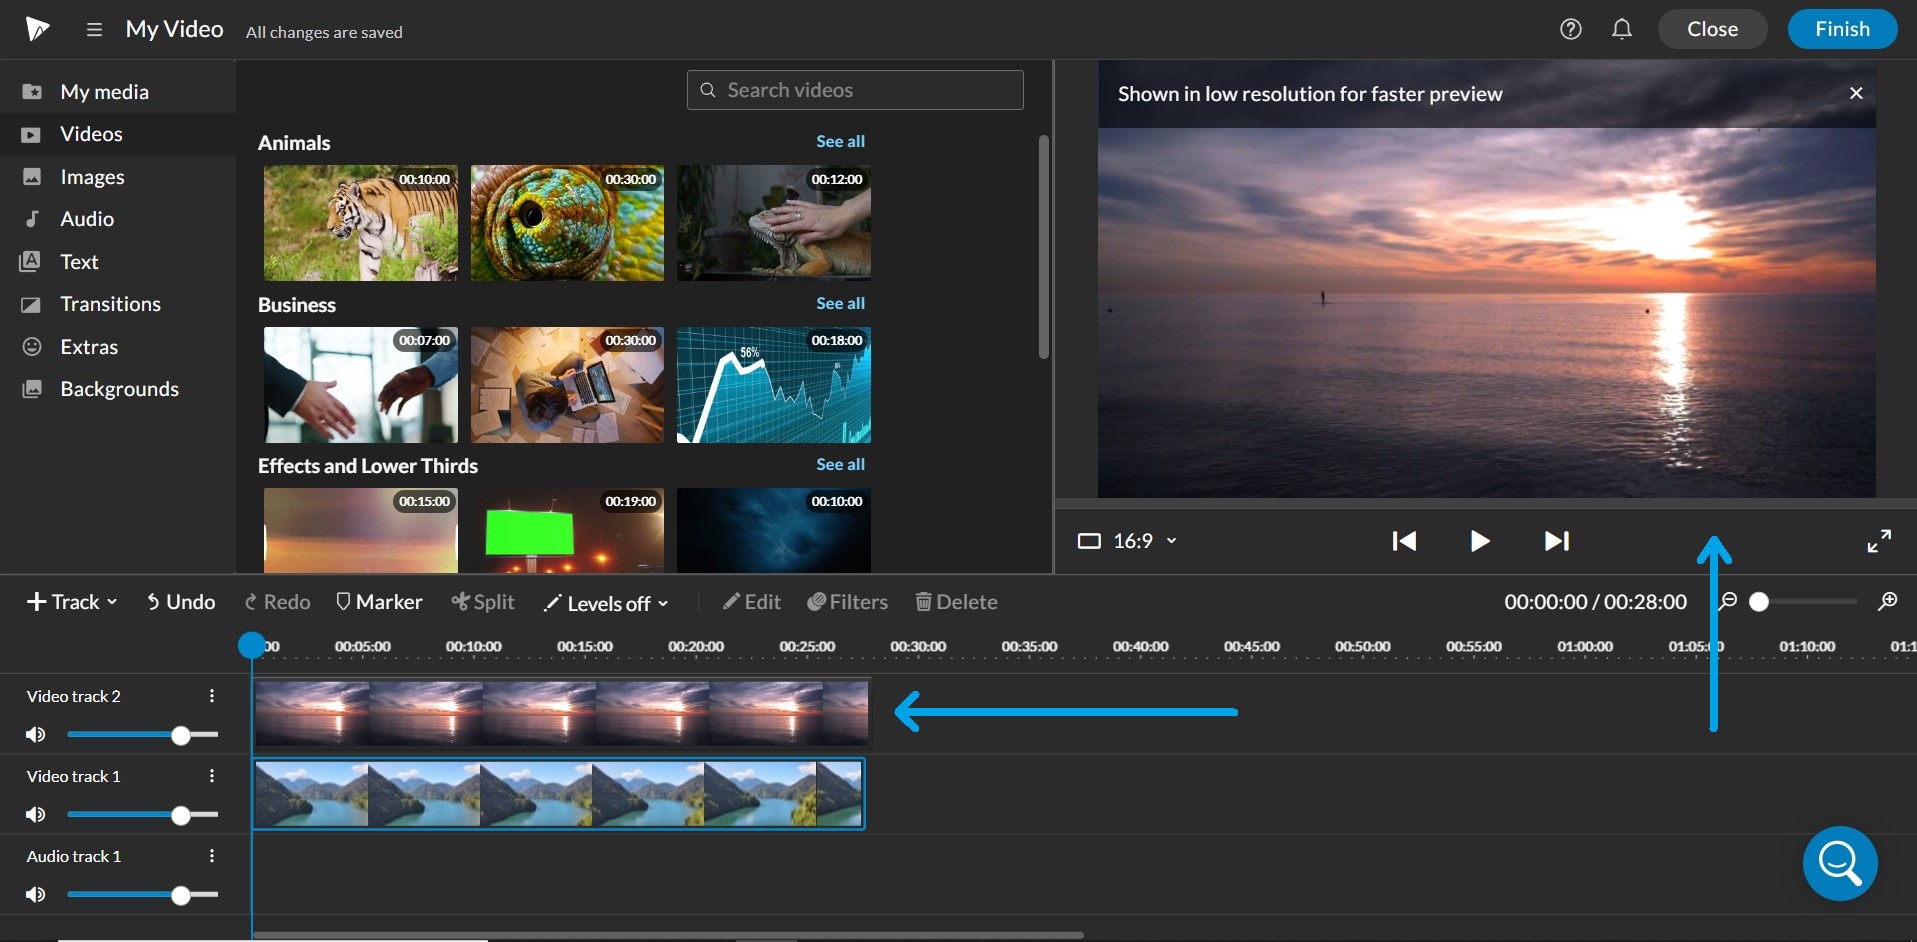
The first thing to do is to place media in the video tracks of the Timeline. When you put your clips into the Video 1 and Video 2 tracks, put them where you want them to actually be displayed. In the above track, the clip in the track above will be the clip which is visible in the preview window.
Step2Resize and reposition
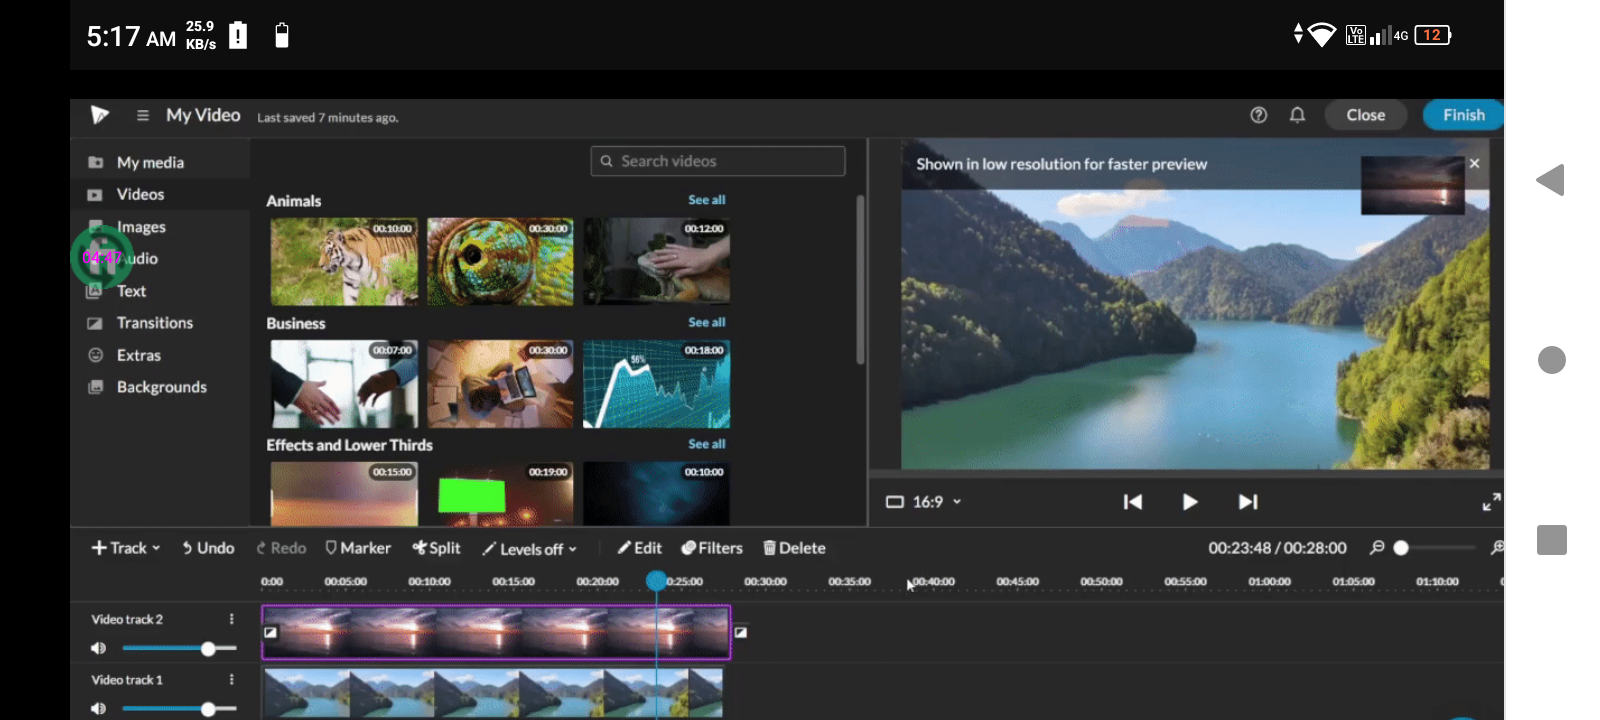
After you place your media on the Timeline, access the clip editor to resize and reposition your clip. Click here for more details about how to resize and place a clip.
Step3Additional tracks
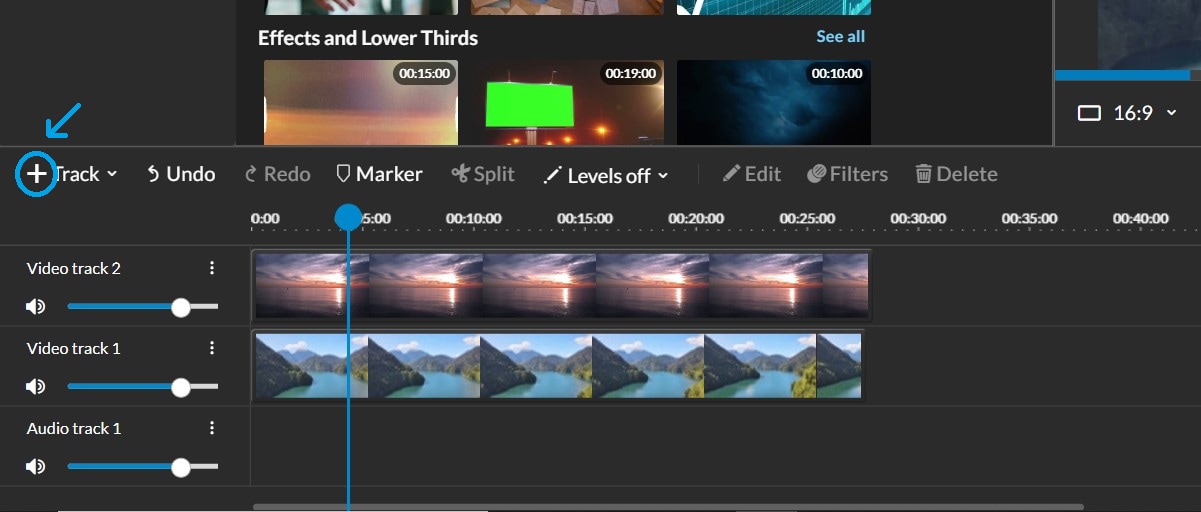
To add further video tracks to allow for your Picture-in-picture effect to stack multiple times, you can choose to add plus icons (+) located on the left hand side of your Timeline.
You will be asked to choose the track type you will add.
When you put multiple video tracks, you'll see this sandwich effect in the preview. Every track in Layer Sandwich becomes a layer of your sandwich and whichever clip is on top of your stack in the timeline will be on top of your preview.
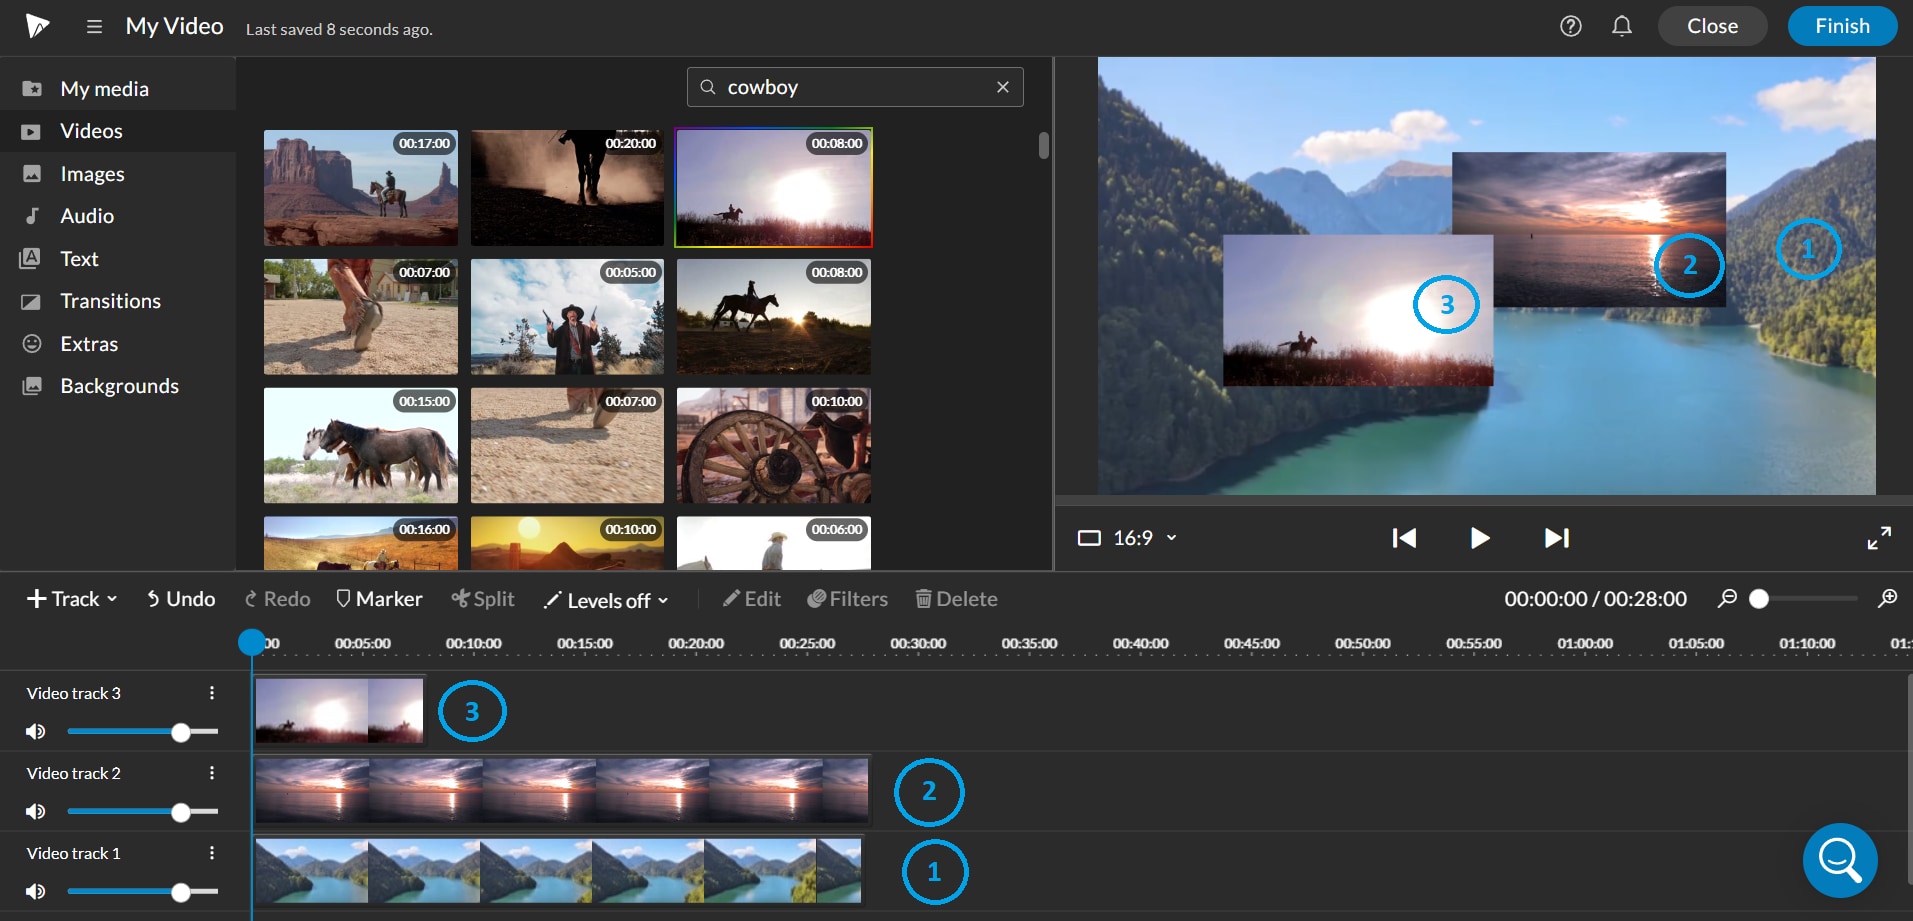
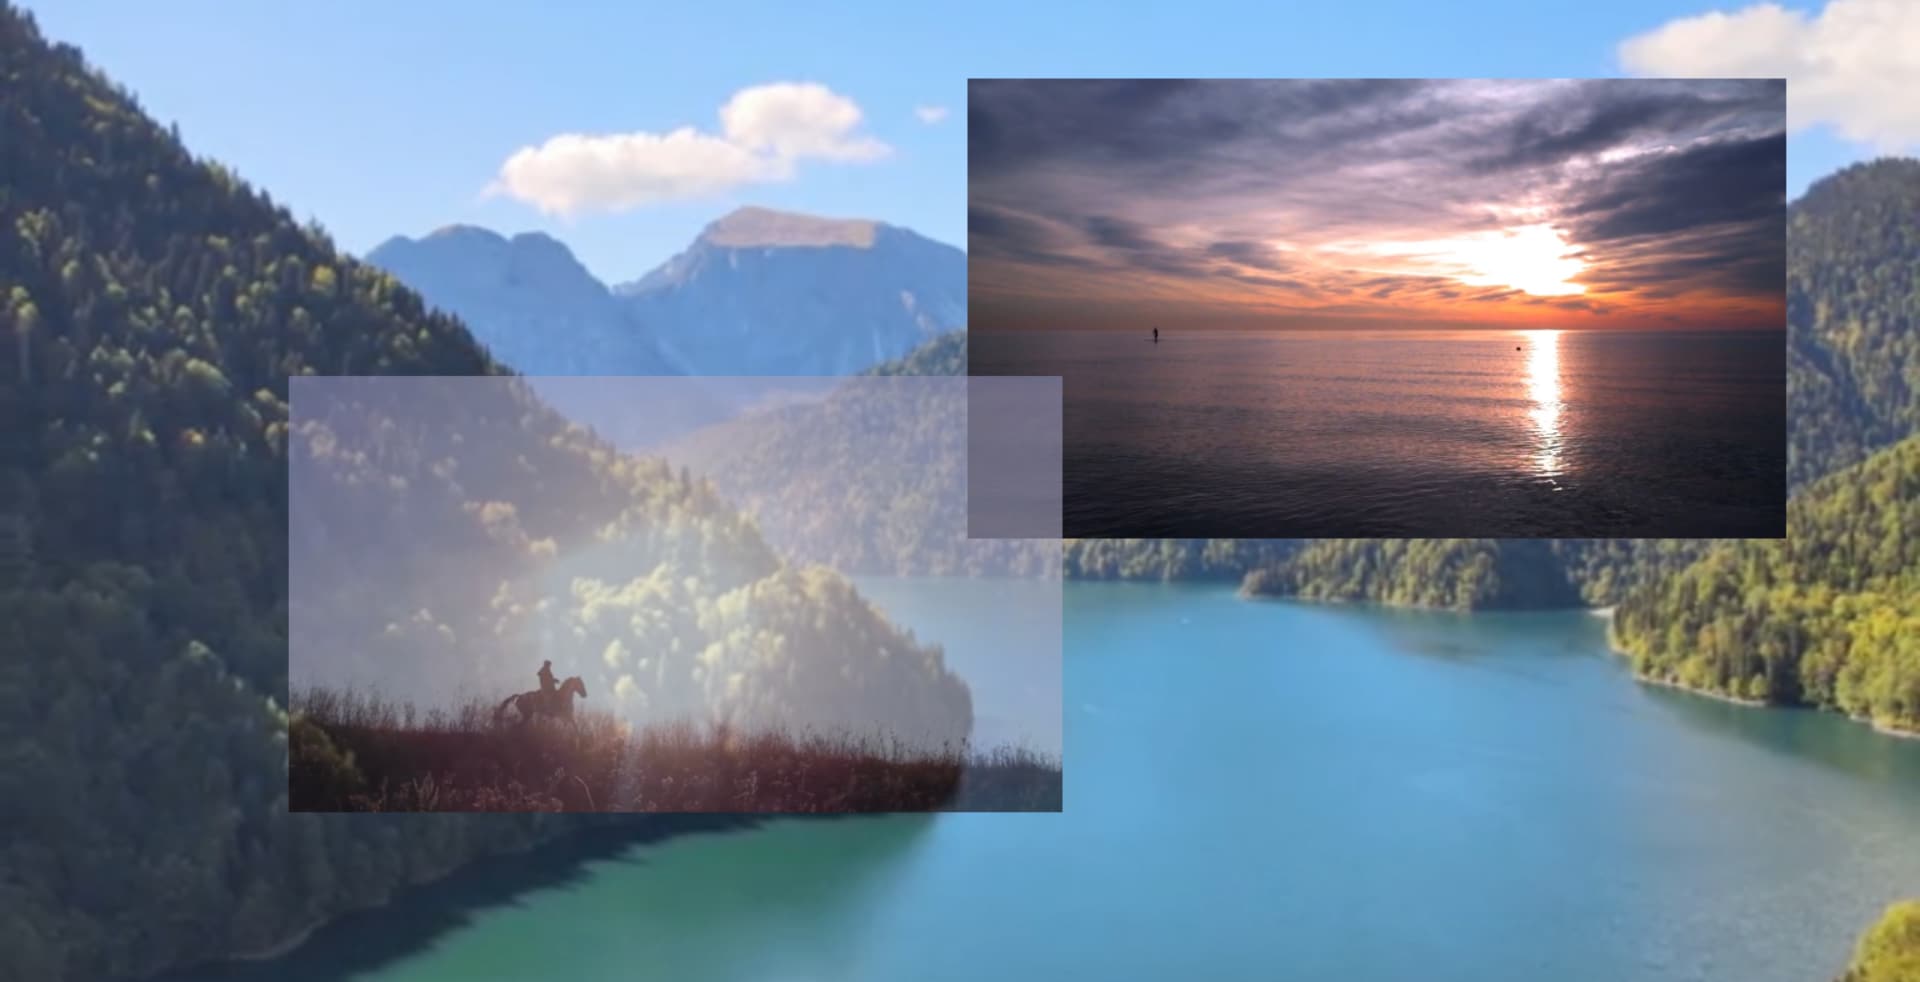
The clip in Video 2 track sits on top of the clip in Video 1 track but below the clip in Video 3 track.
You can even get creative with the opacity of the clip when creating the Picture-in-picture effect!
Why is Filmora the Best Choice for Creating Picture-in-Picture Videos?
When creating PiP videos, platforms such as OBS Studio and WeVideo have basic tools, but they are limited, and as a creator you oftentimes are left without the advanced control and customization you might desire. For example, with OBS Studio you can stream live but it lacks some flexibility for post production editing, as it doesn't offer keyframe animation or preset templates and everything must be individually adjusted. Although WeVideo is freely accessible and web based, free access can sometimes limit features and resolution options, making it not quite suitable for higher quality projects or more intricate PiP arrangements.
Here's why Filmora is ideal for creating Picture-in-Picture (PiP) videos:
- Multiple PiP Layers: Stacking several PiP videos allows us to create complex, multi layered effects all inside of Karaoke Mode without leaving the app.
- Instant Keyframe Animation: With Filmora's easy keyframe controls transitioning your PiP windows is a close walk in the park.
- Dynamic Motion Effects: When combined with your content, Filmora's PiP motion effects bestow your video with a smooth transition.
- High-Quality Export Options: Create HD and 4K PiP videos exportable in YouTube and social media.
- Audio Sync and Balancing Tools: Balances volume levels of PiP audio to main content sync PiP audio precisely.
- Color and Brightness Adjustments: Make color and brightness independent from the main video on PiP layers.
- Flexible Screen Positioning: The PiP window size and location can easily be adjusted to fit what style video you have.
Part 3: Best Practices for Using PiP Effect
The PiP effect does need thought about placement, content choices and how the audio balance comes together. You have the flexibility to make all of these work seamlessly with Filmora.
Tips for Positioning PiP for optimal placement:
- Custom Positioning and Scaling: Drag the PiP around in the preview window for free adjustment on placement. This is placed in a corner or side of the screen to ensure it does not block up the main content.
- Grid and Alignment Tools: The alignment tools Filmora provides help you keep things nicely aligned and balanced, so your PiP layer doesn't sit there covering a crucial part of your main video.
Decide which content to place in PiP:
- Opacity and Border Options: Filmora's PiP opacity controls help make the PiP more subtle or prominent and border tools help make it stand out visually.
- Customizable PiP Templates: Some of the built in templates sizes and shapes in Filmora that would help to display PiP content in accordance with video's style and description.
Audio Balance and Clarity:
- Independent Audio Controls: The main and PiP videos have separate audio control, so you're able to give both a balanced sound, without your viewer's ears getting huller from it.
- Audio Ducking Feature: With Filmora's audio ducking tool, your audios will be adjusted automatically according to track's activity and helps keep the sounds plain during voice overs or commentaries.
By following these best practices, your PiP effect will not only look good but also work well — keeping your viewers engaged with your content without distracting them away from your main content.
Conclusion
Picture-in-picture (PiP) effect is a very useful video editing tool for improving tutorials, comments on video, or presentations. Filmora's advanced tools to create and fine tune PiP effects are both accessible and professional. With Filmora, you get all that you need for making great PiP videos, from basic positioning through to advanced keyframe animations and ability to have several PiP layers. Having gone through this guide, you'll be all set to add PiP to your next video project.


 100% Security Verified | No Subscription Required | No Malware
