


 100% Security Verified | No Subscription Required | No Malware


 ChatGPT
 Perplexity
 Gemini
 Claude
 Grok
Grok
DaVinci Resolve may be one of the most powerful video editing applications with a comprehensive suite for color grading, color correction, visual effects, and audio post-production. However, many users have reported some issues within DaVinci Resolve, such as slow playback during video editing.
This problem is quite common, especially when you are working with high-resolution footage, complex effects, or heavy timelines. DaVinci Resolve’s demanding system requirements can strain your computer, leading to laggy playback and reduced performance.
So, how do we solve this slow playback problem in DaVinci Resolve? Below, we’ve compiled some effective strategies to improve playback performance, as well as similar video editing software you might consider if DaVinci Resolve does not meet your needs.

In this article
Part 1. Why Does DaVinci Resolve Have Slow Playback?
Slow playback in DaVinci Resolve is not uncommon and can stem from various factors related to the demands of video editing. This problem is particularly noticeable when working on tasks that require extra processing power, such as slowing down video. Since the software needs to adjust frame rates to ensure smooth playback, it can amplify any existing performance issues as a result.
Here are some common reasons why video playback might be lagging in DaVinci Resolve:
- High-Resolution Footage: Working with high-resolution video files (such as 4K or 8K) requires significant processing power and memory. If your system isn't equipped to handle these files, playback may lag.
- Complex Edits: Applying multiple effects, transitions, or color corrections can increase the processing load and lead to slower playback.
- Insufficient Hardware Resources: DaVinci Resolve is a resource-intensive program. If your computer’s hardware—such as the CPU, GPU, or RAM—isn't powerful enough, it can struggle to keep up with the demands of real-time playback.
- Playback Settings: The playback settings within DaVinci Resolve, such as playback resolution and render cache, can affect performance. Lowering playback resolution can help improve smoothness.
Part 2. Best Solutions to Fix Slow Playback Videos on DaVinci Resolve
Depending on the cause of slow playback, there are several solutions you can try to improve performance. Regardless of the issue, these fixes are a good starting point. Give them a try and see if they resolve the problem.
Method 1: Lower Playback Resolution
To solve the slow playback issue in DaVinci Resolve, try lowering the playback resolution. By default, the timeline proxy resolution is set to Full, but reducing this can ease the processing load during editing.
Step 1: Go to the Playback menu.
Step 2: Select "Timeline Proxy Resolution" and choose a lower setting such as Half or Quarter. This change will improve playback performance while preserving the quality of the final output.

Method 2: Enable Render Cache
Another effective strategy for smoother playback is to enable the Render Cache. This feature creates temporary cache files for pre-rendered frames, which helps in faster playback.
Step 1: Navigate to the Playback menu again
Step 2: Select Render Cache > Smart. This option allows DaVinci Resolve to automatically determine which clips should be cached, so it can optimize the overall playback performance.

Method 3: Use Proxy Media Files
Next, using proxy media files can also significantly improve playback, particularly with large video files. A proxy file is a lower-resolution version of your original video. To generate a proxy file:
Step 1: Go to the Media Pool.
Step 2: Right-click the video you want to proxy and select "Generate Proxy Media." This process, which may take some time depending on file size, will provide smoother playback during editing.

Method 4: Change Timeline Resolution
If you are working with high-resolution footage, another way to fix DaVinci Resolve’s slow playback issue is by adjusting the timeline resolution. By lowering the timeline resolution, you reduce the load on your system, which helps with smoother editing.
Step 1: Access the Project Settings by clicking the settings icon at the bottom right.
Step 2: Expand the "Timeline Resolution" menu and choose 1920×1080 HD (or lower).

Alternatively, you can adjust this directly in the Media Pool by right-clicking the timeline, selecting Timelines > Timeline Settings, and choosing the desired resolution.
Method 5: Upgrade DaVinci Resolve to Studio
If the slow playback issues in DaVinci Resolve persist despite other adjustments, consider upgrading to DaVinci Resolve Studio. The Studio version supports advanced features such as hardware-accelerated decoding and encoding for formats like H.264 and H.265, which can significantly boost editing and rendering speeds.
You can purchase and download DaVinci Resolve Studio from the official website, where it is available for $295.
Part 3. DaVinci Resolve Alternative without Playback Issues
Still having no luck with your DaVinci Resolve slow playback problem or purchasing the Studio version may be too costly? If so, you can consider an alternative video editing software. Some options offer similar capabilities to DaVinci Resolve but provide improved performance and stability at a lower cost.
On the top recommendations, there is Wondershare Filmora. Filmora is a more cost-effective option compared to DaVinci Resolve Studio. This software also offers a stable performance for a range of editing tasks, including managing playback speed.

Compared to DaVinci Resolve, Filmora provides a user-friendly interface and efficient tools that handle video editing tasks smoothly, even when slowing down video playback. With Filmora, you have the flexibility to slow down your video to as low as 0.01x without much problem.
How to slow down video playback using Filmora
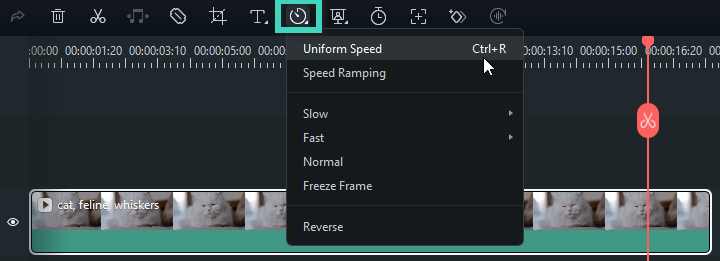
Step 1: Adjust video speed using the speed controls
Once you have added your video to the timeline, click on the video clip you wish to adjust. Then, select the Speed icon in the toolbar above the timeline. From the available options, choose "Uniform Speed" to adjust the playback speed throughout the clip.
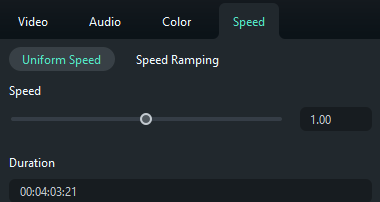
Step 2: Set your desired playback speed
To reduce the playback speed, drag the Speed slider to the left. For precise adjustments, you can manually enter a speed value lower than 1 in the Duration field.
Step 3: Select a speed preset
Alternatively, you can choose from available speed presets. Navigate to Speed > Slow, and select from options like 0.5x, 0.25x, 0.1x, 0.05x, or 0.01x.

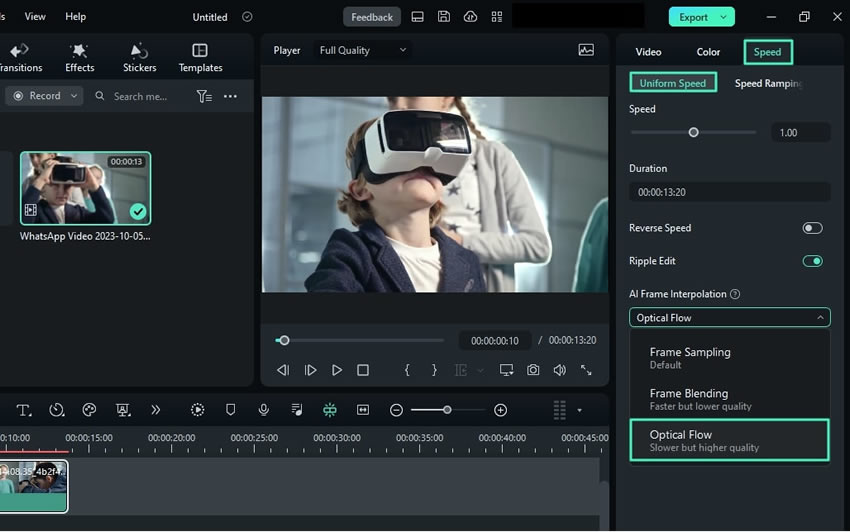
To improve the smoothness of slow-motion playback, you can use the AI Frame Interpolation feature in Filmora. This tool generates additional frames between existing ones. It analyzes the video’s motion to predict and insert intermediate frames to create a smoother effect.
To apply AI Frame Interpolation, select your video in the timeline. Navigate to the property panel settings on the right and go to Speed > Uniform Speed. Then, select "AI Frame Interpolation" and choose "Optical Flow."
Conclusion
Dealing with slow playback in DaVinci Resolve can be frustrating. But with the solutions provided, you can significantly improve your editing experience. If DaVinci Resolve doesn’t meet your needs, Wondershare Filmora can be your best alternative solution. It’s a stable and cost-effective video editing software with easy-to-use features.
Evaluate your editing needs, experiment with the solutions provided, and choose the software that best fits your workflow and budget. Remember, the right tools can make a world of difference in your video editing experience.
