
 100% Security Verified | No Subscription Required | No Malware

Slideshows are powerful tools for telling stories, teaching, and presenting ideas. Adding music to your PowerPoint slideshows can take them to the next level, setting the tone, evoking emotions, and keeping your audience engaged. Music has the power to transform your presentation from ordinary to extraordinary.
However, despite its potential, many slideshow presentations are used without music. This may be because some people don't know how to integrate audio into their slideshows or find the process too complicated. In reality, learning how to create a slideshow with music is simple and accessible to anyone, despite their technical skills.
This guide will cover step-by-step instructions on how to add music to a PowerPoint slideshow. Here, you will learn how to do it completely and easily.

In this article
Part 1. How to Put Music on a PowerPoint Slideshow
Adding music to your PowerPoint presentation is a simple yet effective way to enhance the viewing experience. It might surprise you, but knowing how to add music to a PowerPoint slideshow is easier than you think. Follow these step-by-step instructions to power up your slideshow with the perfect soundtrack:
Step 1. Insert music into your PowerPoint slide
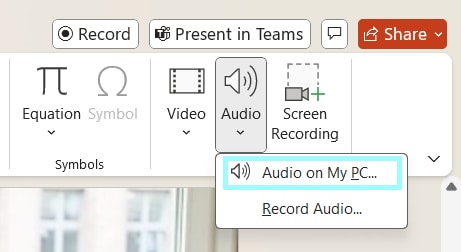
Go to the PowerPoint slide where you want the music to begin. Click on the Insert tab in the top menu. Select Audio > Audio on My PC (or Audio Online if you want to use an online source).
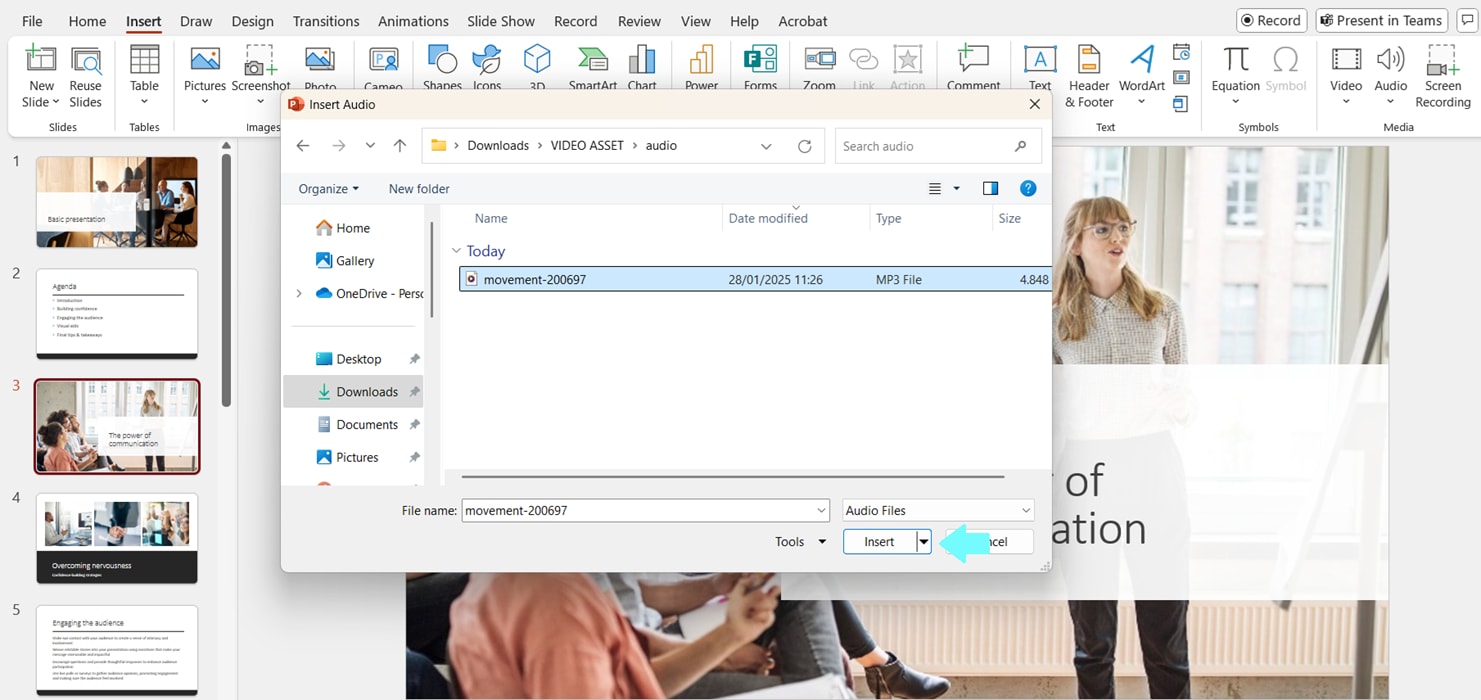
Browse your computer to locate the desired audio file, select it, and click Insert. Ensure your audio file is in a supported format, such as MP3 or WAV.
Step 2. Set the audio playback options
Once the audio is added, an audio icon will appear on the slide. Click on the icon to select it.
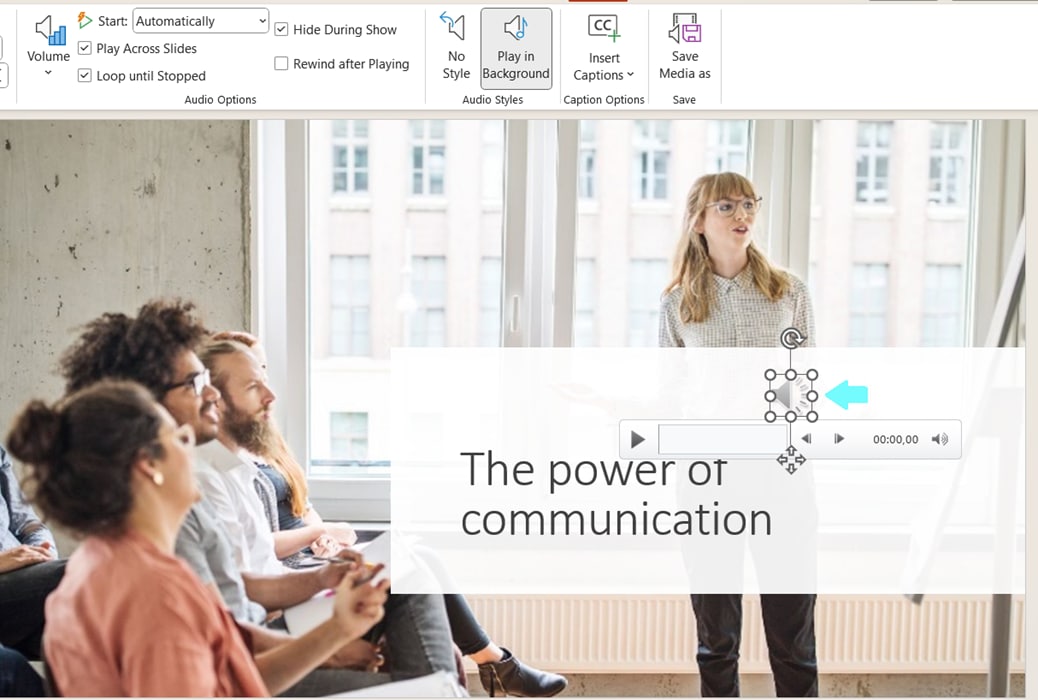
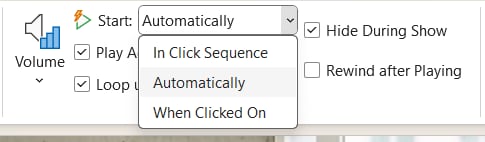
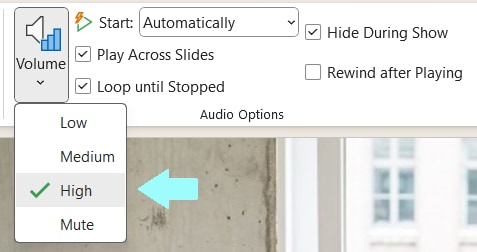
Go to the Playback tab on the toolbar. Adjust the settings
- Start: Choose "Automatically" to play the music as soon as the slide is displayed.
- Play Across Slides: Check this option to have the music continue playing throughout your slideshow.

- Loop Until Stopped: Select this if you want the music to repeat continuously.
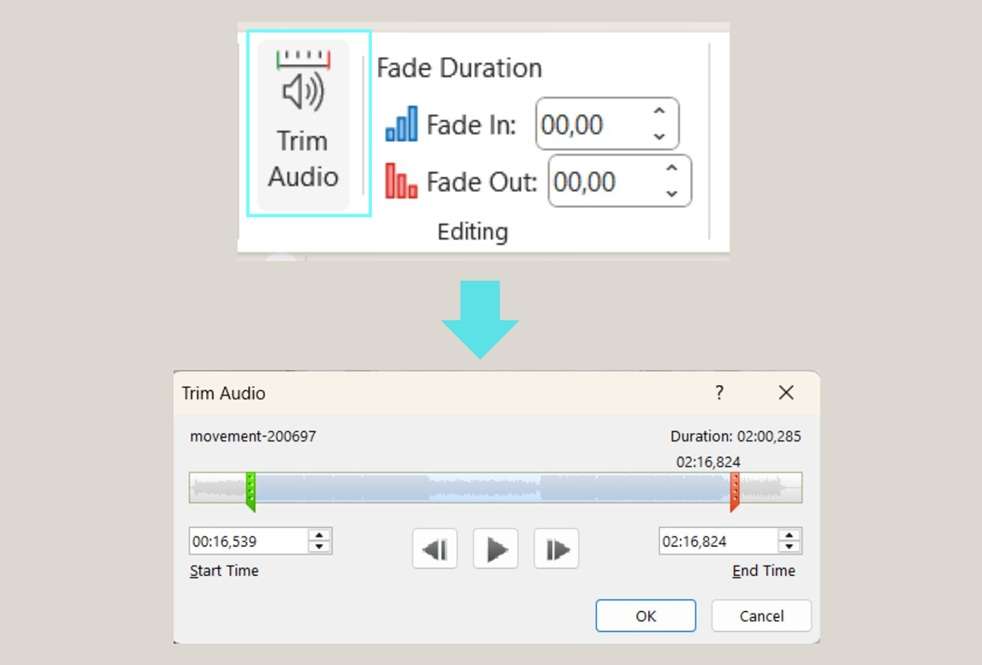
Step 3. Adjust volume and timing
Use the Volume button in the Playback tab to set the audio level.
You can also use the Trim Audio feature to adjust the start and end times of the music.
Step 4: Preview your slideshow
Play your slideshow to ensure the music works as expected. Make any necessary adjustments to the volume, playback settings, or slide transitions.
With these steps, you can easily integrate music into your PowerPoint slides and engage your audience with an appealing multimedia experience. Check out the next part, where we will discuss how to add music to your slideshow video for a professional touch.
Part 2. How to Add Music to Your Slideshow Video for a Professional Touch
While adding music directly to your PowerPoint slideshow is effective, there’s another way to enhance your presentation by turning it into a video. A slideshow video is more dynamic and engaging than a static and plain PowerPoint slideshow, so it's suitable for sharing online or presenting to a larger audience.
First, you’ll need to export your presentation as a video. Here’s how:
- Open your PowerPoint presentation.
- Click on File > Export > Create a Video.
- Choose the video resolution and file format, then save the video to your computer.
As your slideshow is a video file, you can use a powerful video editor such as Wondershare Filmora to add music and enhance it further. Filmora stands out as one of the best options for this task for several reasons:
- A Library of Royalty-free Music: Filmora offers a vast library of royalty-free music tracks, so you can choose and add the perfect soundtrack without worrying about copyright issues.
- Generate Custom Music with AI: You can even create custom music to your liking based on your prompt with Filmora’s AI Music Generator, which gives you a unique and personalized audio experience.
- Creative Elements Library: Filmora includes a wide range of transitions, filters, stickers, and video effects to take your slideshow video to the next level.
- All-in-One Editing Tools: Easily edit, trim, cut, and arrange your video to give it a polished and professional look.
- Intuitive Interface: Filmora’s intuitive interface ensures that even beginners can create professional-quality slideshow videos effortlessly.
 secure download

How to add Music to your slideshow video using Filmora
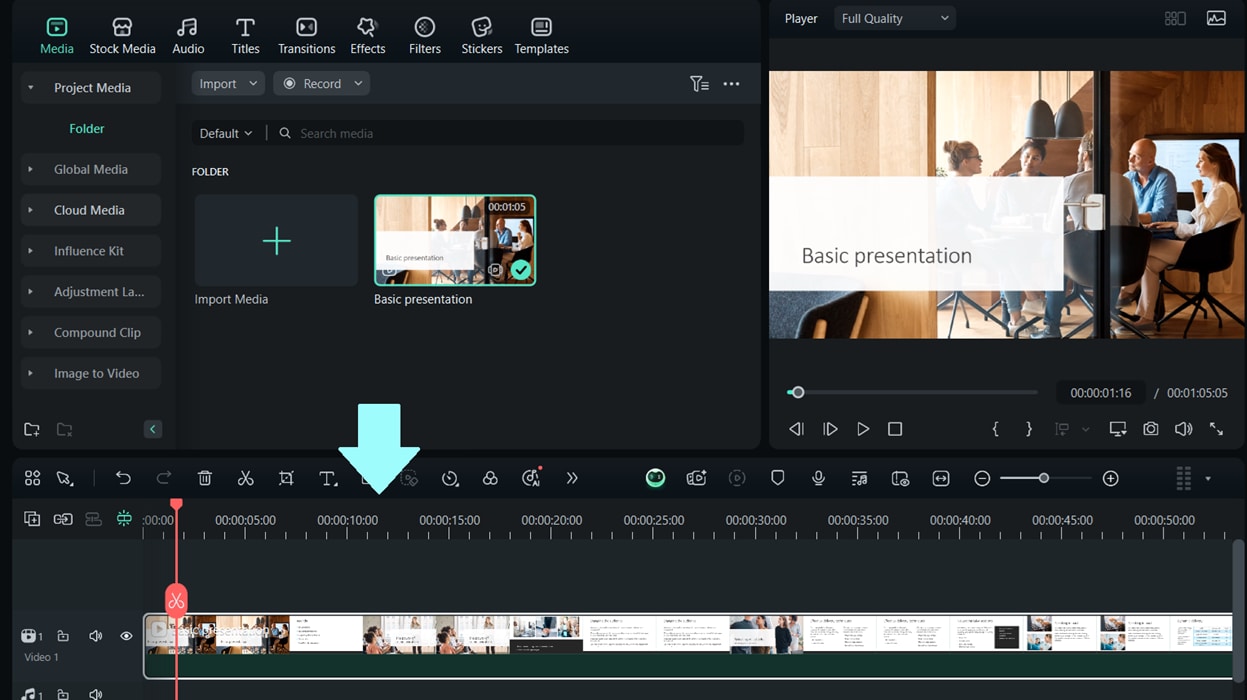
Step 1. Import your video file
Launch Filmora on your computer. Click New Project and import the exported slideshow video by dragging it to the media library or clicking the Import button. Drag the video files from the media library to the timeline.
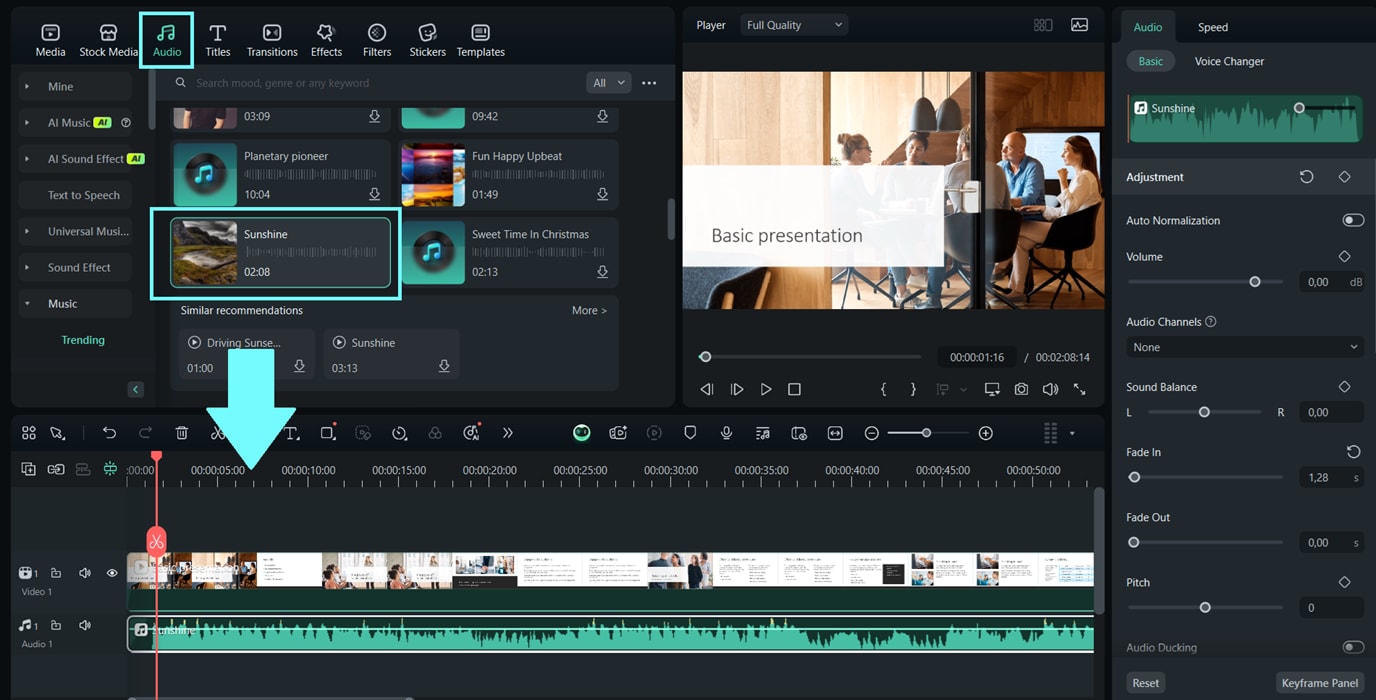
Step 2. Add Music to Your Video
Go to the Audio tab at the top of Filmora’s interface. Browse through the music library or use the AI Music Generator to create custom music. Select your desired track and drag it onto the audio timeline below your video.
Adjust the length of the music to match your slideshow by trimming or looping the audio.
Step 3. Enhance your slideshow video
Use the Transitions tab to add smooth transitions between slides.
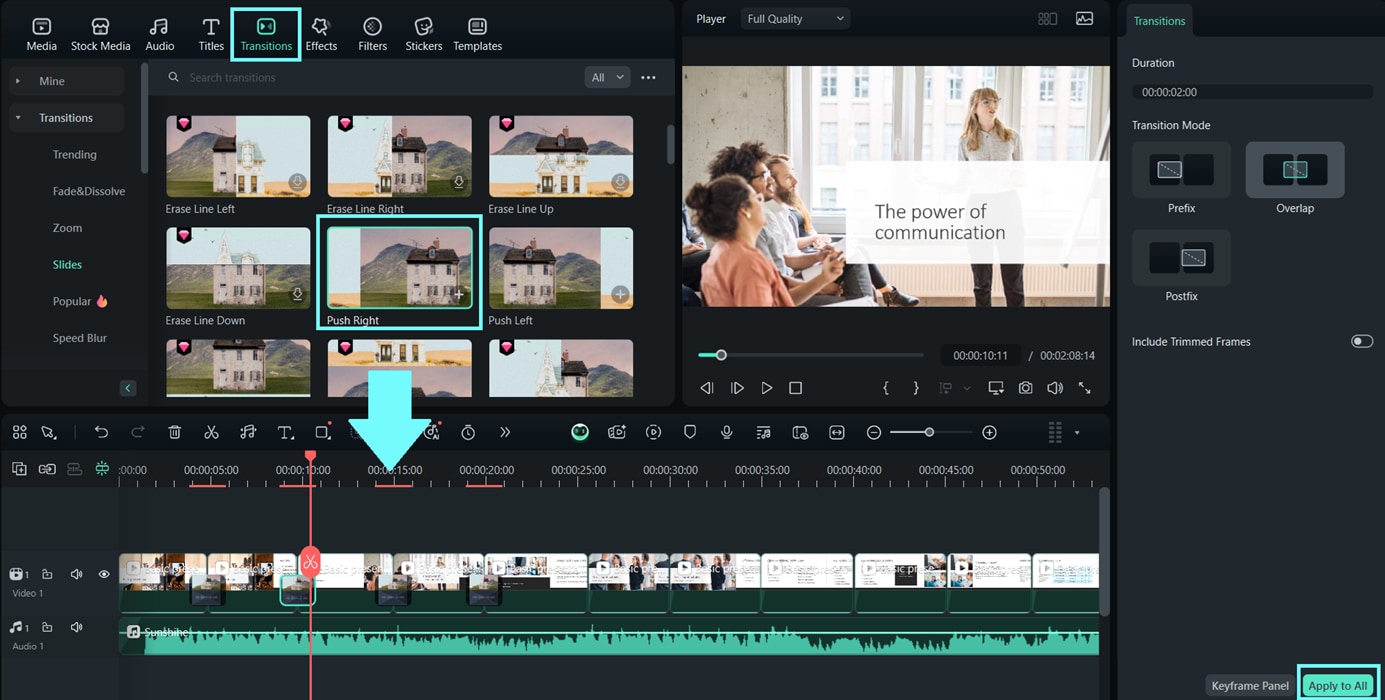
Explore the Effects tab to apply filters and video effects. Add text, stickers, or overlays from the Elements tab to make your video more engaging.
Step 4. Preview and Export
Click the Play button to preview your slideshow video with the added music. Once you are happy, click Export to save your video. Then, select the desired resolution and format before exporting.
You can create a smooth and professional slideshow video with music and now your presentation becomes dynamic and engaging by following the steps above.
Part 3. How to Make a Slideshow with Music on iPhone in Just a Few Steps
Adding and editing music to your slideshows is not limited to computer users. You can also do it seamlessly on mobile devices like the iPhone. Thankfully, Filmora is also available on the mobile app, so you can easily learn how to make slideshows with music on your iPhone by combining convenience with professional-quality editing tools.
Step 1. Launch the Wondershare Filmora mobile app on your iPhone
Install the Filmora mobile app on your iPhone (if you don’t already have it), and open it to start editing. Tap on New Project and select the photos or video clips you want to include in your slideshow Arrange the media in your preferred order on the timeline.
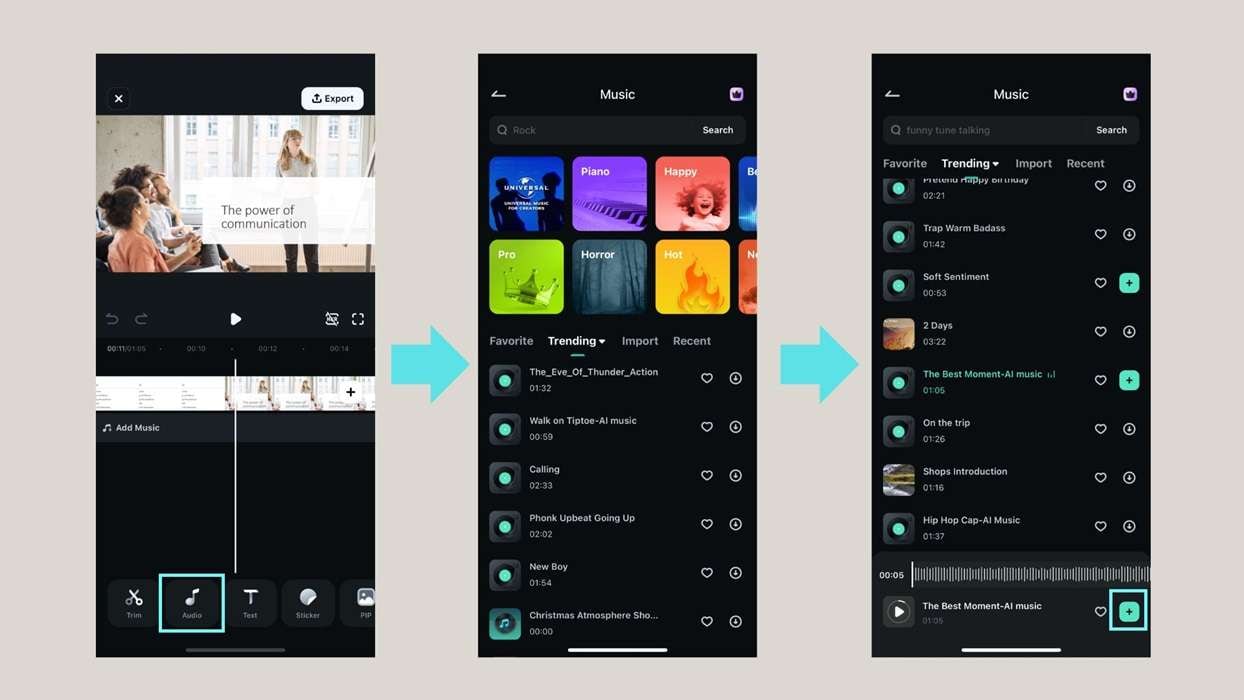
Step 2. Add Music to your slideshow
Tap the Audio and browse the music tracks or use the search bar to find a specific track. Select the desired track and tap Add to include it in your timeline. Adjust the music to fit your slideshow by dragging its edges to trim the length or reposition it as needed.
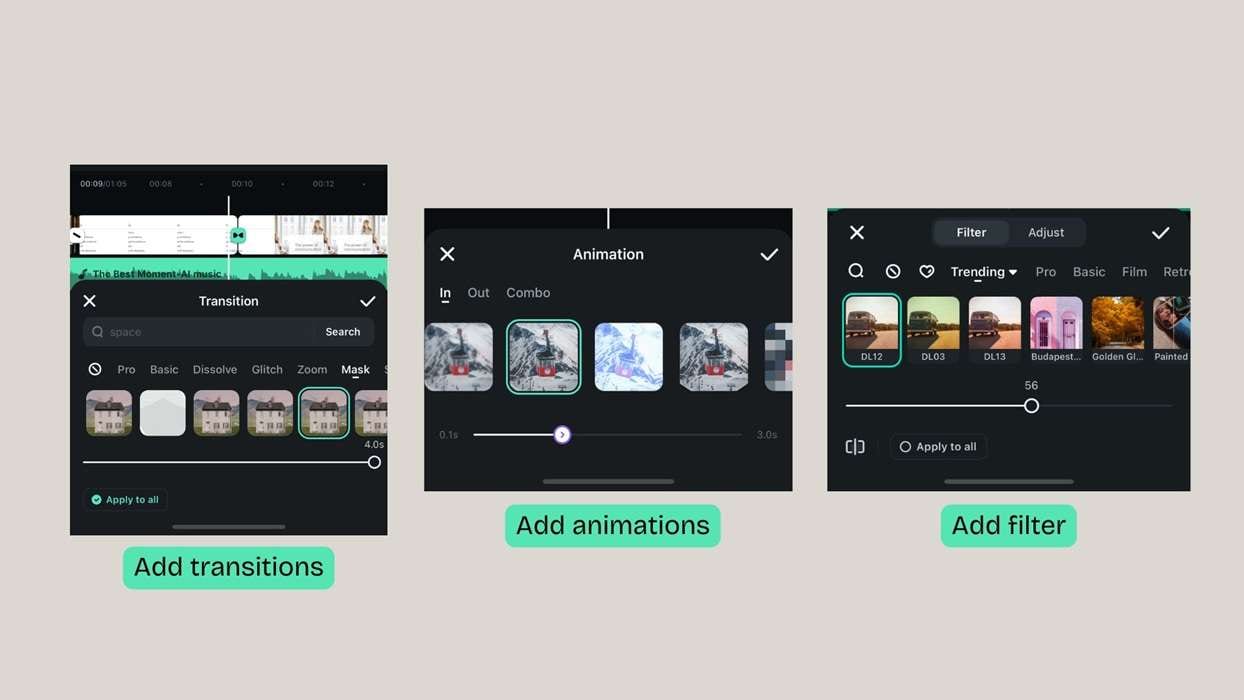
Step 3. Customize your slideshow with creative effects
Experiment with Transitions, Animations, or Filter options at the bottom of the screen to add visual enhancements and create smooth and dynamic scene changes. Preview your slideshow to ensure everything flows seamlessly.
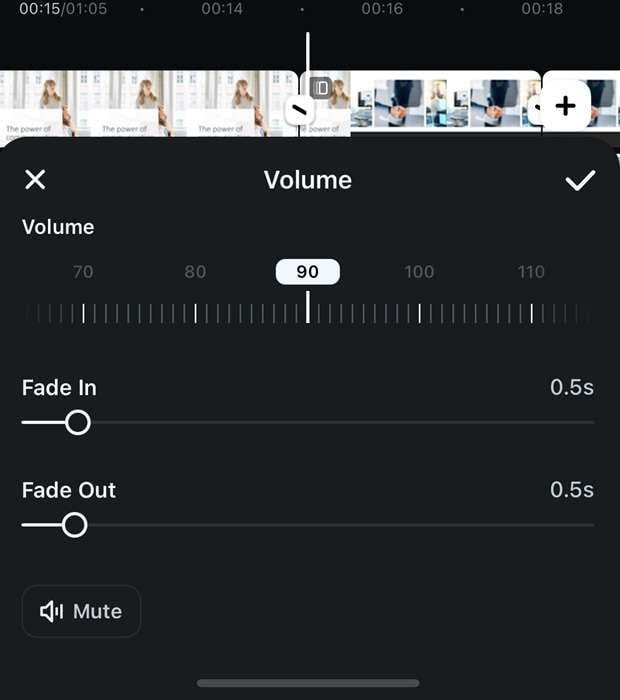
Step 4. Final adjustments
Adjust the audio volume by tapping on the music track in the timeline and selecting the volume control. Add fade-in and fade-out effects to ensure smooth audio transitions.
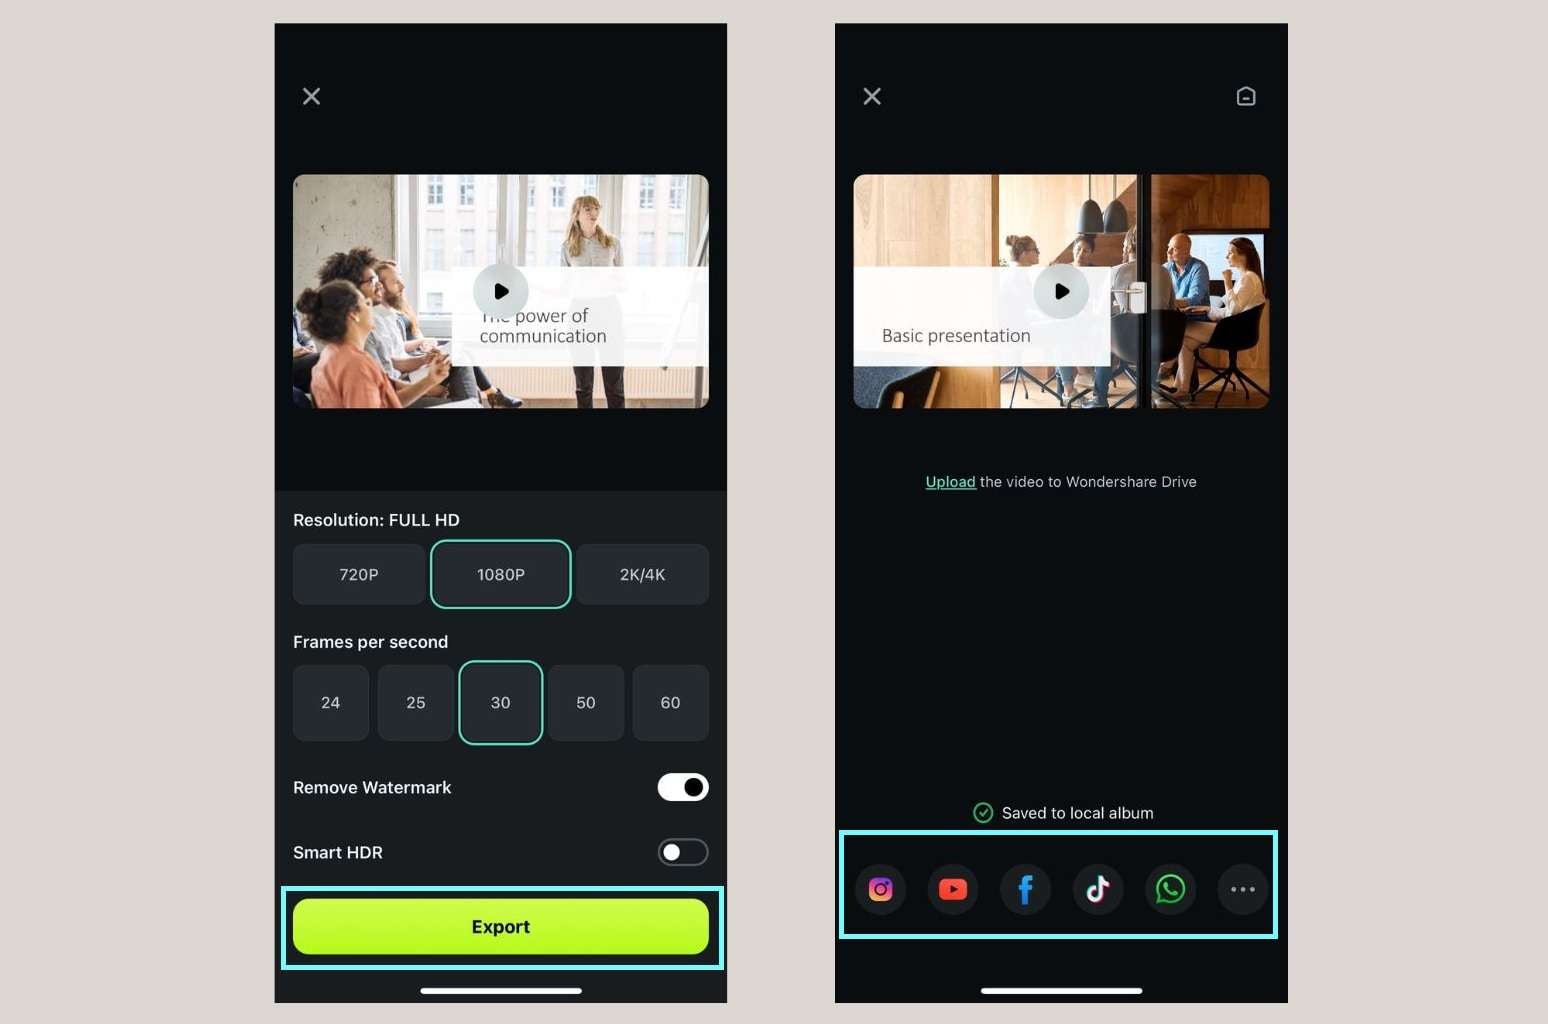
Step 5. Export and share your slideshow
Once satisfied, tap the Export button. Select the resolution and format settings for your slideshow video. Save the video to your iPhone or share it directly to social media platforms like Instagram, YouTube, etc.
Using Filmora Mobile, you can easily create professional-quality slideshows with music right from your iPhone. Its easy-to-use interface and advanced features make learning how to make a slideshow with music on your iPhone both easy and enjoyable.
Bonus Tip: Create Stunning Slideshows with AI Using Filmora's AI
While traditional slideshow makers let you arrange images and add music manually, Wondershare Filmora now takes it to the next level with its latest AI-powered tool: AI Text to VideoAI Idea to Video.
With this feature, you don’t need to start from scratch—just enter your idea or a short prompt like: “A nostalgic birthday slideshow with travel photos, emotional music, and soft transitions.”
Filmora’s AI will automatically generate:
- 📝 A complete story-based script and structure
- 🎬 A cinematic, scene-by-scene storyboard
- 🎨 Visuals and styles that match your theme (e.g., romantic, fun, vintage, cyberpunk, anime, Disney-style, etc.)
- 🗣️ AI voiceover and lip-sync (optional for narration)
- 🎵 Music suggestions and auto-captioning
Unlike basic slideshow makers, Filmora turns your concept into a fully-realized video, giving you full creative control to edit scenes, pacing, visual effects, and more—all with minimal manual work.
So if you're looking to go beyond a simple photo-and-music slideshow and tell a story that truly resonates, Filmora’s AI Idea to Video is your shortcut to cinematic-quality results.
Conclusion
Learning how to make a slideshow with music can transform it into a powerful storytelling tool. In this article, we've covered the steps to enhance your presentation by integrating the perfect soundtrack to ensure your content connects with your audience on an interactive level.
For those looking for a versatile and easy-to-use tool, Filmora is a solid choice. From its royalty-free music library to its AI Music Generator and creative effects, Filmora offers all you need to create engaging and professional slideshows easily. Whether you're working on a desktop or mobile device, Filmora's intuitive interface makes the editing process seamless for beginners and experts.
