


Converting a sequence of PNG frames into a video may be complicated. But it's far from the truth! It is essential knowledge for anyone who works or is passionate about it. You need to convert a set of PNG images into a video.
This skill is key for content creators, graphic designers, and anyone who wants to make a great video.
Here are five easy and reliable steps to convert PNG sequences to videos. They guarantee excellent results. Let’s start transforming your PNG sequences into impressive videos in no time!
In this article
Part 1. Understand Image Sequences and Making a Video
A PNG sequence is a set of single PNG images, usually numbered in a row. The software combines the images to display animation frames or videos. Each PNG image in the sequence is a frame. Running the frames one after the other creates the impression of motion. This is widely used because lossless compression keeps the image quality and detail the same.
Significance and Applications of Converting PNG Sequence to Videos
It brings animated characters to life, creates special movie effects, and helps us understand complex processes like weather patterns or biological functions.
For example, stop-motion animation captures each tiny movement as a separate image. These images are then stitched together to form the final animation.
Part 2. Create a Video from the Image Sequence with Wondershare Filmora
Creating a video from an image sequence in Wondershare Filmora is simple and efficient. But before that, You need to make conversion of PNG image sequence to JPEG, since only JPEG/JPG files are supported to import as image sequences in Wondershare Filmora.
Why Filmora Is The Ultimate Video Editor For Great Videos That Anyone Can Make
Wondershare Filmora is a versatile and user-friendly video editing software for beginners and experienced editors. It offers a range of powerful features, including drag-and-drop editing, a library of built-in effects and transitions, and support for high-resolution formats, including 4K.
Filmora's intuitive interface makes creating and editing videos easy, while its extensive toolset allows for detailed customization and professional results. Its affordability and regular updates make it a popular choice for creating polished videos efficiently.
Filmora Stands Out for Several Reasons
- Simple editing features: It includes trimming, cutting, adding effects and transitions, and color correction. Filmora also supports 4K video editing to guarantee the high quality of the video being produced.
- Drag-and-Drop Interface: This includes the basic concept. It has the functionality of Drop for editing. It works for their clips and image sequences. You can easily import and arrange.
- Regular Updates: The app is often updated with new features. You will always have the latest tools and methods.
- There are many export options: You can adjust the video for the platform to which it will be uploaded or for the project it is for.
So first, you will have to convert PNG image sequences into JPEG sequences before importing them into Filmora. By converting your PNG sequences to JPEG, you can seamlessly import and work with your images, optimizing for Filmora’s capabilities. Filmora can also export videos as image sequences in JPEG and PNG format, which is great for speaking to different post-production departments.
Batch Conversion of PNG Sequence to JPEG
Here’s the easiest way to convert your PNG sequence to a JPEG sequence.
Step 1: Open Png.jpgwebsite.
Step 2: Click the “UPLOAD FILES” button and navigate your files. You can select up to 20 images at a time.
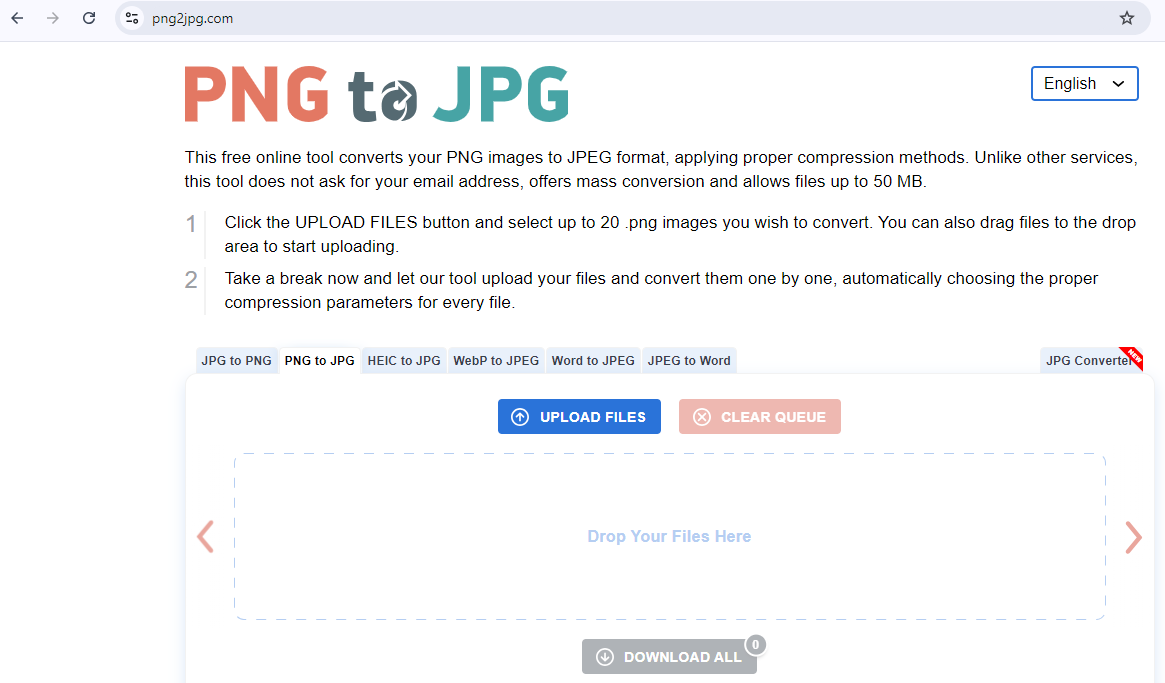
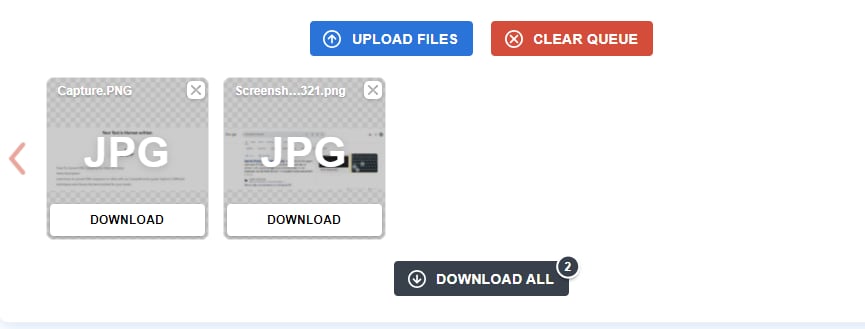
Step 3: Once uploaded, the tool will automatically start converting your files individually.
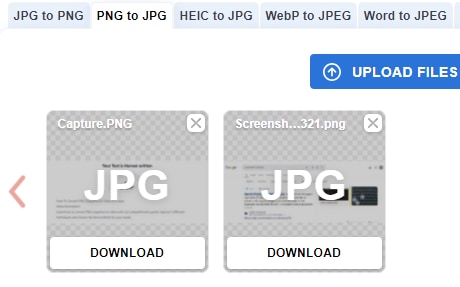
Step 4: After the conversion is complete, download your new JPEG images.
Follow these steps to import your JPEG image sequence and compile it into a video.
Step-by-Step Guide to Import JPG Image Sequence and Create Video
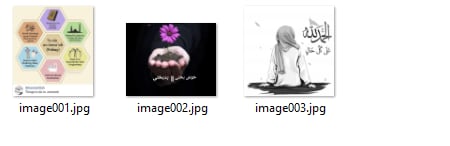
Step 1: Firstly, ensure your image sequence is in JPEG format and numbered correctly in sequential order (e.g., image001.jpg, image002.jpg, etc.).
Step 2: Download Filmora by clicking the buttons below on your device.
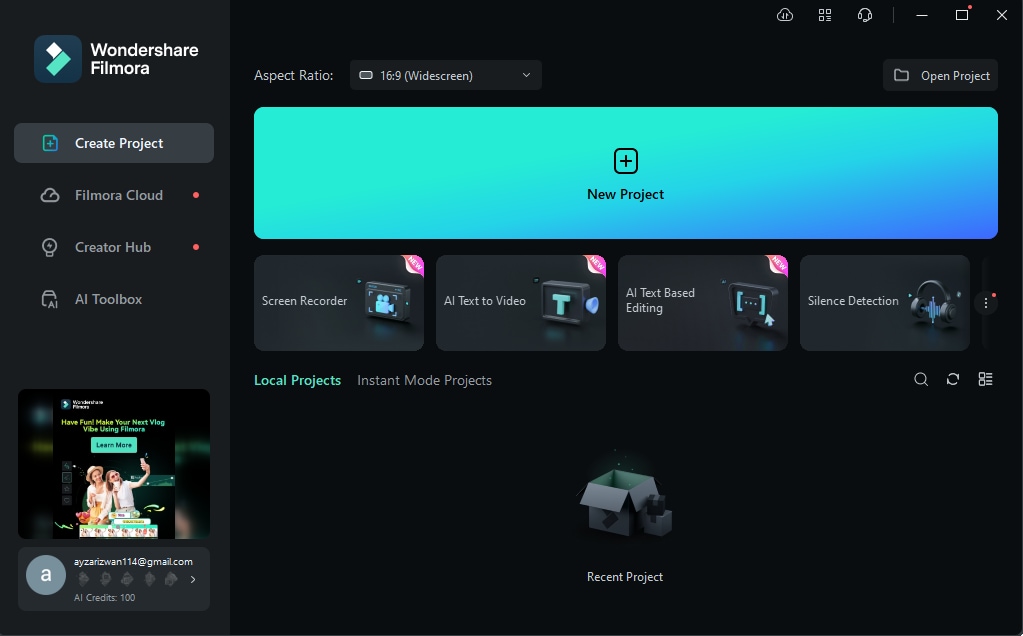
And launch Wondershare Filmora and click on New Project to start a new video editing project.
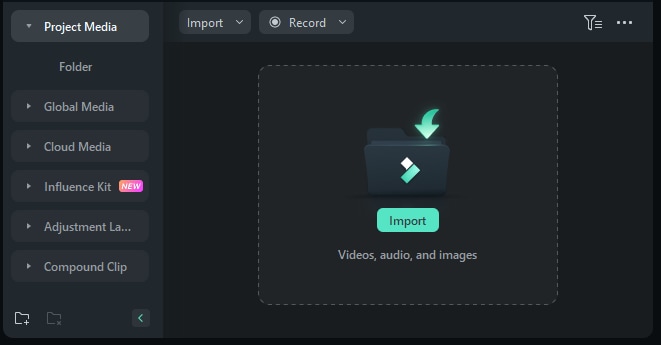
Step 3: Click on the Import button to import your image sequence.
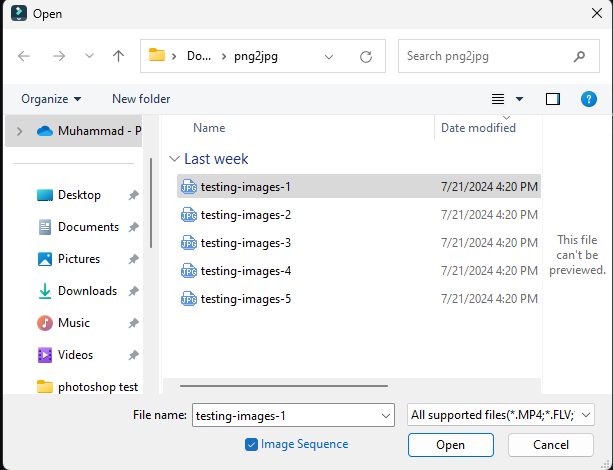
Step 4: Navigate to the folder containing the JPEG image sequence you want to import. Click on the first image, then the image sequence check box. Click on open.
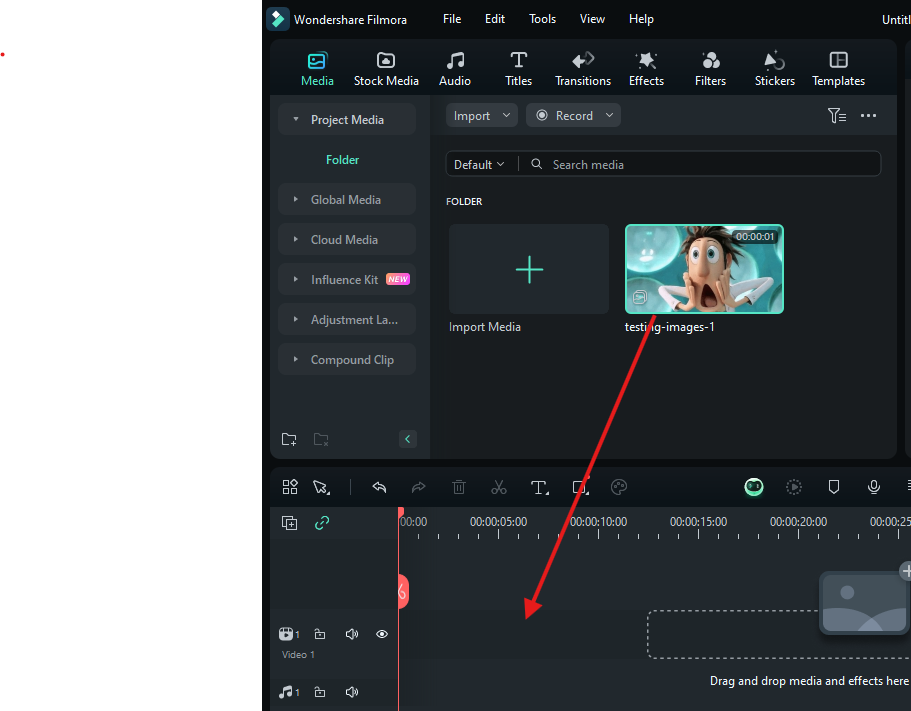
Step 5: Drag and drop the imported image sequence onto the timeline.
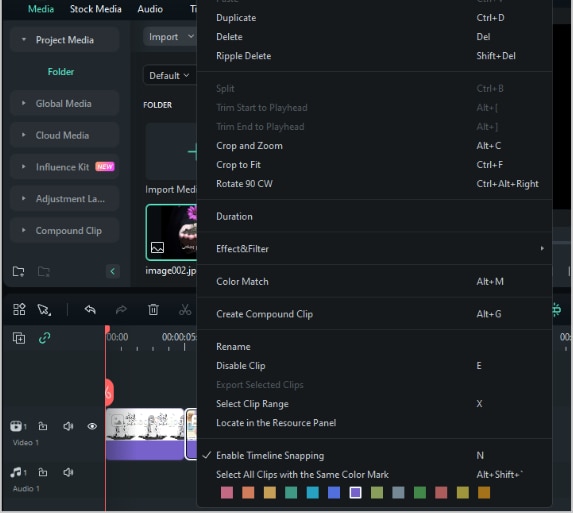
Step 6: By default, Filmora sets a specific duration for each image. To adjust the duration, right-click on an image in the timeline and select Duration. Set the desired duration for each frame.
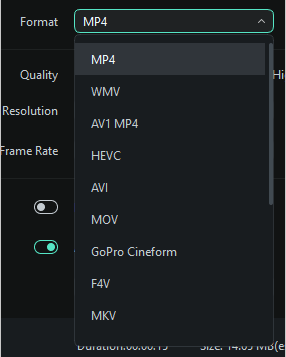
Step 7: Click the Export Button and choose Export Format:
The following section is for you if you want to explore more alternative tools. Without any delay, let’s move to it.
Part 4. Alternative Methods for Converting PNG Sequence To Videos
If you are a beginner who needs a user-friendly interface or a developer who wants powerful tools to manage media files, you can use tools other than Filmora. We have discussed some of them in the following sections. The upcoming section explains how to convert PNG sequence to video via FFmpeg.
Convert PNG Image Sequence to Video in FFmpeg
FFmpeg is a professional tool for converting, editing, recording, and streaming media files. It is available for Windows and macOS.
FFmpeg works via the command line, which makes it less favorable for non-professionals. However, converting the PNG sequence to video is fine. FFmpeg offers batch processing to manage multiple image sequence conversions simultaneously.
Let’s move to the steps you must follow to convert the PNG sequence to video without further delay.
Step-by-Step Guide to convert PNG sequence to Video via FFmpeg
The guide to converting PNG sequence to video via FFmpeg is discussed in a detailed step-by-step fashion. Follow each step accordingly to accomplish your task.
Step 1. Download and install FFmpeg. Once you are done, launch the tool.
Step 2. Once you have the image sequence, click the Start button in the lower left corner.
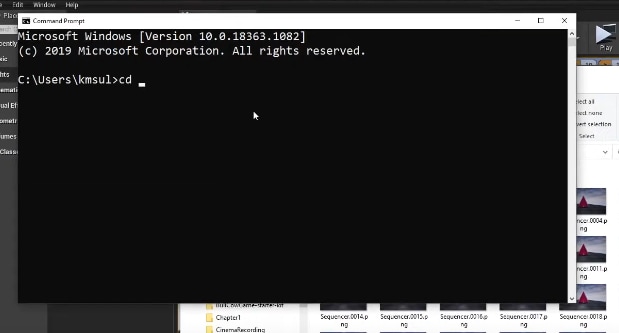
Search and click to open the Command Prompt.
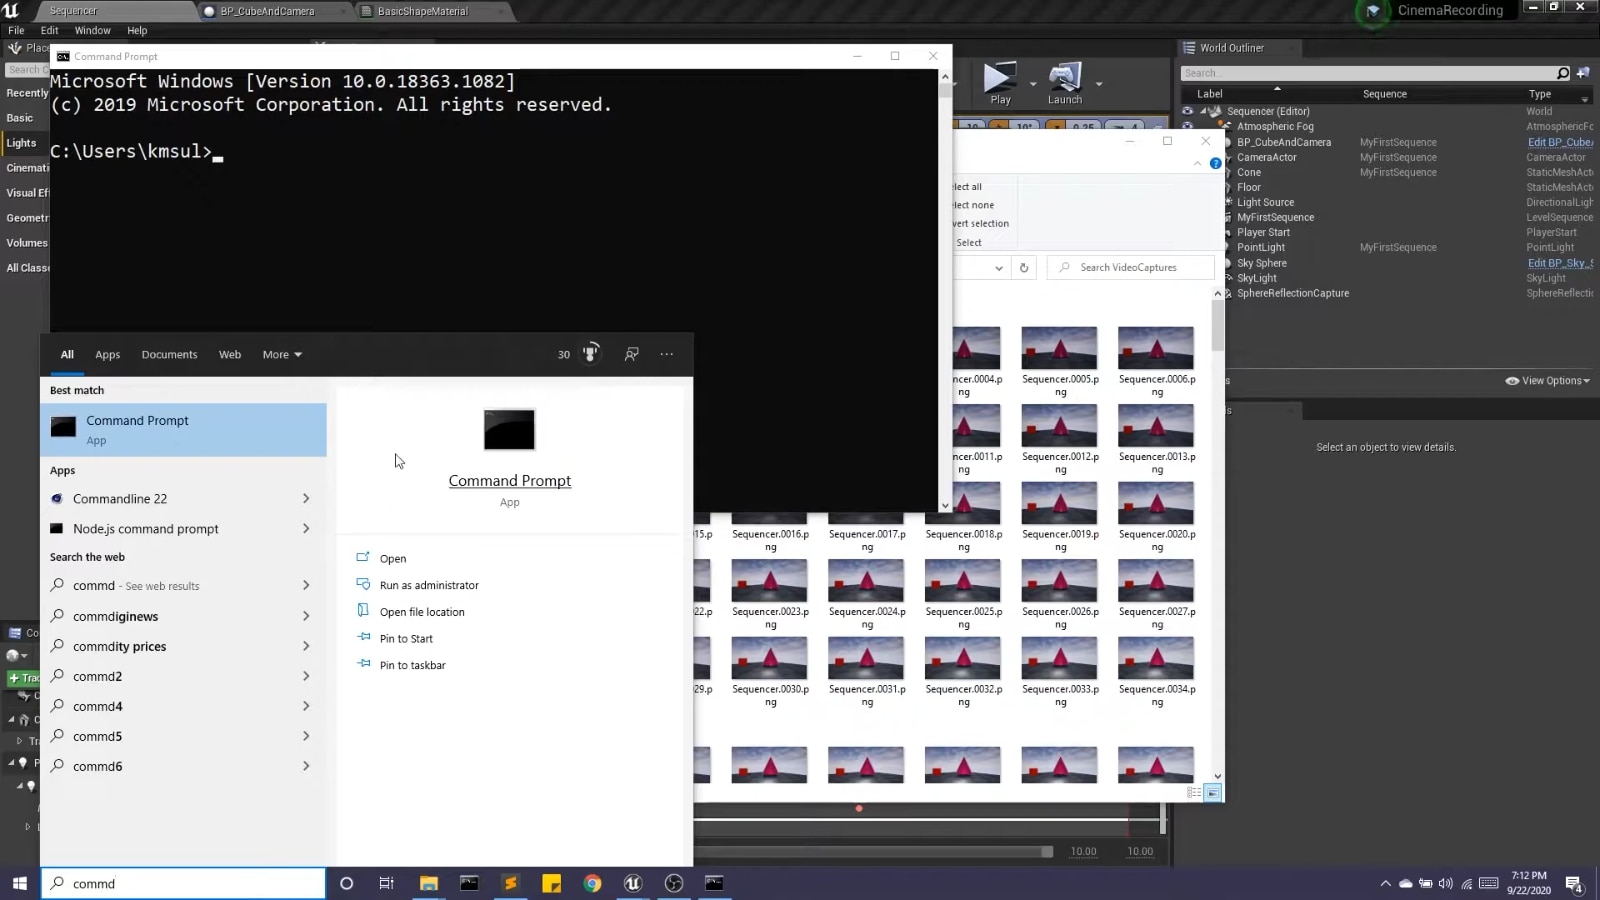
Step 3. The command prompt will open.
Now, type ‘cd’ (change directory) as shown in the picture below.
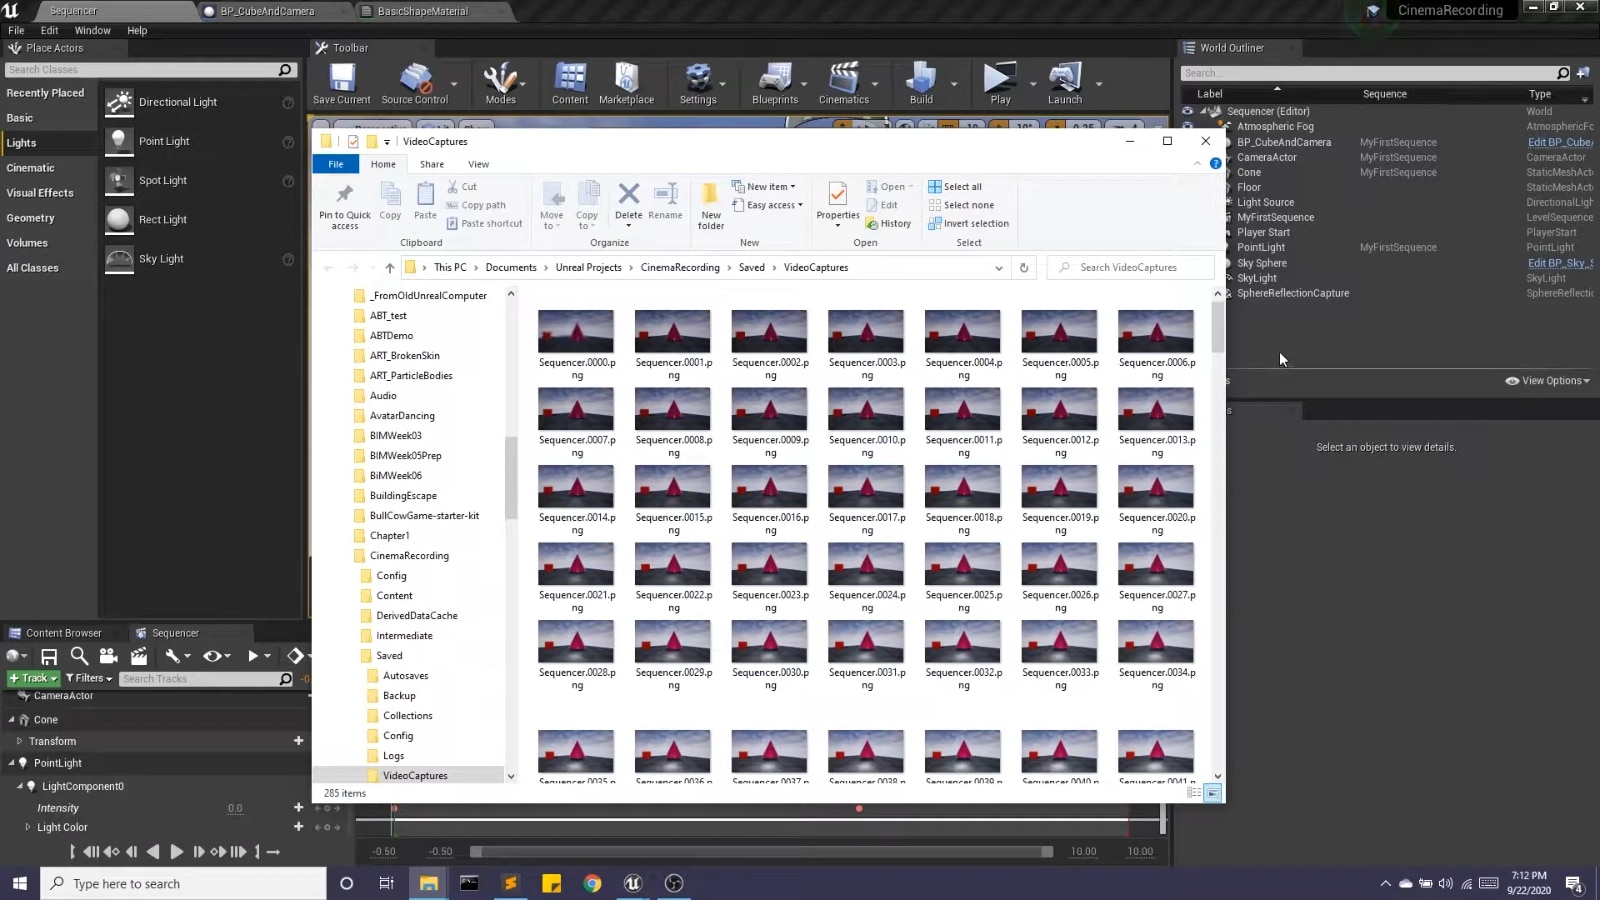
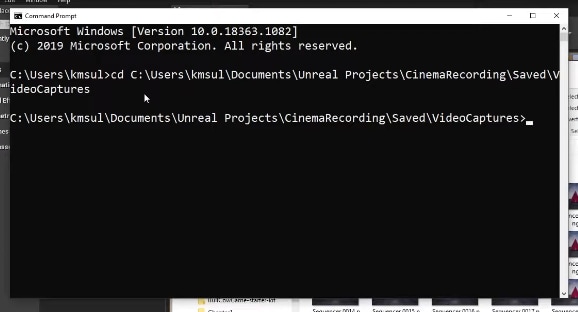
Step 4. Copy the link to the folder where you kept the image sequence, as shown in the image below.

Paste the copied link in the command-line prompt.
Press the Enter key on your keyboard.
Step 5. Type ‘ffmpeg -r (frame rate) -i (input image names) -pix_fmt yuv420p (video Image name).mp4’
In the case of the example given here in the guide,
‘ffmpeg -r 30 -i Sequencer.%04d.png-pix_fmt yuv420p myfirstfilm.mp4’
When you are done, press the Enter key on your keyboard.

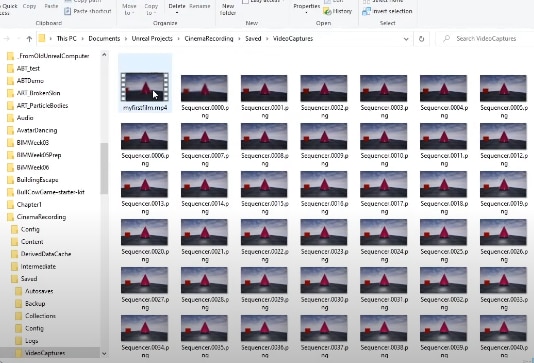
Step 6. Go back to the folder where you kept the image sequence. Your video is there by name.
Click to play it.
Convert PNG Image Sequence to Video in Adobe Photoshop
Adobe Photoshop has been in use for media file editing and graphic design since 1988. The software supports many file formats and offers a wide array of tools, which makes it favorable for conversion and customization.
Adobe Photoshop is a go-to solution for converting PNG sequences to videos. The Timeline panel, Export formats set, and Frame Rate controls help you manage your project effectively.
Step-by-Step Guide to convert PNG sequence to Video via Adobe Photoshop
Converting a PNG sequence to a video via Adobe Photoshop is very easy. Here’s a step-by-step guide on how to do it.
Step 1. Download and install Adobe Photoshop. Once you have completed installation, launch the tool.
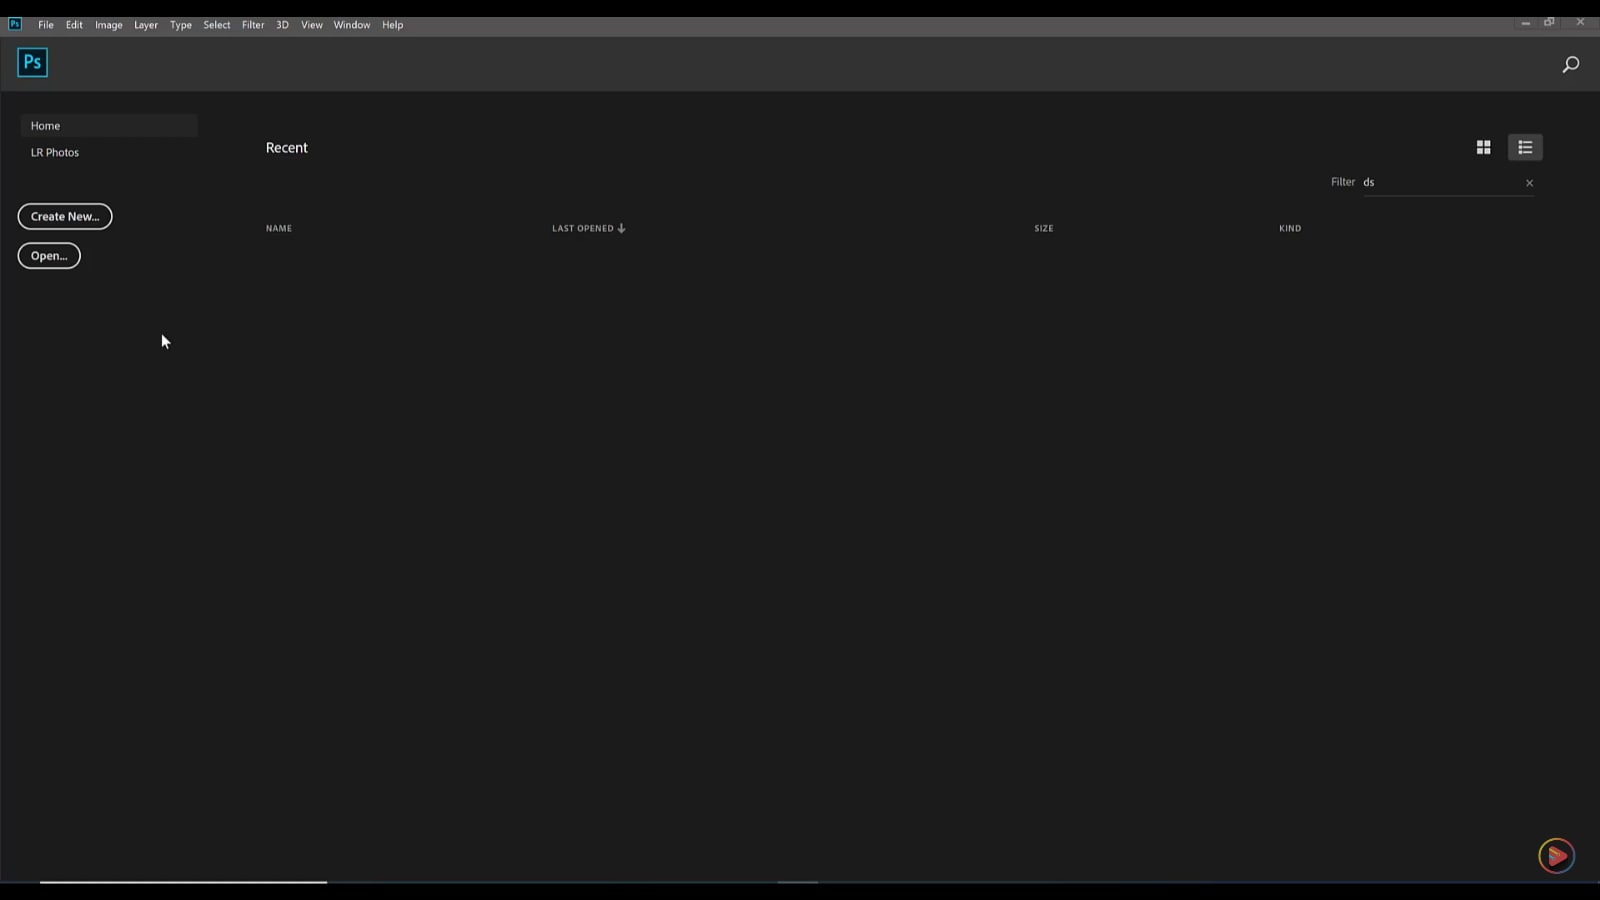
Step 2. On your left side, find and click the Open button. Locate the PNG files you wish to convert.
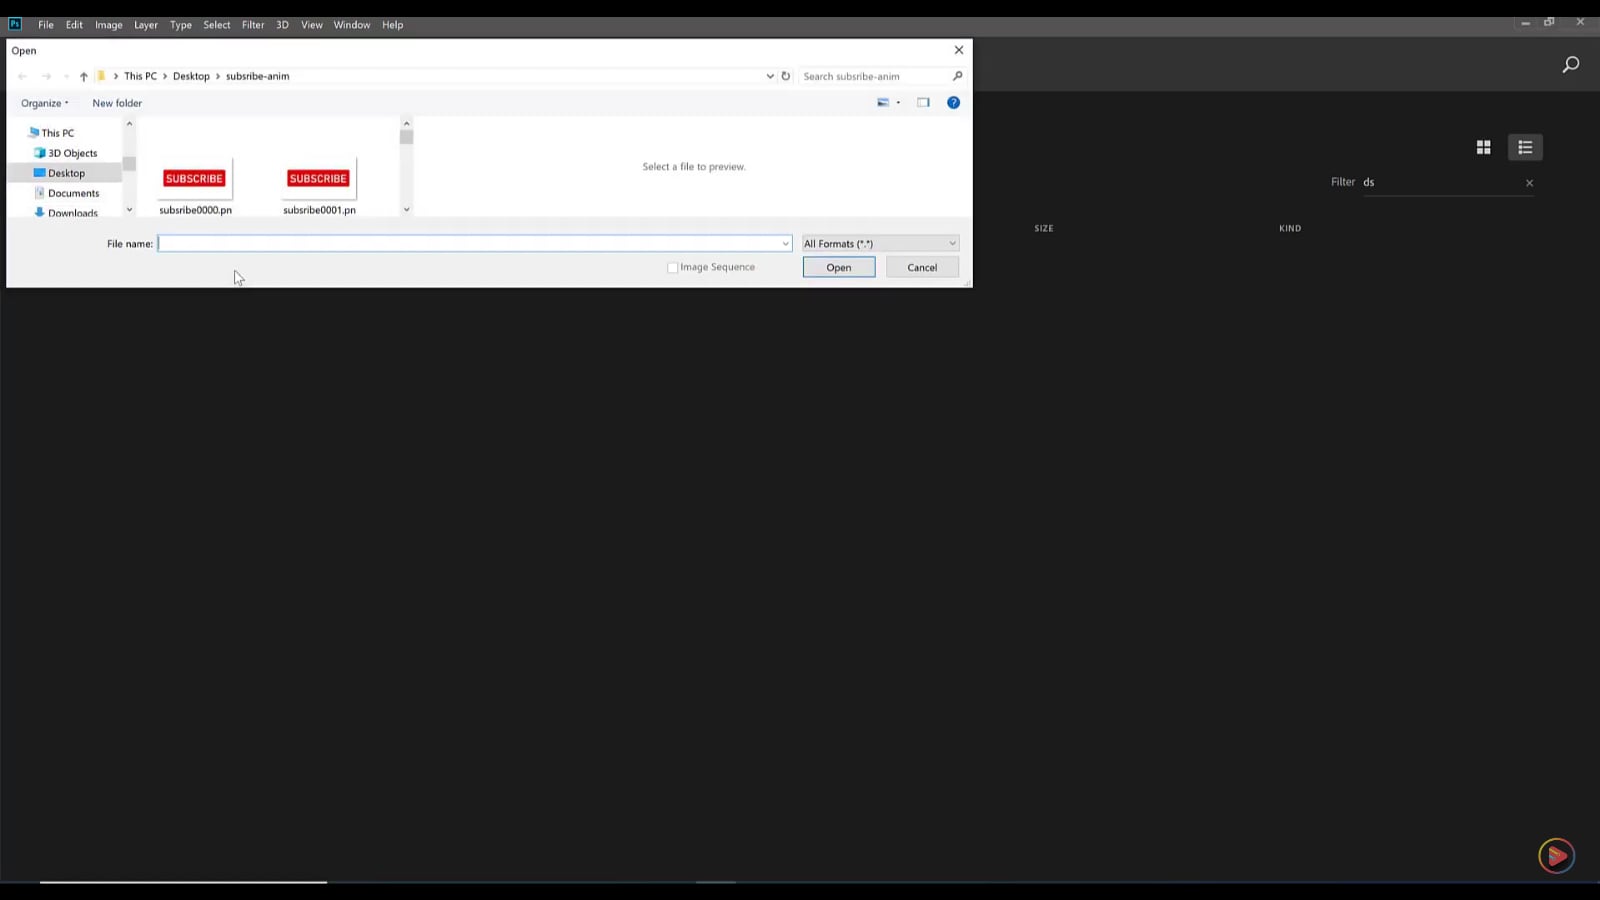
Select the Image Sequence option.
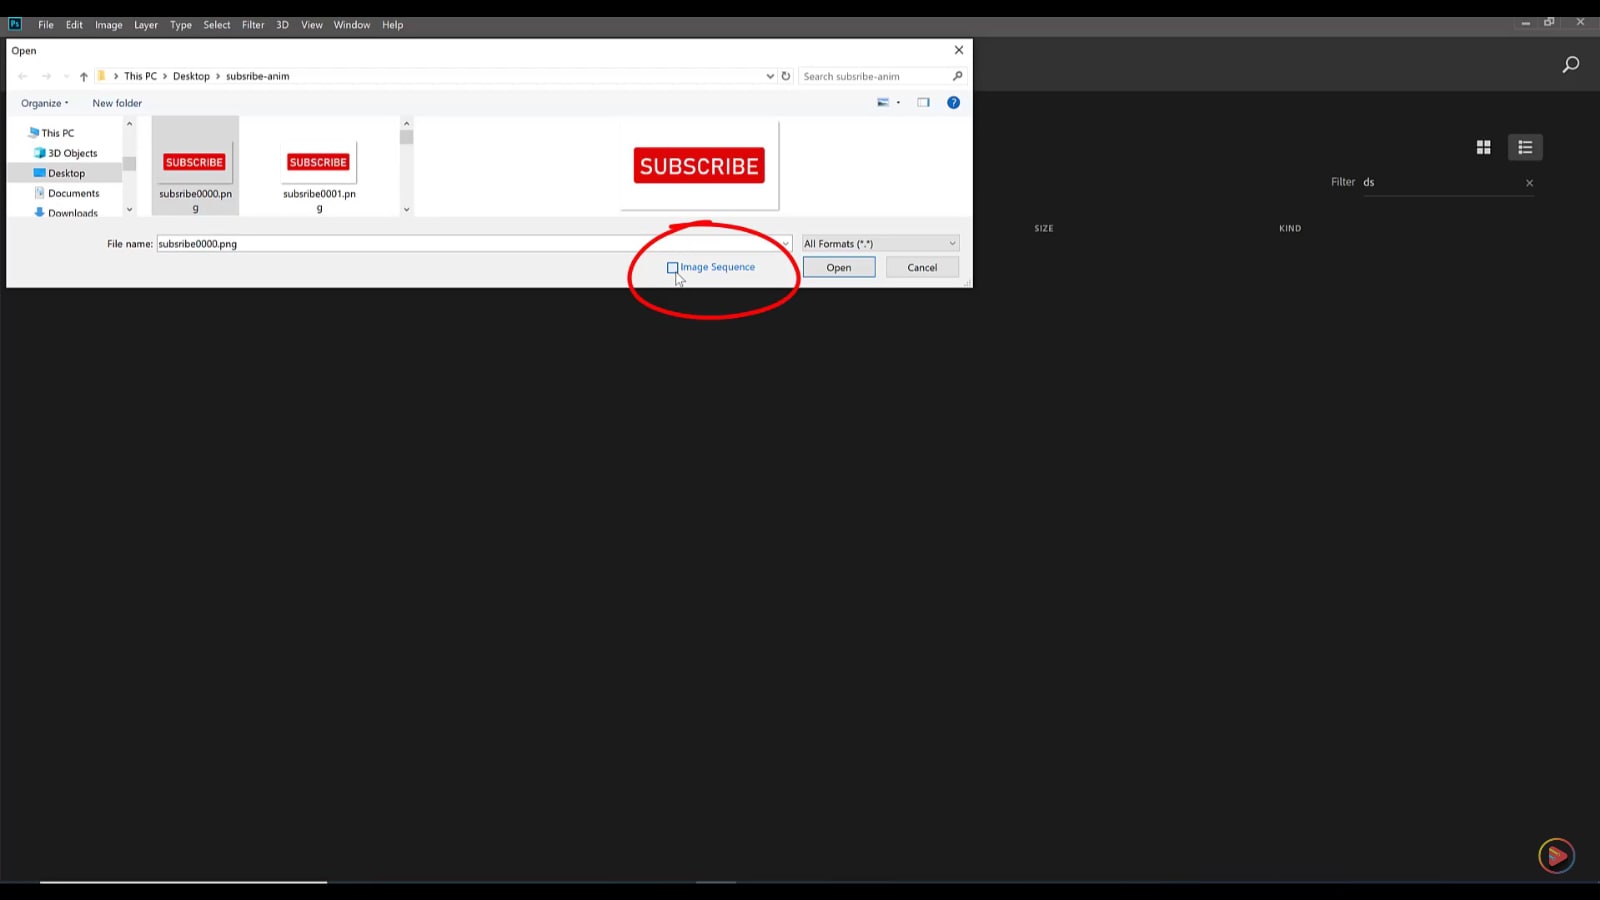
Once you are done, click the Open button.
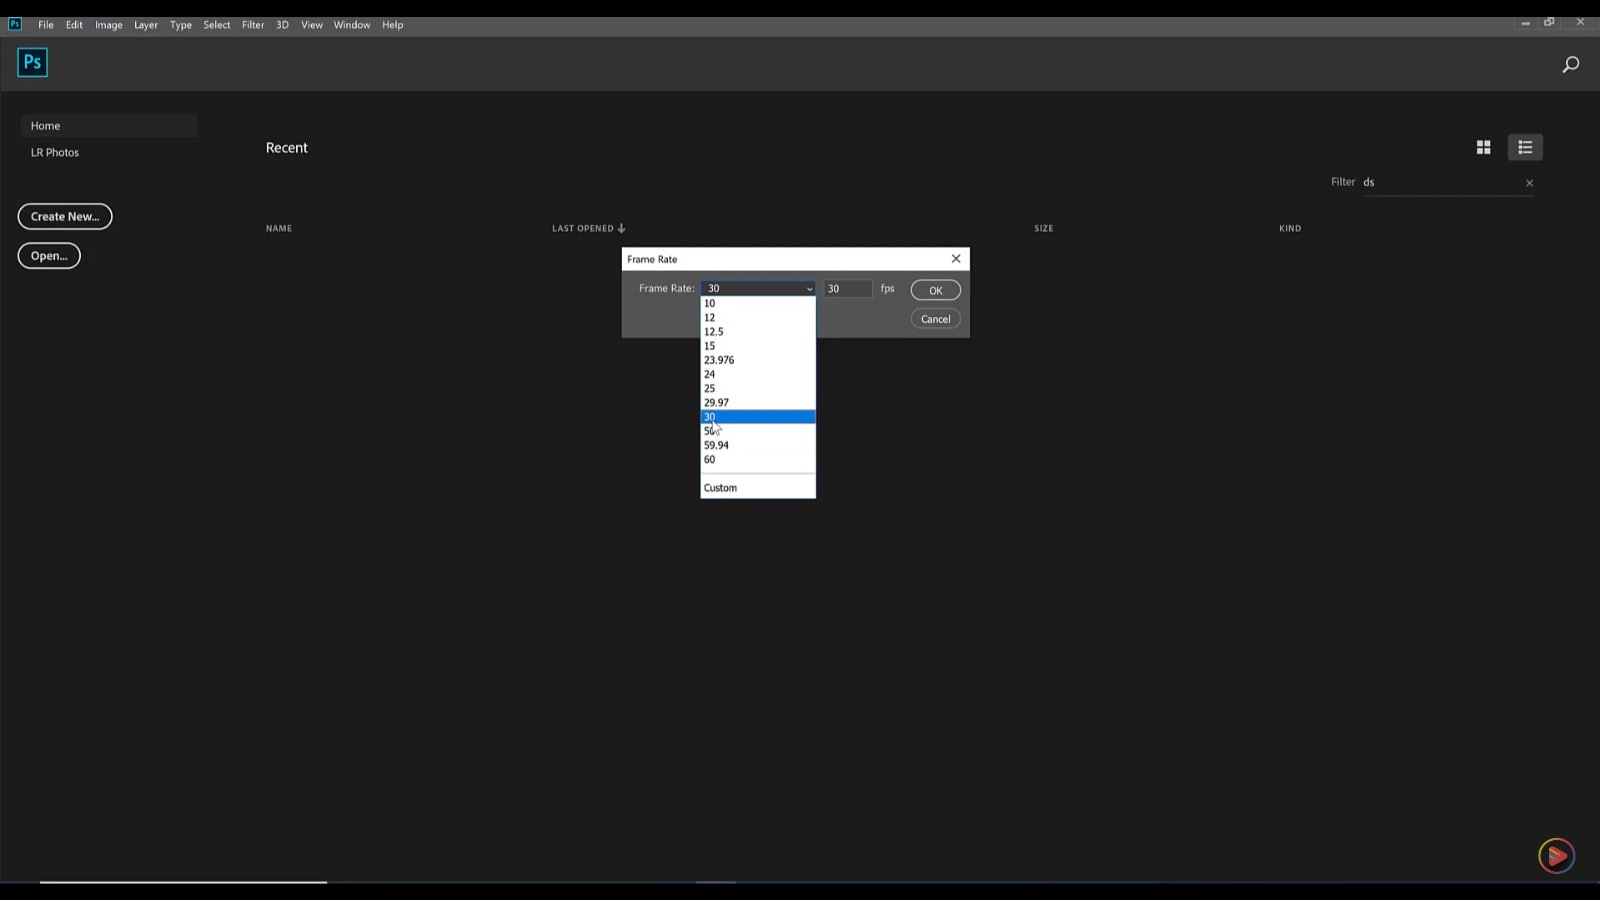
Step 3. Select the frame rate and click on the OK button.
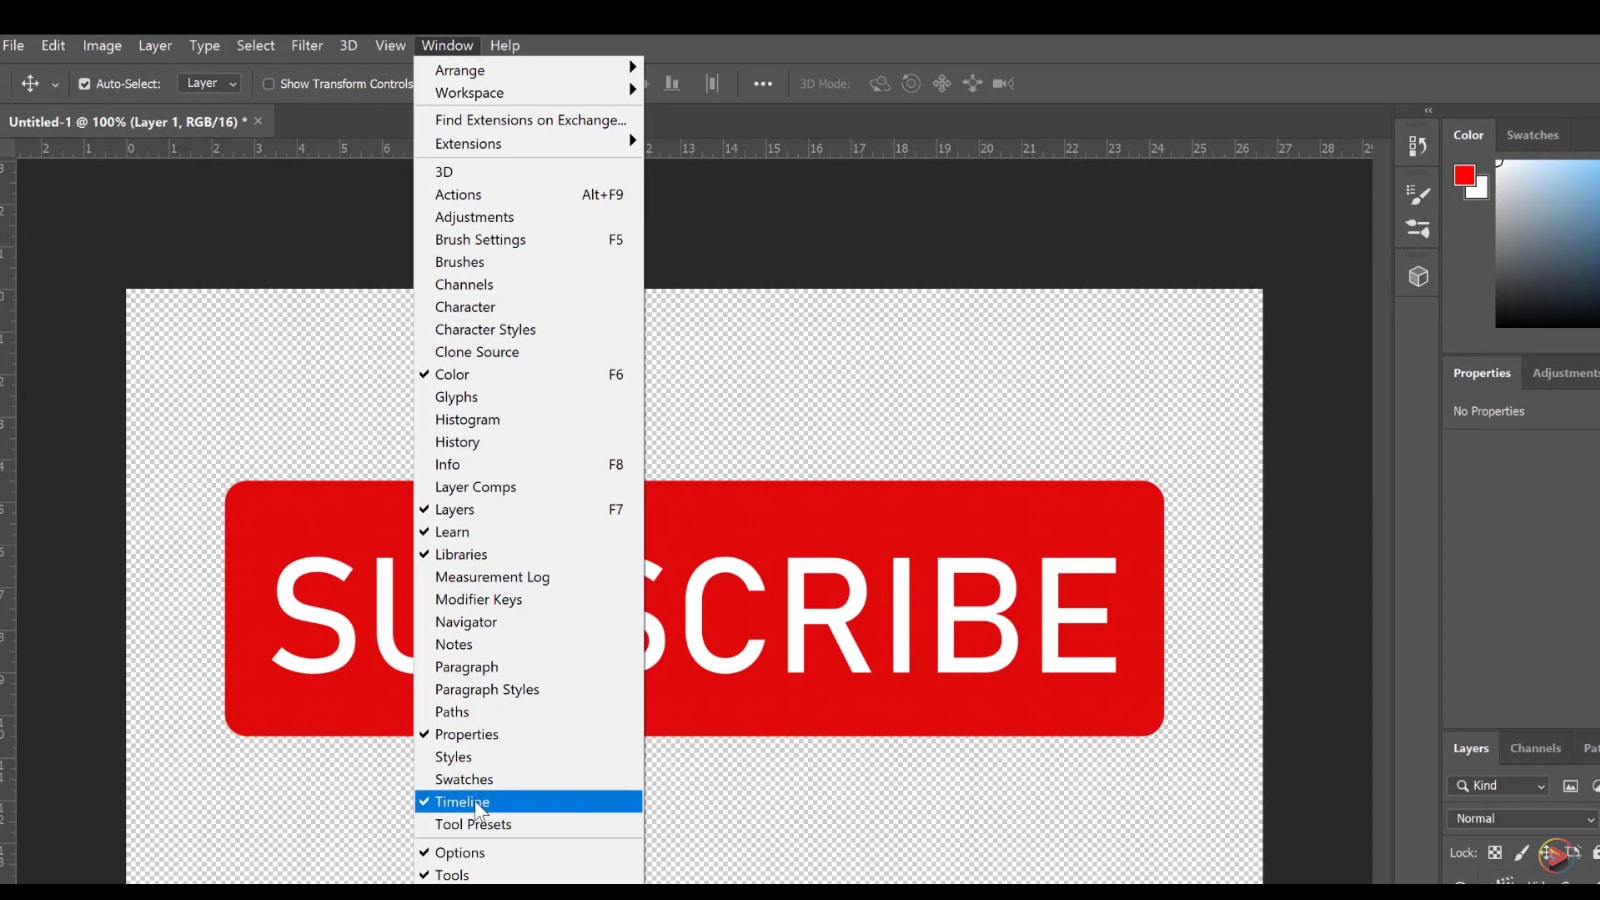
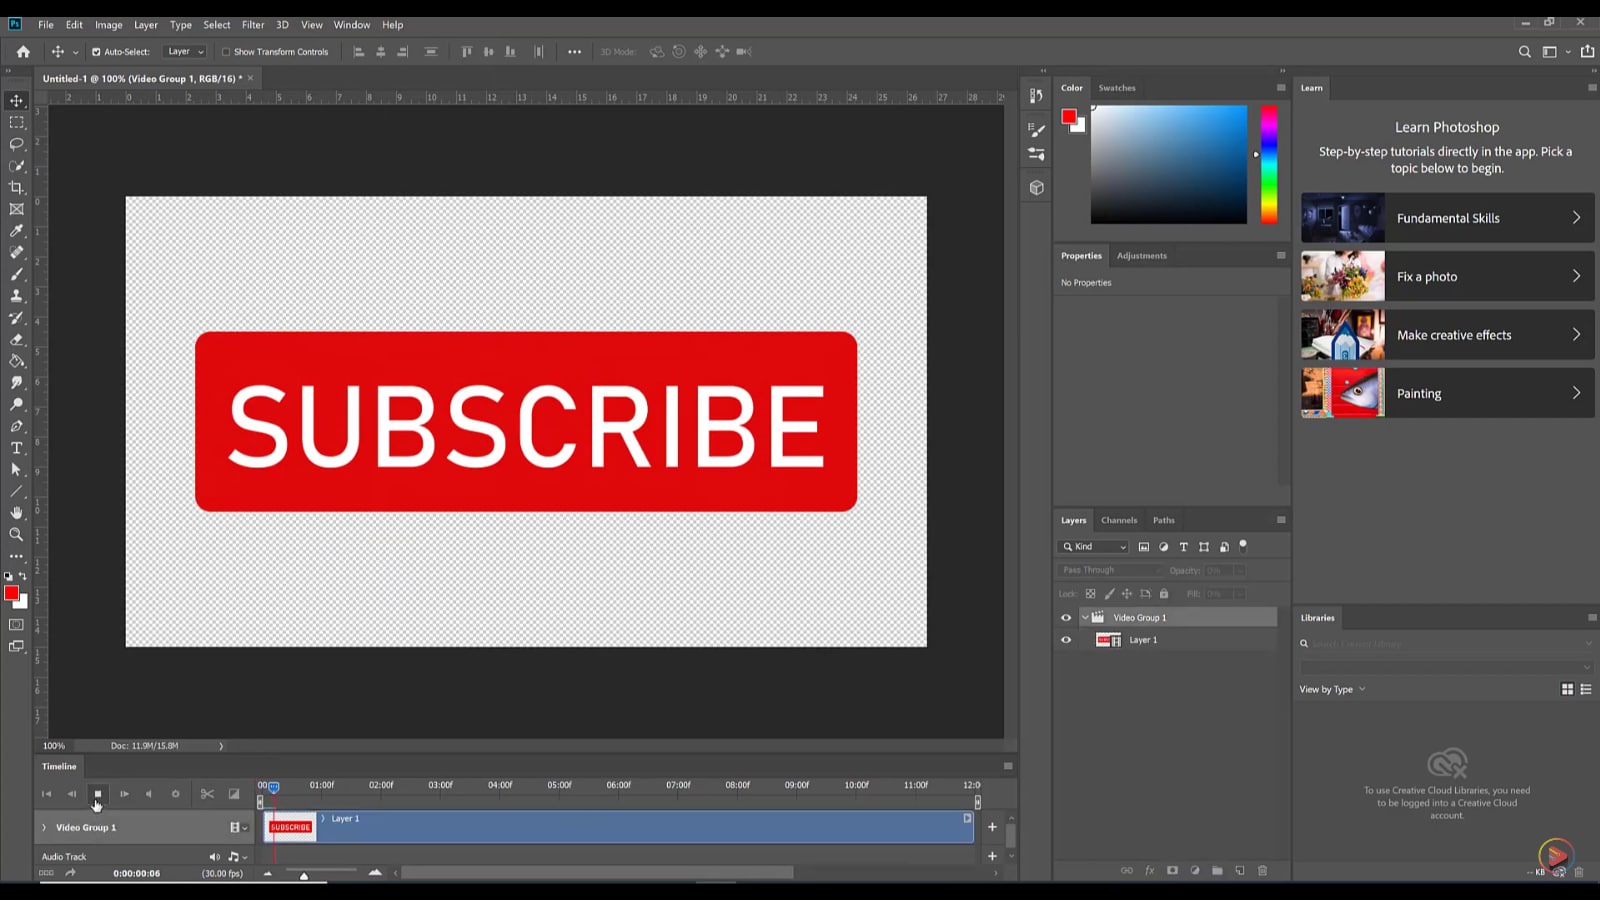
Step 4. Locate the Window section in the top left corner. Find Timeline and click on it.
Step 5. Now click on the play button. Your video's timeline will appear when it is played.
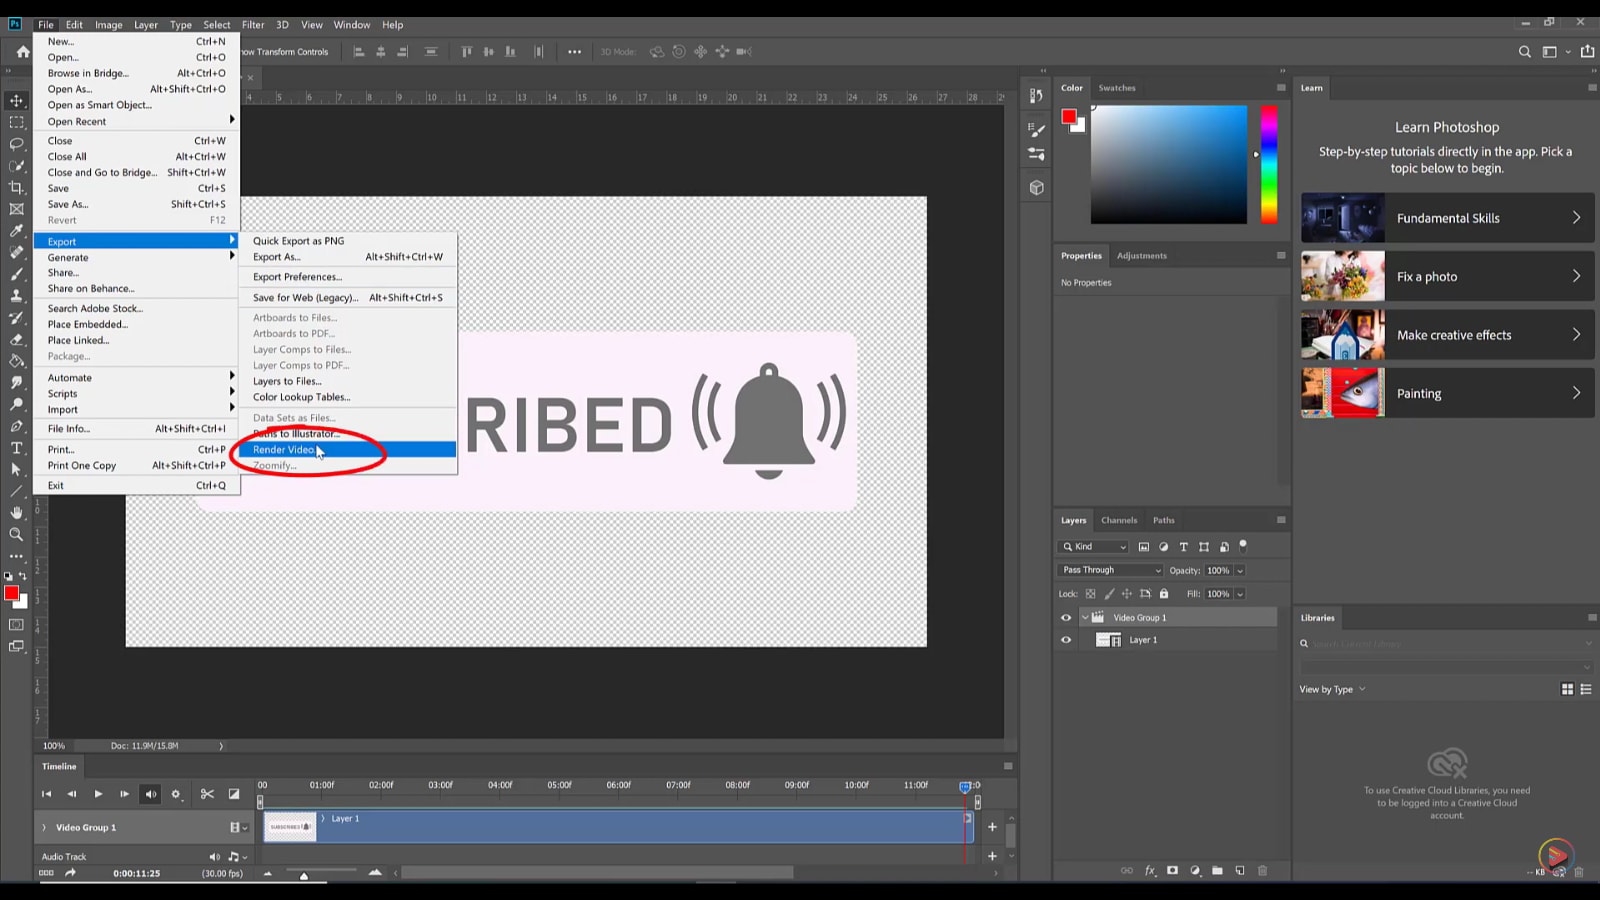
Step 6. In the top left corner, click on the File button. Find and click on the Export. In the Export section, find and click on Render Video.
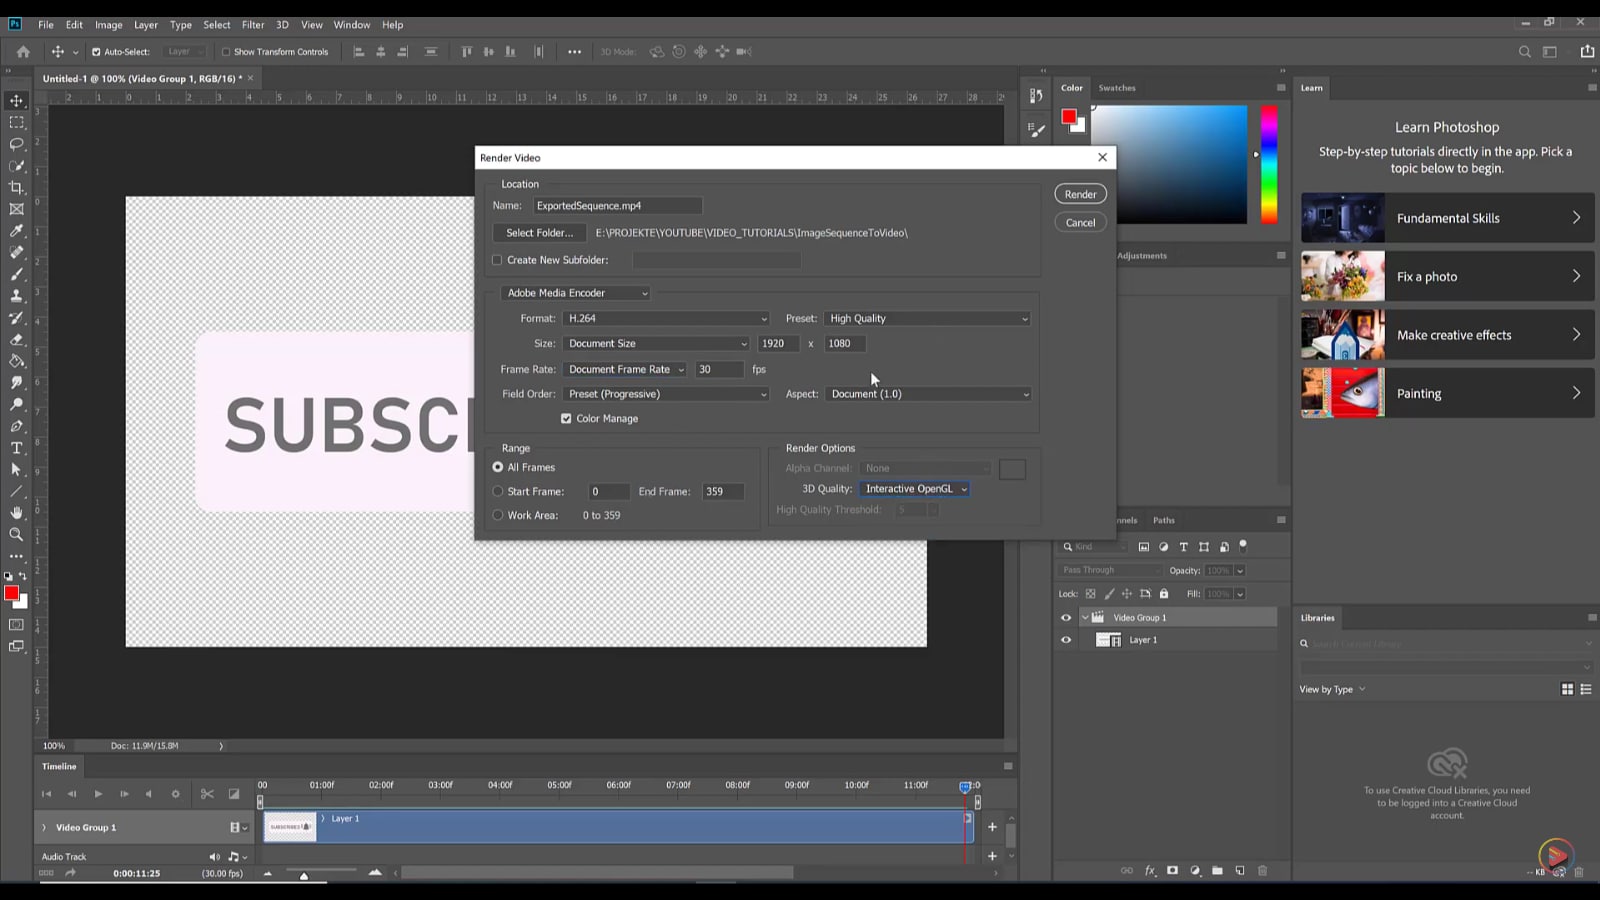
Step 7. After clicking on Render Video, the Render Video window will show up. Make the necessary changes you wish to make and click on the Render button. You will find the saved video in the selected folder.
This is all about Adobe Photoshop and a step-by-step guide to converting PNG to video files. The following section discusses another tool, Blender, and its step-by-step guide.
Convert PNG Image Sequence to Video in Blender
Blender specializes in 3D models and animations. It has been a comprehensive tool used by industrialists and developers to create and customize animations and digital art since 1988.
Blender offers several tools to enhance your media files, such as modeling, sculpting, texturing, and rendering. It supports Windows, Linux, and macOS and is free to use for a lifetime.
Let’s move to the step-by-step guide to convert the PNG sequence to video without delay.
Step-by-Step Guide to convert PNG sequence to Video via Blender
Using Blender is very user-friendly. All you need to do is follow the given steps to convert the PNG sequence into video,
Step 1. Download and install Blender from the Website. Launch the tool.
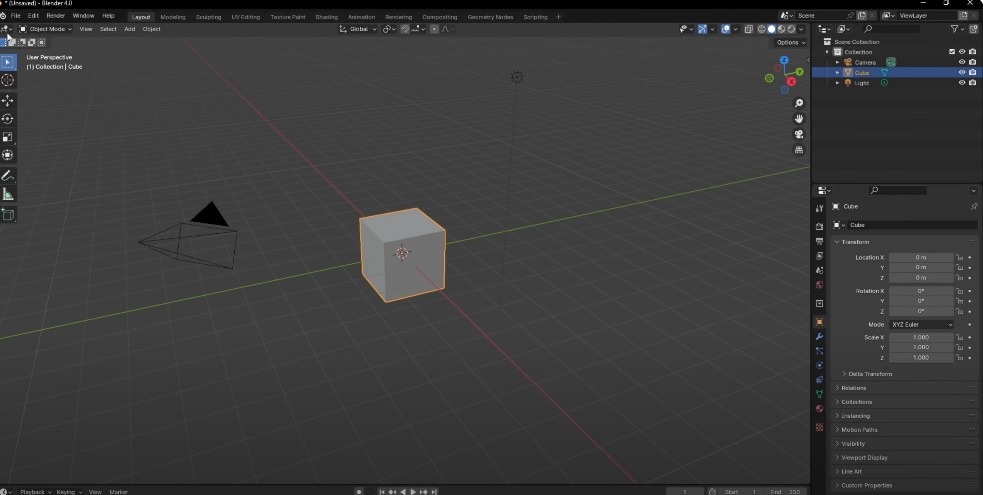
Step 2. Go to the Editor type (top left corner). Set it to Video Sequencer.
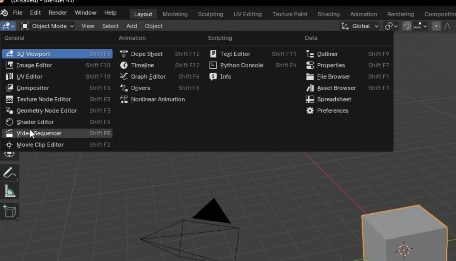
Step 3. Go to the Add and choose the Image Sequencer.

Locate the folder you have saved the PNG images in.
Select all the PNG images.
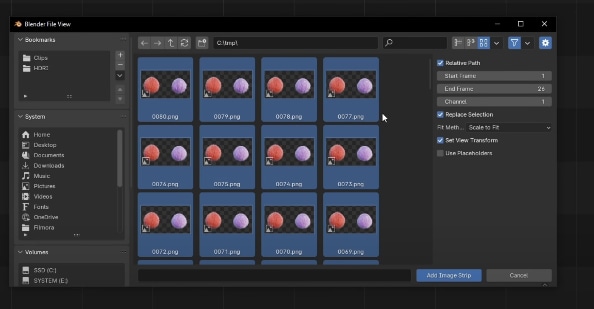
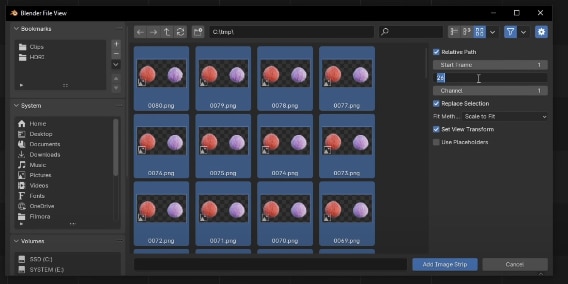
Step 4. Set the End Frame to the number of images you have selected.
Then, click on the Add Image Strip button.
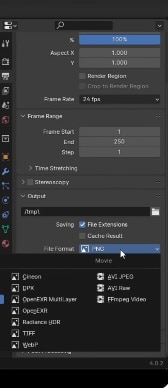
Step 5. You can adjust the Format and the Frame Range from the options given on the right side of the interface.
To save the file, scroll down and find the File Format. Click on it and set it to MPEG video.
We discussed all you need to do to convert a PNG file to a video using Blender. The following section discusses the last alternative tool, the online converter - PNG sequence to MP4.
Convert PNG Image Sequence to Video Online
Online converters allow you to convert your PNG sequence to video. Several web-based tools will enable you to play around with your media files. Online converters are ideal for one-timers who only need converters sometimes.
MConverter is one of the most trusted online PNG to MP4 converters. It has a primary interface. MConverter allows batch processing. You can upload files directly from cloud accounts.
The free trial has limited features. Paid versions start at 7.49/month.
Step-by-Step Guide to convert PNG sequence to Video via Video Online
Here’s the guide to converting the PNG sequence to video by MConverter.
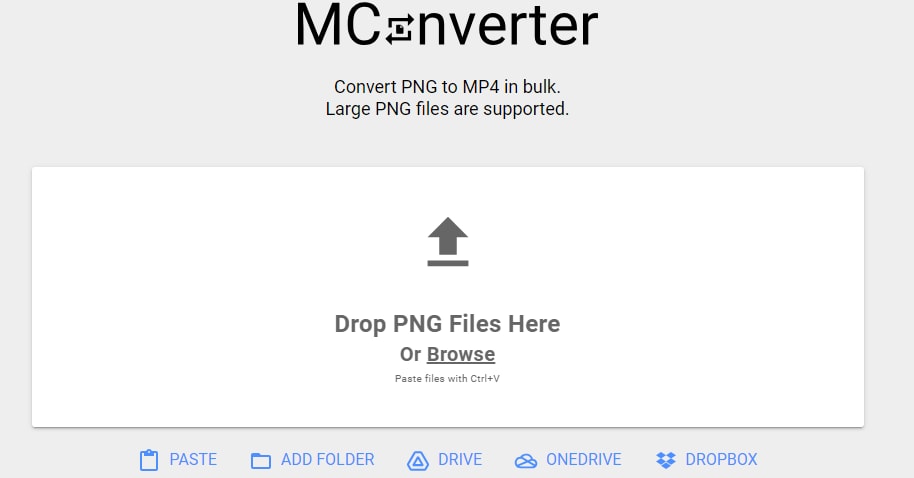
Step 1. Launch the MConverter.
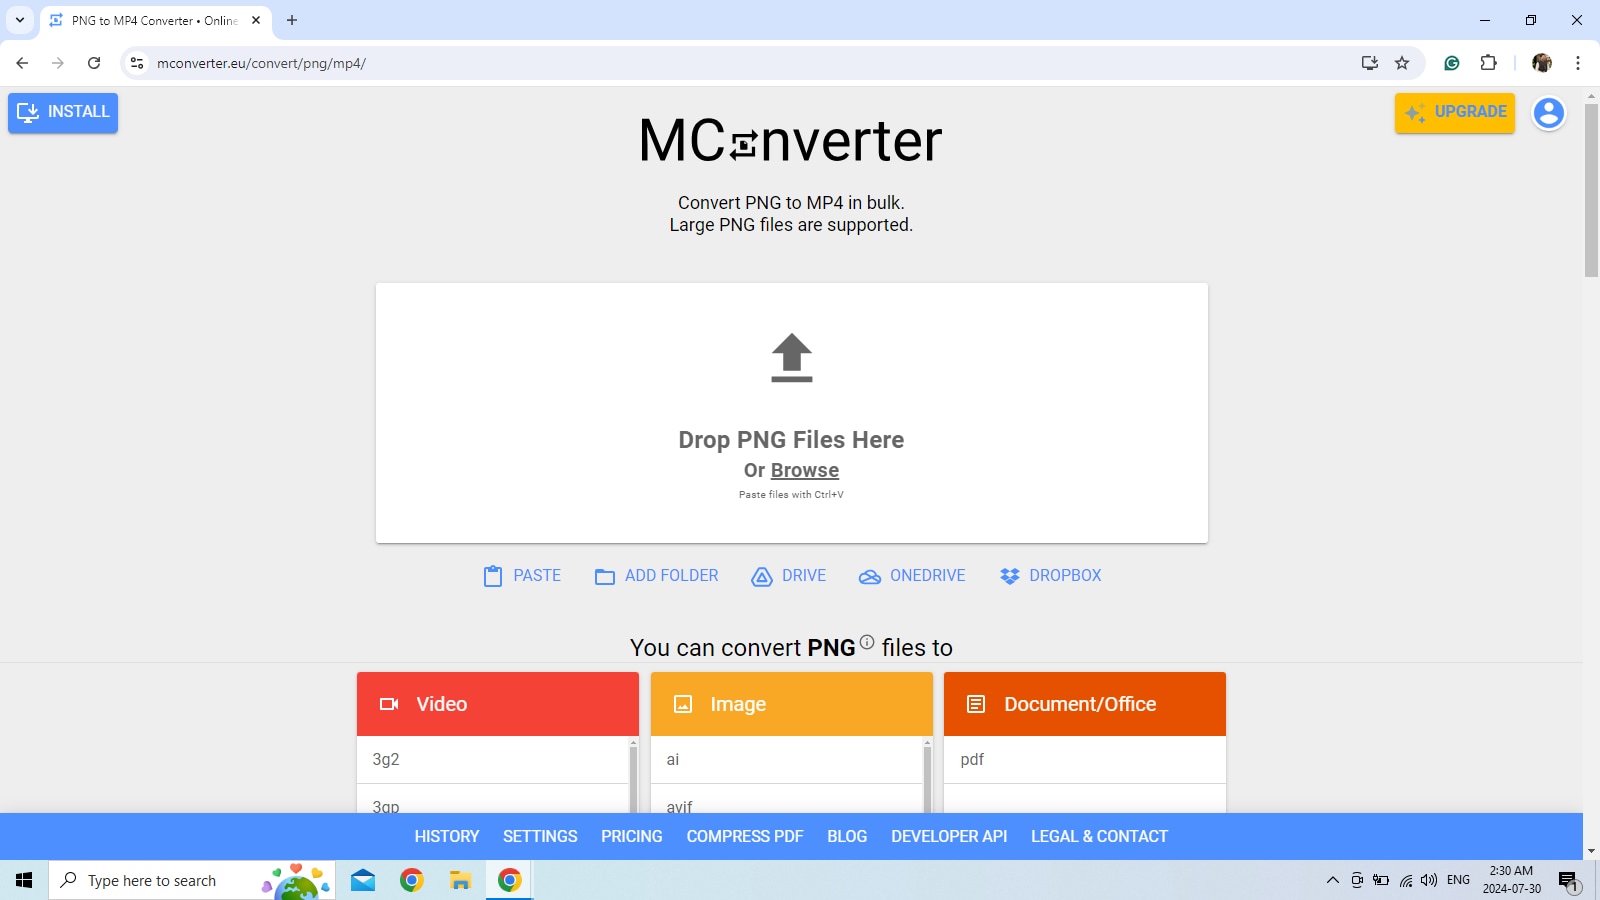
Step 2. Click on the Drop PNG Files Here. Browse the file that keeps your images.
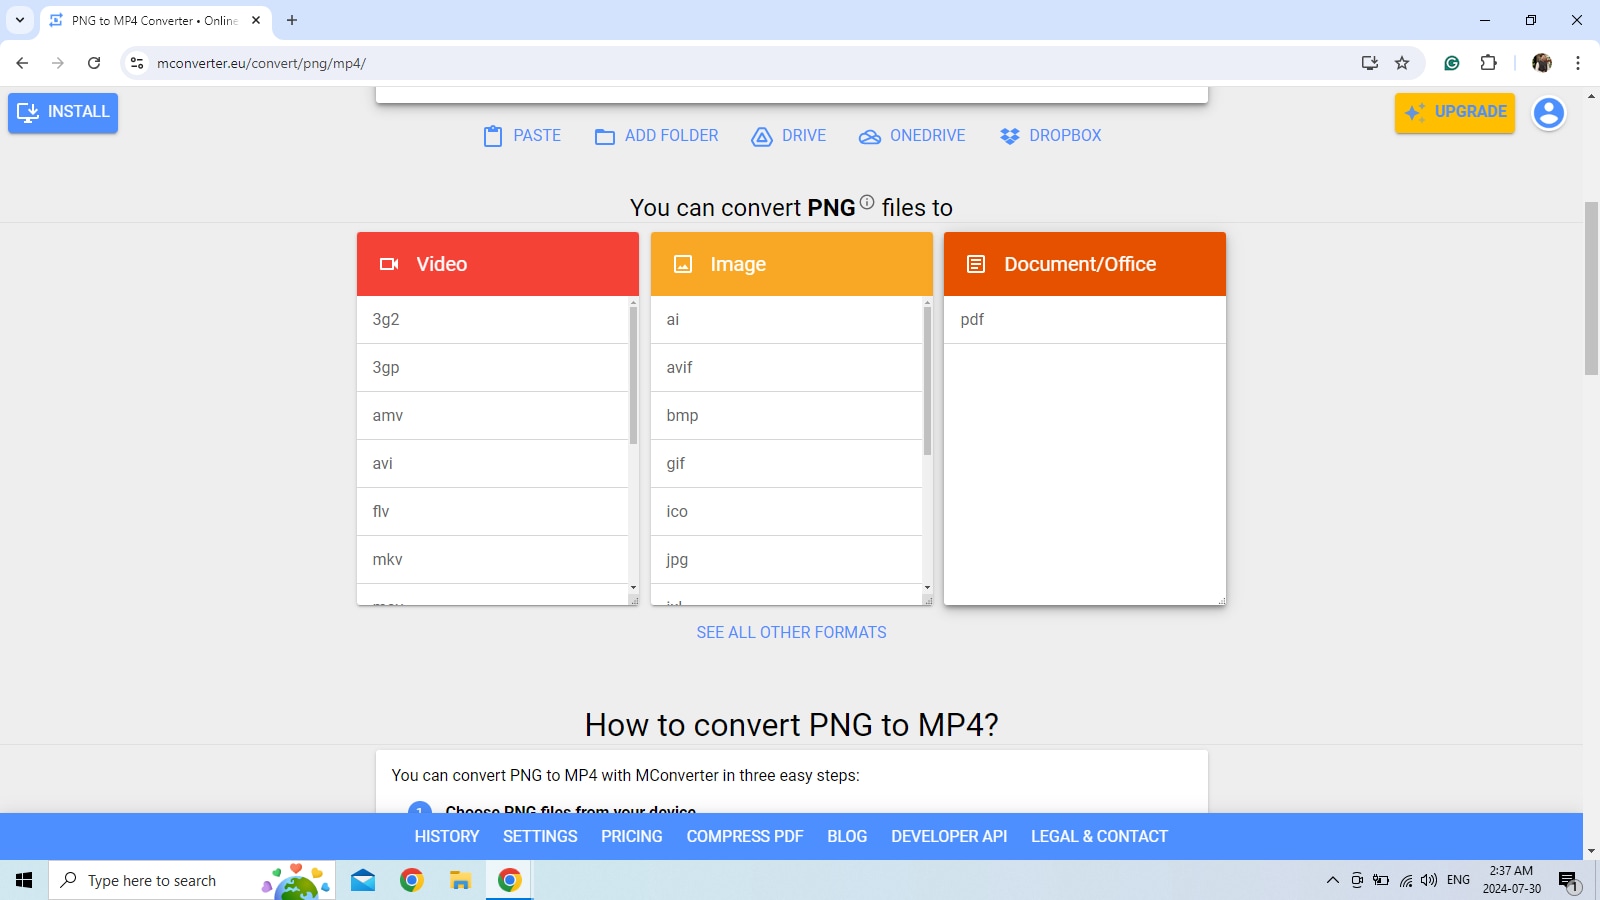
Step 3. Below the Drop PNG Files Here, you will find the Target format section.
Select mp4 format.
Step 4. Download the converted media file directly.
You can manipulate the destination of the video file by naming the folder in the SAVE TO section.
Now, let’s move to the next section, where we have discussed frequently asked questions regarding PNG sequence and video conversion.
Conclusion
Editing and converting media files, particularly image sequences, into videos is widespread today. Filmora, with its simple user interface and rich functionality, can help convert PNG into video. We've explored alternative tools to Filmora.
Each tool has its own unique set of functions and benefits. Some are simpler to use, while others require command-line expertise. Online converters are also available for one-timers. They do have limitations regarding the quality and privacy of the content.
We hope you find this article helpful.
