For the Best Results, Use the Latest Version.
-
Preparations
-
Account
-
Get Started & Basic Settings
-
Compatibility & Tech Specs
-
Performance Settings
-
-
Creating Projects
-
Creating New Projects
-
-
Importing & Recording
-
Video Editing for Windows
-
Basic Video Editing
- Enable/Disable Clip in Windows
- Magnetic Timeline for Windows
- Dual Monitor Setup for Video Editing on Windows
- Select All Clips on Timeline for Windows
- Manage Timeline and Tracks on Windows
- Auto Ripple for Windows
- Split & trim video
- Crop & Pan & Zoom Video
- Compositing
- Change Video Speed on Windows
- Playing videos in reverse
- Mark In and Mark Out for Windows
- Markers for Windows
- Group editing
- Customizable Backgrounds for Videos and Images in Windows
- Video snapshot
- Using freeze frame
- Logo Reveal For Windows
- Apply auto enhance
- Applying drop shadow
- Adjustment layer for Windows
- Transforming
- Video Editing Ruler – Windows
-
Advanced Video Editing
- Drawing Tools for Windows | Filmora Guide
- Create Multi-Camera Clip
- Compound Clip for Windows
- Multi-Clip Editing for Windows
- Filmora Motion Blur | Windows
- Filmora Flicker Removal Guide | Windows
- Apply mask to video
- Creating a PIP effect
- Keyframe Graph Editor for Windows
- Add animation keyframing for Windows
- Keyframe Path Curve for Windows
-
AI-Powered Video Editing
- Smart Scene Cut for Windows
- Smart Short Clips for Windows
- AI Face Mosaic for Windows
- Filmora AI Eye Contact- Windows
- AI Video Enhancer for Windows
- AI Text-to-Video for Windows
- Planar Tracking for Windows
- AI Idea to Video for Windows
- Filmora Image to Video for Windows
- Filmora Image to Prompt for Windows
- Instant Cutter Tool for Windows
- AI Extend
- Filmora AI Relight - Windows
- Filmora AI Image Enhancer Guide - Windows
- AI Script to Video Guide for Windows
- AI Text-Based Editing for Windows
- AI Mate Editing for Windows
- Create with instant mode
- ChatGPT Plugin - AI Copywriting
- AI Smart Cutout
- Lens correction on Windows
- Auto reframe video
- AI Portrait Cutout
- Scene detection feature
- AI Smart Masking for Windows
- Make motion tracking
- Video Stabilization for Windows
- AI Video/Photo Object Remover for Windows
- AI Smart Search for Windows
- AI Skin Tone Protection for Windows
- AI Image for Windows
- Chroma key (green screen)
- Super Slow Motion with Optical Flow for Windows
- Video Denoise for Windows
-
-
Audio Editing for Windows
-
Basic Audio Editing
-
Advanced Audio Editing
-
AI-Powered Audio Editing
-
-
Text Editing for Windows
-
Basic Text Editing
-
Advanced Text Editing
-
AI-Powered Text Editing
-
-
Video Customizations
-
Video Effects
-
Audio Effects
-
Transitions
-
Stickers
-
Filters
-
Color Editing
-
Animations
-
Templates
-
Asset Center
-
-
Exporting & Share & Cloud Backup
Apply Segmented Speed Control Windows
This feature allows you to create multiple speed variations within a single video clip using adjustable speed points. It helps editors create cinematic slow motion, fast-paced action cuts, beat-synced edits, and dramatic freeze frame moments with precision. Segmented speed automatically divides clips into independent speed segments, giving each section its own playback speed and allowing real-time preview for smoother editing workflows.
Comprehensive Steps to Apply Segmented Speed Control
The segmented speed control feature in Filmora enables users to adjust playback rhythm with professional precision. Follow the steps below to learn how to use this feature:
Index
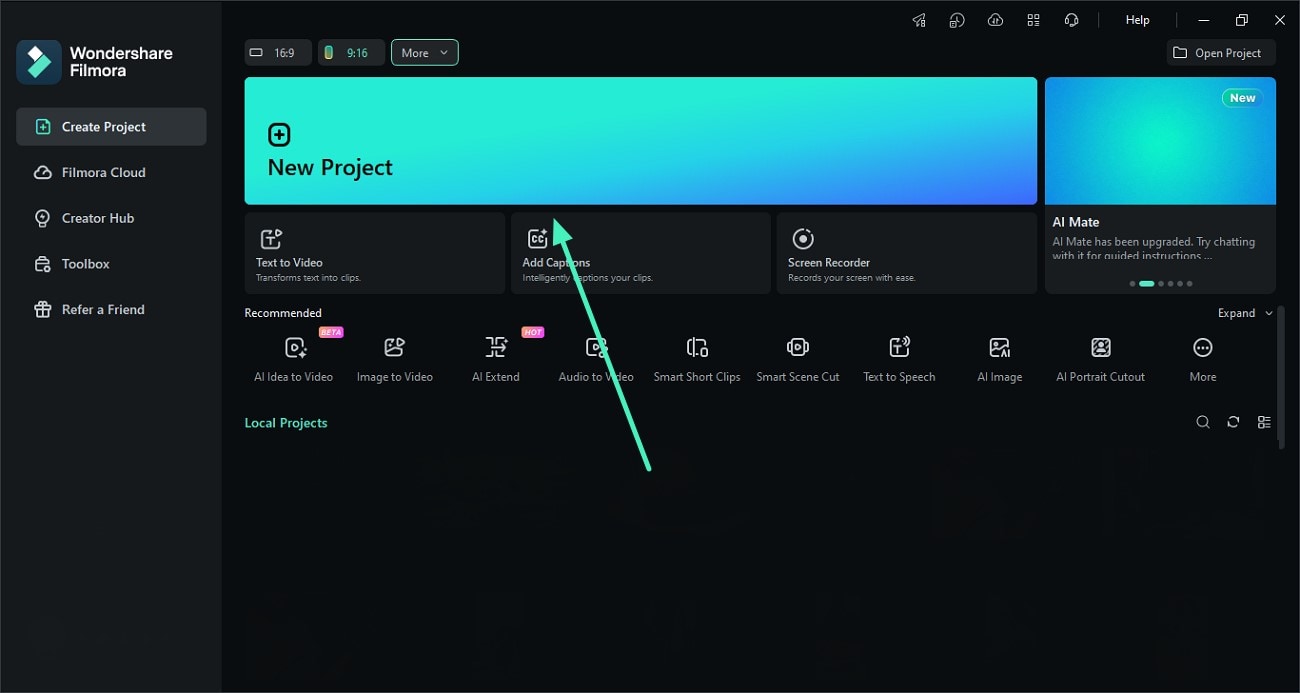
Step 1. Open a New Filmora Project
Launch Filmora on your Windows and click the New Project option from the homepage. Import your video into the media library and drag the clip onto the timeline. Select the video clip where you want to apply segmented speed adjustments.
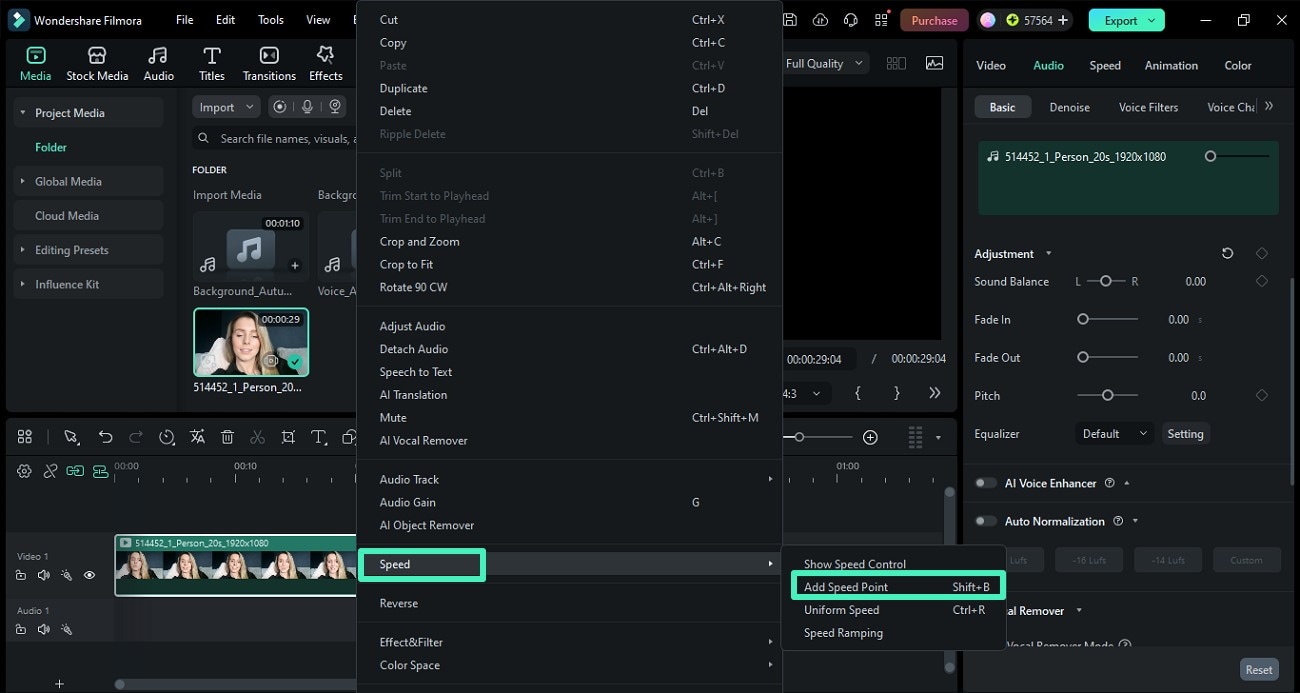
Step 2. Enable Speed Control Panel
Move the red line playhead to the position where you want to create a speed variation and right click to enable a list of options. Expand the Speed option and choose Add Speed Point.
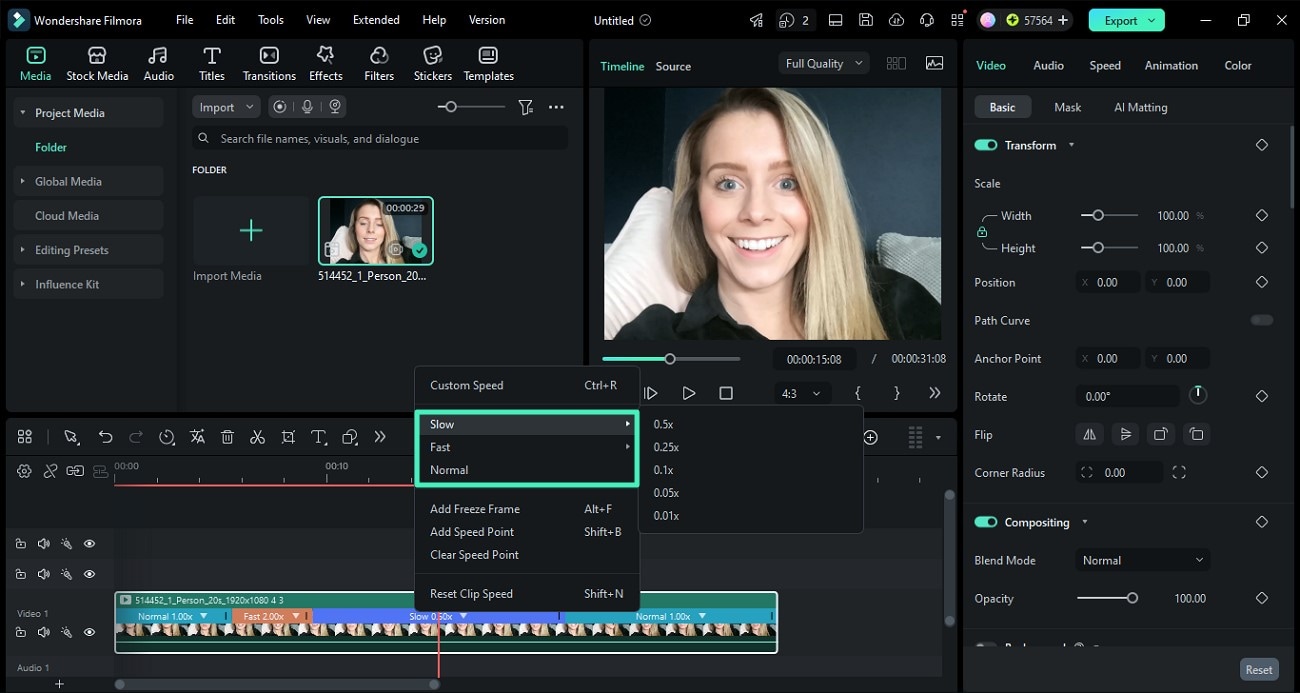
Step 3. Adjust Playback Speed for Each Segment
Click on an individual speed segment to customize its playback speed. Use the preset options such as Slow, Normal, or Fast, or manually enter a custom speed value according to your editing needs. This divides the footage into multiple speed segments. Each segment can then have its own speed setting, making it possible to apply different playback speeds within the same clip.
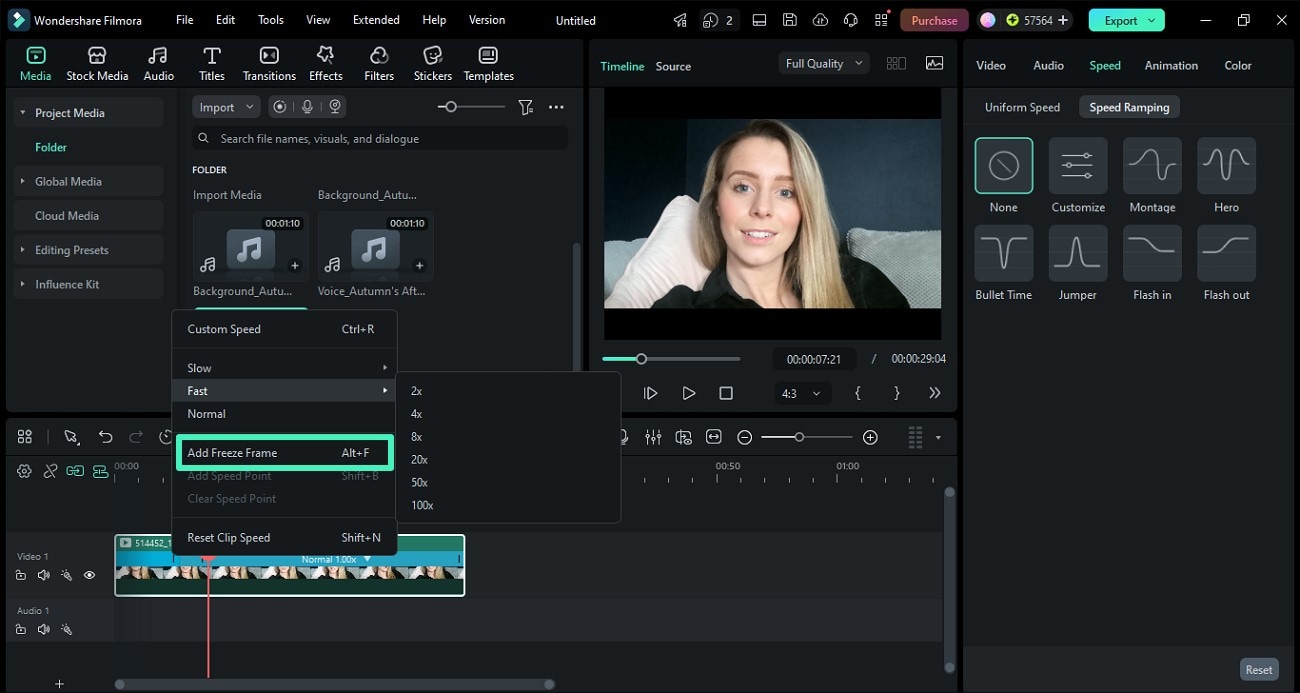
Step 4. Insert Freeze Frame Between Segments
Place the playhead at the exact frame where you want the motion to pause. Use the Freeze Frame option to automatically create a separate freeze segment with a default duration of 5 seconds.
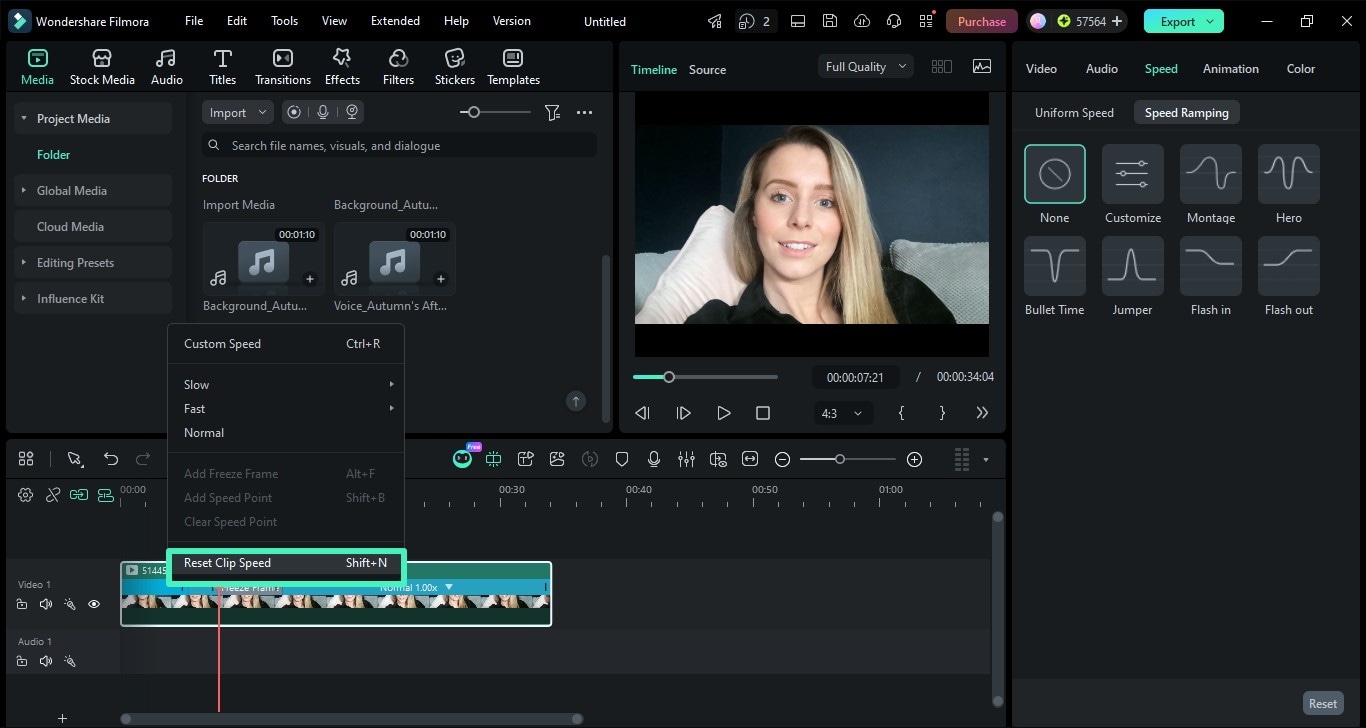
Step 5. Clear or Reset Speed Segments
To simplify the timeline, select a speed segment and clear the speed points by clicking the Clear Clip Speed. This will restore the clip back to a single 1x speed segment.
Related Posts
Featured Articles
How to Schedule Instagram Reels in 2 Best Ways
Master Instagram reel scheduling in 2026. Learn how to schedule a reel on Instagram using the mobile app and Filmora on desktop to maintain a consistent posting schedule.
How To Make the Perfect Trailer for Your YouTube Channel
Take your YouTube game to the next level! Our guide breaks down tips, examples, and a step-by-step guide on how to create a YouTube channel trailer that hooks viewers and boosts subscribers!
Effortlessly Remove, Blur, or Change Your OBS Camera Background
Master OBS webcam background effects! Learn to remove, blur, or change your camera background without a green screen. Discover easy methods, pros & cons, and a powerful alternative for stunning streams & videos. Click to transform your OBS setup!
Recommended User Guide
Markers for Windows
Here is the user guide for adding or removing marker on Filmora.
Enable/Disable Clip in Windows
When working on professional projects as a video editor, turning on and off clips helps with optimized editing. Hence, Wondershare Filmora offers this functionality as a professional editing software.
Logo Reveal For Windows
Do you seek a way to quickly create brand value with your product logo? Learn how Wondershare Filmora automatically creates impressive logo reveal animations.
