


 100% Security Verified | No Subscription Required | No Malware
 TL;DR:
Create cinematic speed transitions in Wondershare Filmora by utilizing timeline speed points for segmented adjustments or the Speed and Duration tool for uniform clip slowdowns.
● Filmora V15.5.10 and later on Windows allows you to divide a single clip into multiple speed sections by right-clicking to add speed points, applying custom speeds to each segment, and optionally inserting a trimable 5-second freeze frame.
● To uniformly slow down an entire clip without speed points, access the Custom Speed dialog box via the Speed and Duration menu and reduce the speed multiplier below 1x or increase the total duration time.
● Smooth slow-motion requires recording your source video at a frame rate higher than 60fps to ensure the slowed footage does not drop below the minimum 24fps playback threshold and become choppy.
Ask AI for a summary
 ChatGPT
 Perplexity
 Gemini
 Claude
 Grok
Grok
Are you looking for an effortless way to give a unique cinematic effect? Speed ramping is an approach to adjust the clip's speed to send the message across and give the audience an element of suspense.
Adobe Premiere Pro and Movavi helps to create a smooth speed change in the video. The article presents the basics of speed ramping and covers how to slow down a video through Wondershare Filmora. So, let us begin, shall we?
Part 2: How to Do Segmented Speed Ramping in Filmora (V15.5.10+)
To fine-tune a speed ramp inside a single clip, Filmora v15.5.10 and later lets you split the clip into multiple speed sections directly on the timeline. Follow the steps below to add speed points, adjust each section, and reset when needed.
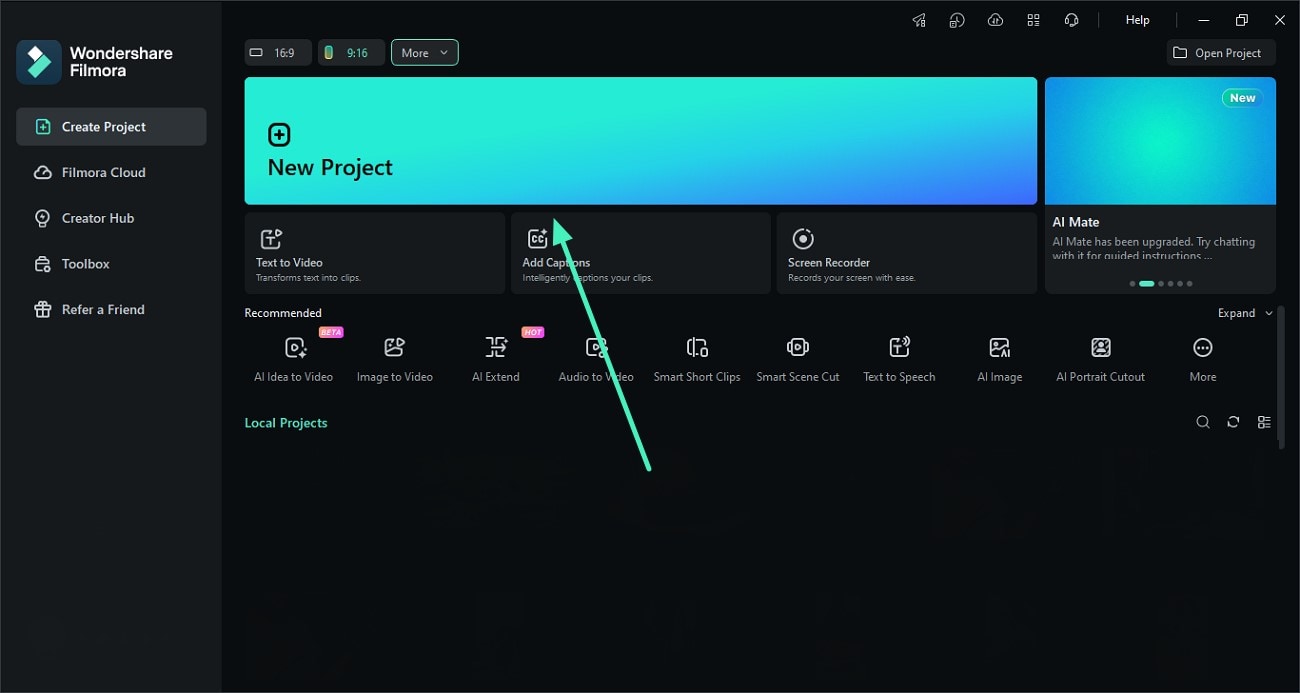
Step 1: Start a New Project and Add Your Clip
Open Filmora on Windows and click New Project. Import your footage into the media library, then drag it onto the timeline. Click the clip to make sure it’s selected before you begin speed ramping.
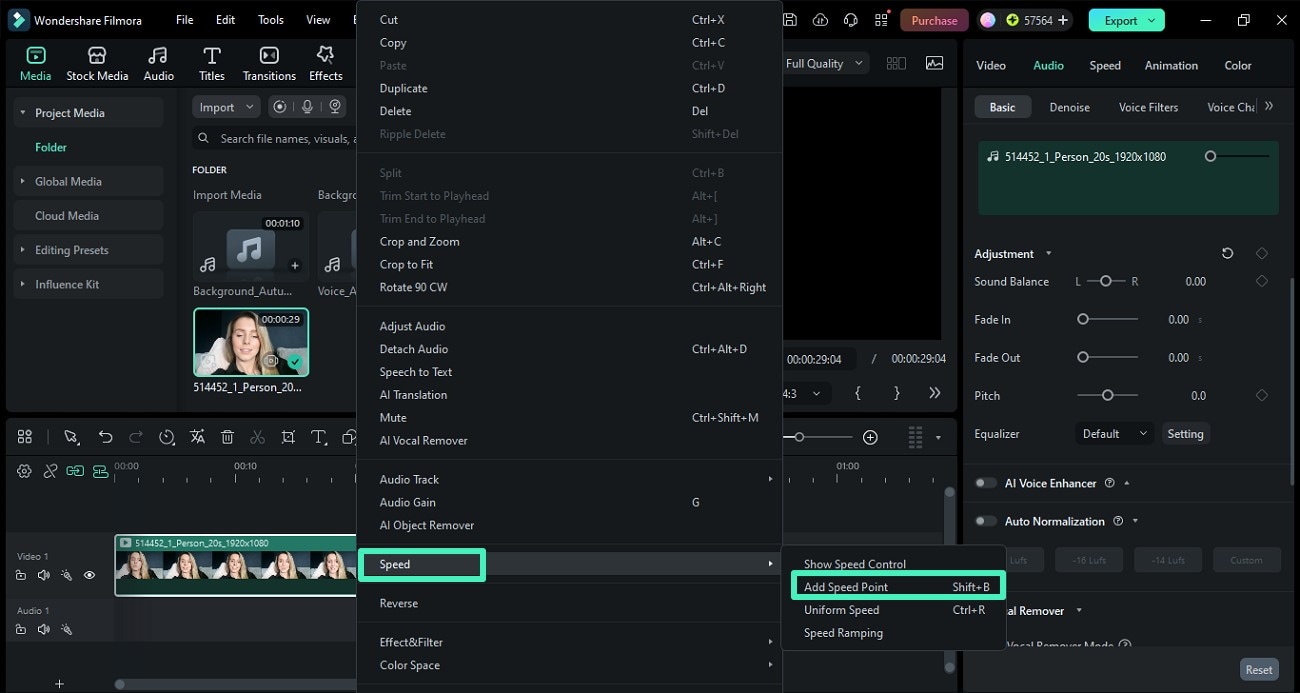
Step 2: Add a Speed Point Where You Want the Ramp to Change
Move the playhead (the red timeline indicator) to the exact moment you want the speed to shift. Right-click on the clip, open Speed, and choose Add Speed Point to create a new control point.
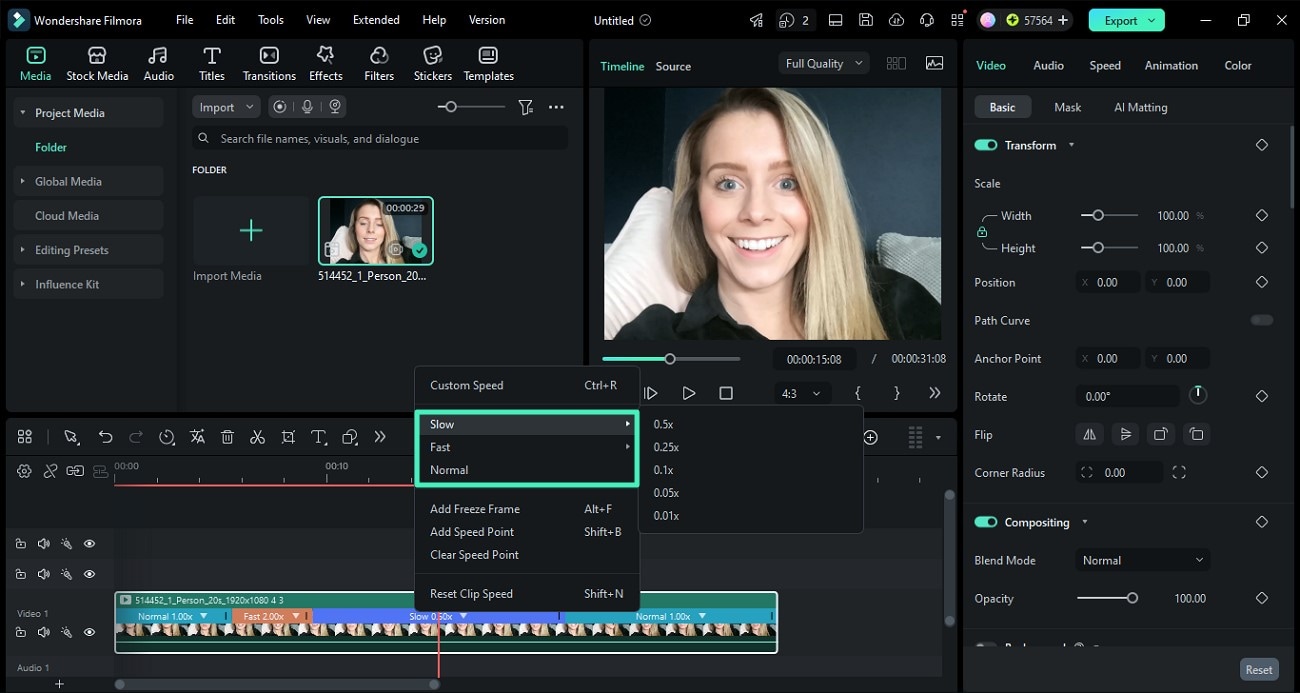
Step 3: Set Different Speeds for Each Section
After adding speed points, the clip is divided into separate sections. Click a section to adjust its playback speed—pick a preset like Slow or Fast, or type in a custom value. Repeat this on other sections to build a ramp that speeds up and slows down within the same clip.
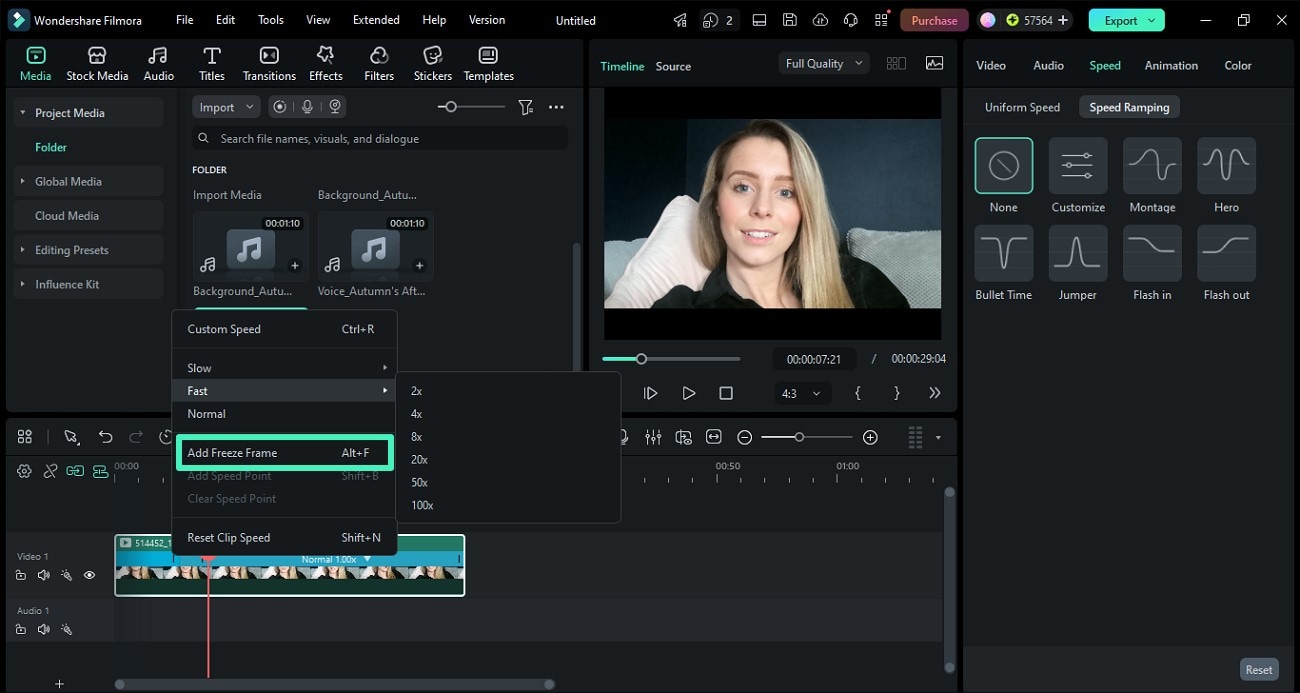
Step 4: Add a Freeze Moment Between Speed Changes (Optional)
If you want a dramatic pause, place the playhead on the exact frame to hold and use Freeze Frame. Filmora will insert a freeze segment (default length is 5 seconds), which you can trim to match your timing.
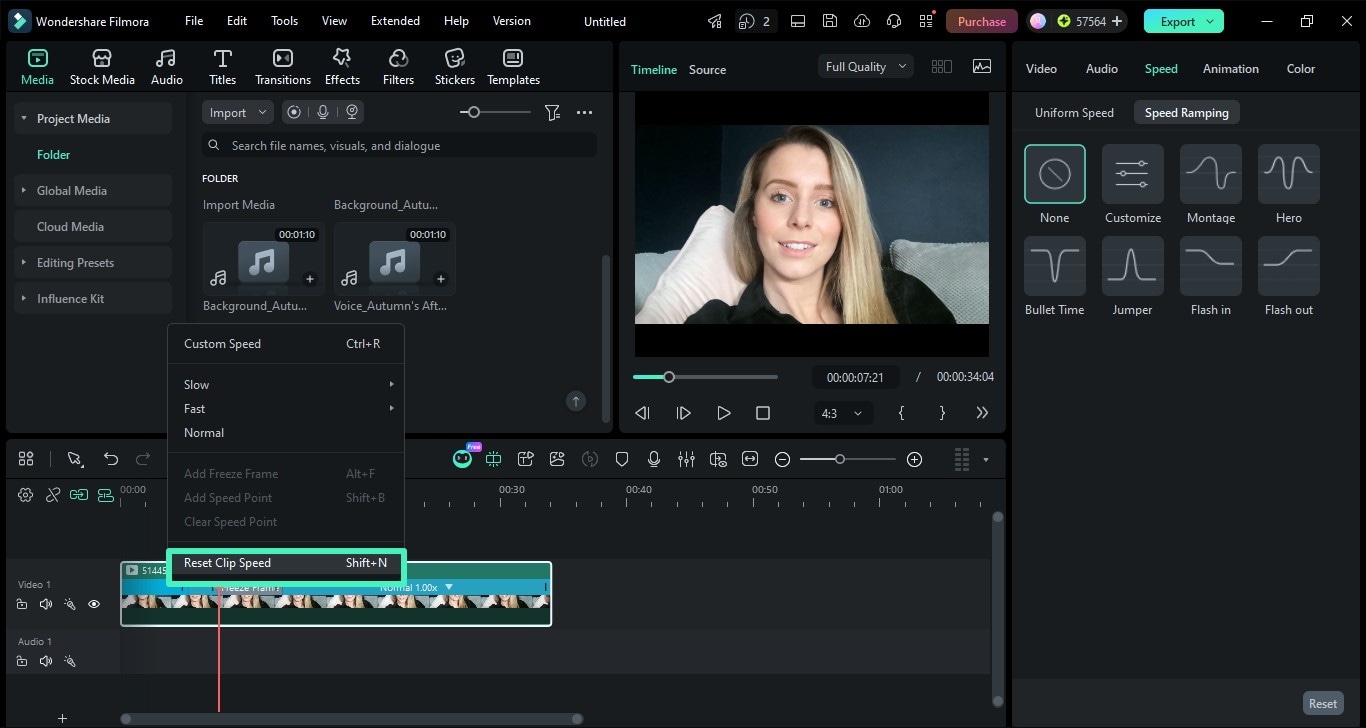
Step 5: Clear Speed Points to Return to Normal
To remove the ramp and simplify the clip, select the clip/segment and click Clear Clip Speed. This deletes the speed points and restores the clip to a single, standard 1x speed.
Part 3: How to Slow Down A Video in Filmora?
The next concern on this list is how to make slow-motion video normal speed and vice versa. The media industry needs to slow down a video to enhance its importance and make it more engaging. The section covers how to make slow-mo video normal speed through Wondershare Filmora. So, without any further delay, let us initiate this!
For Win 7 or later (64-bit)
For macOS 10.12 or later
Step 1: Launch Wondershare Filmora
For starters, launch Wondershare Filmora. Import the video into the software by either browsing it or dragging or dropping the content. The video appears on the timeline in a matter of seconds.
Step 2: Alter the Speed
Moving on, right-click on the video in the timeline. Choose "Speed and Duration" from a long list of menu options that pop up. A Custom Speed dialogue box appears. Change the duration of the video to reduce it to less than 1x, which is the original speed.

Step 3: Alter the Duration
To alter the duration of the video and make it slower, enter the duration more than the actual one. Hit "OK" as soon as the edits are made. The user can preview the video to know if the changes are good to go.

Step 4: Save and Export
It is time to save the video. Navigate to the "File" tab and hit "Save Project." Change the file name and save it in the desired pathway. Press "Save." You can also export the video to any device or YouTube, Vimeo, or DVD. Click on "Export," rename the file, and pick the trajectory from the system. Press "Export" afterward.

Part 4: Ramping Speed Tips to Make Videos More Creative
Now that the professional knows how to speed up training videos, it is time to understand some pointers beforehand. The user needs hands-on good speed ramping tips so that the videos can be more entertaining, engaging, thrilling, and fun to watch. There are multiple things to be considered while speed ramping the video. The section offers a preview of three tips for ramp transition.
Recording at a High Frame Rate
One important tip to consider while speed ramping is the frame rate. If you plan to slow down the video after shooting it, you should capture the video in higher than 60fps. When a video is slowed down, one should have enough frames to meet the threshold frame rate, which is 24fps.
If you do not meet the minimum threshold, the video will be choppy and not engaging. The video only looks cinematic when recorded at a high frame rate so that additional changes can be made without affecting the quality.
Changing the Frame Resolution
Another tip revolves around changing the frame resolution. The tip alters the properties of the clip from the inside out. The video can be slowed down by changing the frame resolution from 120fps to 24fps from the clip's settings. In doing so, the frames will be stretched into the required fps. Resultantly, the video is slowed without getting choppy.
Purposeful Time Remapping
The purposeful speed ramp should be adopted instead of choosing the same speed for the whole video. It is because a video is a mixture of emotional, mystery, thrill, and slow motion. Using the same speed for the video can create a negative response on the viewership. Therefore, the need of the hour is to divide the video based on their genre and then tailor the speed accordingly.
Closing Remarks
The use of the right cinematic effect at the right time enhances viewership and engages the audience. The article focused on speed ramping and informed the creative professionals how to slow down a video and how to edit a video to speed up. Wondershare Filmora is a good choice for getting through the process effectively.
Wondershare Filmora
Get started easily with Filmora's powerful performance, intuitive interface, and countless effects!

