For many new editors, one of the biggest questions is what a magnetic timeline is and how it works in video editing. In simple terms, the magnetic timeline is a modern editing system designed to make your workflow smoother by automatically keeping clips connected. If you’ve ever wondered how to use a magnetic timeline in your editor, this section breaks it down clearly.
Definition
The Magnetic Timeline is a dynamic editing system that automatically adjusts clip positions to maintain story flow and prevent gaps or sync issues.
This professional approach to video editing eliminates the need for traditional track management by keeping clips "magnetically" connected. When a clip is added, removed, or trimmed, adjacent clips ripple to fill the space. This reduces editing errors, saves time, and enhances focus on storytelling over micromanaging tracks.
Core Principles of Magnetic Timeline:
Primary Storyline
This is the backbone of the magnetic timeline. All main clips, typically your A-roll or core footage, are placed on this track. Any change you make, such as trimming or deleting a clip, ripples through the rest of the sequence. There are no empty gaps or stray frames, keeping the story seamless.
Connected Clips
Supporting clips such as B-roll, titles, and sound effects attach to specific points on the primary storyline. When you move the main clip they are linked to, the connected clips move as well. This keeps visuals, captions, and audio cues in sync automatically.
Secondary Storylines
When several connected clips work together, such as a sequence of B-roll shots or text cards, you can combine them into one editable block. This mini-timeline can be adjusted as a single unit while staying linked to the main storyline.
Benefits of Implementing Magnetic Timeline:
Instantly closes gaps and avoids clip collisions
Clips snap into position, which eliminates the need to drag and manually realign footage after every edit. The flow of your project stays clean and consistent.
Maintains audio and video sync
Linked content moves together. Audio stays matched to its video, and B-roll or music does not drift out of place.
Saves time and simplifies workflow
There is no need to constantly manage tracks or hunt for stray frames. The system handles alignment, so you can focus on creative decisions.
Prevents black frames and editing mistakes
Accidental gaps or empty spaces between clips are removed before they become a problem. This results in a cleaner, more professional timeline.
Application Section - When/Where to Use
The magnetic timeline is most valuable when you need a smooth, efficient workflow that keeps your project organized and prevents mistakes. It is especially helpful for editors who want to focus on storytelling instead of constantly managing clips and tracks.
How Does Magnetic Timeline Works in Video Editing
Stage 1: Rough Cut Assembly
Start by placing your main footage, often called A-roll, on the Primary Storyline. This becomes the foundation of your project. Every clip you add will snap into position, and any edits will ripple through the timeline to keep it tight and gap-free.
Stage 2: Layering B-Roll and Audio
Next, add supporting elements like B-roll, titles, or music. With the magnetic timeline on, these clips stay linked to the right points in your main sequence. You can cut and rearrange without throwing the rest of the project out of sync.
Stage 3: Advanced Edits and Refinement
For more complex sections, group related clips into Secondary Storylines. This is useful for B-roll sequences, graphics, or repeated patterns. If you need extra precision or want to create intentional spacing, temporarily turn off the magnetic timeline or use tools like placeholders for fine control.
Case Analysis:
Case 1: YouTuber Editing Vlogs
The magnetic timeline speeds up the edit by closing gaps automatically and keeping dialogue, music, and cutaways in sync. This means no manual realignment every time a clip is removed or trimmed.
Case 2: Short Film Production
Editors working on short films can quickly reorder scenes without breaking sync between audio and video. The system keeps the timeline neat while leaving room for creative rearrangements.
Bottleneck Identification and Resolution:
Audio Desync in Dialogue Edits
When dialogue is trimmed, audio sometimes slips out of place in traditional timelines.
How to avoid
The magnetic timeline avoids this by keeping all linked clips locked together, and tools like Roles make managing dialogue, music, and effects easier.
Inserting Placeholder Clips
Editors often need to reserve space for future footage.
How to avoid
With magnetic editing, you can use placeholders, color mattes, or temporarily disable the magnetic function to create that space without disrupting the structure of your project.
Practical Demonstration Section - How to Use
Now that you understand what a magnetic timeline is and how it works in editing, it is time to see it in action. Wondershare Filmora , for example, includes a built-in Magnetic Timeline feature. This tool makes it easy for beginners and experienced editors to keep their clips organized and perfectly aligned.
Step 1
Import Clips: Bring all your media into Filmora's library, including video, audio, and graphics. Drag your main footage onto Video Track 1 to create the foundation of your timeline. This will serve as the core sequence for your edit.
Step 2
Enable Magnetic Timeline: Turn on the Magnetic Timeline feature from the left side of the timeline panel. Once enabled, Filmora will automatically snap clips together, aligning them edge-to-edge.
Step 3
Turn Off Magnetic Timeline (Optional): If you need to manually adjust spacing, insert intentional gaps, or add placeholders for timing, you can temporarily disable the Magnetic Timeline.
Once you start using the magnetic timeline, understanding its core functions will help you get the most out of it. Filmora's version is built to keep edits clean, synced, and simple without requiring extra steps.
Master Track Magnet
Keeps all clips on the main track (Video Track 1) neatly aligned. Clips snap to the edge of one another when you move, trim, or delete, leaving no gaps and making cleanup effortless.
Sub-Track Clip Linkage
B-roll, overlays, and audio placed on sub-tracks link automatically to their main clip. When you reposition the main clip, everything connected to it follows, preserving sync.
Header Adsorption
The playhead snaps to the start or end of clips for accurate editing. This makes cutting and positioning faster without constant zooming in.
Move Clips Automatically
When you drop a new clip between others, the timeline shifts everything aside instantly. There's no need to manually adjust surrounding clips.
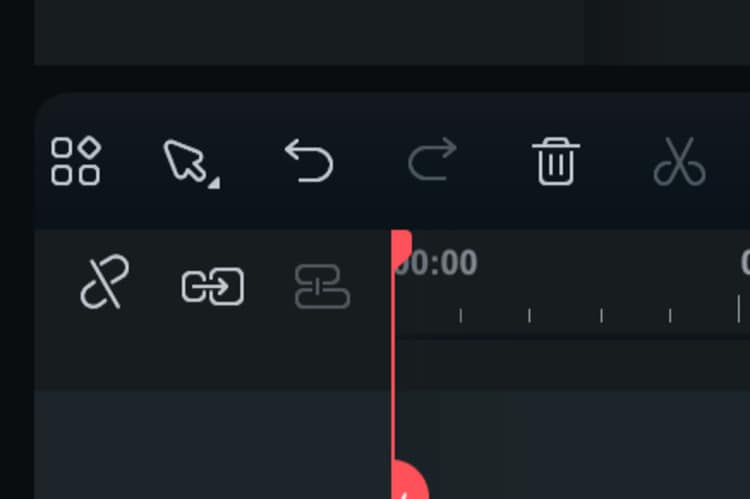
Toggle Magnetic Timeline On or Off
You can turn the feature on or off with a single click using the icon on the left side of the timeline. Sub-track linkage can also be switched off separately for more manual control when needed.