

 ChatGPT
 Perplexity
 Gemini
 Claude
 Grok
Grok
Adobe After Effects is a motion graphics software for digital graphics, animations, and special effects. It is used in video editing and the post-production phase of filmmaking.
One of the major graphics elements used in Adobe Effects is text, which means colors and shapes can communicate a great deal if properly put together. But nothing beats a well-incorporated text design that is in sync with the theme and further enhances the message communicated in a video. Texts can be used to create:
- Title sequences for films
- Lower thirds for names and titles
- Text effects like animations or 3D effects
- Infographics to make data look good
Knowing how to play around with texts, like adding captions, in After Effects can increase your creativity and enhance the overall aesthetic of your video project. This article will guide you on the different methods for adding text in After Effect, text formatting, animations, and other customization options like how to add drop shadow text in After Effects.
In this article
Part 1. How to Create a New Text Layer in Adobe After Effect
Text layers are layers in After Effects that allow you to add text, animated credits, and titles to your project. They allow you to enlarge your texts to any size without the risk of losing quality.
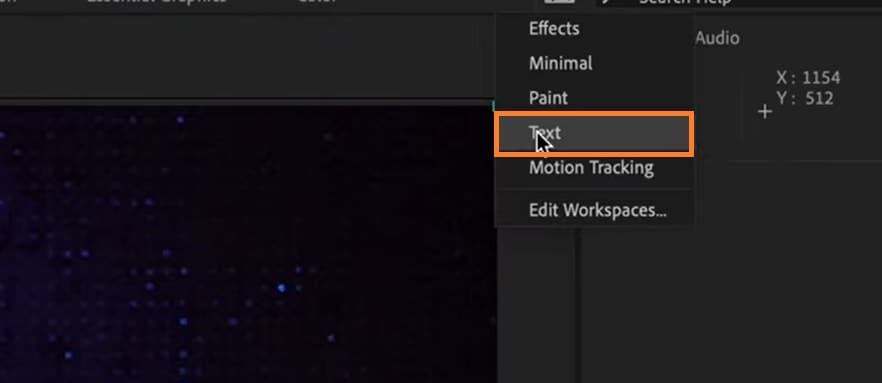
Before adding text to your project, you need to activate the text workspace. Go to the upper right corner of the Composition Panel. Click on the double arrow and select Text.
Use any of these methods when adding text to After Effects:
Method 1: Using Keyboard shortcuts.
Click on Ctrl-T or Cmd-T on your keyboard to add a textbox and start typing.
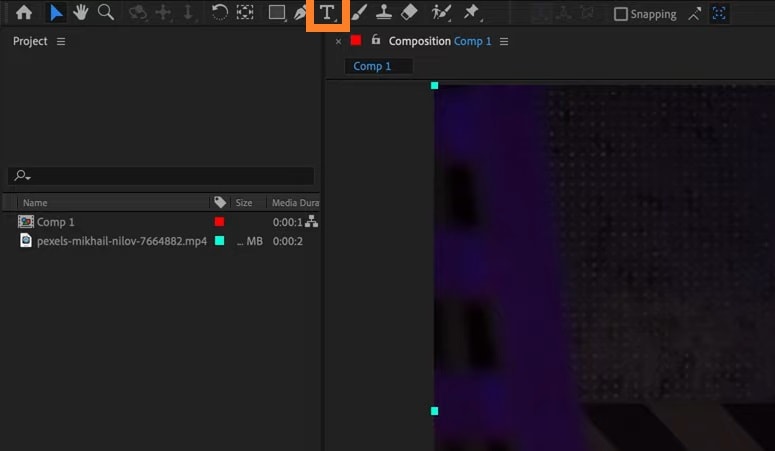
Method 2: Using the Text Tool.
Go to the Composition Panel and click on the Text icon represented as ‘T.’
Method 3: Using the Create Text Layer Command.
SelectLayer > New > Text on the dashboard.

This text command is a quick way to insert a text layer without manually selecting the Text Tool. It’s convenient when you are already working on other tools.
Method 4: Using the New Text Layer Dialog Box.
Right-click on the timeline. Select New > Layer to add a text layer.

Part 2. How to Format Text in After Effects
You can start adding text to After Effects once you’ve created a text layer. Customize your texts to suit the theme of your project by exploring different formatting options—from simple font adjustments to kerning and line spacing.
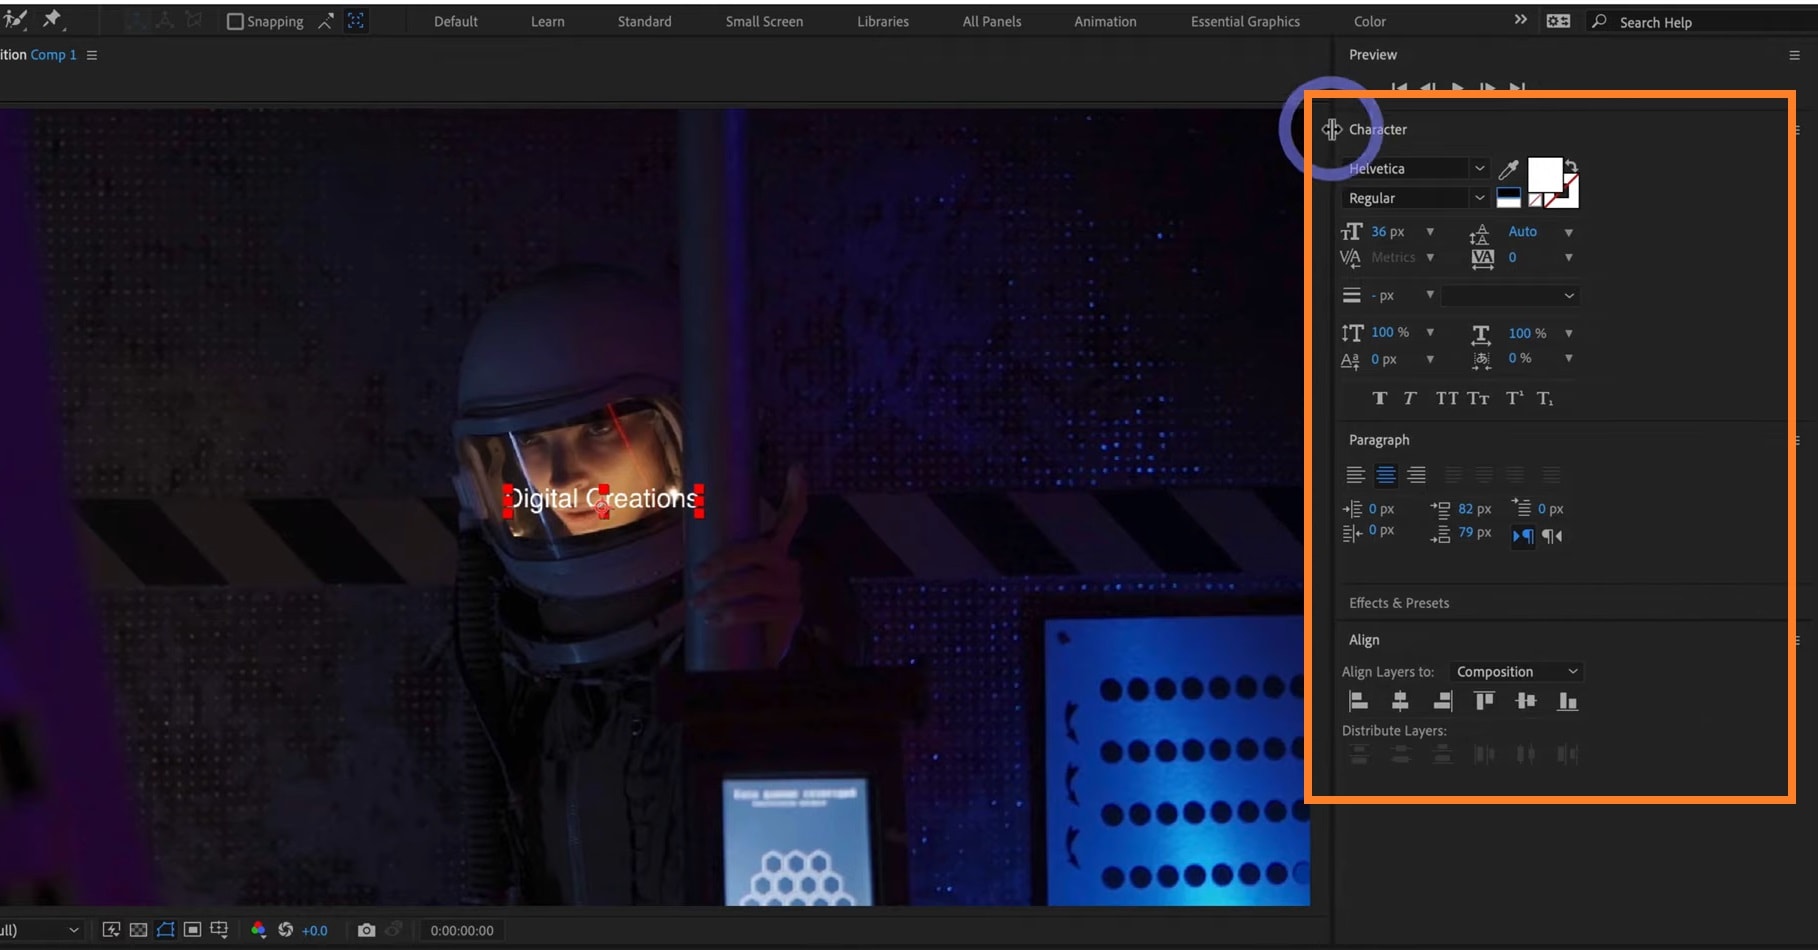
Some of the formatting options you can find in the Character Panel include; font selection, font size, color and type, text alignment, text justification, line spacing, character spacing, and, kerning amongst others. Simply click on the formatting option you want and adjust it to suit you.
Part 3. Methods to Animate Text in After Effects
Animating texts is an underrated way of adding creativity, style, and a personal touch to video content. Here are a few ways to animate things in After Effects.
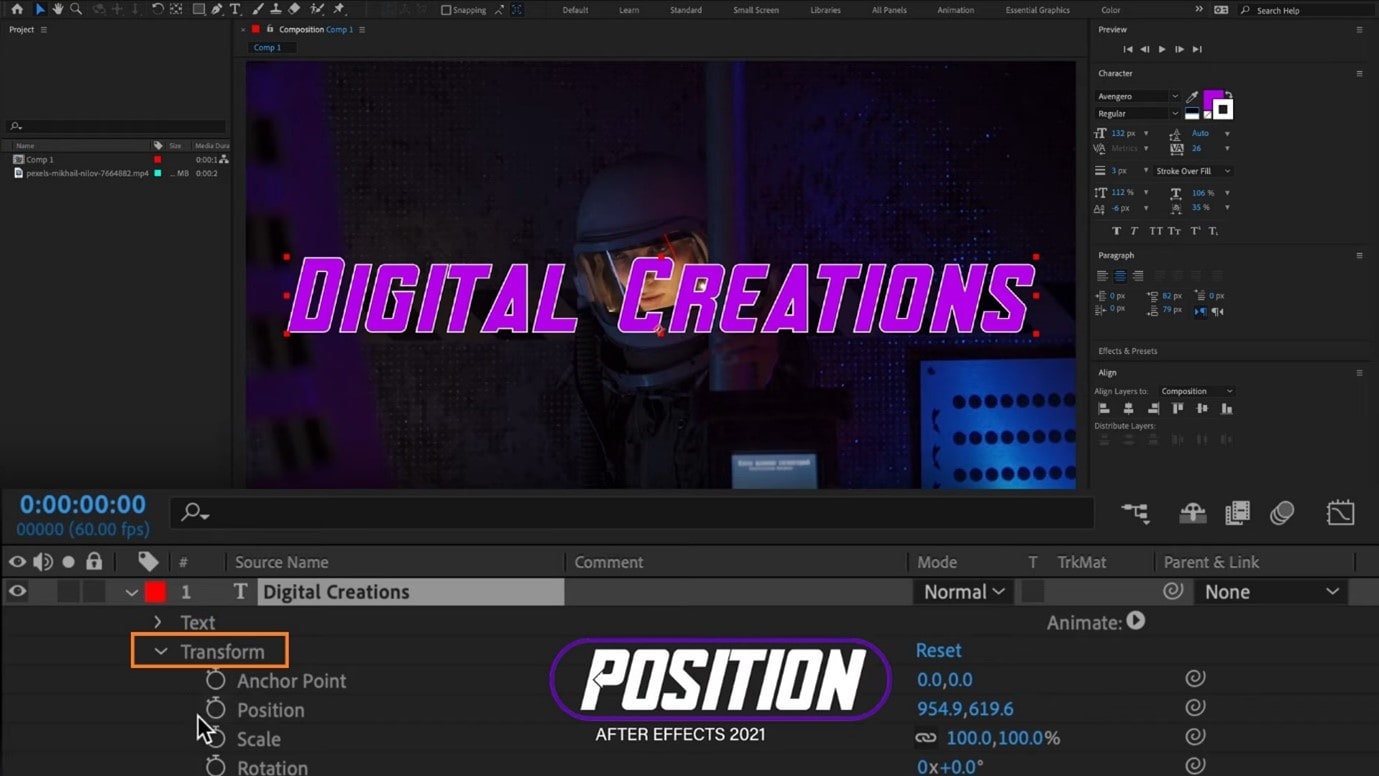
To change text anchor points, scale, and rotation, go to the Timeline Panel and select the text layer. Click on the little arrow on the panel and select your chosen animation.
Keyframes
This controls the timing and movement of text properties. To use keyframes, position your text layer on the timeline. Choose the property you want to animate (position, opacity, etc.) and set your keyframe.
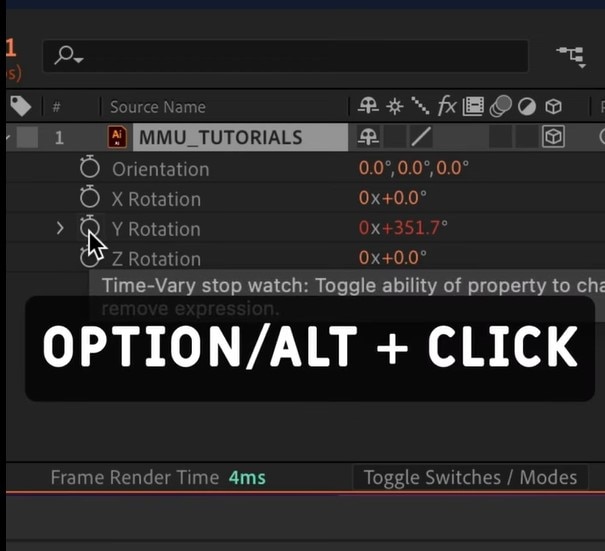
Expressions
To add expressions, Alt-Click (or Option-Click on Mac) on the stopwatch icon close to the text property you want to animate. This will open the expression editor where you can write your own expressions to automate the animation.
Text Animation Presets
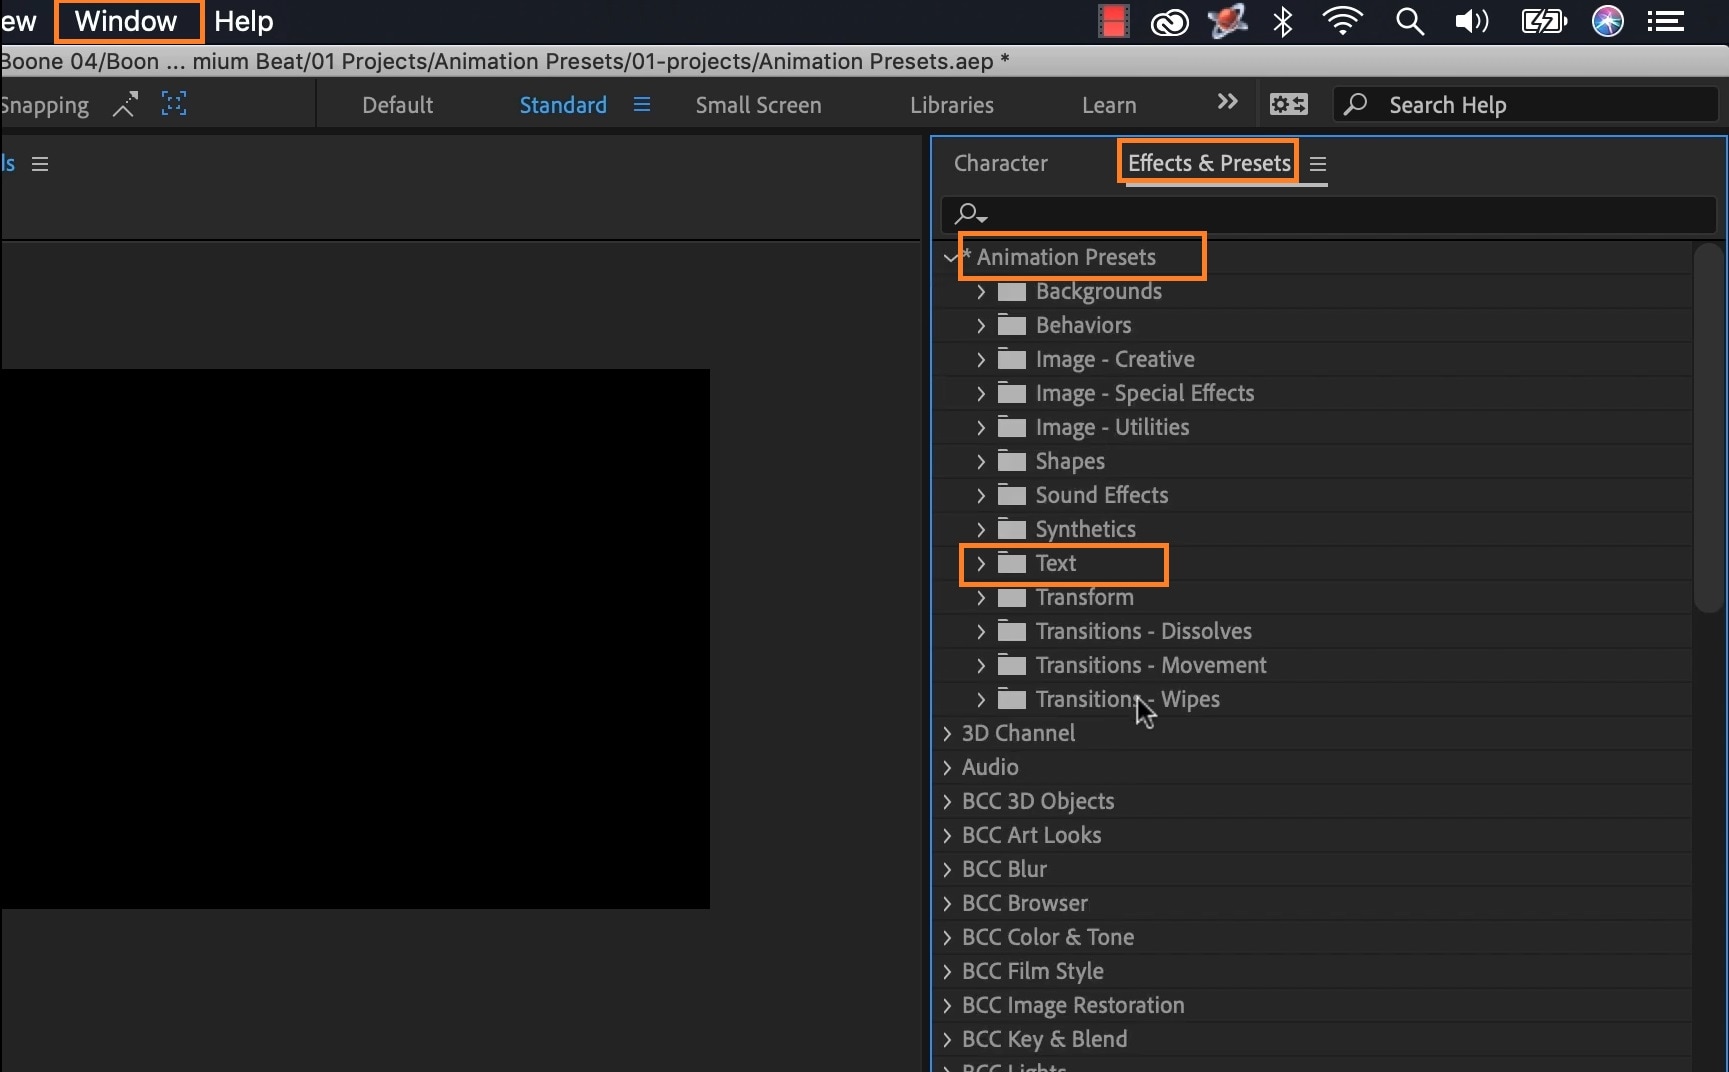
Animation presets can be browsed, saved, and transferred across various devices with the filename extension of .ffx. To apply animation presets, go to Windows > Effects & Presets >Animated Presets > Text.
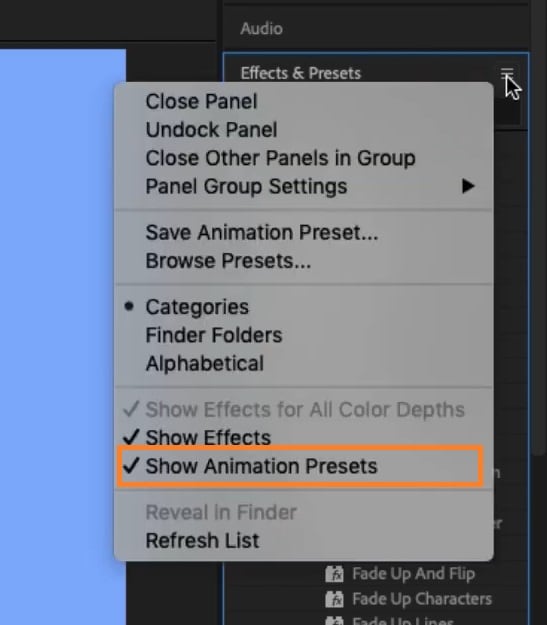
If you can’t see the list of presets displayed, click on the three dotted lines at the top right corner of the Editor Panel. Make sure Animated Presets is checked.
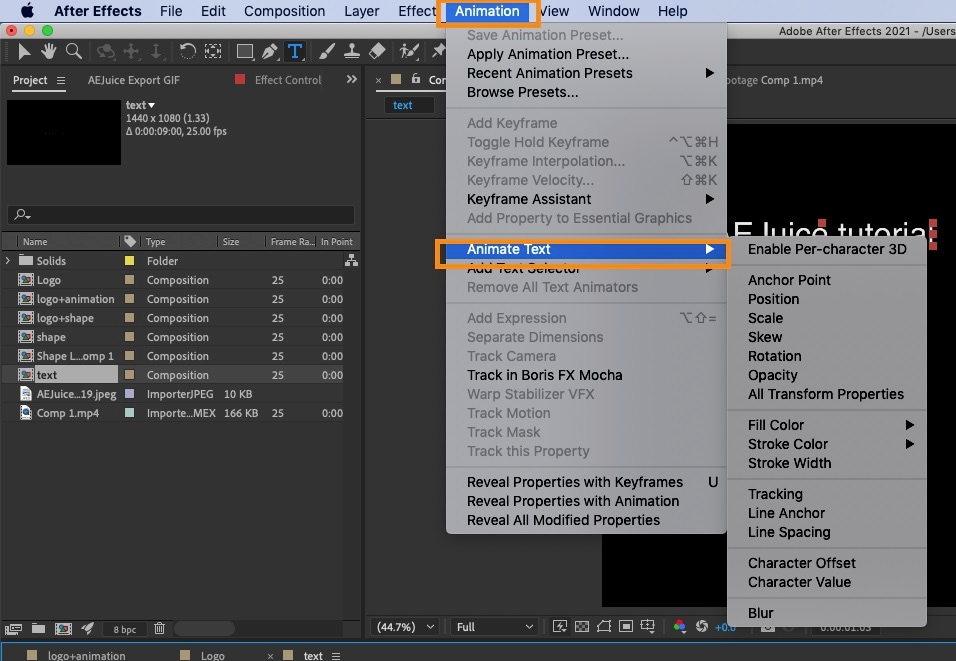
The Animate Text Tool
To use the Animate tool, select Animation > Animate Text.
Part 4. How to Add Effects to Text in After Effects
Adding effects to After Effects takes your texts a notch higher. Let’s see how well you can play along with adding effects to After Ends.
Whether you’re into adding captions in After Effect or you want to add shadow to text after effects, the process is straightforward.
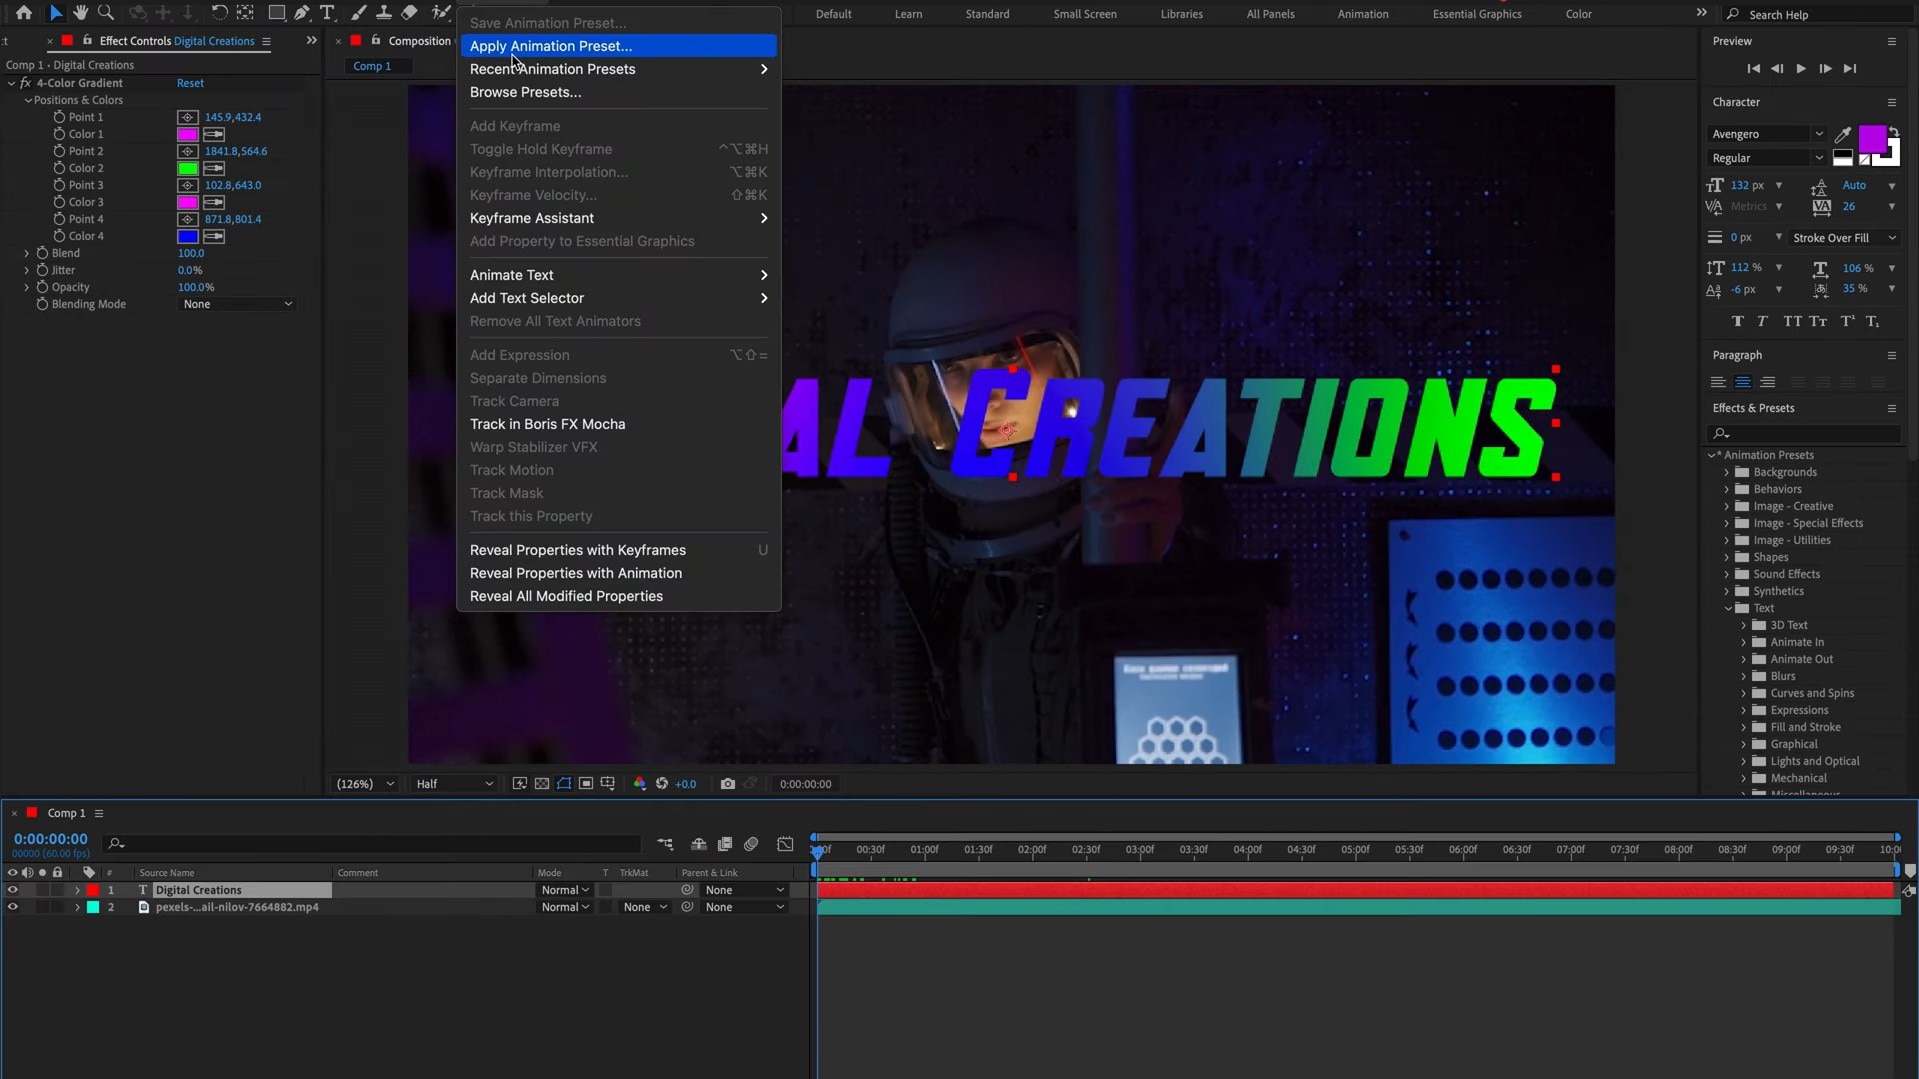
To add presets to text, select the corresponding preset to the effect you want to add. Click the text layer in your composition, and select Apply Animation Preset. To preview your preset before adding to your text, click on Browse instead.
Some text effects that you can add to text include; bevel and emboss, drop shadow, stroke, gradient, lighting effects, motion blur, noise, and pixelate.
Part 5. Exporting Text from After Effects
After exploring the different ways to add shadows to text in After Effect, export your edited files. The process of exporting files from After Effects is called rendering. Rendering files from After Effect takes between a few seconds to a few hours depending on the complexity of the video animations, the length of the file, and the computer speed.
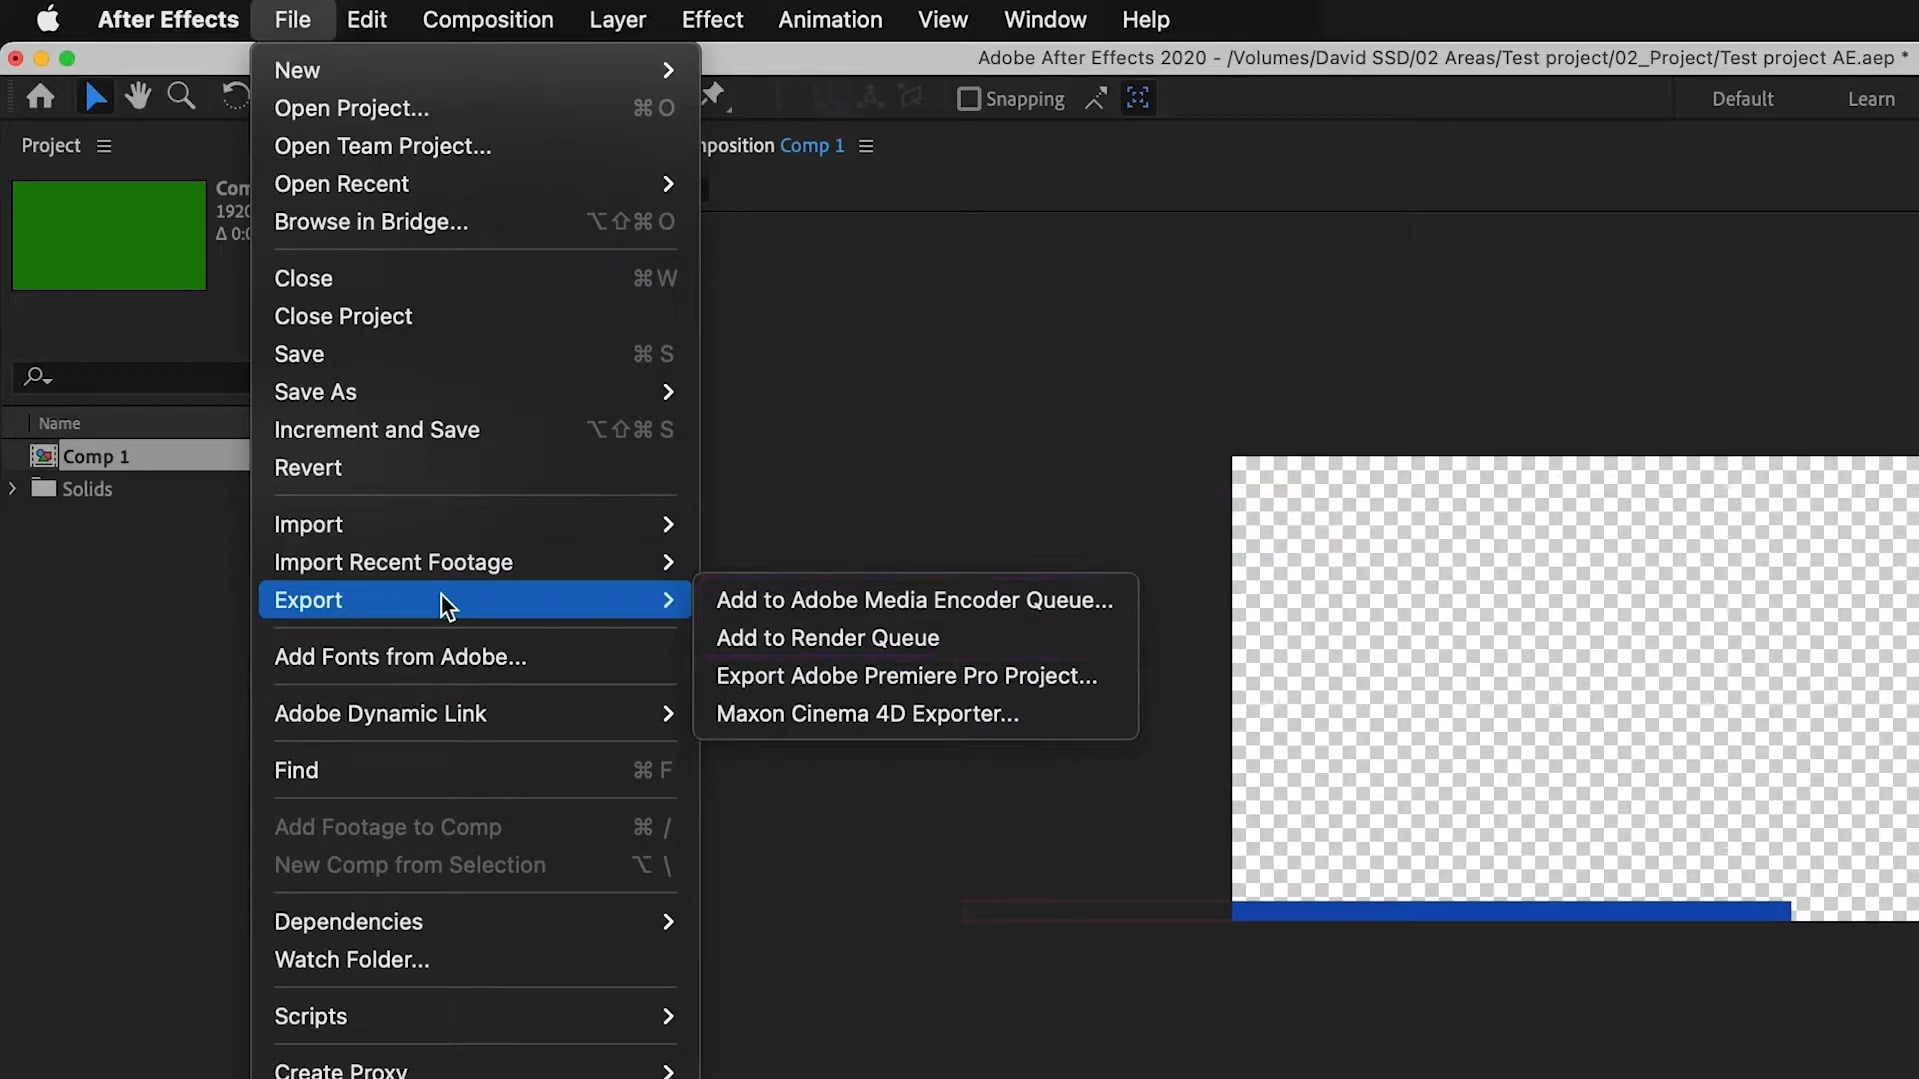
Step 1: To export files, go to Files > Export > Add to Render Queue. The shortcut for this is Ctrl + M (or Cmd +M for Mac).
Step 2: Go to Output Module on the timeline and click the link attached to it.
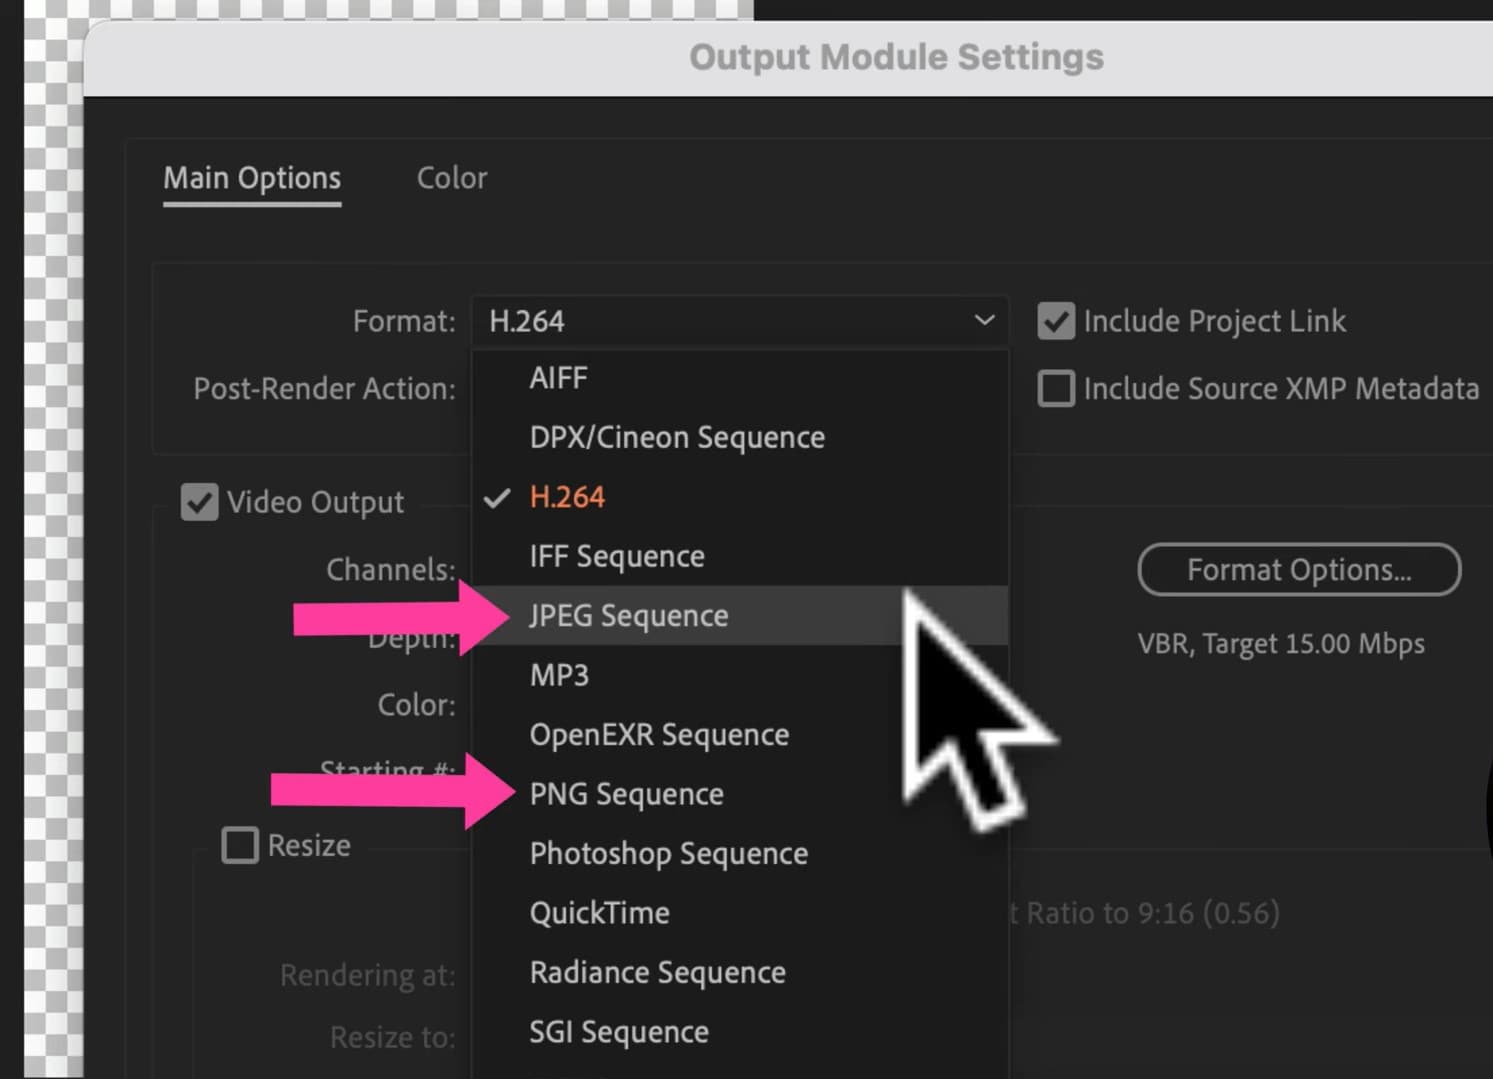
Step 3: An Output Module Settings dialogue box will pop up with options for you to customize your export settings.
If you are exporting a sequence of images, click on Format and set your file format to JPEG or PNG.
If you are exporting a sequence of images, click on Format and set your file format to H.264 (for MPA files), QuickTime, or AVI, depending on your project needs.
After Effects does not directly export text in PDF format. But you can explore other alternatives like:
1. Export text as vector layers; that is, converting them to shapes.
Select the text layer in the timeline. Then go to Layer > Create > Create Shapes from Text.
2. Export the composition to Adobe Illustrator.
Copy and paste your composition in Illustrator. Select Edit > Copy in After Effects, then go to Illustrator and click Edit > Paste,
3. Save as PDF
Once your file is in Illustrator, make the necessary adjustments and save (File > Save as). Choose PDF as the file format.

Part 6. Edit and Customize Text Using Filmora
While After Effects is great for adding texts to photos and videos, it is an advanced tool and can be a bit intimidating for not-so-experienced editors. More like Photoshop!
If this feels like your experience using Adobe After Effects, then you should try a simpler, yet efficient alternative—Wondershare Filmora!
Filmora is a video and audio editing tool with a wide range of features for media manipulation. With Filmora, you can add text, edit, format, and customize themed texts to make your media projects stand out of the crowd with ease. In addition, you have access to several text styles and templates for different project themes.
- Superb video stabilization with low distortion.
- Vast video/audio effects and creative assets.
- Powerful AI for effortless content creation.
- Intuitive, professional yet beginner-friendly.
- Works on Mac, Windows, iOS, and Android.


Here is how to add text to your photos and videos using Filmora.
Step 1: Import your videos or photos onto Filmora. Drag the media file you want to edit to the dashboard.
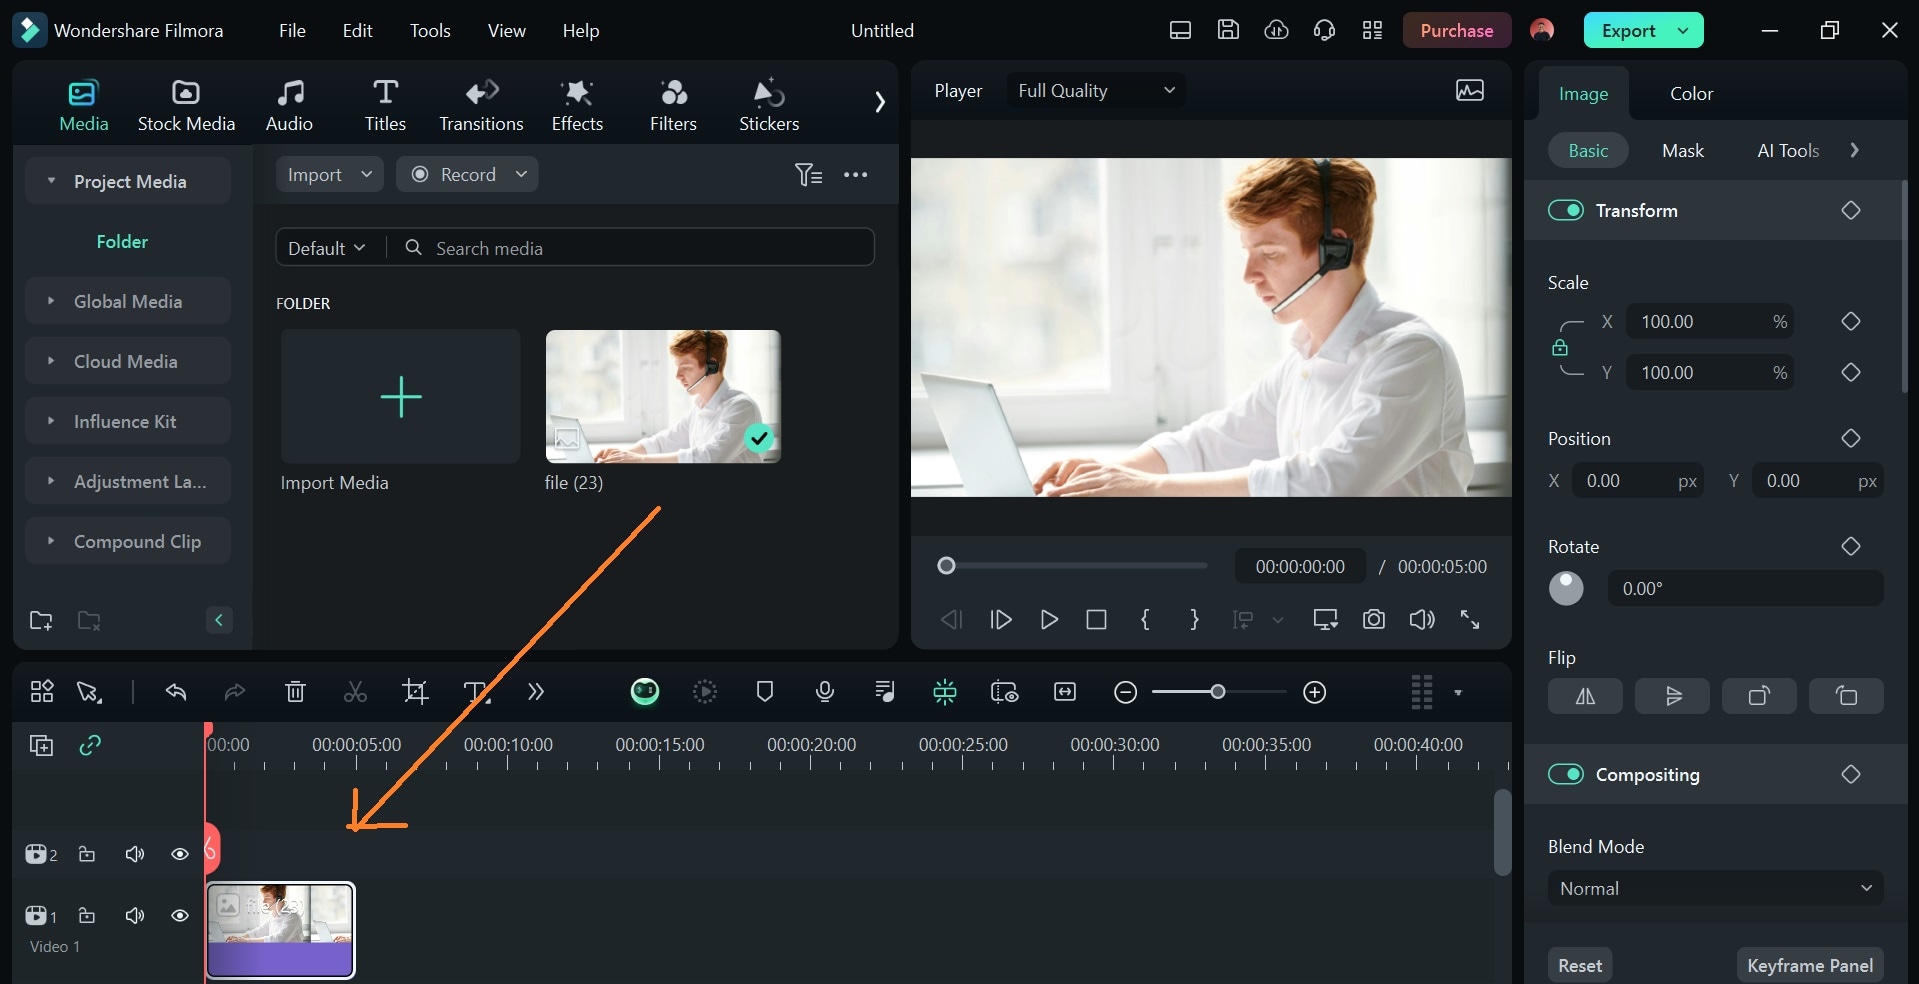
Step 2: Select Titles > Trending to choose a text template. Drag the selected text template and place it just above your media file on the timeline.
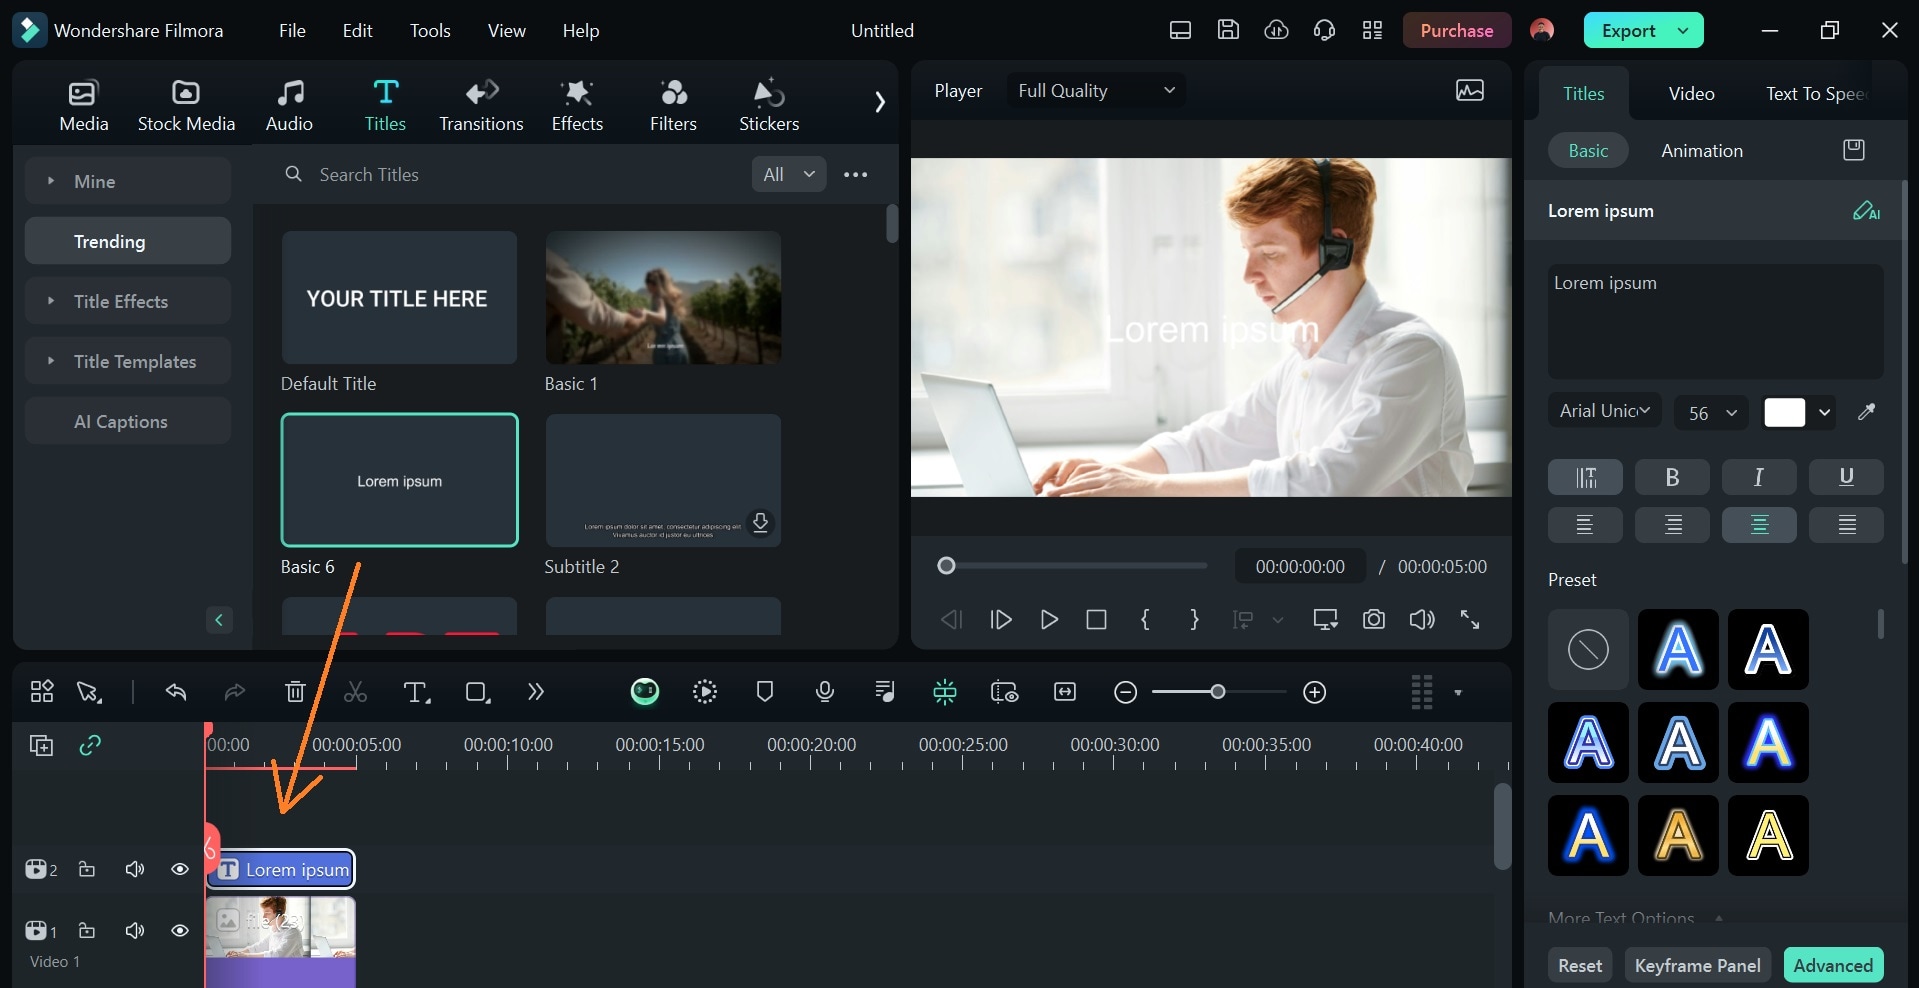
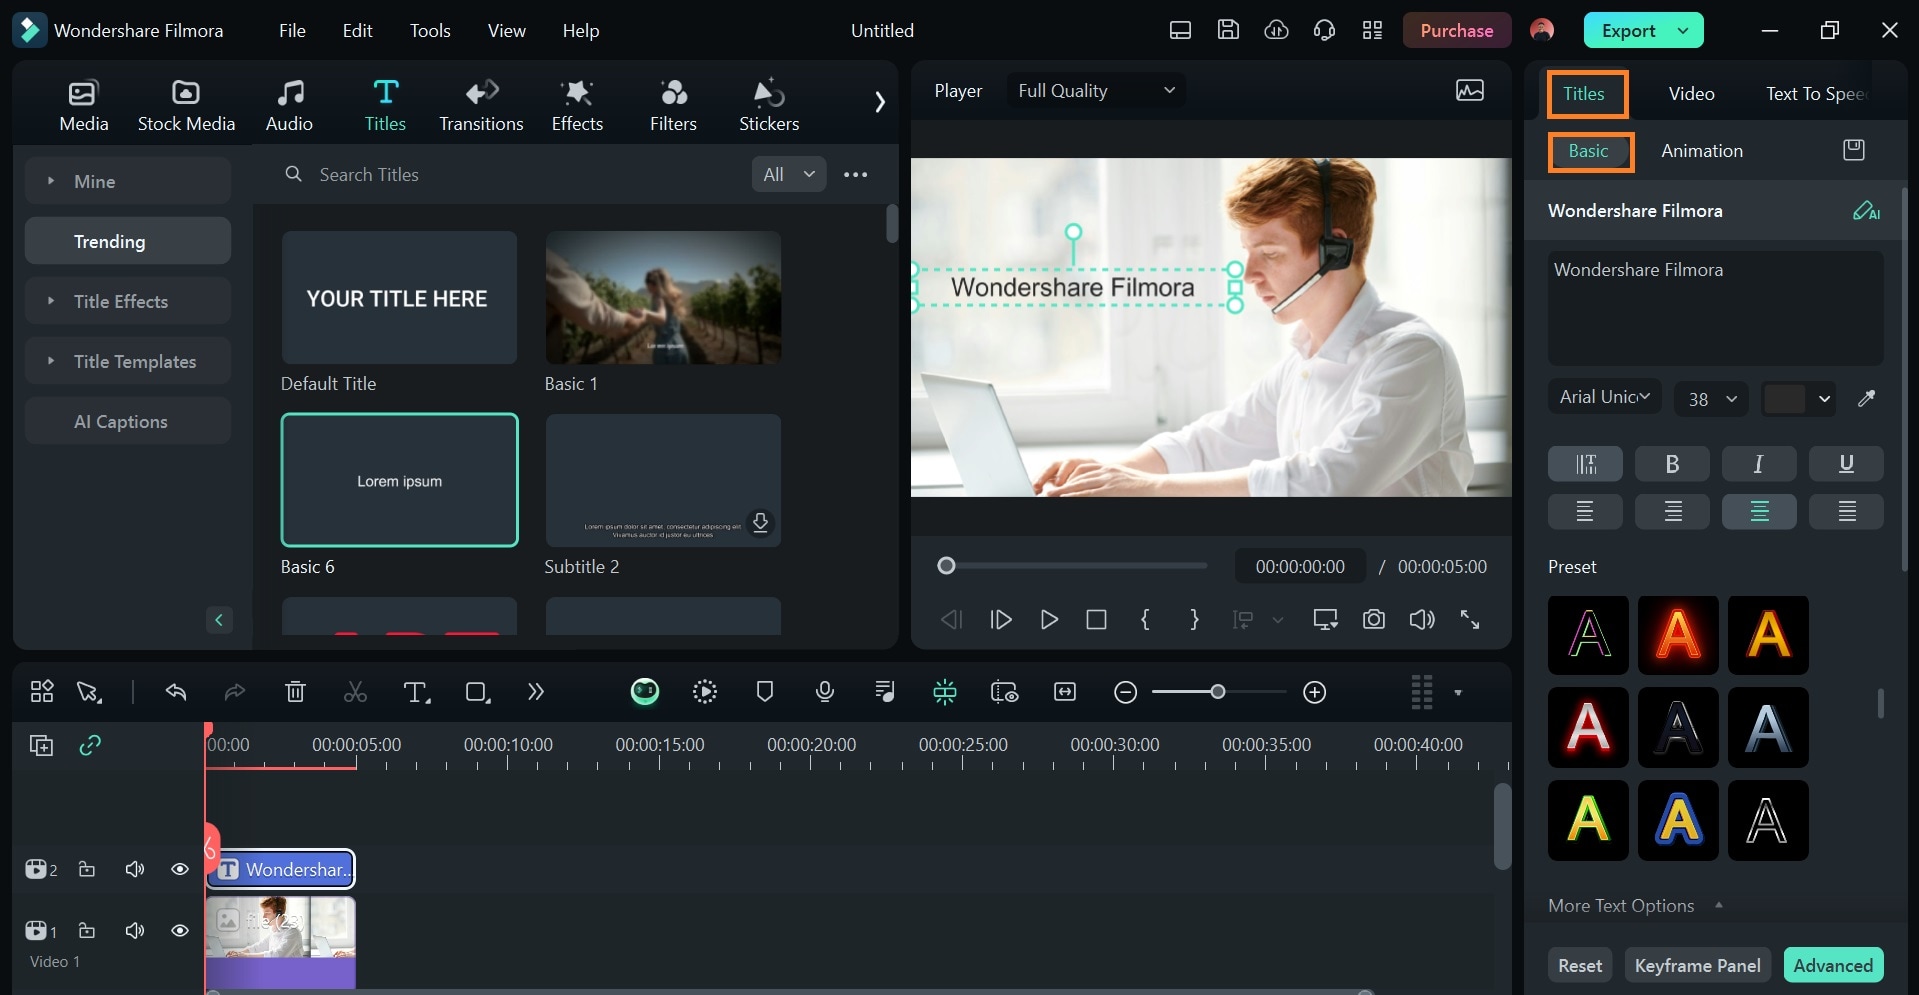
Step 3: Click on the text clip on the timeline. Then go to Titles > Basic on the editor panel. Edit your text. Change your text color, style, font, size, etc., to fit the theme of your video or photo.
Adobe After Effects and Wondershare Filmora are both great tools for adding tests to videos. However, After Effects is structured to have editors build their elements from scratch, which is ideal for experienced users. On the contrary, Filmora is more templated and produces professional results regardless of users’ experience level.
Tips for Incorporating Text in Video
- Ensure that the text colors (or its borders) contrast with the background video. This enhances legibility.
- Always preview your video on multiple devices to ensure the texts are properly framed and positioned.
- Avoid cluttering the screen with too much text.
- Position texts properly based on their purposes. For example, titles, subtitles, and lower thirds.
- Keep animations and effects subtle especially in videos where the viewers need to listen to the speaker.
Conclusion
Playing around with text editing improves basic editing skills, such as knowing how to add drop shadows to text in After Effects.
Whether it’s basic text layers, or complex text formatting and animations, mastering text manipulations with Adobe After Effects is no mean feat. But with this article, you should have proper guidance on how to add captions, change text animations, and add shadow to text in After Effects.
Still not up for all the stress? Then try Filmora’s text feature and you’ll find more surprises there!
