
 100% Security Verified | No Subscription Required | No Malware


 ChatGPT
 Perplexity
 Gemini
 Claude
 Grok
Grok
VLC Media Player is one of the most popular free video players. It's lightweight and open-source, and it works on almost every platform. It also supports nearly any video or audio format. One of its underrated features is the ability to adjust the video playback speed. Suppose you want to watch lectures faster to save time, slow down tutorials to catch every detail, or analyze video footage frame-by-frame. In that case, VLC makes increasing or decreasing playback speed easy with easy menu options and handy keyboard shortcuts.
In this guide, we'll explain how to adjust video play speed in VLC, show you how to make speed changes permanent, and introduce a more advanced alternative for professional results.
In this article
How to Increase Speed in VLC Media Player?
Speeding up playback reduces viewing time without skipping content, perfect for long online courses, recorded meetings, or podcasts. Here's how to increase play speed in VLC Media Player.
- Open your video in VLC Media Player.
- In the top menu bar, click Playback > Speed > Faster to increase the speed in larger increments.
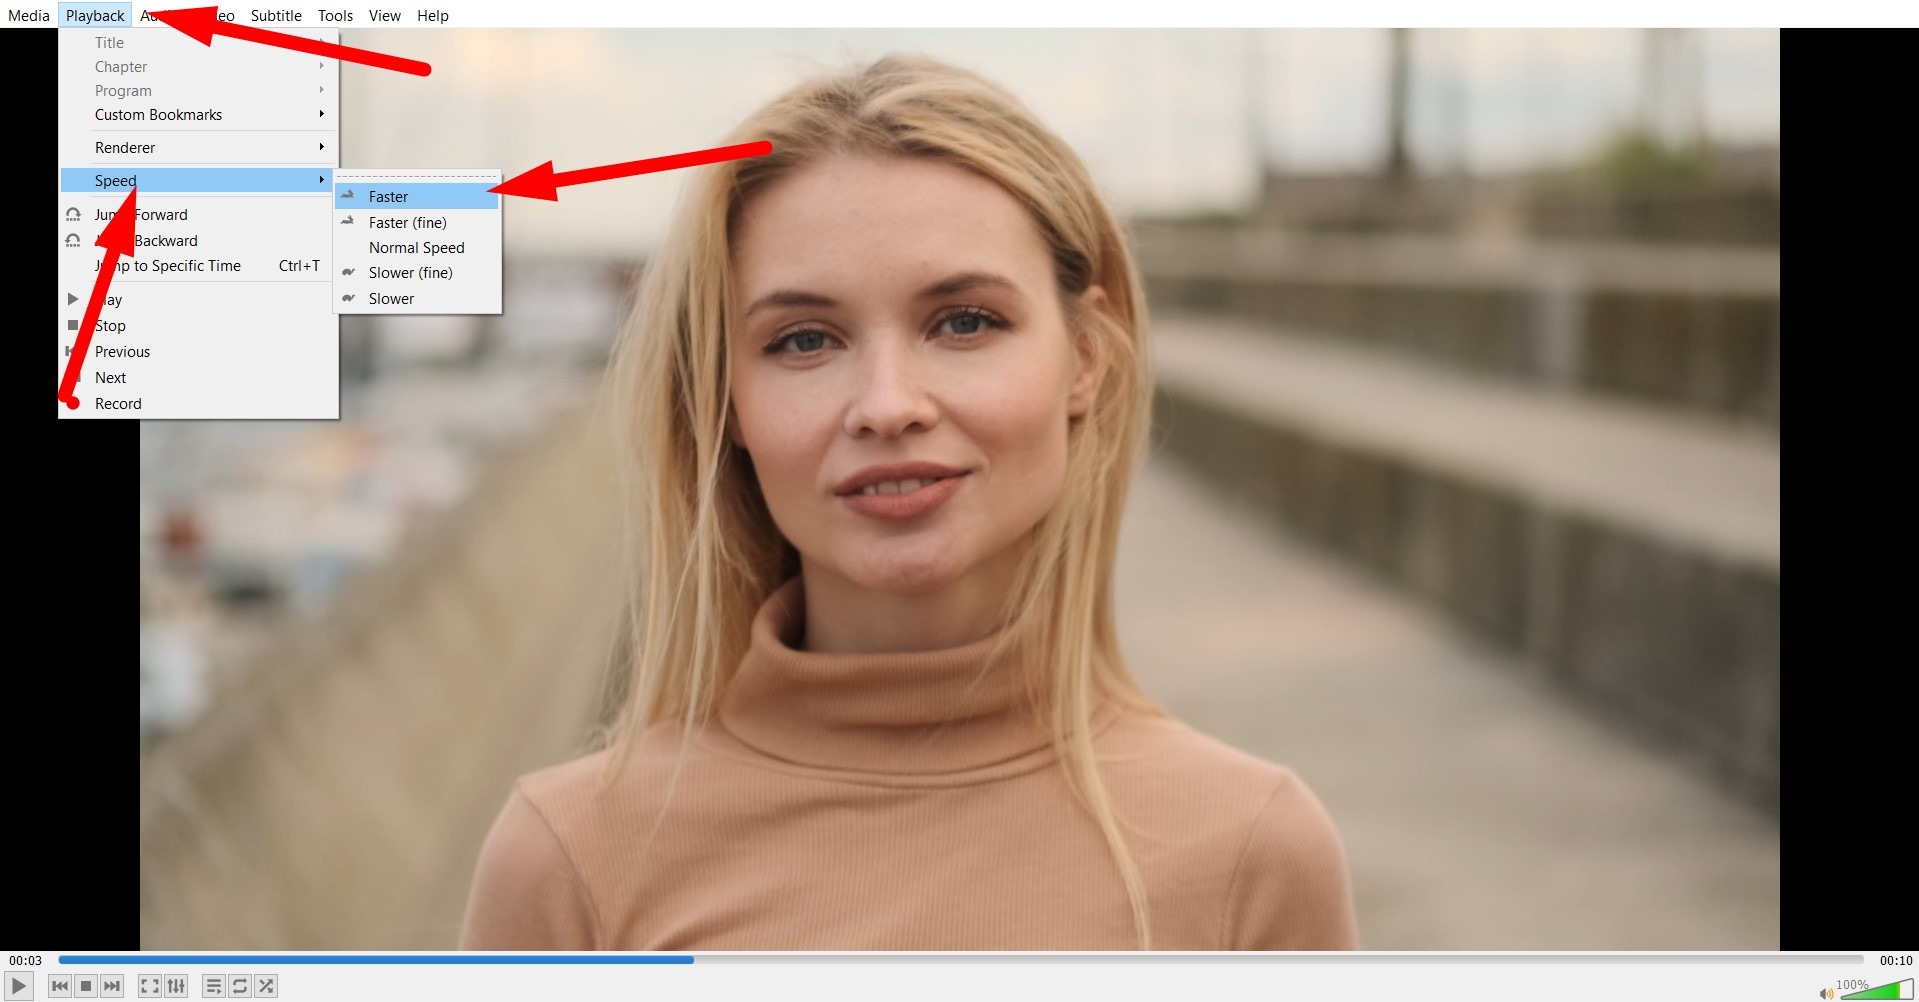
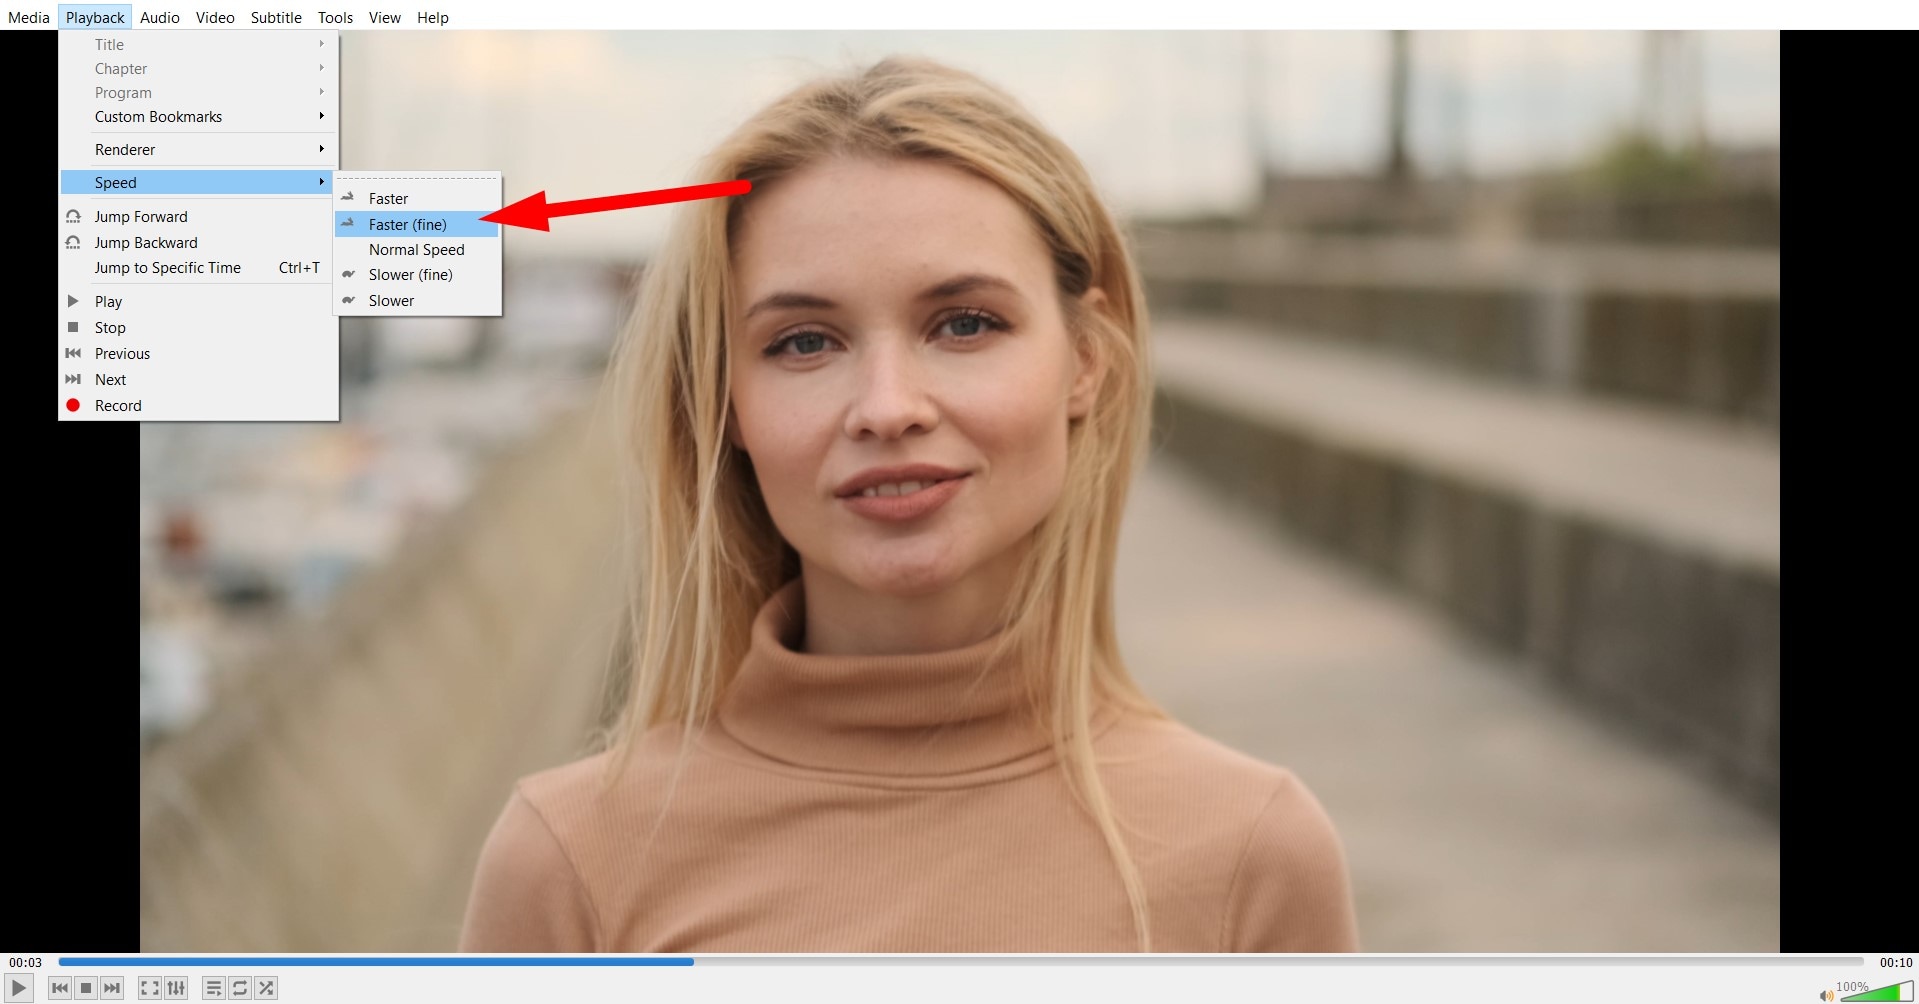
- Select Faster (fine) for more precise control to make gradual speed adjustments.
How to Slow Down Playback in VLC?
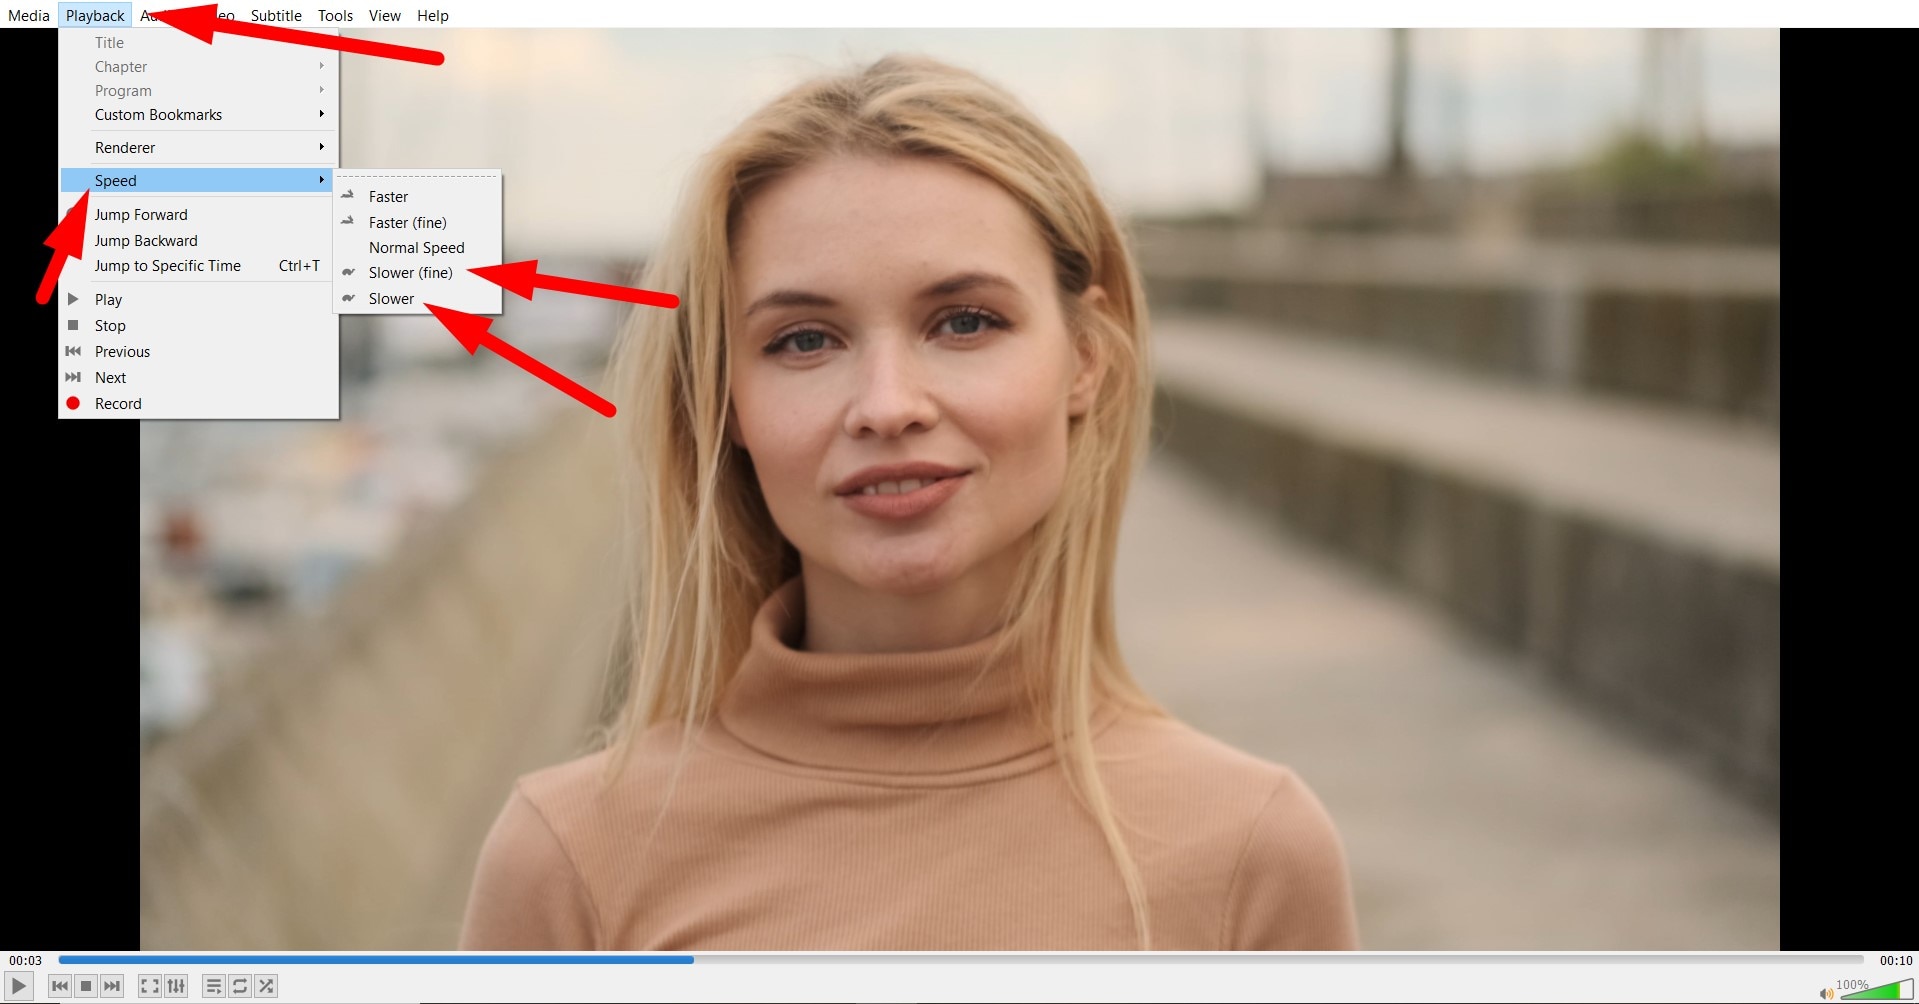
The process of slowing down playback on VLC is the same as increasing it. Follow the same path. Navigate to Playback > Speed > Slower (or Slower (fine) for smaller increments).
How to Change the Speed of a Video Permanently in VLC
By default, changing the playback speed in VLC is only temporary. This means that it only affects how you view the file during that session. The original video remains unchanged.
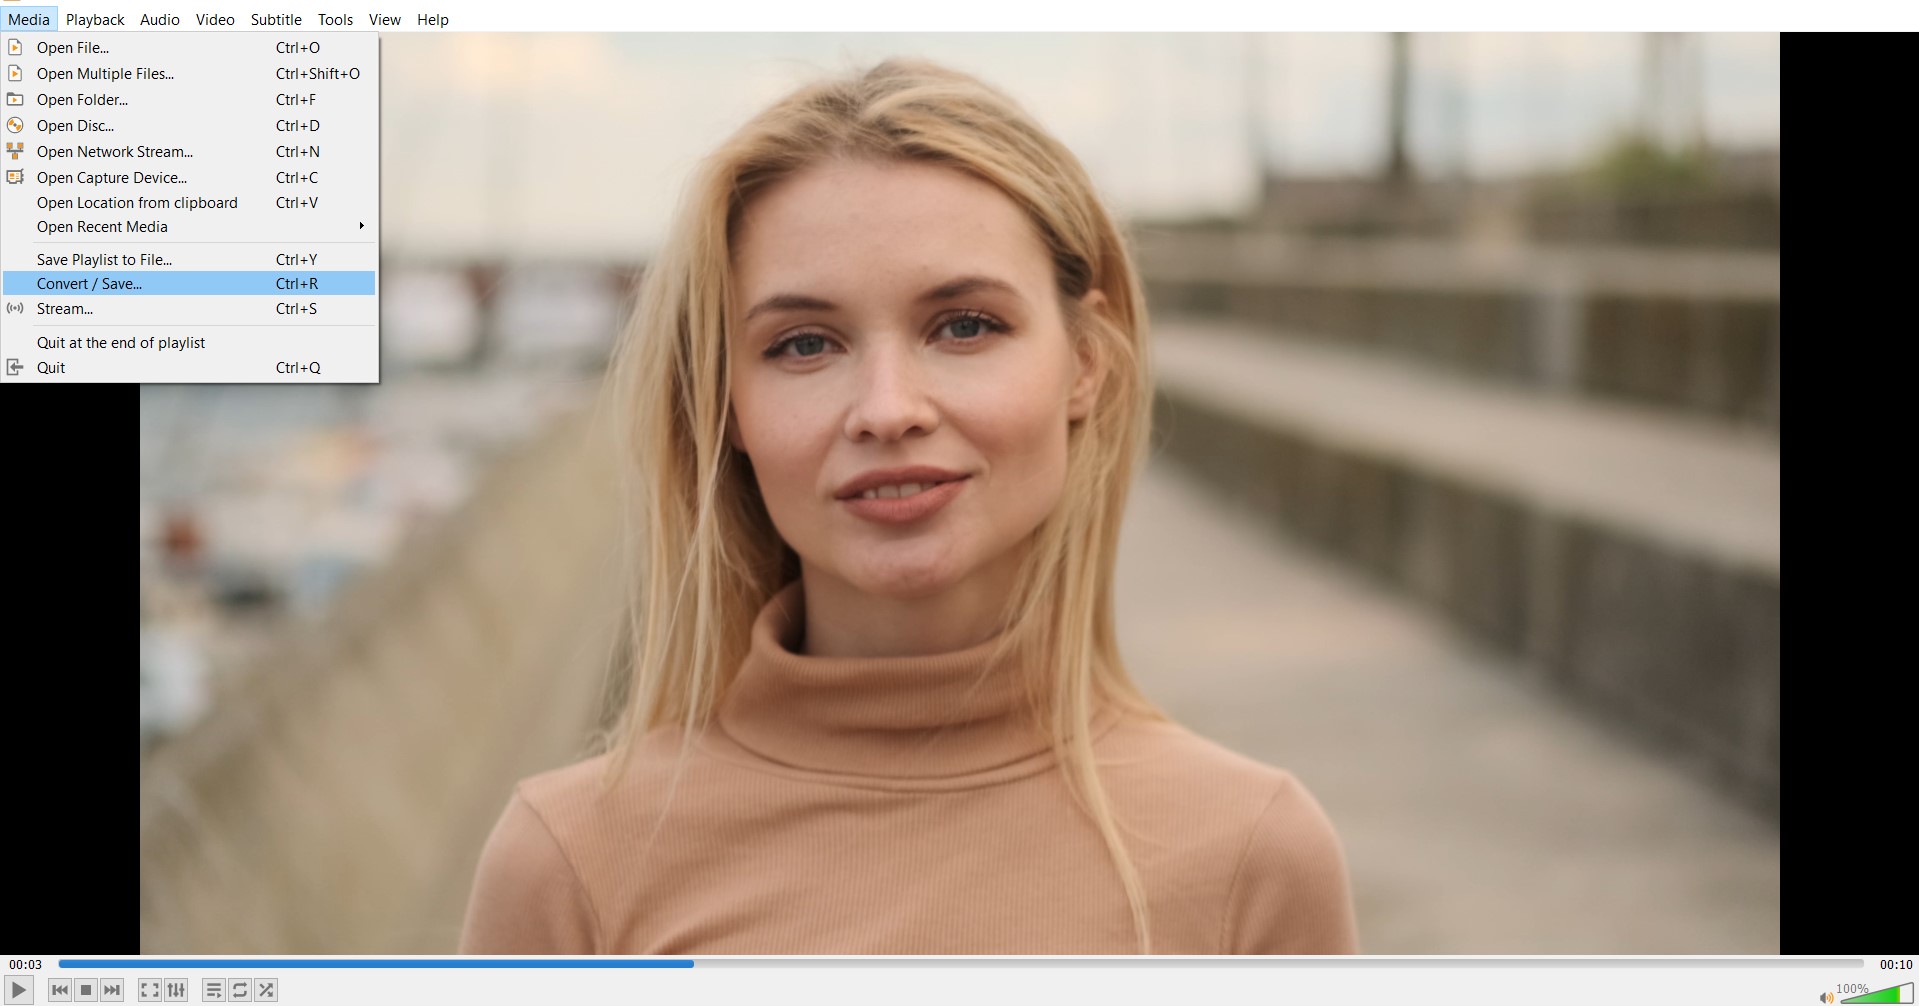
If you want the speed change to be permanent, you can use VLC's Convert/Save feature with transcoding. Here's how this works.
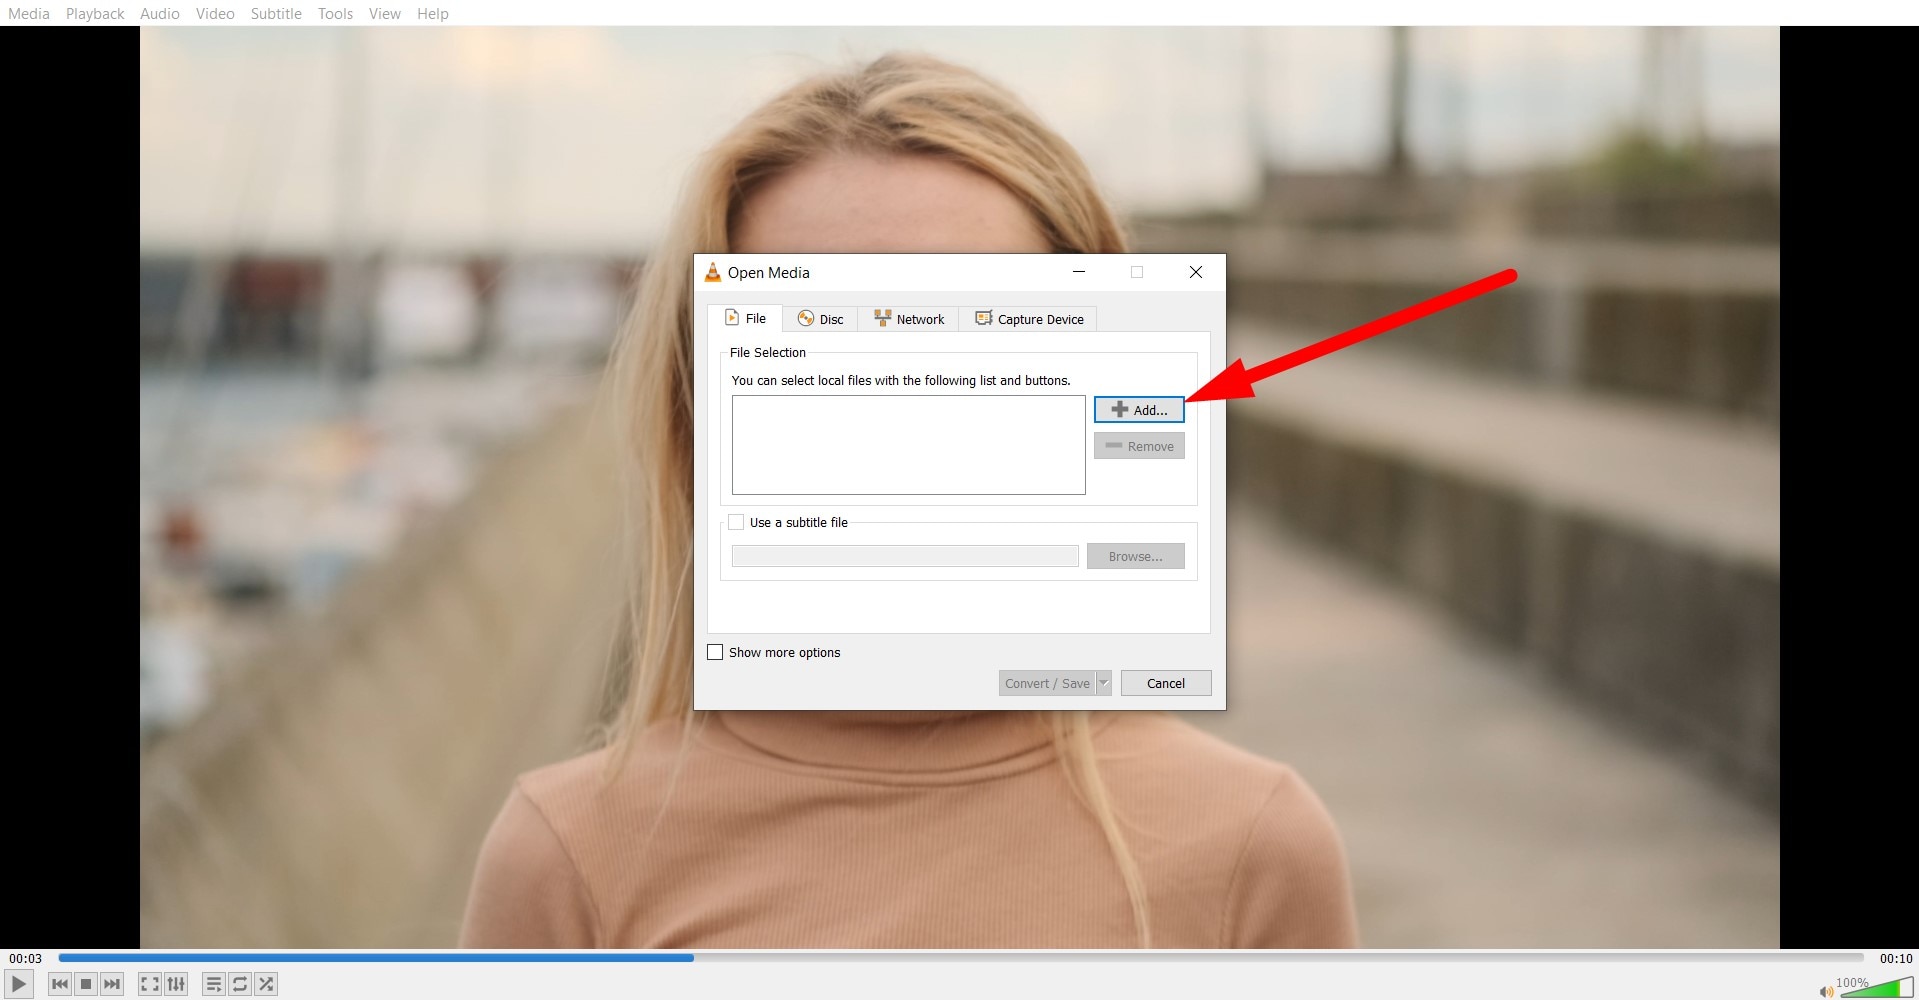
- Go to Media > Convert / Save.
- Click on +Add and select the video file from your hard drive.
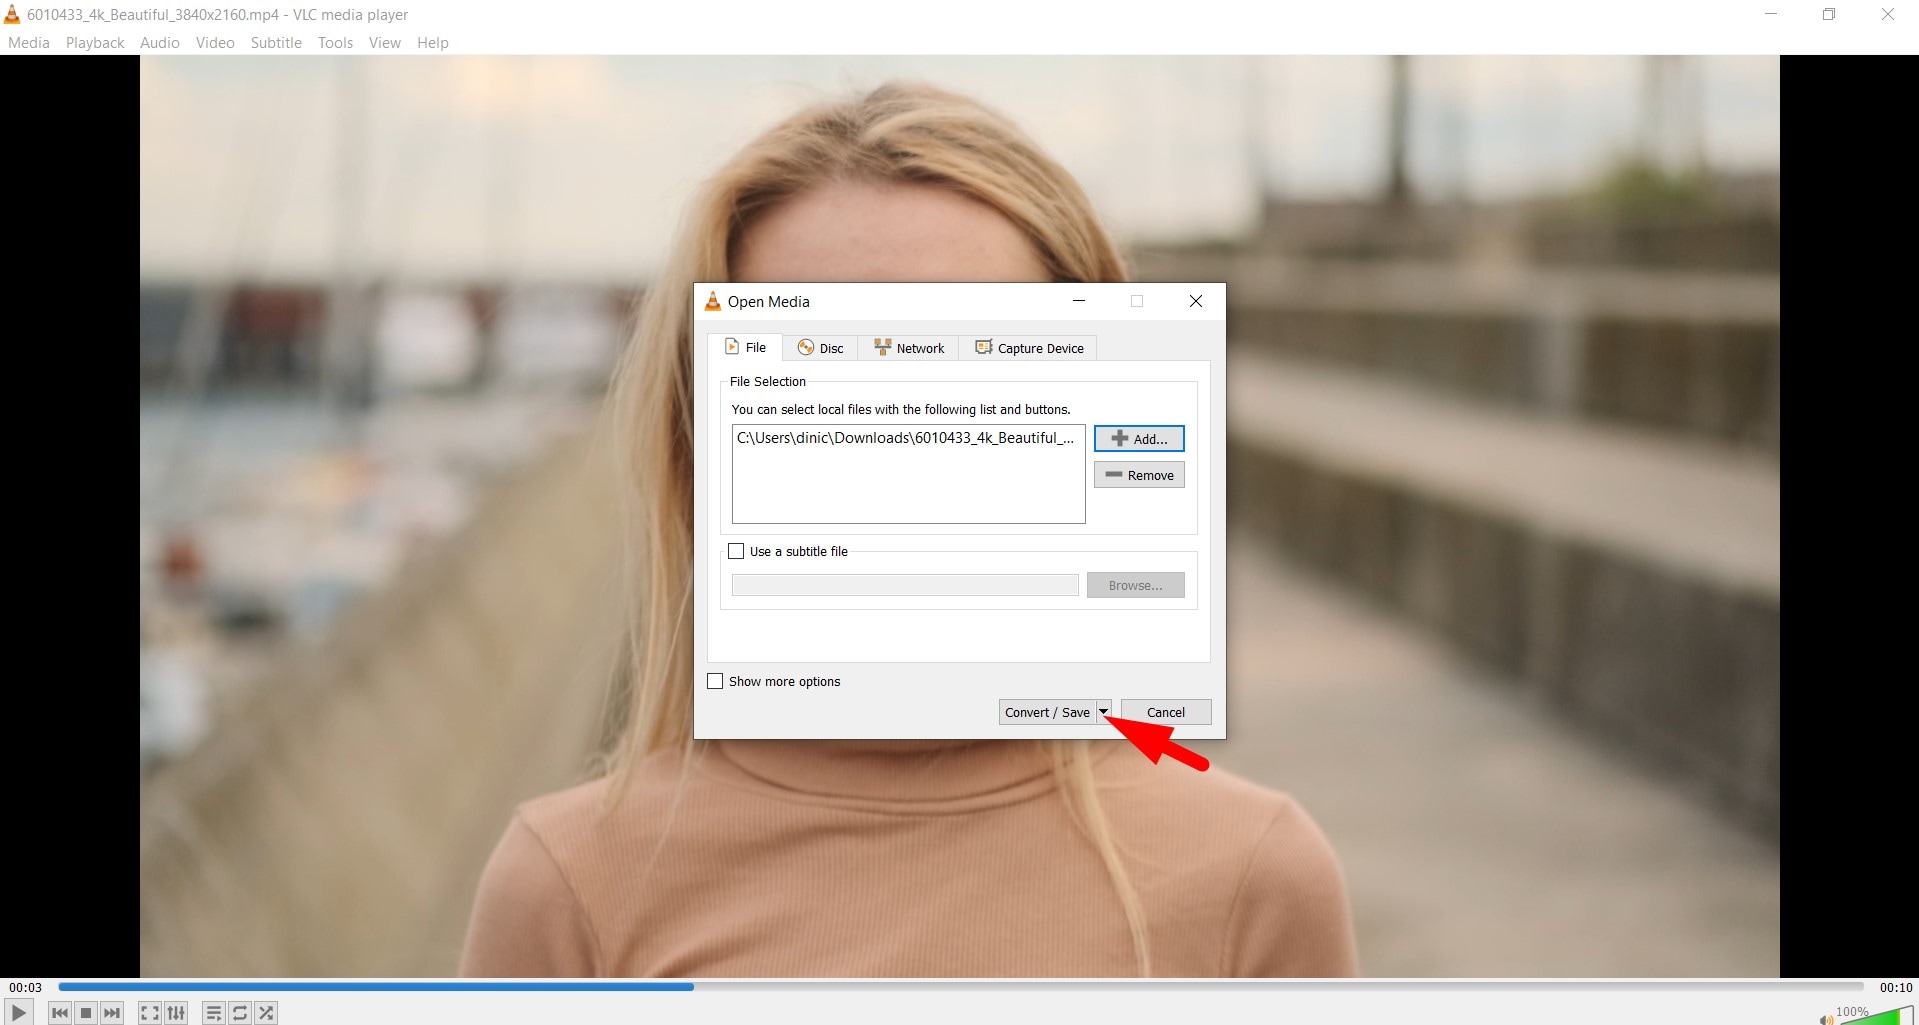
- Click on Convert / Save once again.
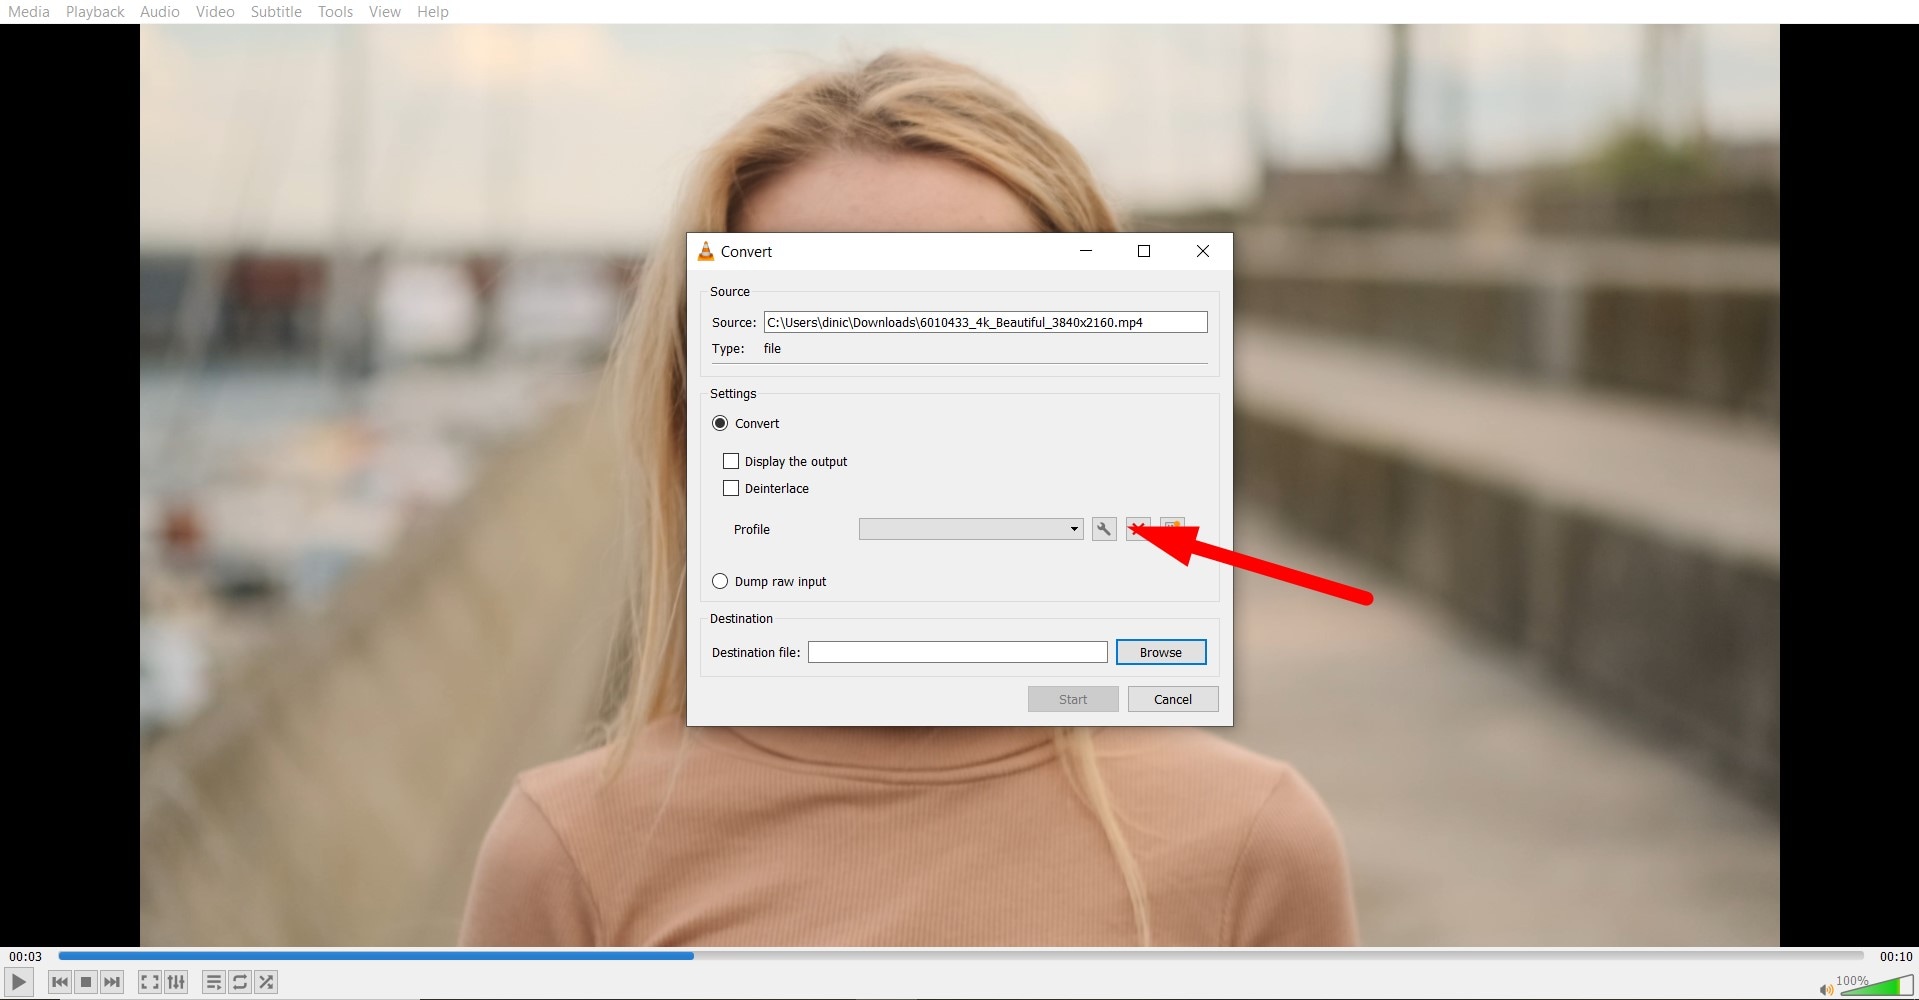
- In the Profile settings, click the Wrench Icon to edit.
- Click on the Video Code card, tick the Video Box, and adjust the frame rate and bitrate to match your speed change. When you are done, click Create.
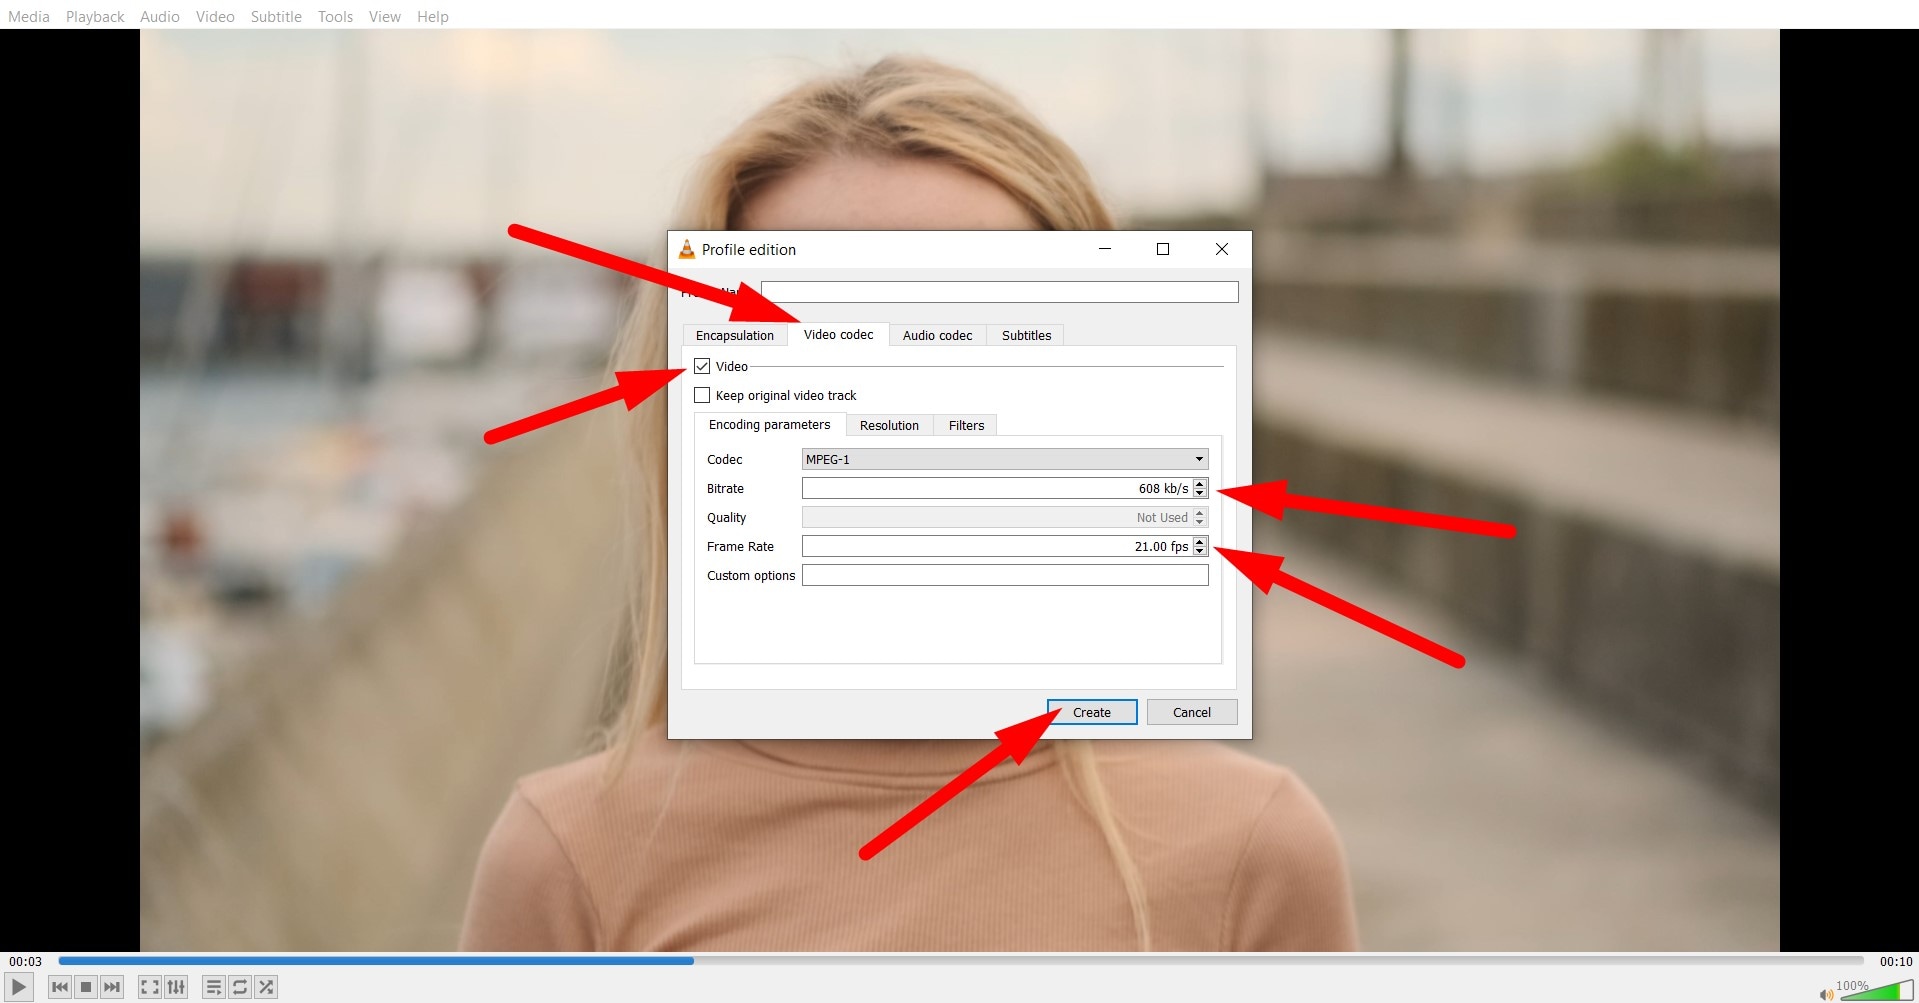
If you did your calculations correctly and used the correct frame rate and bitrate, you will get a video that matches the speed you were aiming for. If not, you will have to go back to the drawing board and do it all over again. Also, as you have noticed, this process can be a bit technical and may not produce the smoothest results. So, you need something better.
Filmora: A Better Alternative for Permanent Speed Changes
Dedicated video editing software is better for permanent speed adjustments, especially if you want features like speed ramping, fine segment control, and professional export quality. That's why we recommend Wondershare Filmora, a full-featured video editor packed with helpful AI tools that let you create wonderful, crisp videos (even from scratch).
 secure download

Take a look at the most important reasons why Filmora is better for video speed control.
- One-click speed changes – Instantly speed up or slow down a clip without complex settings.
- Speed ramping – Gradually change the speed for an awesome slow-mo cinematic effect.
- Frame interpolation – Keep the playback completely smooth even at extreme slow motion.
- Quality exports – Export the final video at your chosen speed in 4K to get a permanent speed change.
- Cross-platform – Filmora is available for Windows, Mac, and mobile (Android and iOS) devices.
We'll give you a quick tutorial for both the desktop and mobile versions of Filmora to show you how easy it is to change the video speed. Before you begin following the steps, download and install Filmora on your preferred device, open it, create a new project, and import the video you want to work on.
secure download - For the PC version, you need to click on the video in the timeline to select it, and then go to Speed > Speed Ramping. From there, you can choose to customize the speed for each section of the video or simply pick one of the available templates.
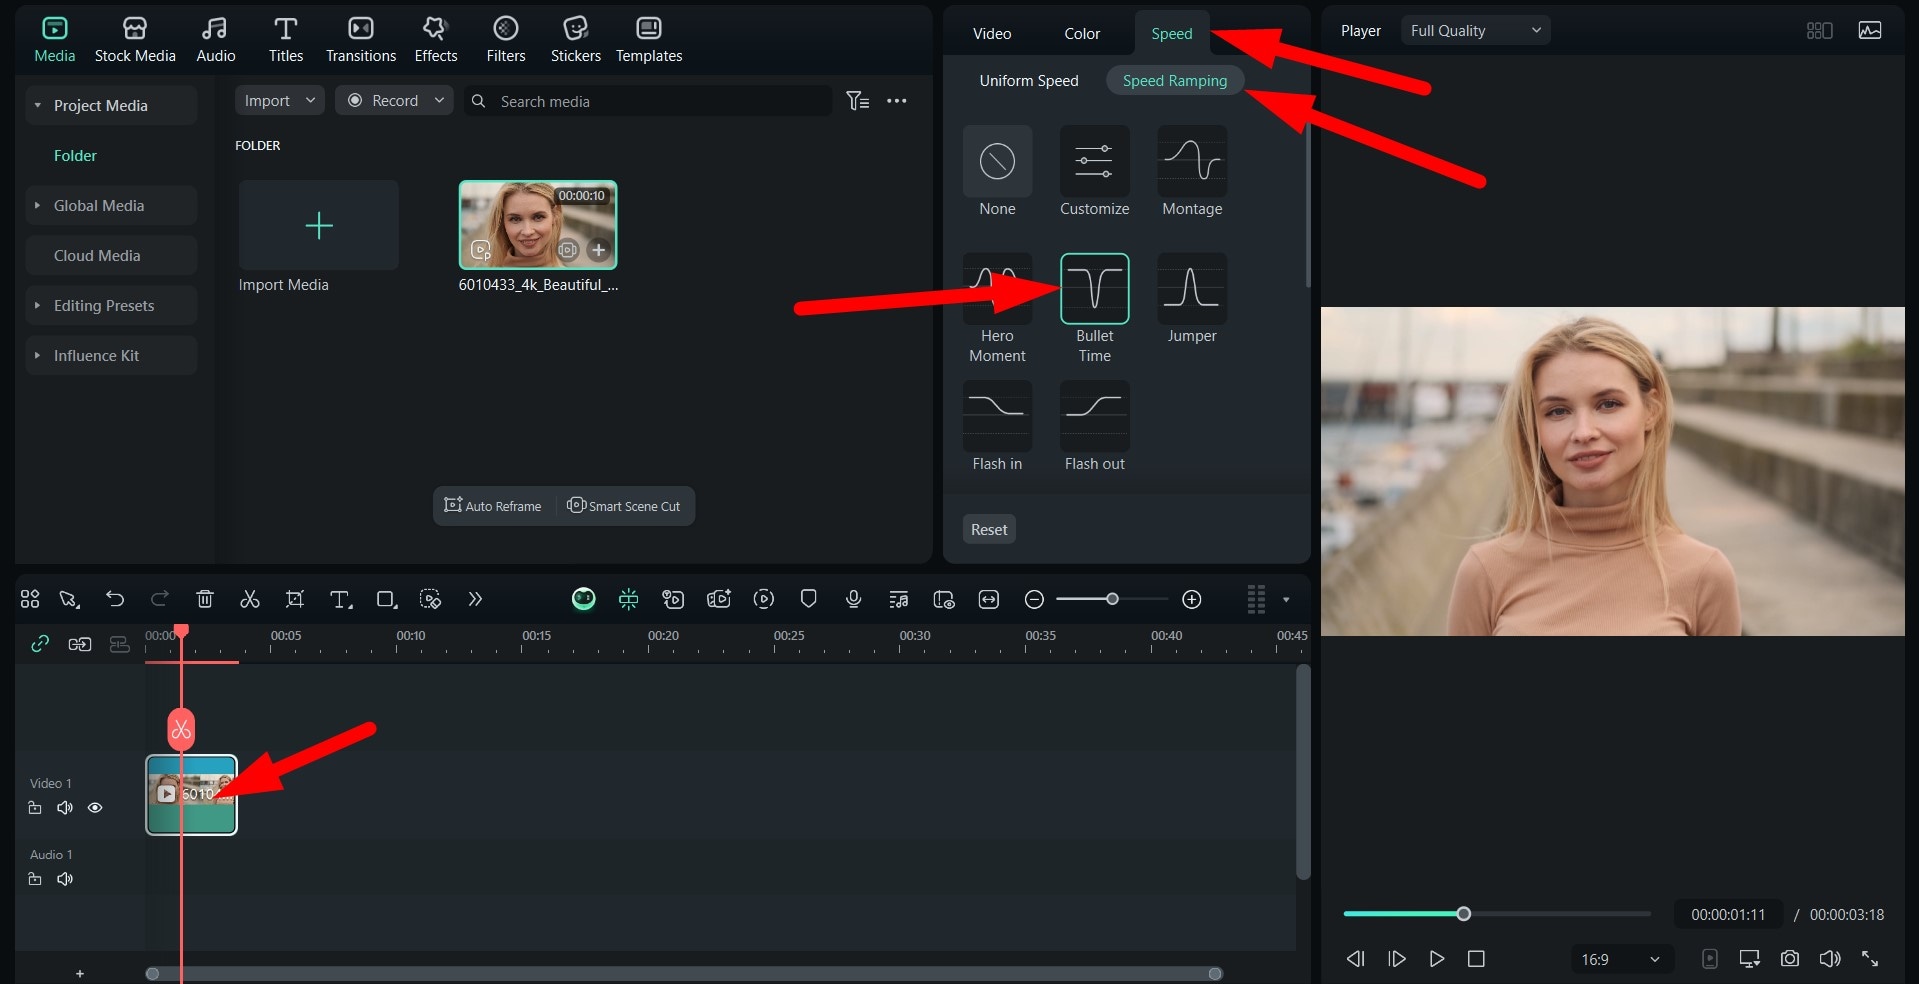
- Here's the result for the Bullet Time preset.

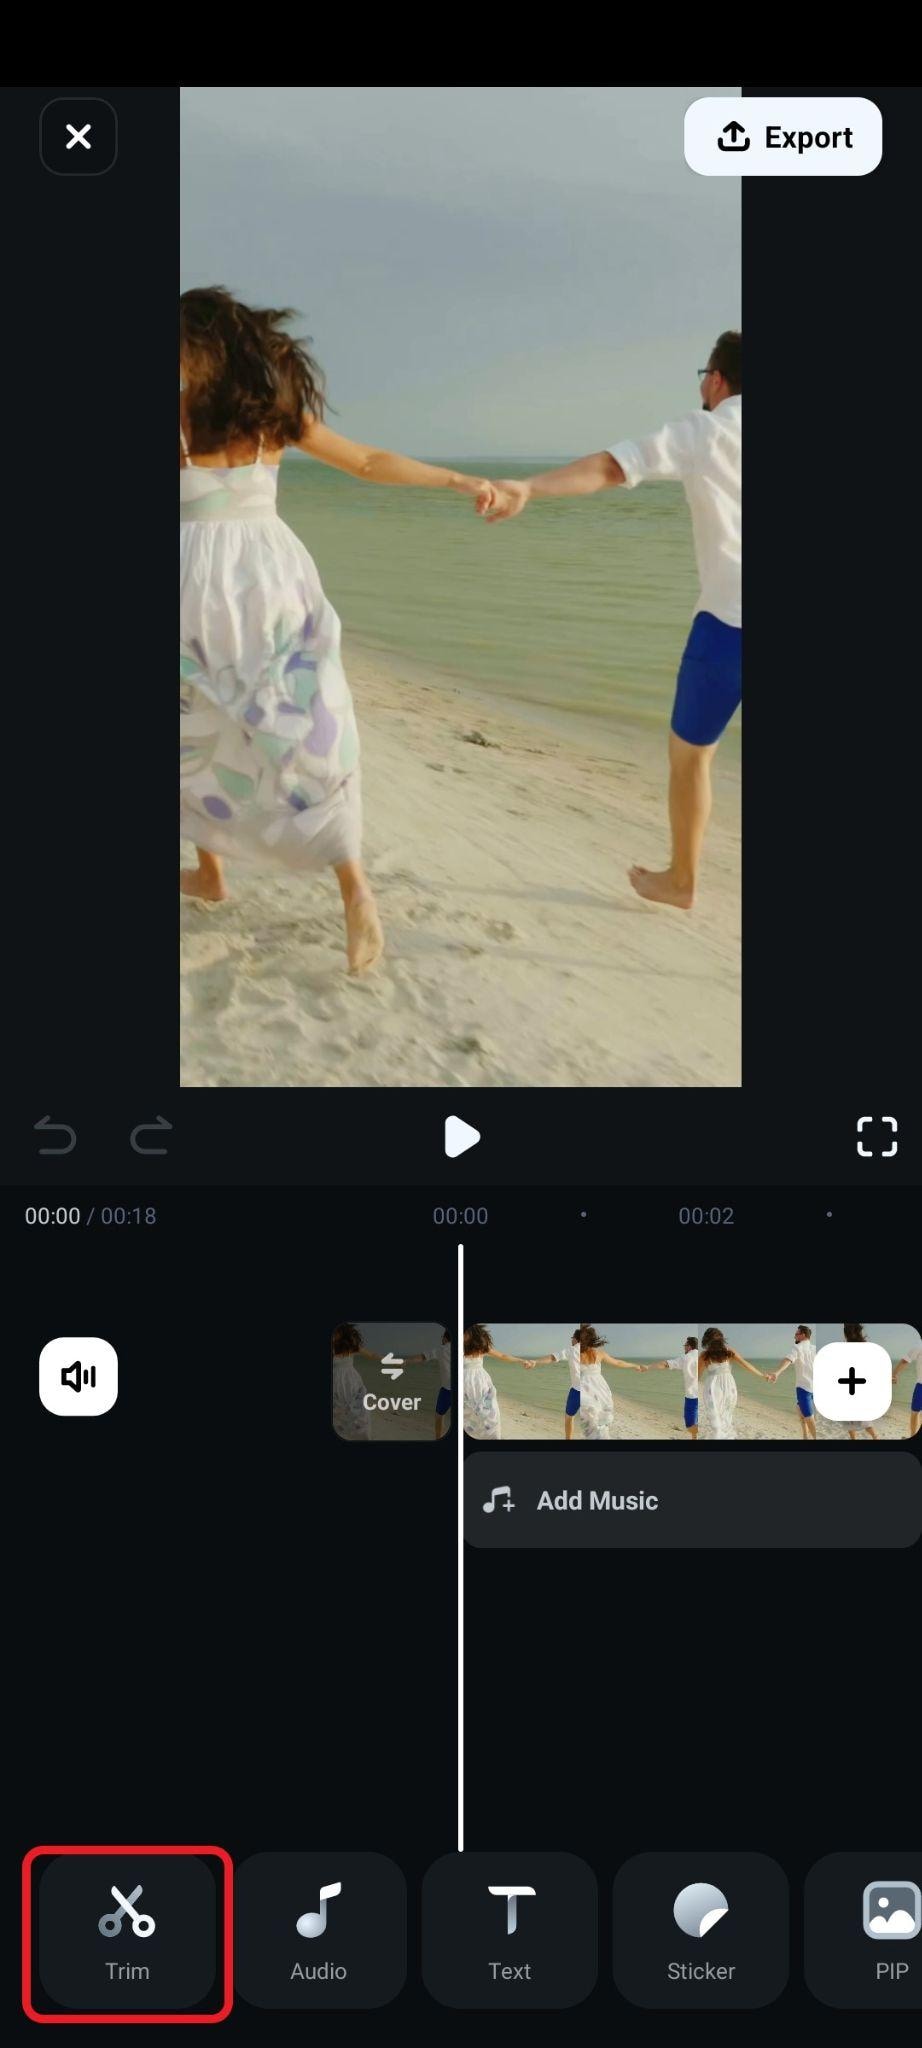
If you want to adjust video speed on your mobile with the Filmora app, follow the steps below.
- Tap on the Trim card in the bottom menu.
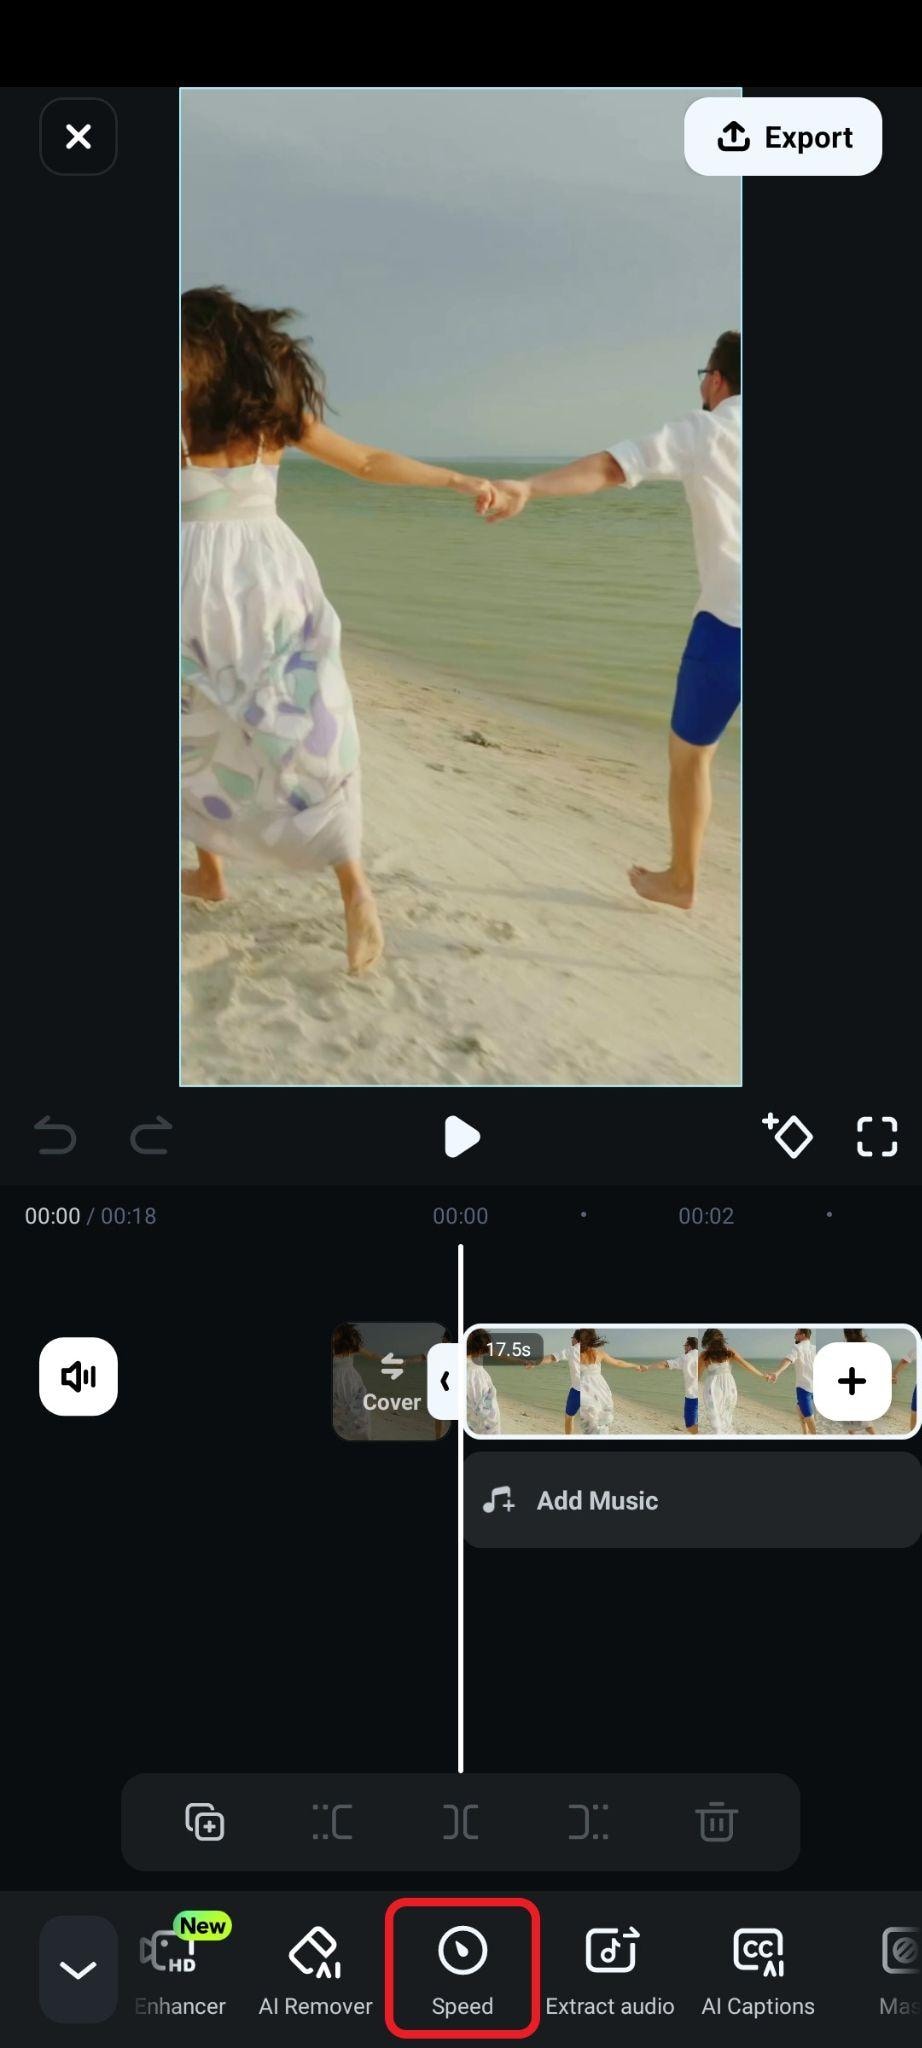
- Now, in the sub-menu, tap on Speed.
- Now, tap on the Curve option, and just like in the desktop version, select a template or make manual adjustments. We will use "flash in."
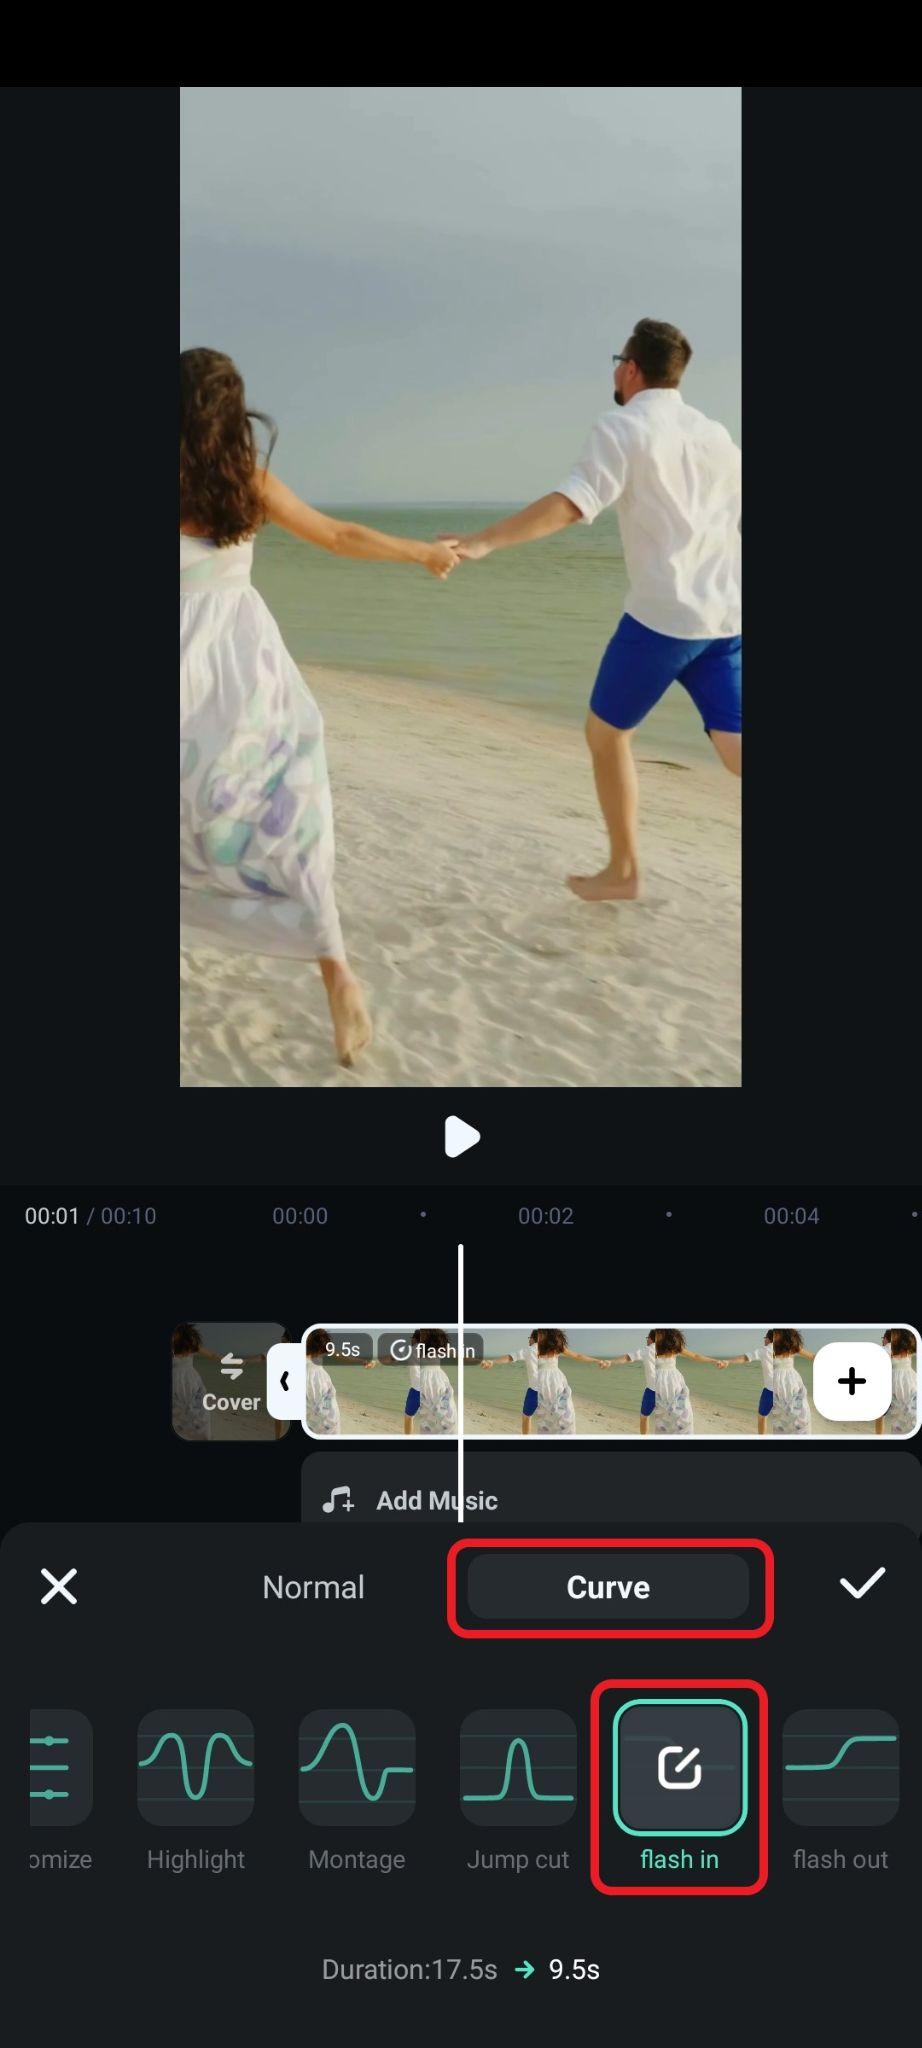
- After you accept the changes by tapping on the checkmark, the speed of the video will be adjusted, and you can export it. Here's how this one turned out.

So, if you need permanent, polished speed adjustments, you can download Filmora and try it today. After you adjust the speed, you can play around with other features, add effects and animated stickers, incorporate animated titles, and make the video fun for social media.
Conclusion
VLC Media Player makes it simple to speed up or slow down videos in real time using menu options or quick keyboard shortcuts, which is perfect for casual viewing, learning, or analysis. But if you want to make speed changes permanent, add cinematic ramps, or get pro-level smoothness, a dedicated editor like Filmora is the way to go. Try the desktop and mobile versions and experience the joy of video editing firsthand.
secure download 