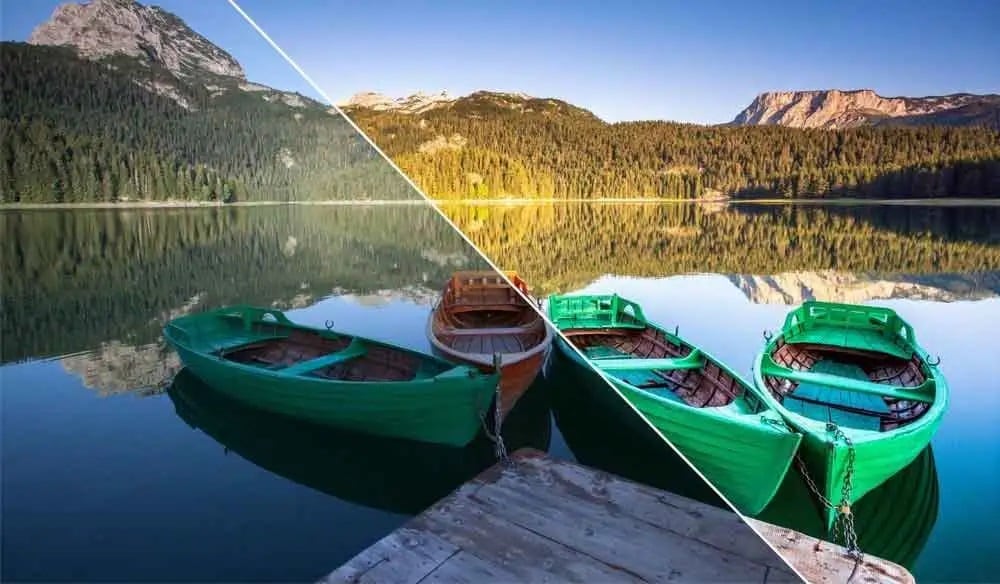
LUTs can be some of the most beneficial elements of your video editing journey. They provide everything you need to make your recordings professional and audience-ready quickly. However, starting with LUTs video editing can be challenging, especially if you’re a new videographer.
This guide will explain everything you need to know about LUTs to start. We’ll also show you how to apply them for the best results. Without further ado, let’s jump into the guide.
In this article
What Are LUTs in Video Editing?
Lookup tables or LUTs are color grading and correction filters you can use for your video editing experience. They create specific maps for your videos, helping you identify which aspects to correct to get the ultimate color results.
LUTs can help you reach consistent and professional results to catch the attention of your viewers. However, many people mistake LUTs for presets, so check out the differences below to learn which filter you need for your editing experience.
LUTs vs. Presets: How Do They Differ?
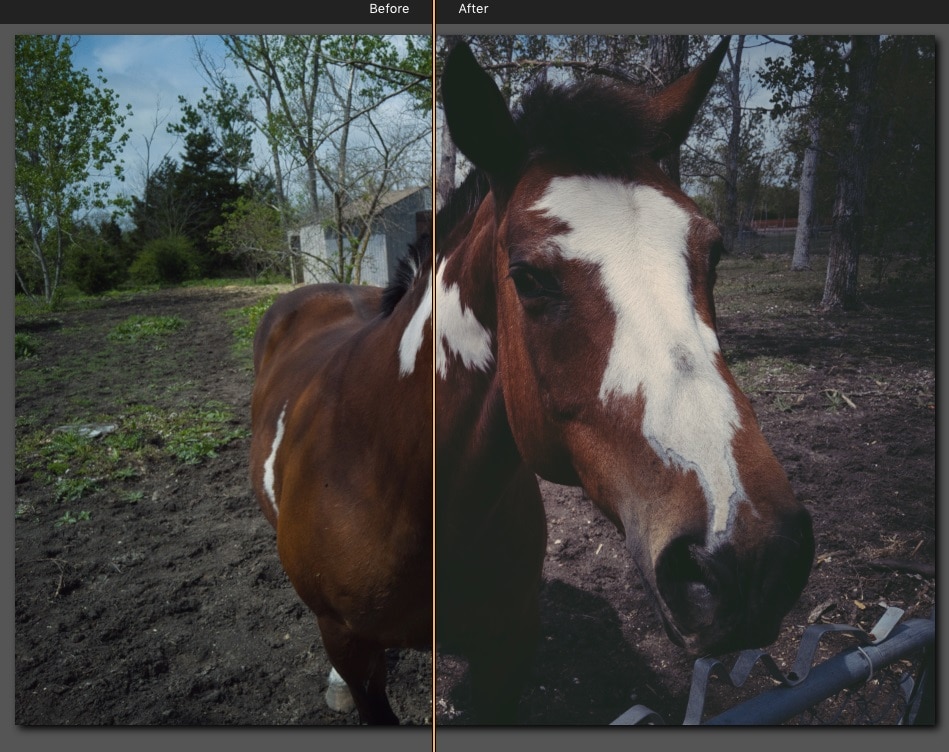
Here are the most notable differences between LUTs and presets:
- Purpose – You can use LUTs for color correction only. They use specific maps to help you reach the desired results. On the other hand, you apply presets to an entire video. They deal with visual aspects in general.
- Flexibility – LUTs are less flexible than presets since they serve specific color correction purposes. On the other hand, presets provide more settings and are generally more customizable.
- Difficulty – LUTs deal with colors, so you may need to understand the color theory to get the desired results. On the other hand, presets are simple to use and don’t require experience.
As you can see, LUTs are generally more challenging to operate with, but you’ll see professional outcomes if you embark on a LUT journey.
Types of LUTs and When to Use Them
LUTs come in various types and forms, so you should learn the differences to know which type to use. Check out some of the most common LUT types below to better navigate the experience:
- Technical – These LUTs transform one color to another during the video editing process. You can use them to represent the colors accurately and convey the desired message in your recordings.
- Creative – These LUTs can help you achieve the desired design and deliver unique results. For instance, you can use them to make your videos look like old movies.
- Calibration – These LUTs are the most customizable of the bunch. You can completely manipulate your color experience with them. Calibration LUTs are professional filters that require a lot of skill to master.
- Viewing – Temporary or viewing LUTs let you preview your videos with LUTs without applying the changes. If you enter the viewing mode, you can see what you need.
- Speed – If you’re working with extensive workloads, speed LUTs can help you manage the experience better. You can apply quick changes to multiple videos and transform your experience.
The list of LUTs continues, so explore everything the LUT video editing world offers and maximize your efficiency.
1D vs. 3D LUTs
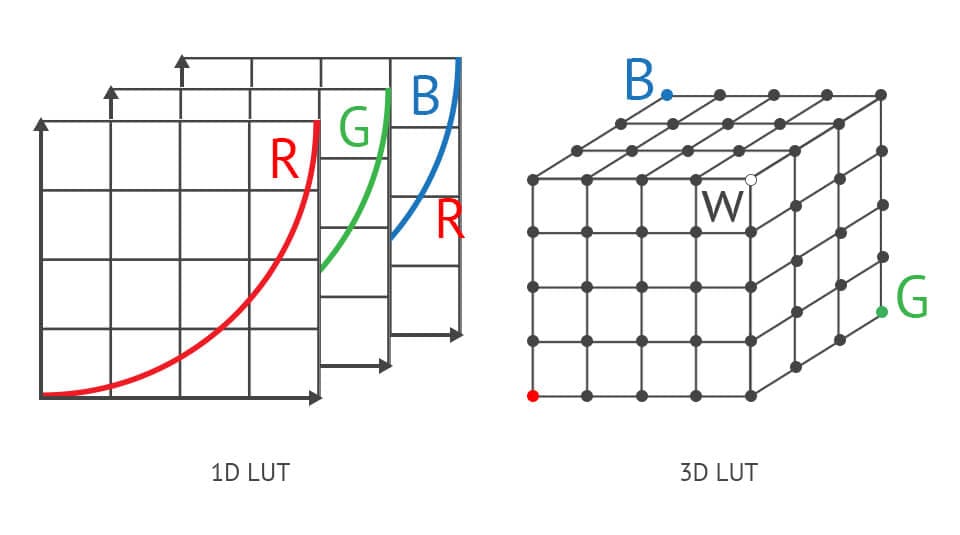
When starting your LUT experience, you’ll notice two types of LUTs: 1D and 3D. Check out their primary differences below and decide which option is the best for your project:
- Purpose – 1D LUTs can manipulate a specific color independently. On the other hand, 3D LUTs affect colors in relation to one another.
- Functionality – 1D LUTs are perfect for simple tasks, such as adjusting the brightness in your videos. However, 3D LUTs can change all palettes to help you reach the wanted visual results.
- Ease of use – 1D LUTs are straightforward and don’t require experience. Conversely, 3D LUTs require time and skills to achieve the desired results.
Benefits of Using LUTs to Enhance Videos
Using LUTs in video editing can significantly impact your experience. We’ll present some benefits below to explain why you should consider adding these elements to your videos.
- Consistency – Once you apply LUTs to your videos, you’ll notice consistent results for all your projects. That will increase user engagement and help you become a video editing professional.
- Higher editing efficiency – Instead of manually manipulating all the colors in your videos, LUTs let you cut the post-production time and get the best results as quickly as possible.
- Enhanced video quality – LUTs can significantly increase the quality of your videos, helping you present professional results and reach a broader audience.
As you can see, LUTs can be crucial for your video creation and editing experience, so you should try them out and watch your journey turn around.
Expert LUT Editing Tips to Streamline Your Workflow

Since starting with LUT editing can be challenging, we’ve prepared several tips to help you navigate the experience better and master your skills quickly. Here’s what to do:
- Create a plan – The first step is to visualize how you want your videos to look. Once you have a picture in your head, finding and applying the desired LUT will be easier.
- Preview your LUTs – That’s vital before applying each LUT to your video. It’ll help you see whether you’ll reach the desired results or opt for another solution.
- Adjust the intensity – You can customize your LUTs by adjusting the color intensity. It’ll help you achieve preferred results faster and become a video editing professional.
- Experiment with LUTs – Since the world of LUTs is teeming with opportunities, experiment with them to find those that best fit your preferences and editing needs.
Once you implement these tips, you’ll become an unstoppable editor.
Wondershare Filmora: A One-Stop Shop for LUT Editing

Mastering the art of LUTs can be complicated and overwhelming, so you need specialized tools to make the experience seamless. Wondershare Filmora is the key to successful LUT editing, as it provides the convenience and efficiency you need to get the results quickly.
This intuitive software offers advanced video editing features to help you reach your visual goals. As far as LUTs go, you’ll access a library of over 100 options, meaning it’s suitable for everyone, regardless of your visual preferences.
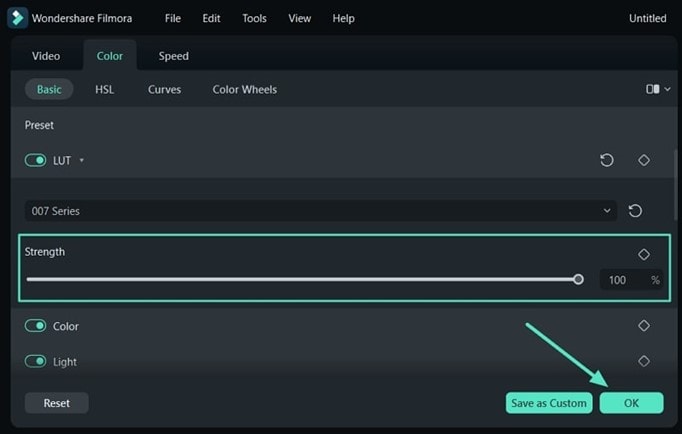
The best part about Wondershare Filmora LUTs is that they are fully customizable, letting you adjust your experience accordingly. You can modify the strength and specific colors until the results meet your expectations.
The software also provides AI-powered color correction features. It lets you automatically adjust the colors in your videos and get the best content in just a few minutes. Therefore, download Filmora to your desktop device and start the ultimate LUT experience.
How to Apply LUTs in Wondershare Filmora
Once you download Filmora to your computer, follow these steps to apply LUTs to your videos:
Step 1: Open Wondershare Filmora and click New Project.
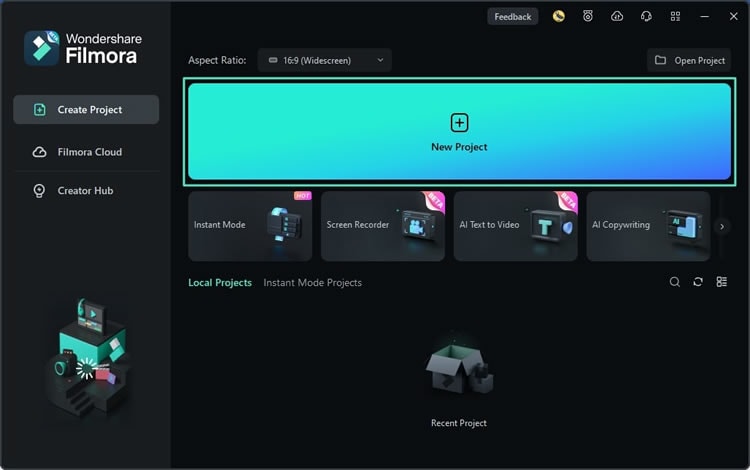
Step 2: Import your video to the platform and drag it to the timeline.
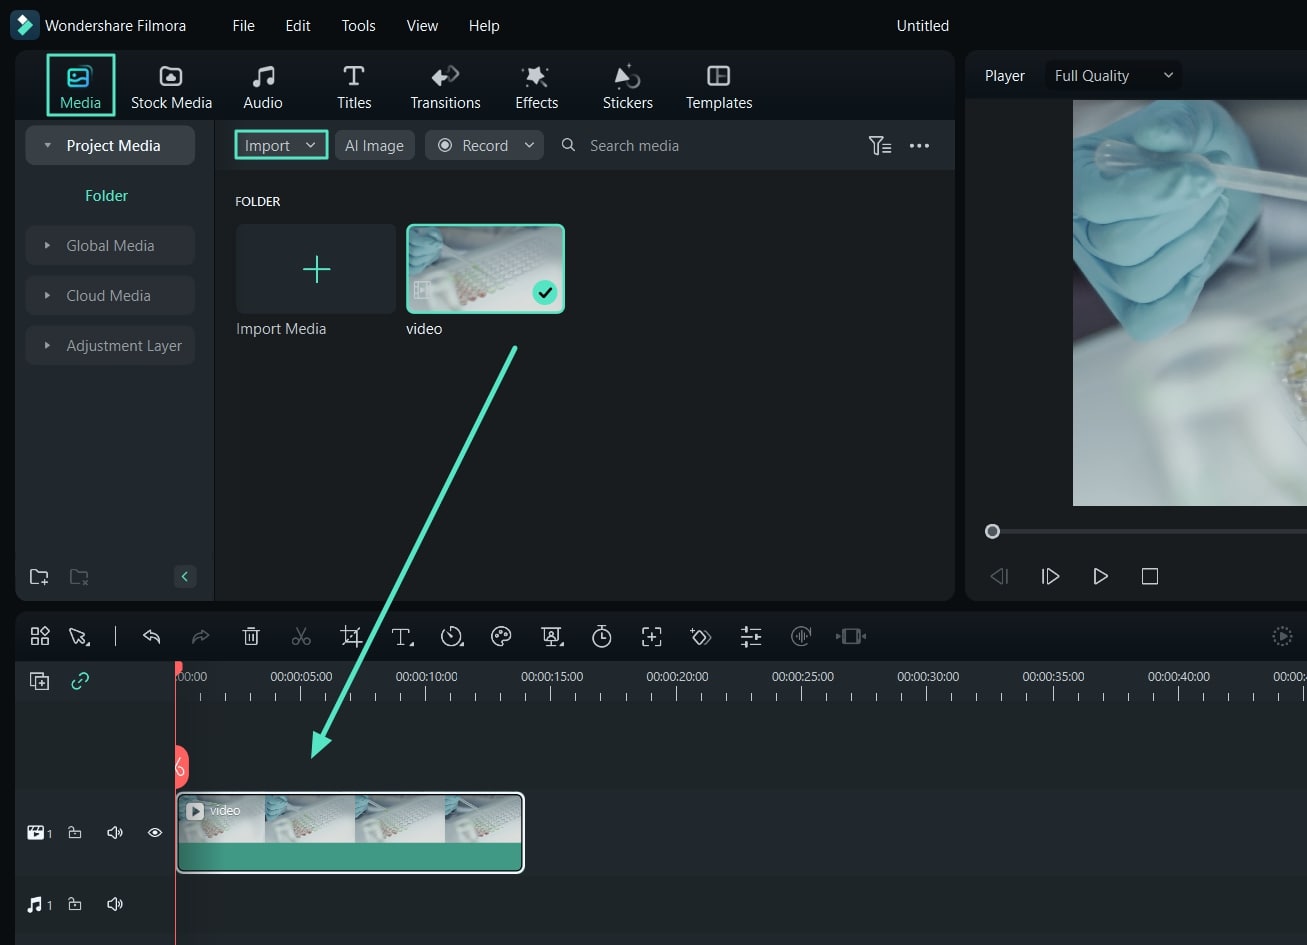
Step 3: Click the video to select it and head to Effects > Filters & LUTs.
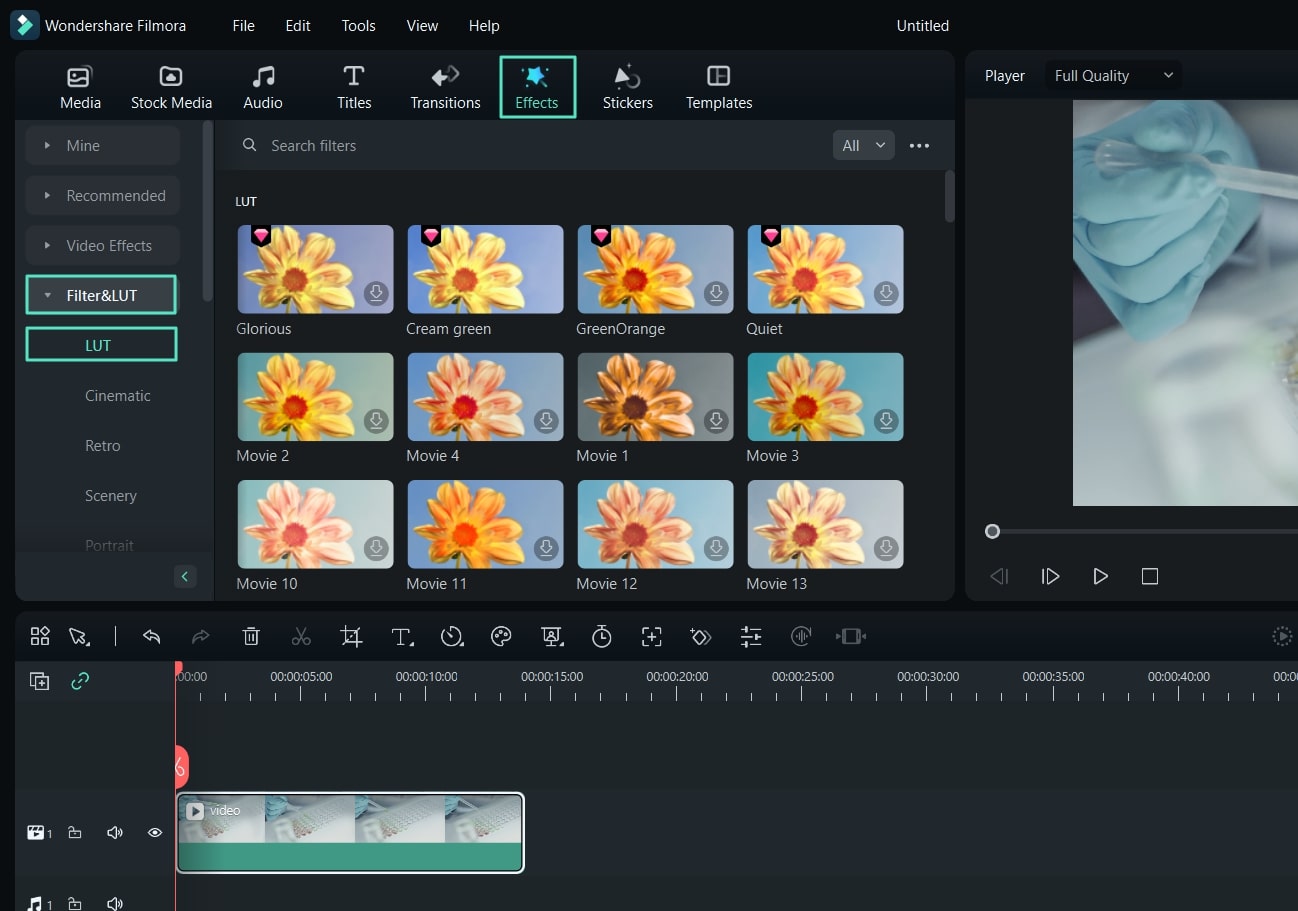
Step 4: Choose a LUT and double-click it to adjust the strength and other preferences.
Step 5: Click Export and choose where to save your video.
Conclusion
LUTs are excellent elements to add to your videos to transform your experience. These filters can be confusing initially, but you now know everything to start with LUT editing and get the best possible results.
Wondershare Filmora is your best ally for LUT video editing. This cutting-edge software can transform your experience and help you create the most professional content. Using LUTs in Wondershare Filmora is a walk in the park; you only need to customize the LUTs according to your preferences. You’ll get the best results quickly with Wondershare Filmora.


 100% Security Verified | No Subscription Required | No Malware

