
 100% Security Verified | No Subscription Required | No Malware


 ChatGPT
 Perplexity
 Gemini
 Claude
 Grok
Grok
In this article
Map animations are taking over social media and travel channels. This visual style is popular on YouTube, TikTok, and in documentaries. People love seeing their trips charted on a cinematic map.
This article shows top travel map animation styles and how to use them in Wondershare Filmora. You'll learn how to make stylish maps in minutes and explore the best travel route video maker options in Filmora. Start your journey into map magic!

Part 1. Why Cinematic Travel Map Animations Are So Popular
Animated maps bring clarity to travel stories. They show routes, destinations, and timing in an easy-to-understand video. Here are some key reasons why this style is trending:
- Visual storytelling: Map animations help viewers follow your journey step by step
- Professional feel: They add polish to travel vlogs, recap videos, and mini docs
- Viewer engagement: Animating location changes keeps people interested
- Versatile use: You can use them for road trips, flight paths, hiking maps, and more
Wondershare Filmora makes it easy to add animated travel maps. You do not need advanced tools or steep learning. The software includes lines, icons, zoom features, and keyframes. You can customize everything in a few clicks.
This animation shows a colorful city map with a red route line traced dynamically across the streets. The path is smooth and steady, guiding the viewer from one point to another. It has a GPS-like effect that is useful for showing directions or location highlights in travel videos. All elements are editable in Filmora.
Travelers, content creators, and documentarians all use these animations. You can show where you visited and how you traveled. It adds color and context to your video. Map visuals help people feel they are on the journey with you.
Download Filmora now and start building map animations that look cinematic. You can tell travel stories with style, no matter your editing level.
Part 2. Top 5 Cinematic Travel Map Animation Styles To Try in Filmora
Map animations give your videos a more polished and exciting look. In this section, you'll explore 5 cinematic travel map animation styles that are easy to create in Filmora. You can find these effects in-app or build them using built-in tools like keyframes, overlays, and visual effects.
Classic Flyover Route Animation
This is one of the most popular travel map styles. It shows a colorful path traveling from one point to another, just like a plane flying across a globe in a movie. The map usually zooms or pans to follow the route.
What it looks like:
A moving blue line travels from one city to another with a slow panoramic view. You can add a plane or car icon that follows the path to make it more dynamic.

 secure download

How to create it in Filmora:
- Use keyframes to animate the path across a custom map background.
- Add a line graphic from Filmora's stock assets.
- Overlay a moving icon (plane or car).
- Use zoom and pan to follow the route naturally.
- Add background music or sound effects for realism.
Tip: Combine this with animated text showing the destination names.
Vintage Paper Map Style
This style feels like an old travel documentary. It uses sepia tones, faded textures, and explorer-like design elements. It gives your video a historical or nostalgic feel.
What it looks like:
A brown or beige map with compass symbols, stamps, and dotted paths. Movements feel slow and cinematic.
How to create it in Filmora:
- Use a vintage map texture as your background.
- Apply LUTs (color filters) for a faded, old-paper effect.
- Add assets like compasses, torn edges, and ink lines from Filmora's library or Filmstock.
- Include slow transitions and calm background music.
Bonus: Add stamp sound effects when new places are marked.
Modern Minimalist GPS Route
This map animation style is clean and easy to understand. It mimics digital map apps like Google or Apple Maps. It's perfect for vloggers and quick location changes.
What it looks like:
A white or gray map with a moving blue line, showing roads and labels. Sometimes a location pin pops up at the end.
How to create it in Filmora:
- Use a clean map background from Filmora's stock.
- Add a colored path using motion keyframes.
- Insert a pin or marker icon at key locations.
- Use quick cuts and zooms to match a fast vlog pace.
Pro tip: Add on-screen text or voice narration to highlight why each stop matters.
Plane Icon With Dotted Line Movement
This style shows a plane, car, or boat moving along a dotted line. The icon moves as the map pans slowly. It's fun and perfect for recap videos, travel diaries, and animated intros.
What it looks like:
An animated icon moves from one point to another while dragging a dotted line behind it. The map may tilt or pan slightly.
How to create it in Filmora:
- Use a motion path for your travel icon (plane, car).
- Add a dotted line animation behind it using Filmora's shape elements or custom graphics.
- Combine this with a soft camera pan.
- Include takeoff and landing sound effects for extra fun.
Extra tip: Add shadows or glows to the icon to make it pop from the map.
Cinematic Zoom Across the Globe
This is the most dramatic style. It begins with a full view of the globe or map and then zooms into a location. It creates a strong opening or transition, perfect for documentaries and cinematic edits.
What it looks like:
The screen starts with the whole world in view. It zooms quickly into a specific country or city. Labels appear as the view closes in.
How to create it in Filmora:
- Start with a globe or world map image.
- Use scale and position keyframes to zoom into your desired location.
- Add blur effects and whoosh sounds for motion.
- Overlay text or labels as the camera lands on the target spot.
Pro idea: Combine this with your first travel clip for a strong intro.
Each style offers a unique way to tell your story. You can experiment with different combinations, transitions, and colors. Filmora gives you full control over every movement, path, icon, and background. Even if you're starting, you can build these effects using the simple drag-and-drop system.
Next up, you'll learn about the top templates and assets you can add to make your map animations look even better.
Related Templates For You to Try


Part 3. Best Templates and Assets To Enhance Map Animations in Filmora
To take your map animation to the next level, you can use ready-made templates, assets, and effects inside Filmora. These resources help you add style, direction, and sound to your video without needing complex tools.
Here are some of the best assets you can use in-app:
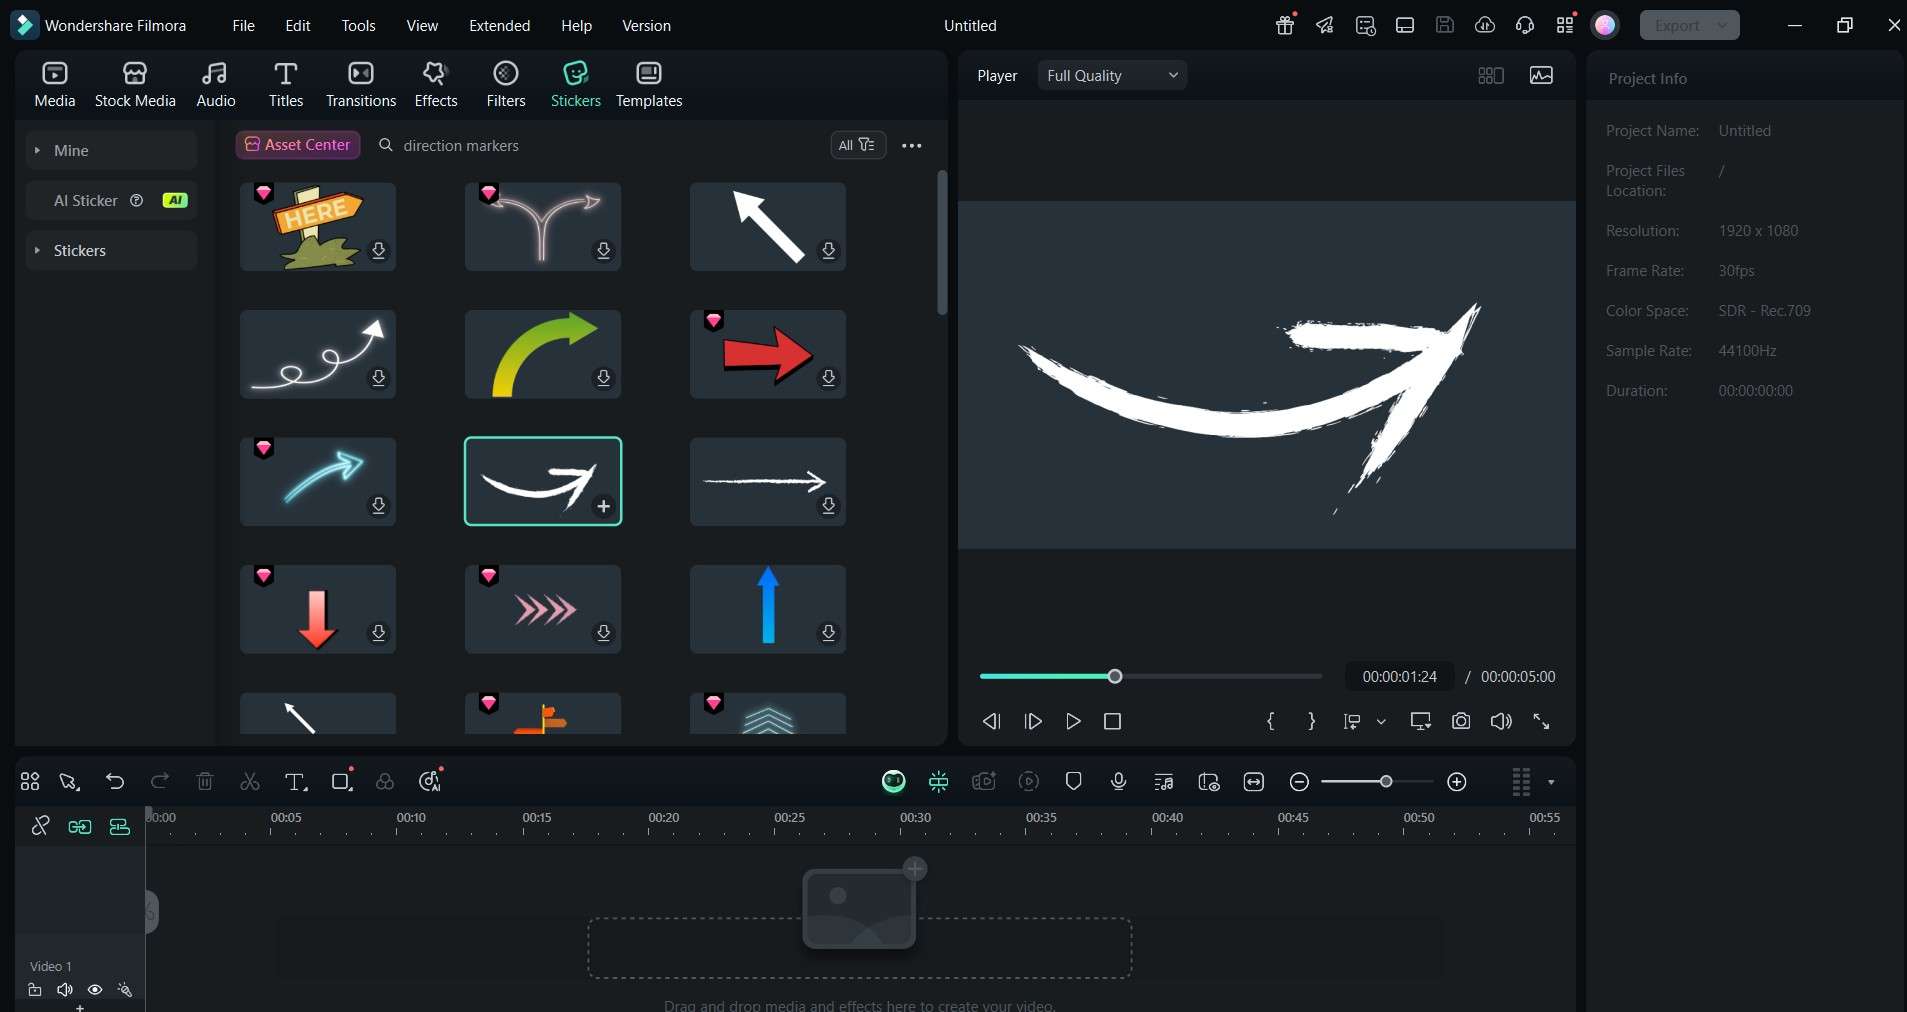
secure download Direction Markers and Route Icons
Use location pins, flags, plane icons, cars, boats, and arrows to show movement. These visuals make your route easier to follow and more fun to watch.
Motion Lines and Path Animations
Filmora includes customizable line animations you can use to trace your route. These lines can be curved or straight, and you can animate them using keyframes for a smooth effect.

Map Backgrounds and Overlays
Choose from paper maps, satellite images, or hand-drawn textures. You can apply overlays to give your video a vintage, colorful, or cinematic look.
Sound Effects
Add plane whooshes, wind rushes, ticking sounds, and location beeps to boost the viewer's experience. Filmora's sound library has plenty of these to try.
Zoom and Blur Presets
To highlight a location, use zoom-in presets with light blur and sound. These presets save time and give your video a pro-level feel.
To use these:
- Go to the Stock Media or Effects tab
- Drag assets directly into the timeline
- Customize color, speed, and size with just a few clicks
These elements help your cinematic map animation feel polished and exciting. They save time and let you focus on storytelling, not editing from scratch.
Part 4. Other Tools To Create Travel Map Animations Online
Not using Filmora yet? You can still experiment with basic map animations using quick online tools. These platforms offer easy ways to make travel maps, though they may lack deeper editing control. Here are some of the best options to try:
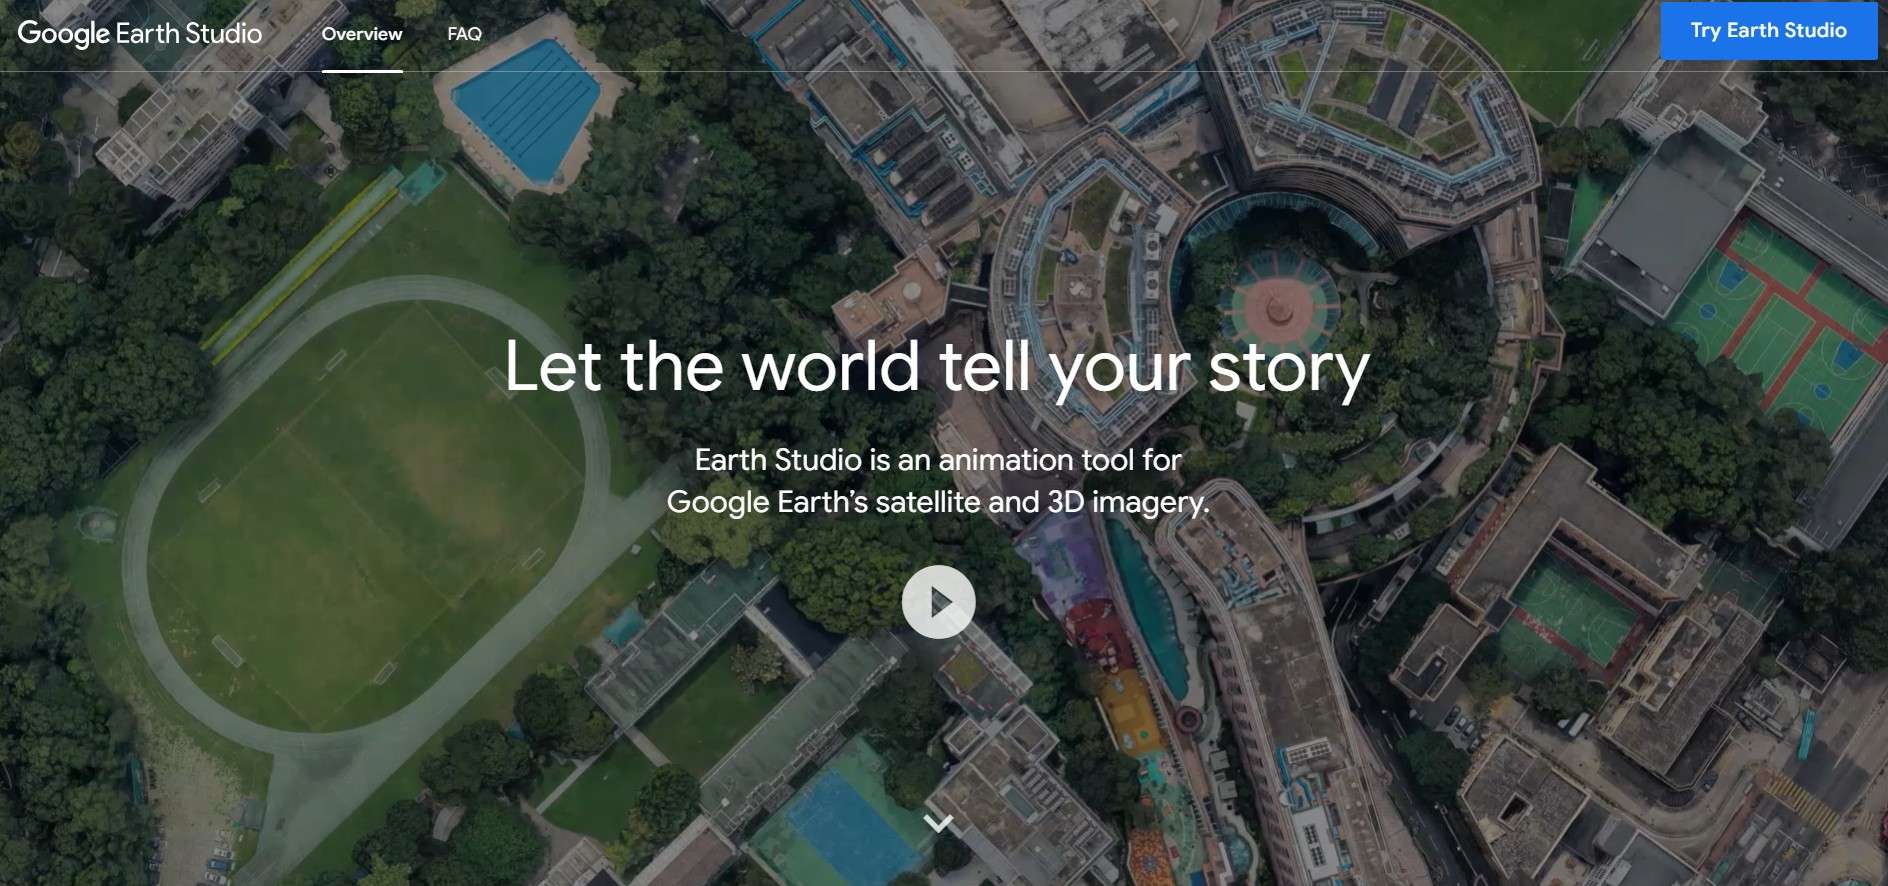
Google Earth Studio
Google Earth Studio lets you animate real-world locations in 3D. You can create flyover effects, city zoom-ins, and camera paths that follow roads or landmarks. It's perfect for location-based storytelling in travel or education content.
Key Features
- Satellite-based maps and 3D terrain
- Keyframe controls for camera paths
- Export to video formats
Limitations
- Watermark required for public use
- Requires a Google Earth license request
- No direct timeline editing like Filmora
Renderforest
Renderforest provides map templates where you can plug in destinations and create animated paths. It is browser-based, so there's nothing to install. It's ideal for fast results.

Key Features
- Ready-made travel animation templates
- Simple drag-and-drop interface
- Voiceover and background music options
Limitations
- Watermark on free exports
- Limited motion control
- No deep keyframe support
AniMap
Animaps is focused on route animations over time. It's useful for planners, educators, and trip summaries that show how a journey unfolds.
Key Features
- Timeline-based route display
- Real-time playback
- Shareable via link
Limitations
- Outdated interface
- No HD export
- No advanced styling options
Filmora gives you complete customization, smoother visuals, and full creative control. For serious editing, it's a better choice.
Conclusion
Animated travel maps are a great way to tell a story. They turn your route into visual art. Filmora makes this easy. You get built-in tools, keyframes, icons, globe zooms, and templates right inside one app. It offers full control and no learning curve.
