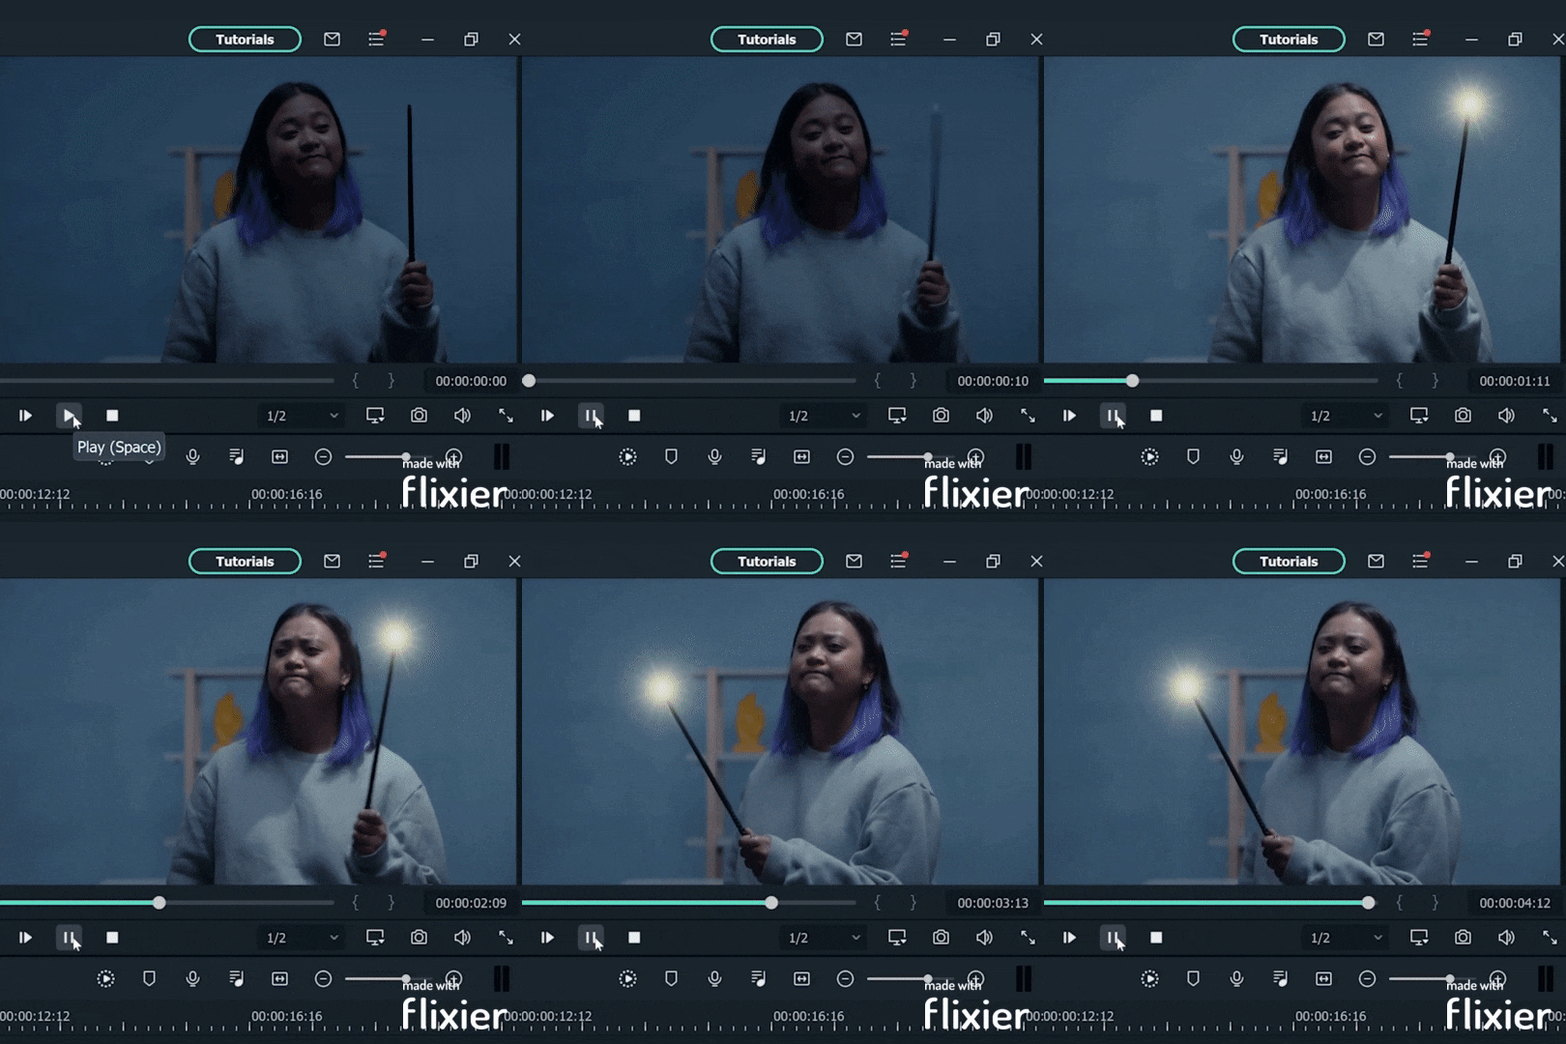
Magic inspires and fascinates everyone. Editors often rely on it to create suspense and attraction in their films. With an all-in-one video editor, Filmora, you can get creative and use ample stupefying effects to amuse your viewers. Before delving into the details of step-by-step guides of some magic effects, let's examine these effects.
In this article
Part 1. What Are Magic Effects?
In terms of video editing, visual effects which imply the presence of supernatural forces (the ones having power over natural forces) are called magic effects. They could belong to any of the effects of charm, i.e., sudden appearance, vanishing, transposition, transformation, etc. For example, in Harry Potter's classic scene, everyone waves a lit magic wand. To make this kinetic effect ourselves at home, read on.

Part 2. How to Create a Magic Effect with Filmora
An easy-to-use and all-in-one video editing software is necessary to realize this magic fully. Here, we use Wondershare Filmora. It can personalize anything in detail. You can also use footage from its stock media with unlimited options. By using this platform for editing, you can reduce your lengthy hours.
There are many different ways you can do spellbound editing on Filmora. To learn the complete step-by-step instructions, continue scrolling.
Step1 Download and Install Wondershare Filmora
Launch the most recent version of the software on your computer to produce an outstanding film. To do this, take the following actions:
- You must first download Wondershare Filmora and open it on your PC or Mac.

Step2 Import Your Photos and Videos
When you open Wondershare Filmora, you will notice the main import window in the top left corner.
- Click in the center of the import window upon the import icon.
- After clicking, Wondershare Filmora will automatically direct you to your PC library.
- Browse to where your target Clips or Images are stored.
- Select all the objects you want to import.
- Click on Open, and you will have imported files.

Step3 Add Your Photos and Videos to the Timeline
Your next step will be to add the imported videos and images to the timeline. When you have many videos and photos imported into the timeline, you can add them simultaneously.
Or you can also add them one by one wherever you need. To add an item to your timeline, follow the steps mentioned.
- Right-click on the photo or video you want to add to the timeline.
- Keep holding the right-click and drag it down to the timeline.

Step4 Adding the Magic Imitating Effect
After these initial setups, you must add the effects from filmstock to our clips. These are pre-made presets of different clipart and graphics, executing unique movements and effects. For their introduction in the video, read along with the following procedure:
- After dragging and dropping the clip onto the first track on the timeline, go to the stickers tab on the top left ribbon, click it, and scroll down to the filmstock dropdown.

- From there, open the Bling Bling Effect Pack and choose the bling light effect of your liking. Then, drag and drop that effect onto the second video track on the timeline.

- Adjust the element's scale according to your required size from the editing menu after double-clicking the element.

- Move the playhead to locate the brightest moment of the element. Now, right-click and select Add Freeze Frame. It will freeze the element at that exact frame

- Find the spot on the base clip's timeline where the corresponding LED used while shooting turns on. Then, bring the element to the second track and adjust its position.

- Adjust the duration to match the end of the two clips on the timeline.

Step5 Adding Keyframe Movement to the Element
It is time to add some keyframes. Once you have successfully added the effect element onto your editing workspace, you have to make it do the magic. Attaching the magic effect bling to the base (background) video is like painting your canvas for the magic to occur. It is a crucial step for bringing out those Harry Potter-like magical feats. Continue scrolling for step-by-step instructions.
- Double-click the effect element and open the Editing Menu.

- In the basic tab, as visible above, Check the key-shaped button in front of the Transform button. It will create a Keyframe in the default form of your motion element. Then adjust the element's position at the wand's tip on the preview window.

Step6 Detailing the Effect Through Keyframing
This part of the procedure is iterative. You will see how keyframing can open several doors of creative freedom in front of you and how many motion effects are possible through it.
- Move the playhead further right and stop where the element is not on top of the magic wand's tip. Then, add another keyframe following the same procedure and adjust the element's position onto the wand's tip.

Repeat the above step for as long as the wand is in motion in the clip. Feel free to spend more time on this step. The more keyframes you add, the more seamless your stunt will look.
Finally, it is time to look at the results. Witness how you have curated a magical masterpiece.

Conclusion
Magic amazes us all, and experiencing it while being creative with your projects makes it even more exciting. Filmora provides multiple tips and tricks to build the supernatural realm onto your screens. Whatever you wish to bring to the screen from the unrealistic realm, Wondershare Filmora is your genie friend. Here's to every Filmora enthusiast casting spells onto their screens. We are eager to witness the tricks and wonders you have up your sleeves. Happy creating!


 100% Security Verified | No Subscription Required | No Malware

