
 100% Security Verified | No Subscription Required | No Malware

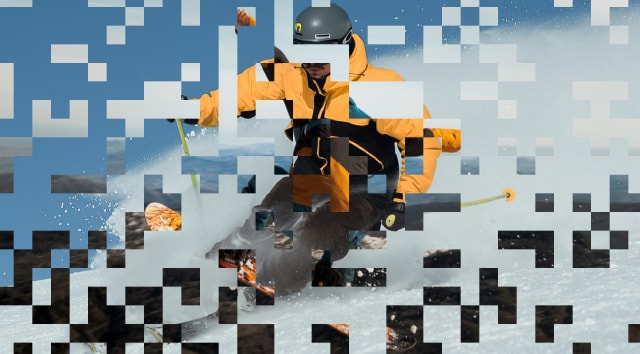
The charm of pixel art templates will always remain part of modern aesthetics. It's defined by vibrant colors, eye-catching palettes, and retro vibes of gaming. Not only is it adored by avid gamers, but creators of all stripes also enjoy leveraging its nostalgic elements. Whether you want to create an 8-bit animation or a retro-themed Minecraft intro, pixel art is perfect for expressing your creativity.
It's a good thing you don't have to animate every frame pixel by pixel. With Filmora, you can apply effects and templates with drag-and-drop ease. In this tutorial, you'll find out when and how to use these templates as well as built-in assets, and learn innovative methods and approaches to animate your ideas with pixels.
In this article
Introduction to Pixel Art Templates
When and Where to Use
Based on pixel art templates style, evoke and add distinctive allure to your videos. Unlike modern graphics, which offer smooth visuals, 8-bit and 16-bit styles feature blocky, simplified animations that remind one of classic video games. The use of bright colors further enhances the nostalgic feeling associated with vintage video games and enchants people from all age groups. Whether you're aiming for fun or for age age-restricted content channel, projects modified to use pixel art are guaranteed to stand out.
They're especially popular across digital platforms where gaming and creativity intersect. You'll often see them used in:
- Minecraft videos: Perfect for intros, transitions, or thematic overlays
- Gaming vlogs or game reviews: Pixel effects emphasize retro or indie aesthetics
- 8-bit music videos: Visuals that match the vibe of chiptune or retro-style tracks
- Throwback content: Great for nostalgic storytelling or video game anniversaries
- Social media reels: Quick pixel-style animations grab attention and spark curiosity
If you're short on time or lack advanced animation skills, these templates let you add complex visuals without frame-by-frame editing. They work well for both short-form and long-form content—adding a stylized, arcade feel in seconds.
Editing Workflow Integration
In the video creation process, pixel art templates typically come into play after the basic structure of your video is built. Once you've selected your clips, added narration or music, and cut everything to your preferred length, you're ready to style and enhance your visuals.
This is where pixel art templates fit best—during the design or enhancement stage—because they help define the mood and visual identity of your video. You can layer them over existing footage, insert them between scenes as transitions, or build entire sections from pixel-themed assets.
They also pair well with several key editing techniques:
- Chroma keying (green screen) to isolate real footage and drop it into a pixel world
- Motion graphics overlays like pixel flames, hearts, or text to emphasize reactions or dialogue
- Retro-style transitions that dissolve or pixelate one scene into another, like in classic video games
In Filmora, these pixel art templates can be quickly layered, resized, or color-matched to suit your video's tone. Even if you're working with live-action footage, pixel elements can create a playful clash between real and digital—great for game-themed reviews, commentary channels, or comedic edits.
Filmora Ready-to-Use Resources
Filmora Resource Suggestions
Filmora offers an impressive range of pixel-art-friendly assets that make your edits instantly nostalgic and fun. These resources are beginner-friendly but powerful enough to support bold creative choices. Here are five standout tools you should try:
- Pixel-Style Text Effects:Add bold, blocky arcade-style text to your video intros, outros, and mid-scene callouts, mimicking vintage game console title screens like NES and SNES with pixel fonts, bounce or typewriter animations, and retro color schemes.
- Blocky Transitions:Use mosaic wipes, pixel dissolves, or tile flips to switch scenes, creating a feeling like “leveling up” or “unlocking” new areas in old-school video games.
- Static & Noise Layers:Add flickering static, snow, or scan lines to your video to mimic the look of old CRT or LCD screens, creating a retro, low-fidelity effect that can signify transitions, flashbacks, or hardware lag.

Step-by-Step Guide
Ready to dive into your pixel edit? Here's a simple walkthrough using Filmora:
Step1Start a New Project - Open Filmora and click New Project. Import your footage, audio, and any custom pixel graphics or backgrounds you'd like to use.
Step2Browse Pixel Resources - Go to the Effects tab and search for keywords like "pixel," "mosaic," or "game."
Step3Apply Pixel Effects - Drag your chosen effect or template onto the timeline above your footage. Most are fully customizable—double-click to change colors, size, or animation speed.
Step4Add Pixel Text and Overlays - Under Titles, choose pixel fonts or retro game-inspired text animations.
Step5Use Game Color LUTs - Go to Color > LUT and pick a retro color preset to give your entire video a consistent game-inspired tone.
Step6Export and Share - When you're happy with the result, click Export. Choose a resolution that matches your platform.
Best Practices and Related Techniques
Good Practices
To make your pixel art templates look clean and polished, not just blocky for fun, consider these expert tips:
- Resolution Awareness: As a reminder, pixel graphics consist of sharp and clear blocks. Scaling them up or down too much will make them blurry, and pixel graphics will lose their appeal.
- Pixel Consistency: Mixing pixel assets from different resolutions or styles can make your edit feel disjointed. Try to keep all your templates, overlays, and icons within the same visual family.
- Sound Matching: Don't forget the power of audio. Adding an 8-bit soundtrack or retro sound effects helps immerse viewers in the pixel world.
These best practices will help your final edit feel thoughtfully crafted, not just gimmicky. Pixel art templates aren't just a filter—it's a storytelling style. When applied with intention, it can transport your viewers to another era.
Related Creative Techniques
Pixel art templates become even more powerful when used with advanced editing tricks. Here are three creative techniques to try:
- Stop-Motion Effect: Want that frame-by-frame feel of early console games? Try reducing your frame rate to around 12 frames per second.
- Limited Frame Rate Animation: Instead of animating every second, make your elements move every few frames.
- 8-Bit Soundtrack Syncing: Grab a chiptune-style soundtrack or 8-bit remix of your favorite song and align your cuts or effects with the beat.
These techniques don't just make your video more entertaining—they also signal to viewers that you understand the pixel art aesthetic on a deeper level. It's the little details—like frame pacing and sound—that make your content truly pop.
Conclusion
For today's video editors, pixel art templates invoke a pang of nostalgia. Filmora simplifies the process, whether you're creating content for Minecraft, retro intros, or simply adding flair to your video timeline. With animated text and game-style overlays, even newcomers can make sleek, 8-bit videos in just a few minutes using drag-and-drop effects.
These templates are more than just fun—they're a creative shortcut to a unique, recognizable style. So if you're ready to mix creativity with simplicity, start experimenting with Filmora's pixel resources today.
 secure download

