
 100% Security Verified | No Subscription Required | No Malware


 ChatGPT
 Perplexity
 Gemini
 Claude
 Grok
Grok
In this article
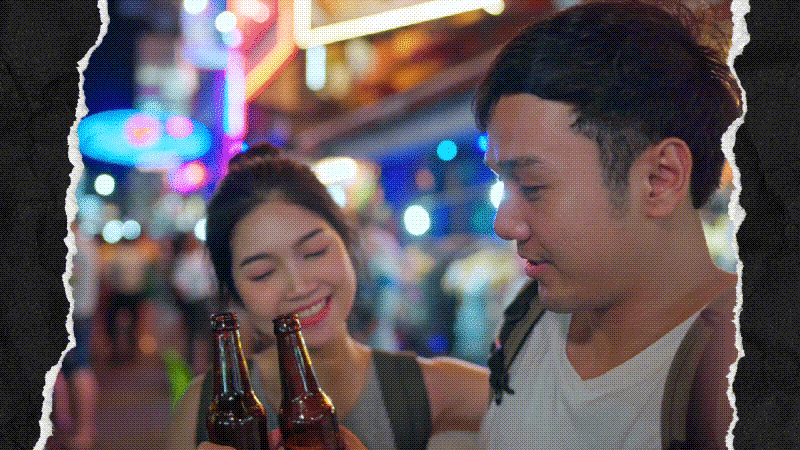
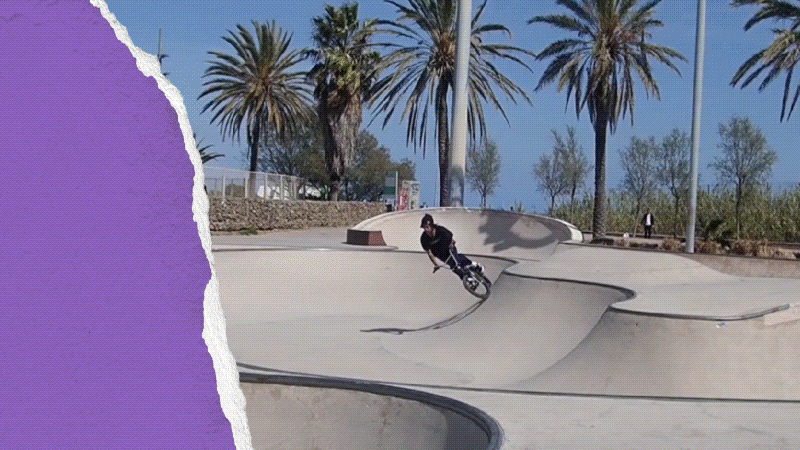
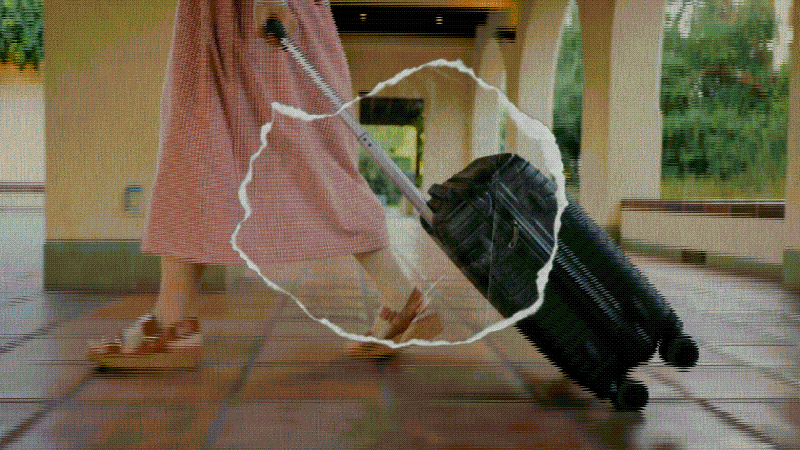
You've probably seen videos online using the paper torn effect on TikTok, Instagram, and Twitter (now X). This kind of effect has become popular lately. Instead of plain transitions, it adds eye-catching ripped edges and a scrapbook-like texture that keeps viewers engaged while watching your content.
To apply the same effect to your video, there are plenty of paper effect video makers and apps that can help you do it easily. We will share the best tools to use and walk you through step-by-step tutorials so you can start adding this creative ripped effect to your videos today.
Part 1. What is a Paper Effect?
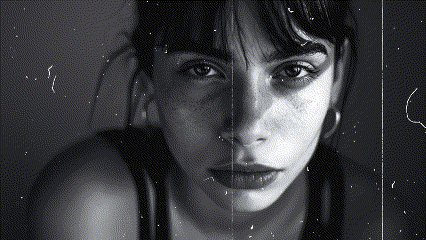
A paper effect video is an editing style that makes your clips look like they've been ripped, cut, or pasted onto a page. You can use it to highlight key moments, create a dramatic reveal, or transition from one scene to another.
This ripped effect is particularly popular for:
- Short-form content that needs to stand out right away and grab attention on TikTok, Instagram, or YouTube Shorts.
- Creative storytelling where the torn edges or layered textures can add emotion and personality to the video.
- Mood boards and inspiration reels to show off aesthetics, designs, or themes in a stylish way.
- Vlogs that include different clips or daily moments, giving them a fun, scrapbook-like texture.
Part 2. Best Paper Effect Video Maker Software on Desktop
If you're editing on your computer, Wondershare Filmora is one of the easiest and most versatile paper effect video makers to try. You don't need advanced editing skills to pull it off, and there are multiple ways to achieve that torn paper look with Filmora.
 secure download

And since Filmora is designed as a complete video editor, your edits aren't limited to paper transitions alone. You can enhance them further with motion graphics, text animations,sound effects, and even AI features like video enhancer and AI noise reduction, just to name a few. You use it as your all-in-one solution to create the whole video content.
How to create a paper effect on your video
Make sure you have installed Filmora to the latest version to ensure you don't miss out on the latest features and updates. Once you're ready, follow the steps below based on the type of paper effect you want to create.
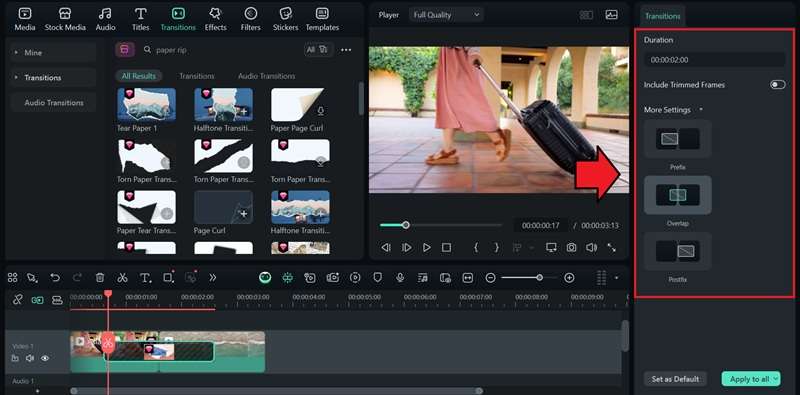
1. Paper Rip Effect Transitions
Step 1: Start a New Project and Import the Clip
Open Filmora and create a new project. Import your clips, then drag them to the timeline.

Step 2: Download and Apply the Rip Effect Transition
Go to Transitions. In the search bar, type keywords like paper, rip, tear, torn, or scrapbook. Drag the chosen paper/rip transition between the clips. Adjust the transition length by dragging its edges.
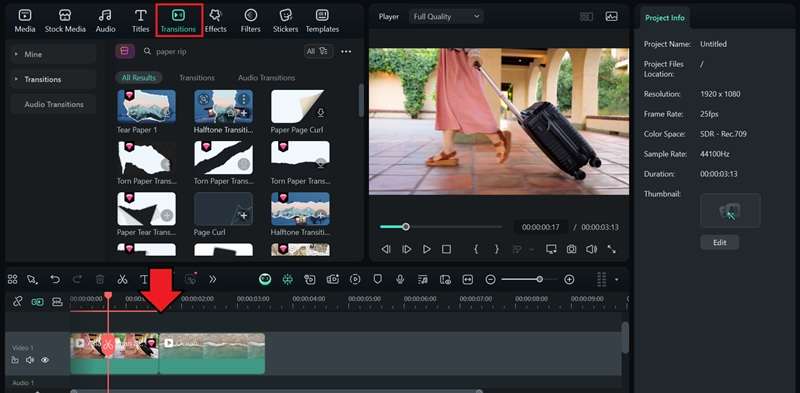
Step 3: Customize the Effect
Select the transition to adjust the position of the paper rip effect. You can place it at the beginning of the clip (prefix), across the middle as an overlay, or at the end (suffix).
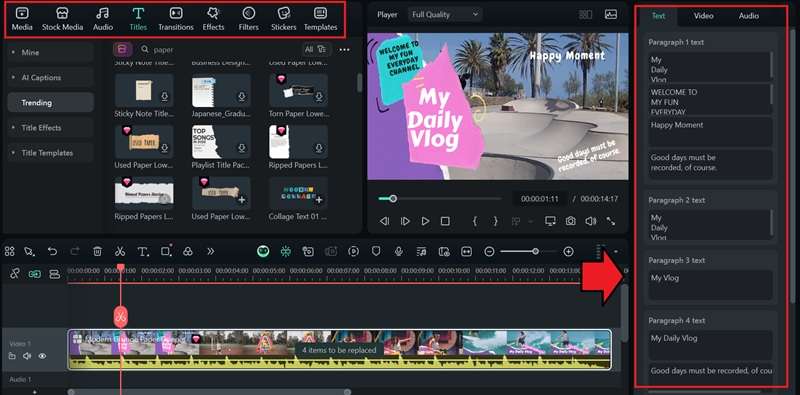
2. Rip Effect Templates
Step 1: Open Templates
Go to the Templates menu in Filmora. Use keywords like paper, rip, or scrapbook to find pre-made templates. Drag it to the timeline.
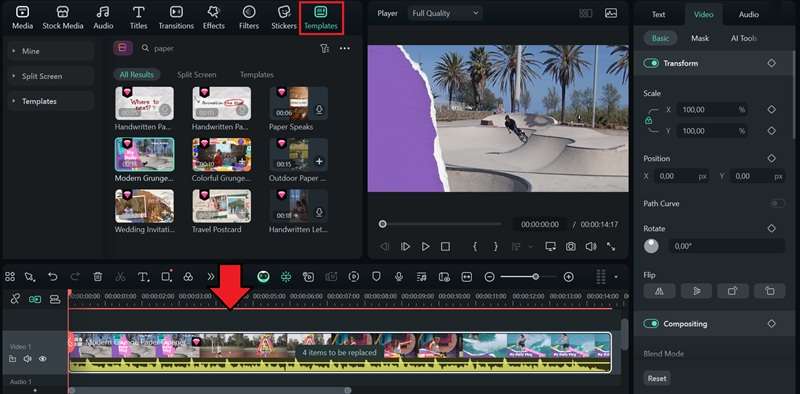
Step 2: Replace the Media
Click on Items to be Replaced, then upload your own clips or images into the placeholders to replace the default content.
Step 3: Customize Your Content
If the template includes editable text, you'll find options in the property panel on the right by selecting the track. Or, you can also personalize the design by adding your own stickers, shapes, or extra text layers.
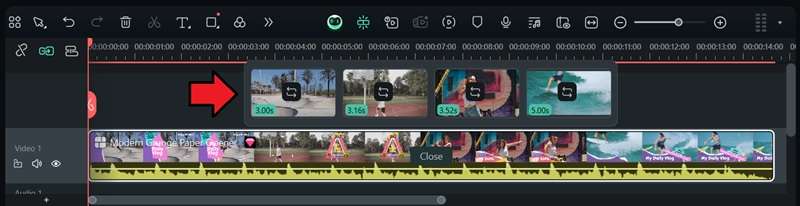
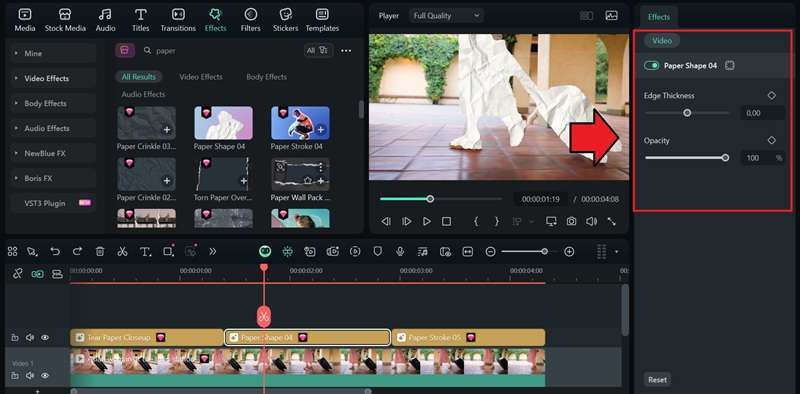
3. Apply Paper Video Effect
Step 1: Find and Add a Paper Ripped Overlay
Head to the Effects menu and search for “paper” or “ripped” effect to find a suitable overlay. Download the one you like and drag it on top of your clip on the timeline.
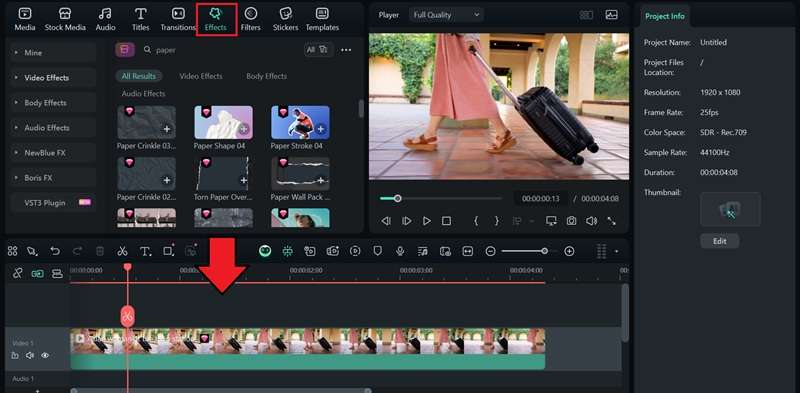
Step 2: Adjust the Timing and Customize
Trim or extend the overlay clip so it matches the duration of your video or the exact moment you want the torn paper effect to appear. If available, you can also adjust the effect by selecting it.
Tip: Since Filmora supports a multitrack timeline, you can also layer the effects to create richer visuals, mix different styles, or combine text, music, and animated stickers.
Part 3. Free Online Torn Paper Video Makers
For the quick creation of a torn paper video effect, you can also use free online torn paper video makers for Instagram, TikTok, or Twitter. It's fast, but it may be more limited in the editing tools it offers.
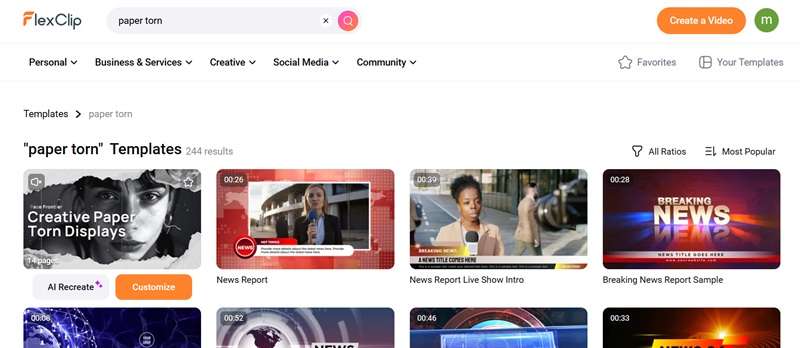
1. FlexClip
FlexClip gives you ready-made “ripped paper” templates and paper-edge frames you can drop your media into. Some templates are set up in vertical 9:16 format for TikTok or Instagram, while others work well for Twitter or other platforms.
Pricing: Free plan lets you download videos in 720p HD, create up to 12 projects, and export clips up to 10 minutes long. Upgrade your plan starting from $19.99/month.
How to create a torn paper video on Flexclip:
Step 1: Go to the FlexClip website and search for a paper torn style template. Once you find one you like, click on it and select Customize to start editing.
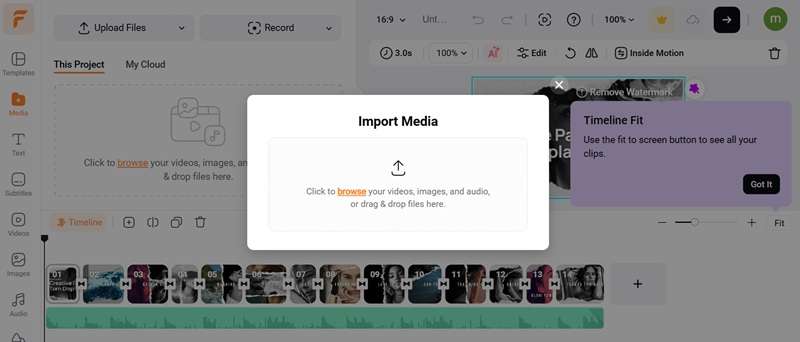
Step 2: Upload your own photos or video clips and replace the placeholder content in the template with your files.
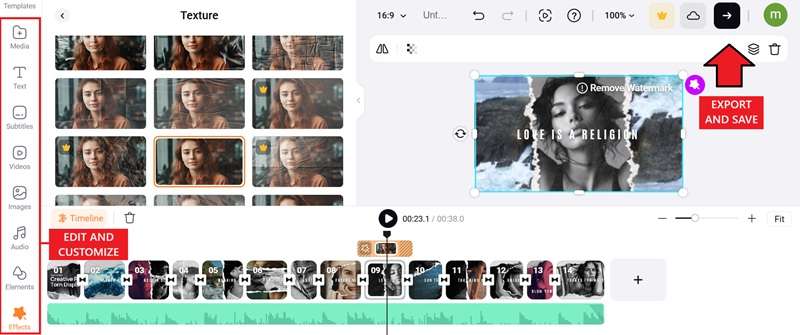
Step 3: Customize and edit your video with available editing tools. You can apply a paper texture by navigating to Effects > Texture and selecting the paper effect. Once satisfied, export and save your video.
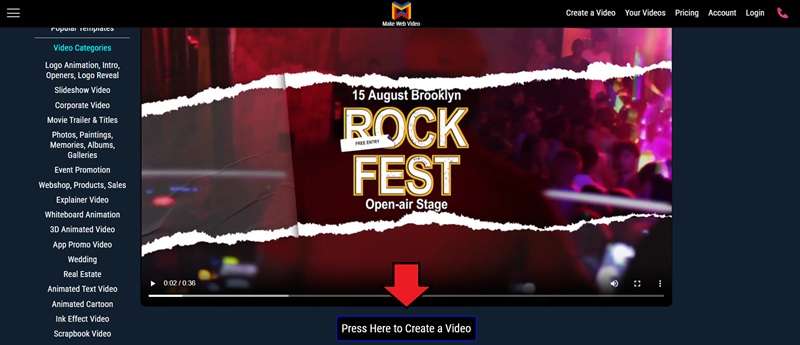
2. MakeWebVideo

MakeWebVideo is a template-driven online editor. It has specific torn-paper slideshow templates that you can use for your project. The interface looks pretty outdated, and the tool is not as intuitive as most modern online tools, but it can be an option for creating a paper-style video without advanced editing.
Pricing: Free users can create and preview videos in standard quality with a watermark. Upgrade your plan starting from $6/video.
How to create a torn paper video on MakeWebVideo:
Step 1: Visit the MakeWebVideo site and browse through the available templates. Select a torn-paper video effect you like, then click to start creating. You may be asked to log in with your account before proceeding.
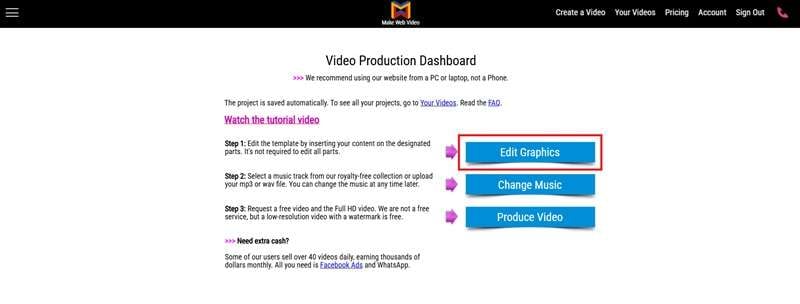
Step 2: On the next page, choose Edit Graphics to open the customization options.
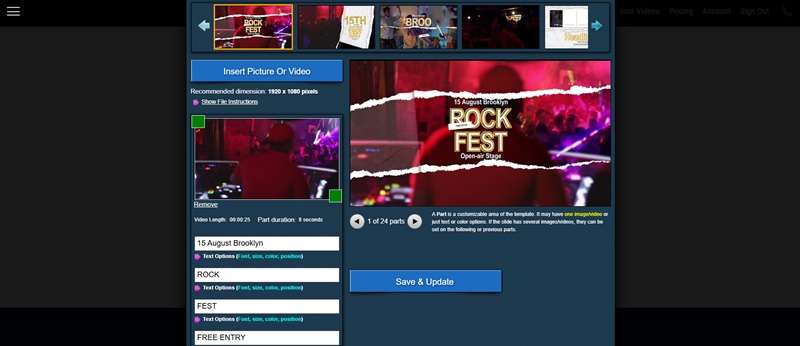
Step 3: Here, upload your own photos or videos to replace the default media. You can also edit the text, adjust colors, and make other changes.
Once satisfied, click Save & Update to apply the edits. Then, press “Dashboard” to return to the dashboard and select Produce Video to generate your final file.
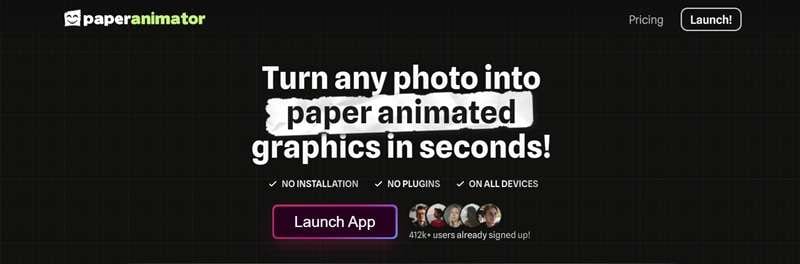
3. Paper Animator
Rather than adding a torn-paper transition, Paper Animator is designed to transform still images into animated videos with a textured, paper-like style and rough, torn edges. This kind of effect is popular on TikTok and Instagram, where creators often use it to give their content a scrapbook-like look.
Pricing: Signed-in users receive 1 free credit. Paid plans start at $2.99 for 5 credits, or you can subscribe for $3.49/month.
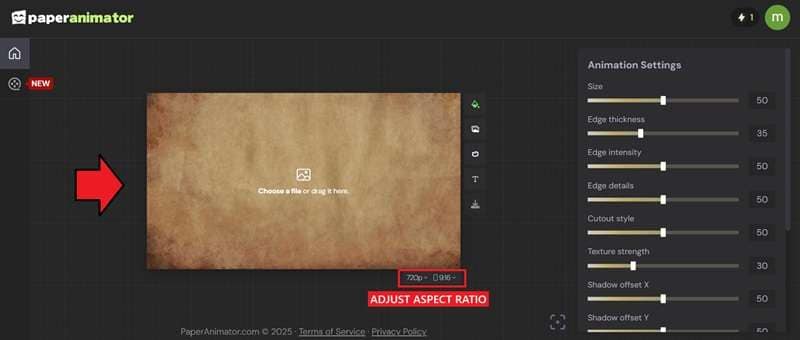
How to create a torn paper video on Paper Animator:
Step 1: On the startup page, click “Launch App.”
Step 2: Adjust the aspect ratio and upload the photo you want to animate. For best results, use a cutout image with a transparent background.
Step 3: Use the slider bar to adjust the animation and the torn-edge effect. You can also enable the “Paper Unfold” animation to add more motion.
Note: If you want to create an effect with text, you can generate it using the Text tool.
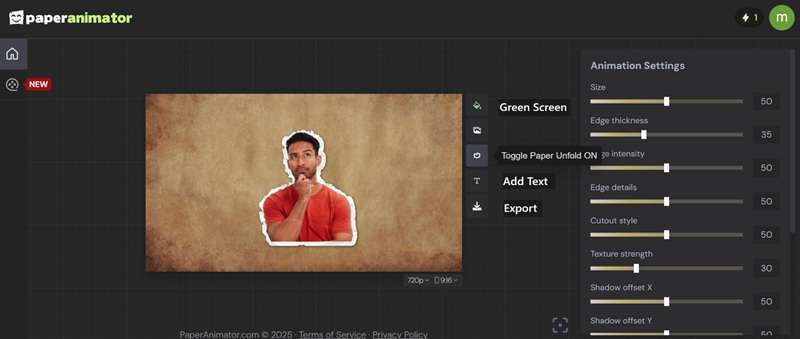
Preview your animation, then export it. If you're signed in, you can enable the green background option so you can easily overlay the animation in another video editor.
Conclusion
Adding a paper ripped effect is a simple way to give your videos extra creativity. It adds texture to your content and helps it stand out on TikTok, Instagram, or Twitter.
The process is also easy if you are using a video editor like Filmora. Filmora includes built-in paper-style transitions, ready-to-use templates, and effect overlays that are easy to apply, even if you're new to editing.
Or, you can also use online paper effect video makers like FlexClip or Paper Animator. They are good for quick edits when you're short on time. Once you start using these effects, you'll see how much more engaging your videos can look.
