
 100% Security Verified | No Subscription Required | No Malware


 ChatGPT
 Perplexity
 Gemini
 Claude
 Grok
Grok
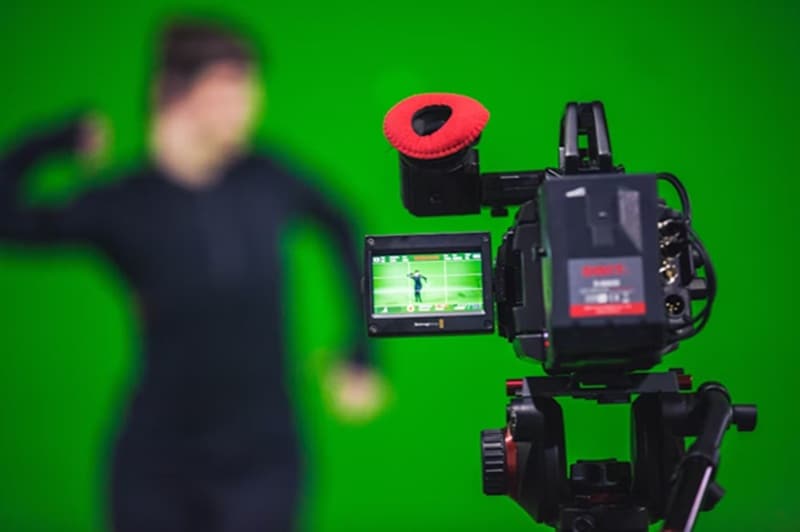
Removing the green screen in Premiere Pro is key to adding a professional look to your footage. You can do anything once the background is gone: placing your subject in a new location, adding motion graphics behind them, or even creating cinematic effects that would be impossible to shoot in real life.
For doing this, Adobe Premiere Pro remains the gold standard thanks to the precision of its Ultra Key effect. In this practical guide, you'll first learn the basics you need to know before removing the green screen in Premiere Pro, followed by a detailed step-by-step tutorial.

In this article
Part 1. What You Should Know Before Removing Green Screen in Premiere Pro
Before you start working on Premiere Pro: how to remove the green screen, it's essential to understand the basics of green screen editing. This technique relies on chroma key, a key process for achieving clean cutouts and professional results.
What is a Green Screen in Video Editing?
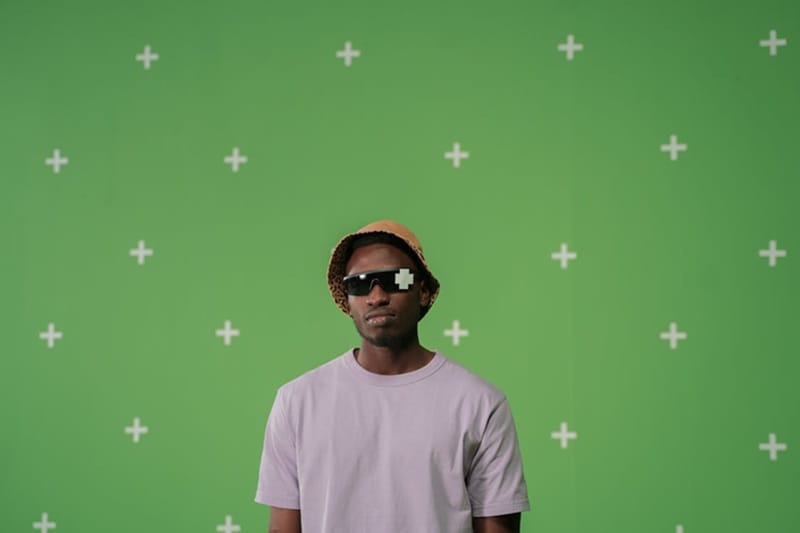
A green screen is a colored background, often green or blue, used to isolate a subject and replace the background with another image or video. The goal is to achieve a seamless integration between the subject and the chosen virtual backdrop.
How Chroma Key Works in Premiere Pro
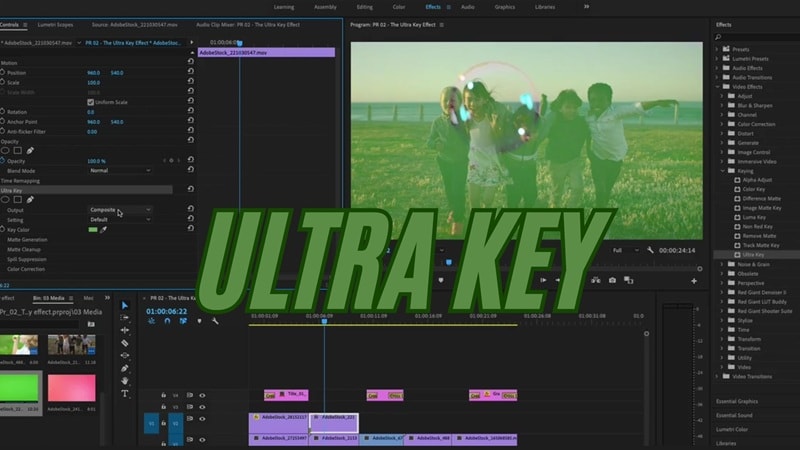
Chroma key relies on selectively removing a specific color from the video shot. The Ultra Key effect for removing green screen in Premiere Pro is the most commonly used tool for this process.
It gives you precise control over transparency, edge cleanup, and color tolerance. With this tool, you can achieve a seamless and natural-looking result without unwanted halos or jagged outlines.
Where You Can Use Green Screen in Premiere Pro
There are plenty of creative ways to use green screen in Premiere Pro. You can remove and replace the background to design all kinds of scenes, such as:
- Replace a background: Place your subject in a new location, whether it's a beach, city skyline, or outer space.
- Add video overlays: Combine multiple clips or effects to create unique compositions.
- Create fantasy or cinematic scenes: Add visual effects, explosions, or dreamlike settings you often see in movies.
The green screen thus offers complete freedom to imagine, compose, and produce immersive, professional videos.

Part 2. Step-by-Step Guide: How to Remove Green Screen in Premiere Pro
Already have a project in mind? This time, let's walk through how to remove the green screen in Adobe Premiere. This step-by-step guide will ensure a clean, accurate, and professional result, even if it's your first time using the software.
How to get rid of green screen in Premiere Pro
Step 1: Start a New Project and Import Your Footage into Premiere Pro
Once you open Premiere Pro, create a new project, set the frame rate, and sequence format appropriate for your project. Then, start importing your clip(s) to the software.

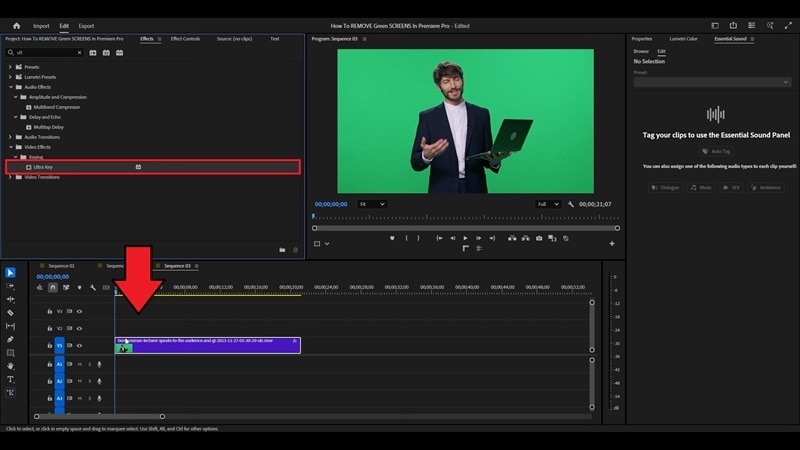
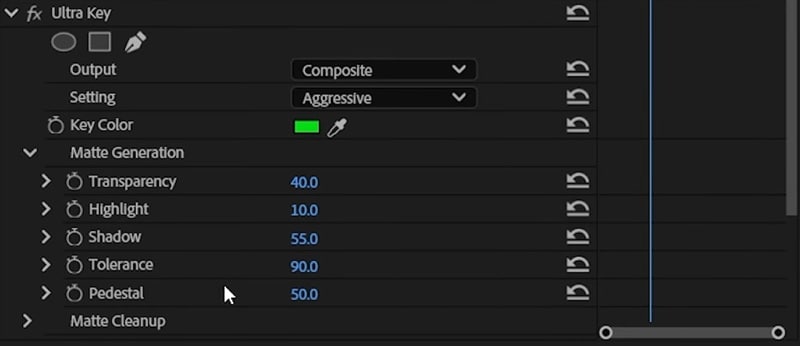
Step 2: Applying the Ultra Key Effect to Remove Green Screen
The effect to remove the green screen in Premiere Pro can be found in Effects > Overlay > Ultra Key. Drag it onto your clip.
Open Effect Controls and select the eyedropper tool. Next, click on a representative green area, ideally close to the subject but without shadows.
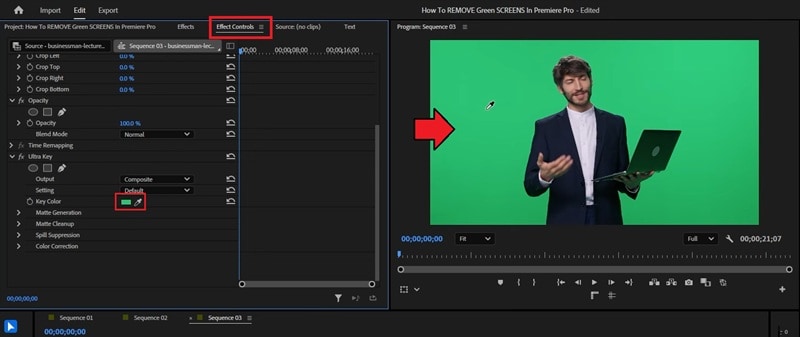
At this stage, the background should be mostly gone; fine adjustments will complete the cutout.
Step 3: Fine-Tuning Settings: Transparency, Spill Suppression & Matte Cleanup
To remove green screen in Premiere Pro with precision, it will depend on the finesse of the Ultra Key settings:
- Adjust Transparency and Tolerance under the Matte Generation panel to reveal the subject without losing fine details (hair, textures).
- Reduce color spill (Spill Suppression) to neutralize green reflections on edges
- Use Matte Cleanup (Choke, Soften, Contrast) to smooth edges and stabilize the matte frame by frame.
Review in full screen and real-time playback; precision and patience produce natural and stable keying.
Step 4: Reviewing and Exporting the Final Results
Review the entire sequence to detect flickering or hard edges around the subject. When you are satisfied, you can start exporting your video to a suitable export format.
Part 3. Easier Ways to Remove Green Screen With and Without Chroma Key
Although removing the green screen in Adobe Premiere offers professional control, it's not the only tool that can give you a clean background removal.
If you want a simpler and faster workflow, especially for quick edits or social media videos, Wondershare Filmora can be a fast and accessible alternative that combines automation and precision for professional results without complex settings.
 secure download

Filmora: A Simple and Affordable Alternative
Filmora's Chroma Key is a quick solution for those who want to achieve a clean result of green screen removal without going through all the manual steps in Premiere Pro. With just a few clicks, users can remove the background, adjust the contours, and harmonize the subject with the chosen backdrop.
|
Premiere Pro |
Filmora |
|
|
Free Version |
Unavailable |
Available |
|
Pricing Plans |
Subscription-based only from $22.99/month. |
Flexible pricing, subscription-based or perpetual license. |
|
Ease of Use |
Feature-rich but complex; requires practice. |
Guided, few clicks; automations speed removal; beginner-friendly. |
|
Best For |
High-control work (ads, VFX, multilayer). |
Solo creators; fast social content (YouTube, TikTok). |
|
Results Quality |
Very clean with Ultra Key and precise tuning. |
Solid on standard shots via AI; consistent with minimal tweaks. |
|
Fine Detail Handling |
Matte cleanup, masks, precise spill suppression. |
Good detection; weaker on fine hair, veils, motion blur. |
|
Potential Drawbacks |
Steep learning curve; slower to fine-tune. |
Less artistic control than Premiere Pro. |
Simplify Background Removal with AI
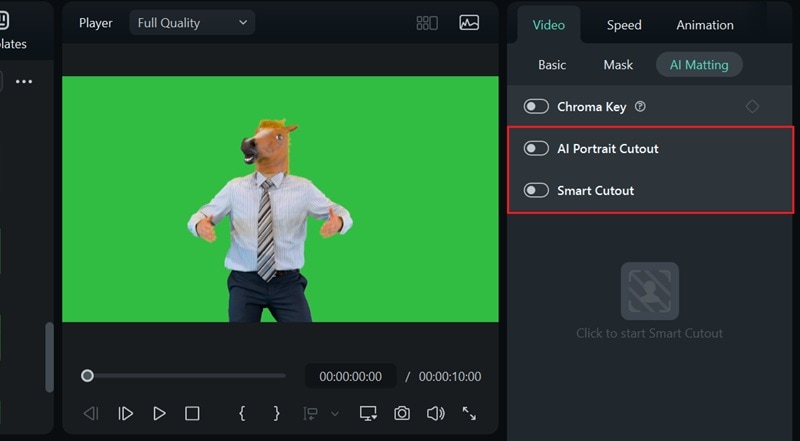
On top of its Chroma Key feature, it also offers AI-powered tools like Smart Cutout and AI Portrait, which can remove the background almost instantly. These tools work differently:
- Chroma Key targets a uniform color (green/blue) for precise keying.
- AI Portrait auto-detects people and isolates them, no green screen required.
- Smart Cutout lets you brush the subject, and the AI tracks it frame-by-frame.
Each method has its strengths. Review how each tool operates to choose the fastest and cleanest approach for your shot. The process is simple and accessible to everyone, even novice videographers.
How to remove a green screen in Filmora
Step 1: Import the video
Launch Wondershare Filmora and start a new project. Import the clip that was shot with a green background into your media library. Then, drag it onto the timeline so it's ready for editing.
 secure download
Step 2: Open the Chroma Key Settings
Click on the video in the timeline, then go to the Video > AI Matting tab in the properties panel. Turn on the Chroma Key option.
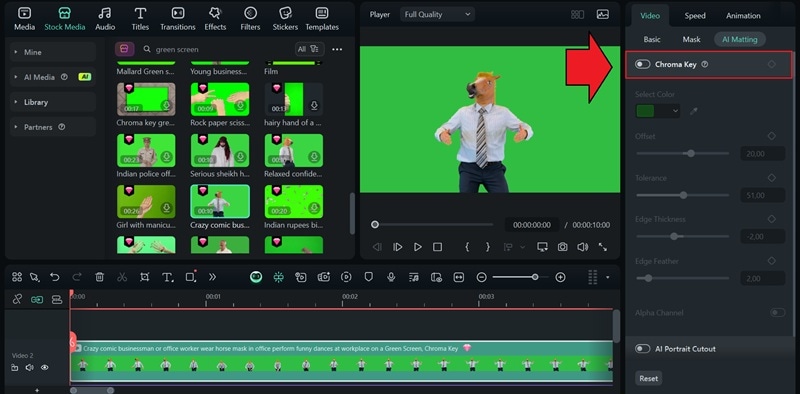
Step 3: Fine-Tune the Chroma Key
If your background is green, Filmora will automatically detect and remove it. To remove a different color, use the eyedropper tool to select the hue you want to key out.
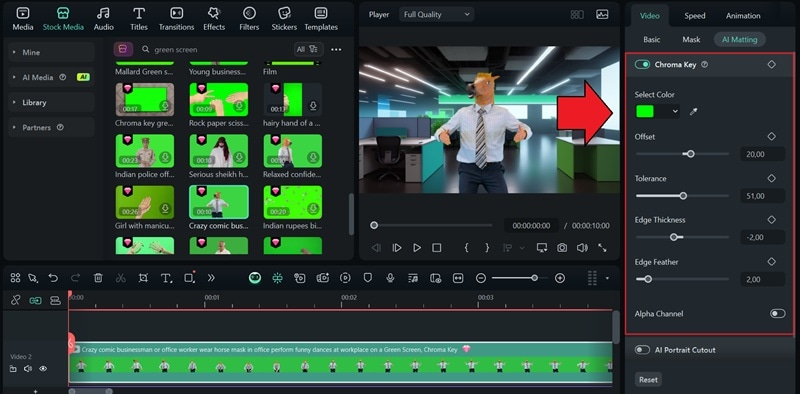
Within the same panel, you can refine the effect using these settings:
- Offset: Adjusts the transparency of the removed area.
- Tolerance: Expands or narrows the color range being keyed out.
- Edge Feather: Softens the transition between the subject and background.
- Edge Thickness: Modifies the edge sharpness of your subject.
- Alpha Channel: Displays keyed-out areas in black and visible areas in white for better precision.
Remove Background with Smart Cutout and AI Portrait
If you want to remove the background without using Chroma Key, you can enable Smart Cutout or AI Portrait under the same AI Matting tab in Filmora.
Part 4. Tips & Tricks for Perfect Green Screen Removal
To effectively remove the green screen in Premiere Pro, proper preparation before editing is essential. Even the best tools cannot correct poorly lit footage or a poorly stretched background.
You can try some simple tips to improve the quality of your chroma key and avoid common mistakes.
Best Practices for Shooting with a Green Screen
- Maintain distance: Position your subject at least 1.5 meters away from the green screen to prevent unwanted green spill or reflections on their skin and clothes.
- Set proper white balance and format: Calibrate your camera's white balance and shoot in a high-quality format, such as 4:2:2 or RAW, to retain enough detail for clean keying.
- Check exposure and lighting consistency: Before applying chroma key, review your footage for any lighting imbalances or exposure issues. Use Lumetri Color in Premiere Pro to make quick corrections.
- Minimize shadows and spill: Use soft, diffused lighting and avoid harsh shadows on the subject or backdrop. It will help achieve a clean matte and reduce time spent fixing edges later.
- Keep the background smooth: Ensure your green screen is wrinkle-free and evenly colored. Creases, folds, or uneven tones can make the keying process more challenging.
Common Mistakes to Avoid When Using Premiere Pro Green Screen
Many users make mistakes that complicate keying in the remove green screen in Premiere Pro.
- Irregular lighting

The most common issue is uneven lighting, which creates darker areas that are difficult to remove when cutting out. A uniformly lit background ensures cleaner keying that is quicker to correct.
- Green clothing
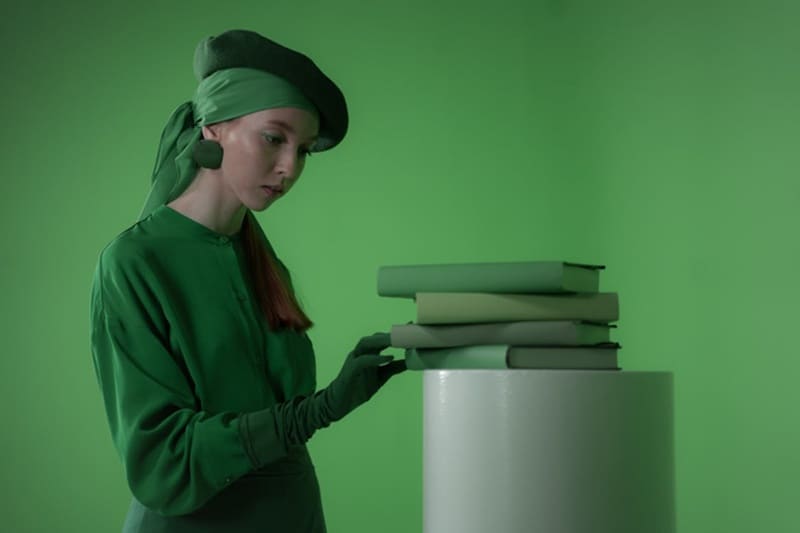
Another mistake is wearing green clothing or clothing with hues similar to the background color, which causes unintended transparent areas and makes cutting out the subject much more complex. Unless it's done intentionally to create an invisibility or camouflage effect, it will only ruin the final composite.
Conclusion
In conclusion, removing the green screen in Premiere Pro becomes easy with the Ultra Key tool. Thanks to its advanced settings, it allows for clean and professional cutouts, ideal for demanding projects.
But if you want something faster and more accessible, you can also use Filmora to remove the green screen for your project. Besides its easy-to-use Chroma Key feature, Filmora's AI Portrait and Smart Cutout tools can automatically detect and separate your subject from the background with impressive accuracy.
secure download
