
 100% Security Verified | No Subscription Required | No Malware


 ChatGPT
 Perplexity
 Gemini
 Claude
 Grok
Grok
We've all been there—you take what should be the perfect photo, only to realize it's blurry or slightly out of focus. It could be an old family picture, a once-in-a-lifetime travel shot, or a picture you need for work. But you get a blurred image instead of a clear photo with sharp details.
In the past, fixing these photo fails required advanced editing skills and expensive software. But thankfully, AI-powered photo editing tools have made it easier.
Now, editing tools with AI blur removers can sharpen your images, restore image details, and enhance overall picture quality with just a few clicks. So, you can easily remove blur from your pictures, even if you don't have advanced editing skills.
In this article, you'll understand how AI image blur removers work and how you can use them to improve your photos instantly.
In this article
Part 1: Common Shot Fails That Make Your Photo Unusable

Even if you don’t use AI to remove blur, not every photo turns out as planned. Whether you’re capturing a special memory or taking pictures for professional use, common photography mistakes can sometimes ruin an otherwise great shot.
Here are the most common failures and how to fix them.
| Common Photo Issues | Cause | Quick Solution |
| Bad lighting | Overexposed, underexposed, harsh shadows | Adjust brightness, contrast, and exposure on Filmora. |
| Low resolution | Older camera, excessive cropping, poor quality | Use Filmora’s AI Image Enhancer to boost resolution and restore textures without losing fidelity. |
| Wrong aspect ratio | Poor framing, incorrect dimensions for print or social media | Crop and resize using photo editing tools to fit the required format |
| Blurry photos | Camera shake, motion blur, taking out-of-focus shots | Use AI blur removers or Filmora’s AI Enhancer to sharpen images and repair facial details. |
| Unwanted objects & random people | Photobombers, cluttered background, distractions | Use Filmora's AI object remover tool to erase unwanted elements—see Part 3. |
Part 2: How to Remove Blur From Photos With AI Blur Removers

Blurry photos happen—whether from camera shake, motion, or poor focus. The result? A soft, unfocused image that lacks the sharpness and detail you wanted. Thankfully, you don’t need advanced editing skills or pricey software to fix this. AI blur removers offer a fast and effective solution to restore clarity in just a few clicks.
Remove Blur Using AI Tool: Artguru
AI blur removers work by using deep learning to detect and enhance blurred areas in an image. Unlike traditional sharpening tools that simply increase contrast, AI tools intelligently predict missing details, refine textures, and improve clarity—without introducing noise or distortion.
One of the best options available is Artguru. It offers an easy-to-use blur remover that fixes your blurry photos in seconds. Apart from removing blur from photos, Artguru enhances facial details, bringing out the best in your portrait photos. This tool also enlarged your images without losing quality.
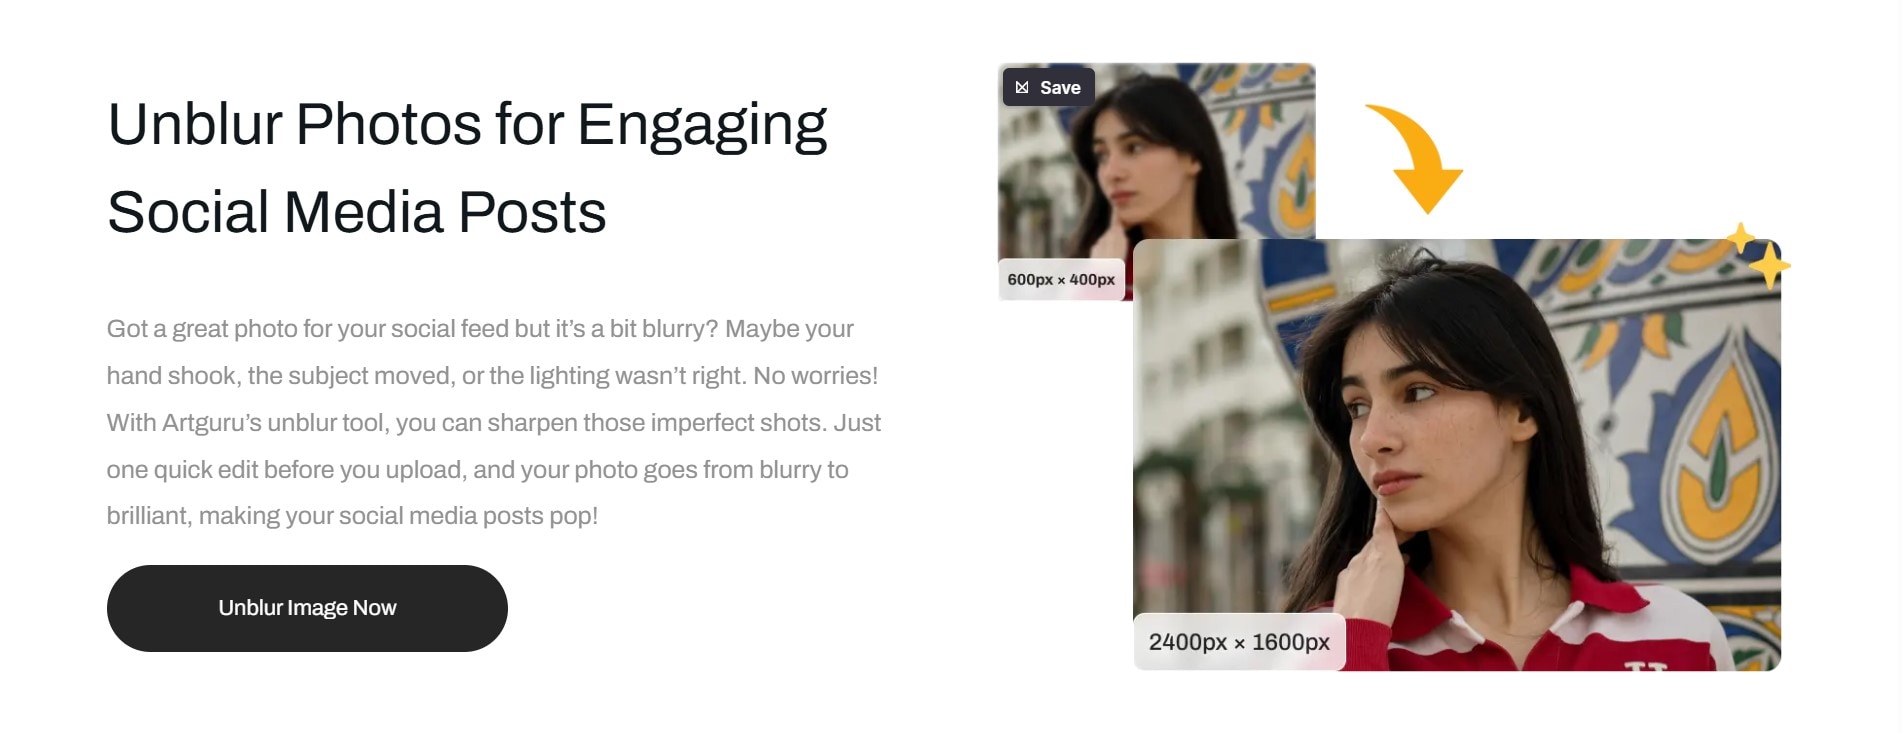
To use Artguru’s AI blur remover for free:
- Open the Artguru website in your browser.
- Upload your blurry image.
- AI will process the image automatically—no editing skills required.

Professional Alternative: Filmora AI Image Enhancer
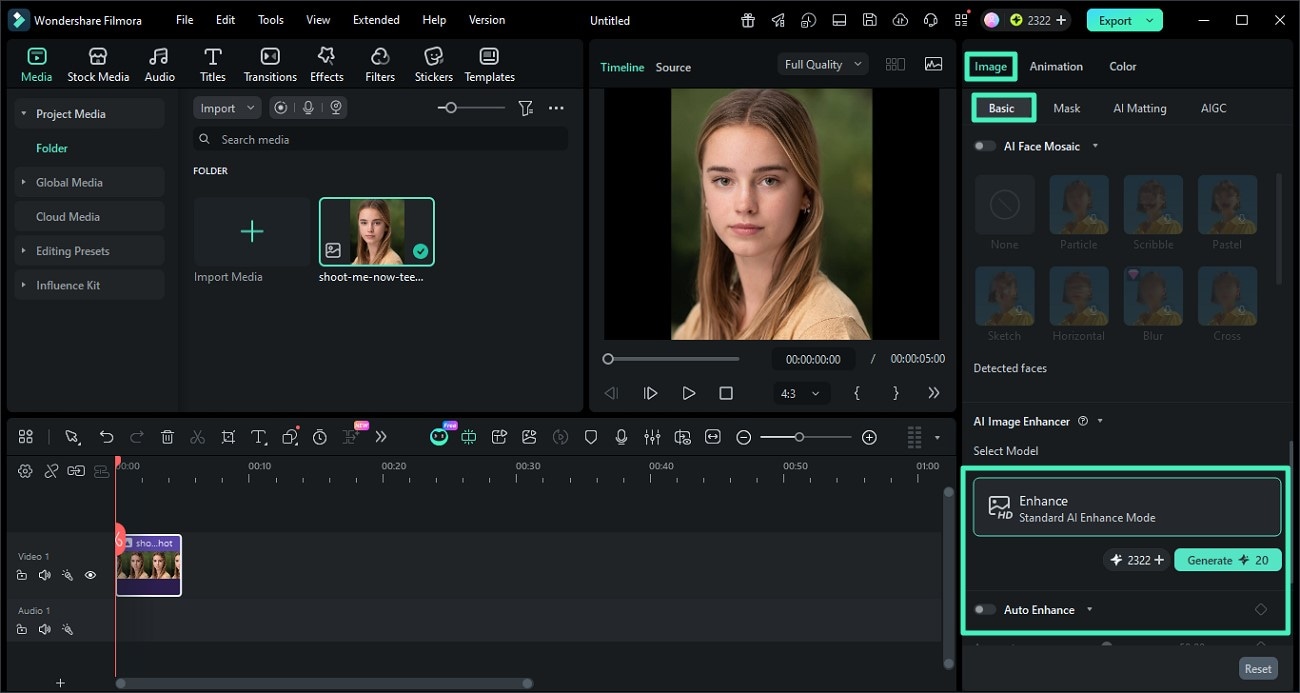
If you are looking for more professional results on your desktop, Wondershare Filmora offers a powerful AI Image Enhancer. This tool is specifically designed to handle low-resolution, noisy, or blurry images with high fidelity. It excels at repairing facial details and sharpening object edges while maintaining a natural look.
- Clarity Boost: Instantly sharpens out-of-focus or low-res photos for a crisper look.
- Detail Restoration: Intelligent optimization of textures, product edges, and facial features.
- Noise Reduction: Removes grain and compression artifacts, making old or low-light shots look clean.
- High Compatibility: Supports enhancing images up to 4K resolution, perfect for social media covers and marketing materials.
To use it in Filmora, simply import your photo, select the asset, and click AI Image Enhancer. The AI will analyze and process the image in seconds, delivering a high-definition result without manual parameter adjustments.
 secure download

Some Alternative Blur Remover AI Tools You Can Use
If you want to try alternative online image-processing tools that can remove blur with AI, here are a few options.
- VanceAI – Sharpening, upscaling, and photo restoration
- Fotor – One-click blur fix, web & mobile support
These tools, like Artguru and Filmora, use AI to remove blur and make it easy to save photos you once thought were unusable. Here’s how you can put them to good use:
- Restore clarity to travel or vacation photos taken in motion.
- Repair old or scanned photos by removing blur and enhancing details.
- Sharpen social media images for platforms like Instagram, Facebook, or LinkedIn.
- Improve the quality of visuals for presentations, marketing, or online stores.

Part 3: Remove Unwanted Items From Your Photos with AI Object Remover

Sometimes, even after removing blur with AI, a perfectly framed shot can still be ruined by unwanted objects. It could be a stranger walking into the background, power lines cutting through the sky, or random clutter taking attention away from your subject. These distractions affect the overall quality of the image and make it unsuitable for professional (or even unprofessional) use.
Luckily, Wondershare Filmora has an AI object remover that can fix this in seconds. Note that this is different from the AI blur remover previously discussed.

Filmora is a video and photo editing software integrated with AI tools for professional-level image manipulation. Its AI Object Remover uses artificial intelligence to remove unwanted parts from a video and photo—be it an object, text, a watermark or logo, a banner, or a person.
Instead of spending hours manually editing, this AI tool will erase unwanted elements and fill in your image background naturally. The best part? You don’t need advanced editing skills.
Filmora’s AI Object Remover works on both mobile phones and desktops.
How to Remove Objects Using Filmora’s AI Object Remover (Mobile Version)
With Filmora on your phone, you can easily remove unwanted objects and text from your photo. This tool allows you to choose between removing an object or a block of text while editing.
- Step 1: Download and Open Filmora on your phone.
- Install the Filmora app from the App Store or Google Play.
- On the home screen, click on New Project and upload your photo. Alternatively, tap the three dots on the right to access the Filmora AI tools section.
 secure download
 - Step 2 (optional): Select the AI Object Remover Tool.
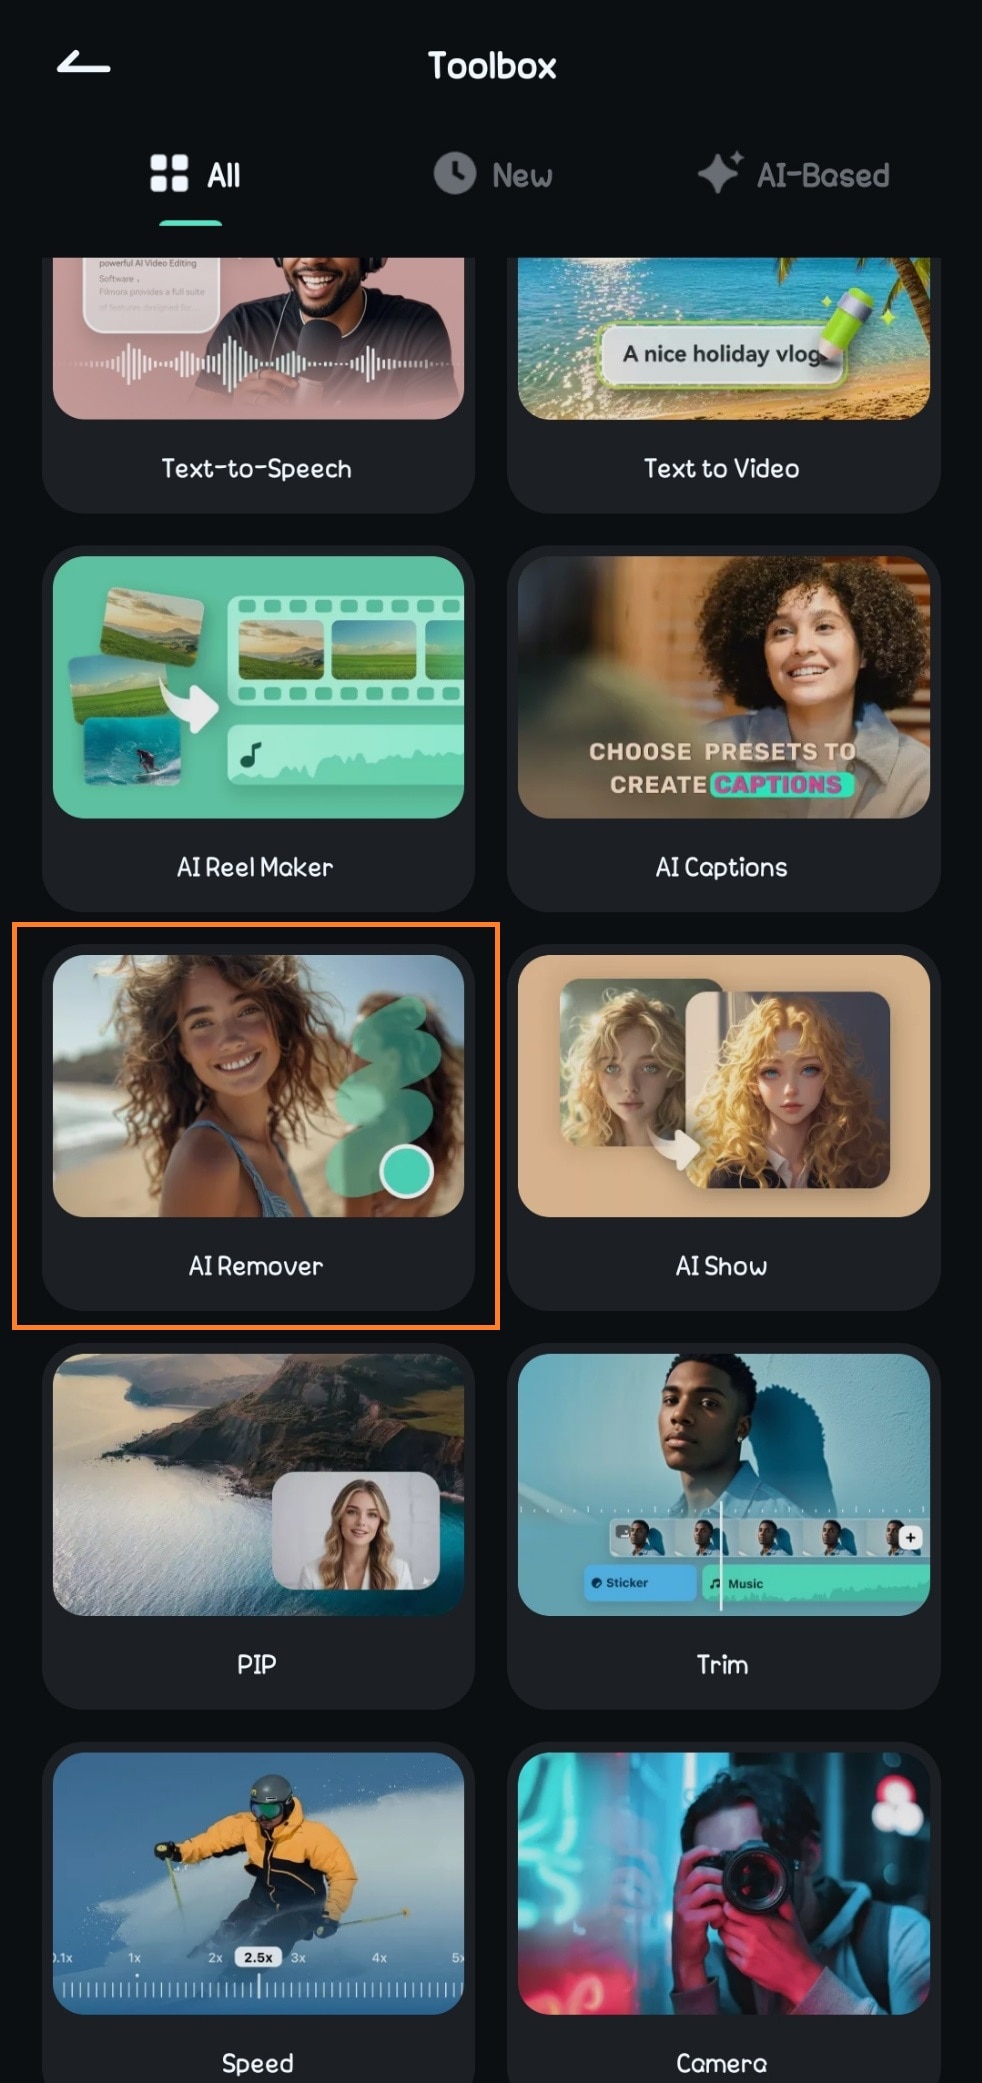
- Go to the AI Tools section and choose AI Remover.
- Then, select the photo you want to remove the object from and upload it.
- Step 3: Use AI Remover.
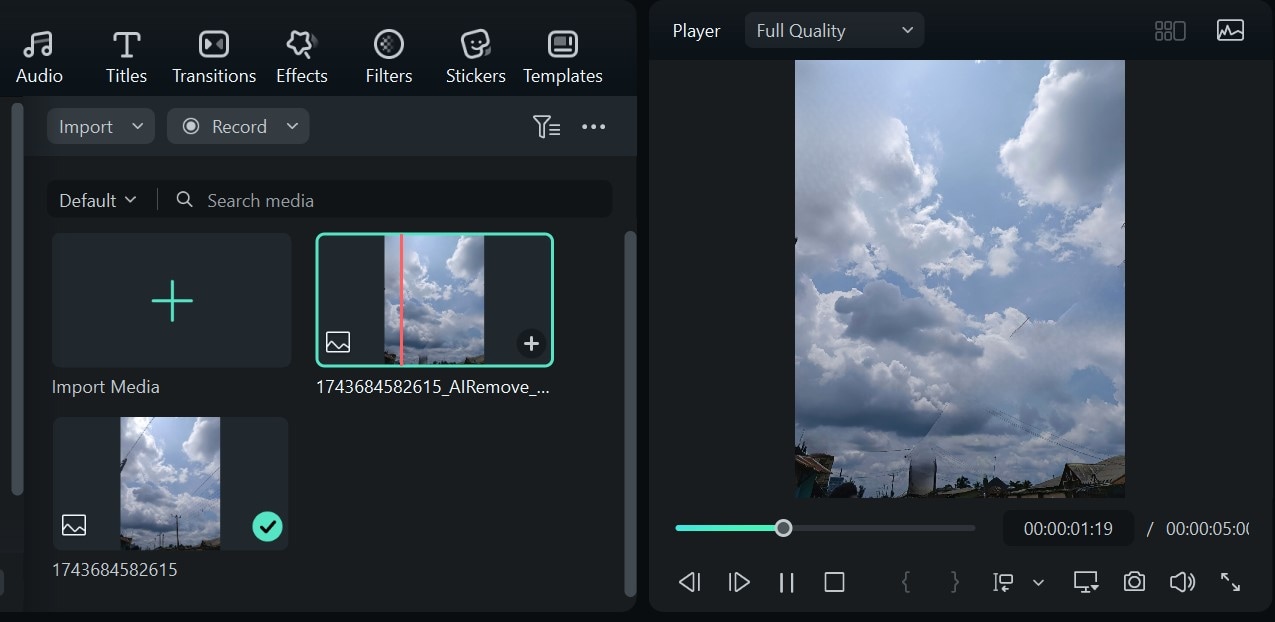
- Select the photo or video on the timeline.
- Amongst the editing options, click on AI Remover.
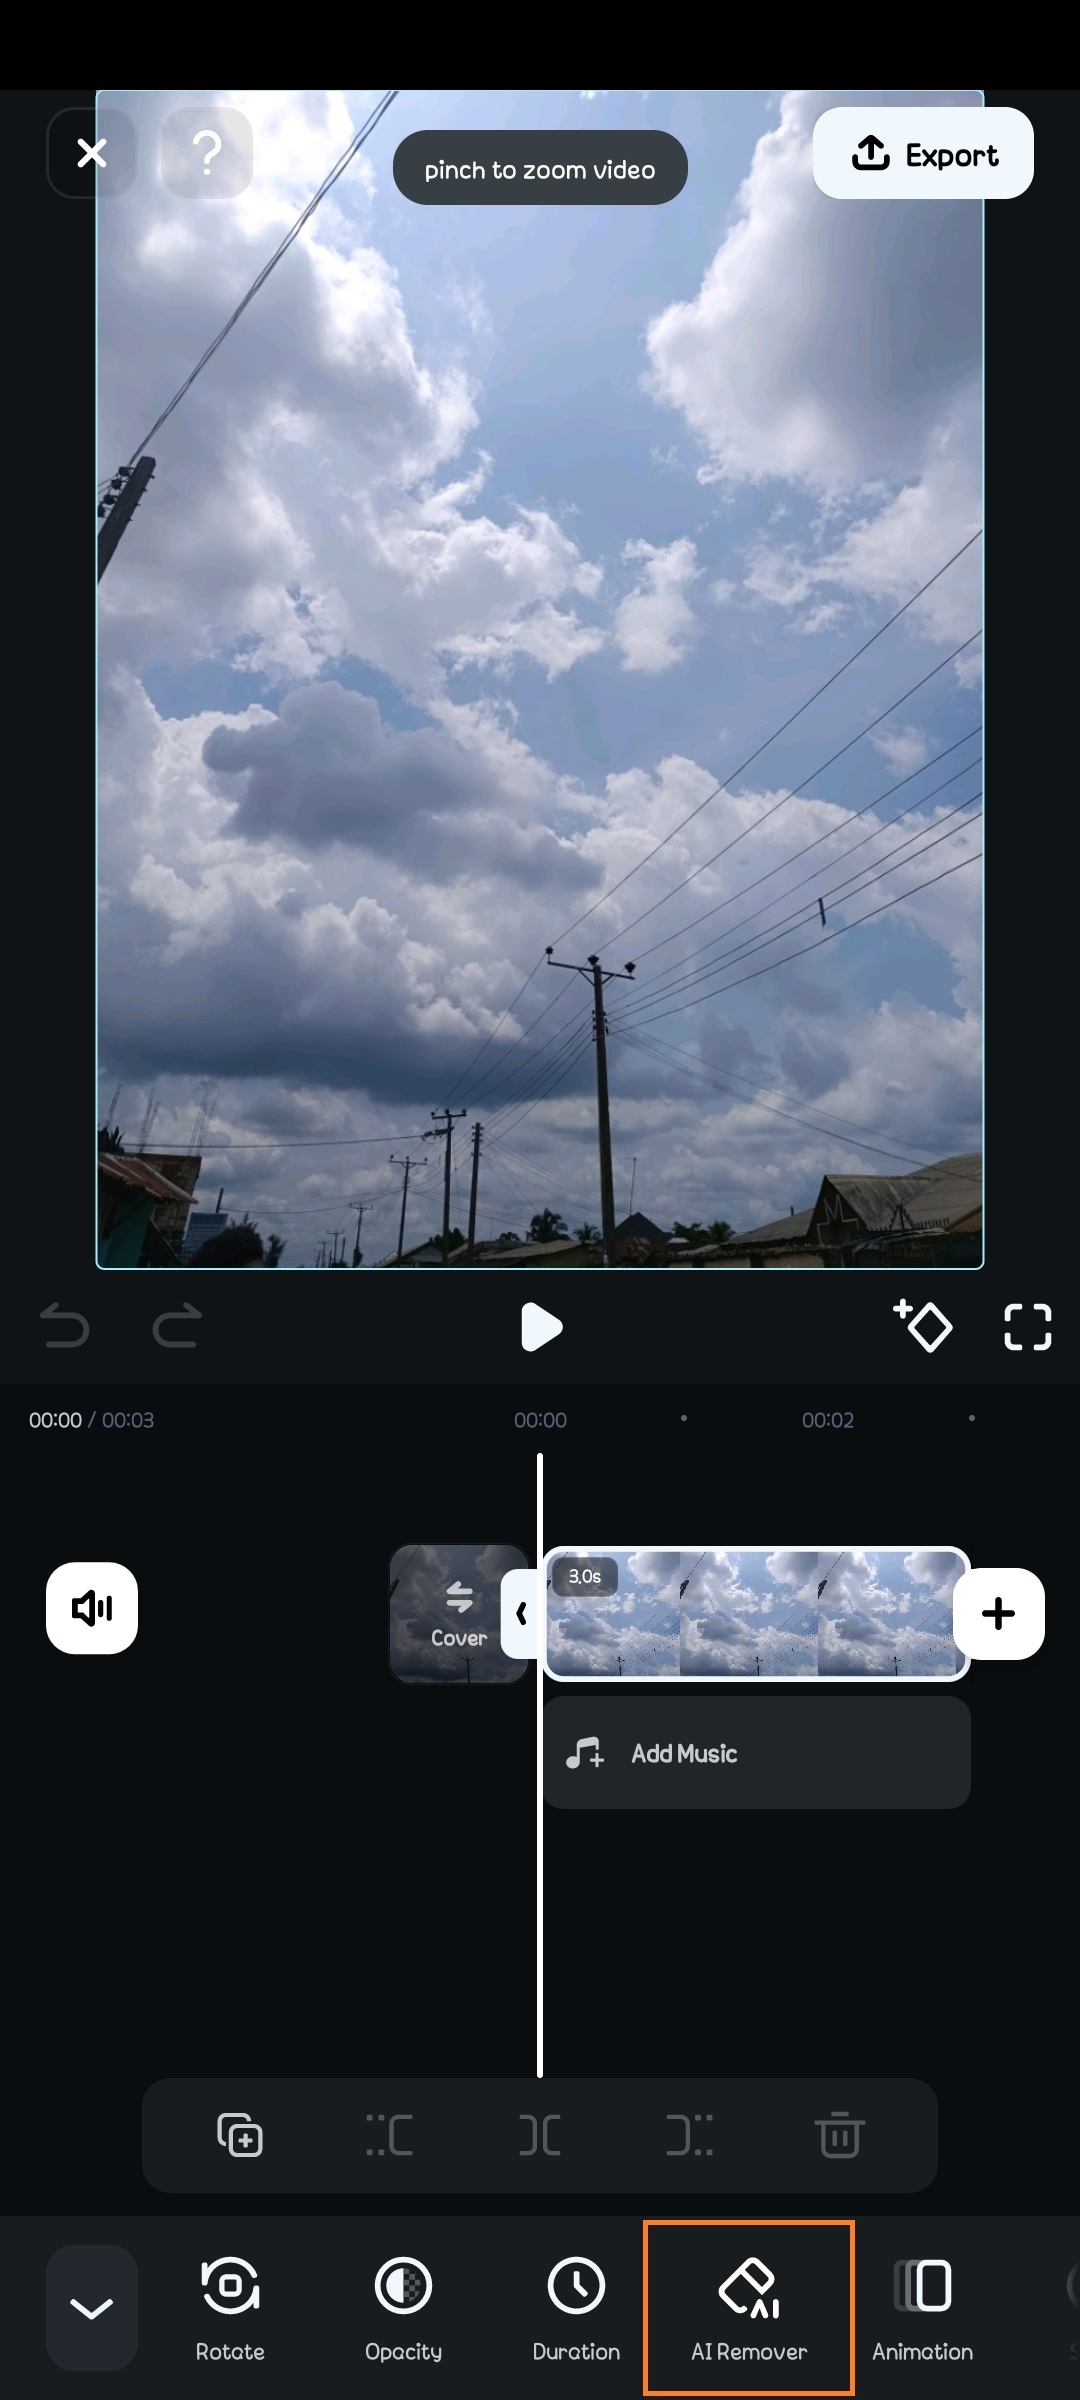
- Step 4: You can choose to remove text or objects. Choose an option that suits your needs.
- To remove objects, select a brush mode—manual or auto.
- For precision during manual removal, adjust the brush size to match the object to be removed.
- Brush over the unwanted object—Use your finger to highlight the object or person you want to erase.
- Once you’re done, click on Process Now.
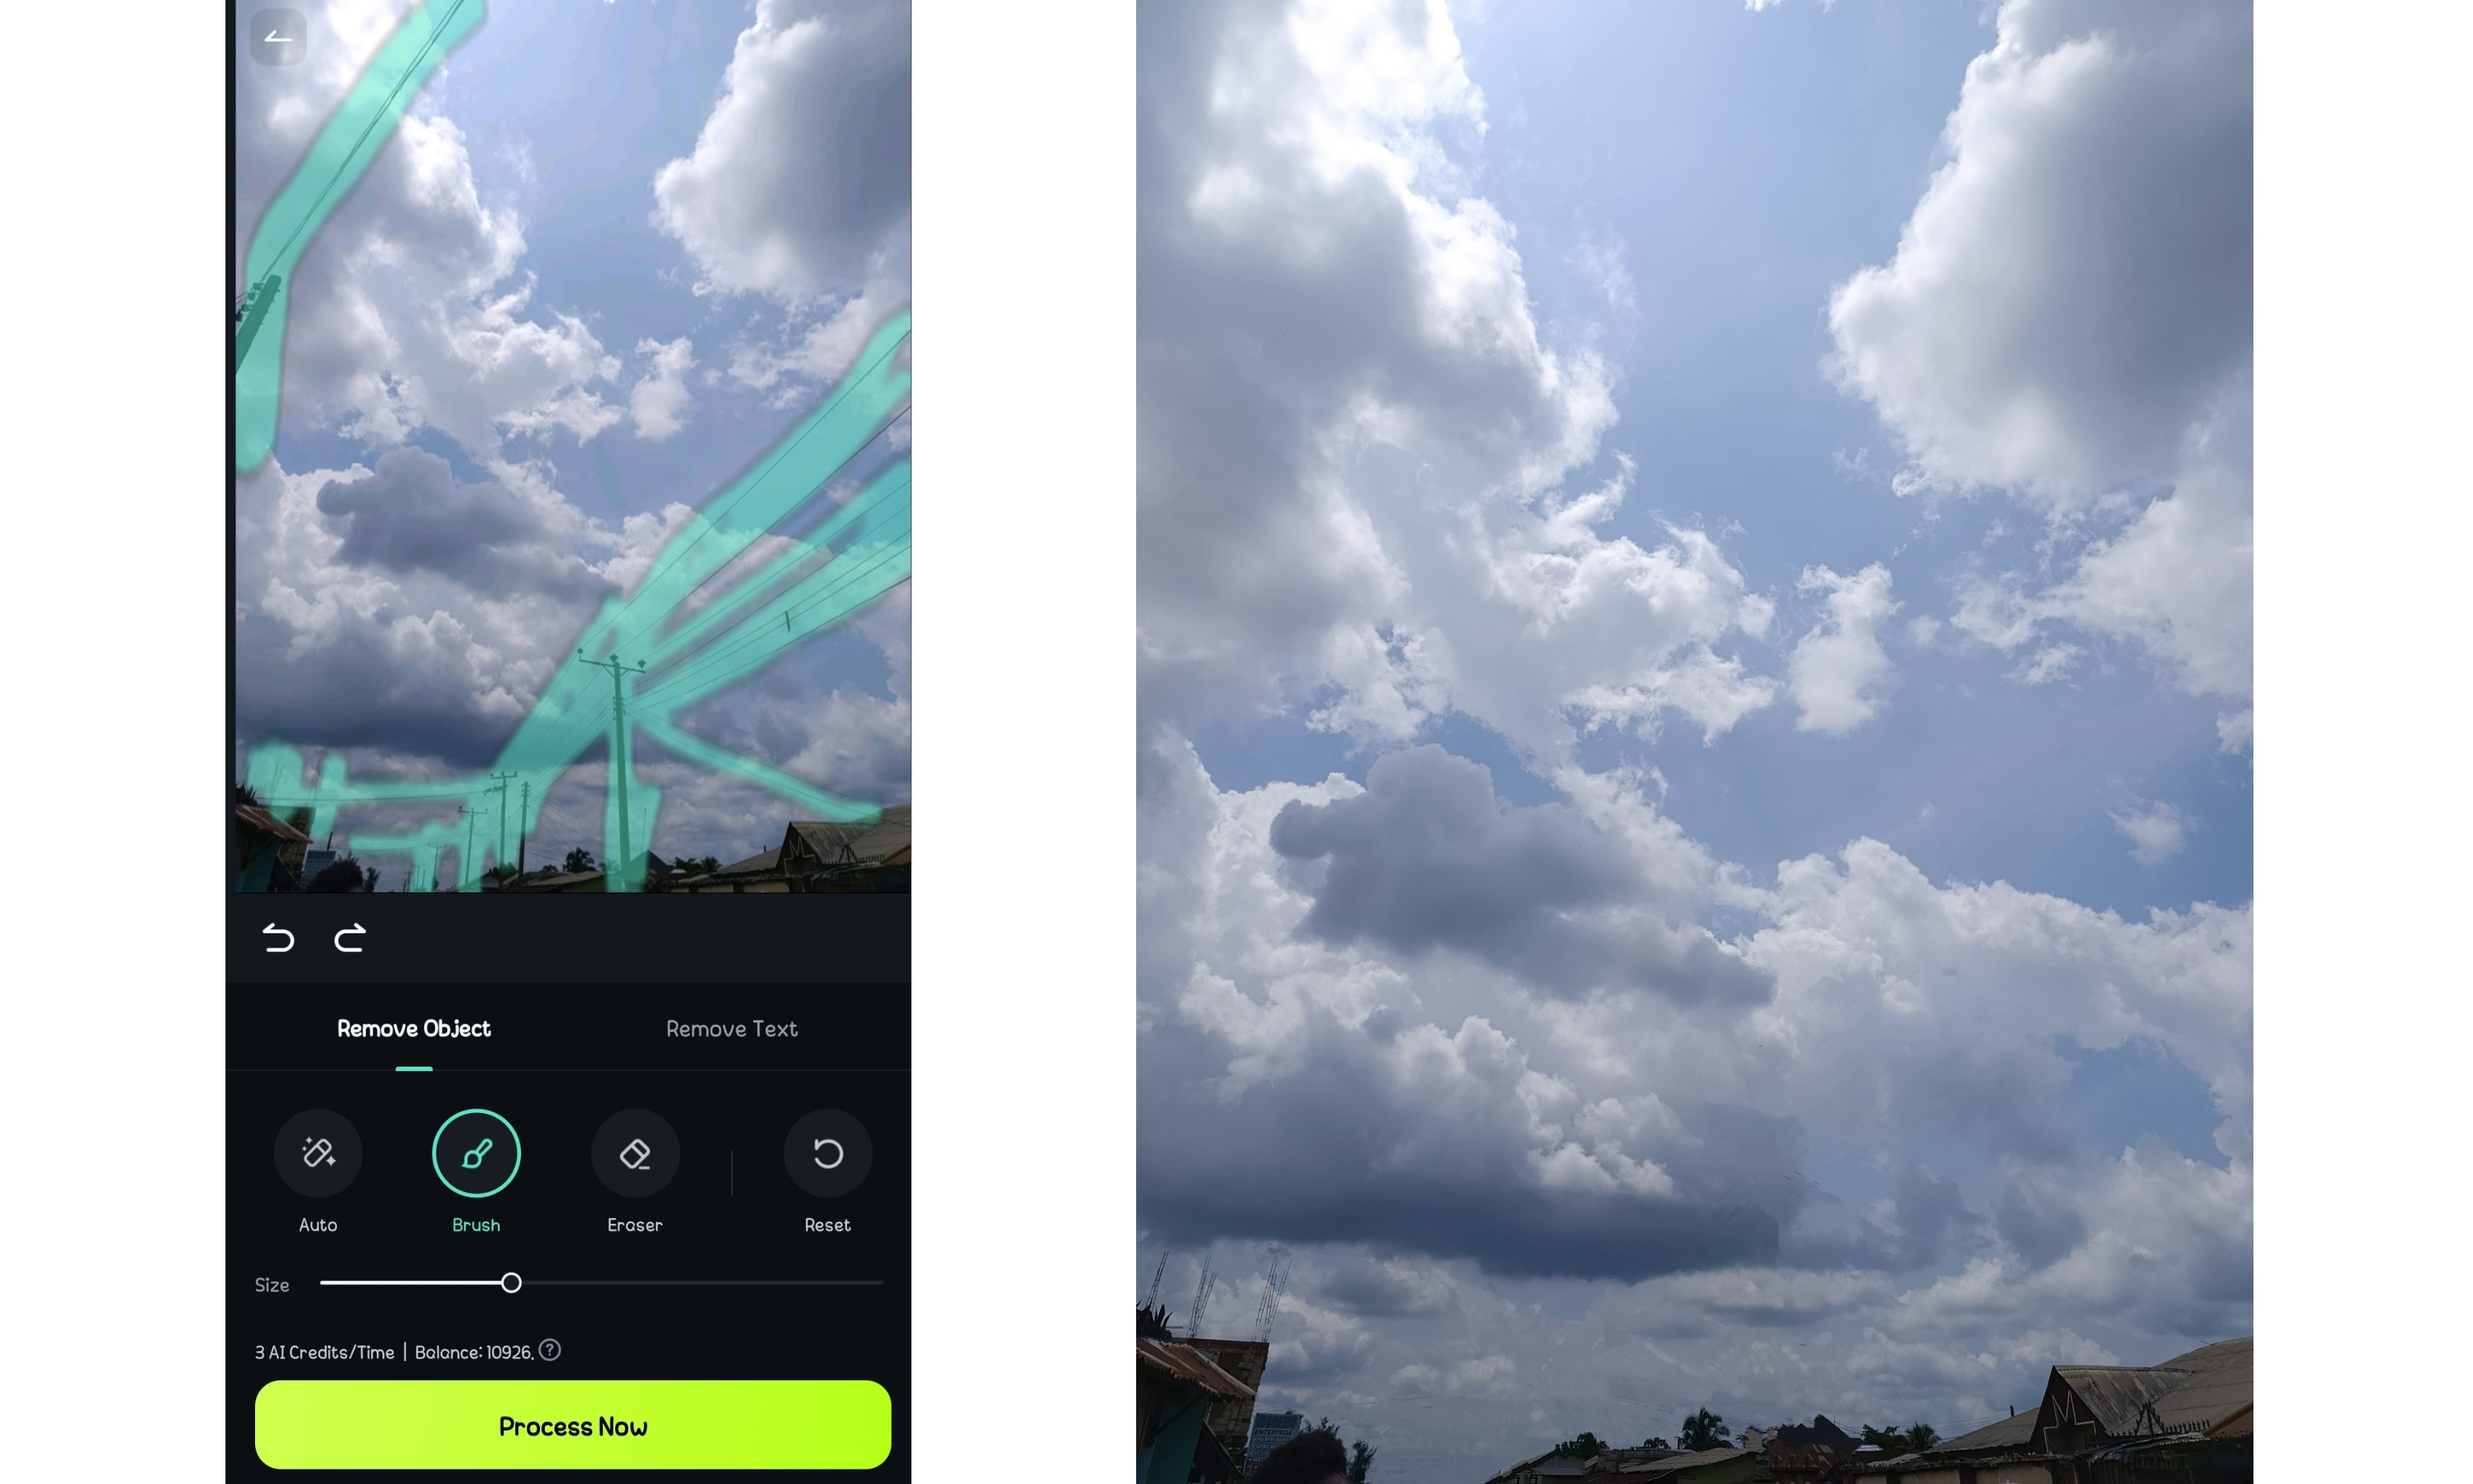
Filmora’s AI will remove all the highlighted objects and fill in the erased area to blend naturally with the surroundings.
How to Remove Objects Using Filmora’s AI Object Remover on Desktop
For more control and advanced editing, the desktop version of Filmora offers an even smoother object removal process. Here’s how to use the tool on a PC.
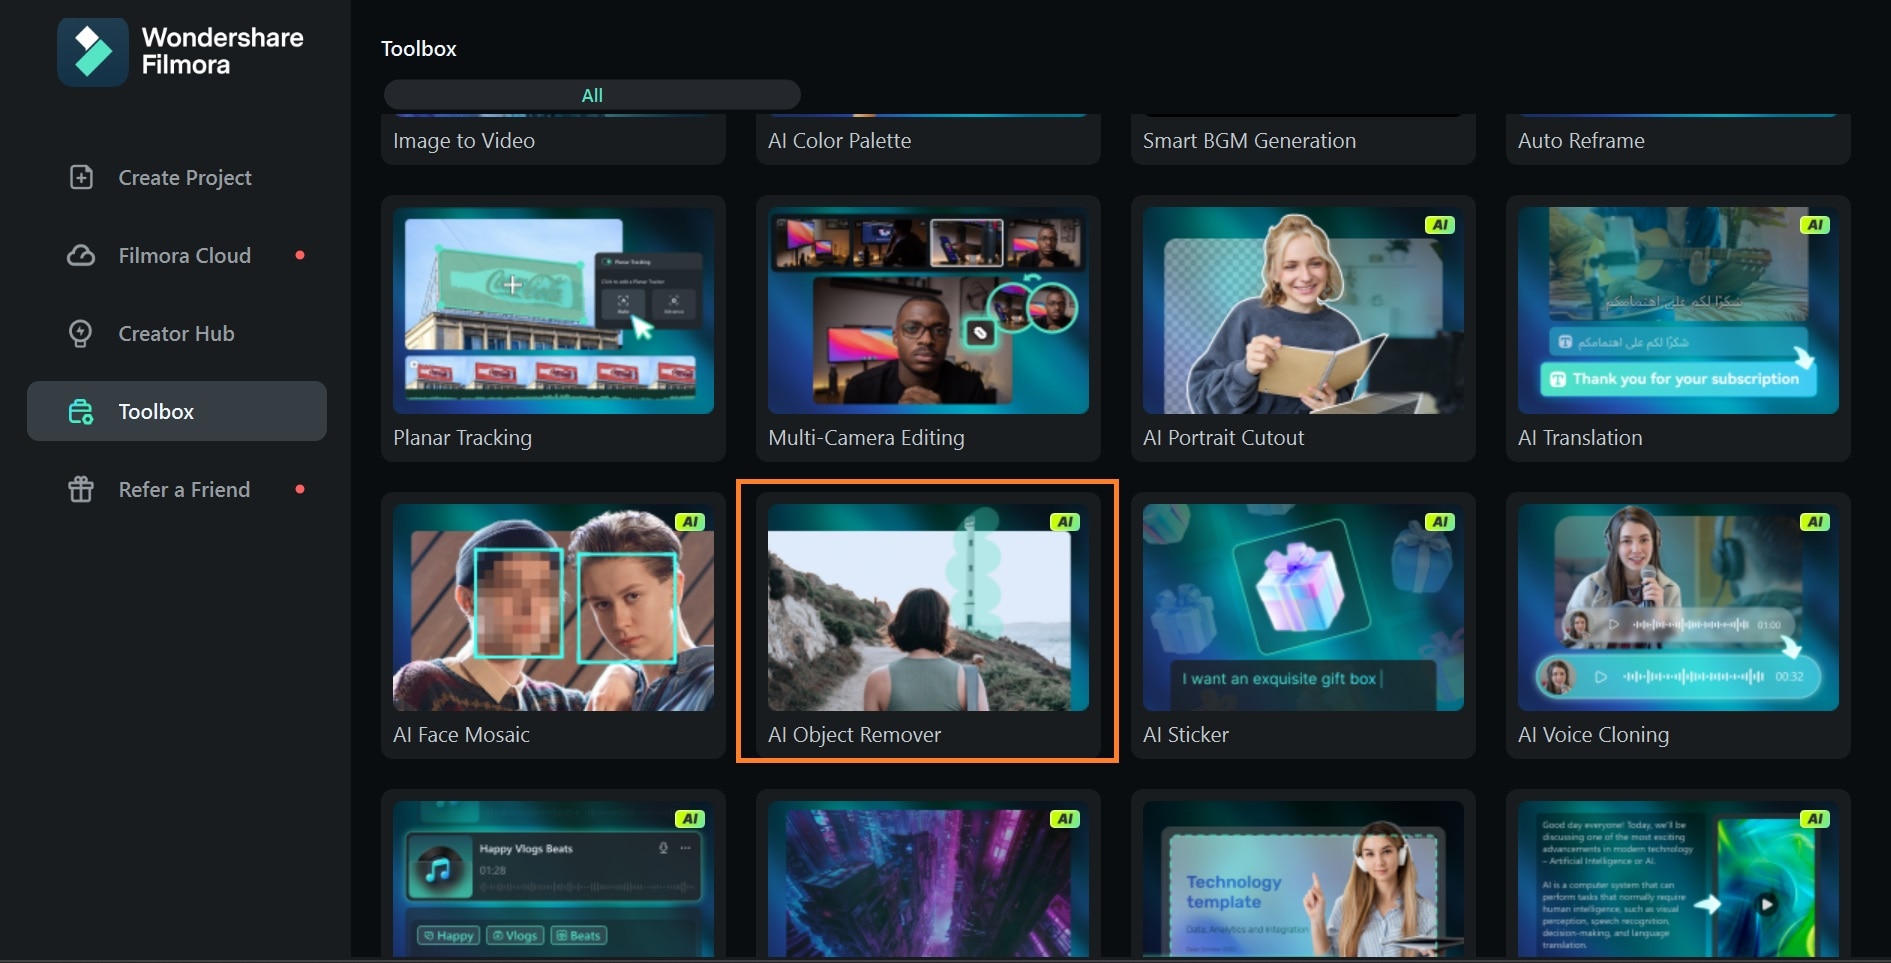
- Step 1: Open Filmora on your computer.
- Go to Toolboxon the Filmora home screen.
- Select AI Object Removerand open your image.
 secure download
 - Step 2: Highlight the object and apply Object Remover.
- Use the selection tool to mark the unwanted object. You can fine-tune the edges for better accuracy and adjust the brush size for more precision.
- ClickRemove.

If you already have your photo or video on the dashboard and want to remove an object while editing, simply right-click on the image on the timeline and select AI Object Remover.
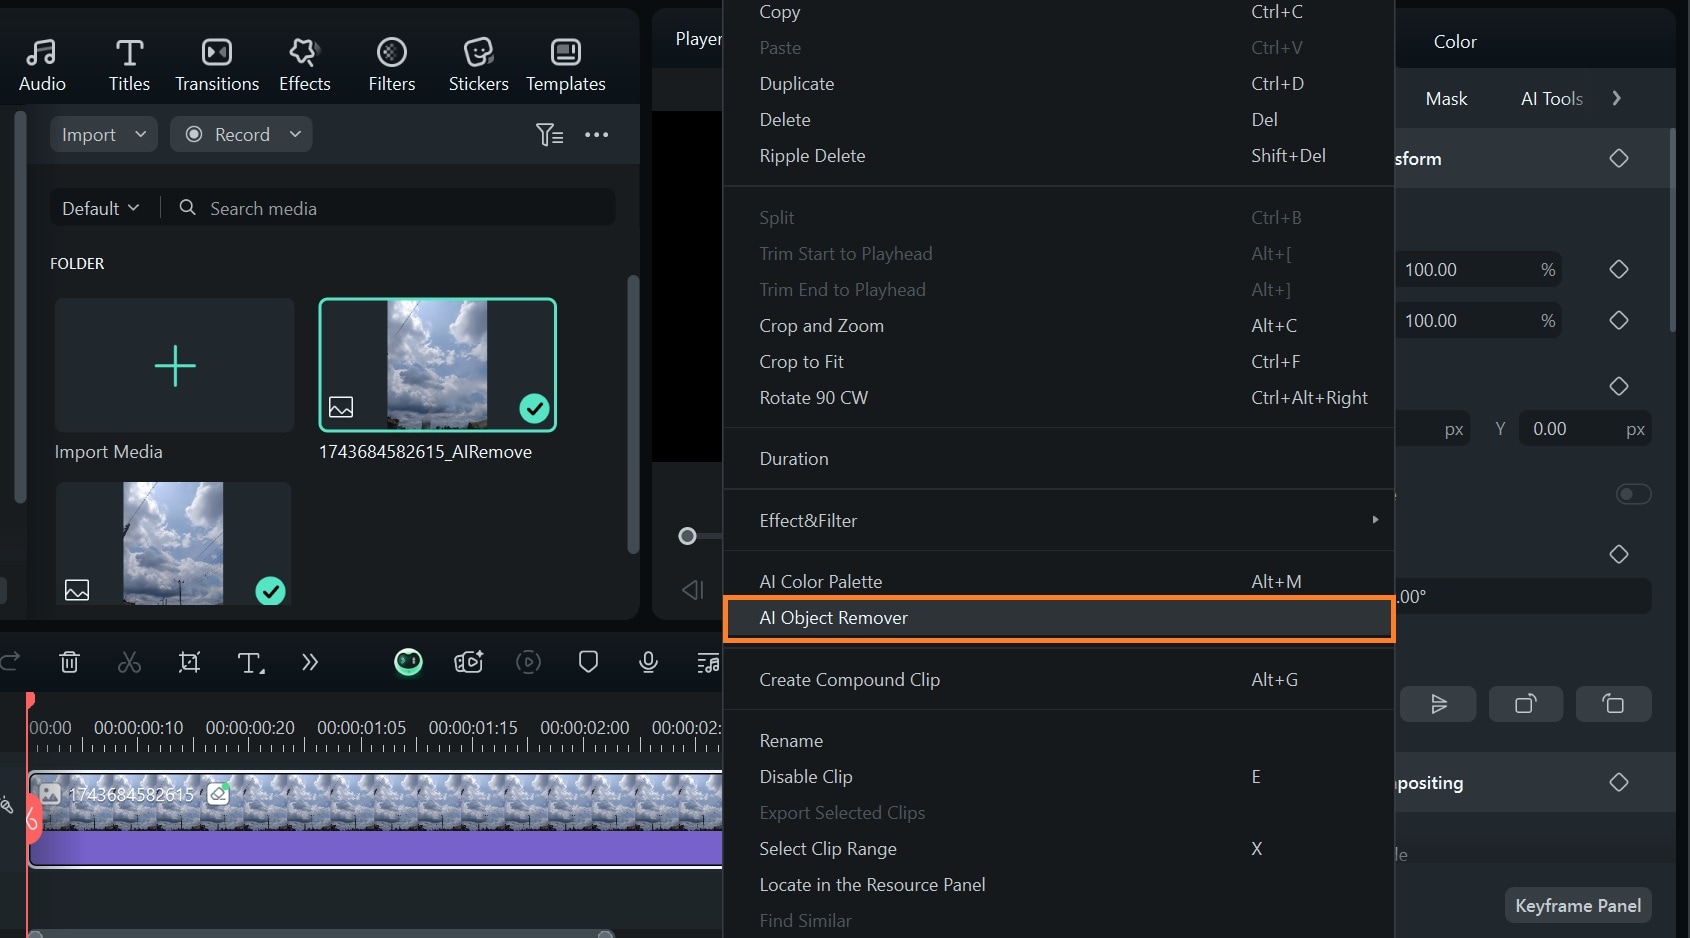
Your edited photo will automatically be updated on the editing dashboard.
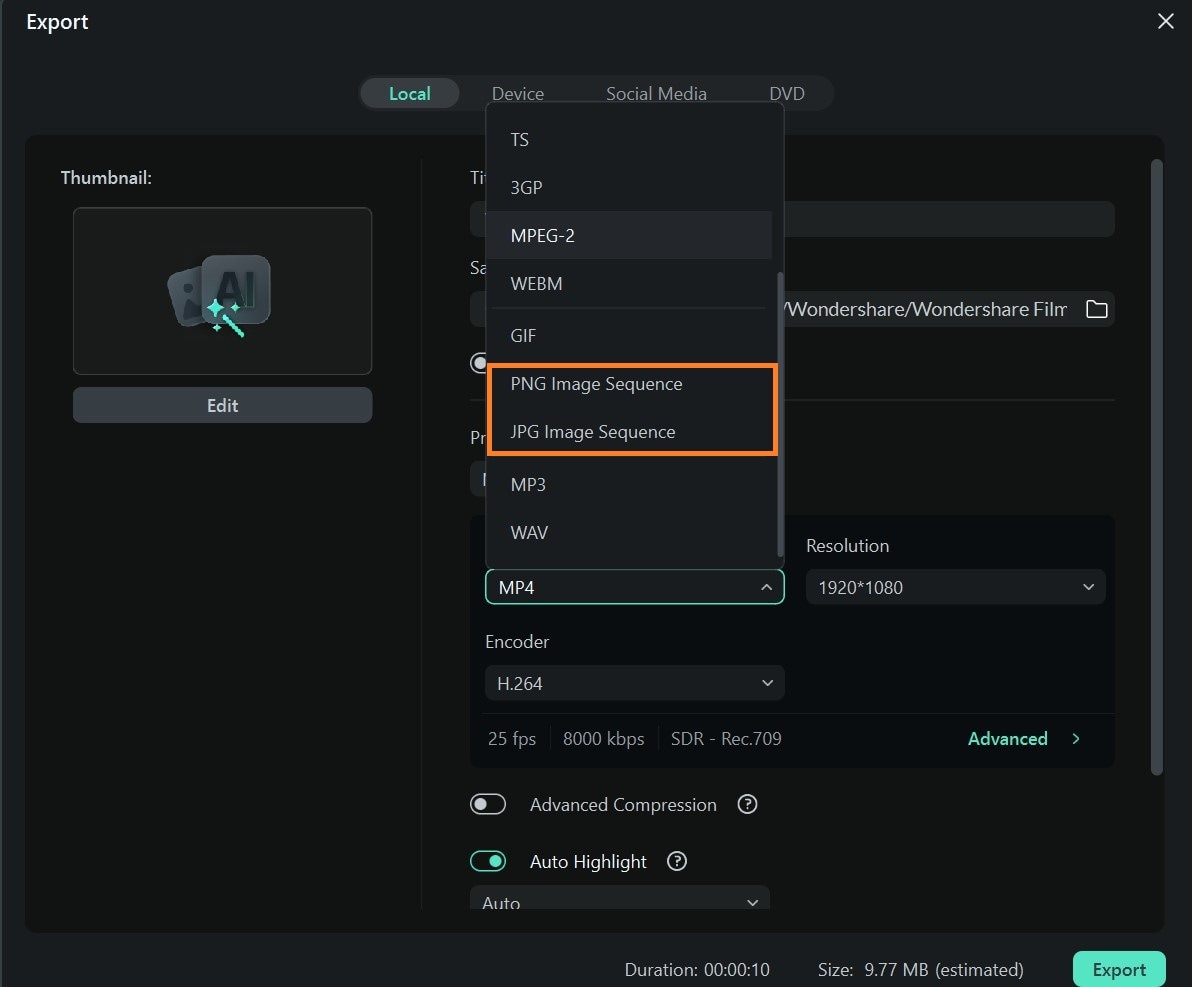
- Step 3: Export the final image.
- Once you’re satisfied with the result, export the image in your desired resolution.
- Ensure you set the media format to JPG or PNG to avoid exporting your image as a video.
Conclusion
Blurry images, distracting objects, and poor resolution no longer have to ruin your perfect shot. Now you can instantly transform your photos and remove blur with AI tools.
Whether you’re using Artguru to fix blurry pictures or Filmora’s AI Image Enhancer and Object Remover to clean up and upscale your visuals, these advanced editing tools make high-quality photo enhancement accessible to everyone. Before you consider deleting that flawed photo, try Filmora’s AI-powered solution—it can easily turn an unusable shot into a professional, high-definition favorite!
secure download 