
 100% Security Verified | No Subscription Required | No Malware


 ChatGPT
 Perplexity
 Gemini
 Claude
 Grok
Grok
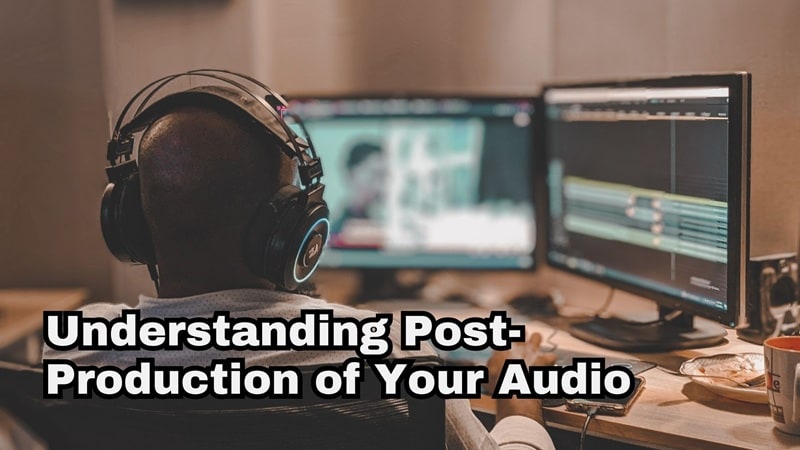
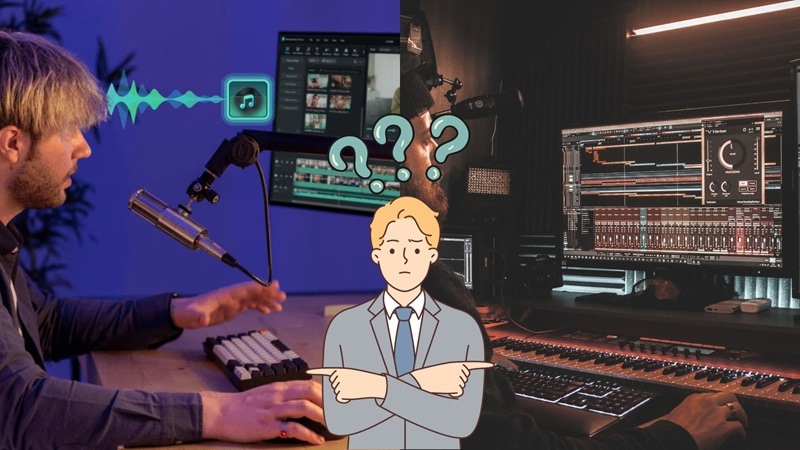
The phrase "audio post-production" (also called "sound post-production") can seem intimidating, especially for beginners. But once you follow a simple, repeatable audio post-production workflow, it all makes sense.
You don't even have to be a sound engineer. This guide covers the complete post-production audio workflow used by professionals, but explained for creators at any level. With the right process and tools—Filmora for speed or Pro DAWs for precision—you can transform rough recordings into clean, balanced, professional sound.
Let's dive into the 5 stages that turn chaos into cinema.
In this article
Part 1. Get to Know the Audio Post-Production Workflow From Set to Studio
In order to capture professional sound, everything builds on different stages. Understanding this flow makes the audio post-production workflows much smoother and less confusing and more like building a story layer-by-layer until everything fits perfectly.
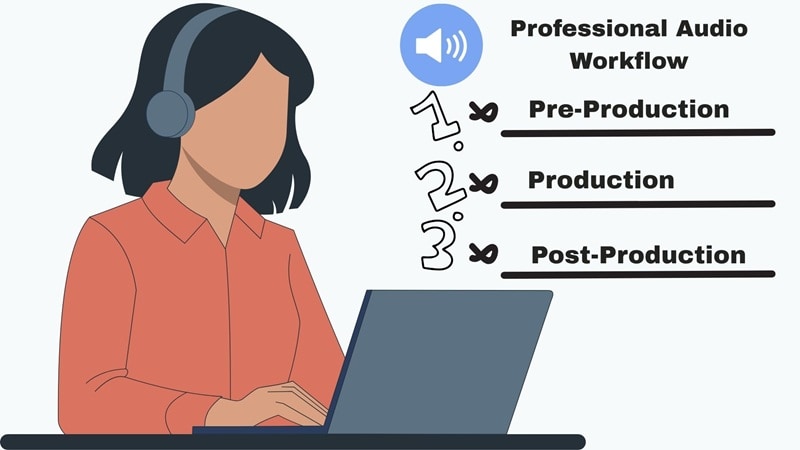
Before Post: Pre-Production & Production
Every great mix starts long before post-production. It starts with the planning, the setup, and the way sound is captured on set. Here is the basic framework for a great-sounding film:
- Pre-Production: This is where the sound plan begins. It includes figuring out what kind of audio the project needs, choosing the right microphones, and scouting quiet locations that make recording easier.
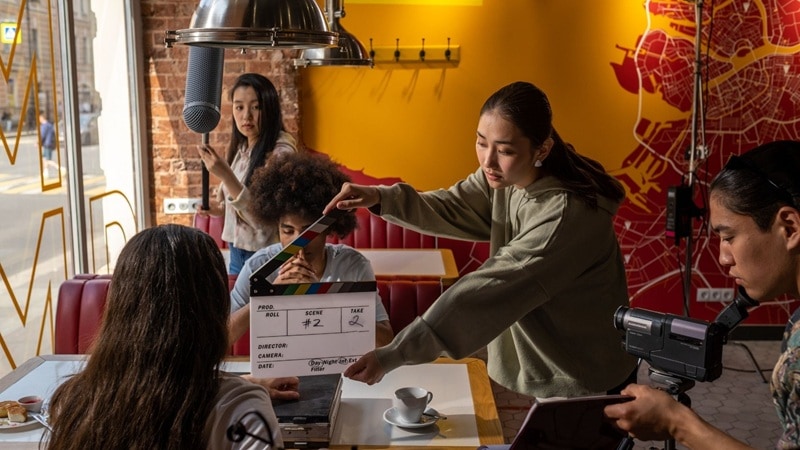
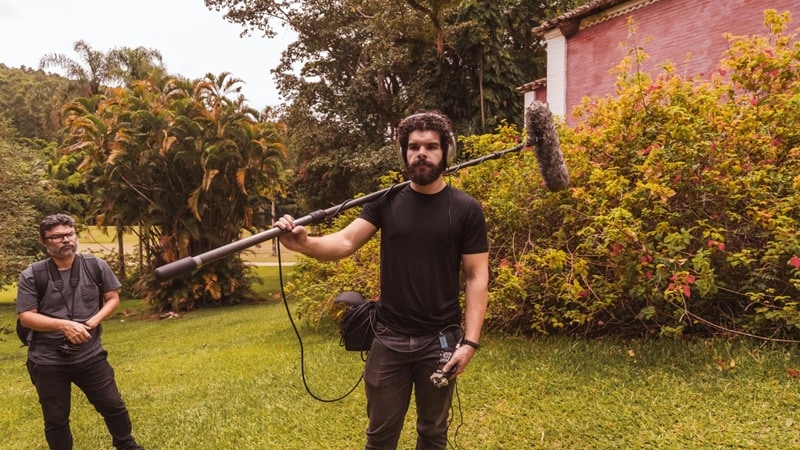
- Production: This stage is all about capturing clean and natural sound while filming. It means recording clear dialogue, ambient noise, and any extra sounds that help the scene feel real.

The 5-Stage Post-Production Audio Workflow
Once you get your recordings, then it's time to move to sound post-production. This is where everything you recorded on set gets shaped, cleaned, and layered until it feels complete. Usually, the post-production audio workflow follows five main stages that guide you from rough recordings to a polished final mix:
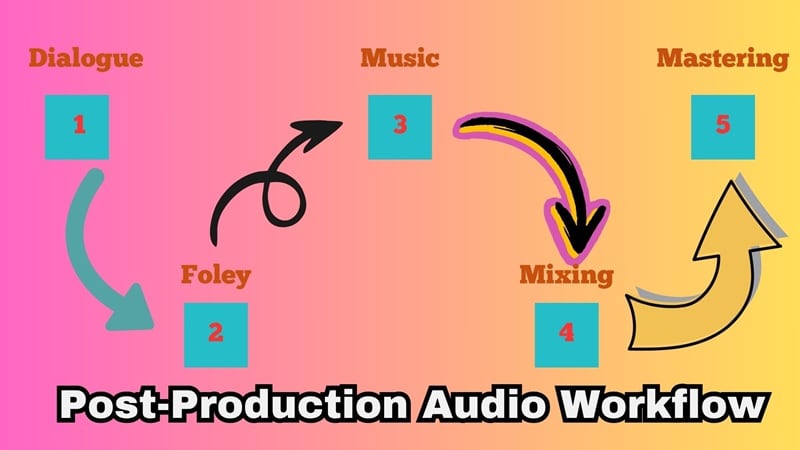
- Dialogue Editing: This is where voices get cleaned up and synced perfectly with the video so every line sounds clear and natural.
- Foley & Sound Effects: Everyday sounds like footsteps, doors, or cloth movement are recreated and layered to make scenes feel real and textured.
- Post Production Music: This step brings in the emotion. The right soundtrack or background score adds rhythm and mood that support every scene.
- Mixing & Balancing: Here, all the sounds including dialogue, music, and effects, are blended so they flow together naturally and nothing feels too loud or out of place.
- Mastering & Delivery: The final stage gives everything its polish. Levels are checked, the mix is finalized, and the sound is prepared for film, TV, or online release.
Part 2. Getting Dialogue Right: Making Every Word Sound Clear and Natural
Without further ado, let's jump into polishing the part people actually hear first: the dialogue. Every audio post-production workflow begins here because clear and natural speech keeps your story grounded. When the dialogue sounds messy or uneven, even the most beautiful visuals lose their impact.
So, getting this part right sets the tone for everything that follows and makes your project feel professional from the very first line. There are two ways you can handle this:
Option A: Using Professional Tools to Clean Dialogue

In sound post-production, professionals rely on dedicated tools like Avid Pro Tools, iZotope RX, and Adobe Audition to make dialogue clean and consistent. Here's how they usually handle it:
- Clean up unwanted hums, hisses, and background chatter to keep the dialogue crisp.
- Repair muffled or distorted recordings using restoration plugins for smoother tone.
- Match sound tone across takes so voices stay natural from one shot to another.
- Replace unclear lines with ADR (Automated Dialogue Replacement) when needed for better clarity.
Given how precise this stage needs to be, Pro Tools is still the go-to choice for professionals. It offers complete control for detailed editing, EQ adjustments, and audio repair, making it ideal for achieving clean and consistent dialogue.
Option B: Fixing Dialogue Fast with AI Tools
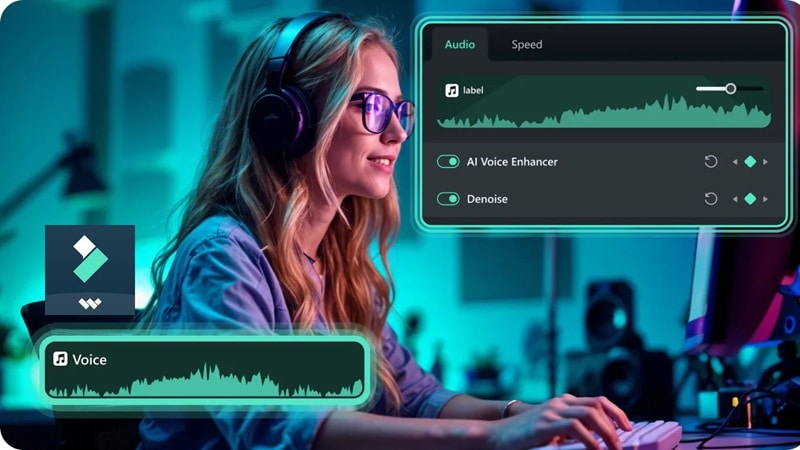
For creators who don't have access to high-end software or are working on a simple project, there's an easier way. Wondershare Filmoraintroduces a true 32-bit Float audio workflow, ensuring your raw recordings preserve full dynamic range and anti-clipping headroom. Combined with built-in AI tools, you can instantly clean and balance your audio without losing fidelity. Here's how Filmora handles this process:

- AI Audio Denoise: Automatically removes background noise so your dialogue sounds clean and clear.
- Remove Hiss & Clicks: Gets rid of mouth noises, static, and other small distractions.
- Automatic Volume Leveling: Balances audio levels across clips to keep the dialogue consistent from start to finish.
 secure download

As you can see, Filmora makes this part of the post-production audio workflow quick and stress-free without diving into complex EQ or compression settings. This makes it a great option for YouTubers, vloggers, or indie creators who want professional results without spending hours adjusting settings.
How to Choose the Right Tool for Cleaning Up Dialogue
Now that you've seen both ways to handle your dialogue, what works best really depends on your project. If you're creating short social clips, you probably just need quick cleanup tools. But if you're working on something bigger, a more advanced setup might suit you better.
To make things easier, here's a simple guide to help you decide which workflow fits your use case best for this stage of sound post-production.
| Type of Project | Recommended Tool | Why It Works Best |
| Social Media Videos | Filmora | Fast and easy for cleaning and balancing sound for phone or headphone playback. |
| YouTube Short Films or Indie Projects | Filmora → Pro Tools | Start simple in Filmora, then fine-tune in Pro Tools for a cleaner mix. |
| Broadcast, Cinema, or Music Releases | Pro Tools | Gives full control and precision for professional sound. |
| Podcasts and Voiceovers | Filmora | Simple noise cleanup and volume leveling for clear voices. |
| Documentaries and Interviews | Pro Tools | Handles multiple microphones and background noise better. |
| Online Courses or Tutorials | Filmora | Quick to clean dialogue and balance levels without complex editing. |
Part 3. Crafting the World with Sound: Building Emotion Through Audio
Once your dialogue sounds clean and clear, it's time to bring everything else to life. This is where sound post-production becomes truly creative. Every little sound, from footsteps to music, helps shape the mood and space of your story.
You'll work on:
- Foley: Recreating real-life sounds like footsteps, door creaks, or the rustle of clothing.
- Sound Effects (SFX): Adding bursts of energy like cinematic hits, swooshes, or impacts that match movement on screen.
- Background Ambience: Filling the silence with natural sounds such as wind, traffic, or room tone to create depth.
- Music: Using emotion and rhythm to guide how the audience feels during a scene.
To capture and design these sounds, you can choose between two approaches depending on your workflow and goals.
Option A: Capturing and Creating Sound in Filmora
If you're editing directly in Filmora, this part of the audio-post production workflow is smooth and straightforward. Everything you need is right inside the software, so you can focus on creativity instead of setup. Here are some of its advantages:
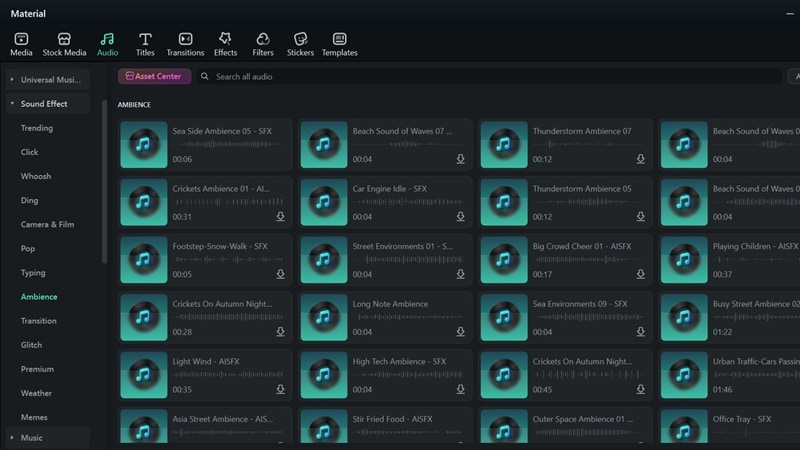
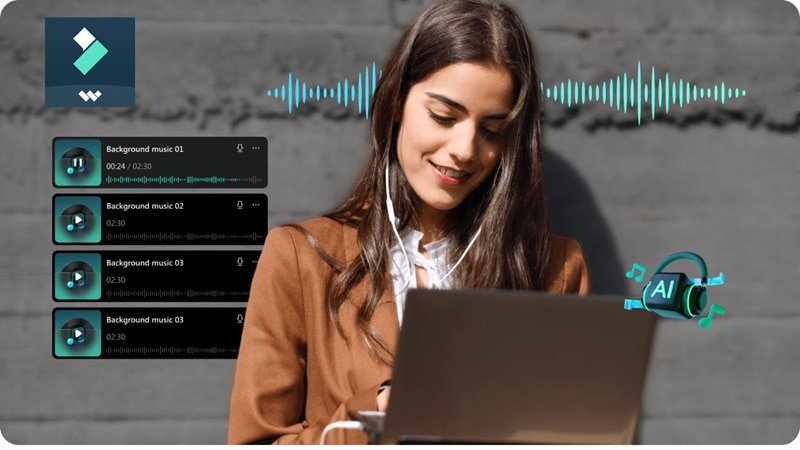
- Built-in Sound Library: Filmora comes with a large collection of royalty-free sound effects and background music, ready to use without searching elsewhere.
- Simple Timeline Mixing: You can preview, drag, and layer sounds directly on the timeline, keeping your workflow fast and organized.
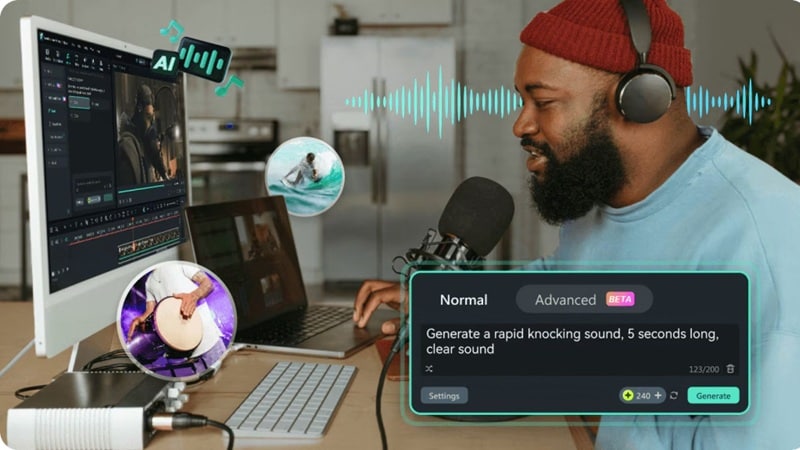
- AI Music and SFX Generator: For post-production music, you can create your own custom music or sound effects with AI Music Generator and AI Sound Effect Generator tools to match the mood of your video perfectly.
Option B: Designing Sound in DaVinci Fairlight
For bigger projects like short films or streaming content, Fairlight in DaVinci Resolve gives you more control and precision. Here's why it works better for advanced projects:
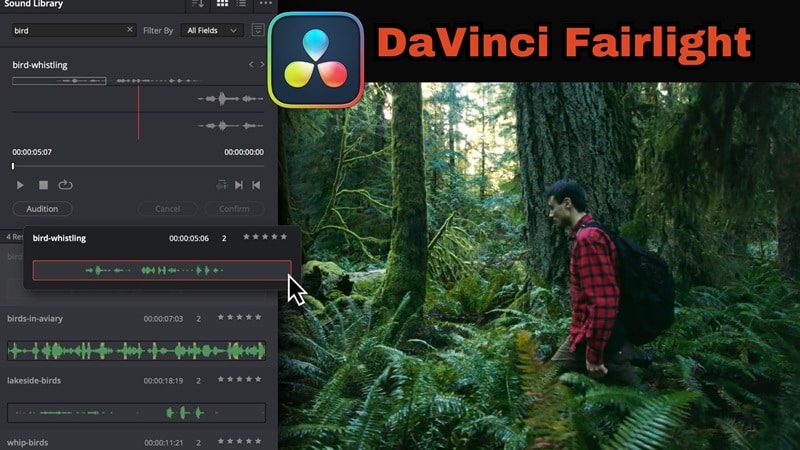
- Full Audio Control: Designed for surround and immersive formats with advanced mixing, EQ, and automation features.
- Built-in Sound Effects Library: Includes a dedicated Foley and sound effects collection for cinematic scenes.
- Smart Sync Feature: The sync button lets you match any part of a sound effect waveform directly to the playhead on your timeline for perfect alignment.
Choosing the Right Tool for Your Sound Design
Both Filmora and DaVinci Fairlight can take your sound post-production to the next level, but the best choice really depends on what kind of sound you're creating. So, take a look at this quick comparison based on your sound design needs.
| Type of Sound | Recommended Tool | Why It Works Best |
| Sound Effects (SFX) | Filmora | Has a wide library and AI tools to create custom effects. |
| Foley | DaVinci Resolve (Fairlight) | Offers detailed control and realistic layering. |
| Background Ambience | DaVinci Resolve (Fairlight) | Handles multiple ambience layers with precision. |
| Music | Filmora | Includes royalty-free tracks and AI music tools. |
Part 4. Mixing It All Together: Where Sound Becomes Cinema
By now, your project has all the pieces it needs: clean dialogue, rich Foley, layered effects, and the right music. The next step is where it all comes together, mixing. This is both a creative and technical part of the post-production audio workflow. It's where you balance every sound so they blend naturally and support each other instead of competing for attention.
Here's what usually happens during this stage:
- Adjust volume levels to make dialogue clear and effects impactful.
- Use panning to position sounds in space, whether left, right, or center.
- Add EQ, compression, and reverb to give depth and realism.
- Test playback across different speakers and headphones to ensure consistency.
For this stage, once again, you can go with a quick and practical option or dive into more advanced control depending on your project.
Option A: Mixing in Filmora for a Simple and Fast Workflow
If you're editing in Filmora, mixing feels natural and easy because everything happens directly on your timeline. With the new 32-bit Float audio pipeline, Filmora preserves the full dynamic range of your recordings, ensuring that any volume adjustments, AI noise reduction, or audio ducking happen without degrading quality. This is especially important when balancing dialogue, music, and sound effects across multiple tracks.
Here are some key points of mixing in Filmora:

- Keyframe Control: Adjust volume precisely across clips for smoother transitions while maintaining audio fidelity thanks to 32-bit Float processing.
- Audio Fading: Create natural in and out fades for dialogue and background music.
- Audio Ducking: Automatically lowers the music when someone is speaking for better clarity.
- Instant Playback: Hear your changes in real-time without leaving the timeline.
By combining 32-bit Float processing with Filmora's intuitive timeline and AI-assisted tools, creators can achieve a clean, professional mix quickly—even without access to high-end DAWs like Pro Tools.
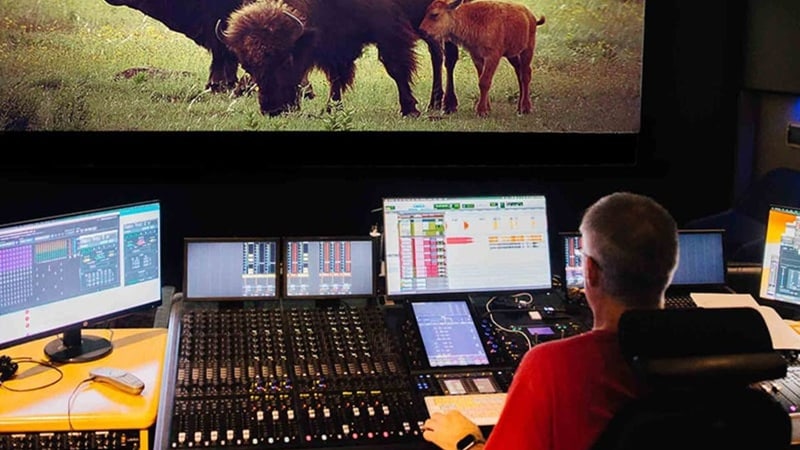
Option B: Mixing in Pro Tools for Complete Audio Control

For projects that demand cinematic sound or broadcast-level quality, Pro Tools remains the industry standard. It gives editors and sound designers full control over every frequency, effect, and track to create a mix that feels immersive and detailed. Here are some aspects that make it ideal for professionals:
- Multi-Track Mixing: Manage large sessions with dozens of audio layers smoothly.
- Advanced EQ and Compression: Fine-tune each sound element to perfection.
- Spatial and Surround Mixing: Perfect for 5.1, 7.1, or Dolby Atmos formats.
- Automation Tools: Control fades, panning, and effects precisely over time.
Choosing the Right Tool for Mixing Your Audio
When it comes to mixing, Filmora and Pro Tools work in very different ways. Filmora is great for creators who want to balance dialogue, music, and sound effects quickly within one timeline. Pro Tools, on the other hand, is made for detailed sound post-production, giving you full control over every element in your mix.
Here's a simple comparison to help you choose which one fits your workflow best:
| Mixing Task | Recommended Tool | Why It Works Best |
| Balancing Dialogue and Music | Filmora | Simple tools like Audio Ducking and keyframe control make mixing fast and easy. |
| Adjusting EQ and Reverb | Pro Tools | Offers precise EQ, compression, and reverb control for professional-quality mixing. |
| Stereo and Surround Mixing | Pro Tools | Handles complex setups like 5.1 or Atmos for film and streaming projects. |
| Quick Online Content Mixes | Filmora | Ideal for YouTube or social media videos that need clear and balanced sound fast. |
Final Touch: Mastering and Preparing Your Mix for Delivery
After your mix sounds balanced, it's time for the final stage of the audio post-production workflow: mastering. During mastering, you'll refine the overall tone and volume of your mix so it translates well everywhere, from studio monitors to phone speakers.
Key points for mastering in Filmora:
- Preserve Audio Quality: Internal 32-bit Float processing prevents clipping, distortion, or loss during volume adjustments and effects.
- LUFS-Compliant Output: Automatically balance your project to meet platform standards (e.g., -14 LUFS for YouTube, -23 LUFS for broadcast).
- Seamless Export: Export to multiple formats without downsampling 32-bit sources unnecessarily, maintaining the original quality of field recordings or high-end audio.
- Flexible Mastering: Combine with AI tools to fine-tune loudness, EQ, or noise reduction while keeping audio transparent and professional.
Part 5. Choosing Your Tools Wisely: Filmora vs. Pro Audio Suites
Alright, so that's the full audio post-production workflow you'll go through to get clean, professional sound. Every stage plays an important role, but here's something worth remembering: You don't need a full studio setup to create great audio, what really matters is finding the balance between keeping things simple and having enough control to shape your sound.
Up next, let's break down when Filmora is all you need and when it's time to step up to professional tools for that extra level of polish.
When Filmora Makes Sense:
- Working on Everyday Projects: Filmora shines when you're editing YouTube videos, vlogs, short films, or social media content. It's built to keep your audio post-production quick while still sounding polished.
- Using AI Tools: The built-in AI tools handle noise removal and background cleanup automatically. You get clear, balanced sound without spending hours tweaking settings.
- All-In-One Editing Space: You can edit both video and audio in the same place. This makes your sound post-production workflow more efficient since you don't have to switch between different programs.
- Looking for Simplicity: If your project doesn't require surround sound or Dolby Atmos mixing, Filmora has all the features you need for clean, balanced audio right out of the box.
In short, Filmora is perfect for creators who want speed, simplicity, and great sound in one place. It's the easiest way to manage your audio post-production workflow without getting lost in complex professional tools.
secure download When to Switch to Professional Tools:
- Working on Bigger Productions: If you're working on feature films, documentaries, or broadcast projects, professional software gives you the level of control and precision you need. These tools are built for high-end sound post-production where every detail matters.
- You Need Advanced Mixing and Immersive Sound: When your project calls for surround sound or multi-channel audio, pro audio suites like Pro Tools, Logic Pro, or Fairlight handle it with ease. They let you mix in formats like 5.1 or Dolby Atmos for that full cinematic experience.
- Need Team Collaboration: If you're working with sound engineers or a post production team, professional tools make it easier to share, edit, and manage sessions without losing quality.
- Ready For Studio Hardware: For those using studio monitors, mixing consoles, or advanced interfaces, pro software connects seamlessly with your setup and offers full customization.
For these scenarios, professional audio suites are still the favorites since they give you deep control, plugin flexibility, and complete post-production audio workflow management. They're made for creators who want their sound to match the quality and precision of the big screen.
Conclusion
Audio post-production is one of the most important parts of any video or film project, and understanding how the workflow works makes a huge difference in the final result. And that's exactly what this guide is here for: walking you through each stage of the audio post-production workflow, from dialogue cleanup to final mastering.
Every step requires attention and balance to bring your story to life through sound. Still, not every project needs the same tools, which is why we've outlined when it's better to use pro software like Pro Tools or Fairlight, and when an all-in-one editor like Filmora can handle the job with ease.
In the end, it's all about finding the workflow that fits your style, fast and intuitive with Filmora, or detailed and refined with professional tools built for the big screen.
