



 100% Security Verified | No Subscription Required | No Malware
 TL;DR:
To equip Audacity with pitch correction and automatic tuning capabilities, download the free GSnap plugin from GVST and manually add it to the software's plugin directory.
● For Windows 7 64-bit or later, paste the extracted .dll file into the Audacity plugins subfolder located in the Program Files directory.
● For macOS 10.12 or later, place the extracted file into the Extensions directory by right-clicking the Audacity application icon, choosing "Show Package Contents," and opening the "Contents" folder.
● To activate the feature, restart Audacity, navigate to the Effects menu, select the Add / Remove plugins option, and manually enable GSnap so it appears under the Effect tab.
Ask AI for a summary
 ChatGPT
 Perplexity
 Gemini
 Claude
 Grok
Grok
You might be surprised to learn that audacity's many default audio effects do not include an autotune feature if you have ever had to correct a song's pitch or tuning. Not to worry!. GSnap is a free plugin that lets you use autotune (not to be confused with Auto-Tune) in audacity. On Windows, Mac OS X, and Linux computers, you can autotune and adjust the pitch of recorded files using GSnap.
This article will guide you to download the audacity autotune plugin to your computer and install it. Then you will be able to adjust the pitch of your sounds easily and tune them automatically without any hassle. This is a free download that can be installed in audacity to help you fine-tune your live vocal performance. During vocal pitch correction, it allows audacity to expand its functionality.
How Does Auto-tune Works?
Negative feedback from listeners is a common occurrence for singers. They need to satisfy their audience by giving them their most perfect production numbers. Nevertheless, there are instances when they need the aid of a device to conceal their mistakes or avoid making them. So they lip-sync and autotune their prerecorded songs.
Singers and music producers are not the only ones to use autotune. The most common users are ordinary people who have made music creation a part of their lives. Then how does autotuning operate?
The pitch is raised to the nearest correct tone when a person sings with the key off (out-of-tune). Moreover, the distortion can mask the out-of-tune parts (especially the highest and lowest pitches) in the overall performance.
How To Add Autotune To Audacity Using GSnap?
The autotune effect in audacity is enabled by the GSnap plugin (from GVST). This might be useful for correcting your pitch or creating a robotic voice. You can download it for free and install it on your computer.
You need to follow the steps to get a free autotune for audacity. Be sure to follow every step to avoid any issues.
Step 1
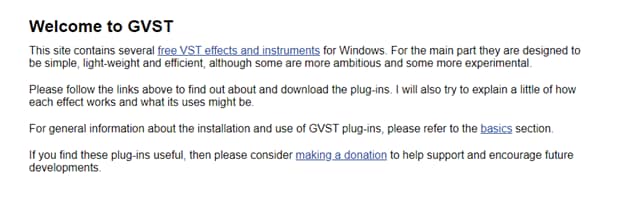
Find GVST - GSnap by searching Google. You can find information about GVST on the official website.
Step 2
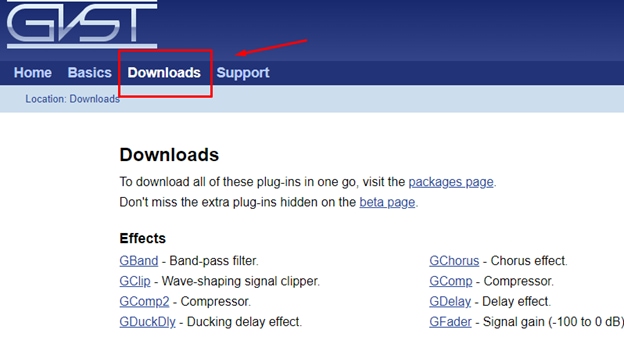
The downloads section can be found at the top of the page. When you click it, you will be taken to the Downloads page.
Step 3
Find GSnap from the list of downloads and click on it. A new page will open to find a GSnap download link. Once you click on it, a zip file will be downloaded to your pc. Keep in mind that this download will only work for windows. For mac and Linux, there will be a separate download link.
Step 4
Open the downloaded zip file and extract all files in it.
Step 5
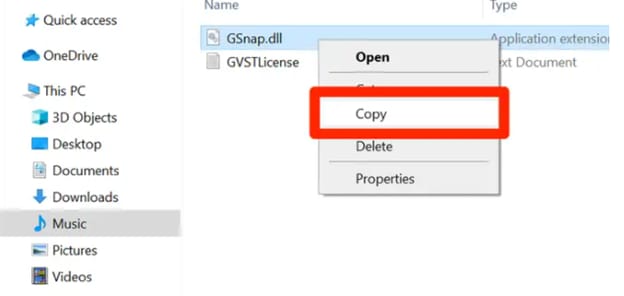
There will be two files present in the folder once you have extracted them. Copy the .dll file to the Audacity plugin directory. Find the Audacity folder in the Program Files folder on your computer. Paste your copied file into the plugins subfolder. Your plugins will be added.
If you are using macOS, then open the Applications folder, right-click audacity's icon, and choose "Show Package Contents." Next, open the folders "Contents" and "Extensions."
Step 6
In some cases, you may be asked for the administrator’s permission. All you need to do is click on the “Continue Anyway” button if a dialogue box appears and wait for any undergoing process to complete.
Step 7
Now run the audacity program, and if it is already running, you may need to restart it to recognize the autotune audacity plugin.
Step 8
Try recording a new sound in audacity, or you can also open an existing one from your system.
Step 9
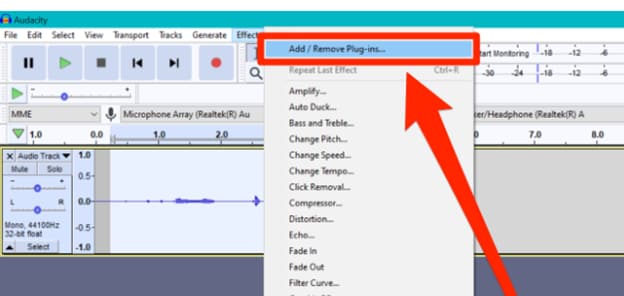
Choose the Add / Remove plugins option from the Effects menu in the menu bar. You can enable GSnap by scrolling down and clicking on Enable. Click OK to continue.
Step 10
GSnap will appear as an effective option under the "Effect" tab in audacity with the new update. Clicking on it will open a window that allows you to tune your audio file automatically.
GSnap has several options and knobs that can be used individually to autotune audio files. Get more information on GSnap's online manual or by experimenting with the options.
Final Verdict
There is no doubt that autotune feature is a necessity of sound producers these days. Although it isn't present in audacity, which is the most widely used tool for audio editing but using GSnap, you can get auto tune for audacity now. It is free to download, and in this article, we showed you how you could easily add it to audacity in just a few simple steps.
For Win 7 or later (64-bit)
For macOS 10.12 or later
