After Effects is a dynamic media editing tool that allows you to apply your creativity and bring your ideas to life. On this platform, you can perform advanced functions such as creating floating text animations in After Effects.
In this article, you will find out how to add floating text to your ideas and how to create floating text effects like 3D floating text in After Effects. Whether you’re a beginner or an expert, this guide will help you understand this concept in no time. Let’s begin.
In this article
Part 1. Step-by-Step Guide to Create the After Effects Floating Text Effect
floating text effects creating by After Effects
Though it may not seem like it at first, creating floating text in After Effects isn’t as difficult as you might think. All you need is adequate direction, and you’re good to go. With that said, here are the steps to create After Effects floating text:
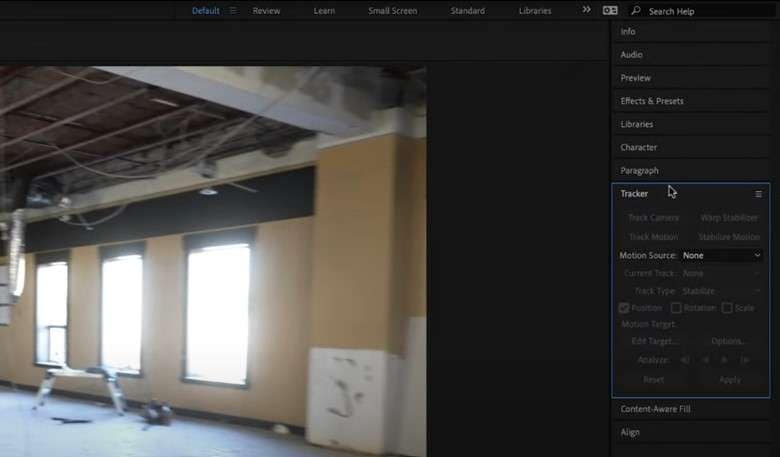
- Step 1: Create a camera tracker to find the best spot to insert your text. To do this, open the Tracker tab and tap Track Camera after selecting the clip of your choice.
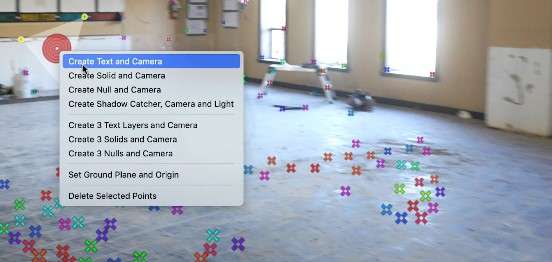
- Step 2: When you find a spot that works for your text, right-click on the marker, create the text and align it accordingly. Be sure to edit the text to your taste before you proceed.
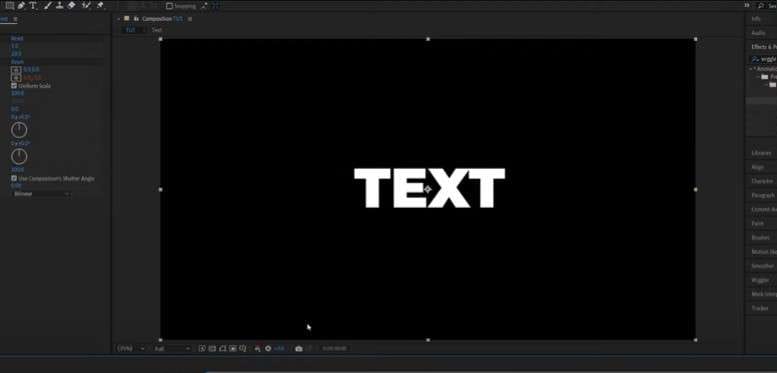
- Step 3: Click on the arrow in front of the text in the timeline. This allows you to reposition, scale, or rotate your text however you want.
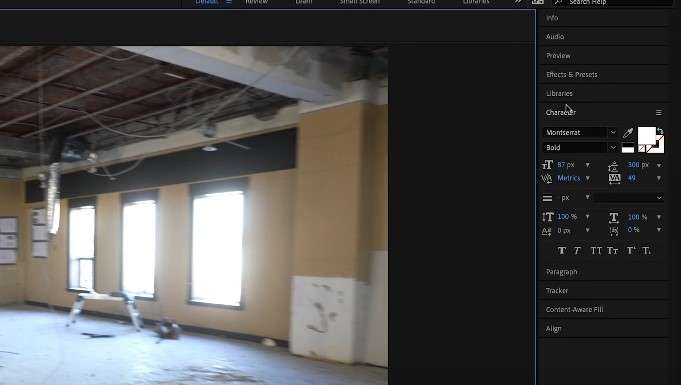
- Step 4: Create another text similar to the first, change its color to black, and reposition it so it looks like a shadow on the floor of your video or behind your text. This makes the floating look more realistic.
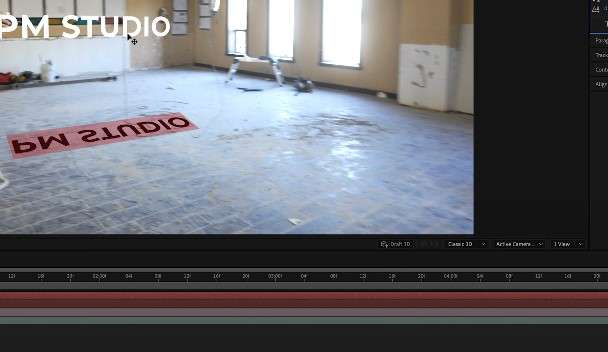
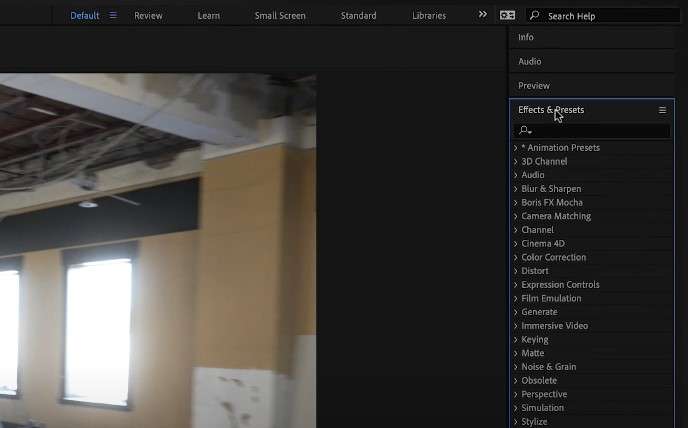
- Step 5: From Effects and Presets, drag the shadow to the text layer and add a blur effect. Next, customize the blur to your preference and preview the result. You can also add a wiggle effect to make the text hover.
How to Make 3D Floating Text
Creating 3D floating text in After Effects is a bit different from doing it the normal way. Tag along as we highlight the steps to create this 3D text in Adobe After Effects:

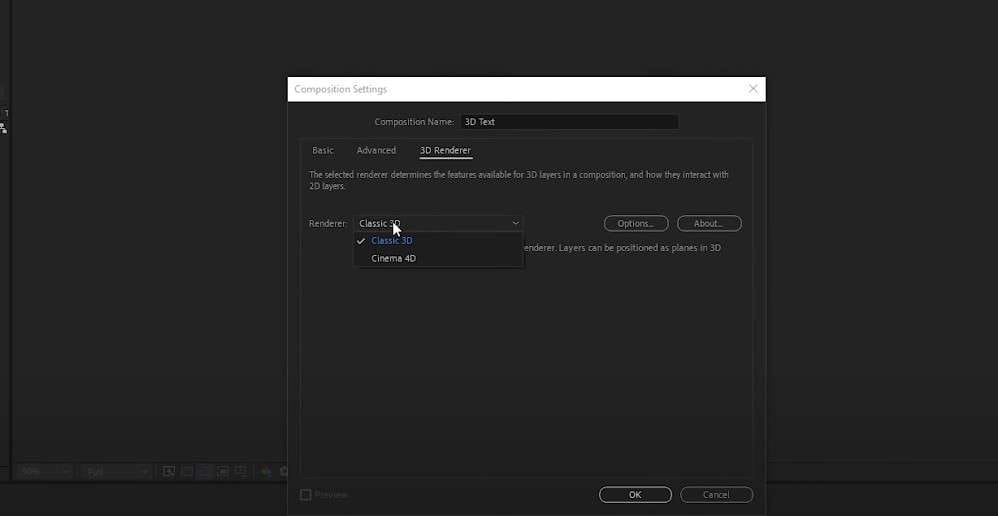
- Step 1: Create a new composition. Go to 3D Renderer, change the renderer to Cinema 4D, and click Ok.
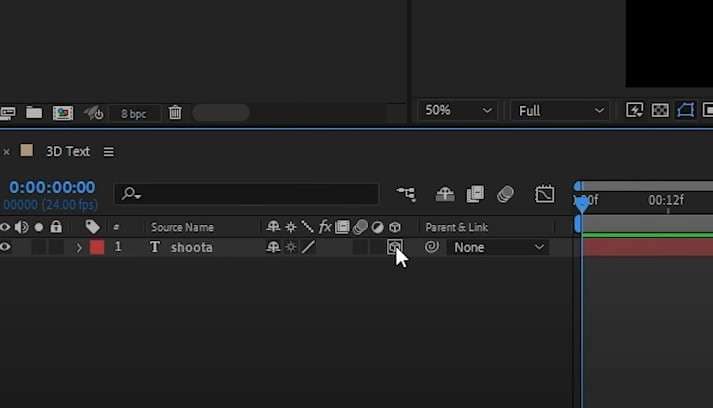
- Step 2: Next, add your text. Then, from the icon beside the text layer, make it a 3D layer.
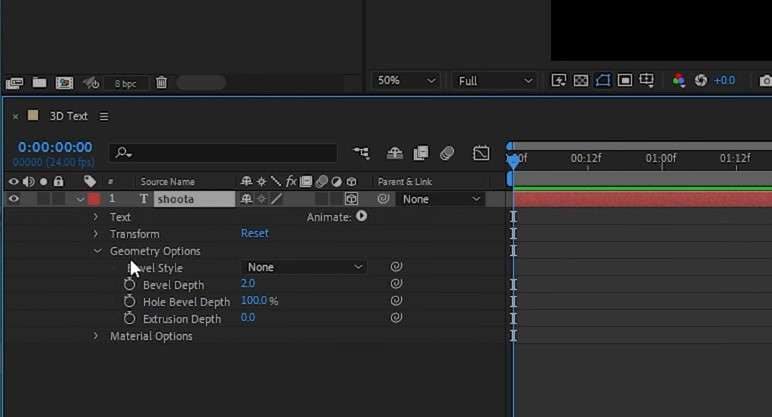
- Step 3: From the text layer drop-down menu, click Geometry Options. Set the Extrusion Depth to around 100 and then choose a bevel style.
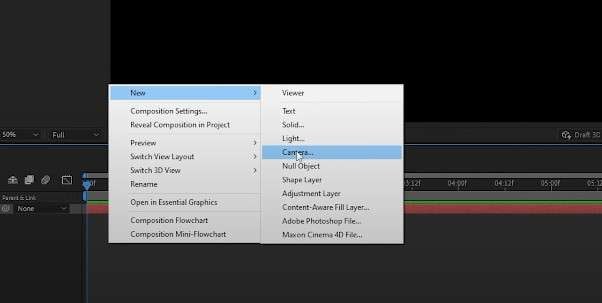
- Step 4: Right-click on the editing suite and select New. Then, create a camera and set it as the default camera. At this point, you can click on your camera and hold down C on your keyboard for the text to move around the camera.
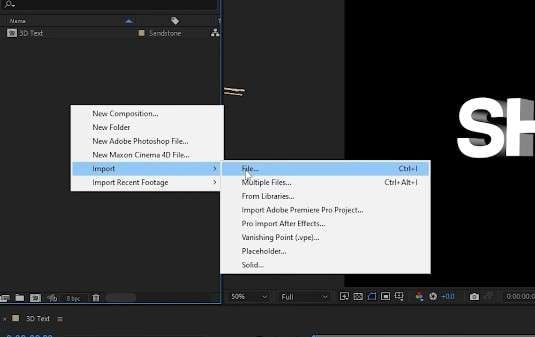
- Step 5: Now, you can change the lighting, color, and general properties. Next, add your media, which will serve as the environment.
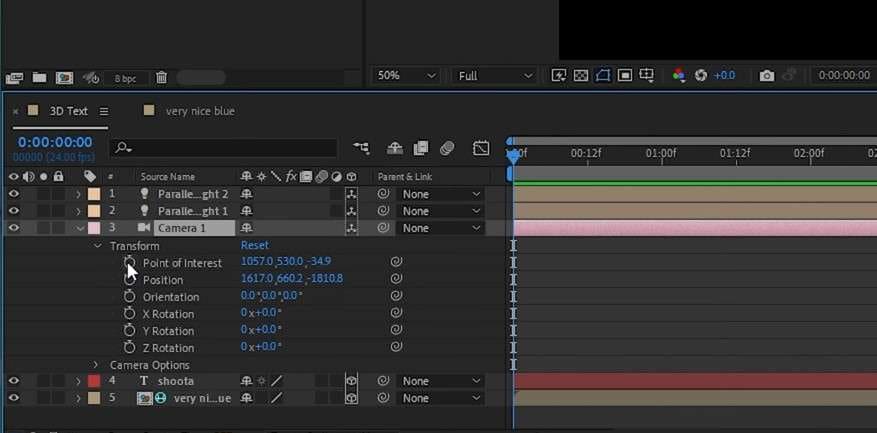
- Step 6: Go down to the Camera, open Transform, and add a keyframe at the beginning. Then, hold down C and move your text however you want. You can also move it around. This lets you animate the text and make it appear to float.
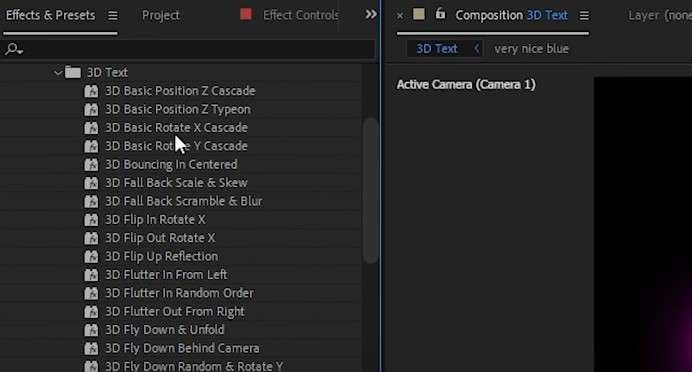
- Step 7: You can also apply 3D text animation or glow presets from the Effects and Presets menu to make it come to life before previewing the final video.
Part 2. Best Practices for Creating After Effects Floating Text

When creating After Effects floating text, several techniques ensure the video looks clean and professional. Here are some of these best practices:
- Layer elements to amplify the floating effect: while it’s cool to create a simple word or floating letters in After Effects, you can take your editing to the next level by applying elect layering. This way, you can add a glow effect to the text or even create a shadow to show the floating effect better.
- Choose the right colors: One of the basic rules for creating floating text is always to use the right colors. Typically, shadows have darker colors, while the text could either be bright or dark. This makes your floating text more realistic.
- Try out new things: Be sure to experiment with color combinations, glowy effects, blurs, and even 3D animations to make the text look more eye-catching. Doing this can also make your content more engaging.
Part 3. How to Add Floating Text in Videos?
Creating After Effects floating text definitely has its perks. However, it can take a considerable amount of time and effort. Not to mention, it might not be the best option for beginners as most After Effects features are quite complex to understand. Do not worry; you can still add clean floating text to your videos with easier-to-use tools like Wondershare Filmora.
Filmora is a dynamic video editing tool that makes it easy to create floating texts and add 3D effects using presets and animations. Its top features include:
- Customizable text animations to create floating text such as the wiggle effect. You can adjust the speed to make your text appear to hover in a spot.
- Eye-catching title presets to cater to any video direction or purpose including 3D minecraft fonts and glow titles. These can make your floating text look more fun and creative.
- A dynamic drag and drop interface that allows you to add titles, media, and elements to your video while creating floating texts.
Here’s how to add floating text in Filmora easily:
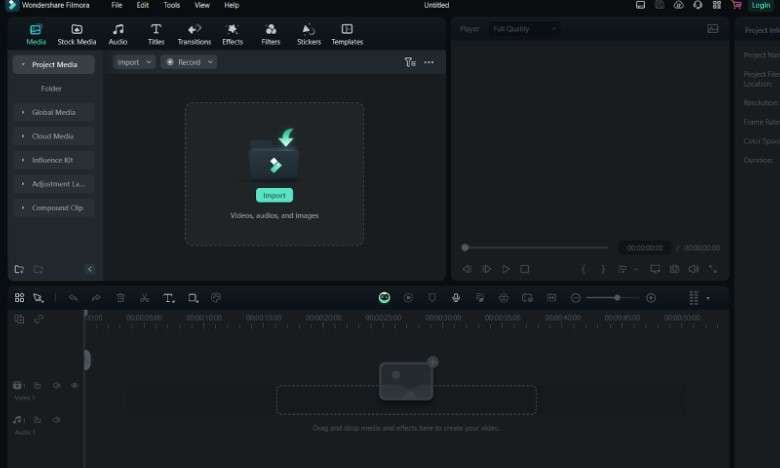
Step 1: After installing and launching Filmora, create a new project and import your preferred video.
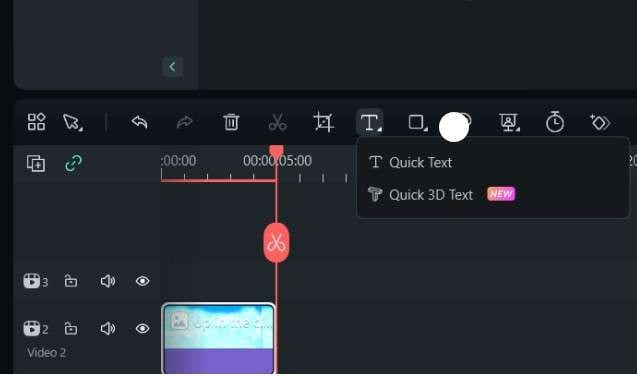
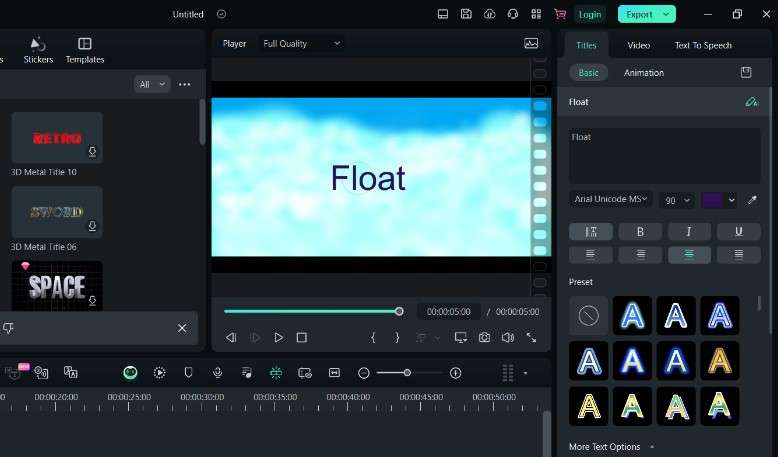
Step 2: Create a new text by clicking the Type Tool and selecting Quick Text. Remember to resize and edit it according to your preferences.
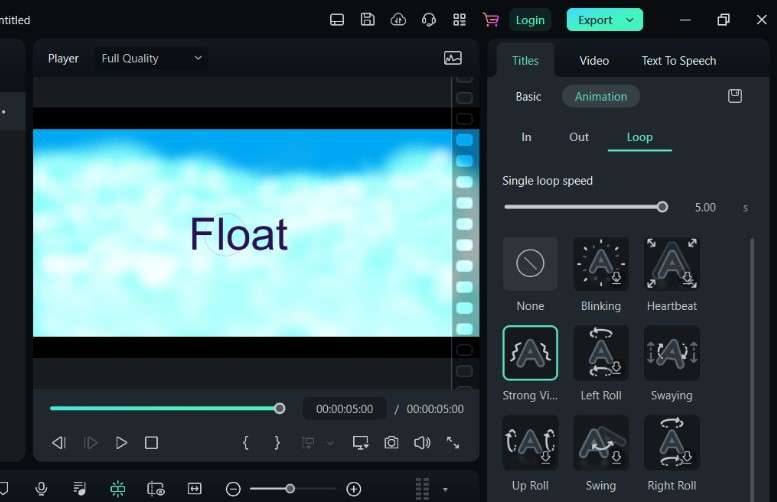
Step 3: Next, go to Animations and then Loop. Scroll down to the Strong Vibration text animation and apply it to your video. Reduce the loop speed so the text looks like it is hovering.
Step 4: To add 3D text, search for 3D in the Titles search bar and select the preset you want.

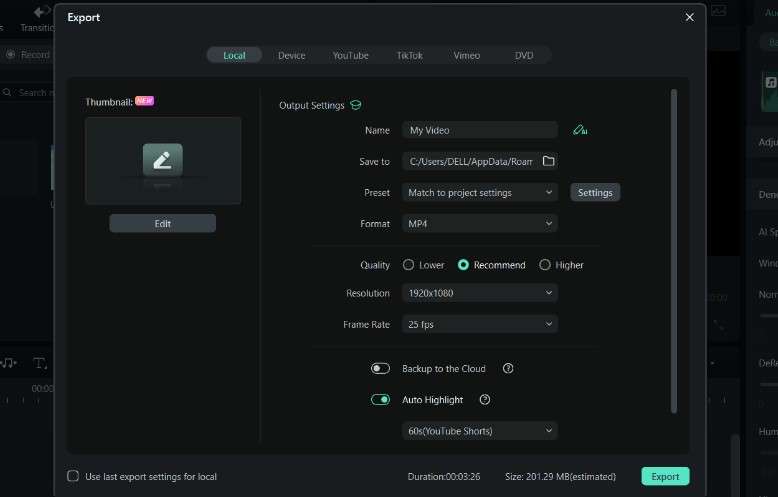
Step 5: Once you’re done, you can customize the video to your taste by changing the color, rotation, and general qualities. Then, preview and export the video.
Combining Other AI Tools to Enhance Your Videos
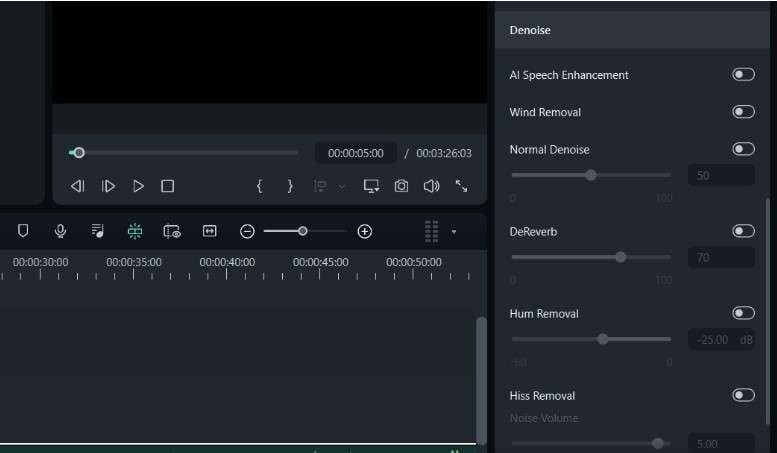
Aside from using presets or animations to make your video engaging, you can enhance it by using Filmora’s AI Tools. For example, the AI video denoise feature can help you remove unwanted background sounds and allow your audience to focus on your voice. This is especially useful when filming content, tutorials, or presentations.
Here are the steps to using the AI Audio Denoise feature
Step 1: After importing your video to Filmora, go to the Audio panel on the sidebar.
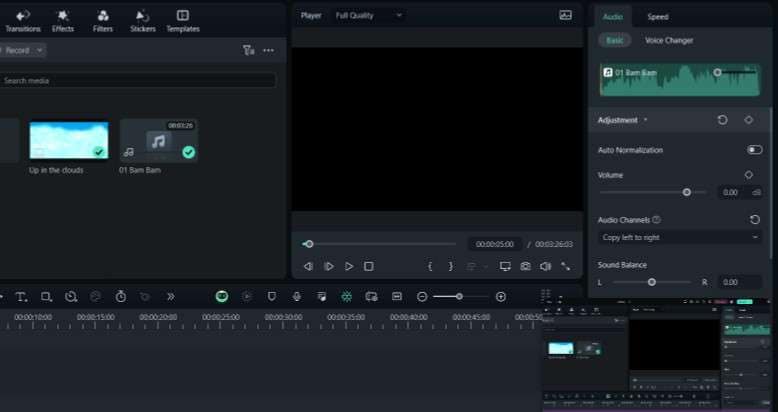
Step 2: Scroll down to the Denoise section and apply the Denoise feature. With just a few clicks, you can enhance the voice or remove unwanted sounds.
Step 3: Once you're done, preview the video to confirm that everything is in order. Then, export it in your preferred format.
Conclusion
Adding 3D floating text in After Effects or floating text can help take your video to the next level of engagement. The animations and appearance of floating text are sure to grasp your audience’s attention and make your video look spectacular.
If you’re finding it difficult to navigate After Effects, however. It is recommended that you switch to a simpler video editing platform like Filmora. Download Filmora for free from our official website, and let’s get you started.


 100% Security Verified | No Subscription Required | No Malware

