

 ChatGPT
 Perplexity
 Gemini
 Claude
 Grok
Grok
Blender is a very powerful software that is well-known for its 3D creation capabilities. Many users rely on this tool to create 3D content from scratch, but little do they know it also offers a comprehensive video editing suite for editing and creating videos.
So, if you’re wondering how to convert an image sequence to video on Blender, this guide will show you the most effective way to accomplish your objective without requiring any technical skill.
In this article
Part 1. What Image Sequence Format Does Blender Support?
As of the time of writing, Blender only supports JPG and PNG image sequence formats.
- PNG: Supports 8 and 16-bit channel depths and includes alpha transparency, making it ideal for high-quality images with transparency needs.
- JPEG: Limited to 8-bit channel depth and does not support alpha transparency, suitable for scenarios where file size is a concern and some quality loss is acceptable.
- JPEG 2000: Offers 8, 12, and 16-bit channel depths with alpha support, providing a balance between quality and compression.
Part 2: How To Convert Image Sequence to Video On Blender
Converting an image sequence of video on Blender is not difficult if you know how to go about it.
Here, we’ll walk you through the step-by-step procedure to get the job done efficiently.
Step 1: Download and install the “Blender” app on your computer.
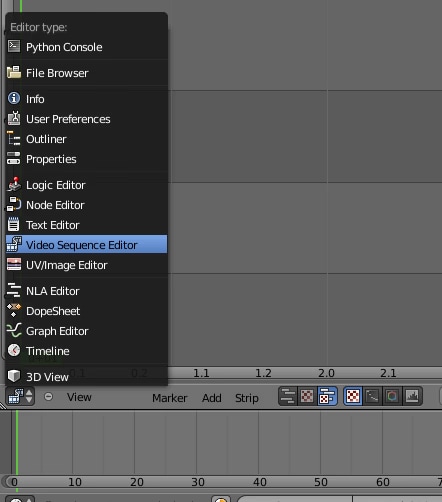
Step 2: Open the Blender app and choose “Video Editing” in its top menu.
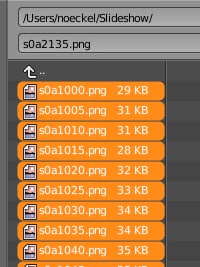
Step 3: Click on the “Add” button. Then, select “Image/Sequence” to upload the image sequence you want to convert to video. Make sure the file format of the image sequence is in either JPG or PNG.
Step 4: Navigate to ”Render” options and choose the “resolution” and “aspect ratio” for the video according to the image sequence stripe.
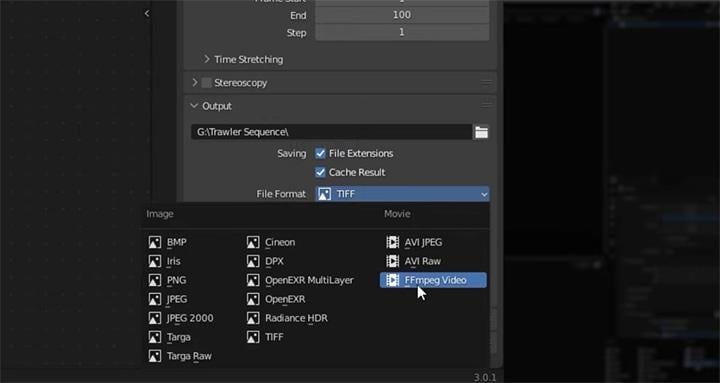
Step 5: Customize the output file settings according to your preference. Then, click on FFmpeg Video in the File Format option.
Step 6: Click on the “Encoding” menu to expand it. Then, set the video format container, codec, output quality, encoding speed, and other relevant settings.
Step 7: Once you complete the above, select Render Properties > Color Management. Then, choose “Standard” in View Transform and “None” in the Look option.
Step 8: Finally, click on “Render” in the top menu bar and select “Render Animation”.
- Once you do that, Blender will start to convert the image sequence to an MP4 video file.
Part 3. Why Do I Fail To Convert Image Sequence to Video in Blender?
An image sequence may fail to convert to video in Blender due to different reasons. In this section, you’ll learn some of the reasons why image sequence is not converting to video in Blender.
- Image Sequence File Error: Blender may crash during rendering if the image sequence file is corrupted or not in the correct size..
- Incorrect Encoding Settings: If the resulting video has quality issues, it might be due to incorrect encoding settings. Ensure that the output quality is set to "High" or "Lossless" in the Encoding panel, and consider using a keyframe interval of 1 for better quality, though this will increase file size.
- Incorrect File Format: This is another common reason why Blender might fail to convert your image sequence to video. Ensure that your image sequence file you wan to convert to video is in JPG or PNG format.
- Render Region Issues: If you encounter errors related to border rendering, ensure that no render regions are set in your workspace. This can be fixed by pressing "Alt + Ctrl + B" to clear any render regions.
- Improper Playback Order: If the image sequence plays backward, it might be due to the order in which images were imported. Re-import the sequence and ensure the sorting order is correct.
Part 4. Best Blender Alternative to Convert Image Sequence to Video Losslessly
Converting image sequence to video on Blender can be quite tricky for first-time users due to the software's over sophisticated UI.
If you want a straightforward method to convert image sequence to video, we recommend you using the Wondershare Filmora video editor software.
In Filmora, you can convert an image sequence into a video by importing the images, arranging them in the timeline, and setting the desired frame duration for smooth playback.

Filmora Video Editor offers a creative way to create and edit videos effortlessly. It supports many powerful video editing features, including green screen, color correction, LUTs resources, and lots more.
Filmora also gives you access to helpful AI-powered tools, such as AI copywriting, AI background removal, AI smart cutout, and Auto frame.
Key Features of the image sequence to video feature in Filmora
- Intuitive Drag-and-Drop Interface: Effortlessly arrange and reorder images within the timeline using a simple drag-and-drop system.
- Adjustable Frame Rate: Control the speed of your video by setting the frame rate, perfect for creating time-lapse or stop-motion effects.
- High-Quality Output: Ensure your video maintains high resolution and clarity, regardless of the number of images used.
- Audio Integration: Enhance your video by adding background music or sound effects directly within the tool.
Tutorial on Turning Image Sequences into Stunning Videos


Steps to Convert Image Sequences to Video
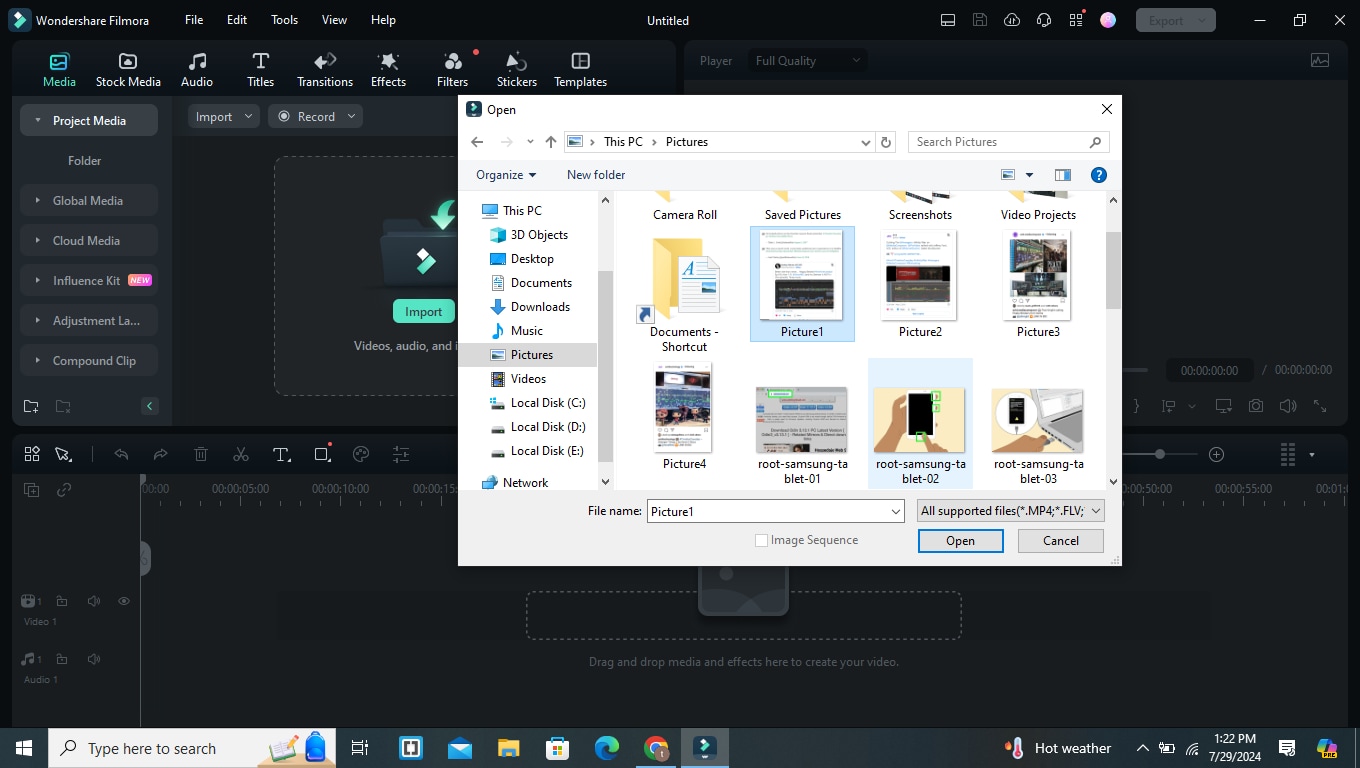
Step 1. Open the “Filmora Video Editor”software on your Mac or PC and click on “Create New Project”. Then, import the “Image sequence” file that you want to convert to video.
Step 2. Drag and drop the “Image Sequence” to the software’s “Timeline”.

- Click on the “Image Sequence” from the timeline and add effects, titles, and music according to your preference.
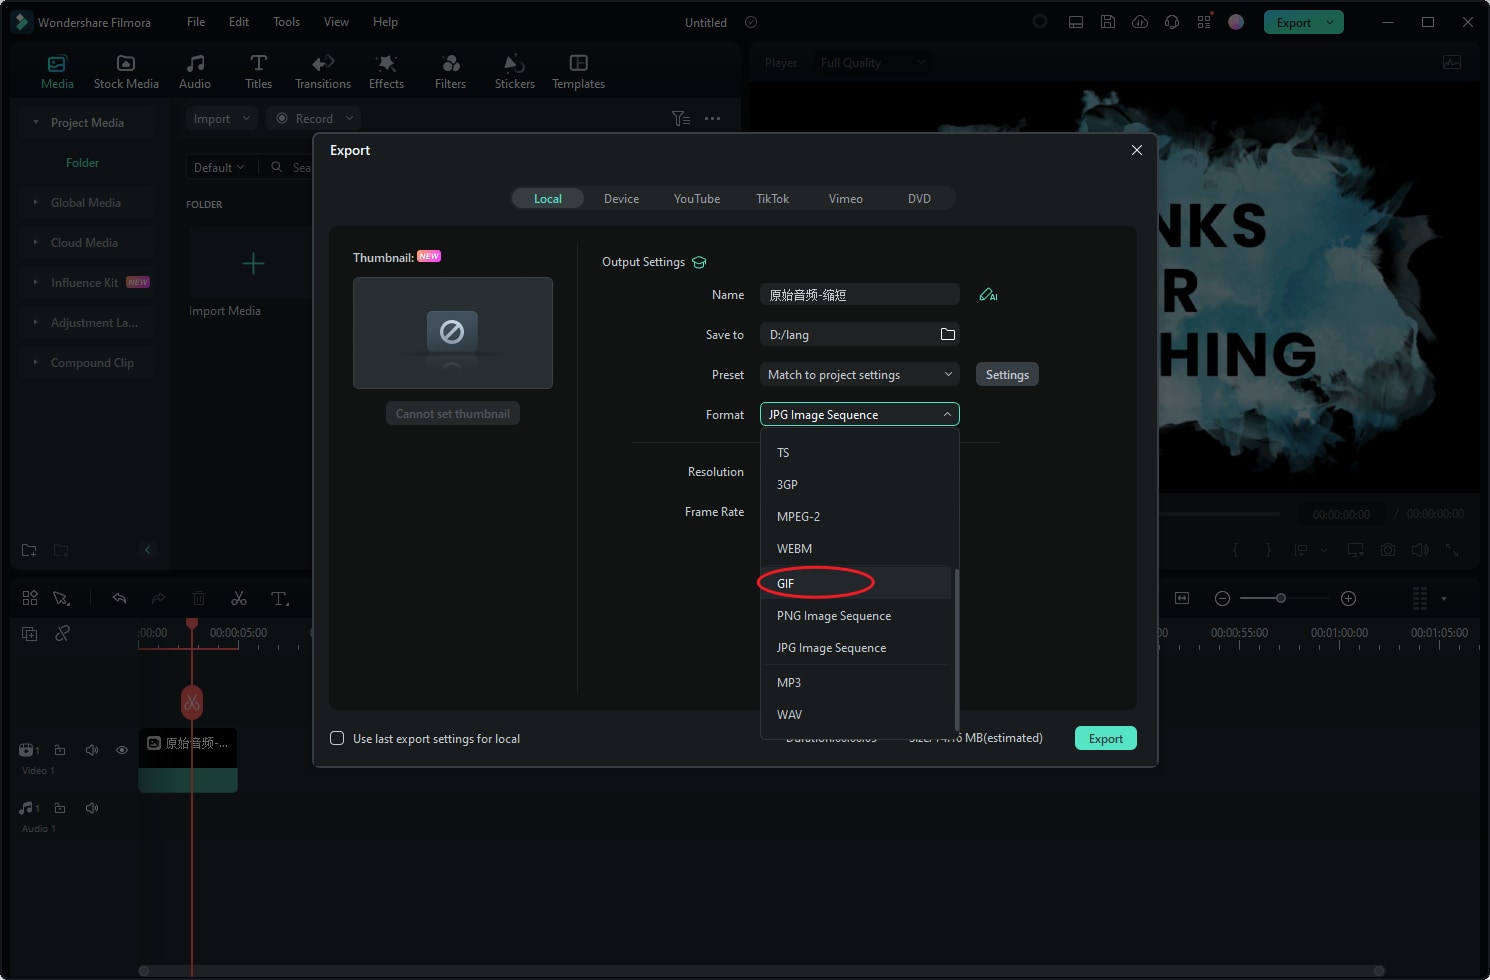
Step 3. Once you finish customizing the image sequence, click on the “Export” button and select MP4 as the preferred exportation format.
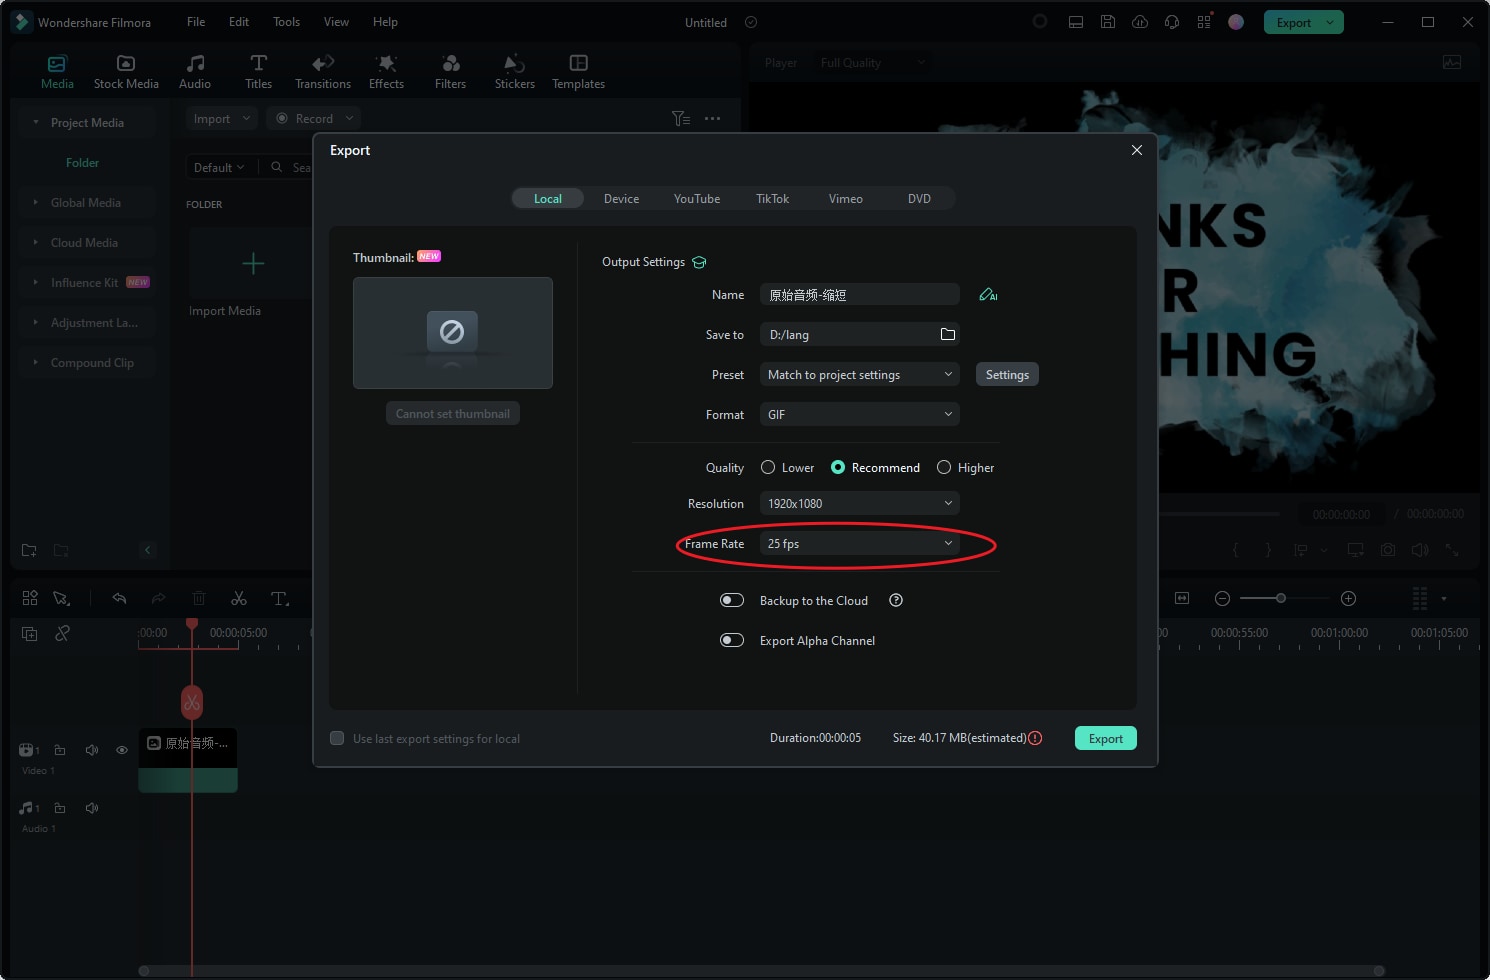
- Also, you can adjust the Frame Rate of image sequence.
Step 4: Finally, save the video file to your computer's local storage.
Conclusion
By now, you should already know how to convert image sequence to video on Blender. We’ve explained the process in the article as simple as possible to help you accomplish the task without any hassle.
However, if you still find Blender a bit difficult to navigate, we recommend using Filmora Video Editor to convert your image sequence to video.
