TikTok videos, Instagram reels, Facebook stories, YouTube shorts – all these content types require you to have your videos in portrait mode for the optimal viewing experience. Now, filming portrait videos is typically easy enough – all you need is your smartphone camera. On the other hand, editing these videos or converting your landscape videos into portrait ones is a different story, especially if all you have to work with is iMovie.
Using iMovie for your portrait videos can be problematic as the editor only works in a 16:9 aspect ratio. However, there's a way you could go around this obstacle. Check out how to edit vertical videos in iMovie and create captivating content.
In this article
How to Edit Vertical Videos in iMovie on Mac
iMovie was notoriously created for horizontal videos only. If you upload your vertical video to it, the editor will automatically add black bar eyesores on either side and turn your video to a 16:9 aspect ratio.
Still, it is possible to edit vertical videos with the help of the newly introduced App Preview feature.
- Step 1: Launch iMovie and go to Projects;
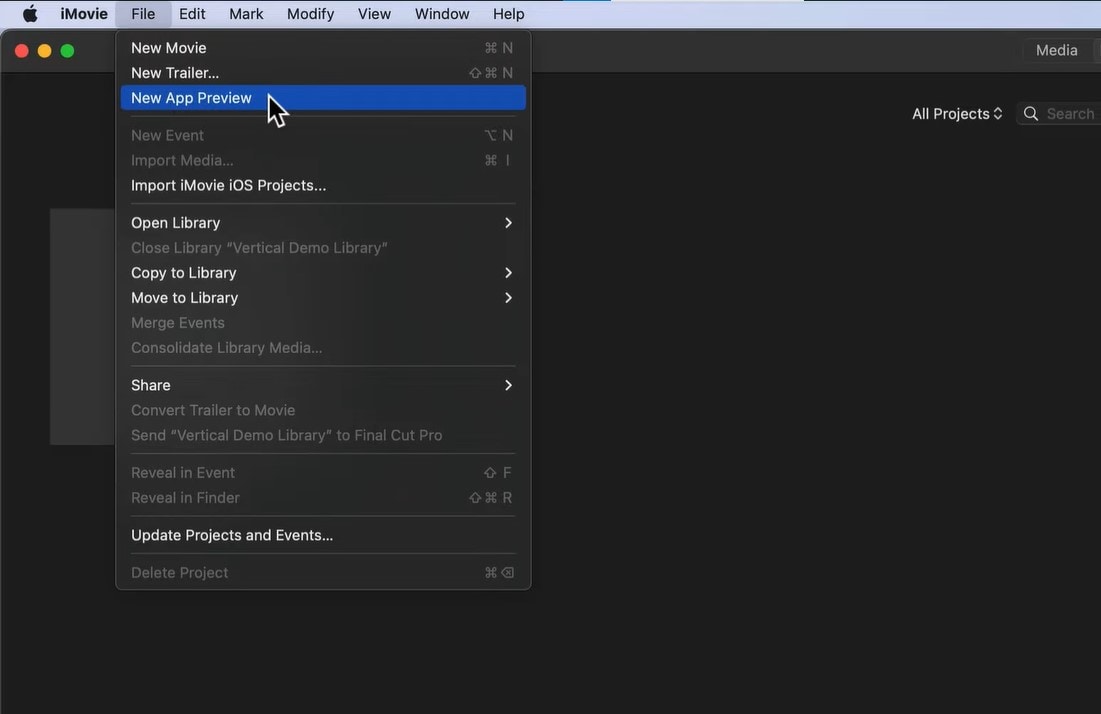
- Step 2: Go to File > New App Preview > OK;
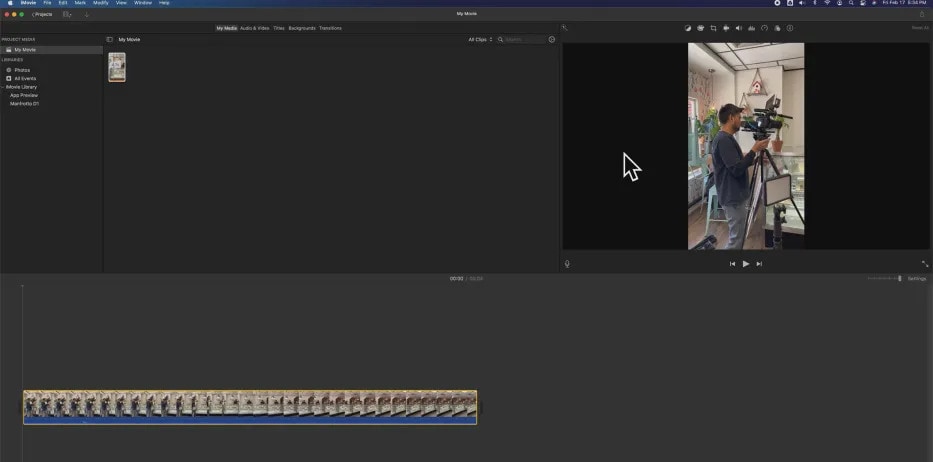
- Step 3: Import your vertical video to the timeline;
- Step 4: After first uploading a vertical video with App Preview, you can then upload a landscape video and transform it into a vertical one;
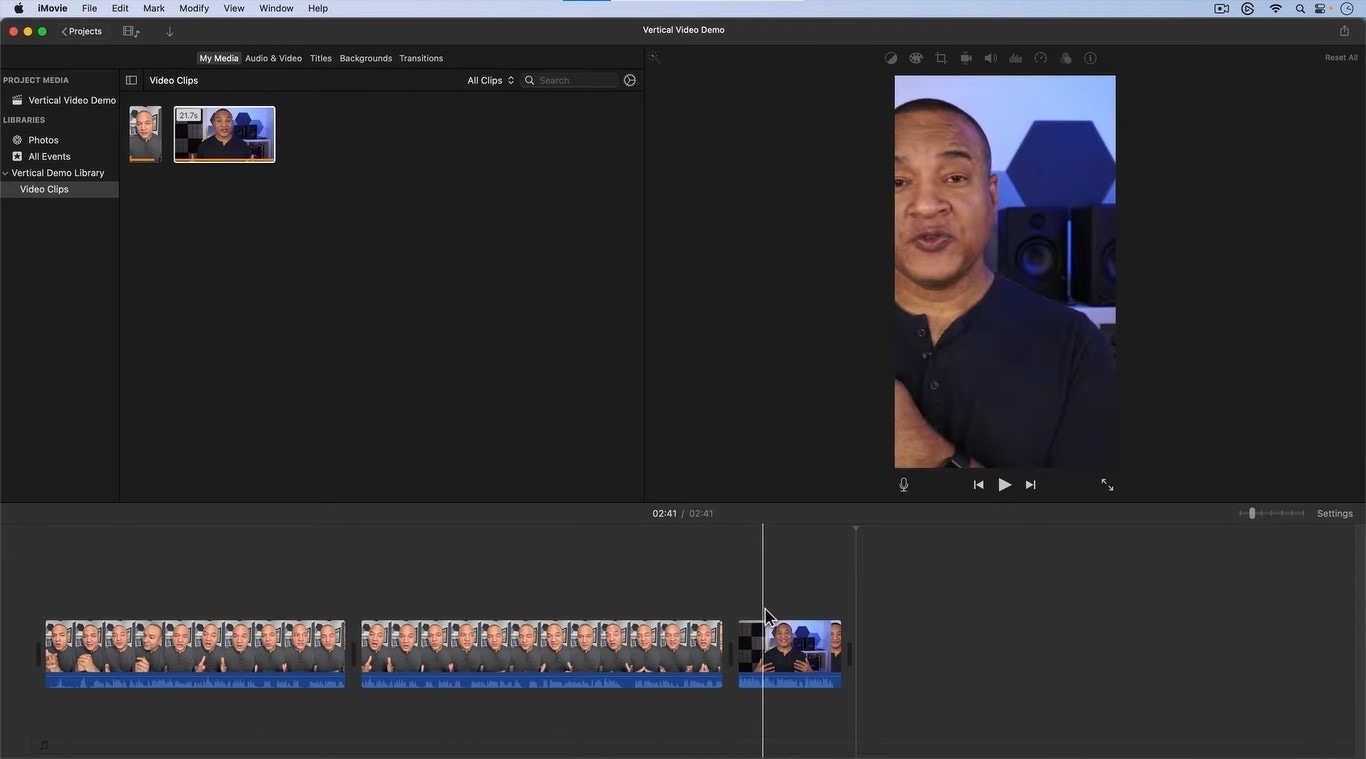
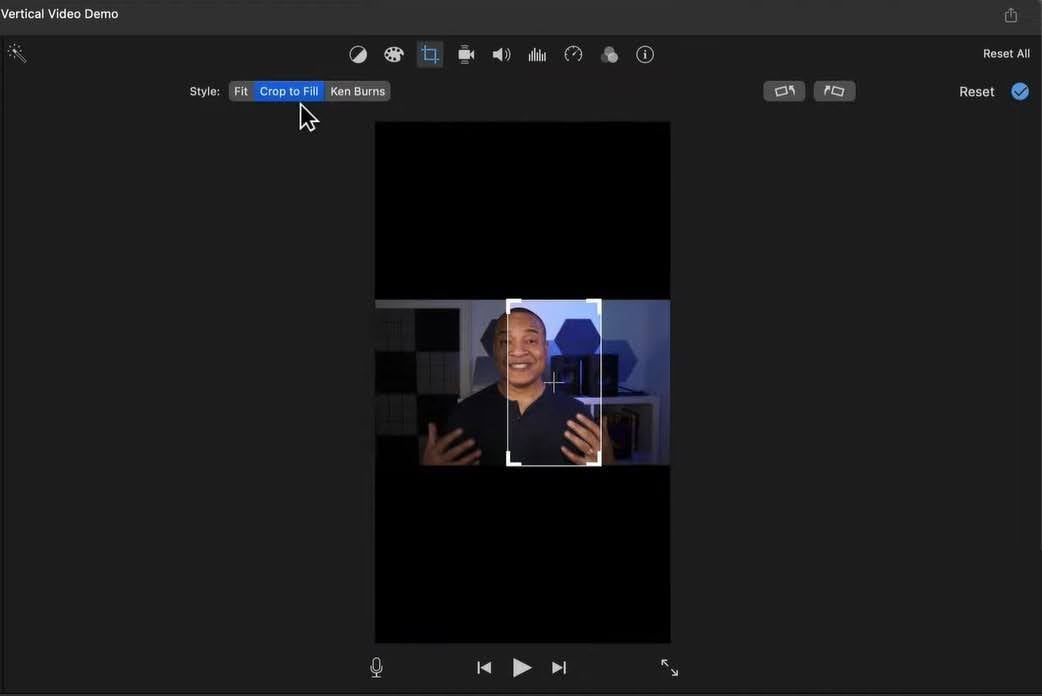
- Step 5: If needed, select your horizontal video, go to the Toolbar, and select the Crop tool to recenter your main subject;
- Step 6: Start editing your video the same way you would any horizontal one;
- Step 7: If you want to add titles, go to the Titles tab on the left-hand side;
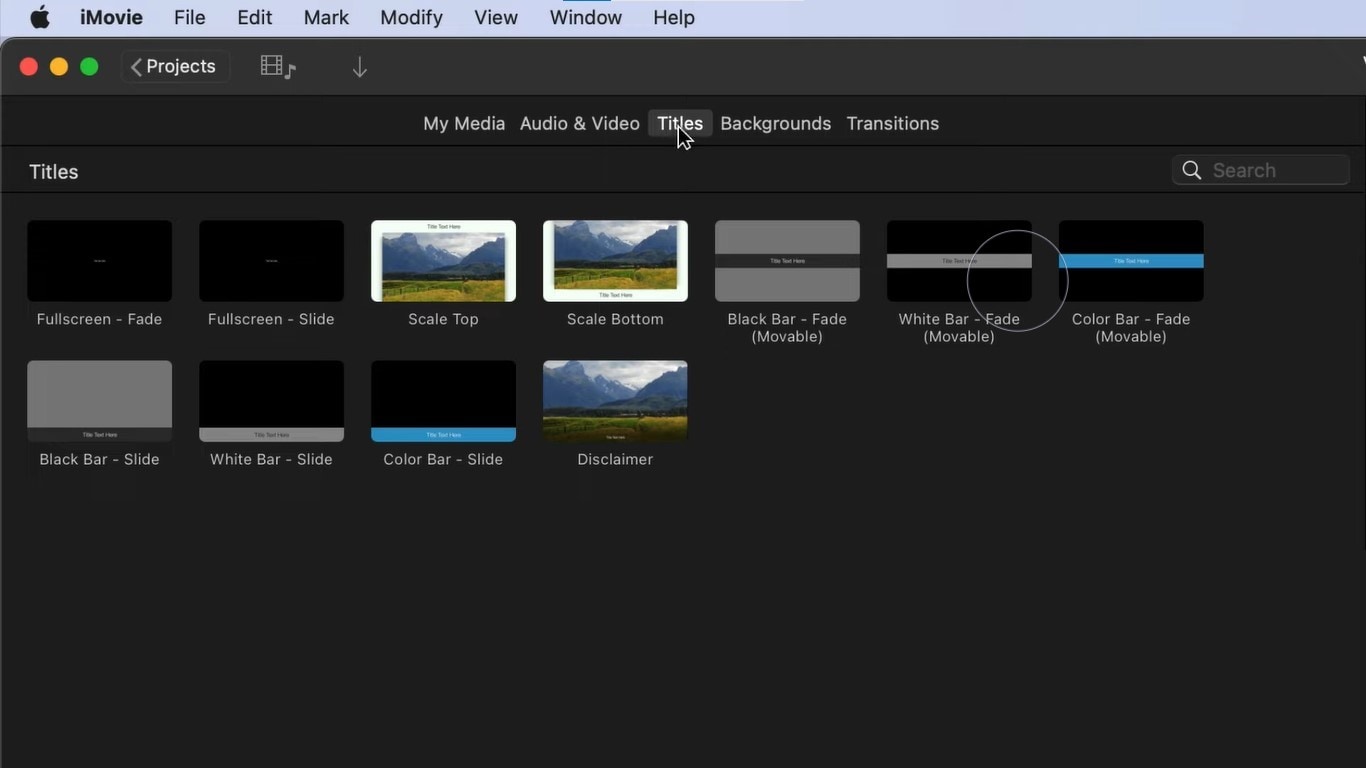
- Step 8: To add transitions, audio, and backgrounds, go to the respective tabs and select the options you like;
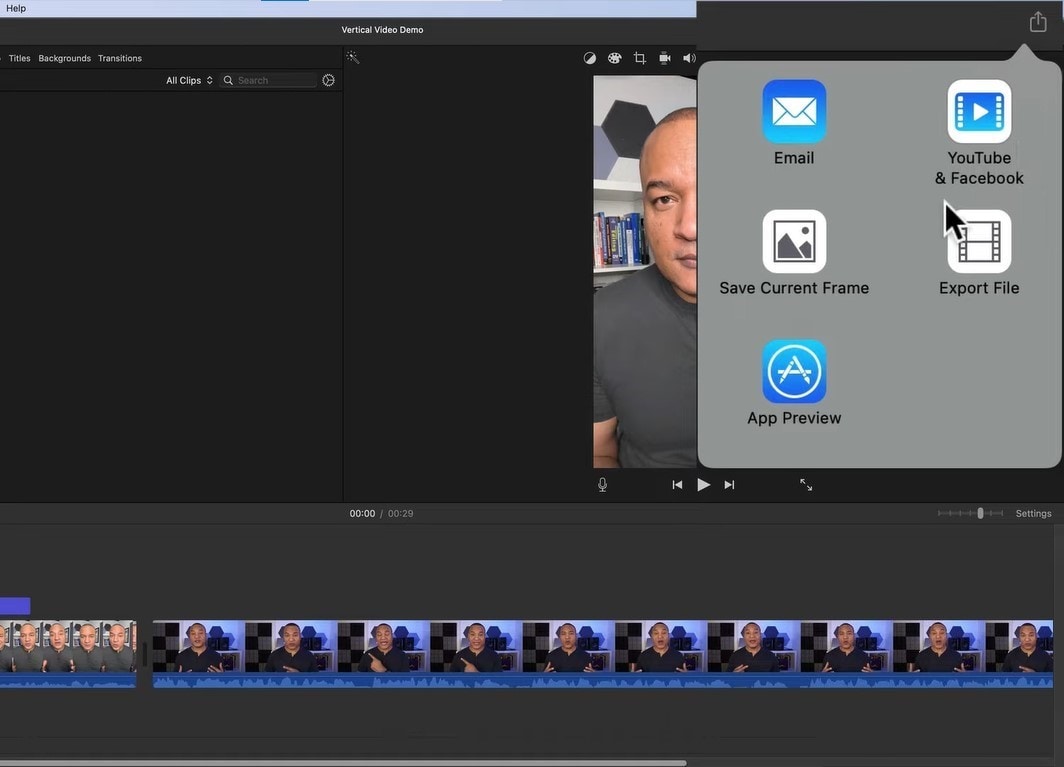
- Step 9: When you're ready to export, click the Share button in the upper right-hand corner and select Export File;
Tips for Editing Vertical Videos in iMovie
Remember that you'll always need to upload a vertical video first when using the App Preview mode. Otherwise, your entire project will automatically be reverted to horizontal mode. Once you've uploaded a vertical video, you can then upload horizontal videos and transform them into portrait mode.
If you don't have a relevant vertical video you want to use, don't worry. Firstly, upload any portrait video you have, then add the landscape one you actually want to work on. Once you've added the landscape video and it got converted to portrait mode, you can delete the irrelevant portrait video you used to set things up. From there, you can add more landscape media, and it will all automatically convert to vertical mode.
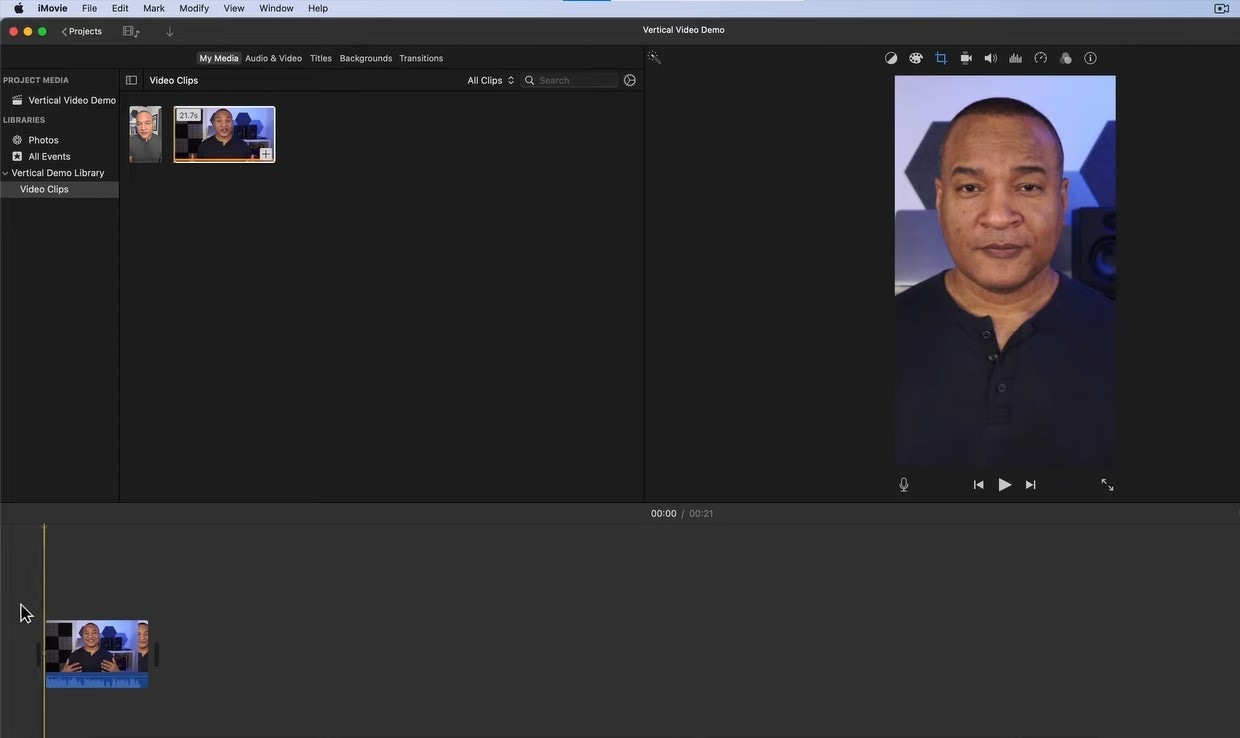
You should also pay attention to the fact that the landscape videos you use will be zoomed in when converted to portrait mode. So, you'll want to ensure you're using 4K videos to minimize quality loss.
Moreover, you should keep in mind that your options for titles, backgrounds, and more will be highly limited. You'll only have access to a few title types, and as far as backgrounds are concerned, you'll only be able to use a few solid colors. So, don't expect the full versatility you would typically get with iMovie and traditional vertical videos.
When you're done, simply export your vertical video with iMovie, then upload it to any platform you choose.
Edit and Export Vertical Videos Using iMovie Alternatives
As you've noticed by now, using iMovie to export vertical videos can be pretty convoluted. It's difficult to perfectly adjust the framing, and it can take a lot of playing around with iMovie and its App Preview mode to make things work. A much better alternative is using a solution that supports portrait mode from the get-go. Wondershare Filmora is the top video editor that lets you easily record and edit both vertical and horizontal videos. It's an all-encompassing recorder and editor that comes with hundreds of features to enhance the quality of your content.
Unlike iMovie, which has limited support and limited editing options for videos in portrait mode, Wondershare Filmora lets your creativity shine regardless of your content's aspect ratio. All the features and creative assets available for landscape videos are also available for portrait ones, so you can seamlessly create content however you choose for any platform you choose. You can even record your footage directly in Filmora and then enrich it with templates, stock media, effects, transitions, etc. You can then enhance it with AI and make it more SEO-friendly with automatically generated captions and subtitles.
How to Make Portrait Videos in Filmora
Filmora makes the entire process of editing portrait-mode videos as easy as can be.
If you have an existing landscape video and want to turn it into a portrait one, the process is a piece of cake:
- Step 1: Launch Filmora and select Create Project;
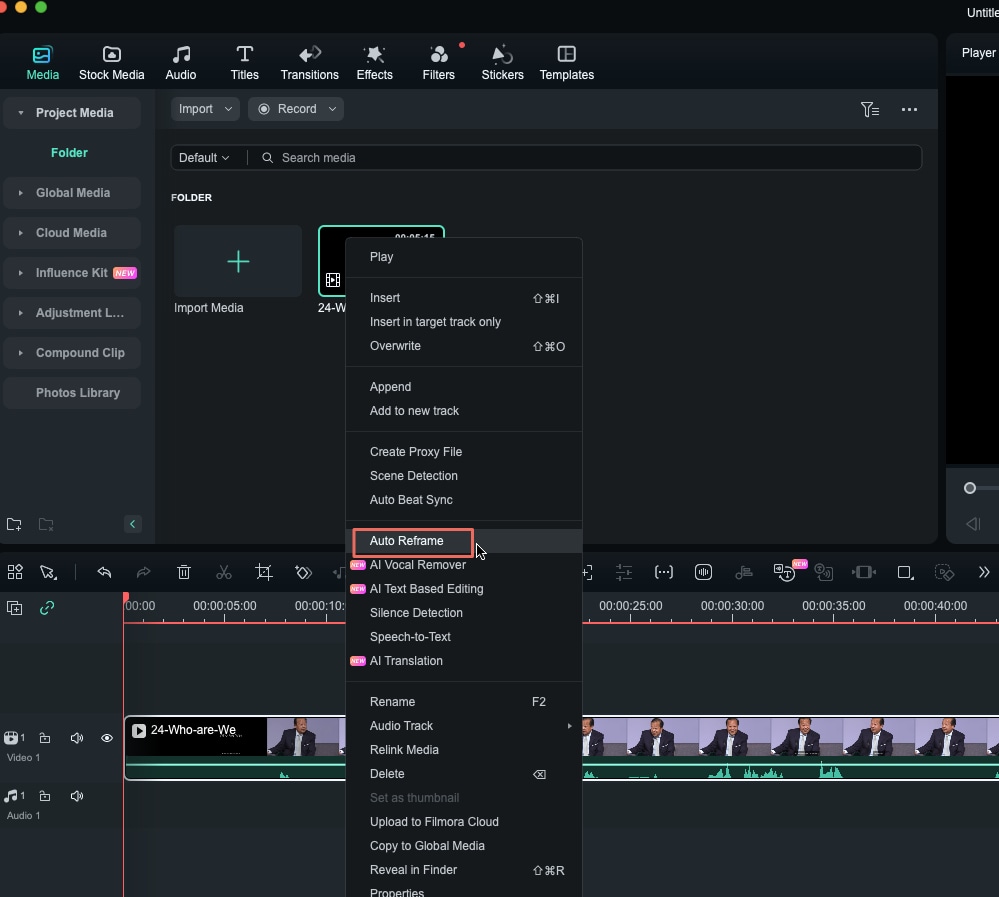
- Step 2: Drag and drop your landscape video to the Media area, right-click the clip, and select Auto Reframe;
- Step 3: Select your preferred aspect ratio (9:16 for portrait mode);
- Step 4: If needed, click Adjust frame and drag the crop box to readjust the video;
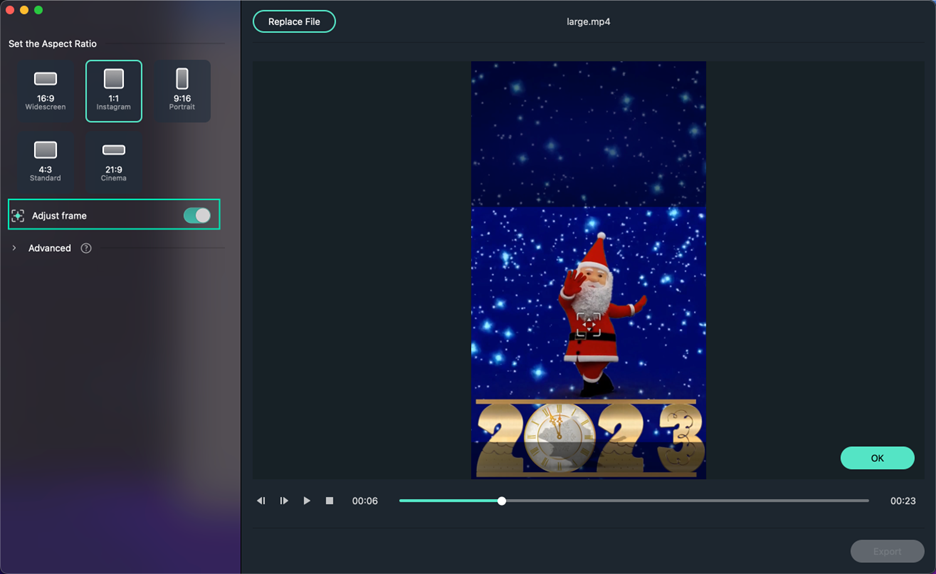
- Step 5: If needed, expand the Advanced options and adjust Tracking Subject and Tracking Speed;
- Step 6: Click the Export button to save your video;
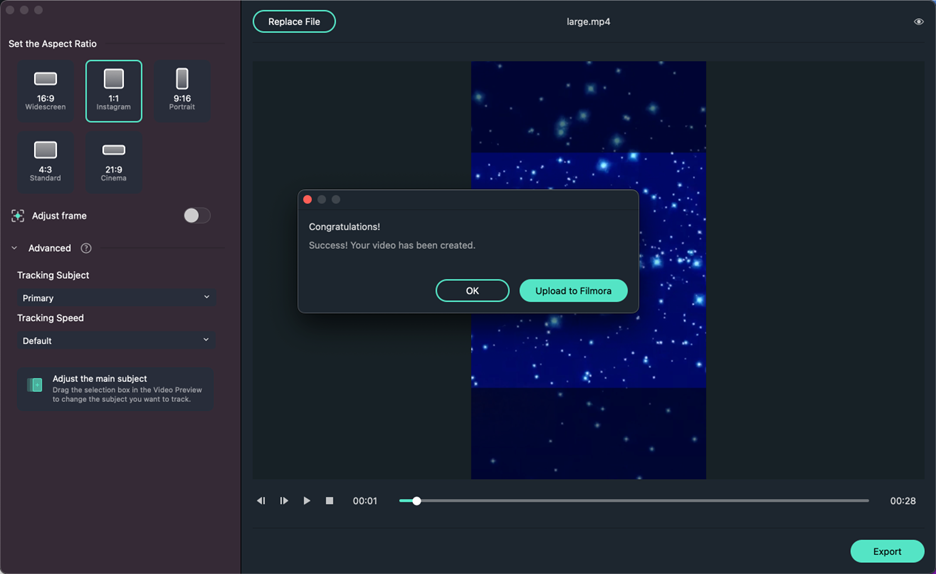
- Step 7: To keep editing your video, select Upload to Filmora;
- Step 8: Drag your newly created portrait video to the timeline to start editing it;

- Step 9: Use the tabs in the Media Panel on the left-hand side to add effects, titles, stickers, templates, and more;
- Step 10: Use the Property Panel on the right-hand side to adjust video and audio, use AI-powered features, and more;
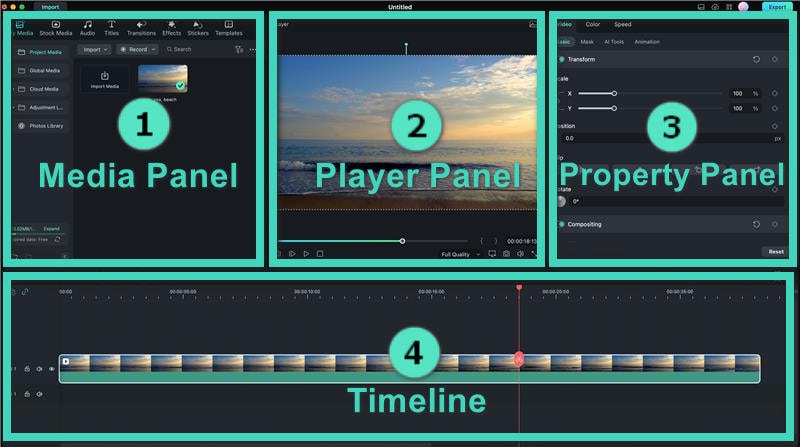
- Step 11: When you're done editing your portrait video, click the Export button;
- Step 12: Adjust the Export settings (format, resolution, frame rate, and more), and choose a save path or select the platform where you'd like to upload your video directly.
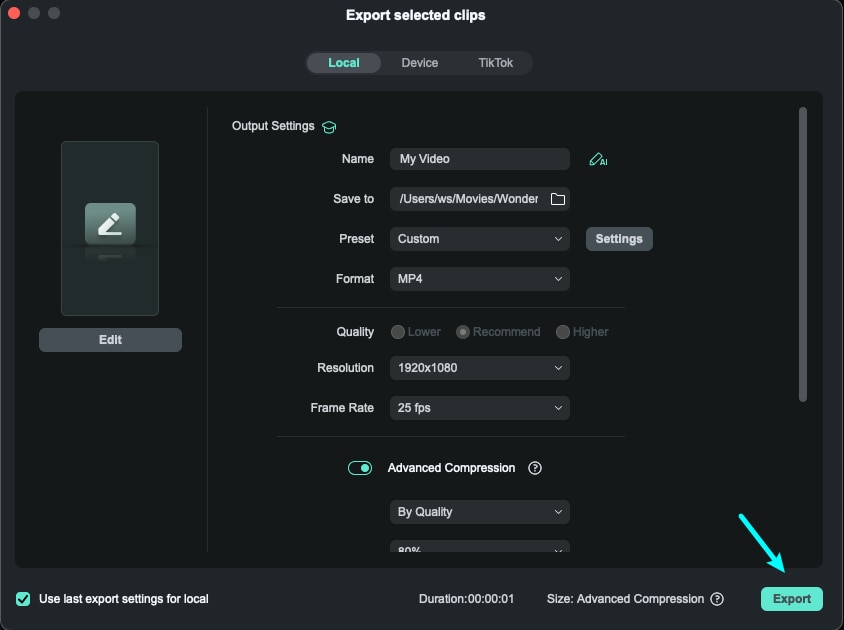
You can save your video locally or upload it directly from Filmora to your platform of choice – YouTube, TikTok, Vimeo, and more.
Conclusion
iMovie is a convenient tool, but it can be highly limiting when creating and editing videos in portrait mode. You'll need to find roundabout ways of editing and perfecting your content. Even then, you don't have the full flexibility to properly frame the video or add all the effects you'd like.
Wondershare Filmora is a much better alternative. It allows you to use any aspect ratio you prefer and seamlessly transform landscape videos to portrait mode, square mode, and more. Moreover, it gives you access to all the same features and effects regardless of your video's aspect ratio.


 100% Security Verified | No Subscription Required | No Malware

